Collaboration Questionnaire
1: Select a specific location on the body for the piece to be designed around. This can range from a small body part such as a hand all the way to a broad large area such as the upper body.
So the area I struggle most with my dysphoria is probably my torso to my crotch. Now as a burlesque artist obviously I'm comfortable with my body being on show, but it's usually the area I derive the most dysphoria from. I would say that specifically it is in regards to, weight. Growing up, I was an overweight child and I struggled a lot with bullying because of that, so I used to carry weight on my chest, which is now a great thing and a bad thing. I like my boobs, but I was bullied for having breast growth as a child, I have naturally very high oestrogen levels, so it's something I felt a love hate relationship with, especially going into my transition. So my breast area to my stomach area has always been a funny 1 and I love my waist. My waist is teeny tiny which is great, but then because of tucking where my testies go up into the sockets they bump out which then makes me look like I've got a bigger stomach than I do so it's. It's. Yeah, just the entirety of my torso. And there's obviously lots of dialogue around that. And I'm very lucky that I have a feminine shape, which I like to accentuate like, I love having my waist on show but not my belly button. I think just falling, such unusual thing because it can go down to something as small as a belly button. Noticeably my belly button. Isn't. Vertical, which is more of a sign of a of a quote unquote fine body as opposed to horizontal. And it's not something anyone else paying attention to, but I am conscious of it. So yeah, I hope that helps you figure out the first question. But it's essentially the entirety of my torso. Though I love my legs and I love my shoulders and I love my face. But yeah, that's my that's my no go region.
2: What personal insecurities, vulnerabilities or gender dysphoria do you attribute to this area? Describe in a few sentences or bullet points.
I think as well that region of my body as a whole doesn't necessarily ascribe itself to any gender presentation. I'm lucky that I have actually very high oestrogen levels, so my body is soft and pillowy in a way I like to compare it to a renaissance body. The kind of idea at that point in time. Were not toned like a masculine physique, but I'm not necessarily curvy like a feminine, so I feel like my body is kind of liminal, especially in that region. I think if you were to take a picture of me, like crotch, to shoulder, people couldn't gender my body and I find that slightly hard. I suppose I don't. We wouldn't want it to be masculine, but it's not phone in the way that I would like it to be. I think it's just off putting it's in a process of transition and I feel it transition effects that region of your body, arguably the most. So yeah, I know it's a huge region, but I would. I would argue that it's like breast to Crouch. Because it is so ambiguous and there's always been a sight of confusion for me and being born with really high oestrogen levels and low testosterone, it's something that I'm slowly starting to adapt to, but yeah, that's what I would say about why I feel dysphoria. UM. And it, you know, it's it's residual trauma from childhood essentially being bullied because of being a plus size child. And now the reason I do burlesque is to celebrate the body that I don't quite feel 100% is mine or 100% is ascribed to any specific gender category. I hope that helps.
3: How do you usually manage these insecurities, vulnerabilities or gender dysphoria in your day-to-day life? For example, using baggy clothing or makeup.
I am a crop top girly through and through. My ideal out of drag costume is Kim Possible. I like a loose baggy, high waisted trouser that cuts off my waist so it accentuates the size of my waist and a crop top that sits just beneath my breast area. I find that's really flattering for my body shape and makes me look really nipped at the waist and border at my top and at my bottom, so I have an hourglass figure. In drag, I like to wear body harness, especially in taking these off. I can send you a picture of what I mean. Because I get to use I get. To draw the eye in in different ways that really like cinch in my waist and throw out my hips, if that makes sense. Usually it's about trying trying to create the hourglass illusion. Especially I'm quite a straight up straight down body. I Like to really accentuate the way the femininity of my of my torso. I'll send you a picture of what I mean by my harnesses, but they've all got, like, leading lines, but essentially drawing my belly button as the centre of, my frame and then expand out again into my chest, into my hips.
4: Can you provide some measurements of the location. For example, clothing size or circumference around the body part.
5: How does the art from of drag help you to express yourself and your gender identity?
For me, drag allows for momentary freedom from the this dysphoria I feel day-to-day. My name out of drag is Olive and which I shortened to Ol, my drag name actually comes from Liv backwards which I thought when I changed my name of Olive, everyone would call me Liv, but no everyone calls me Ol. There's there's a little bit a little bit of method behind madness there. But it gives me a short break on stage where I can create a world where I am in control and I'm orchestrating people's gaze. I think as a trans person we're so often looked at in a way that is not, under our regimentation, you know in the media we're presented to be disgusting, vile creatures, but on stage I get to envelope myself in a world that lasts for maybe 4 or 5 minutes where I am in total control over my body in the way that it's perceived. And there's something about stripping, especially in my genre of drag. That really really helps me with the authority of my body because I'm stripping in a way that works in accordance to my dysphoria and and I'm not satisfying this kind of monstrous pressure that trans women especially are put under nowadays. I'm sexy, I'm siren esque and I like the control that drag gives me of my body when I don't feel that when I'm not in drag I think. Put yourself out in public every day can be so exhausting. That when you're on stage and you're choosing to articulate every single movement, it can give you a real sense of freedom and escapism from the confines of day-to-day life.
Conclusion from the questionnaire
From VIL's responses I have decided to work from the chest to crotch region. I found her discussion of how dysphoria effects everyone differently insightful. For example, I had never considered the belly button a region of dysphoria and it demonstrated how everyone has their own complex relationship with the body.
Also, I thought that her discussion of drag insightful and how the levels of control we have over the perception of the body can be manipulated. I wanted to focus on this element of control, especially in the presentation of the work through the photo shoot.
Initial collages
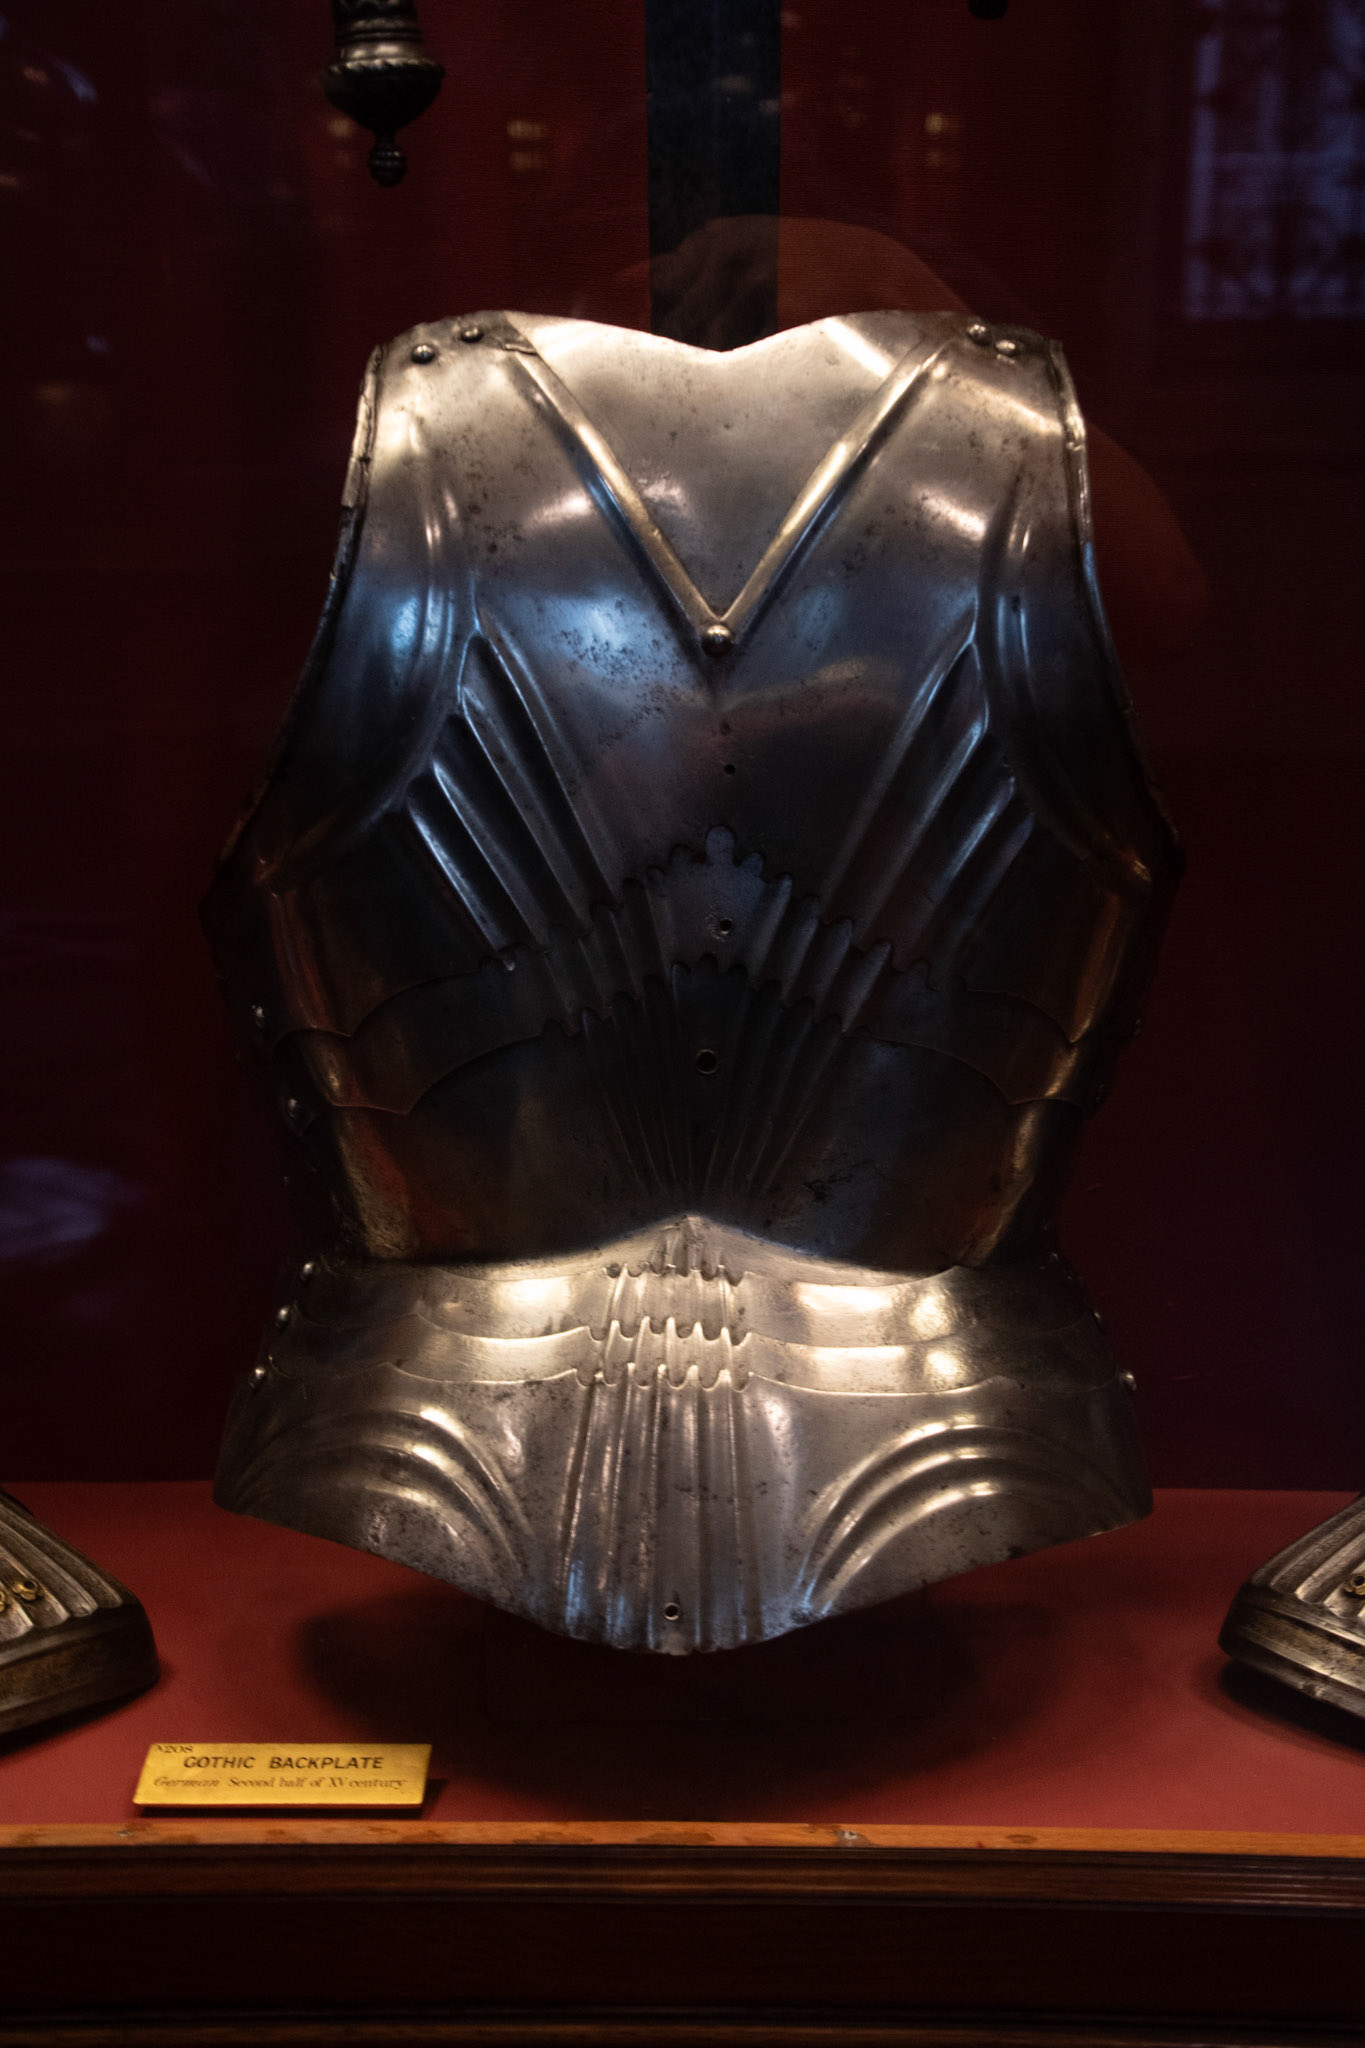
Inspiration imagery from Gallery visits
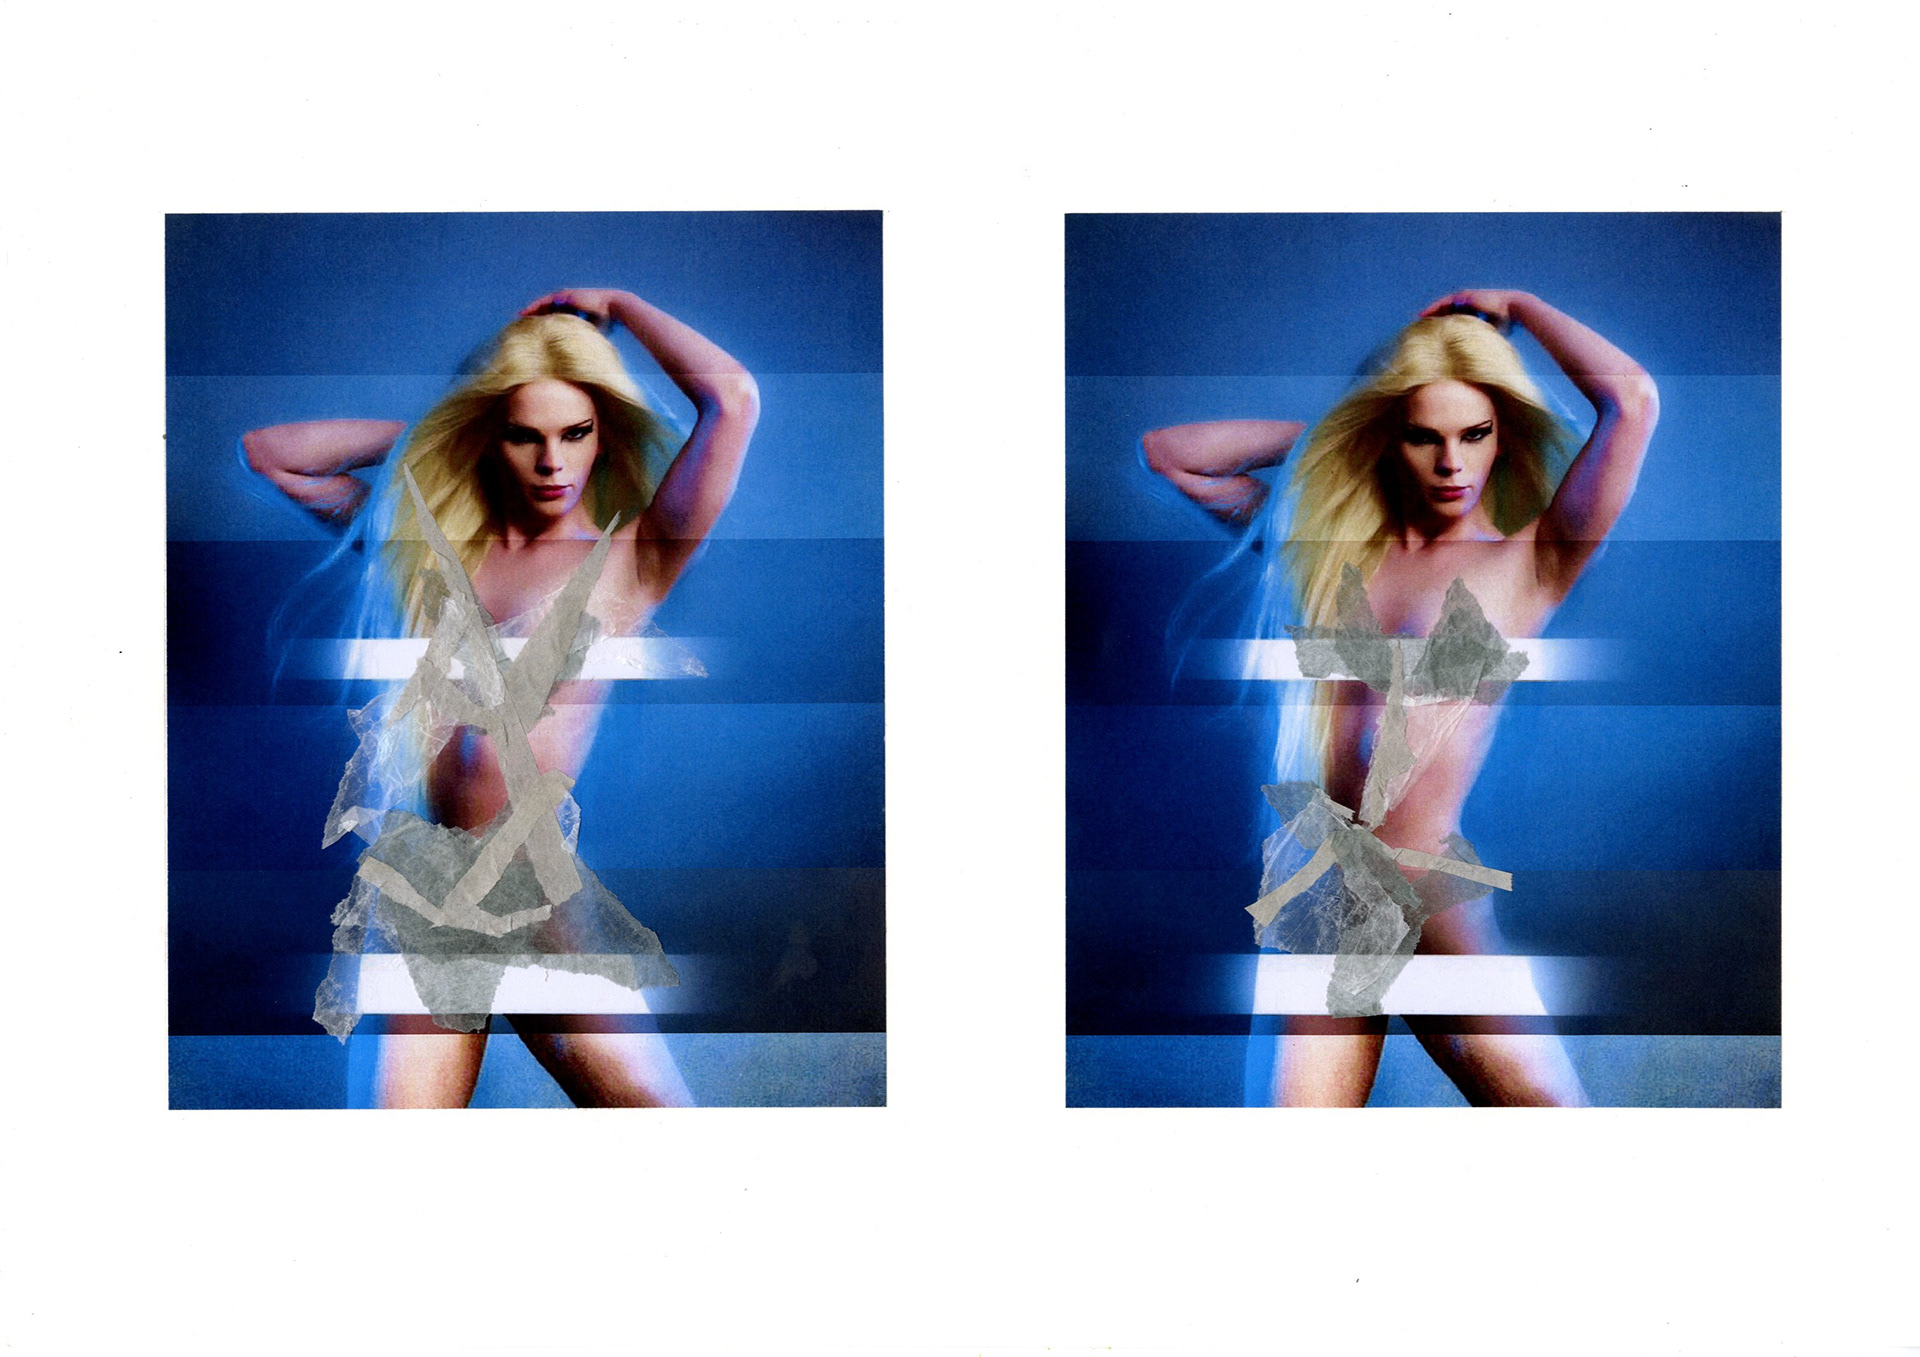
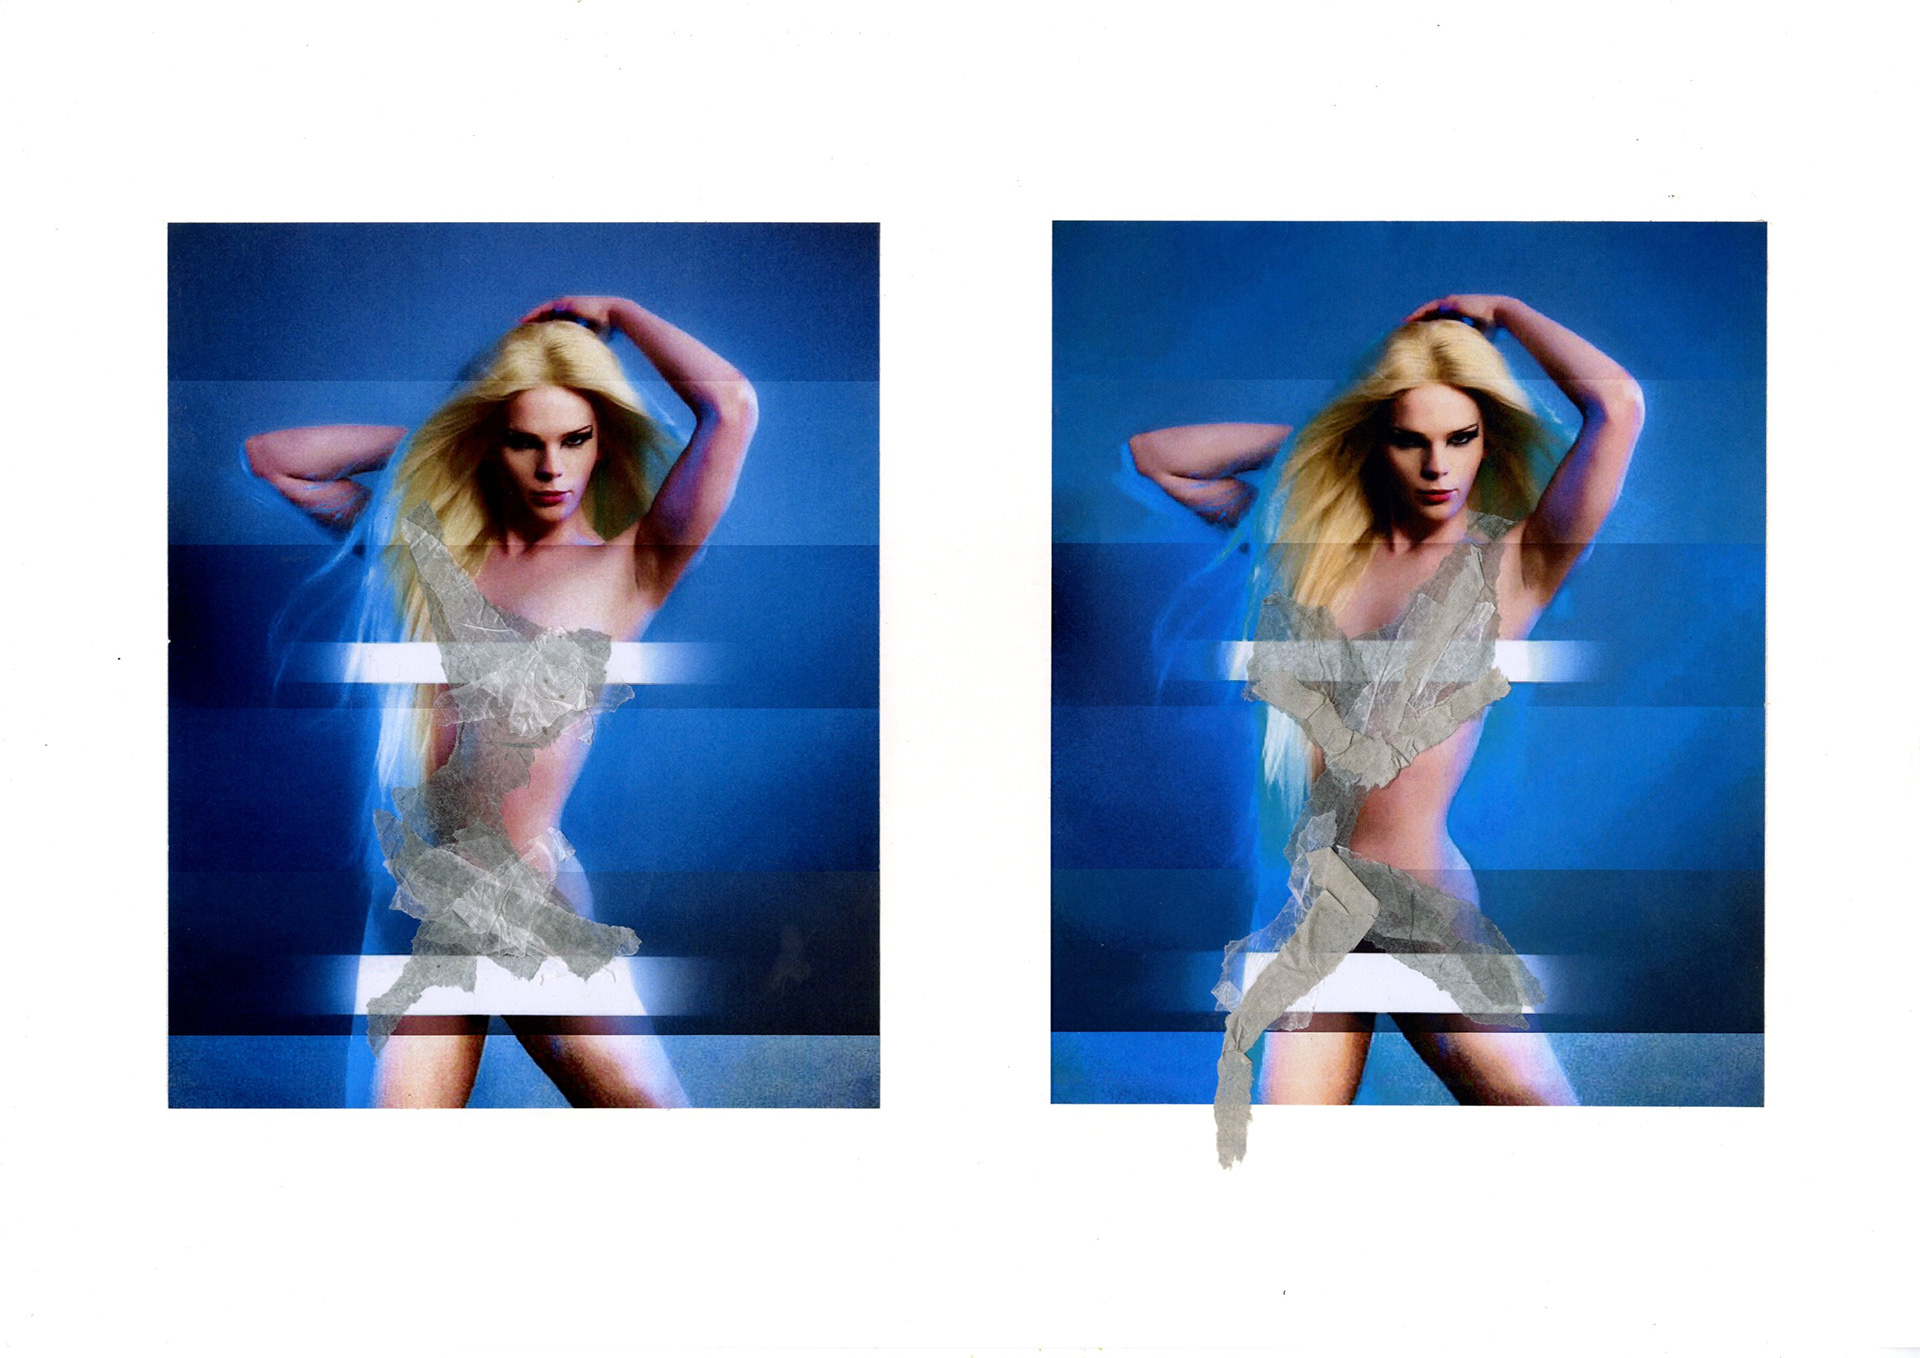
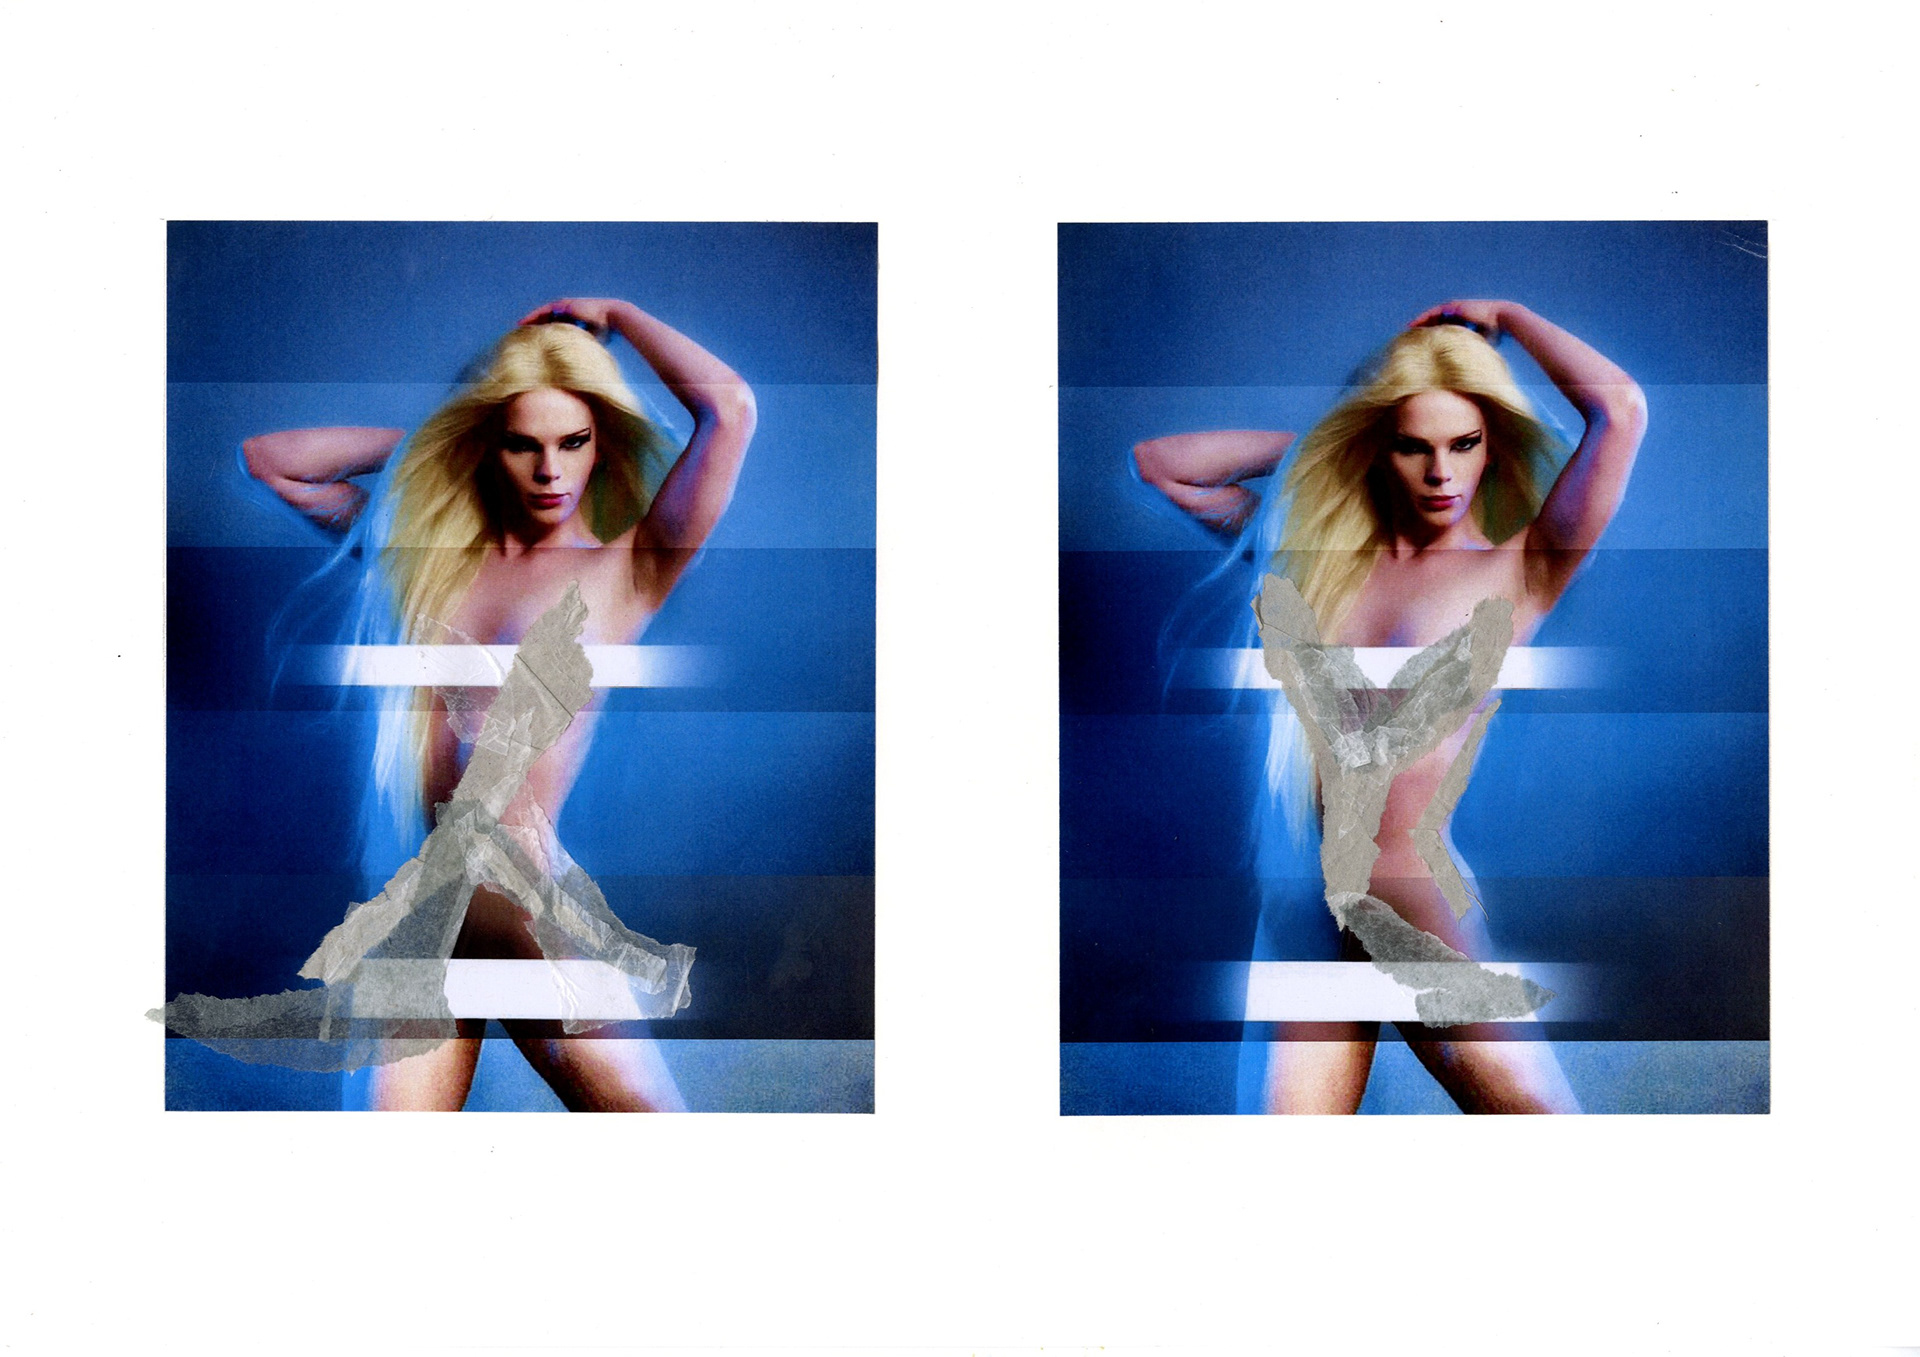
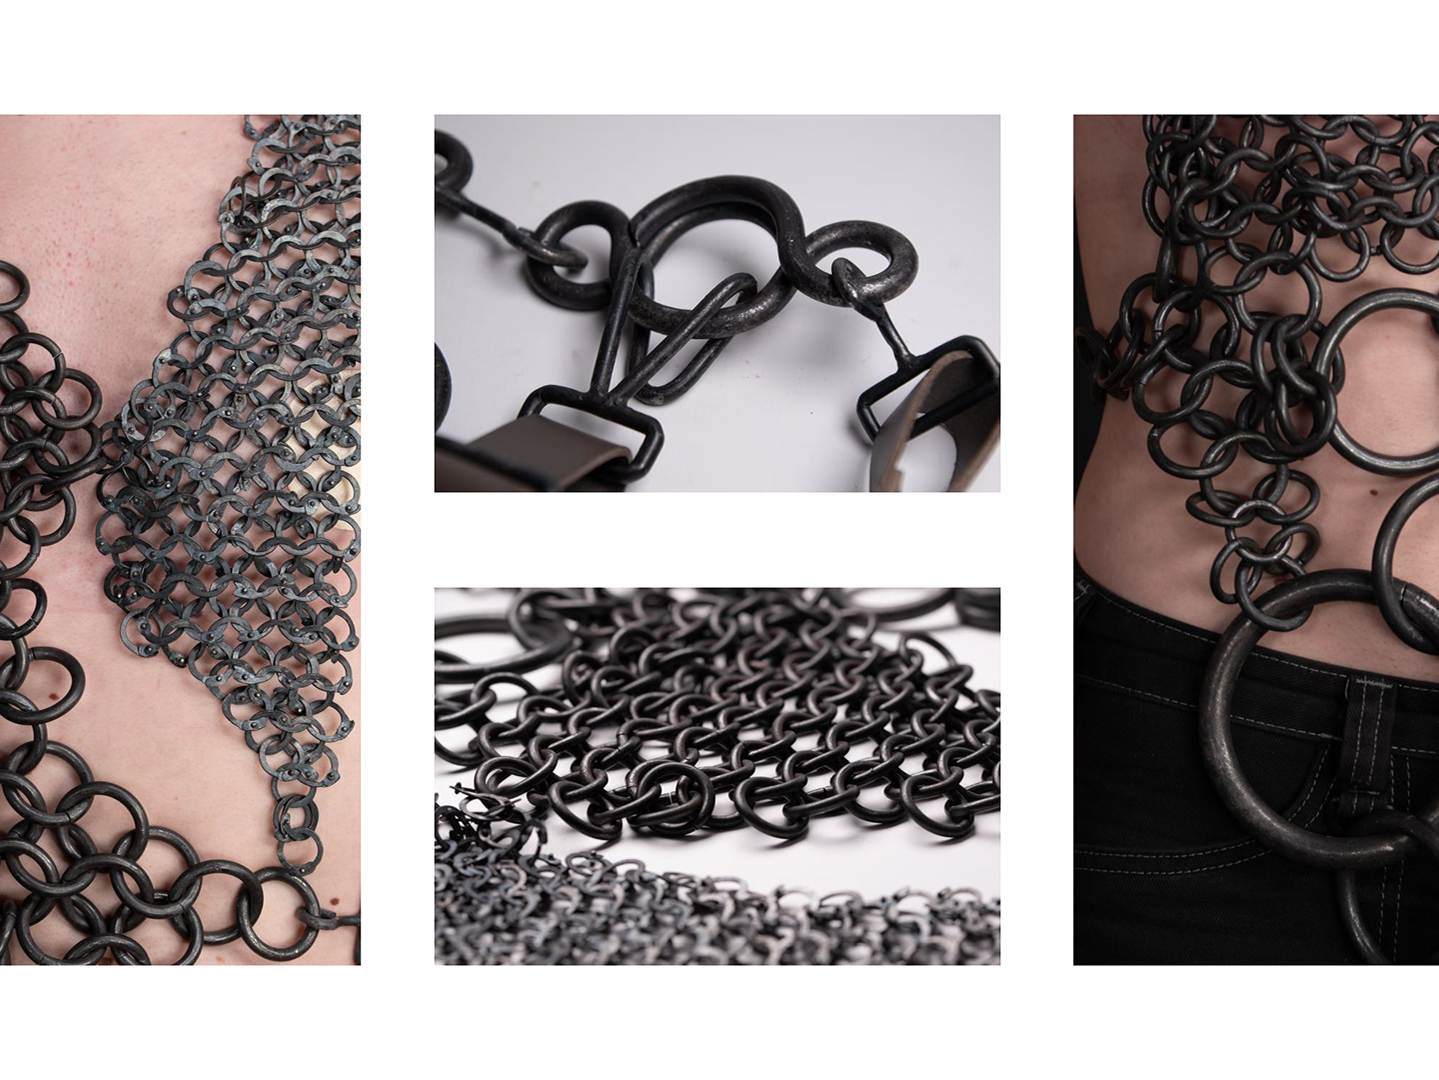
For these collages, I wanted to explore layering and stretching forms across the entire body. I focused on creating leading lines that pinch in at the waist to form an hourglass figure. I also experimented with flaring out the designs over the hips, creating a flowing explosion that extends away from the body to draw attention away from the crotch.
Sketches
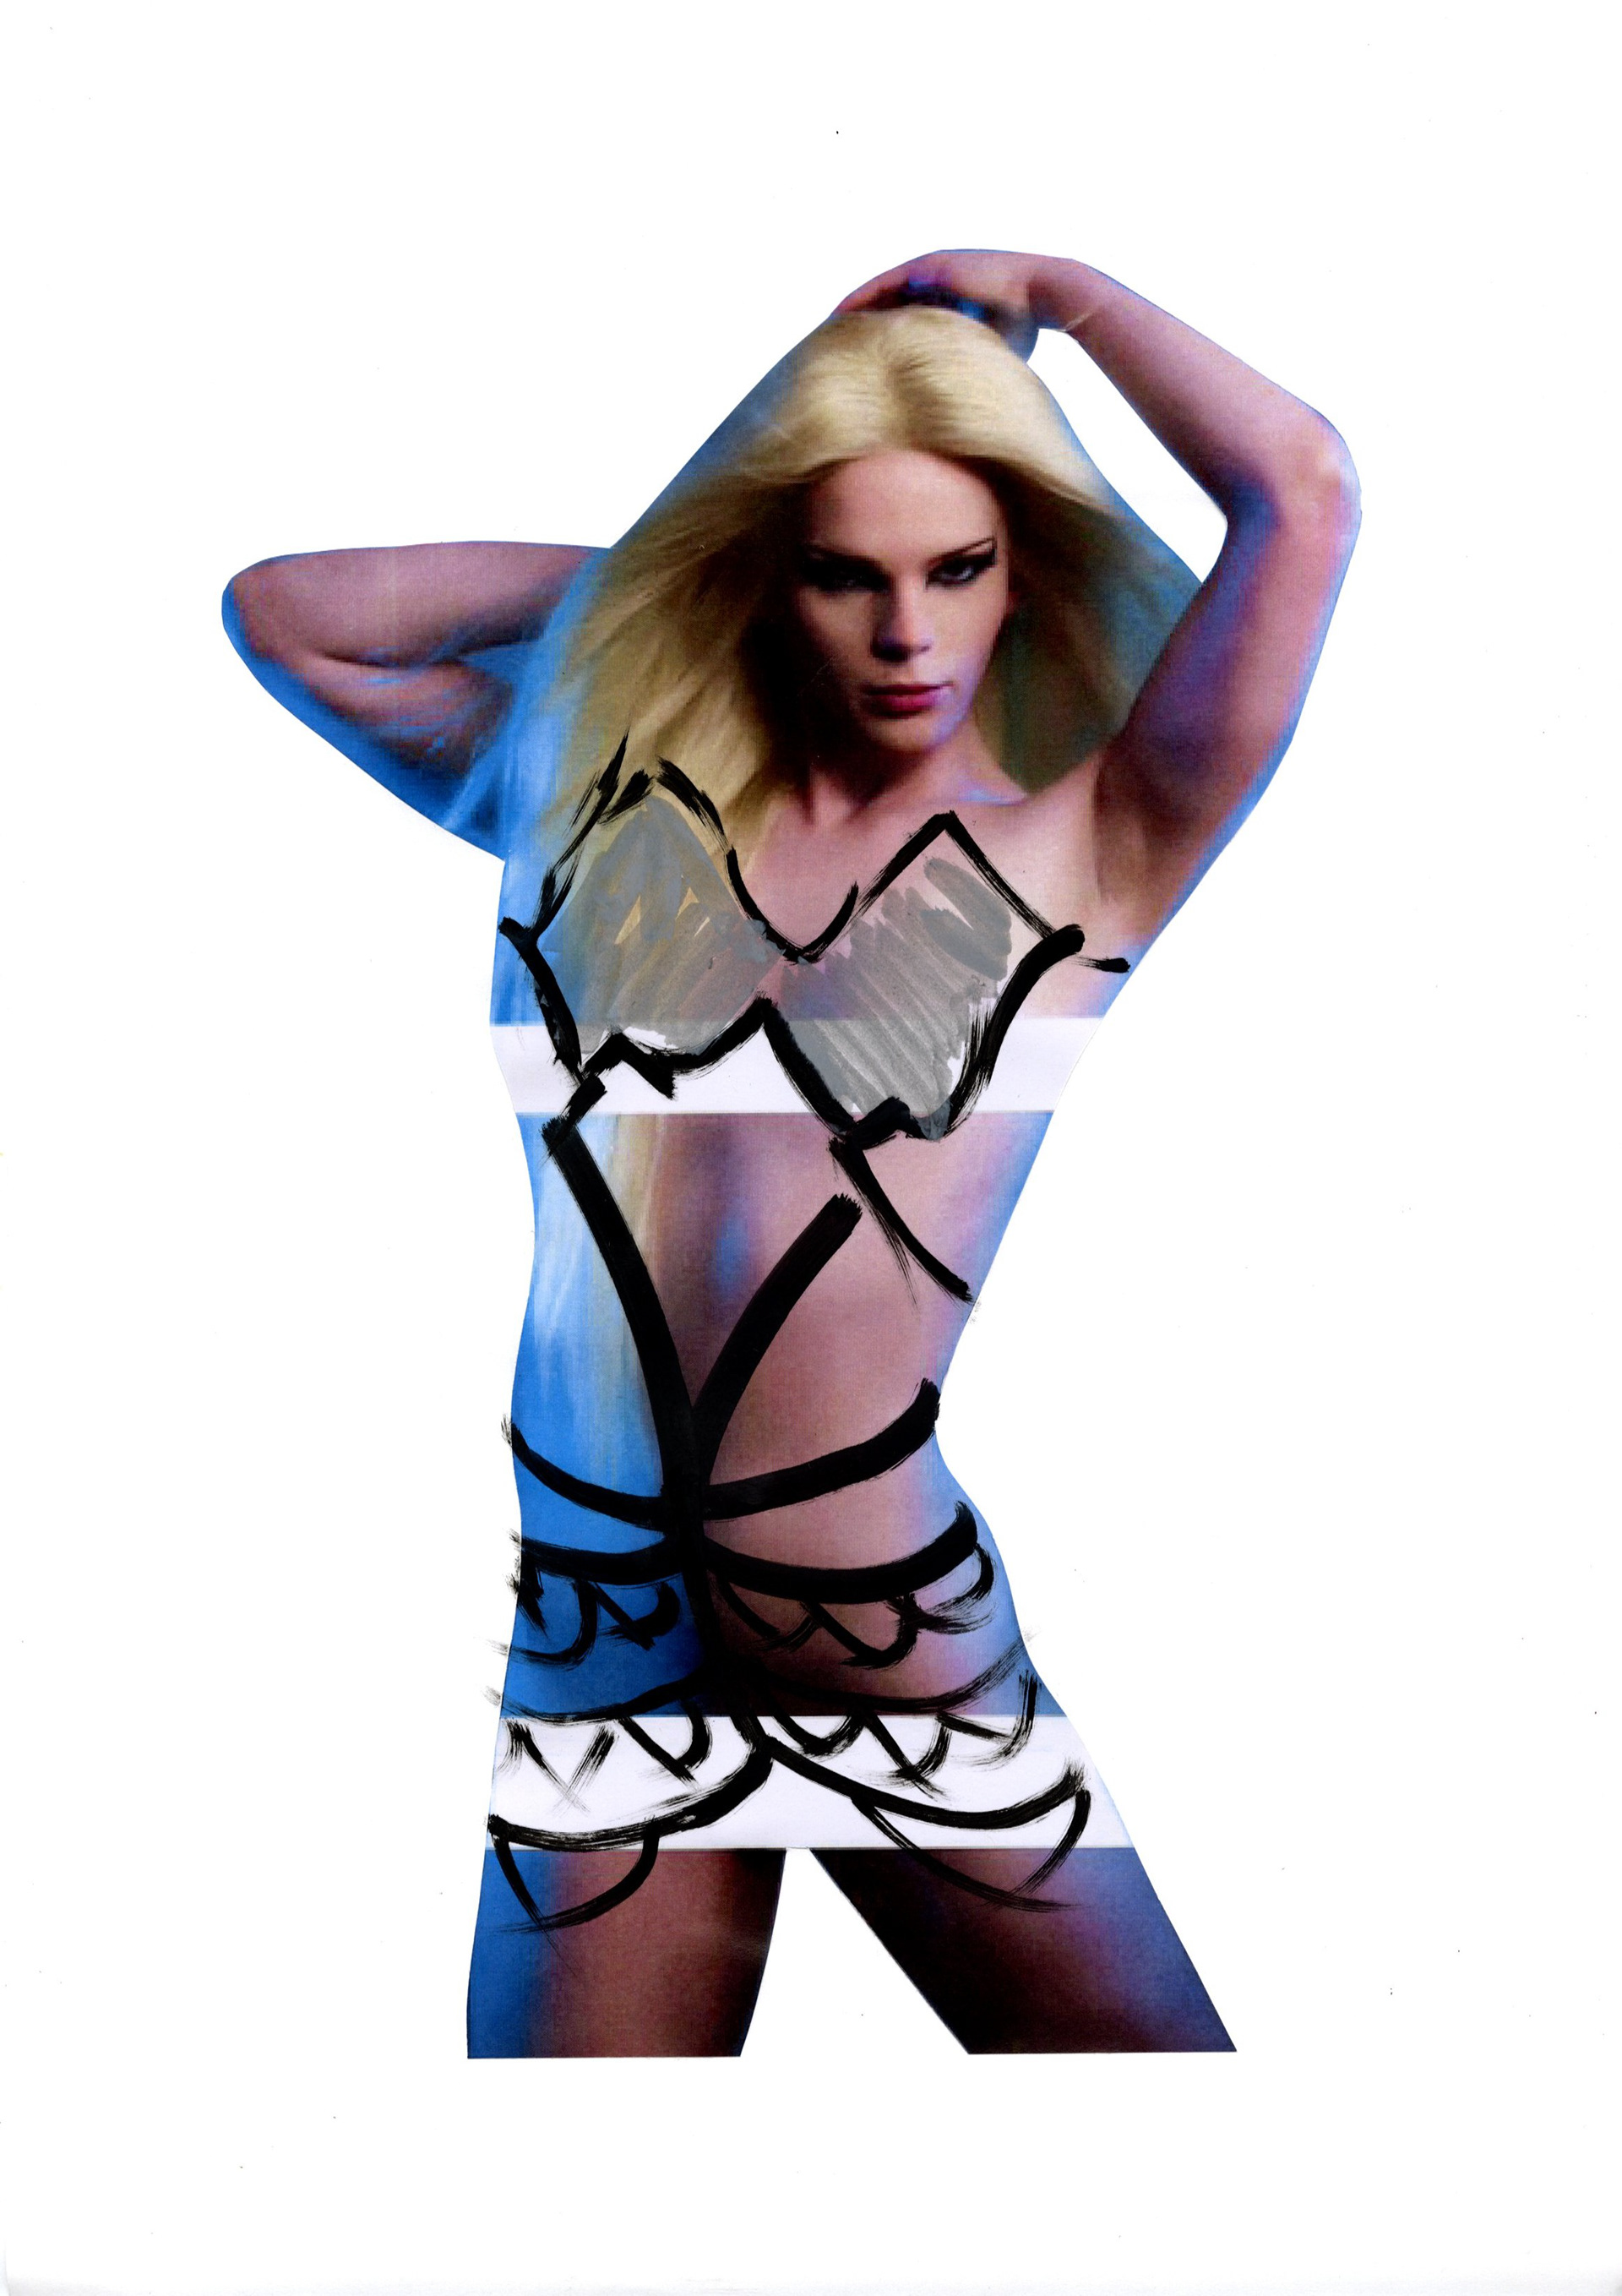
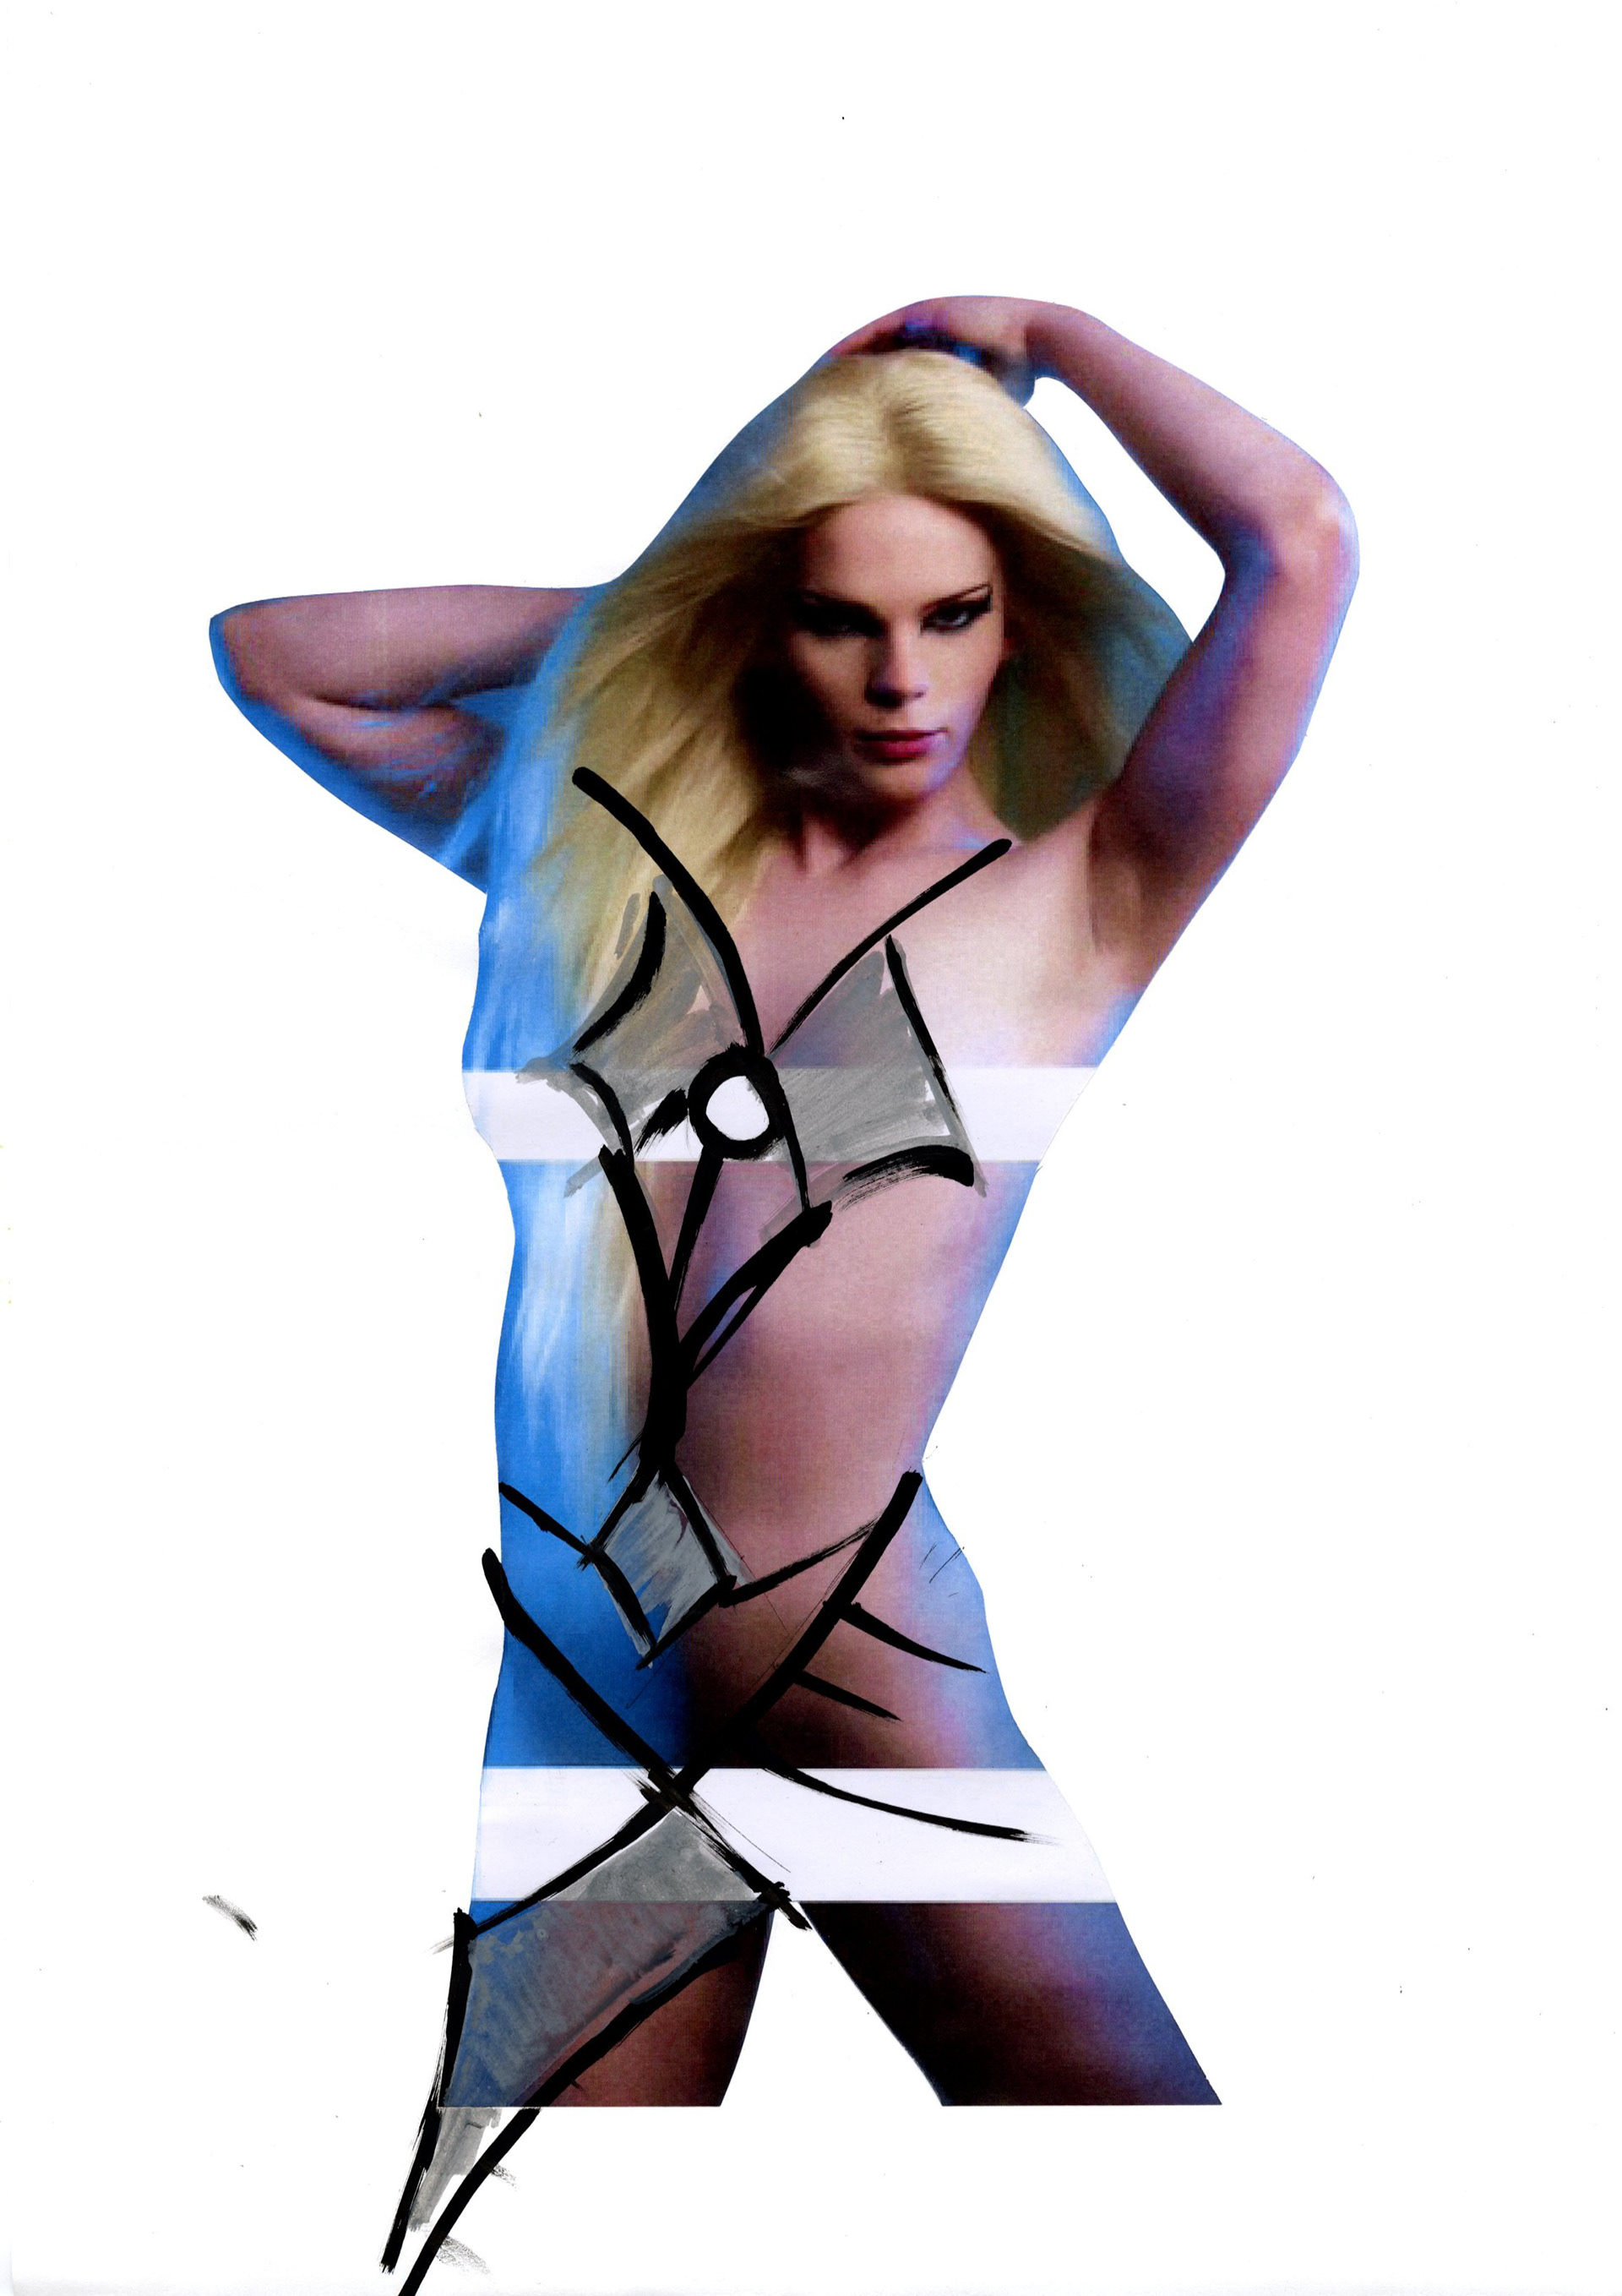
I then refined the collages into sketches to establish clear forms and lines to follow when modeling. In discussions with VIL, we preferred the symmetry and harmony of the right design, which is interrupted by the asymmetry of the skirt. I drew significant inspiration from her insights on leading lines in her harnesses, bringing them together at a central point to cover the belly button. Since VIL expressed comfort in revealing much of her body, I aimed to expose and celebrate the areas she felt confident in, often more than I would have when designing for myself.
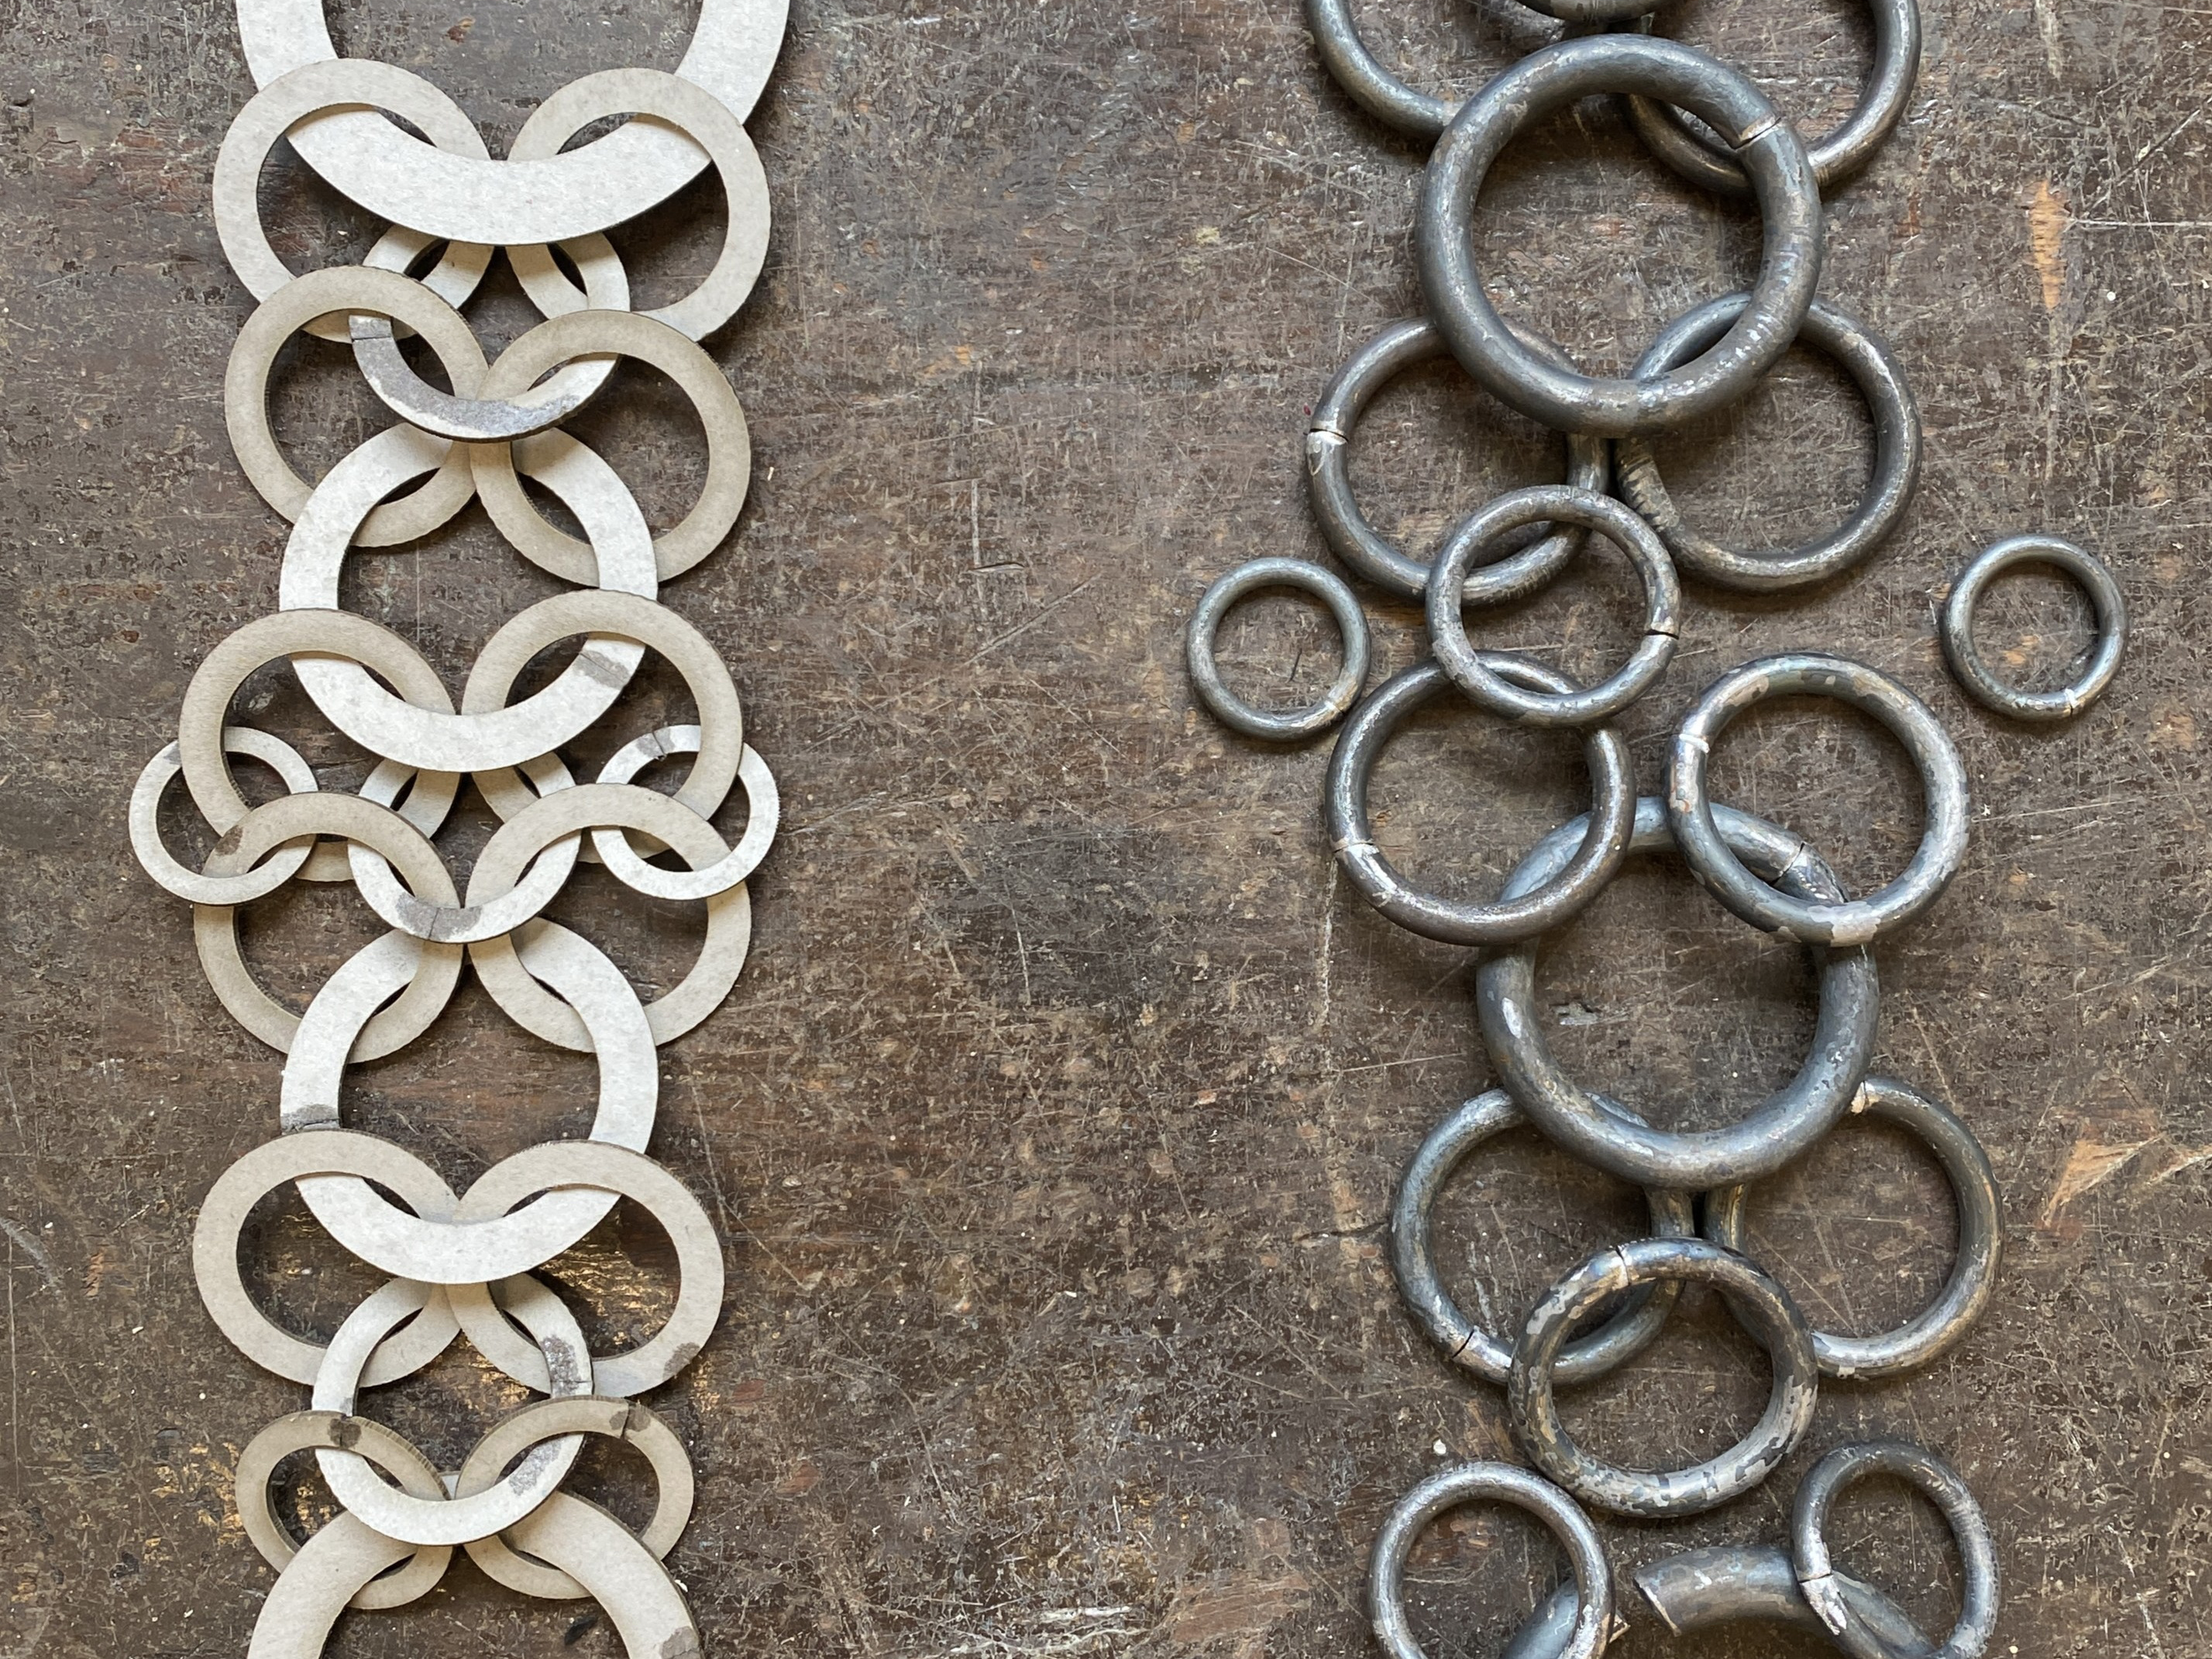
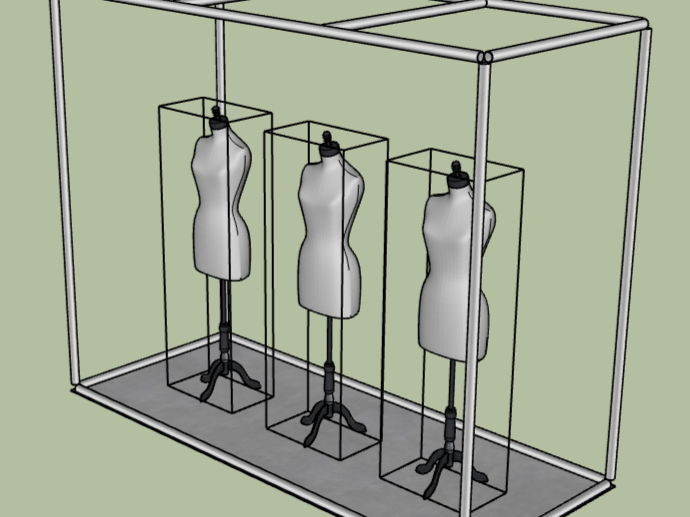
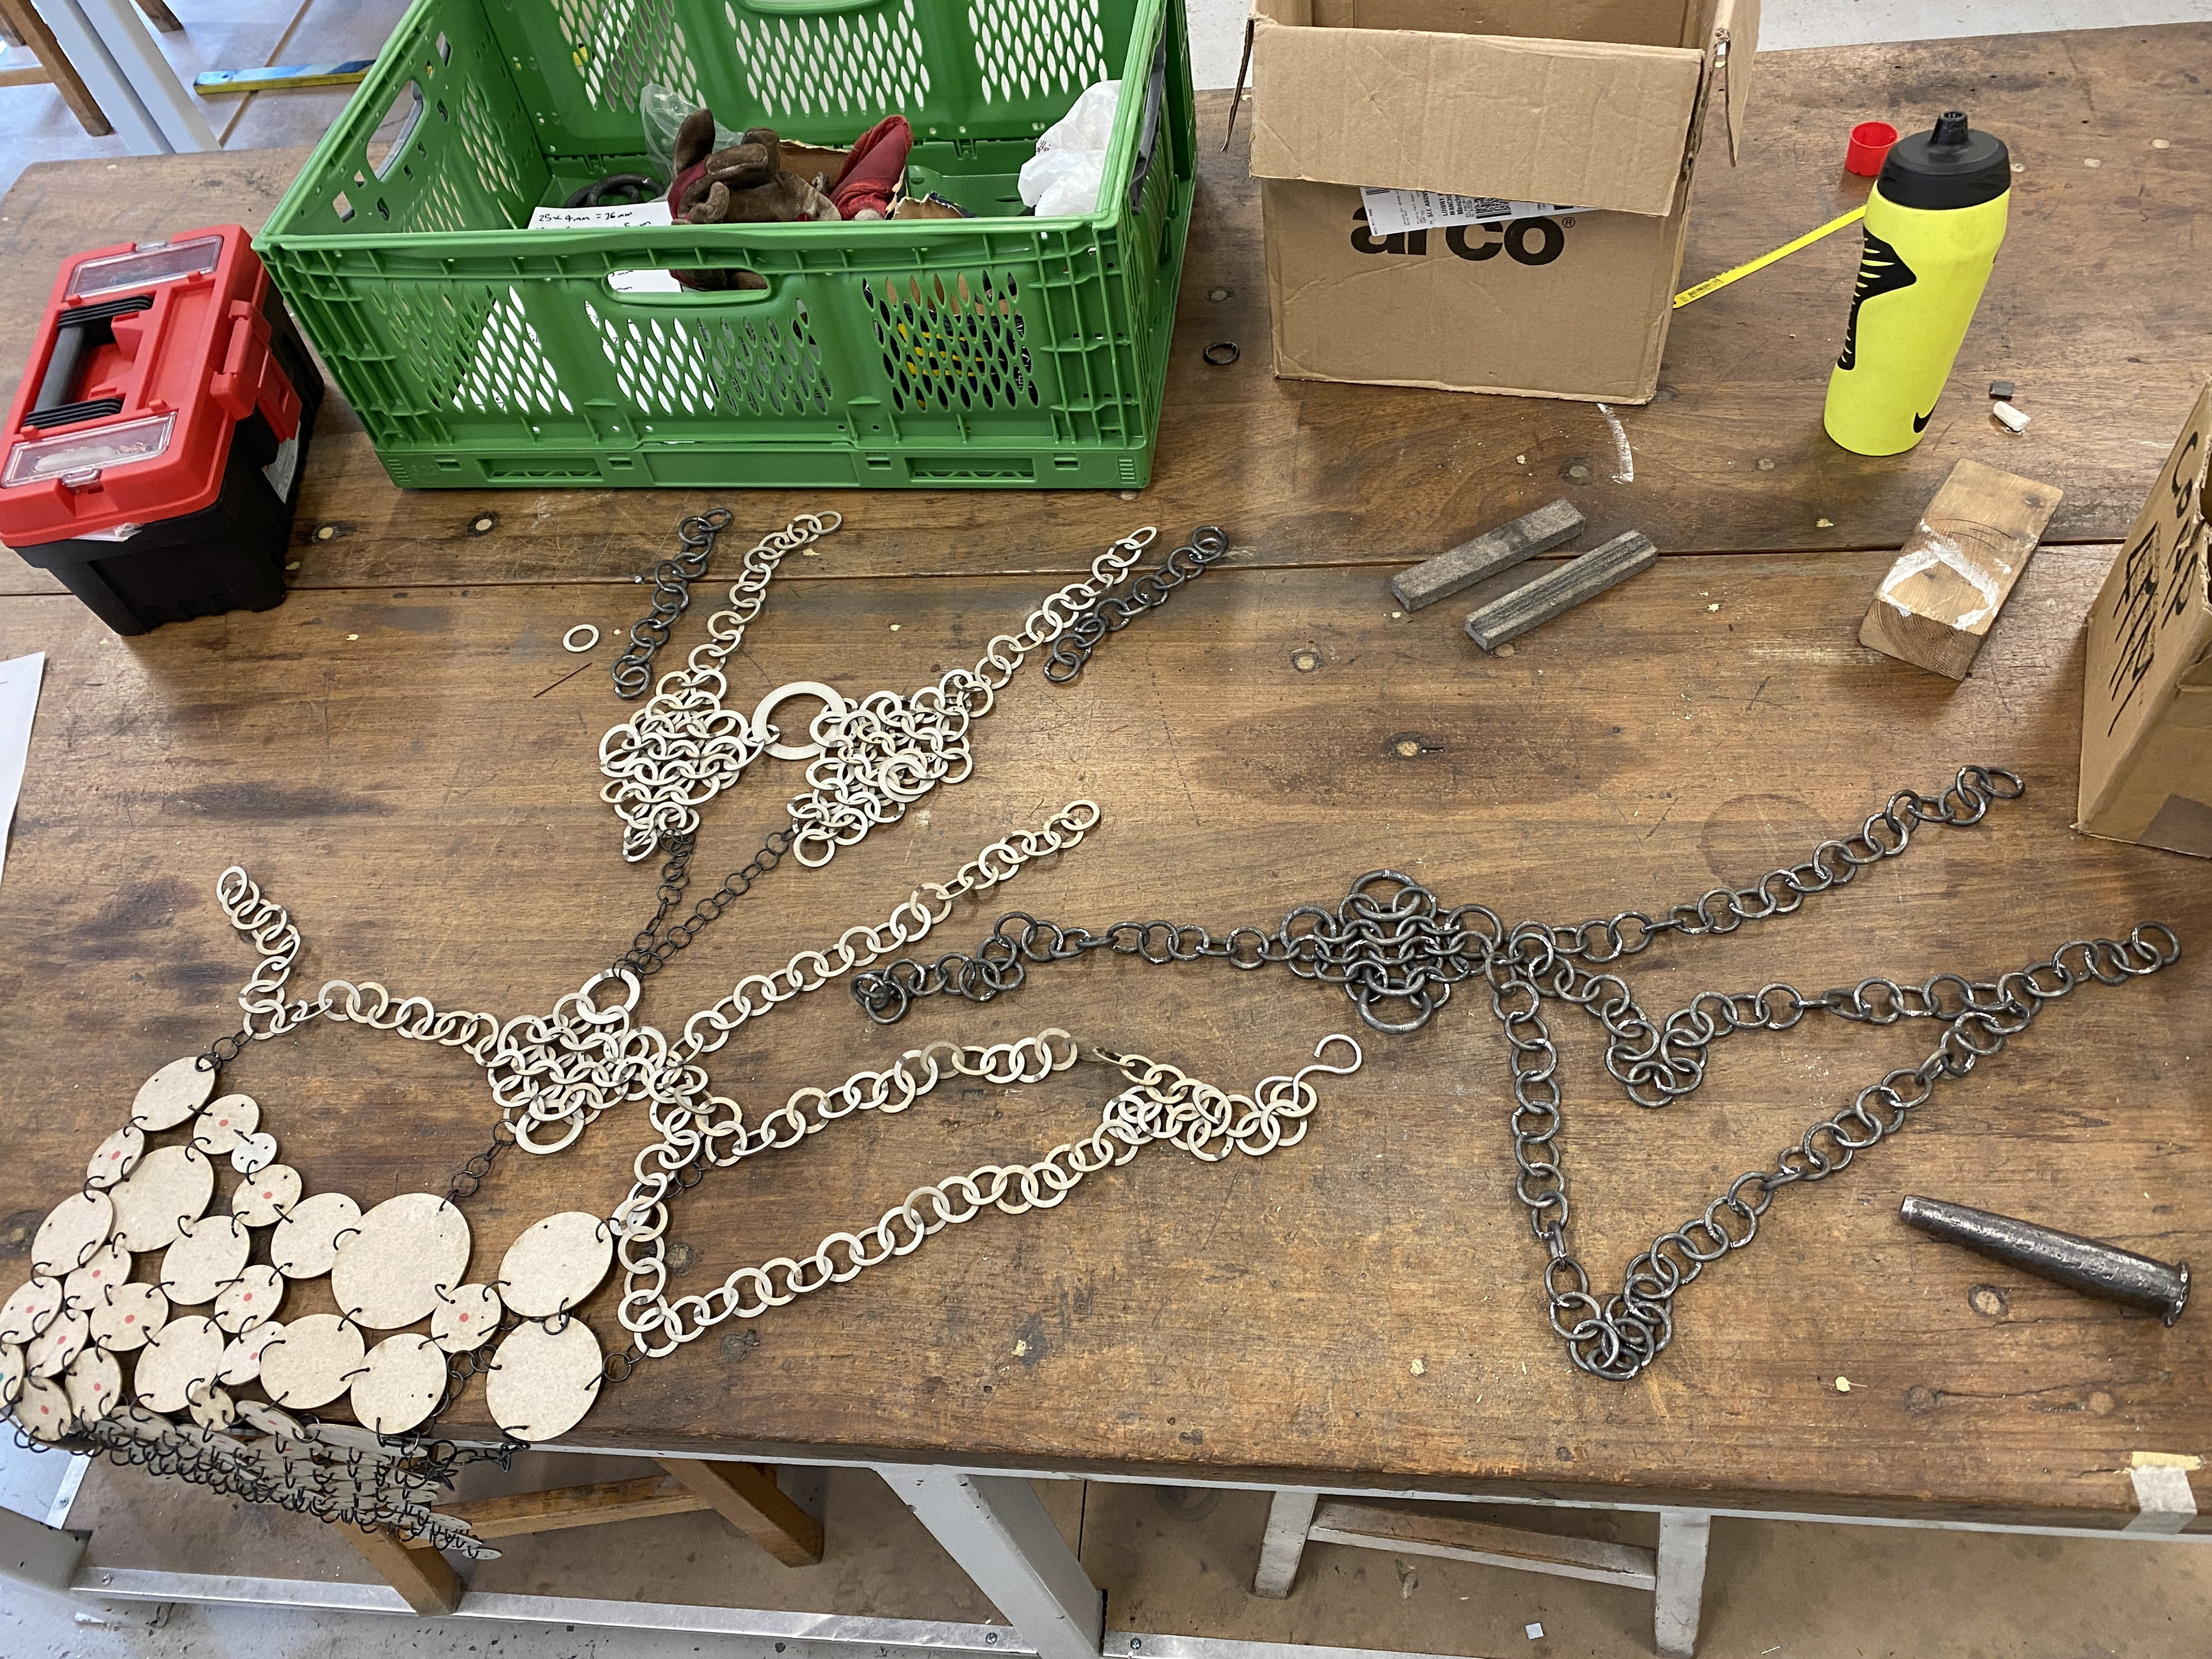
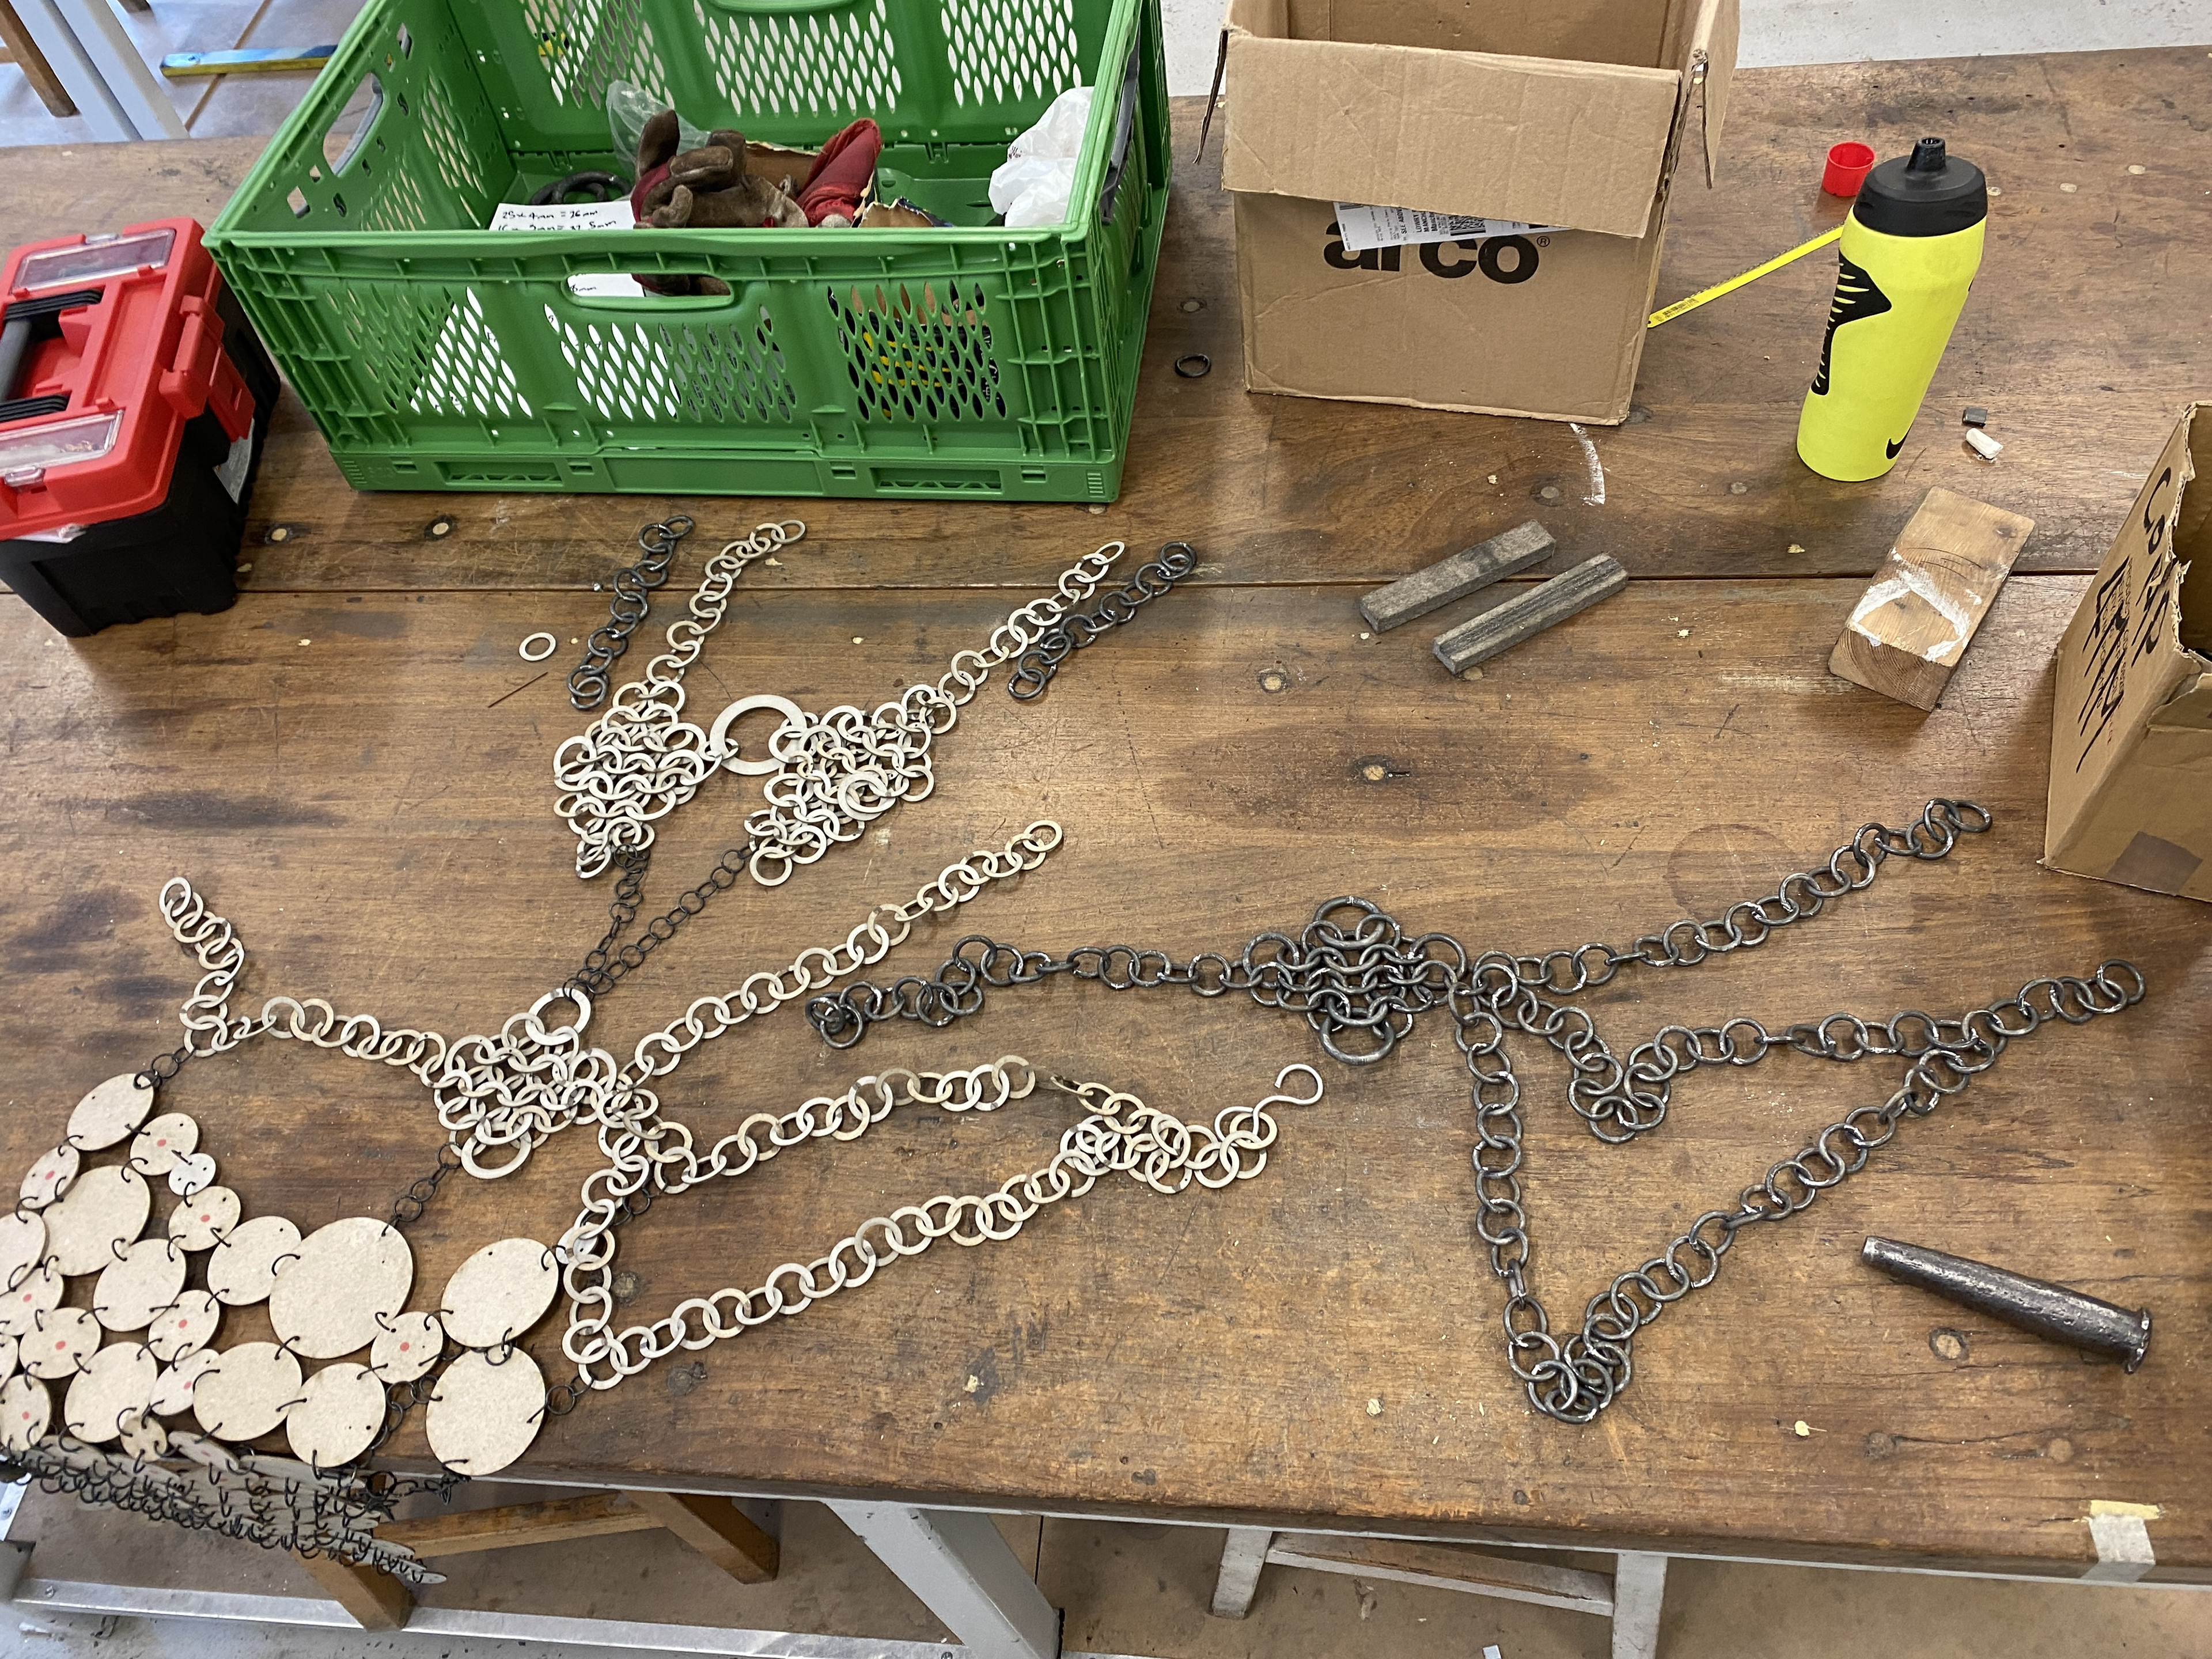
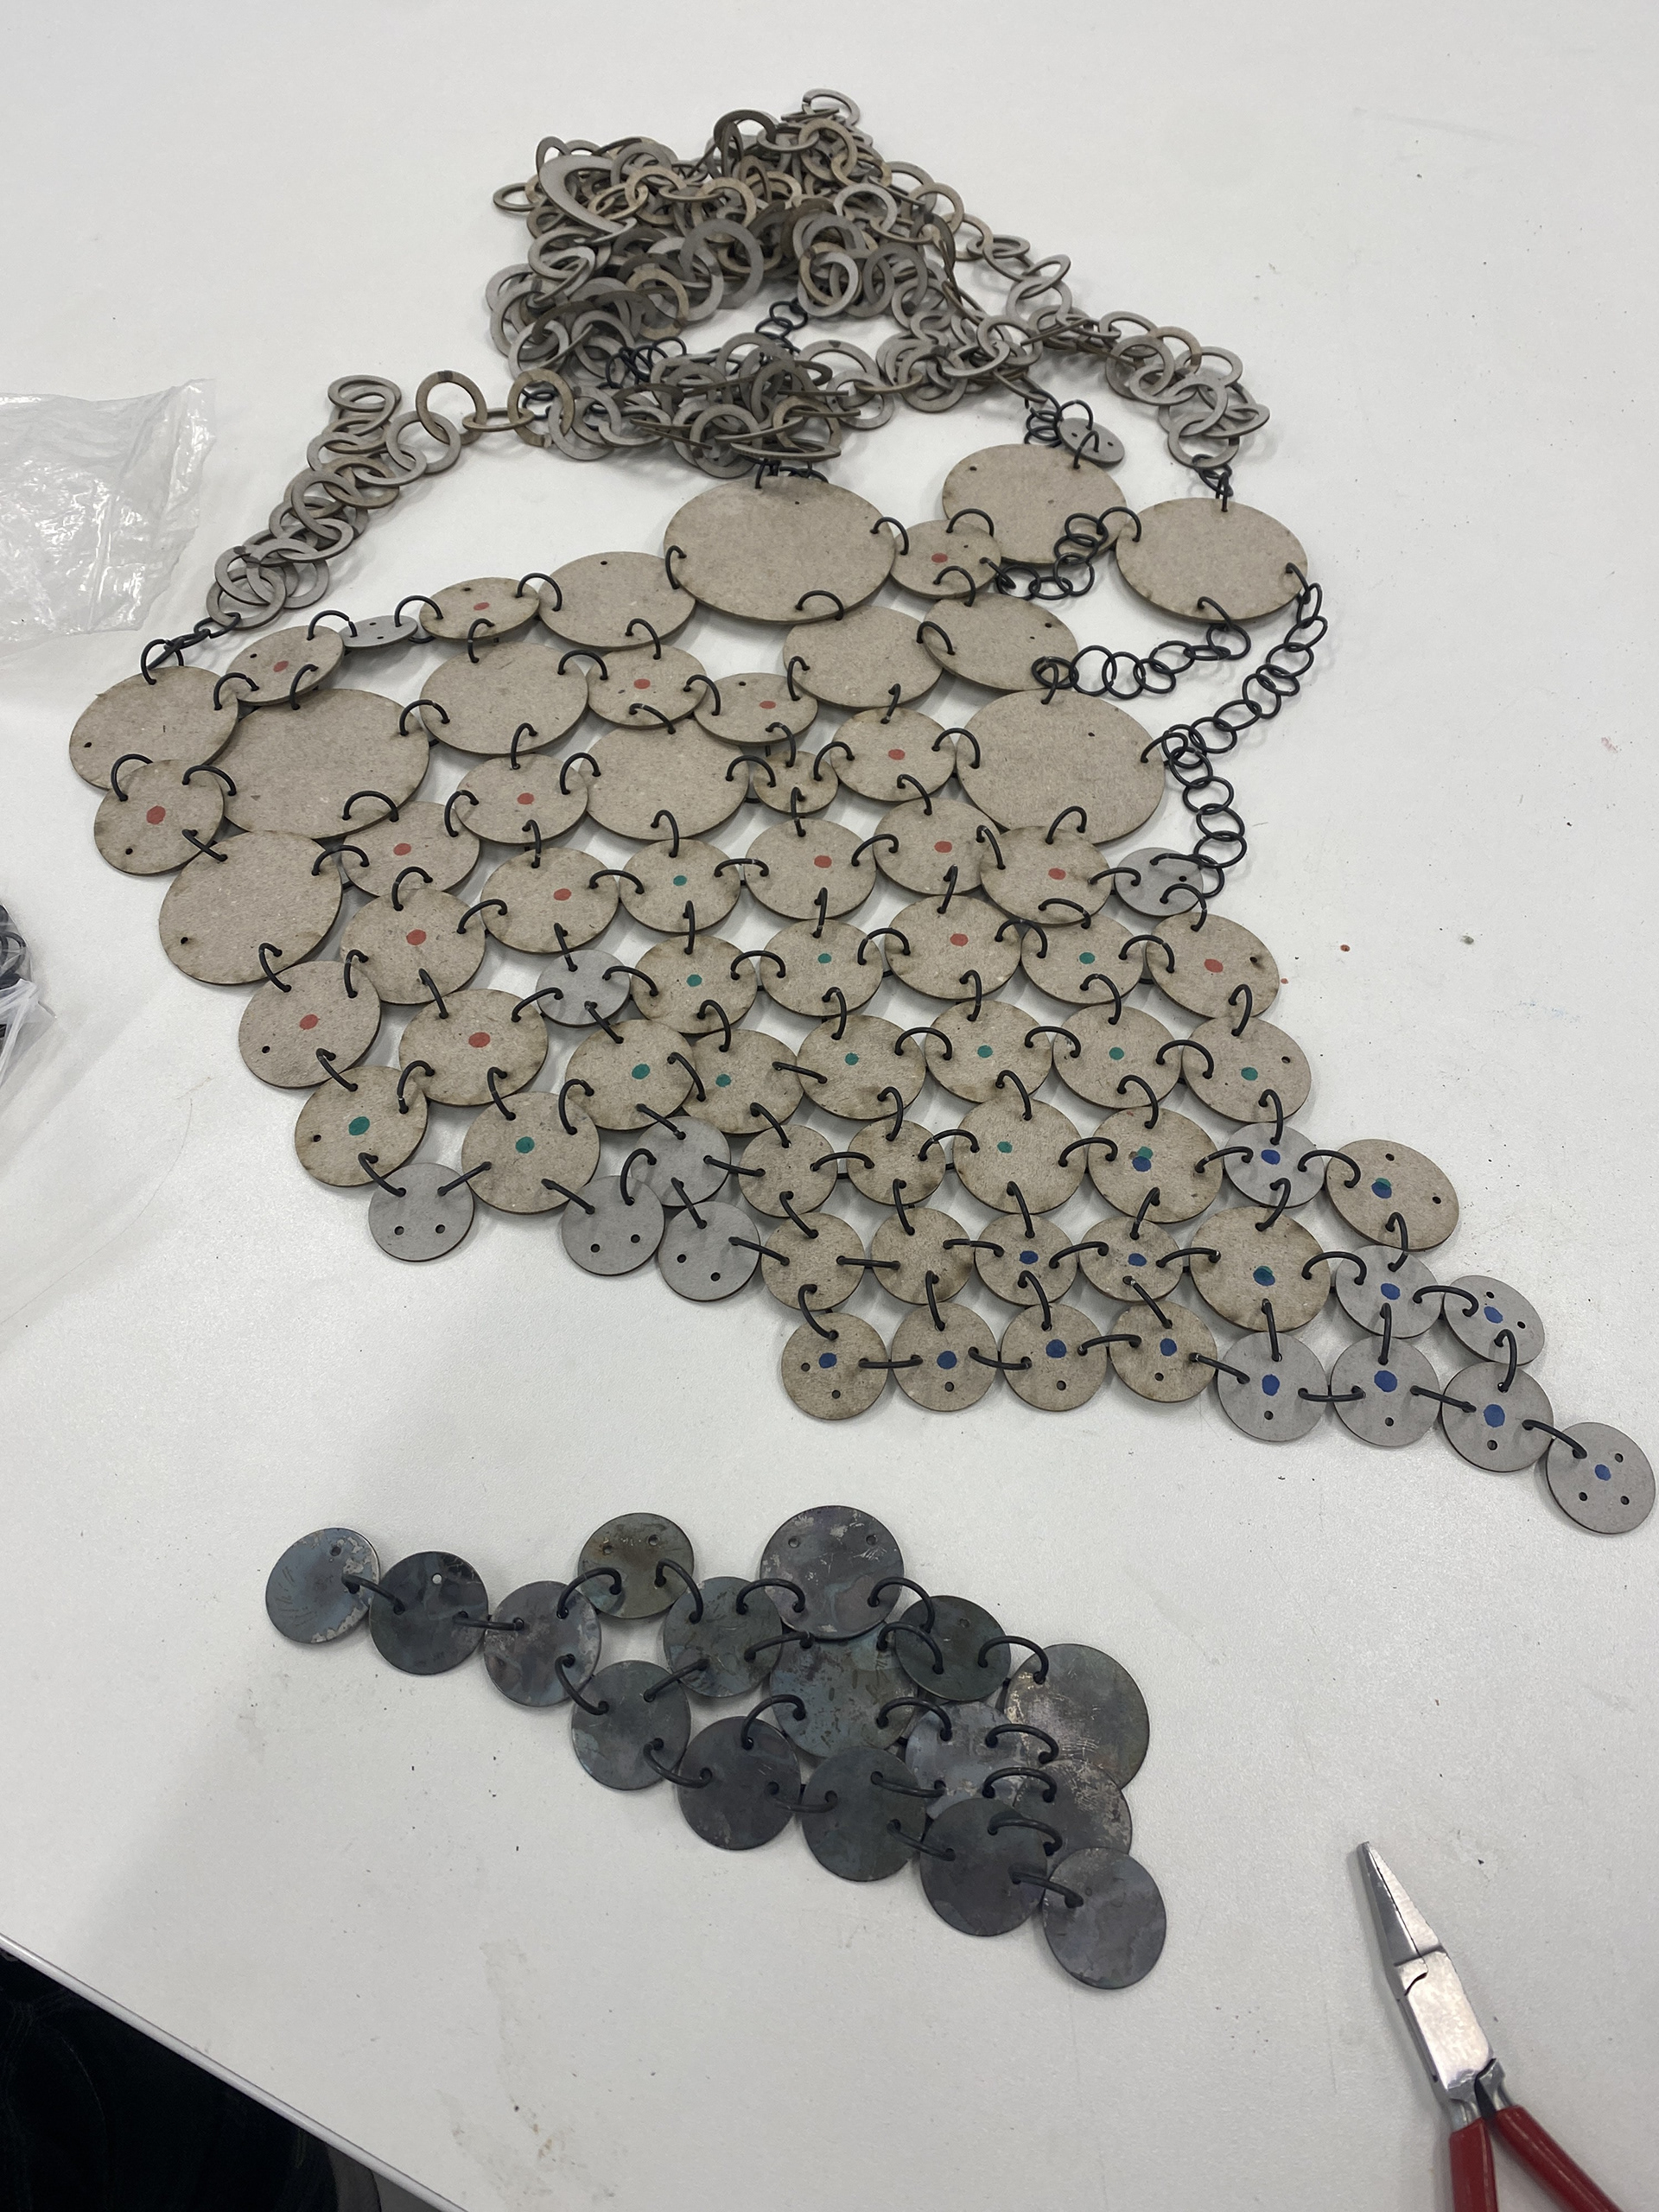
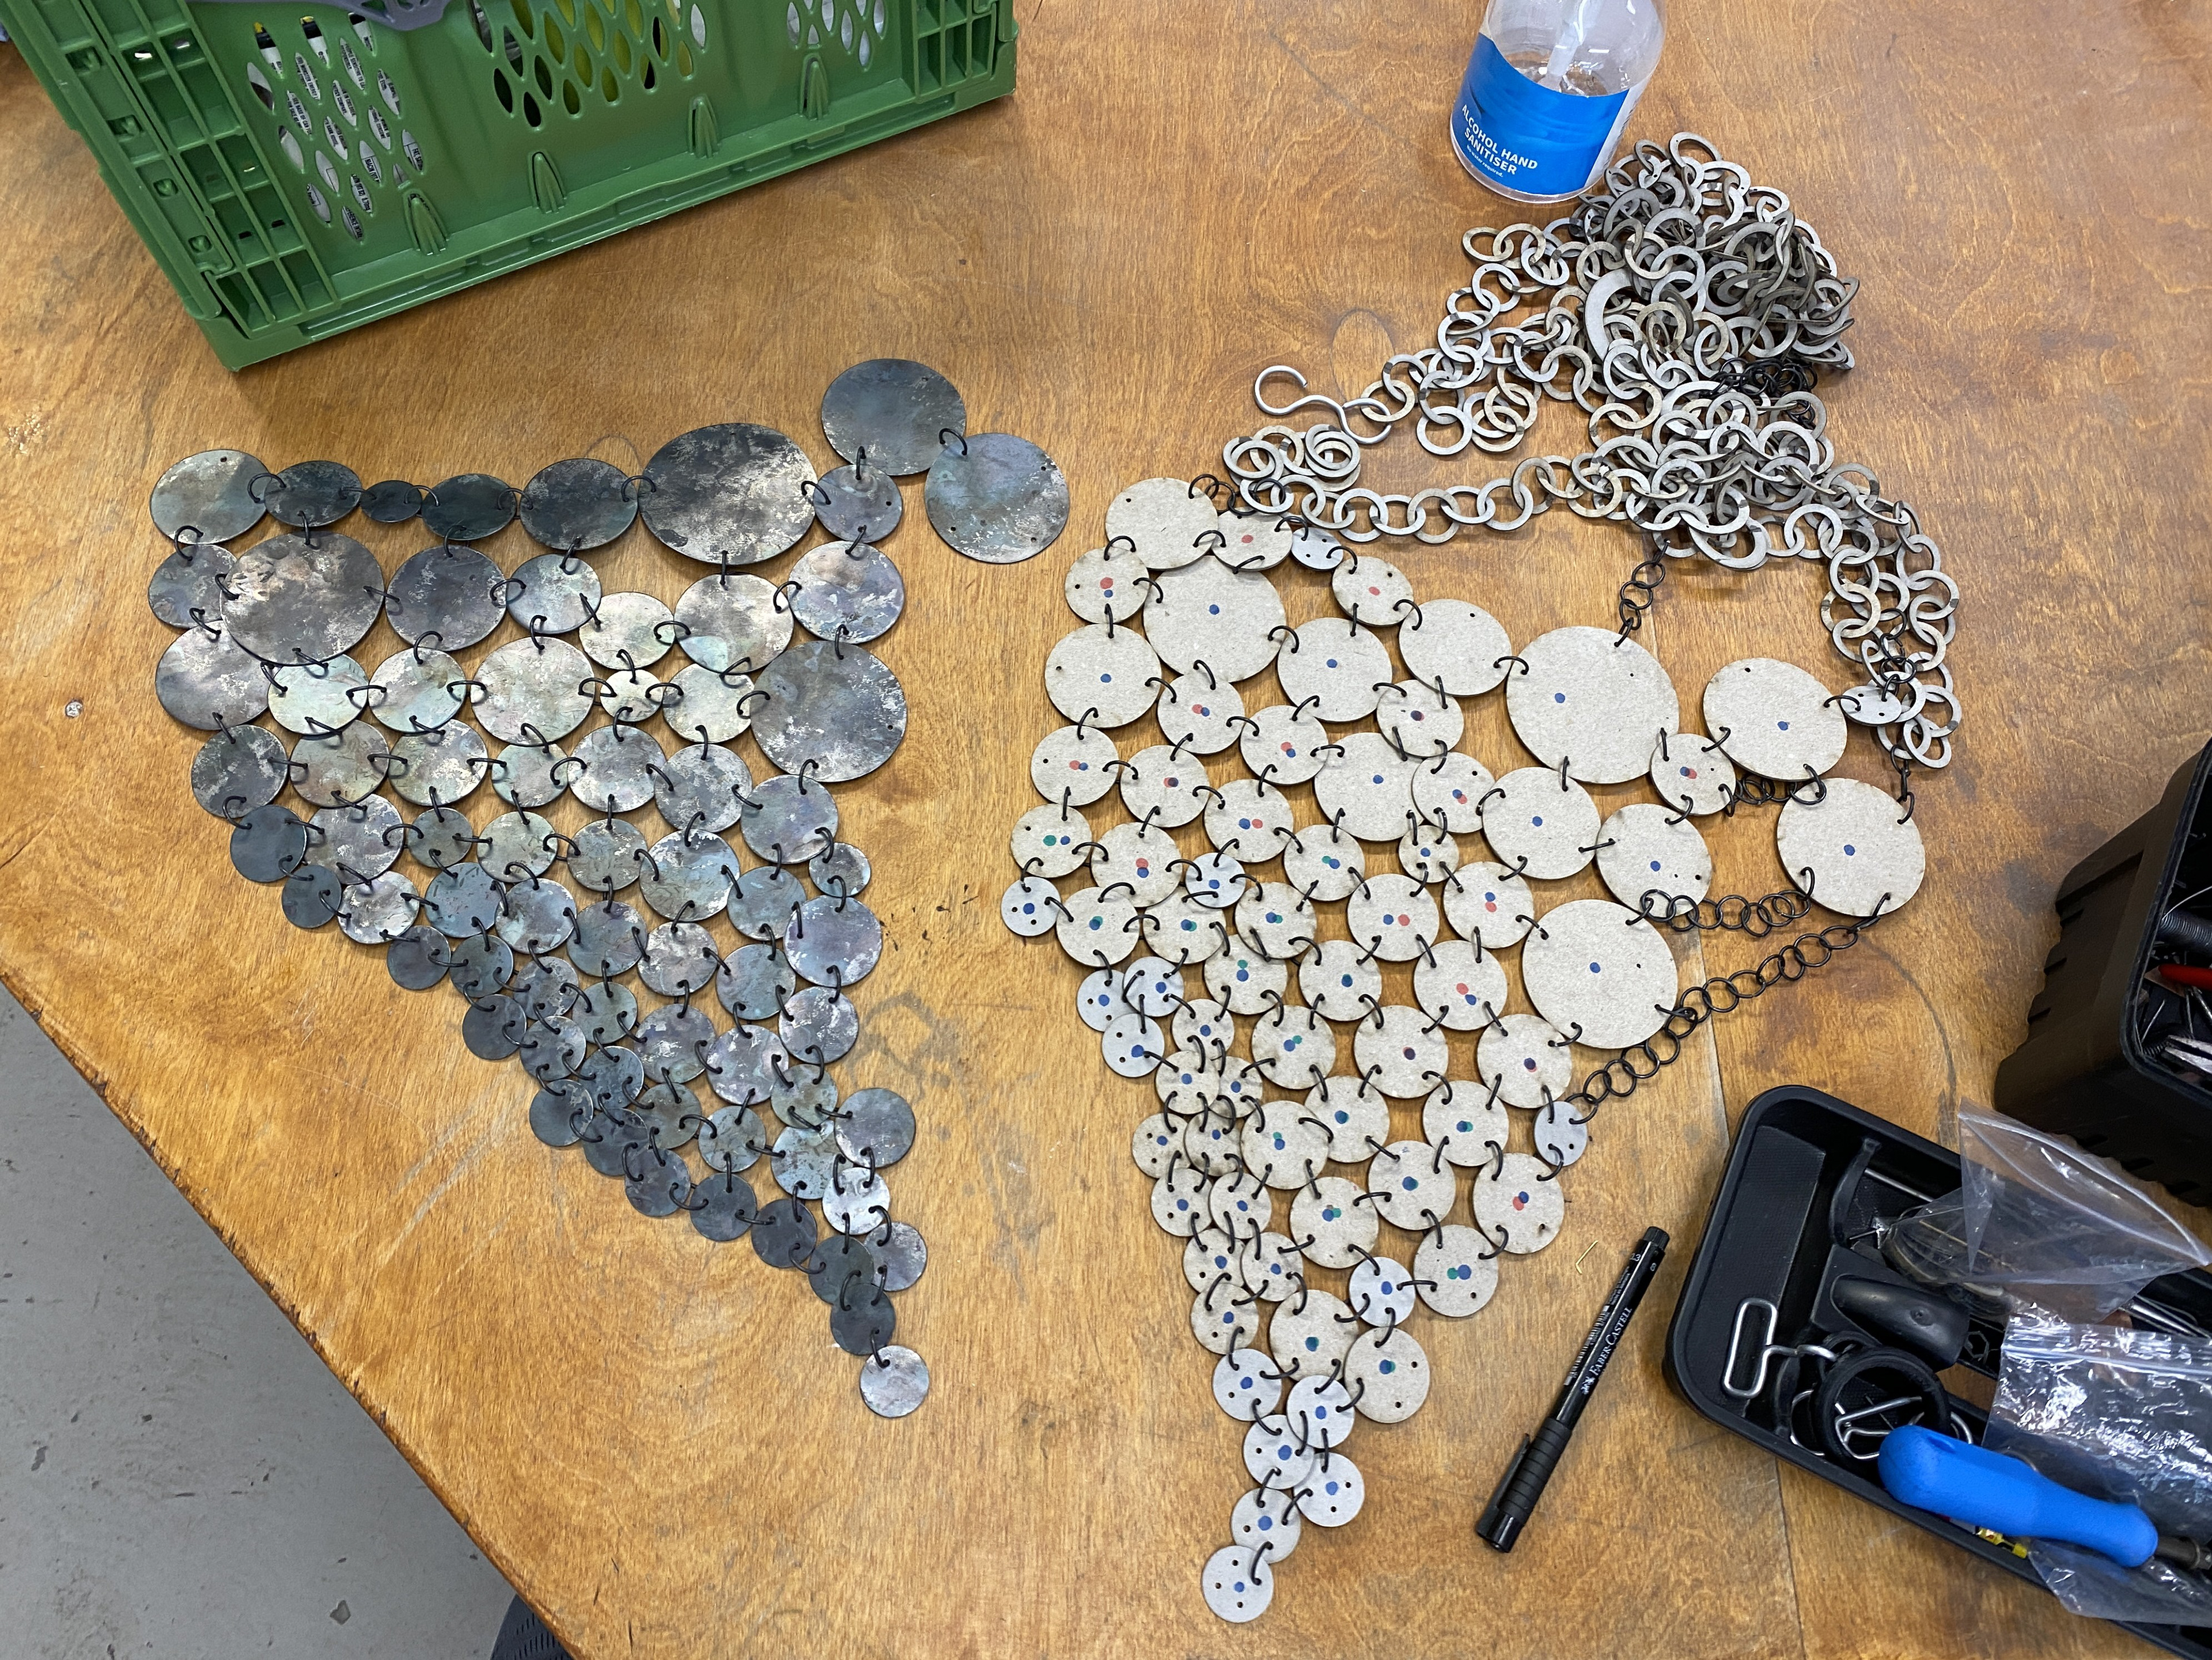
Cardboard Modeling
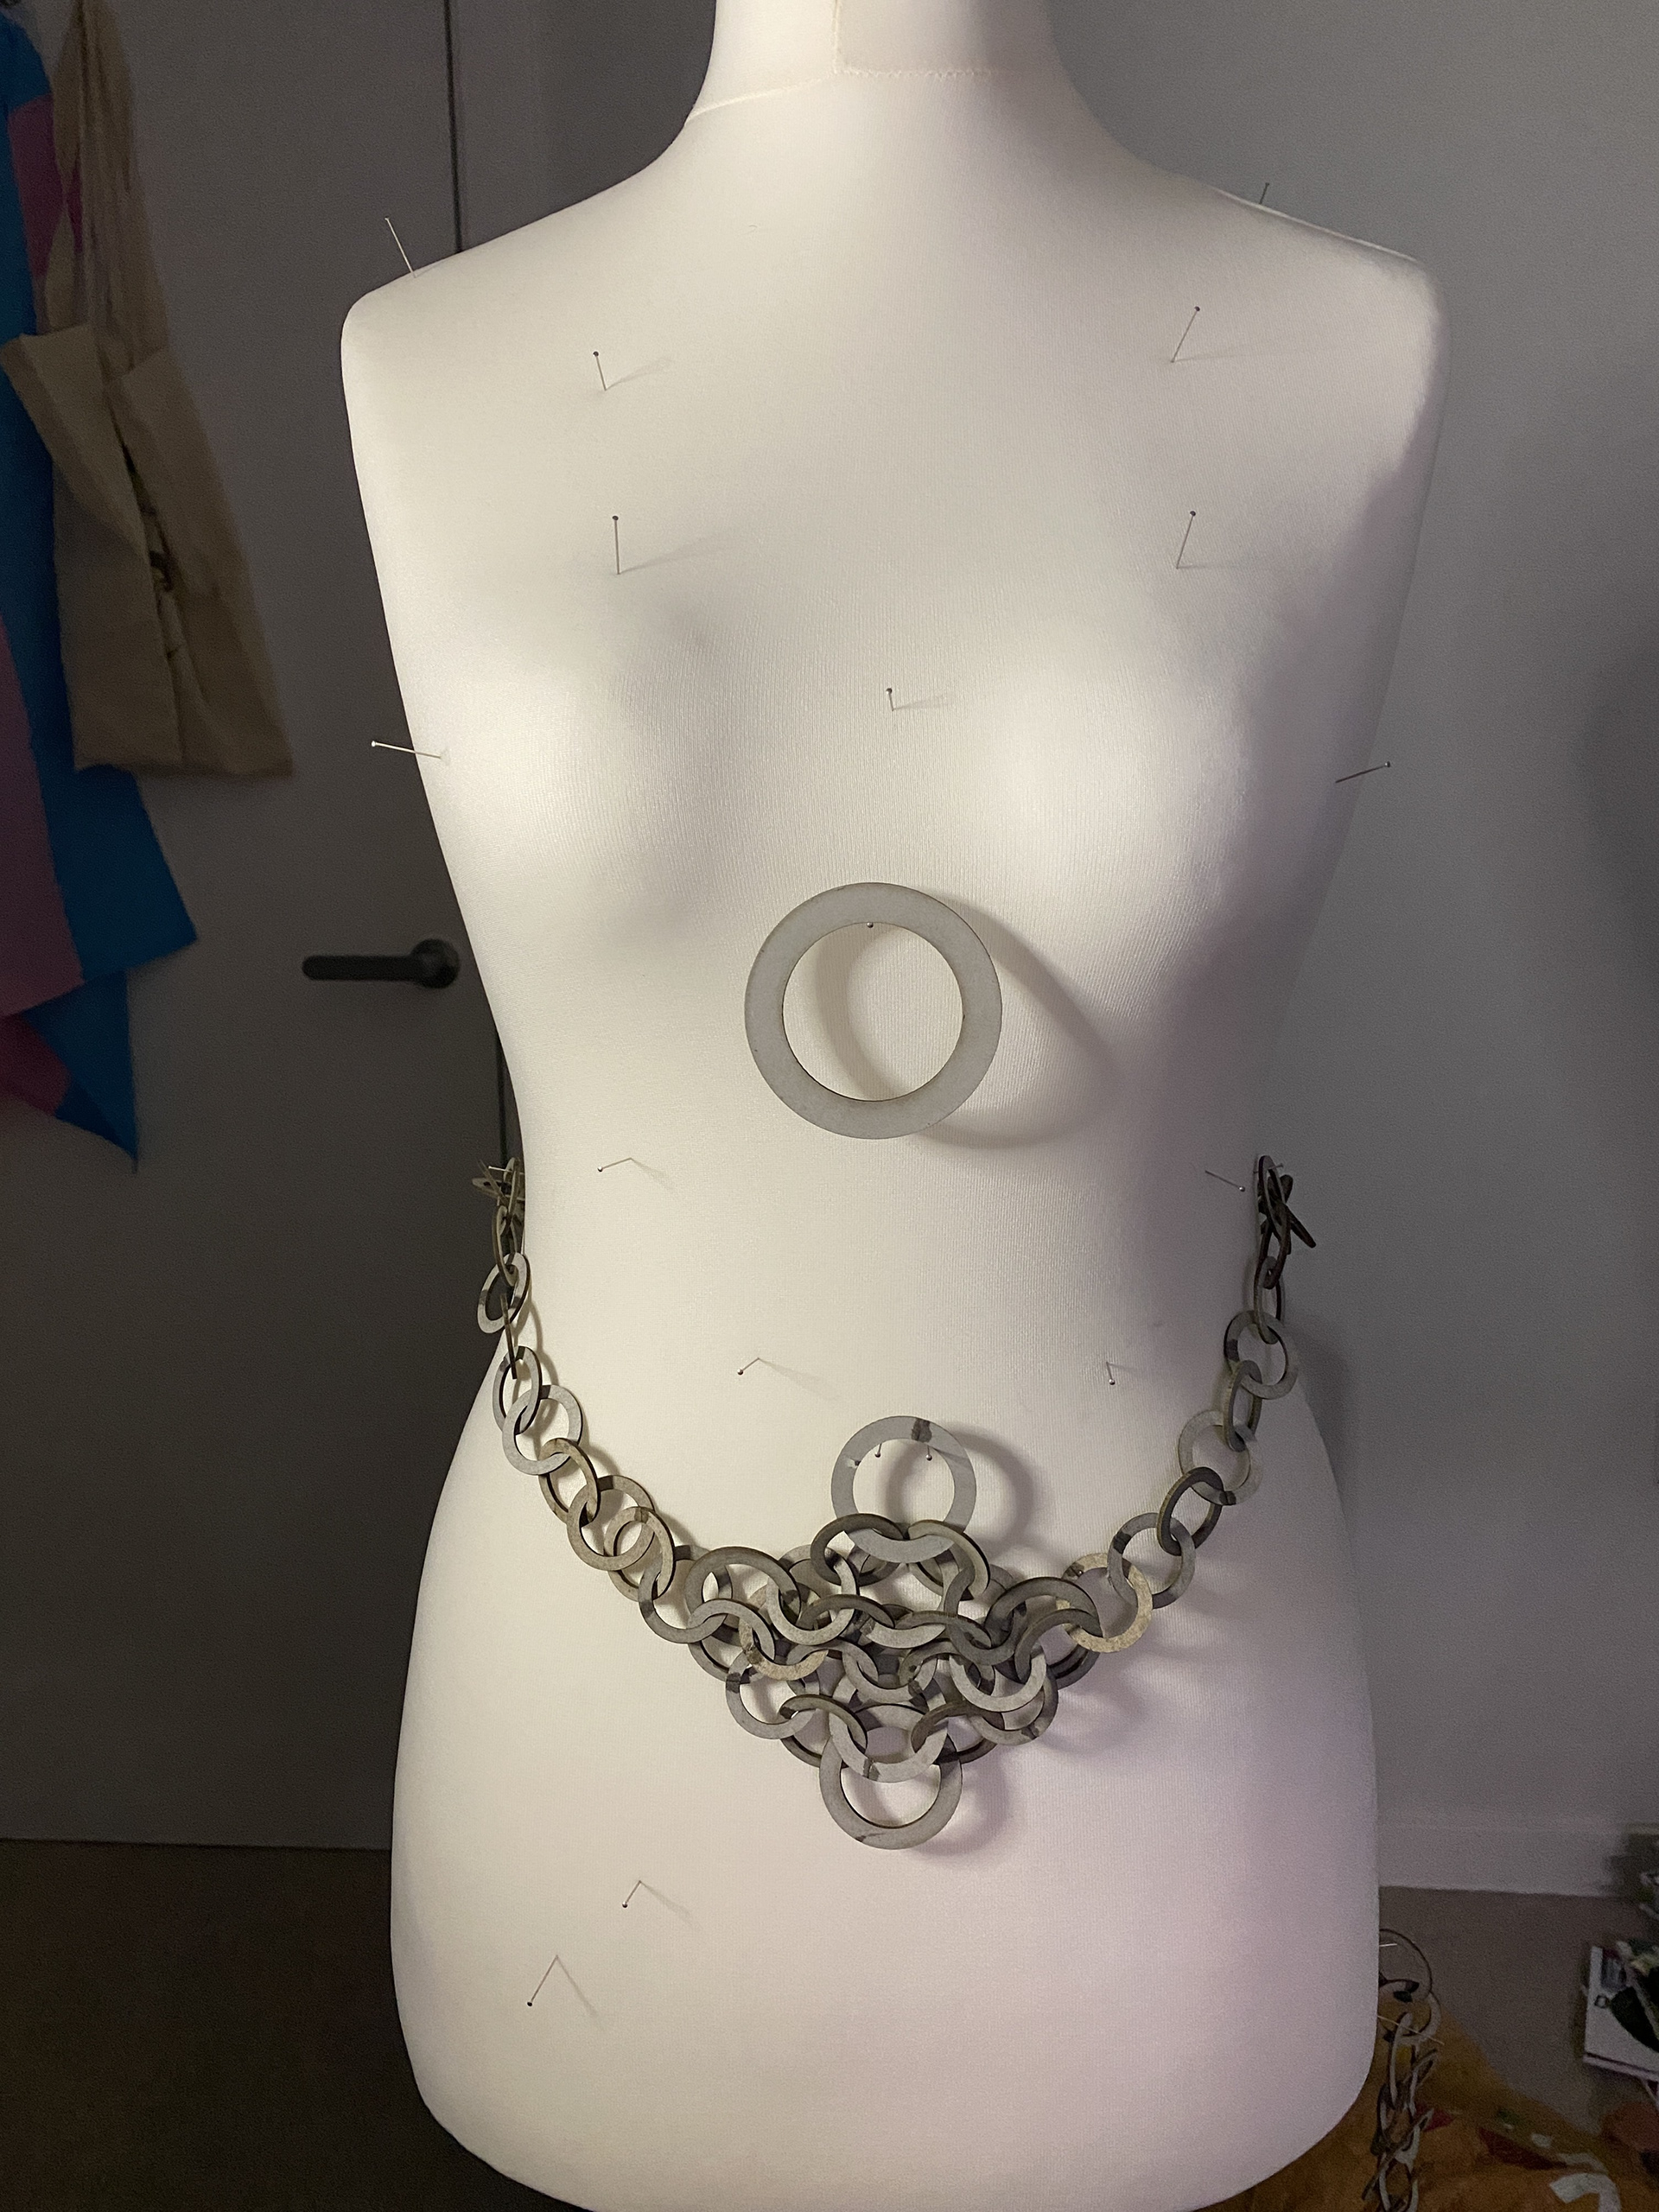
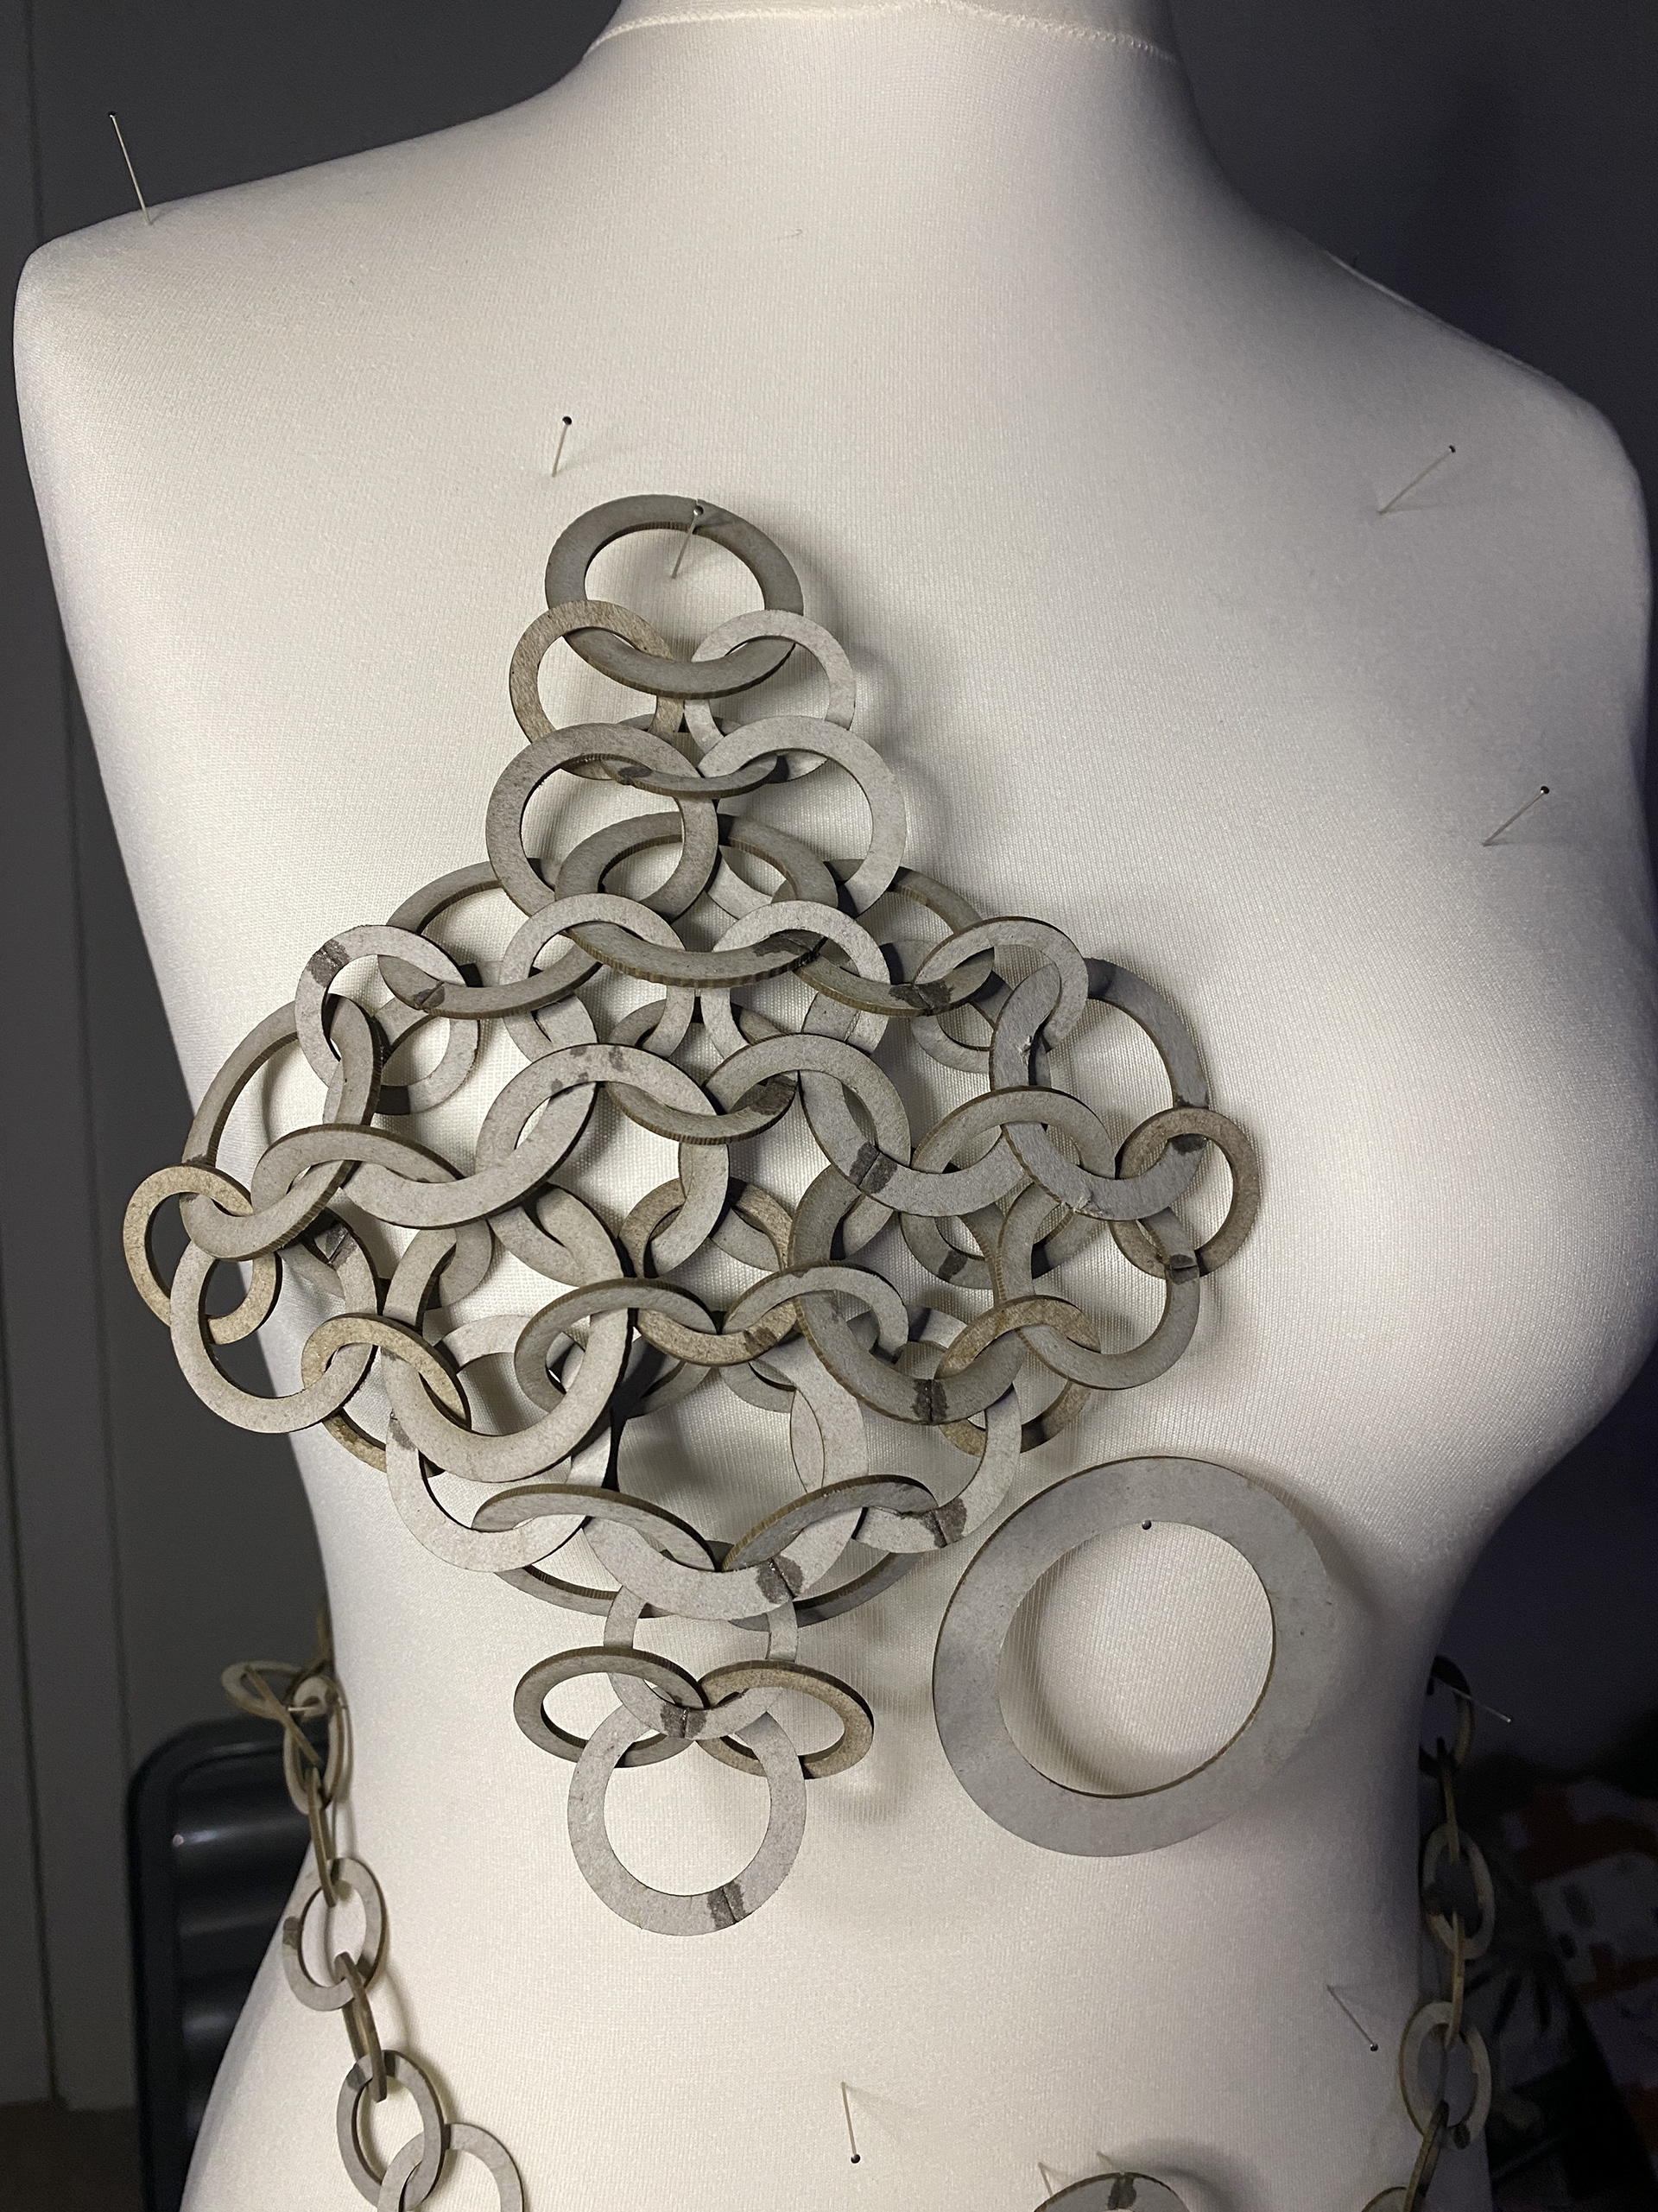
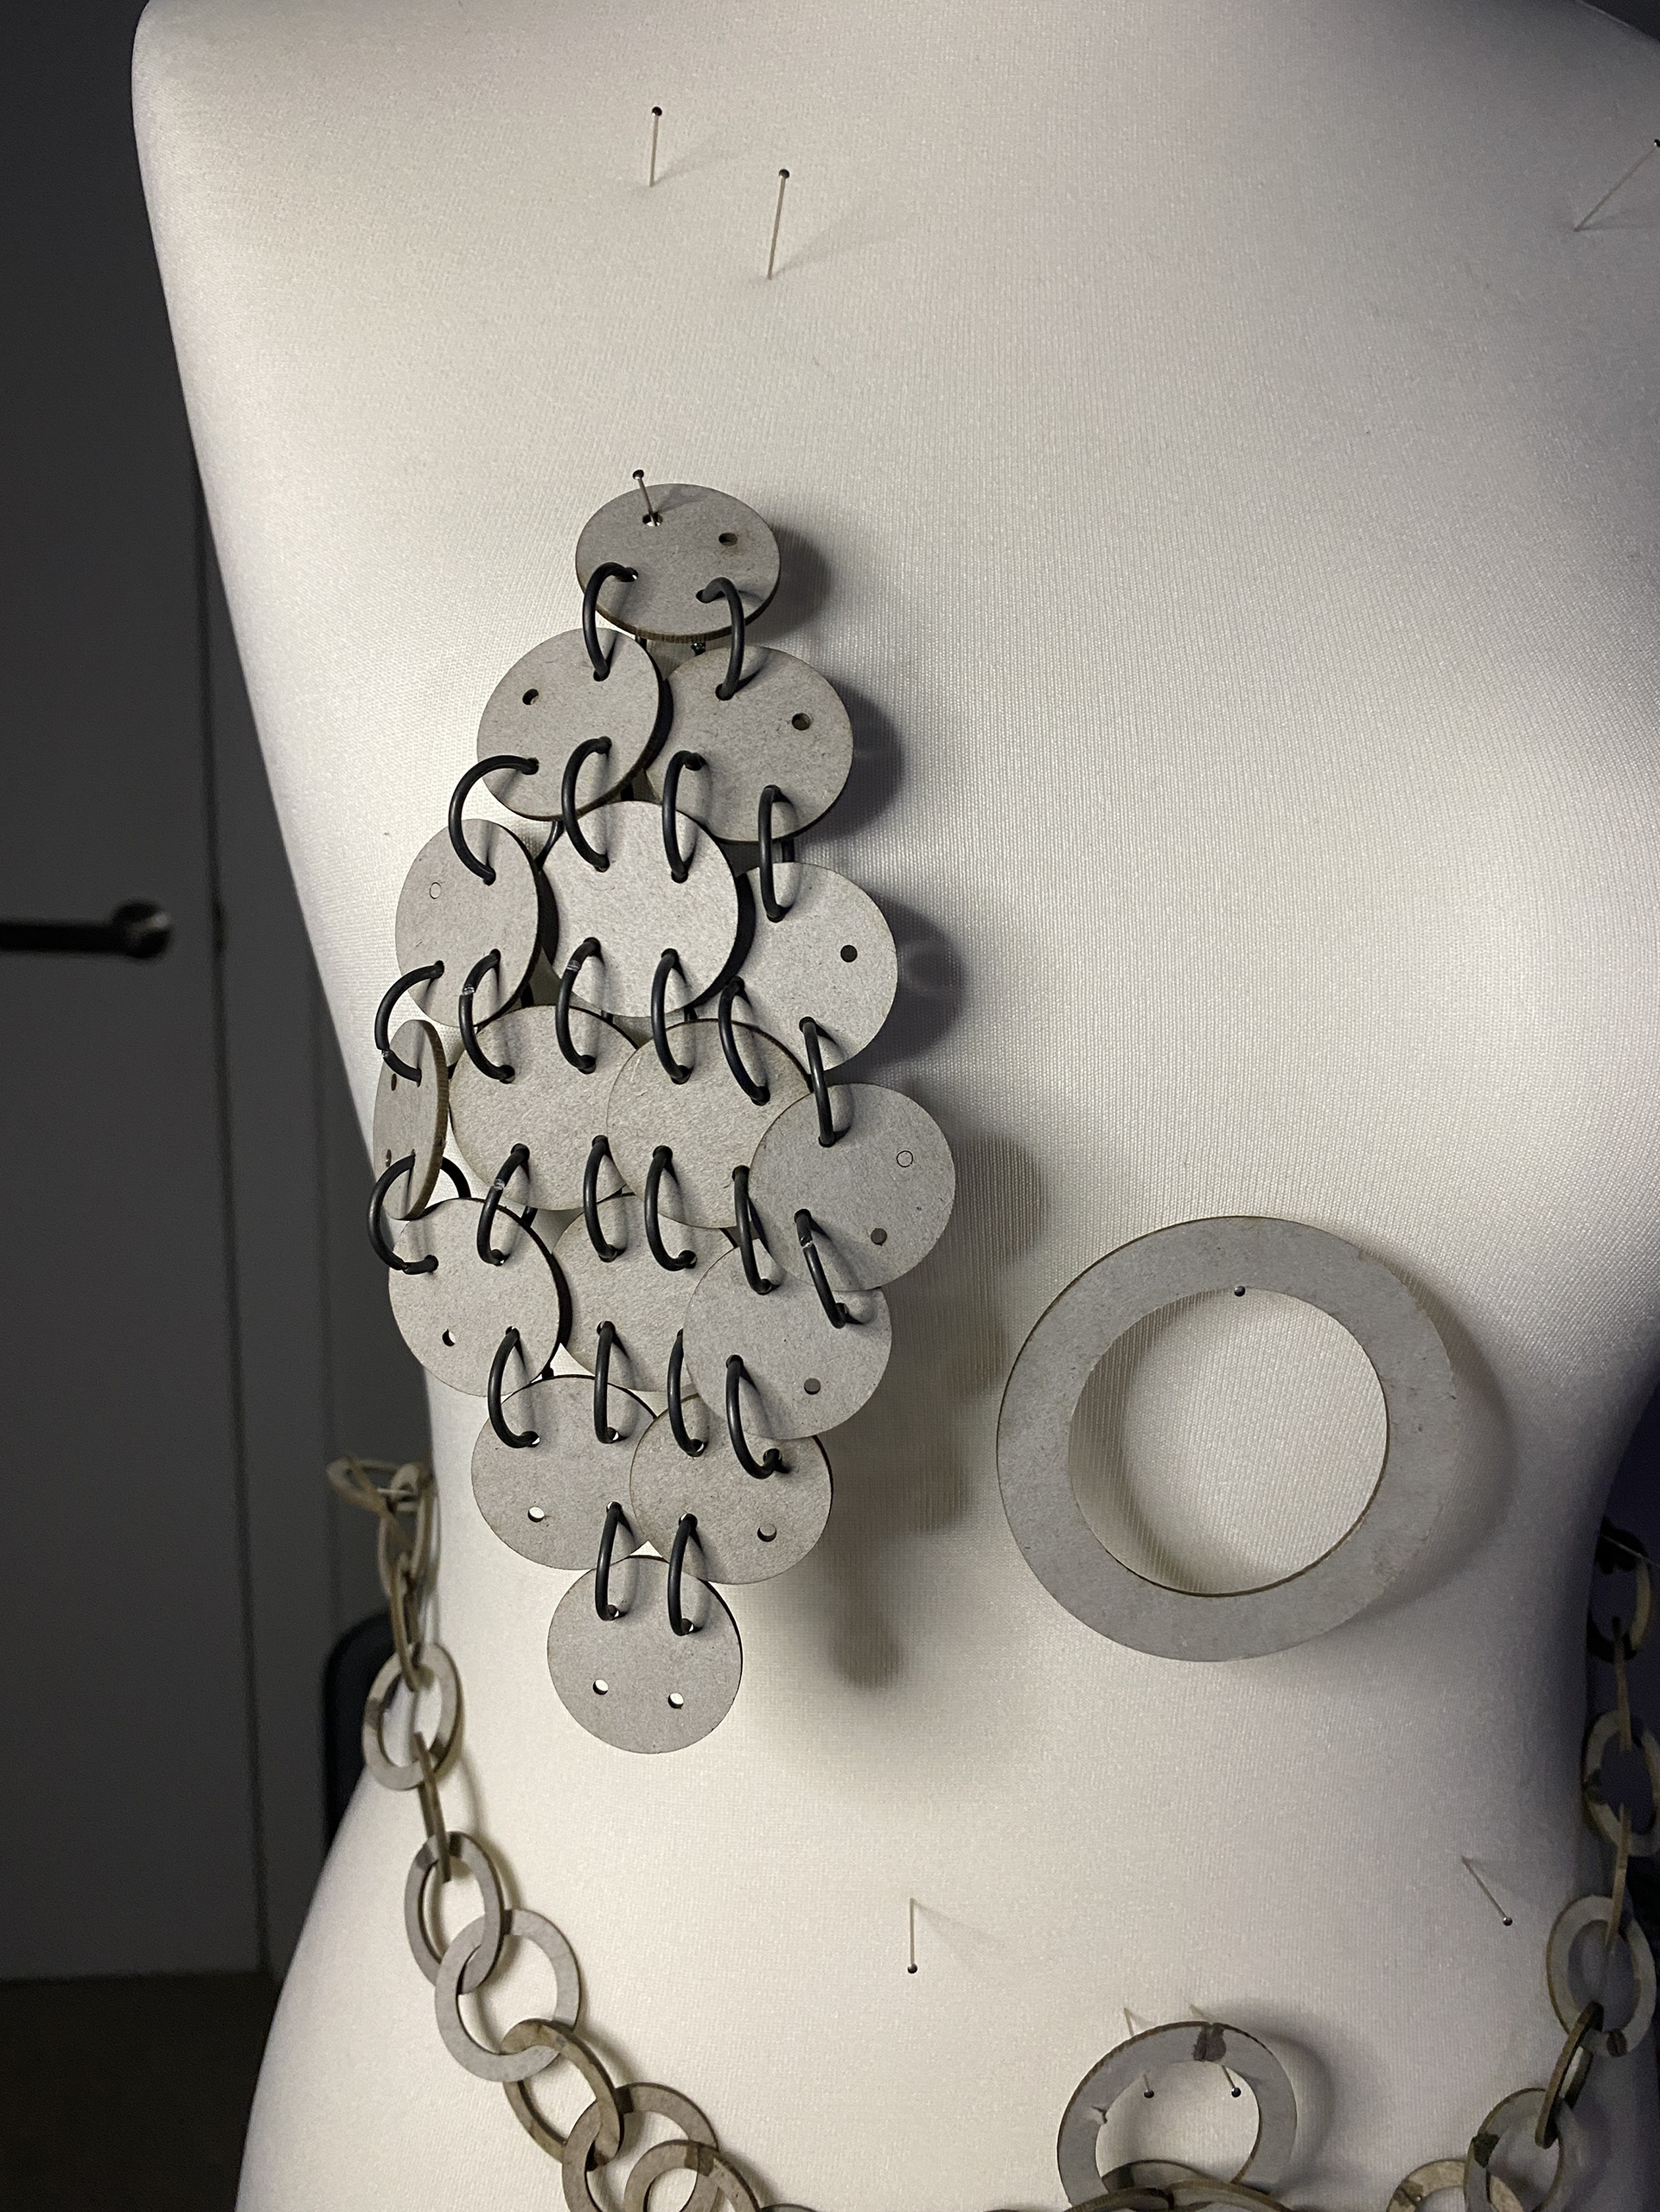
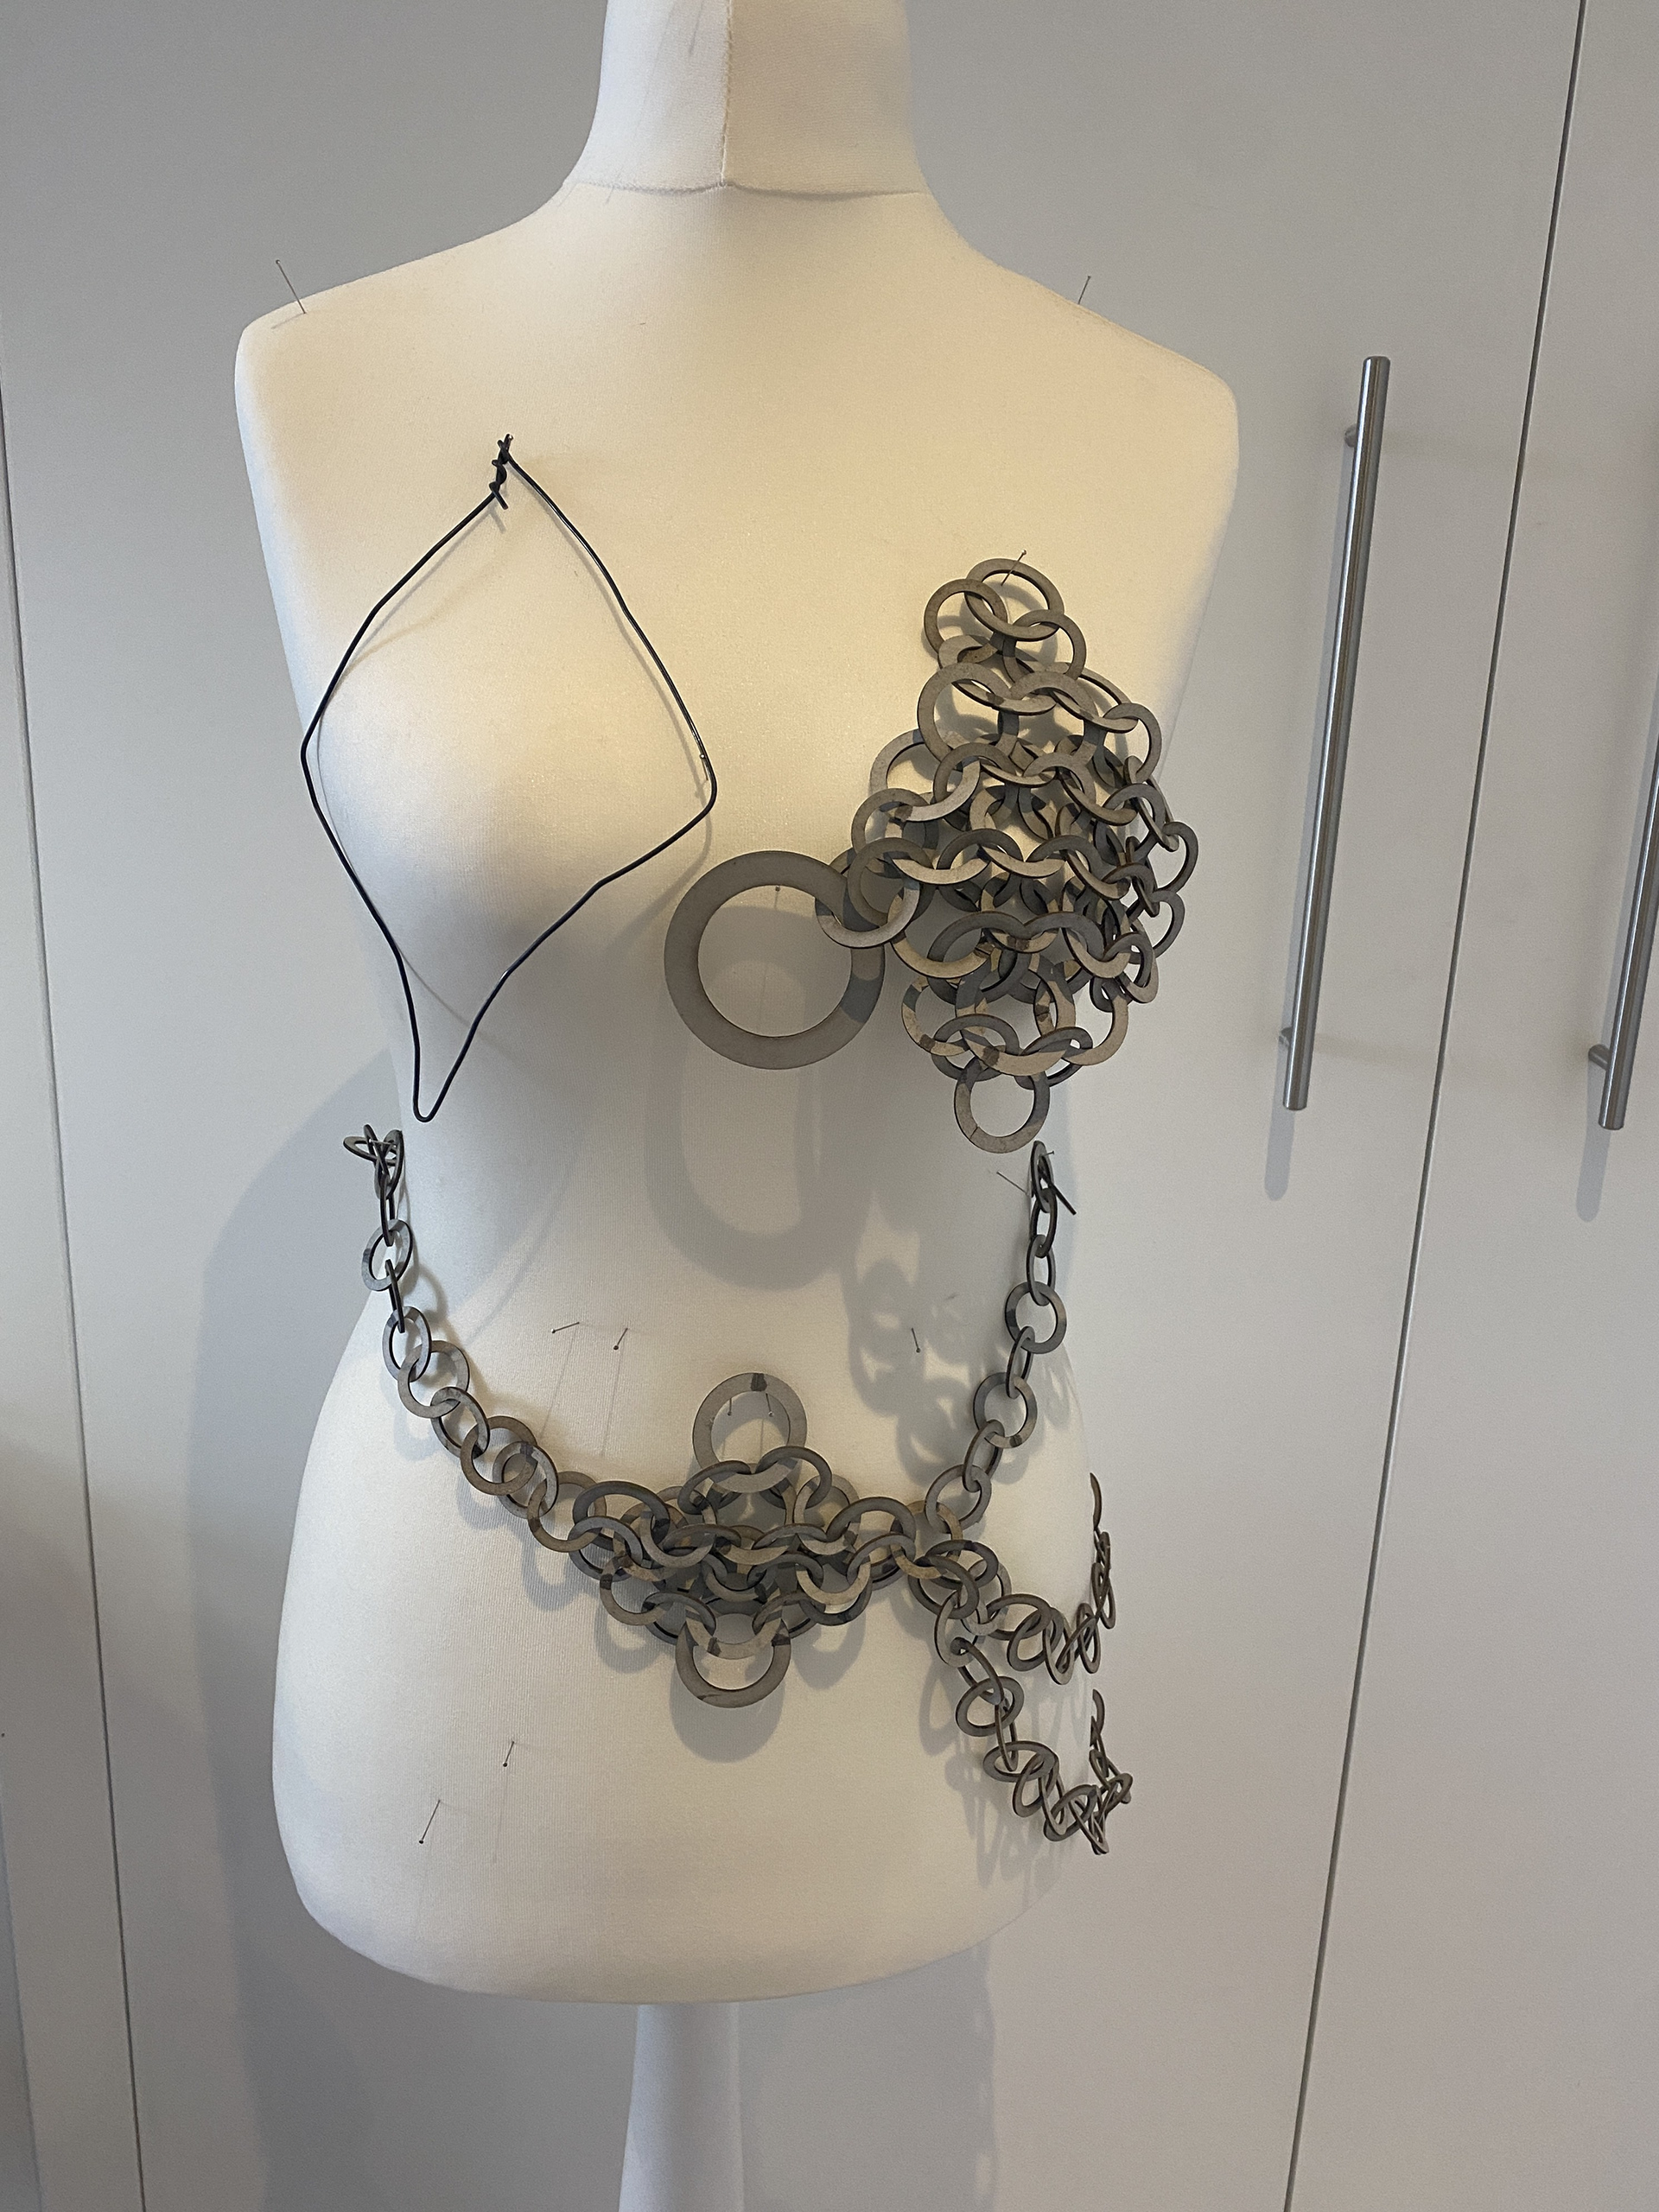
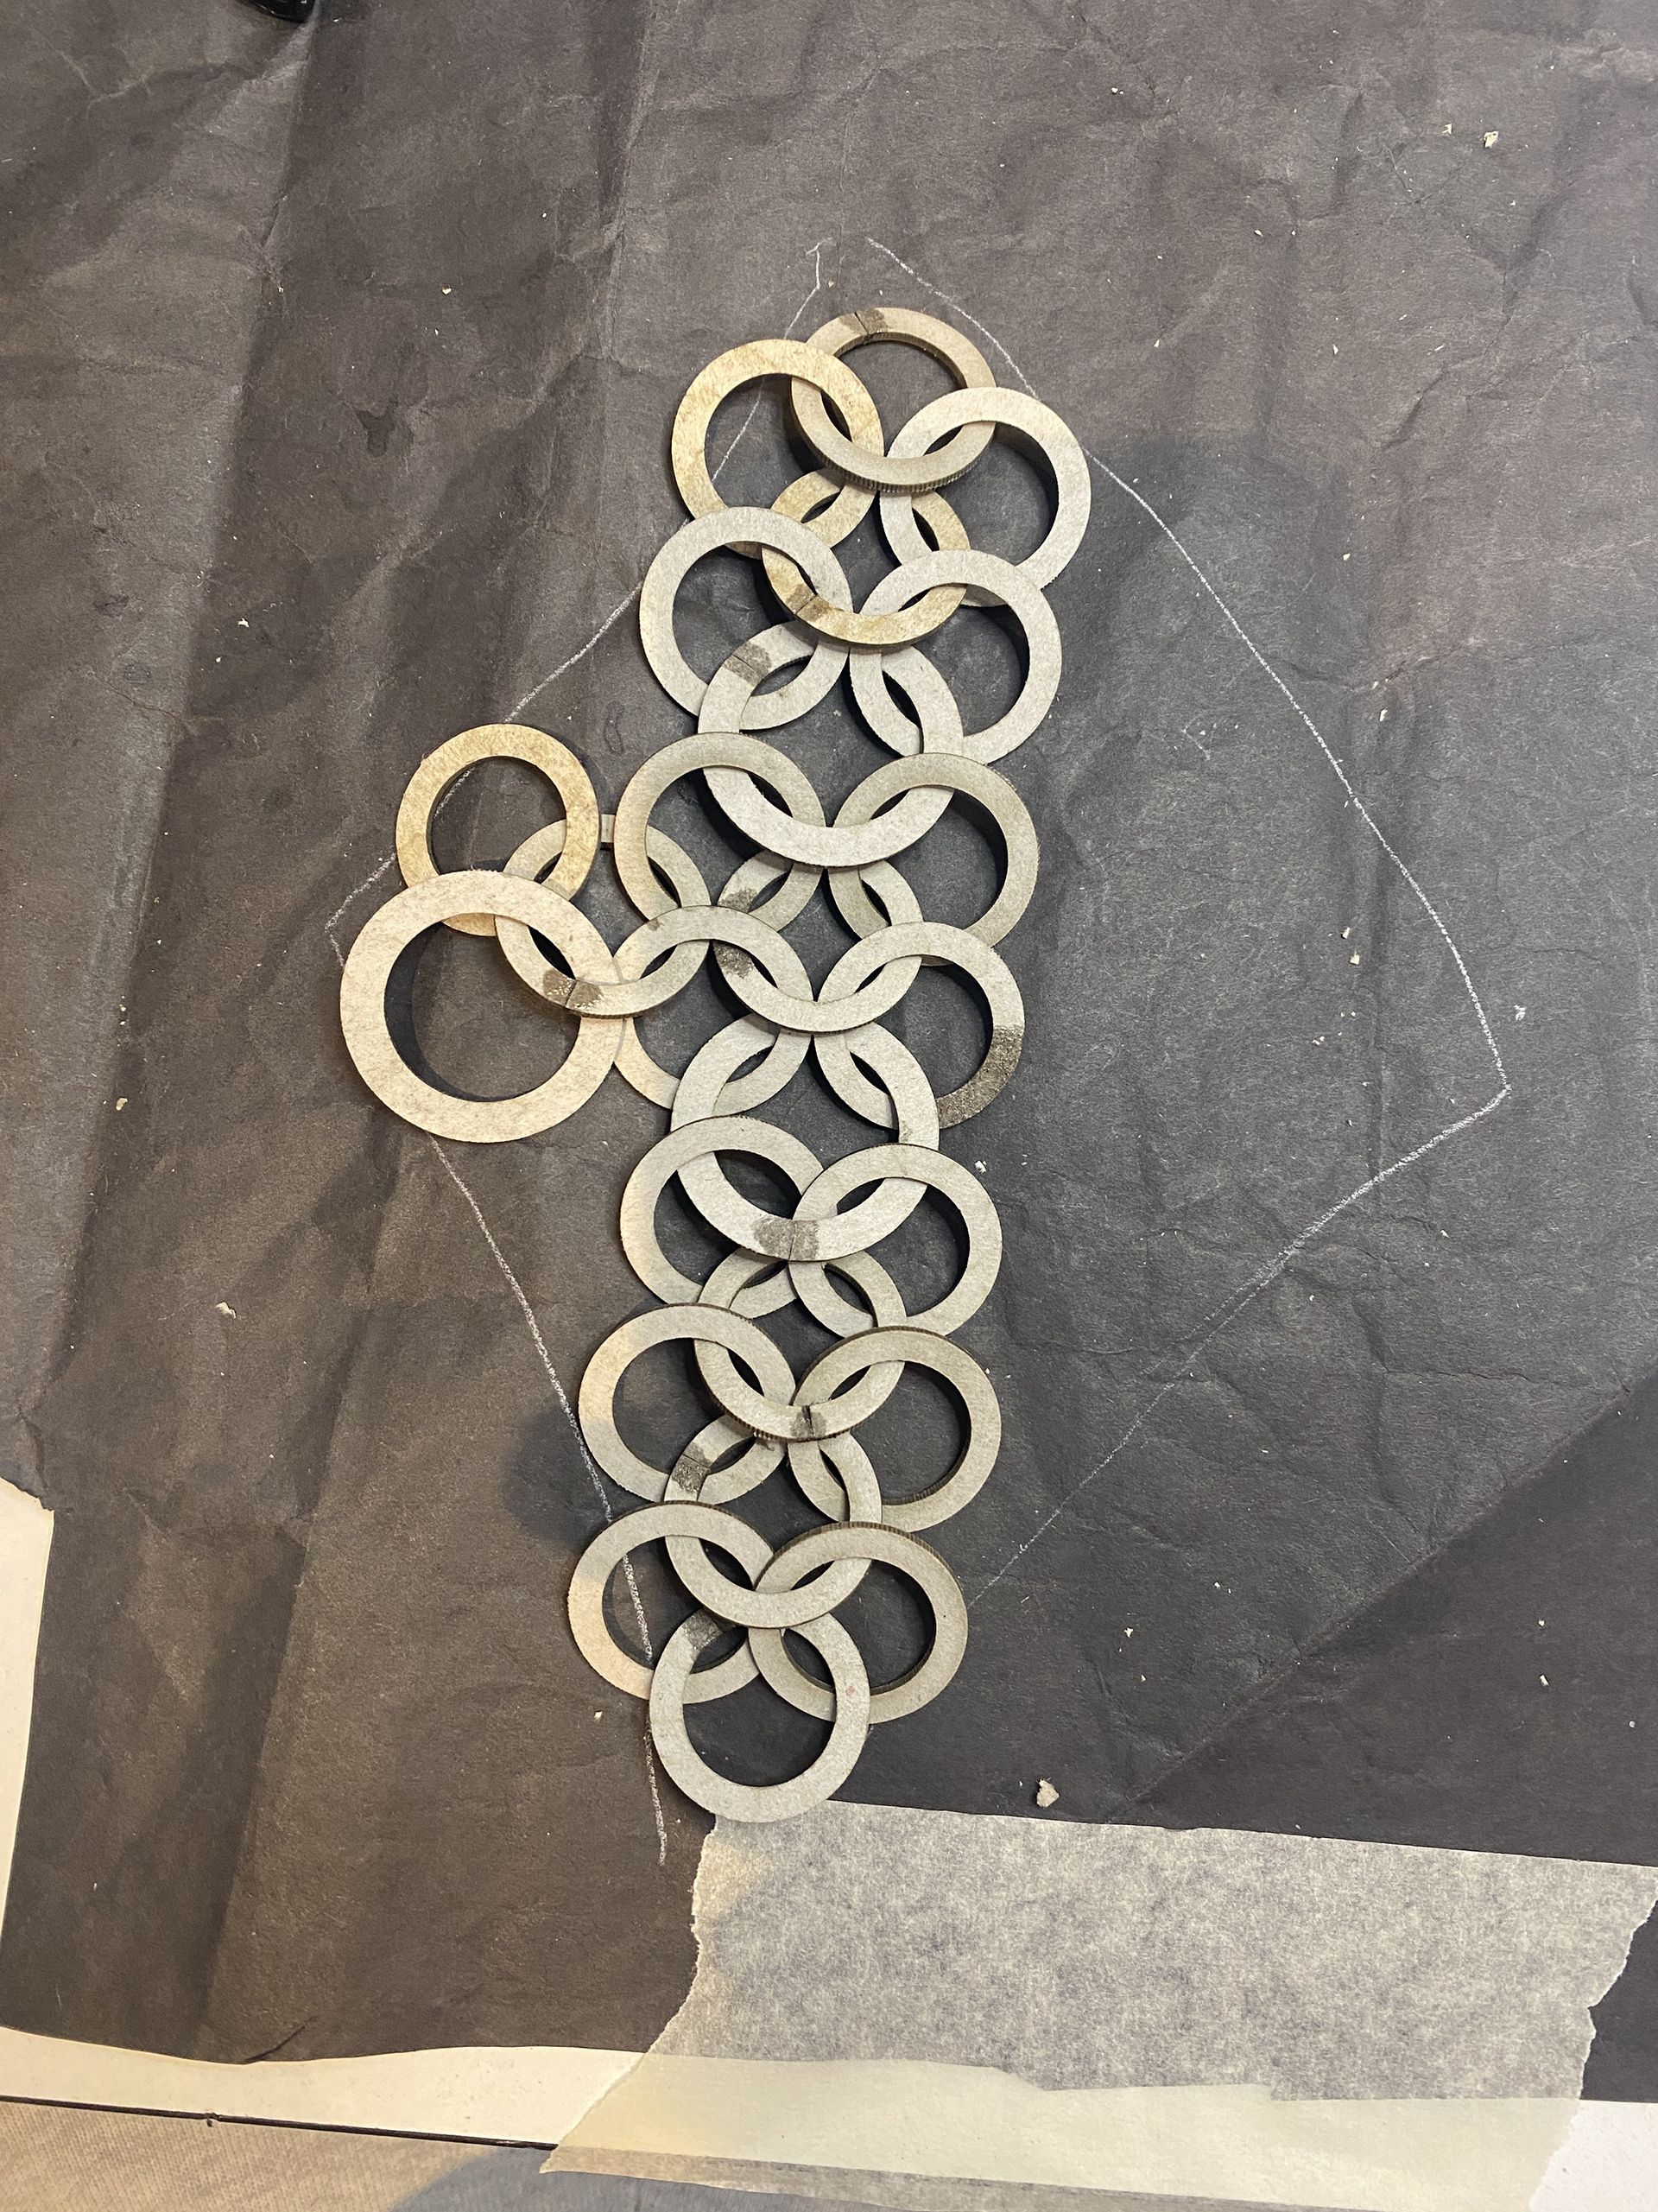
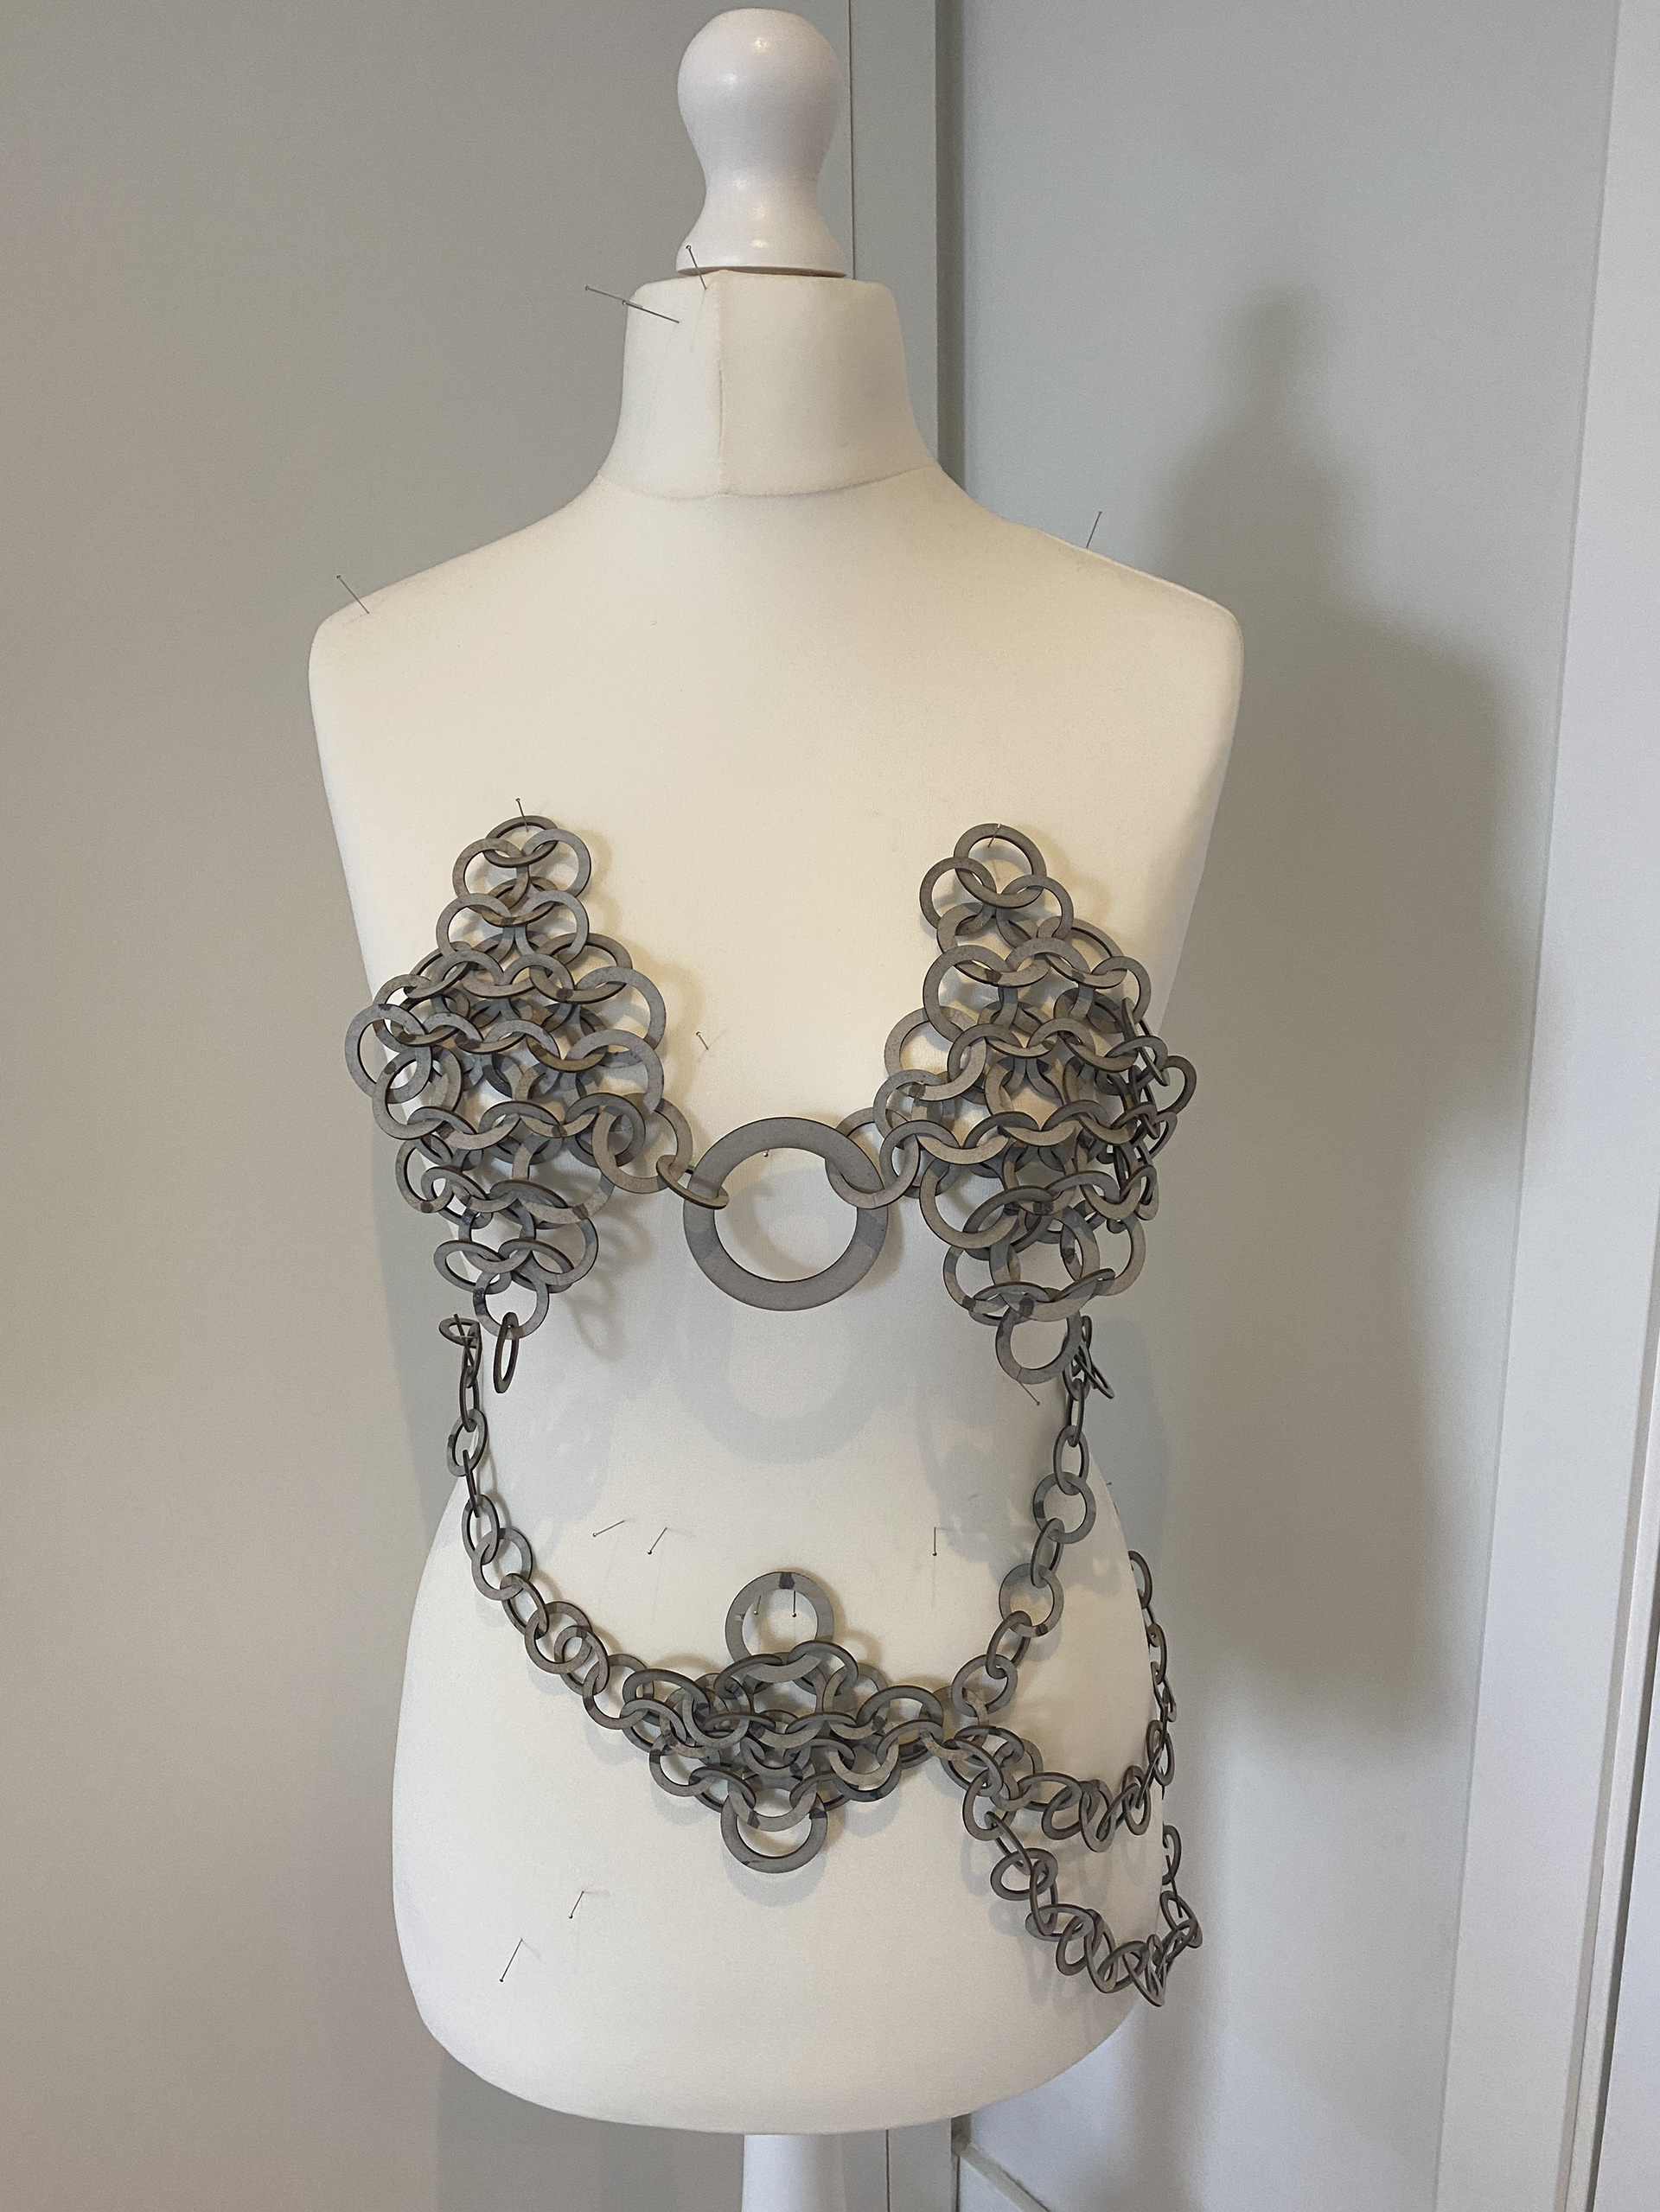
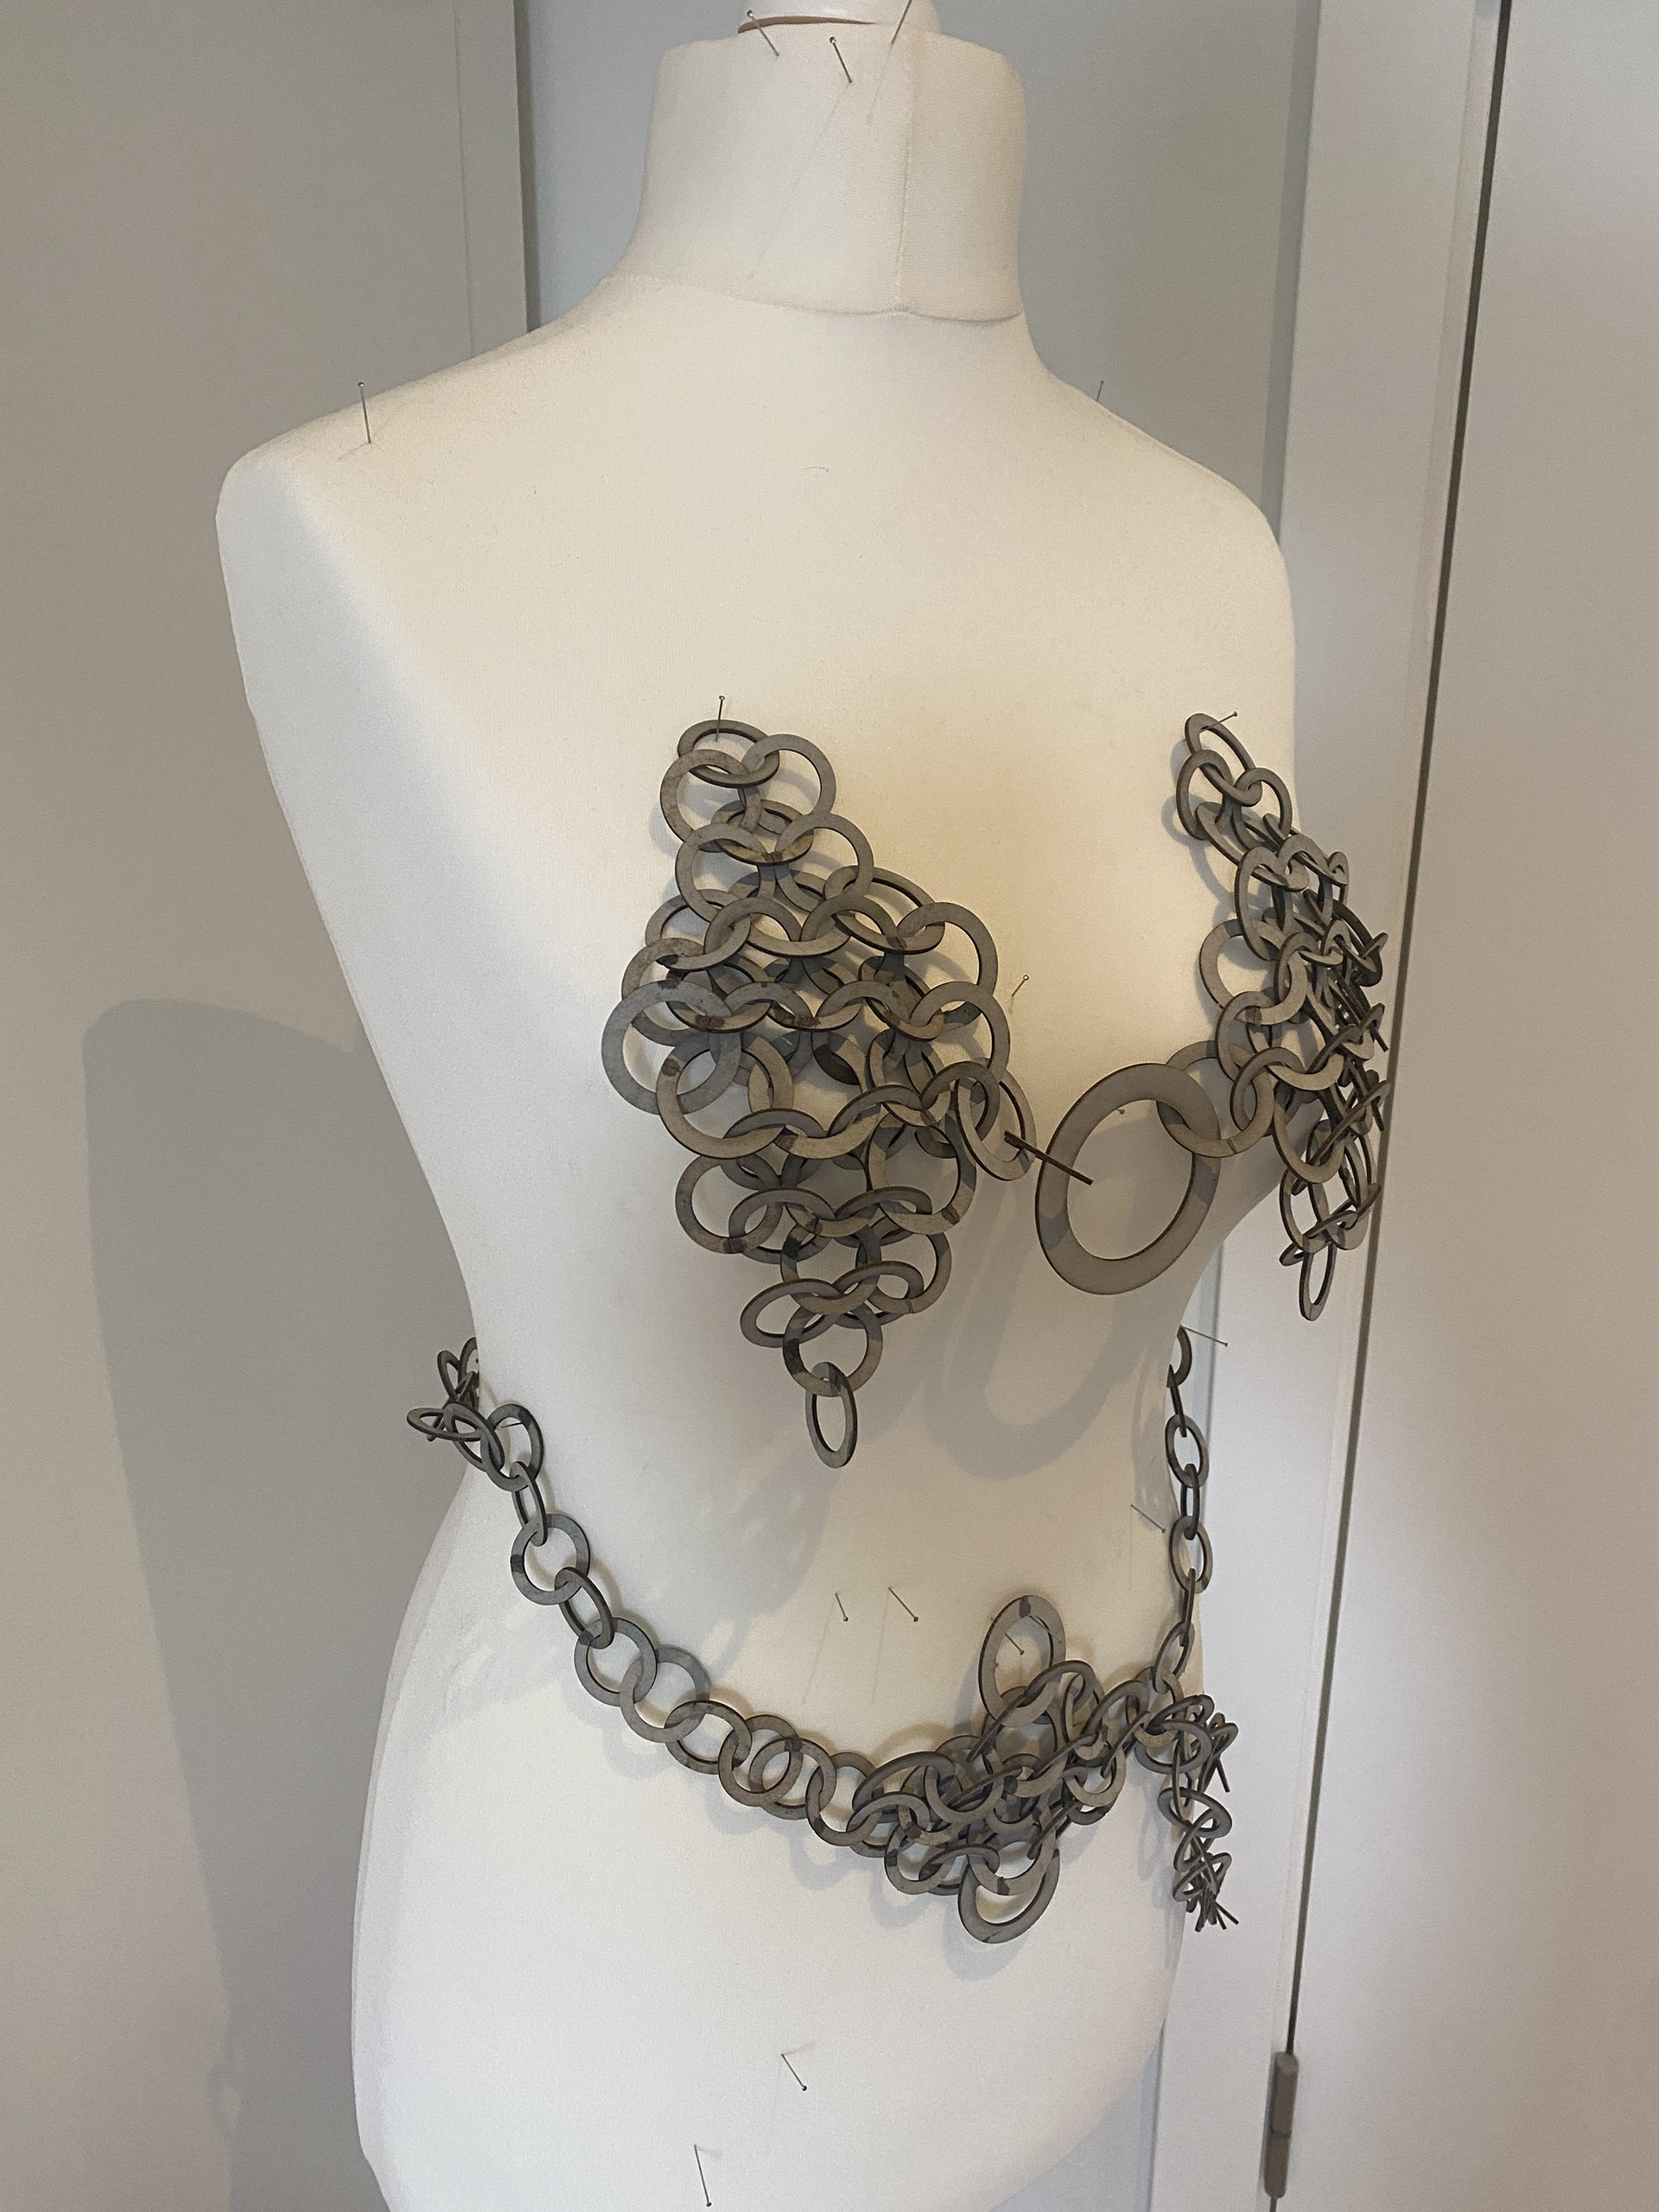
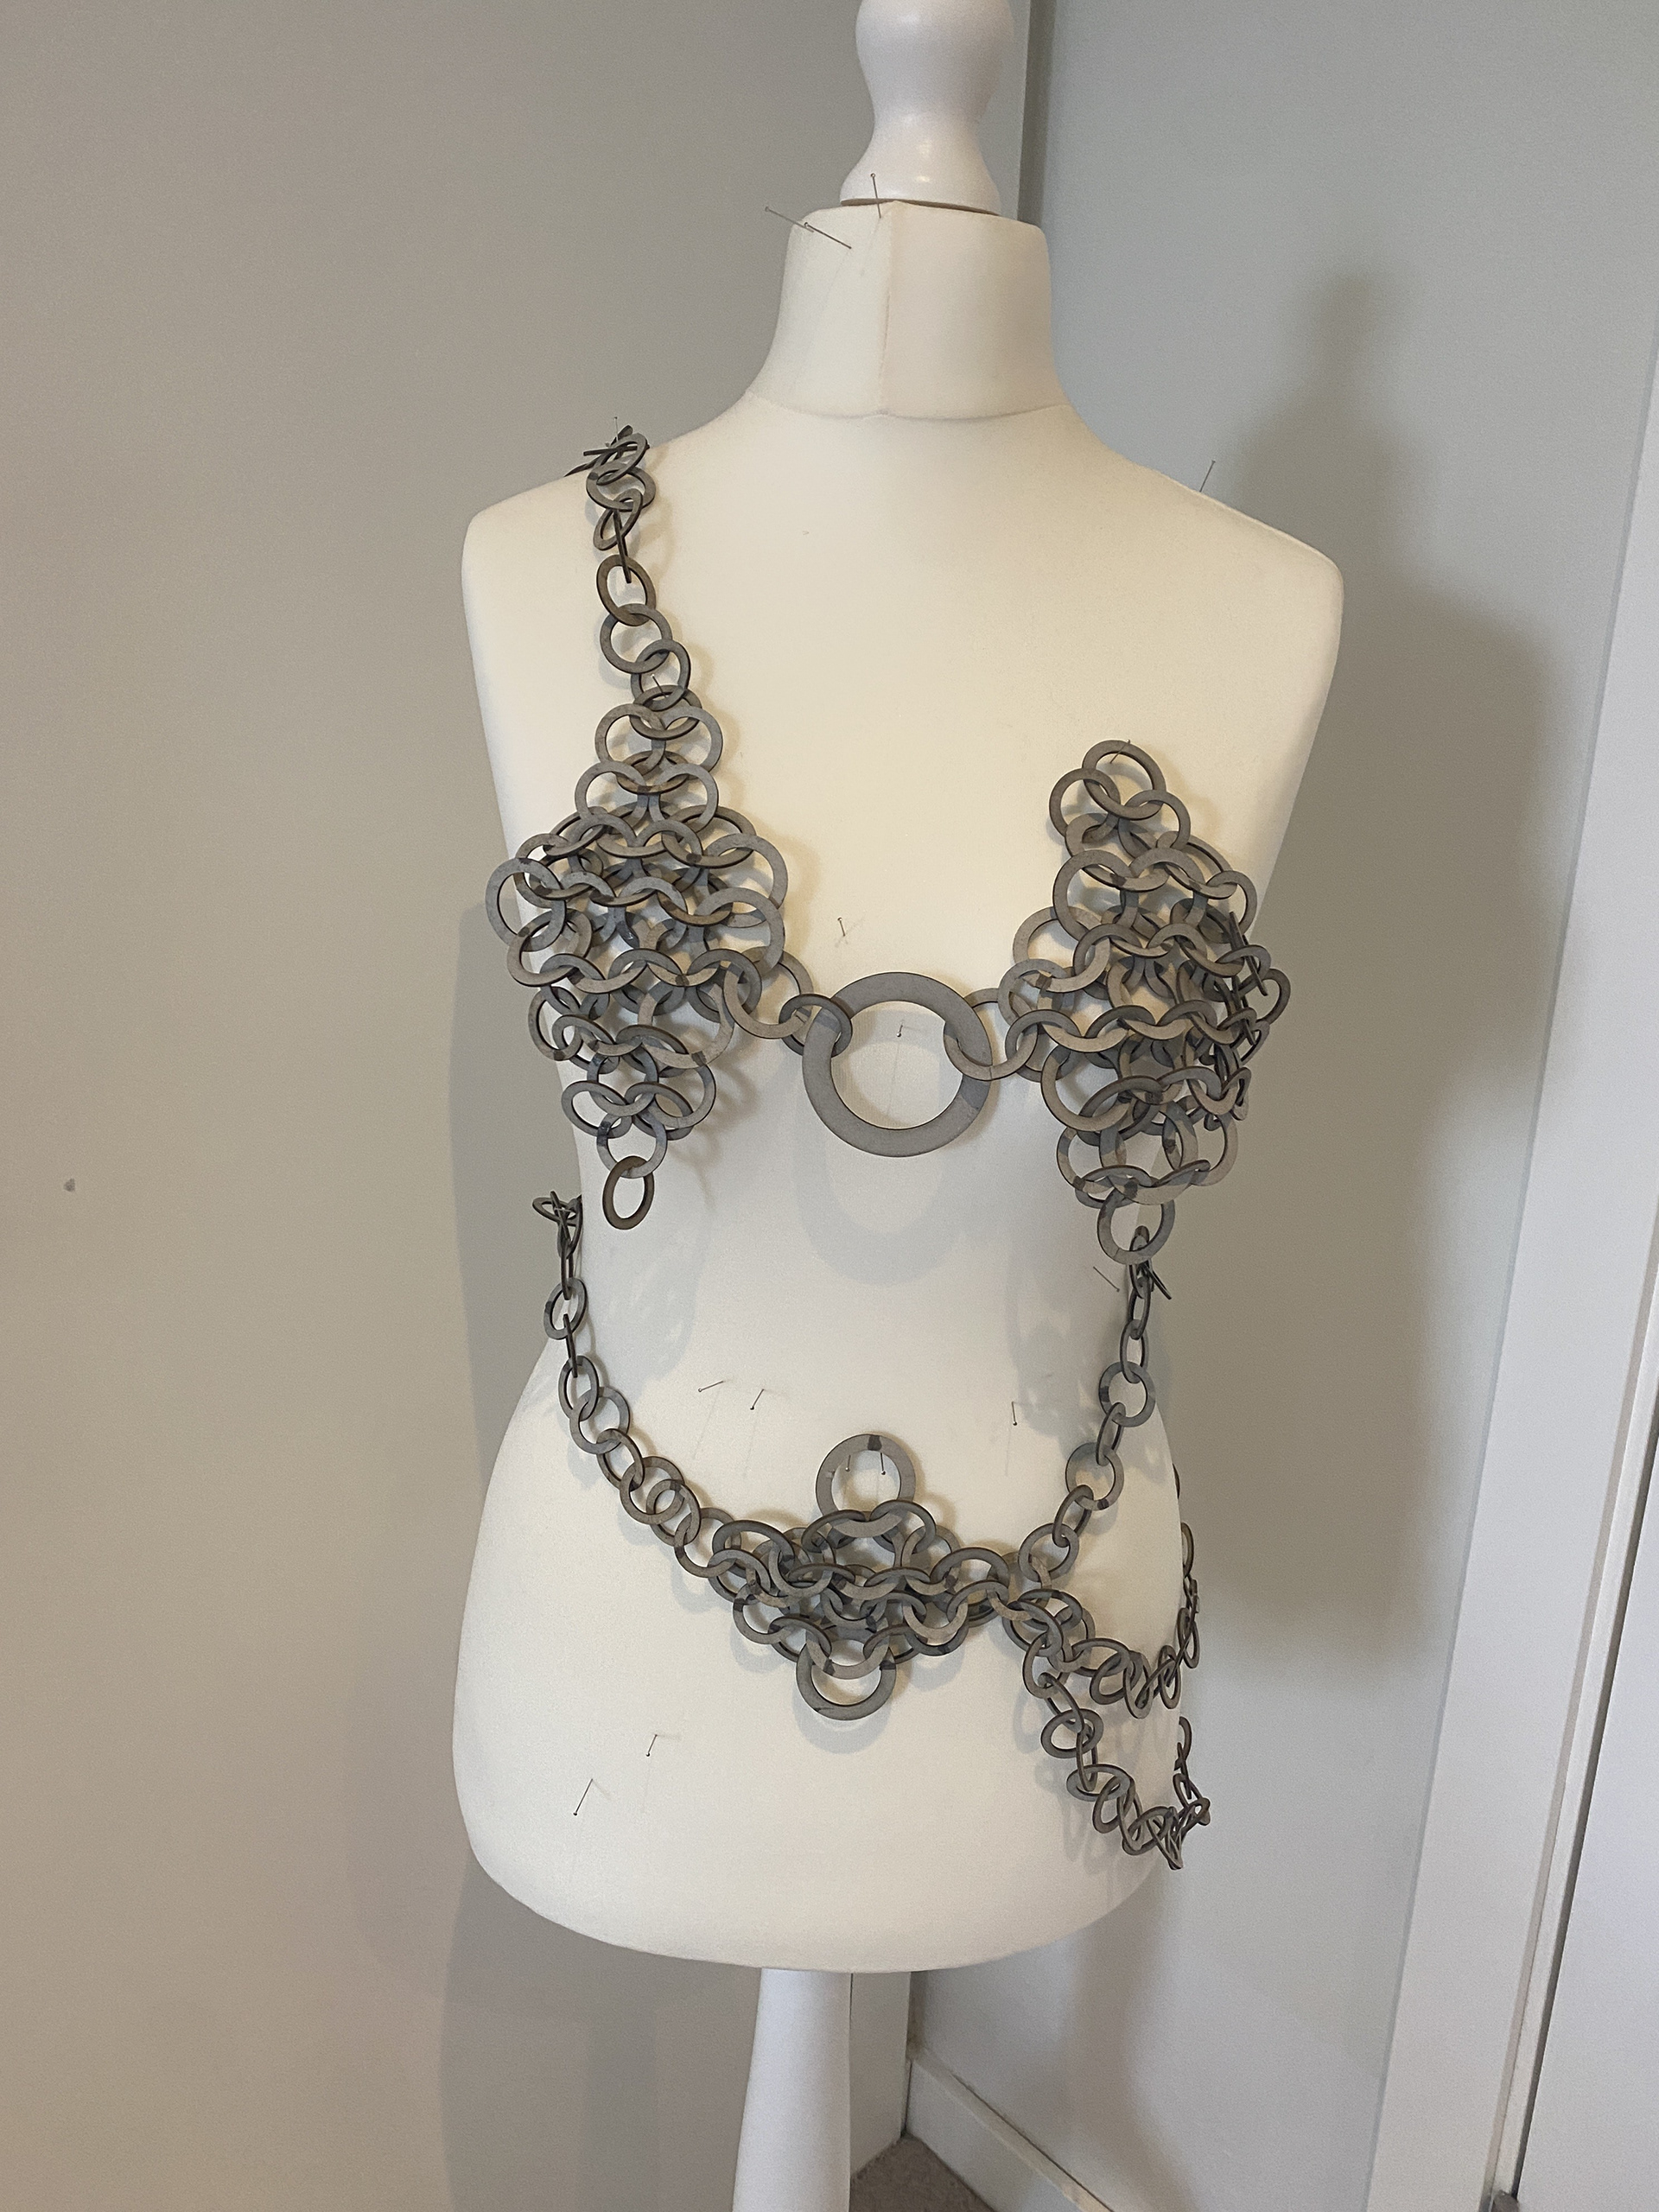
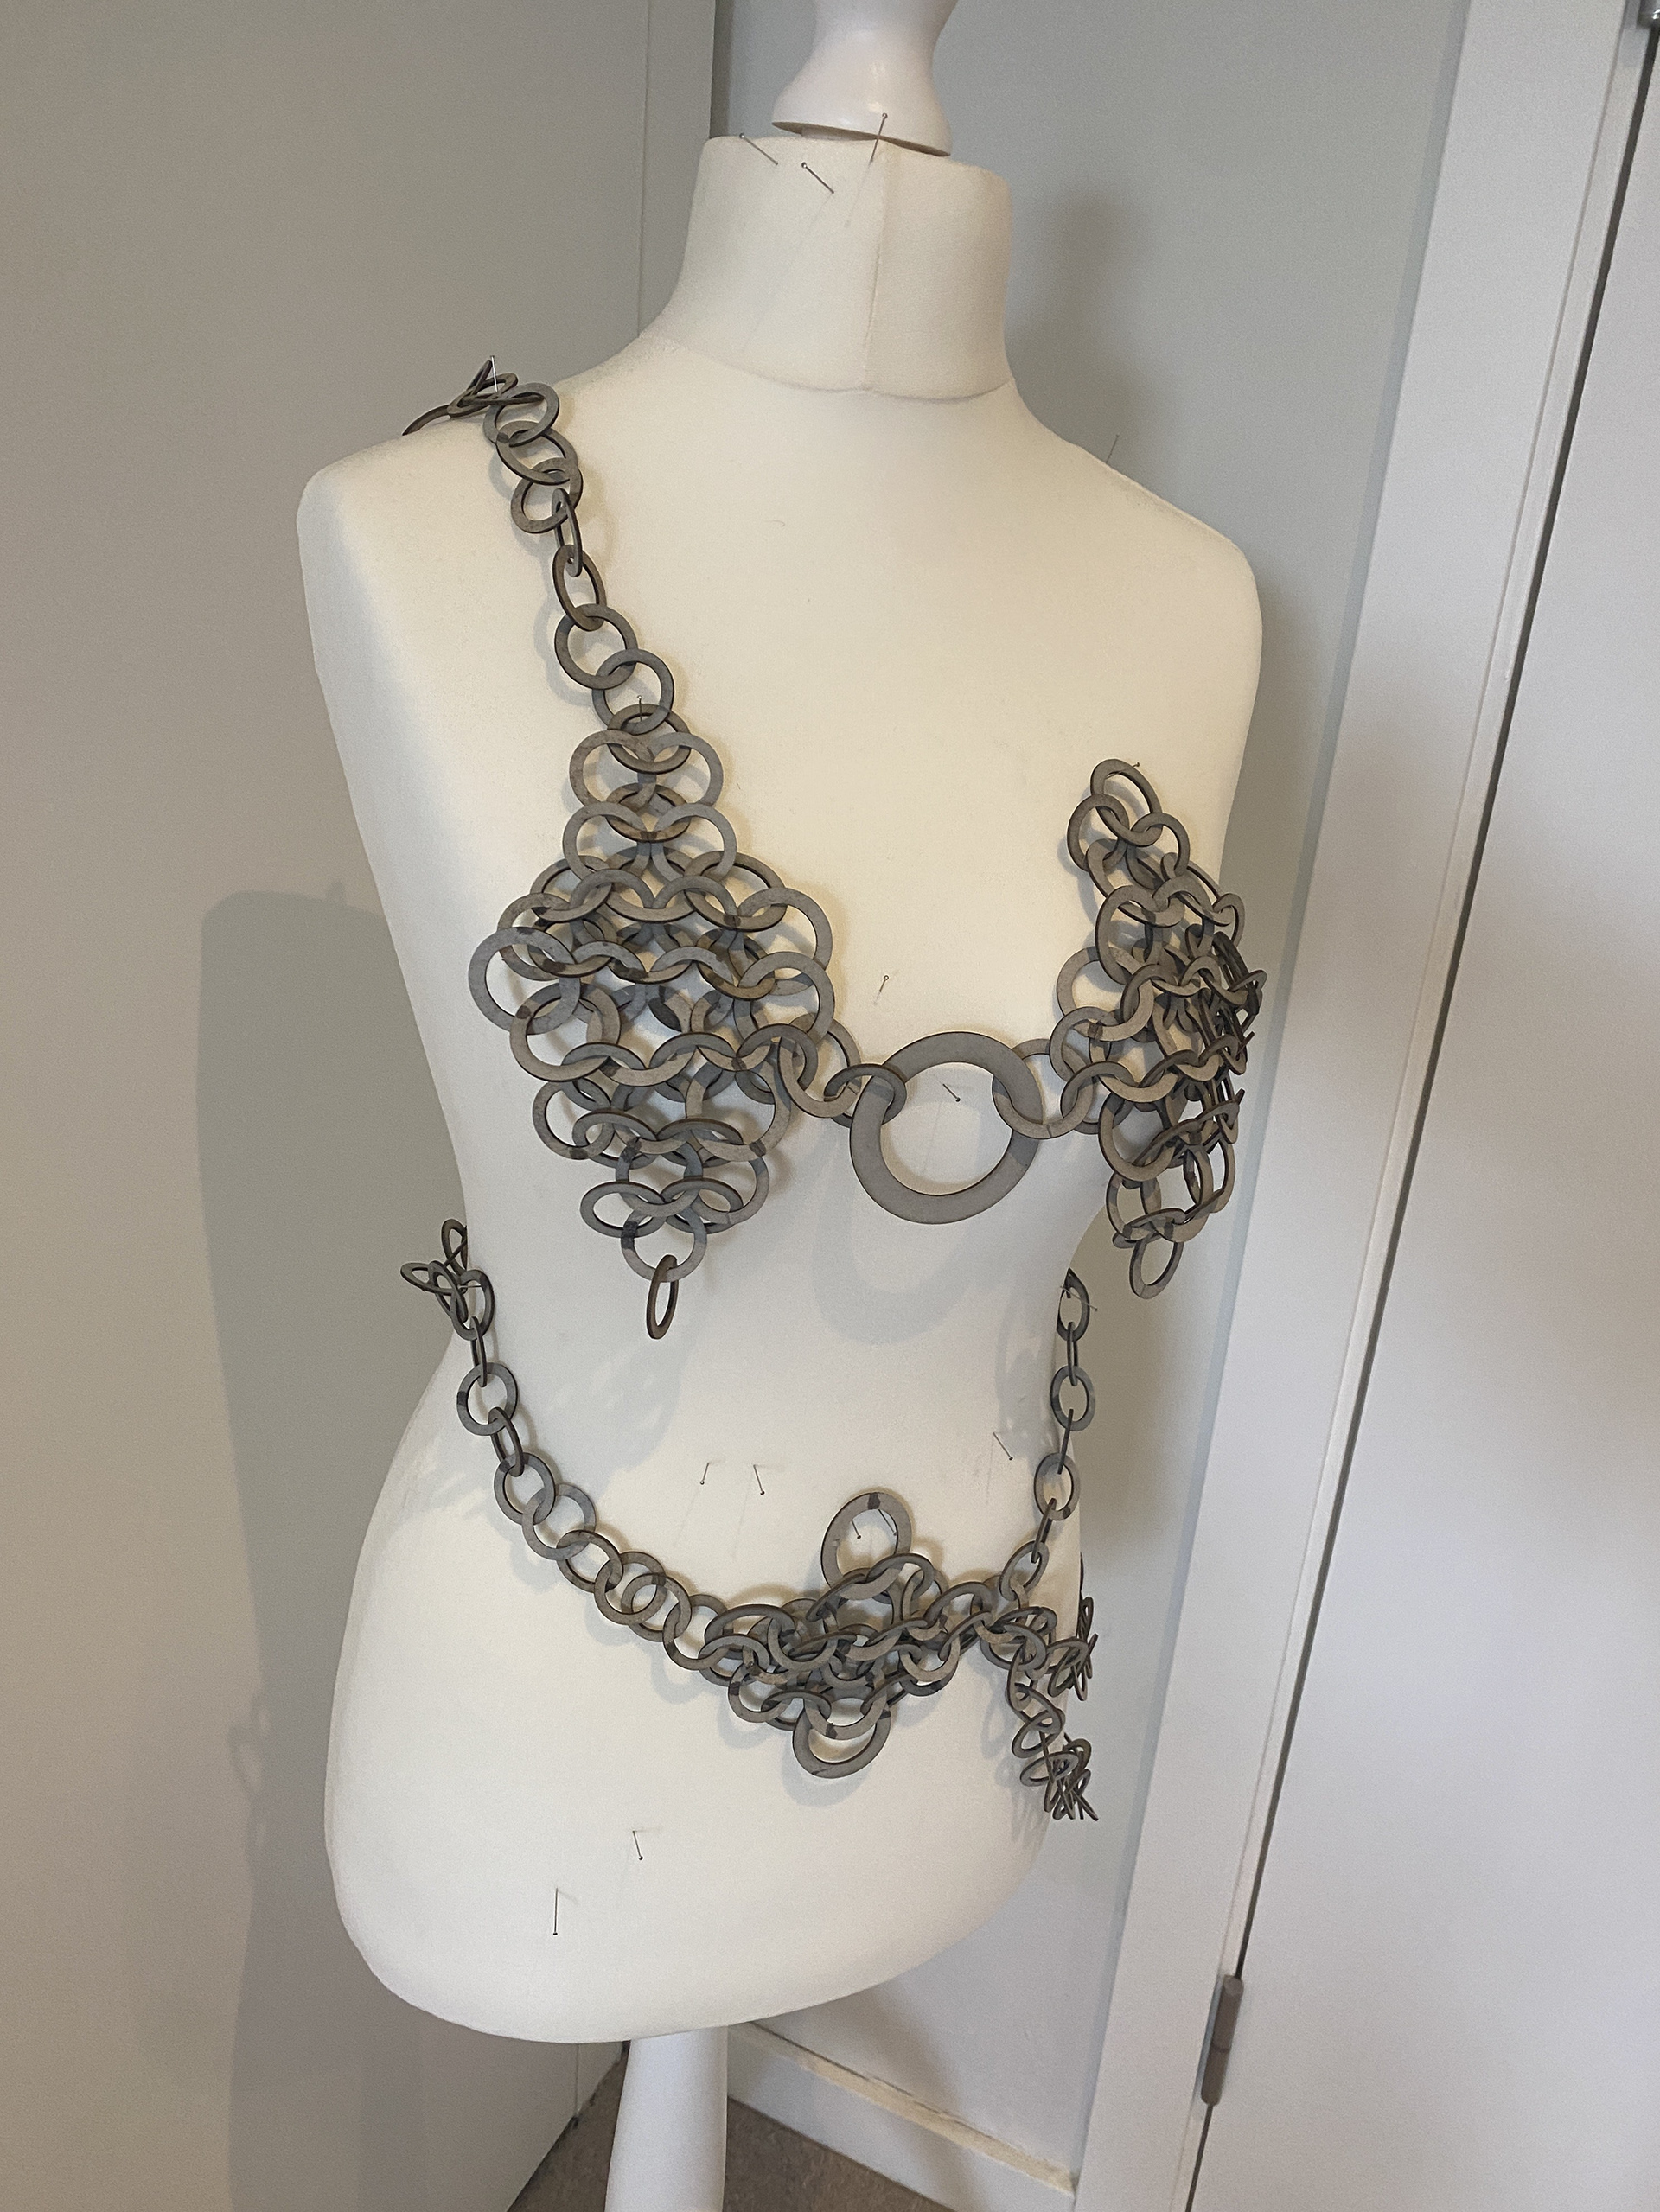
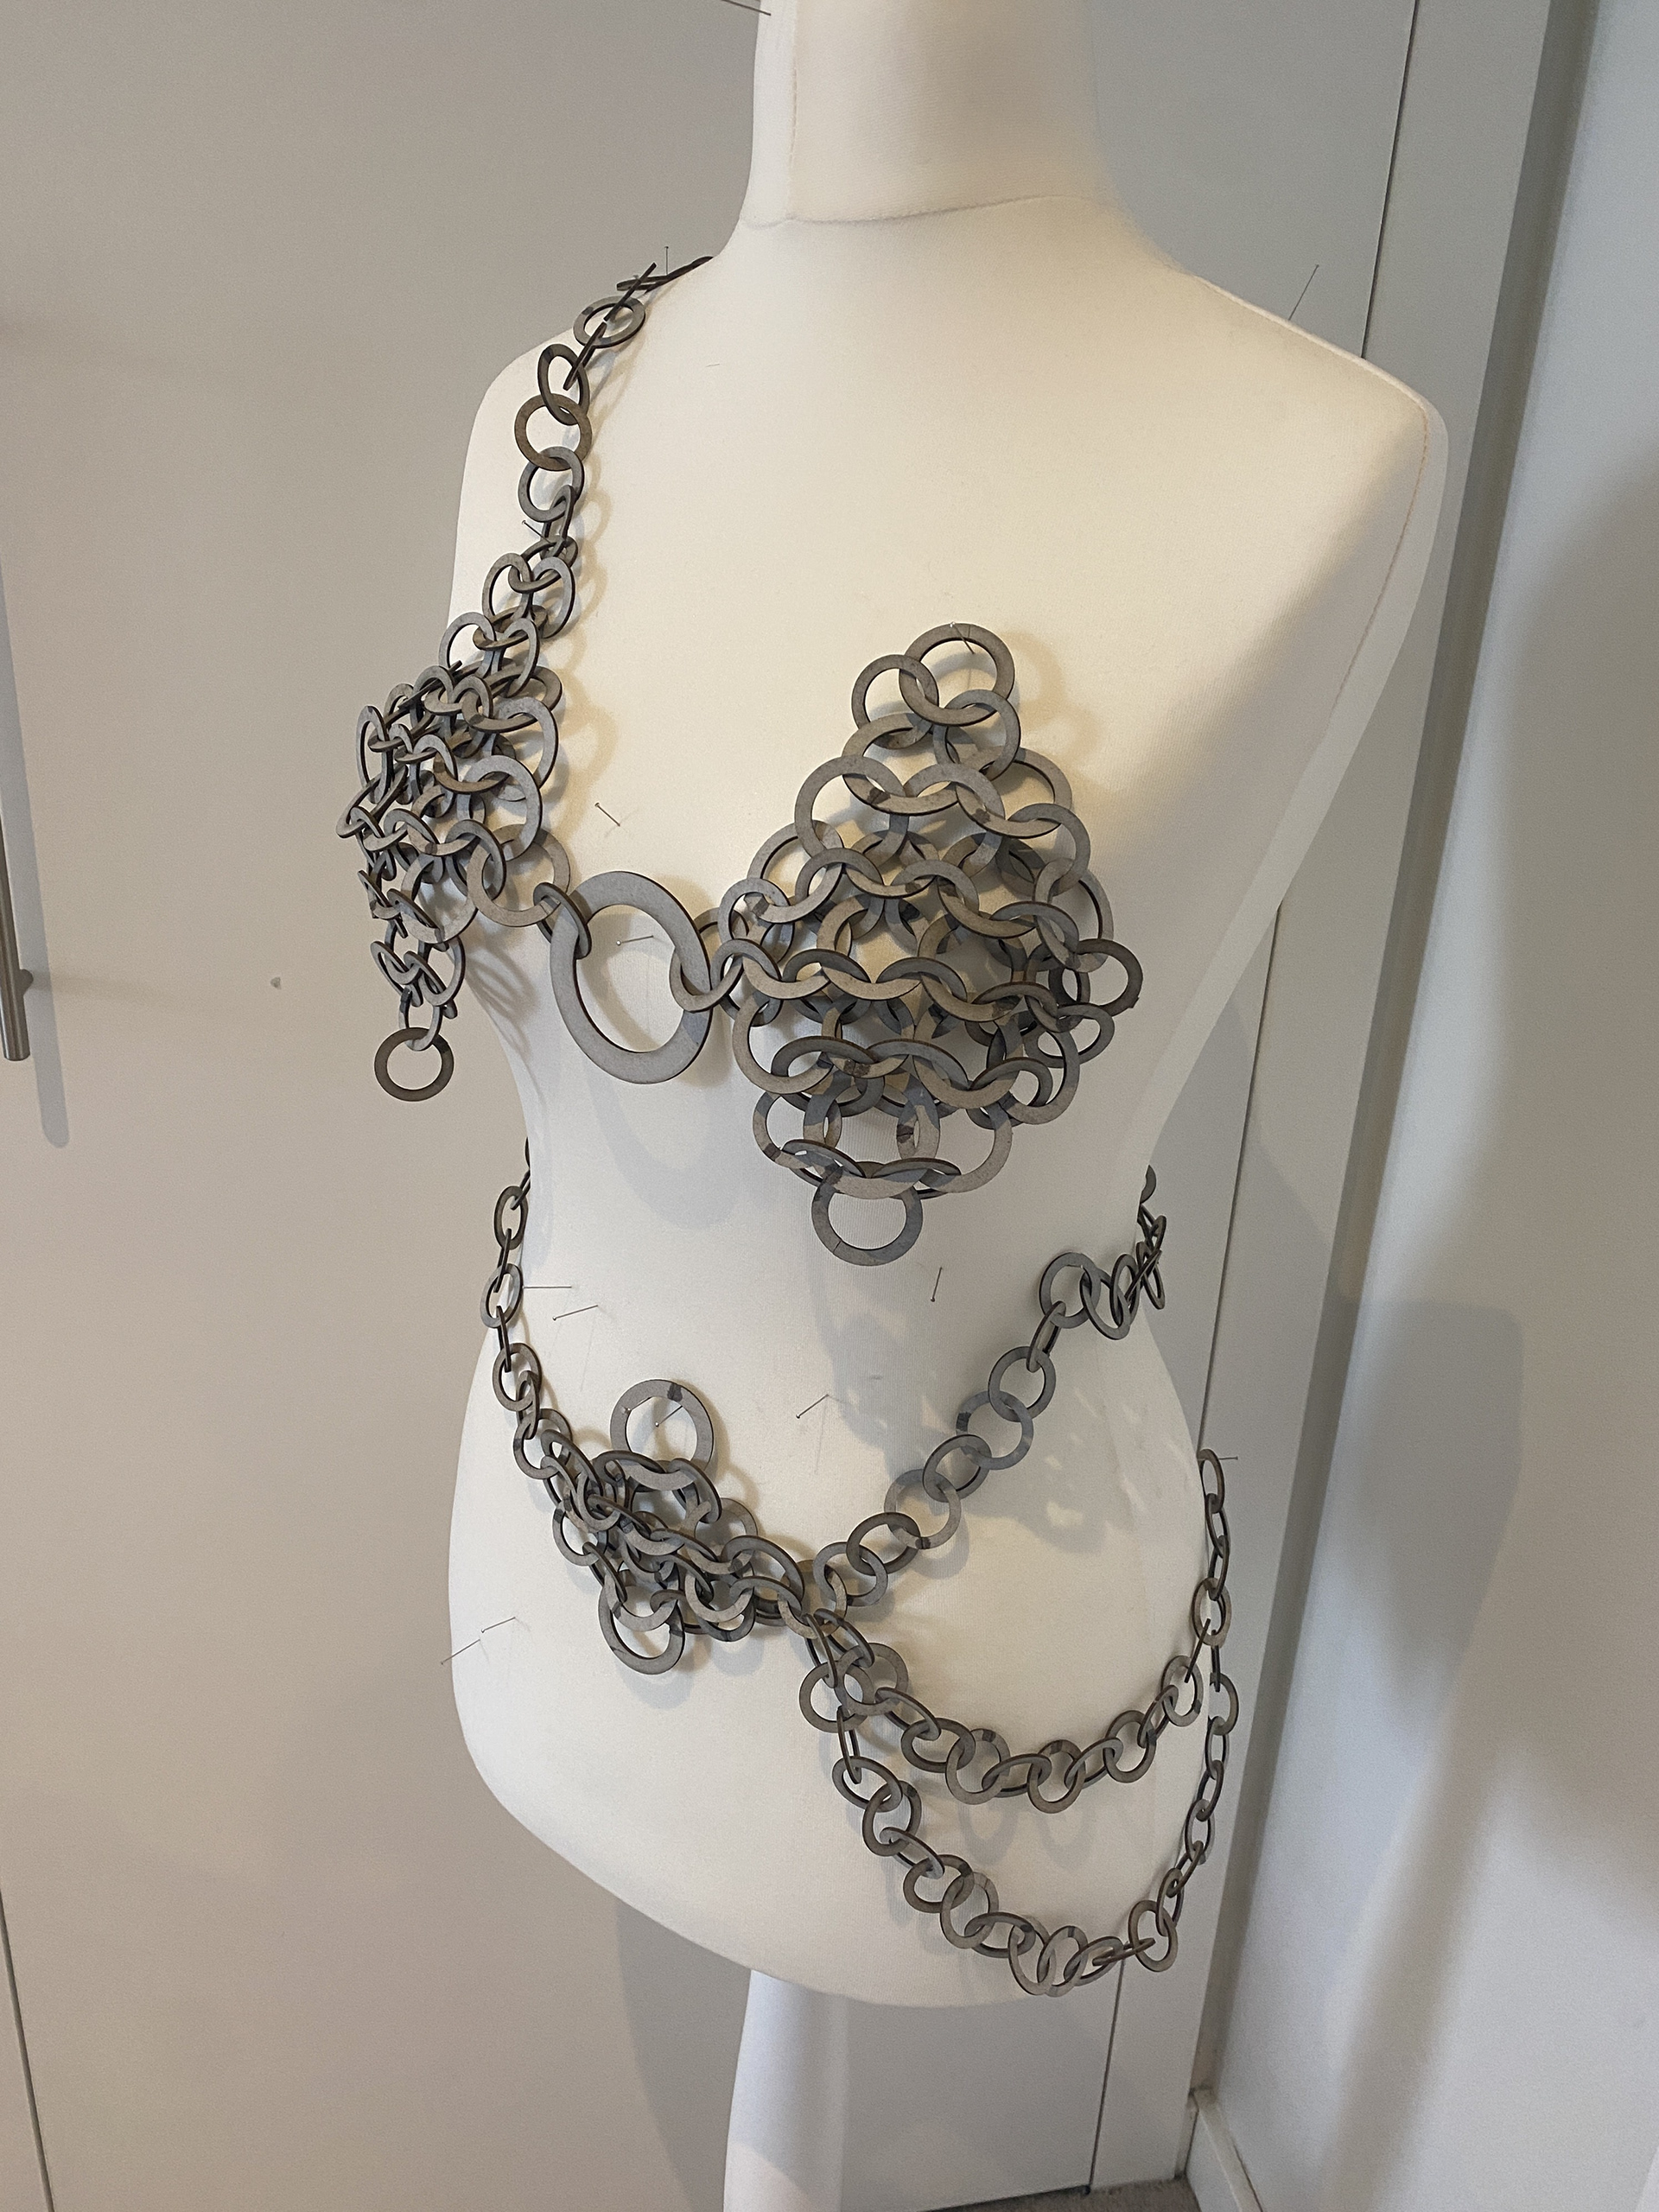
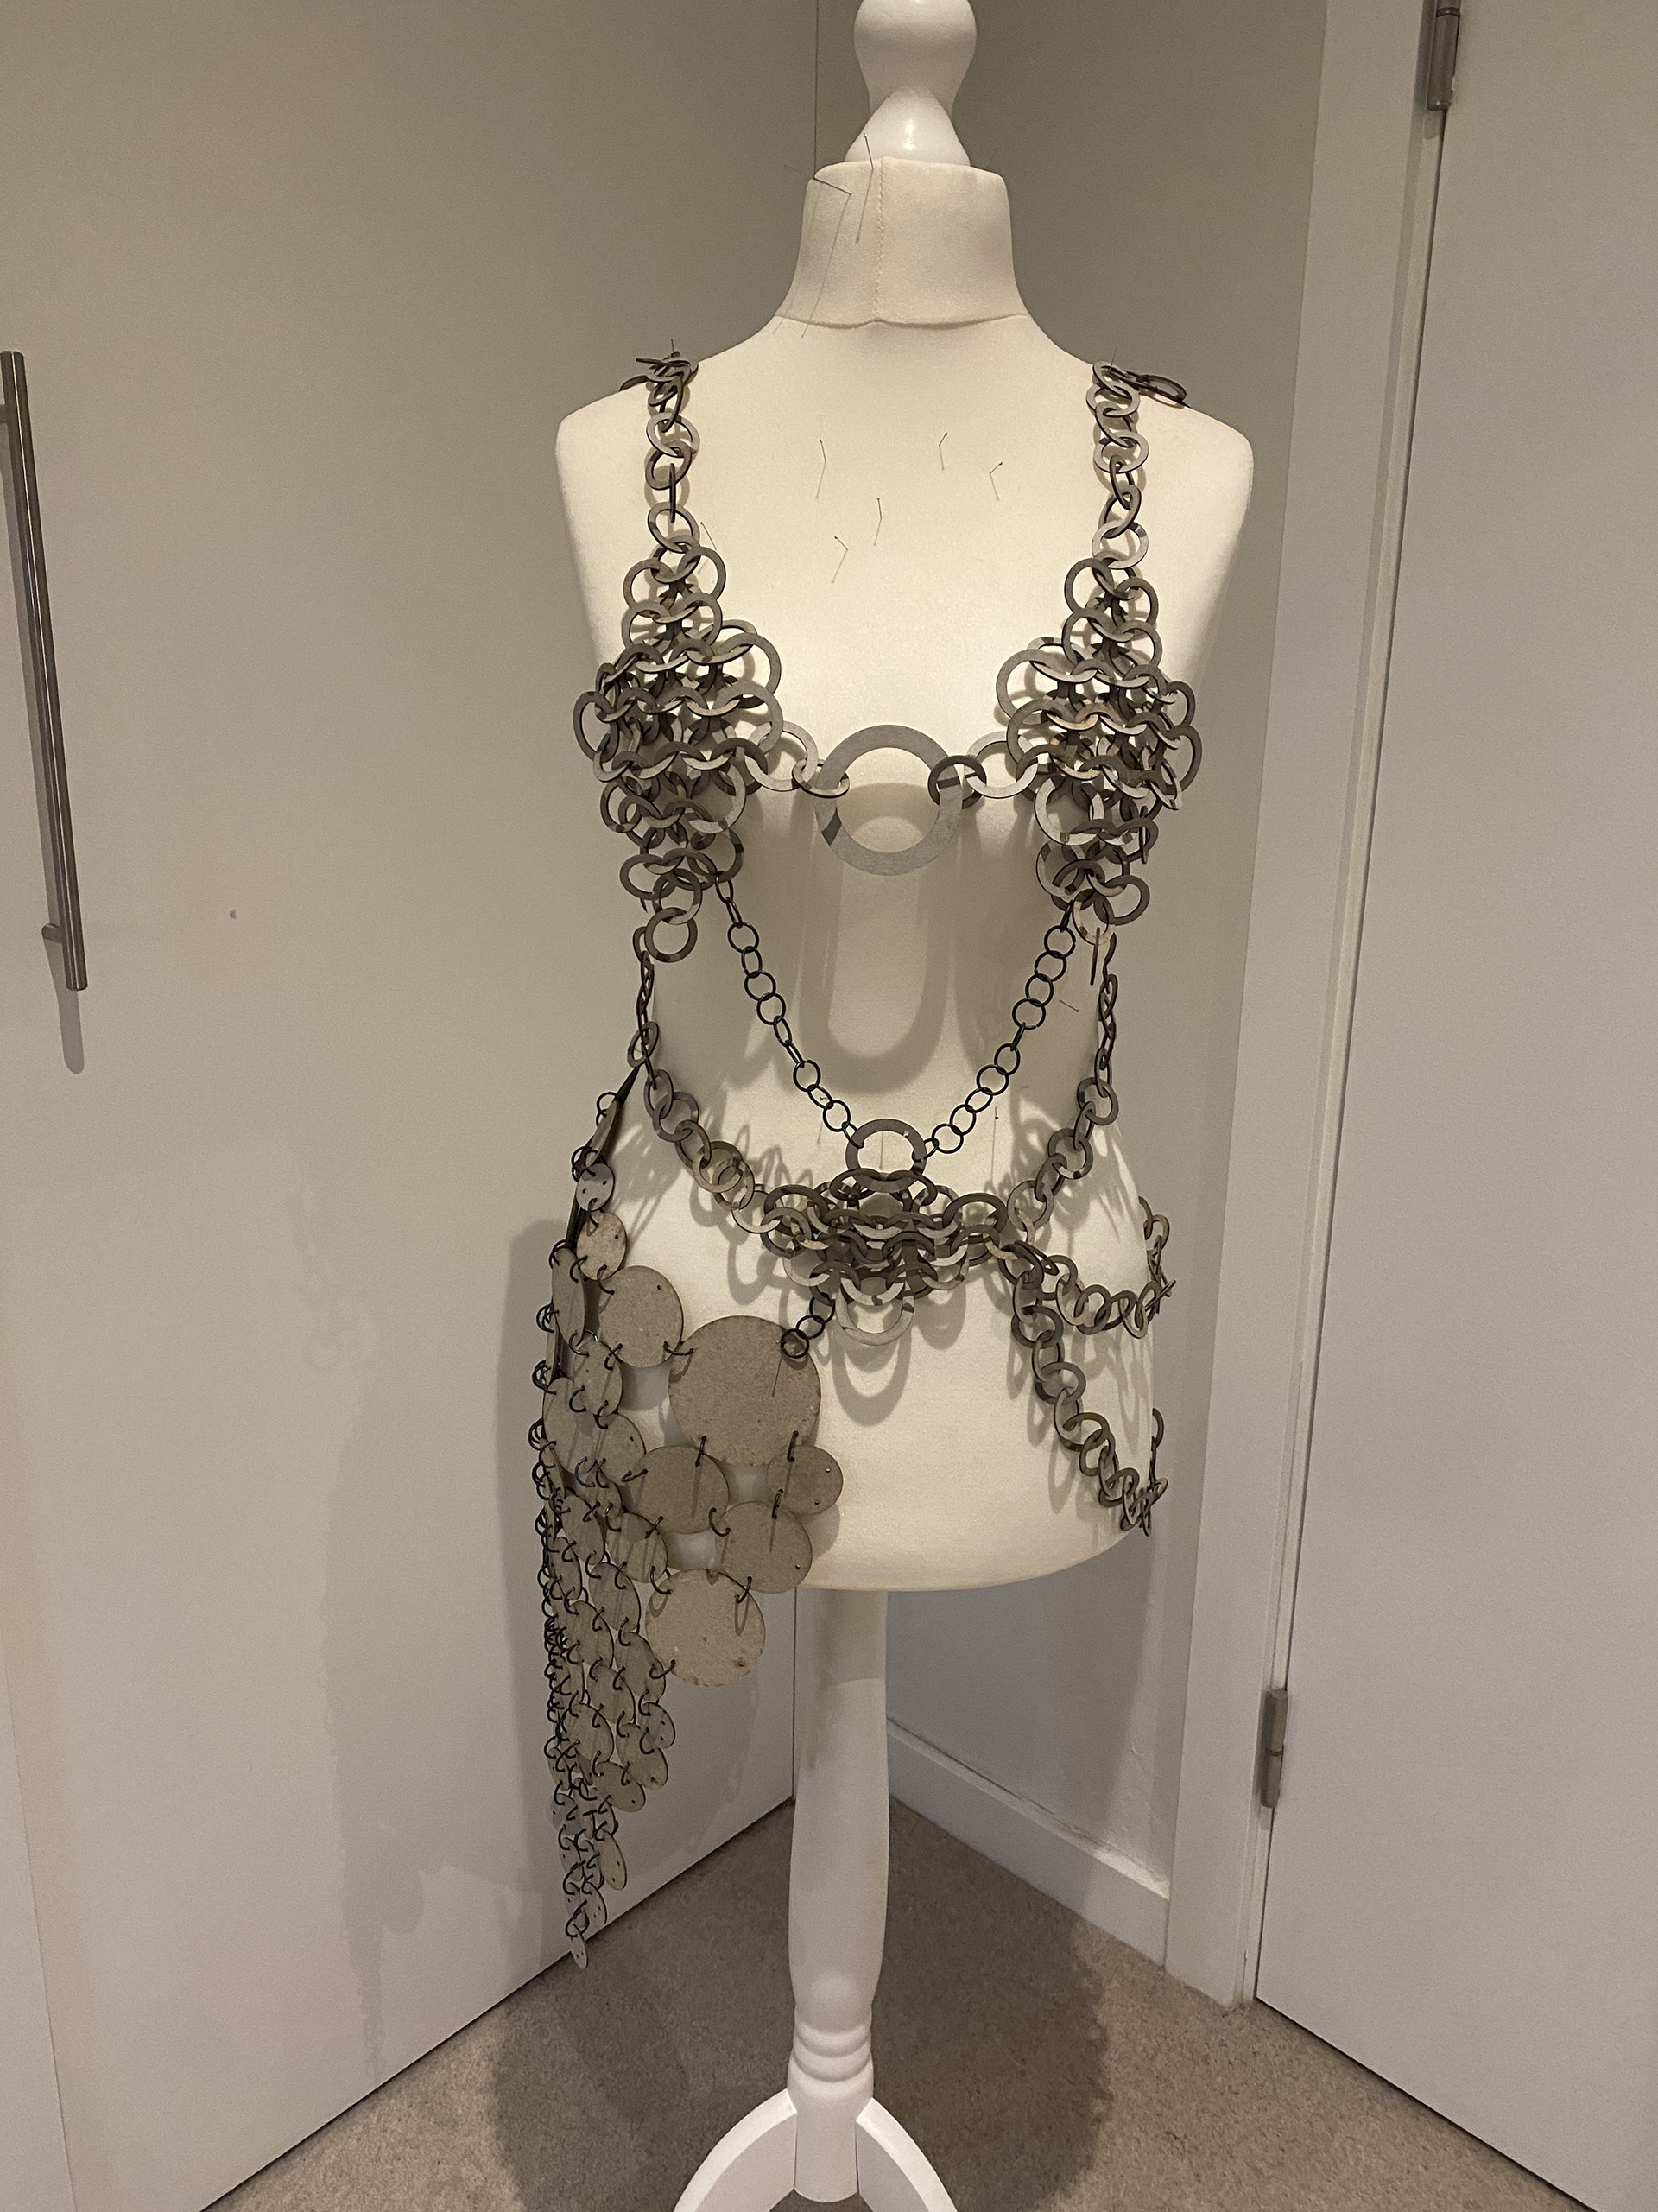

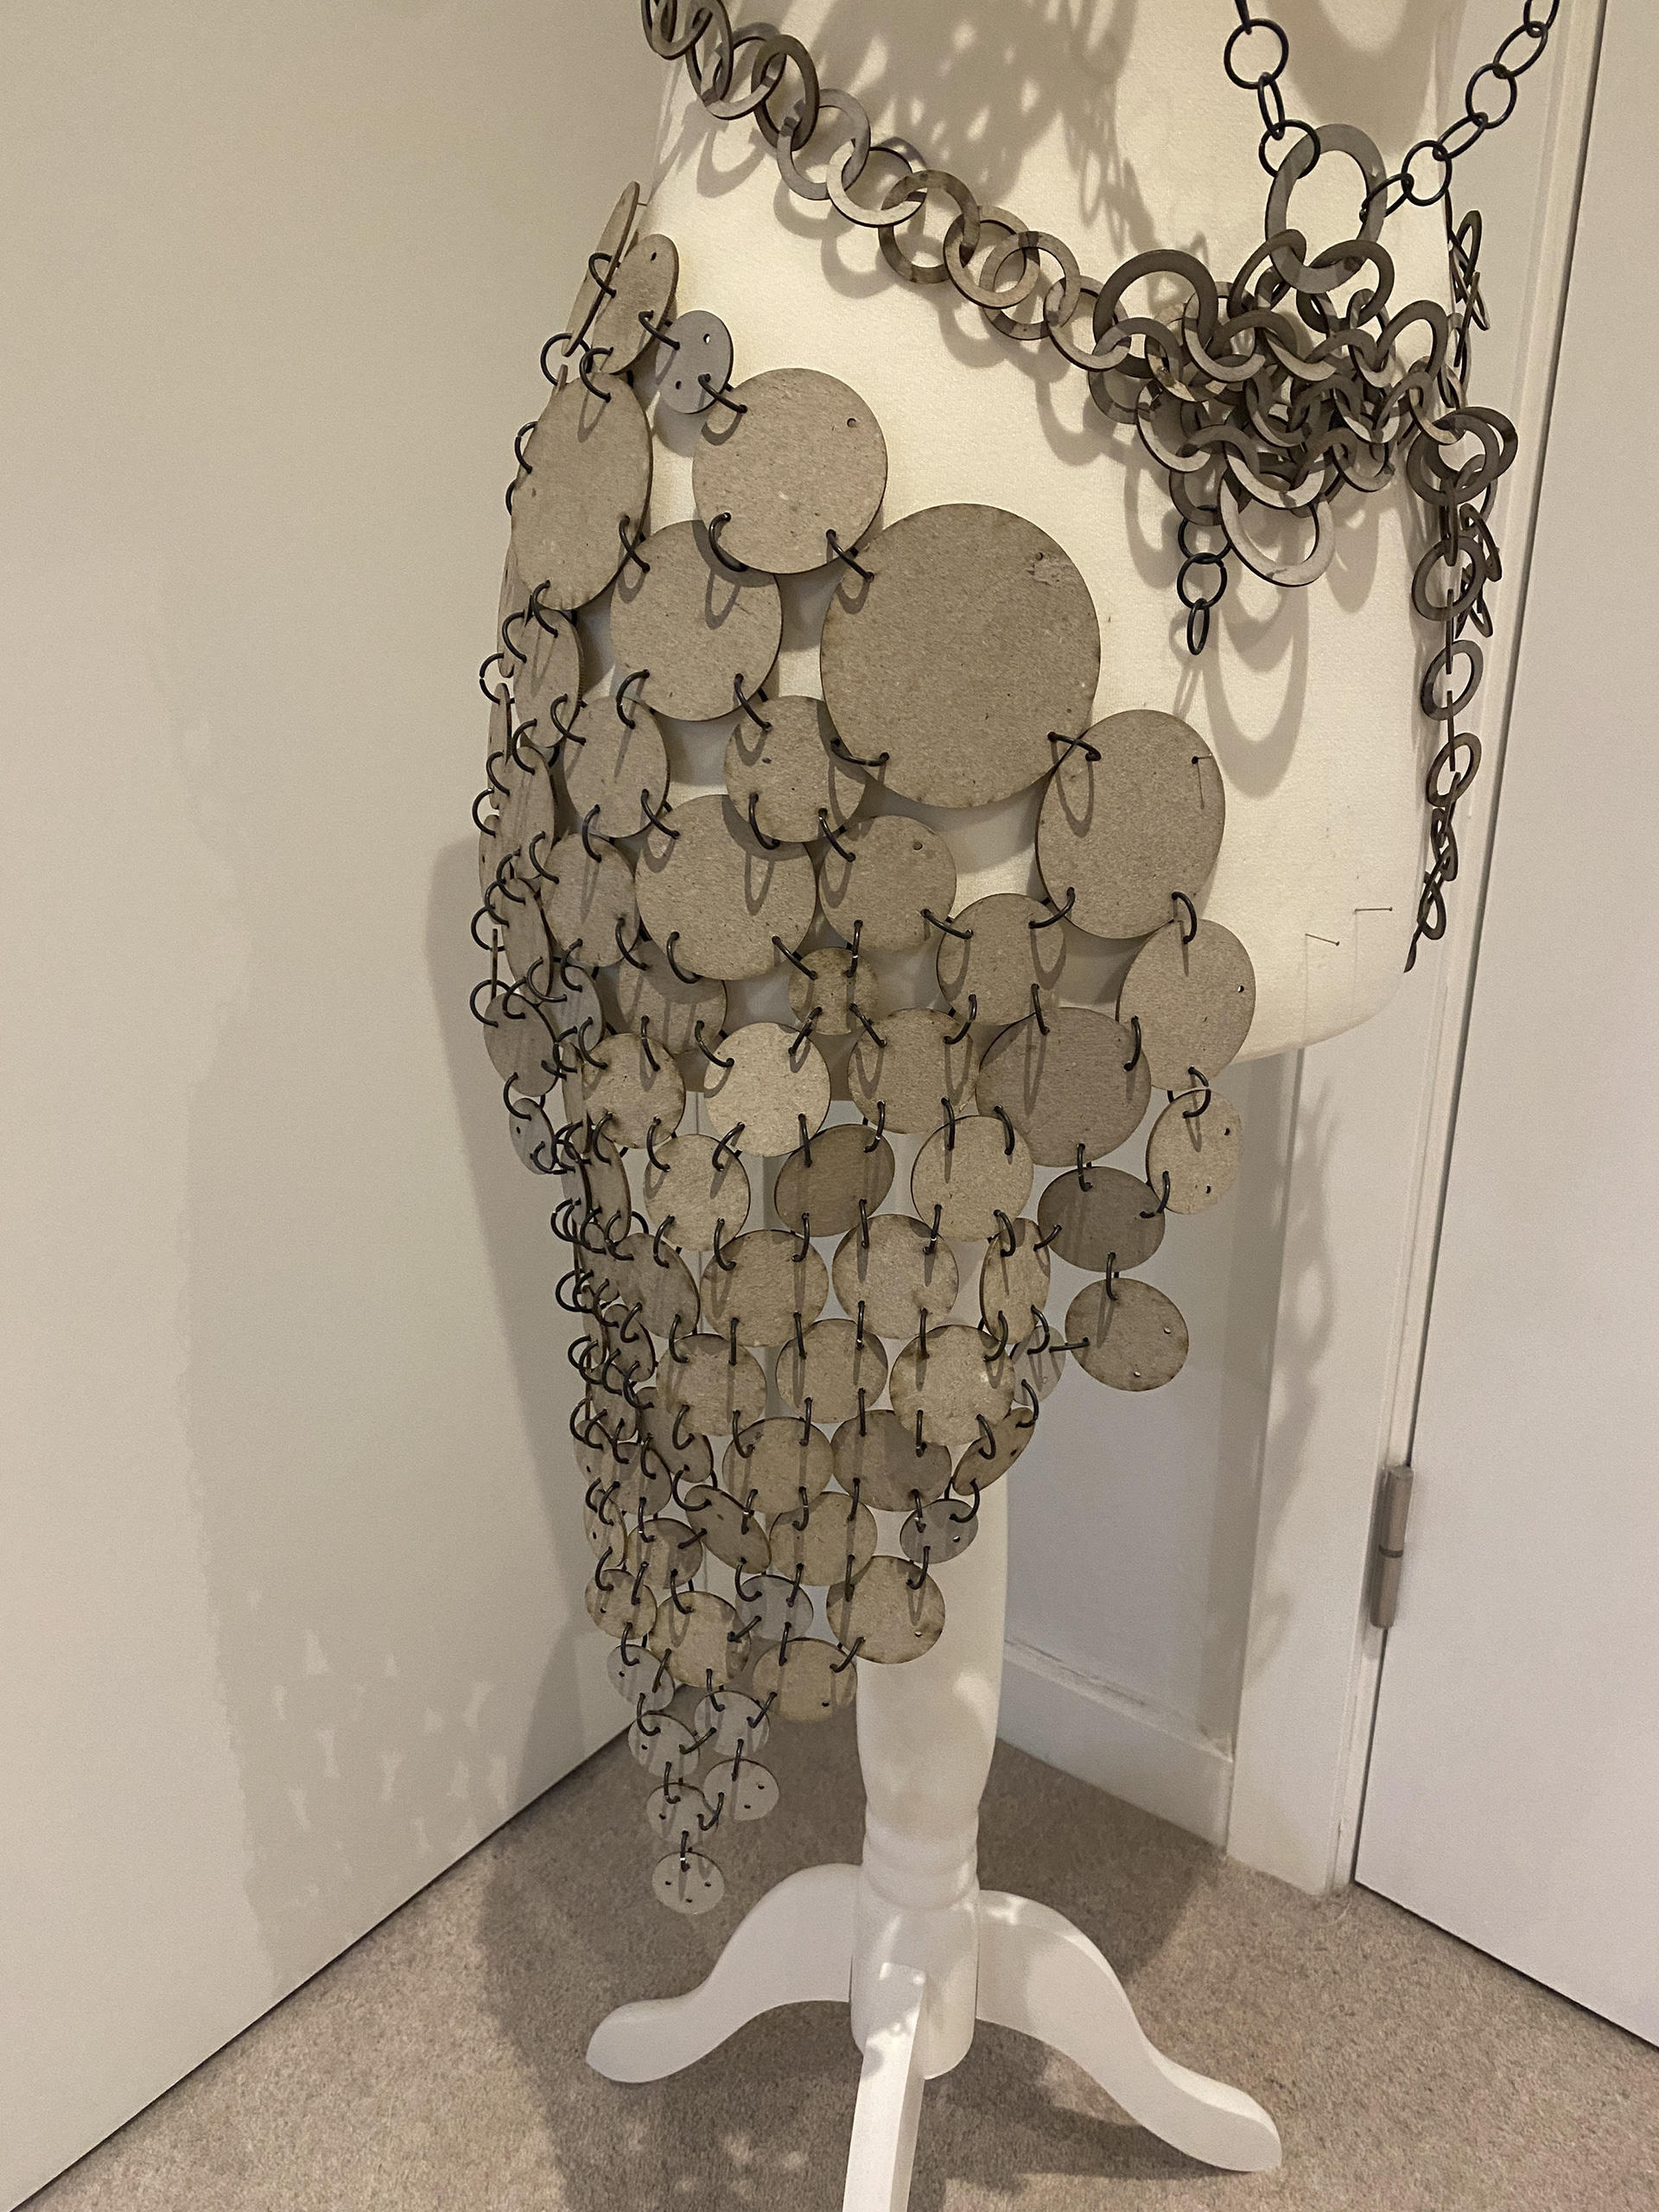
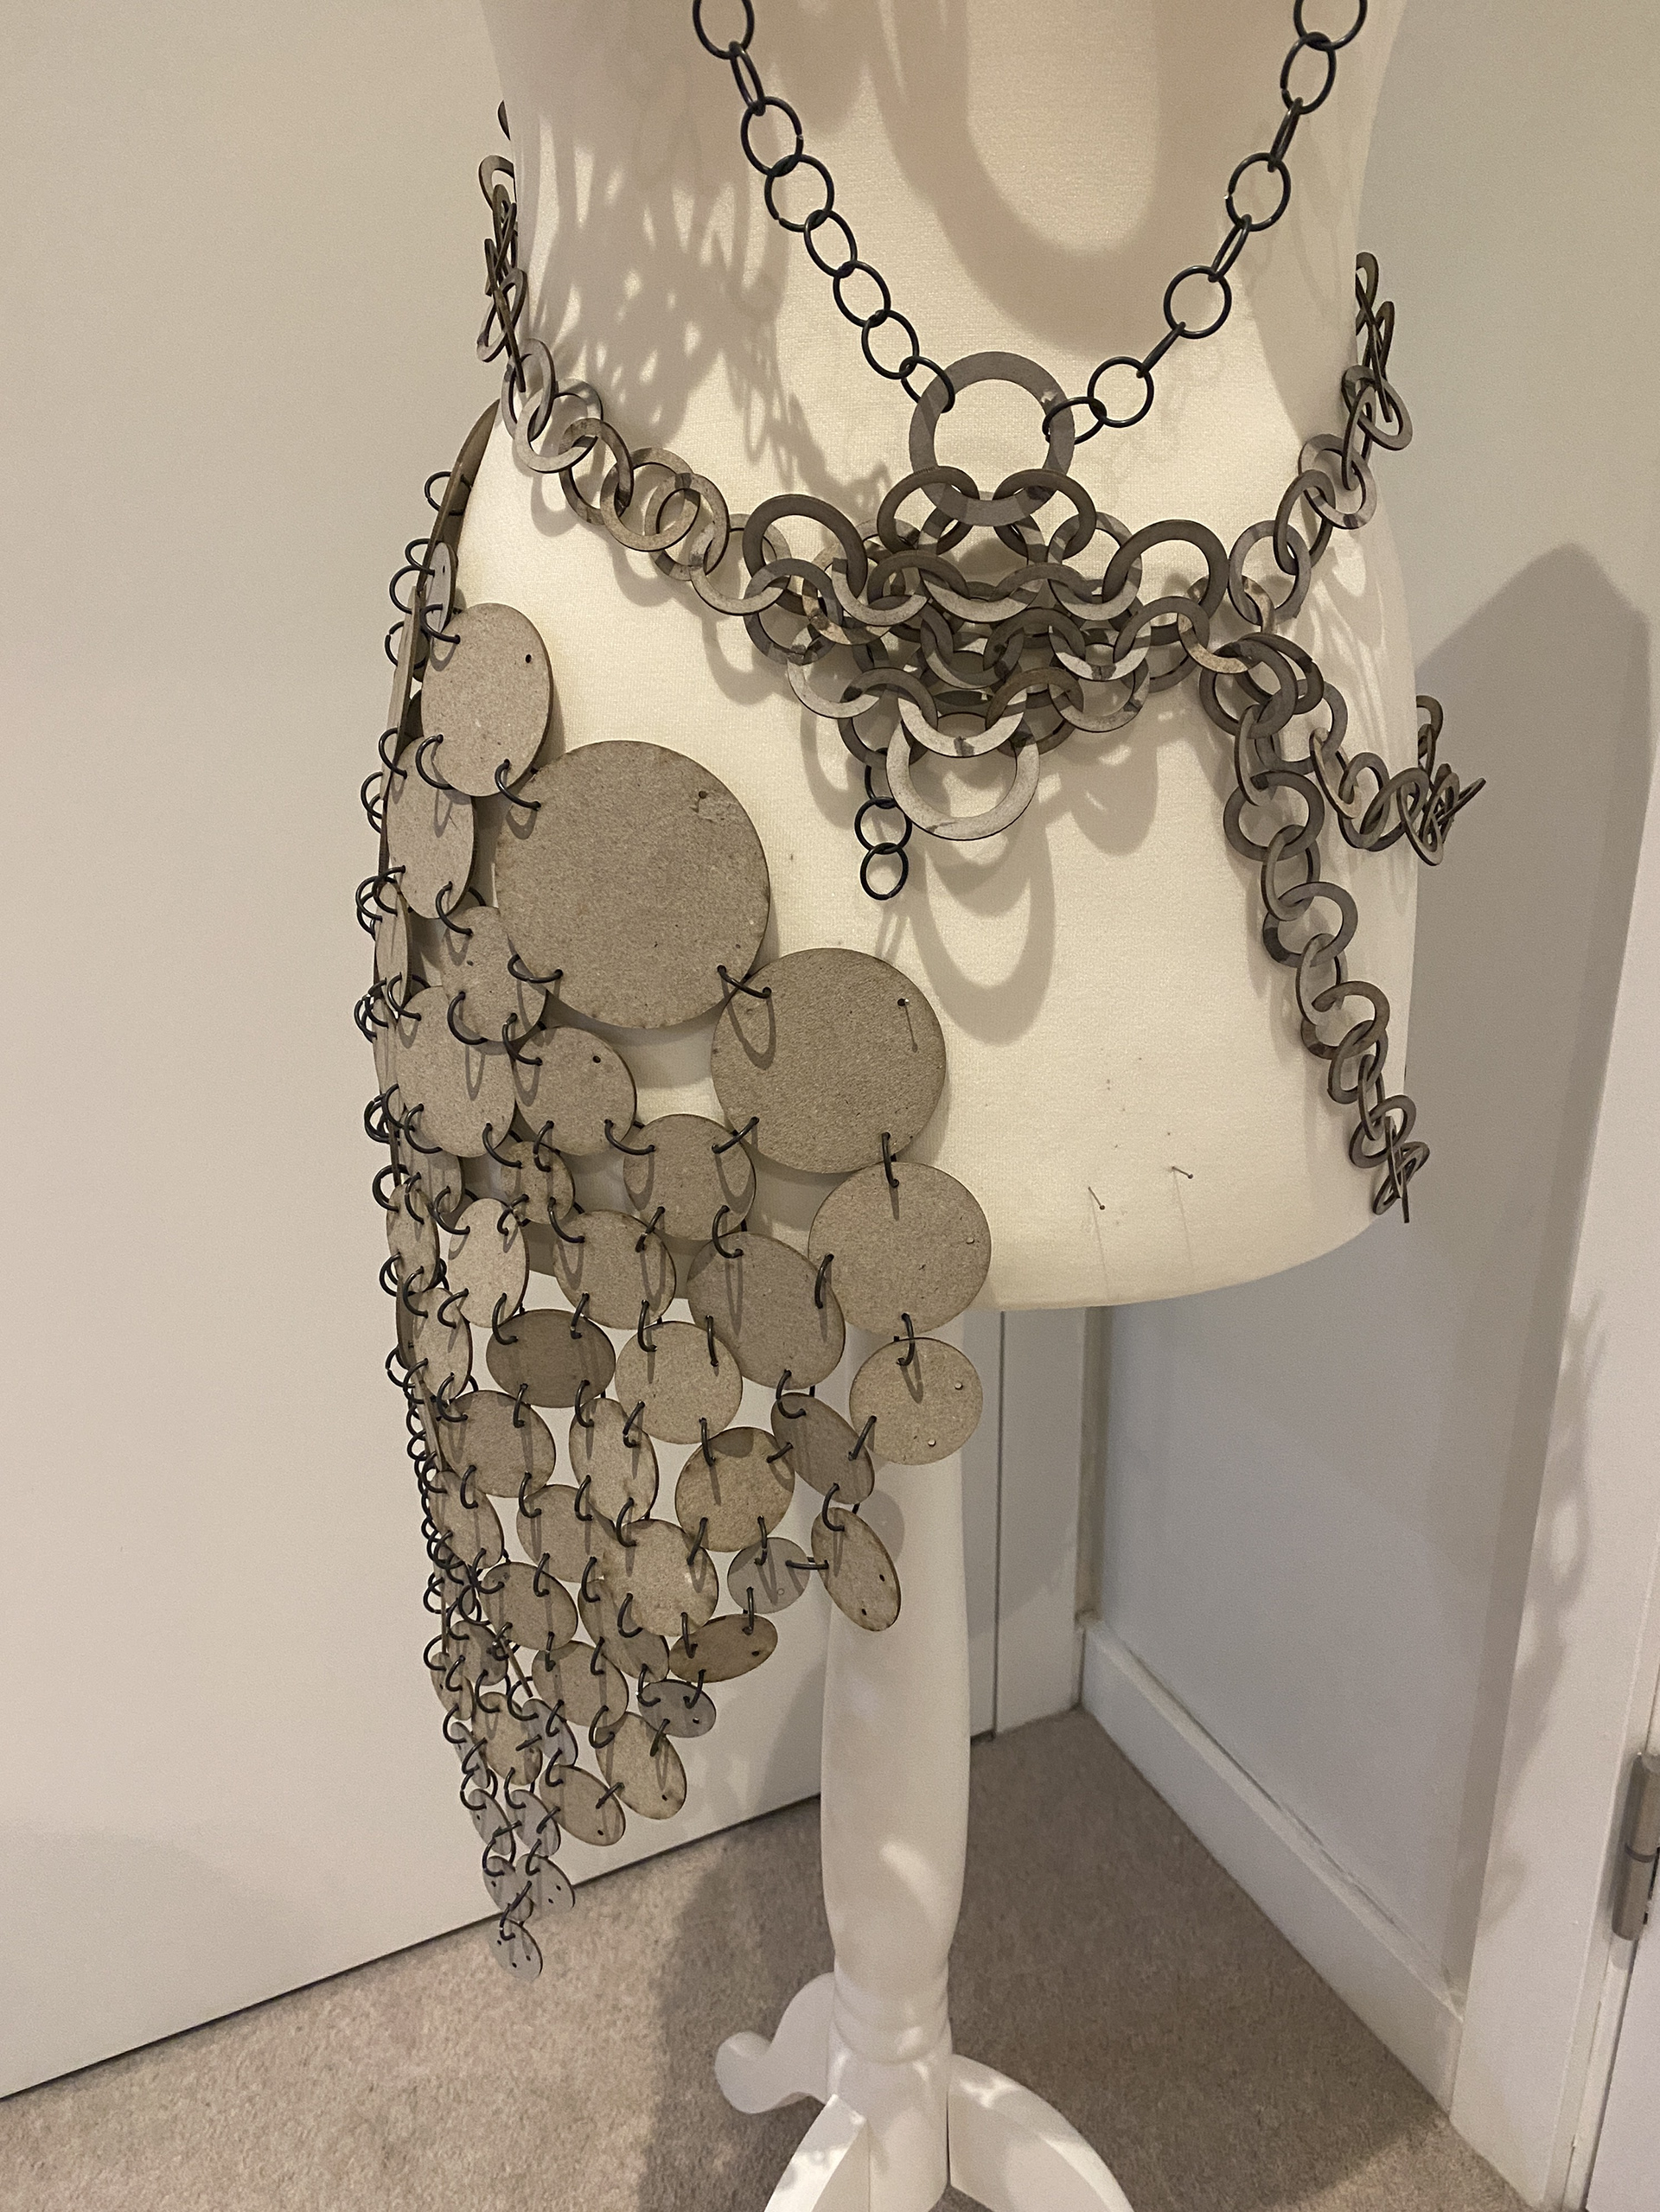
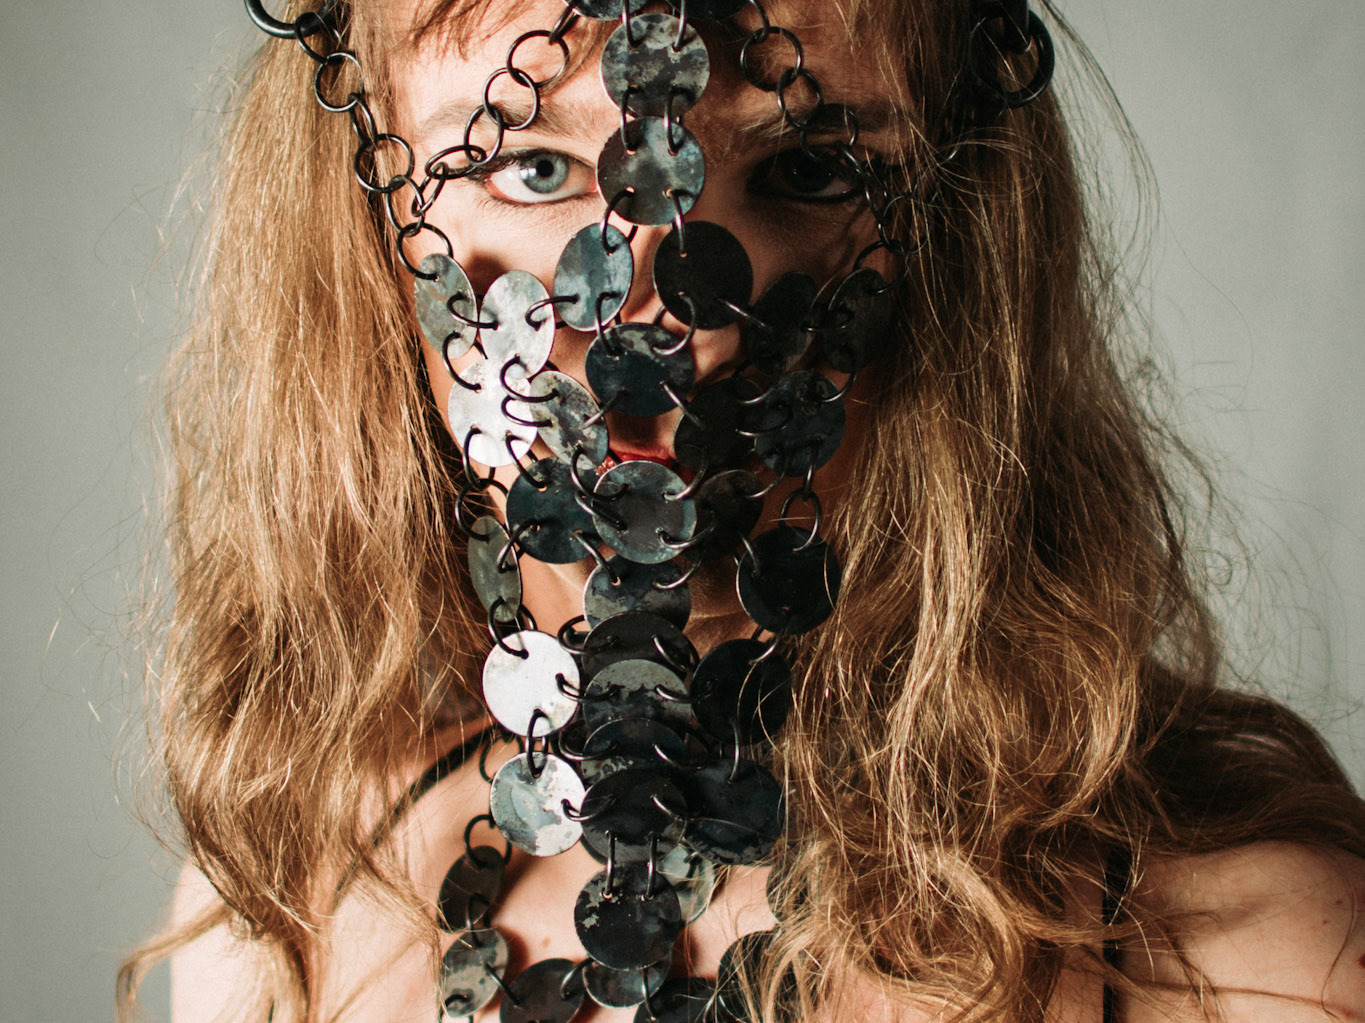
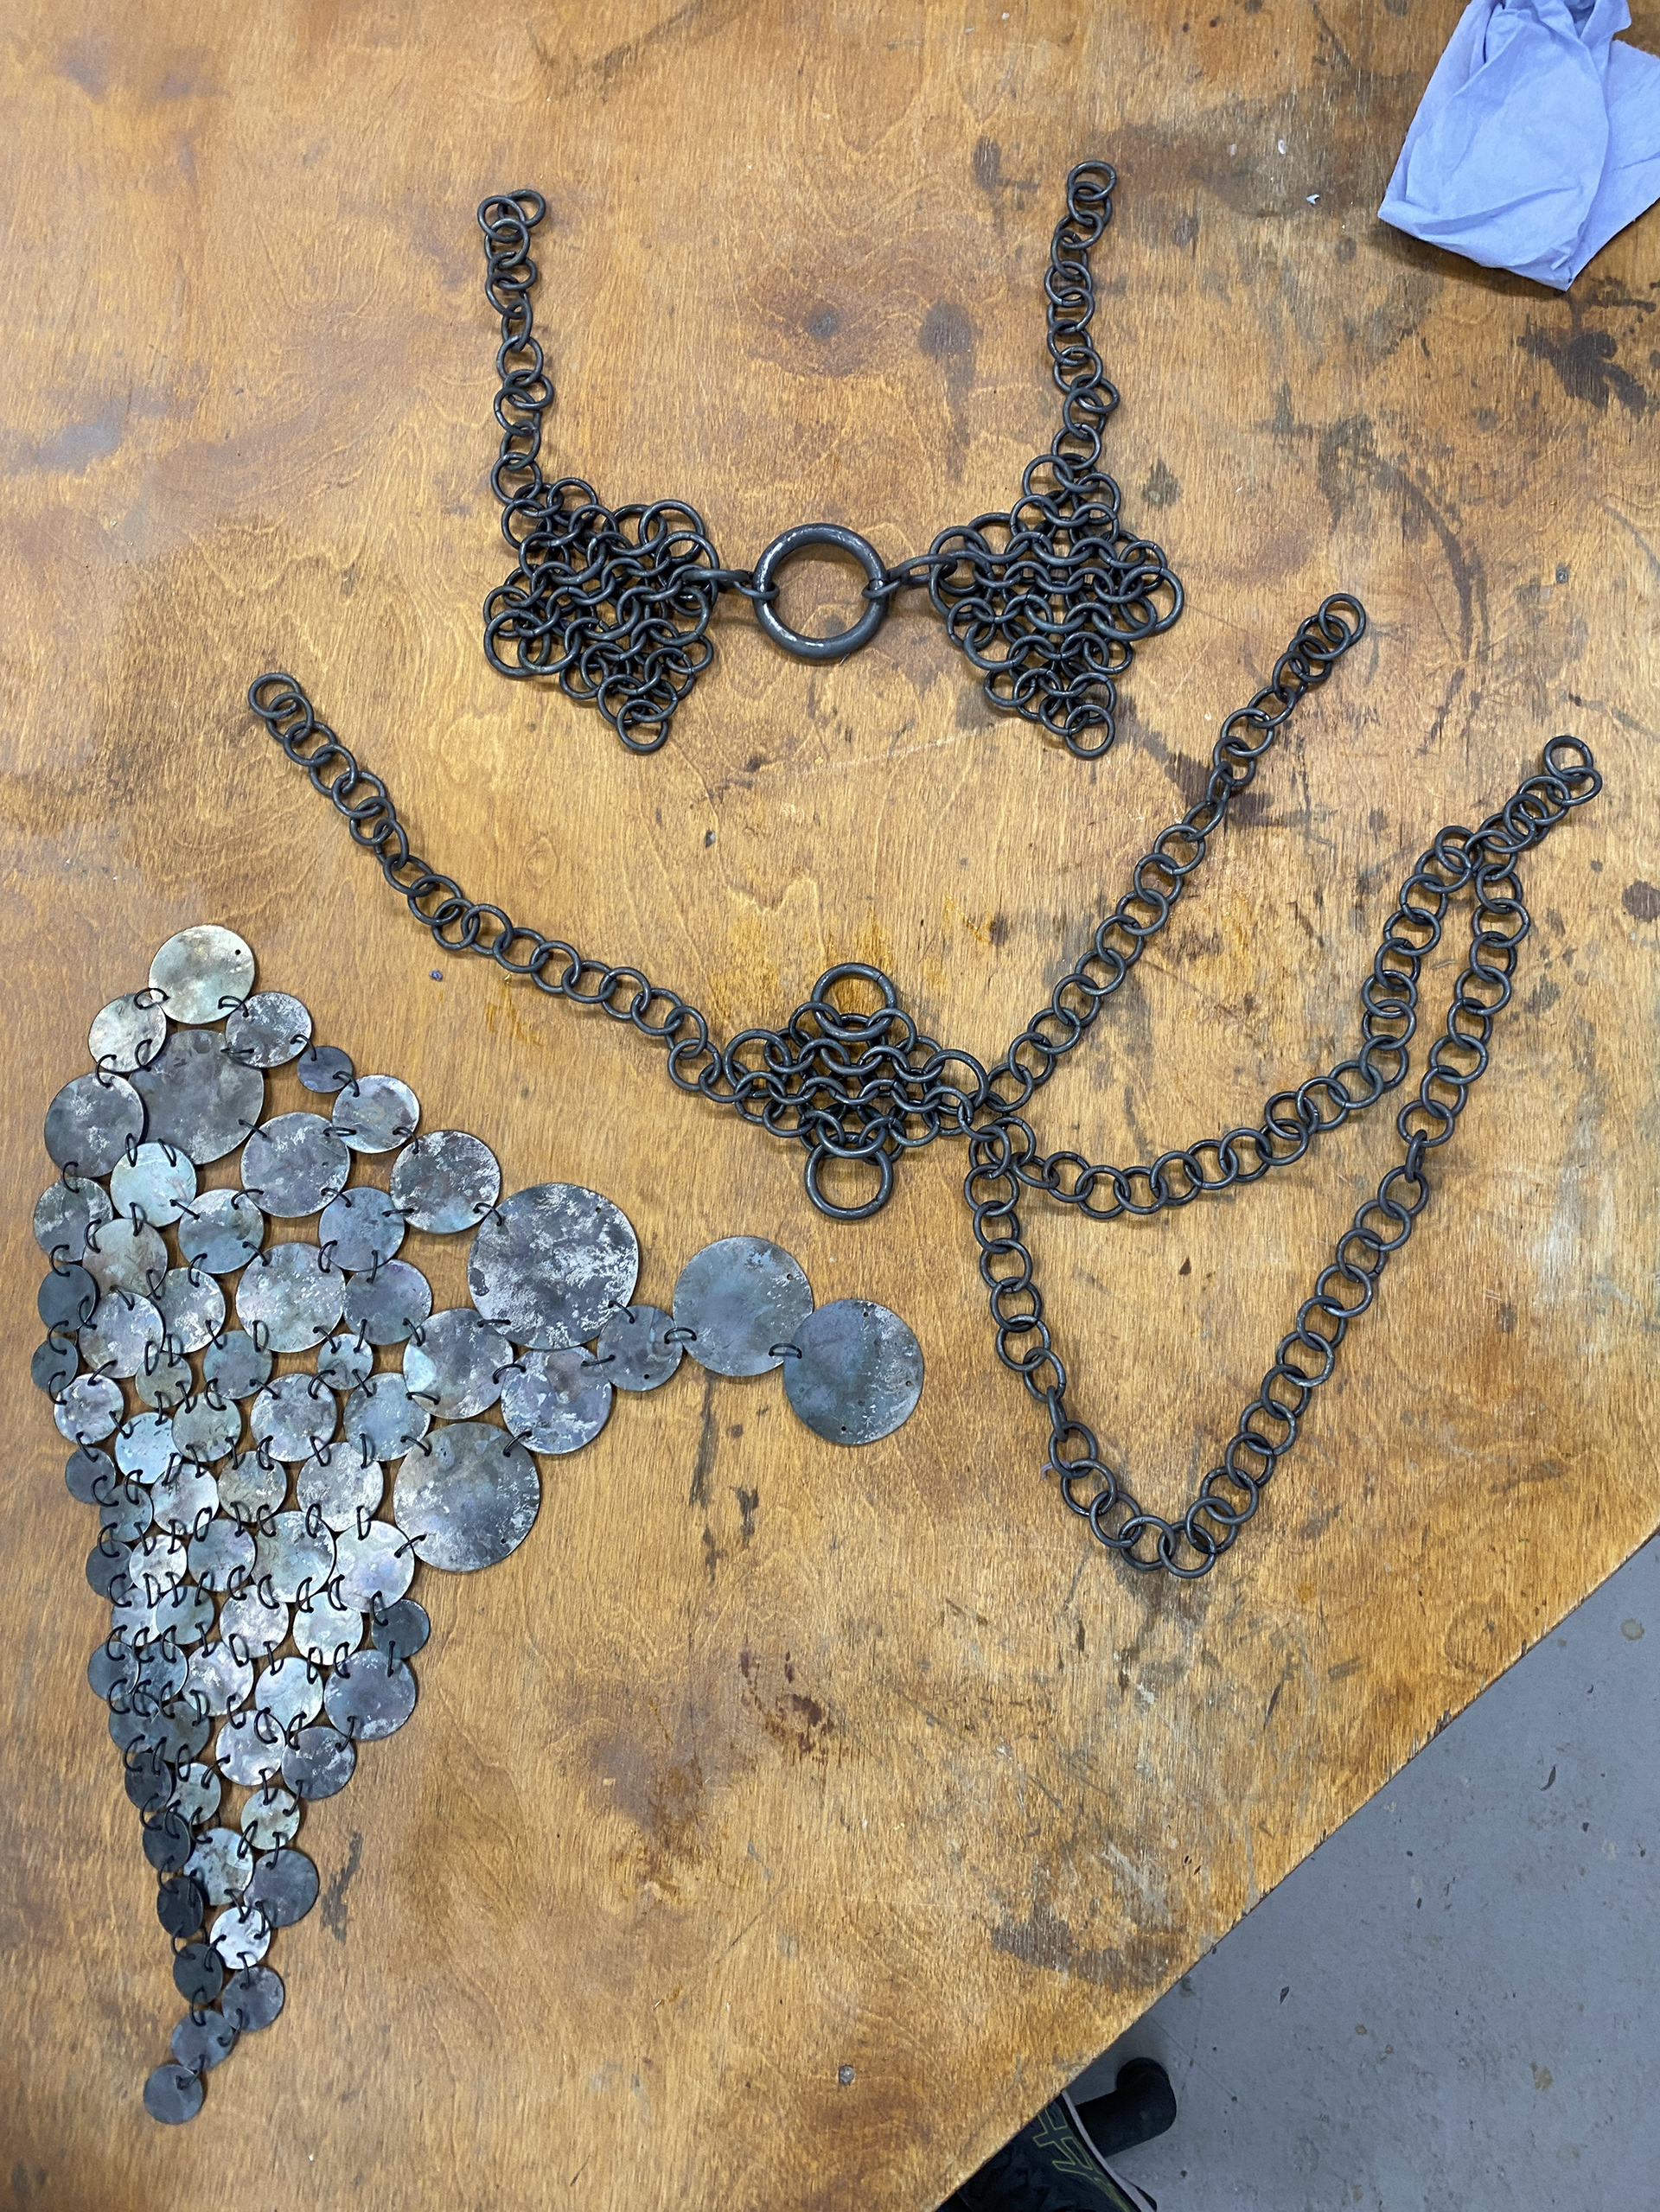
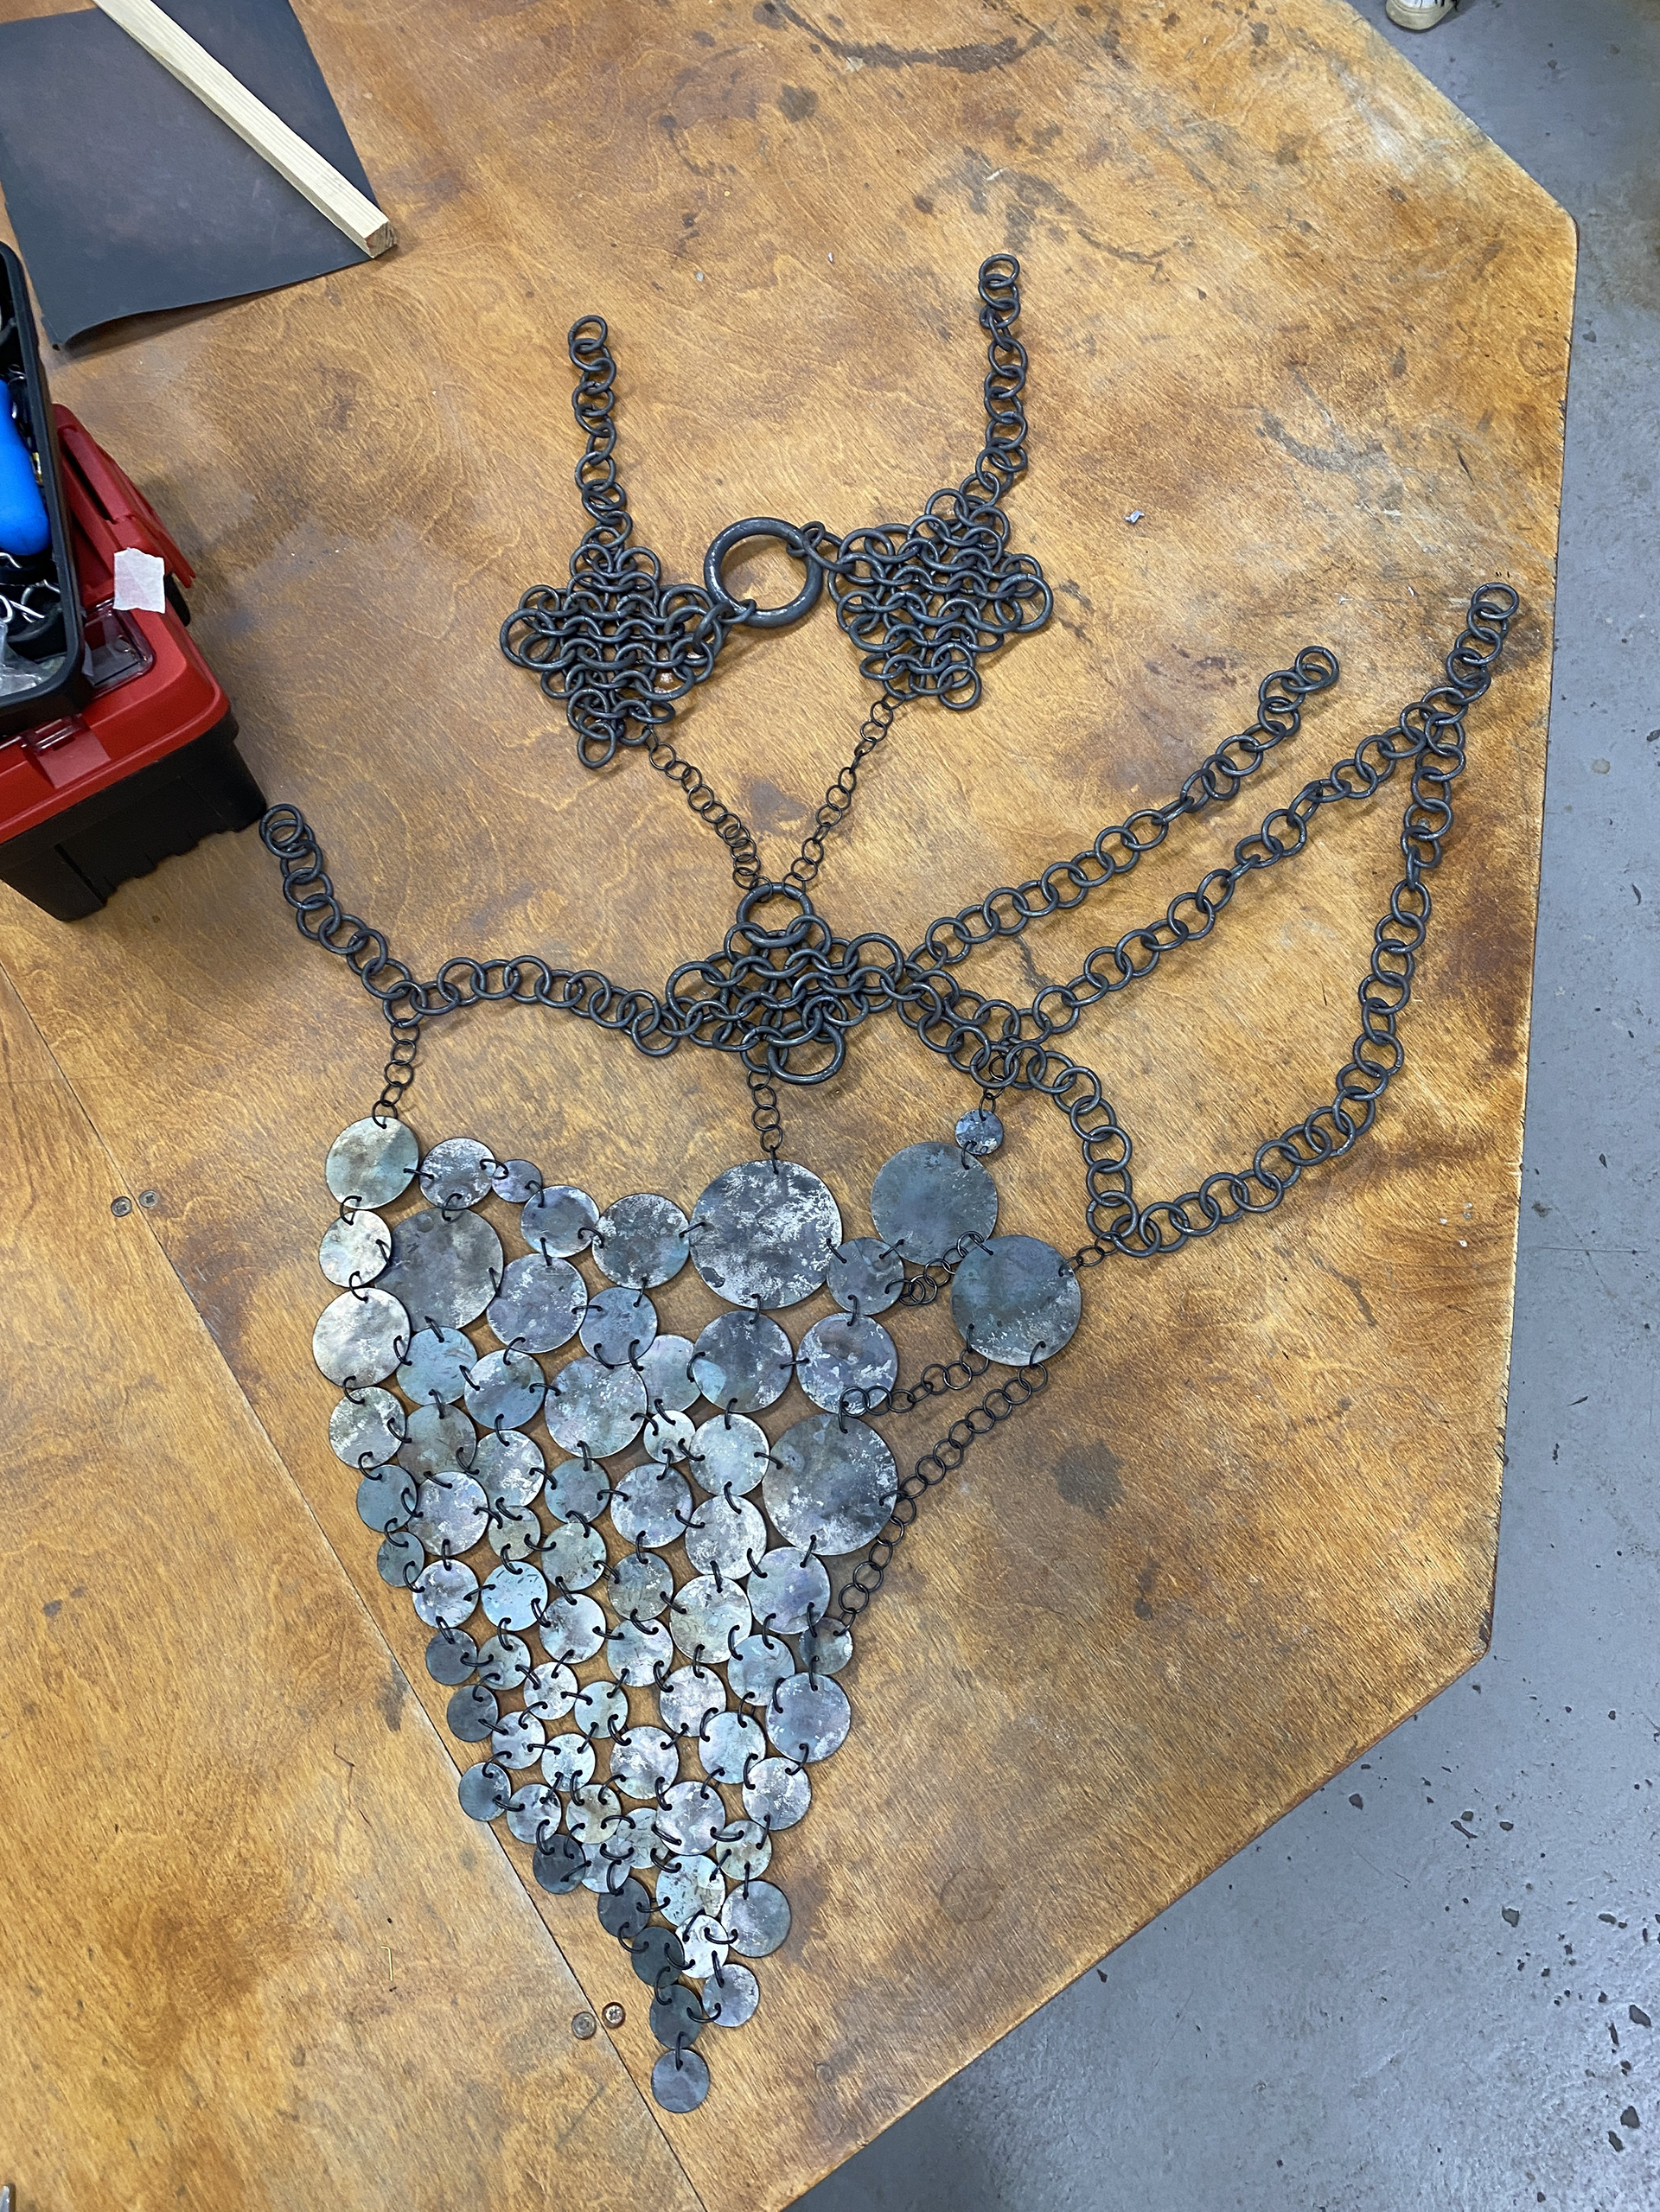
I began the modeling process with the belly button area, creating a dense yet elegant piece of mail with chains stretching outward, serving as both supports and leading lines. I then experimented with various designs to cover the chest; I wanted this section to conceal the breast while leaving the rest of the torso open so I could incorporate additional lines of chain. I struggled to create a piece that sat comfortably on the body and had enough curvature to avoid looking like a patch carelessly slapped onto the figure. To address this, I developed a new method using wire to create a template of the form’s parameters, which I could then fill in with the mail weave.
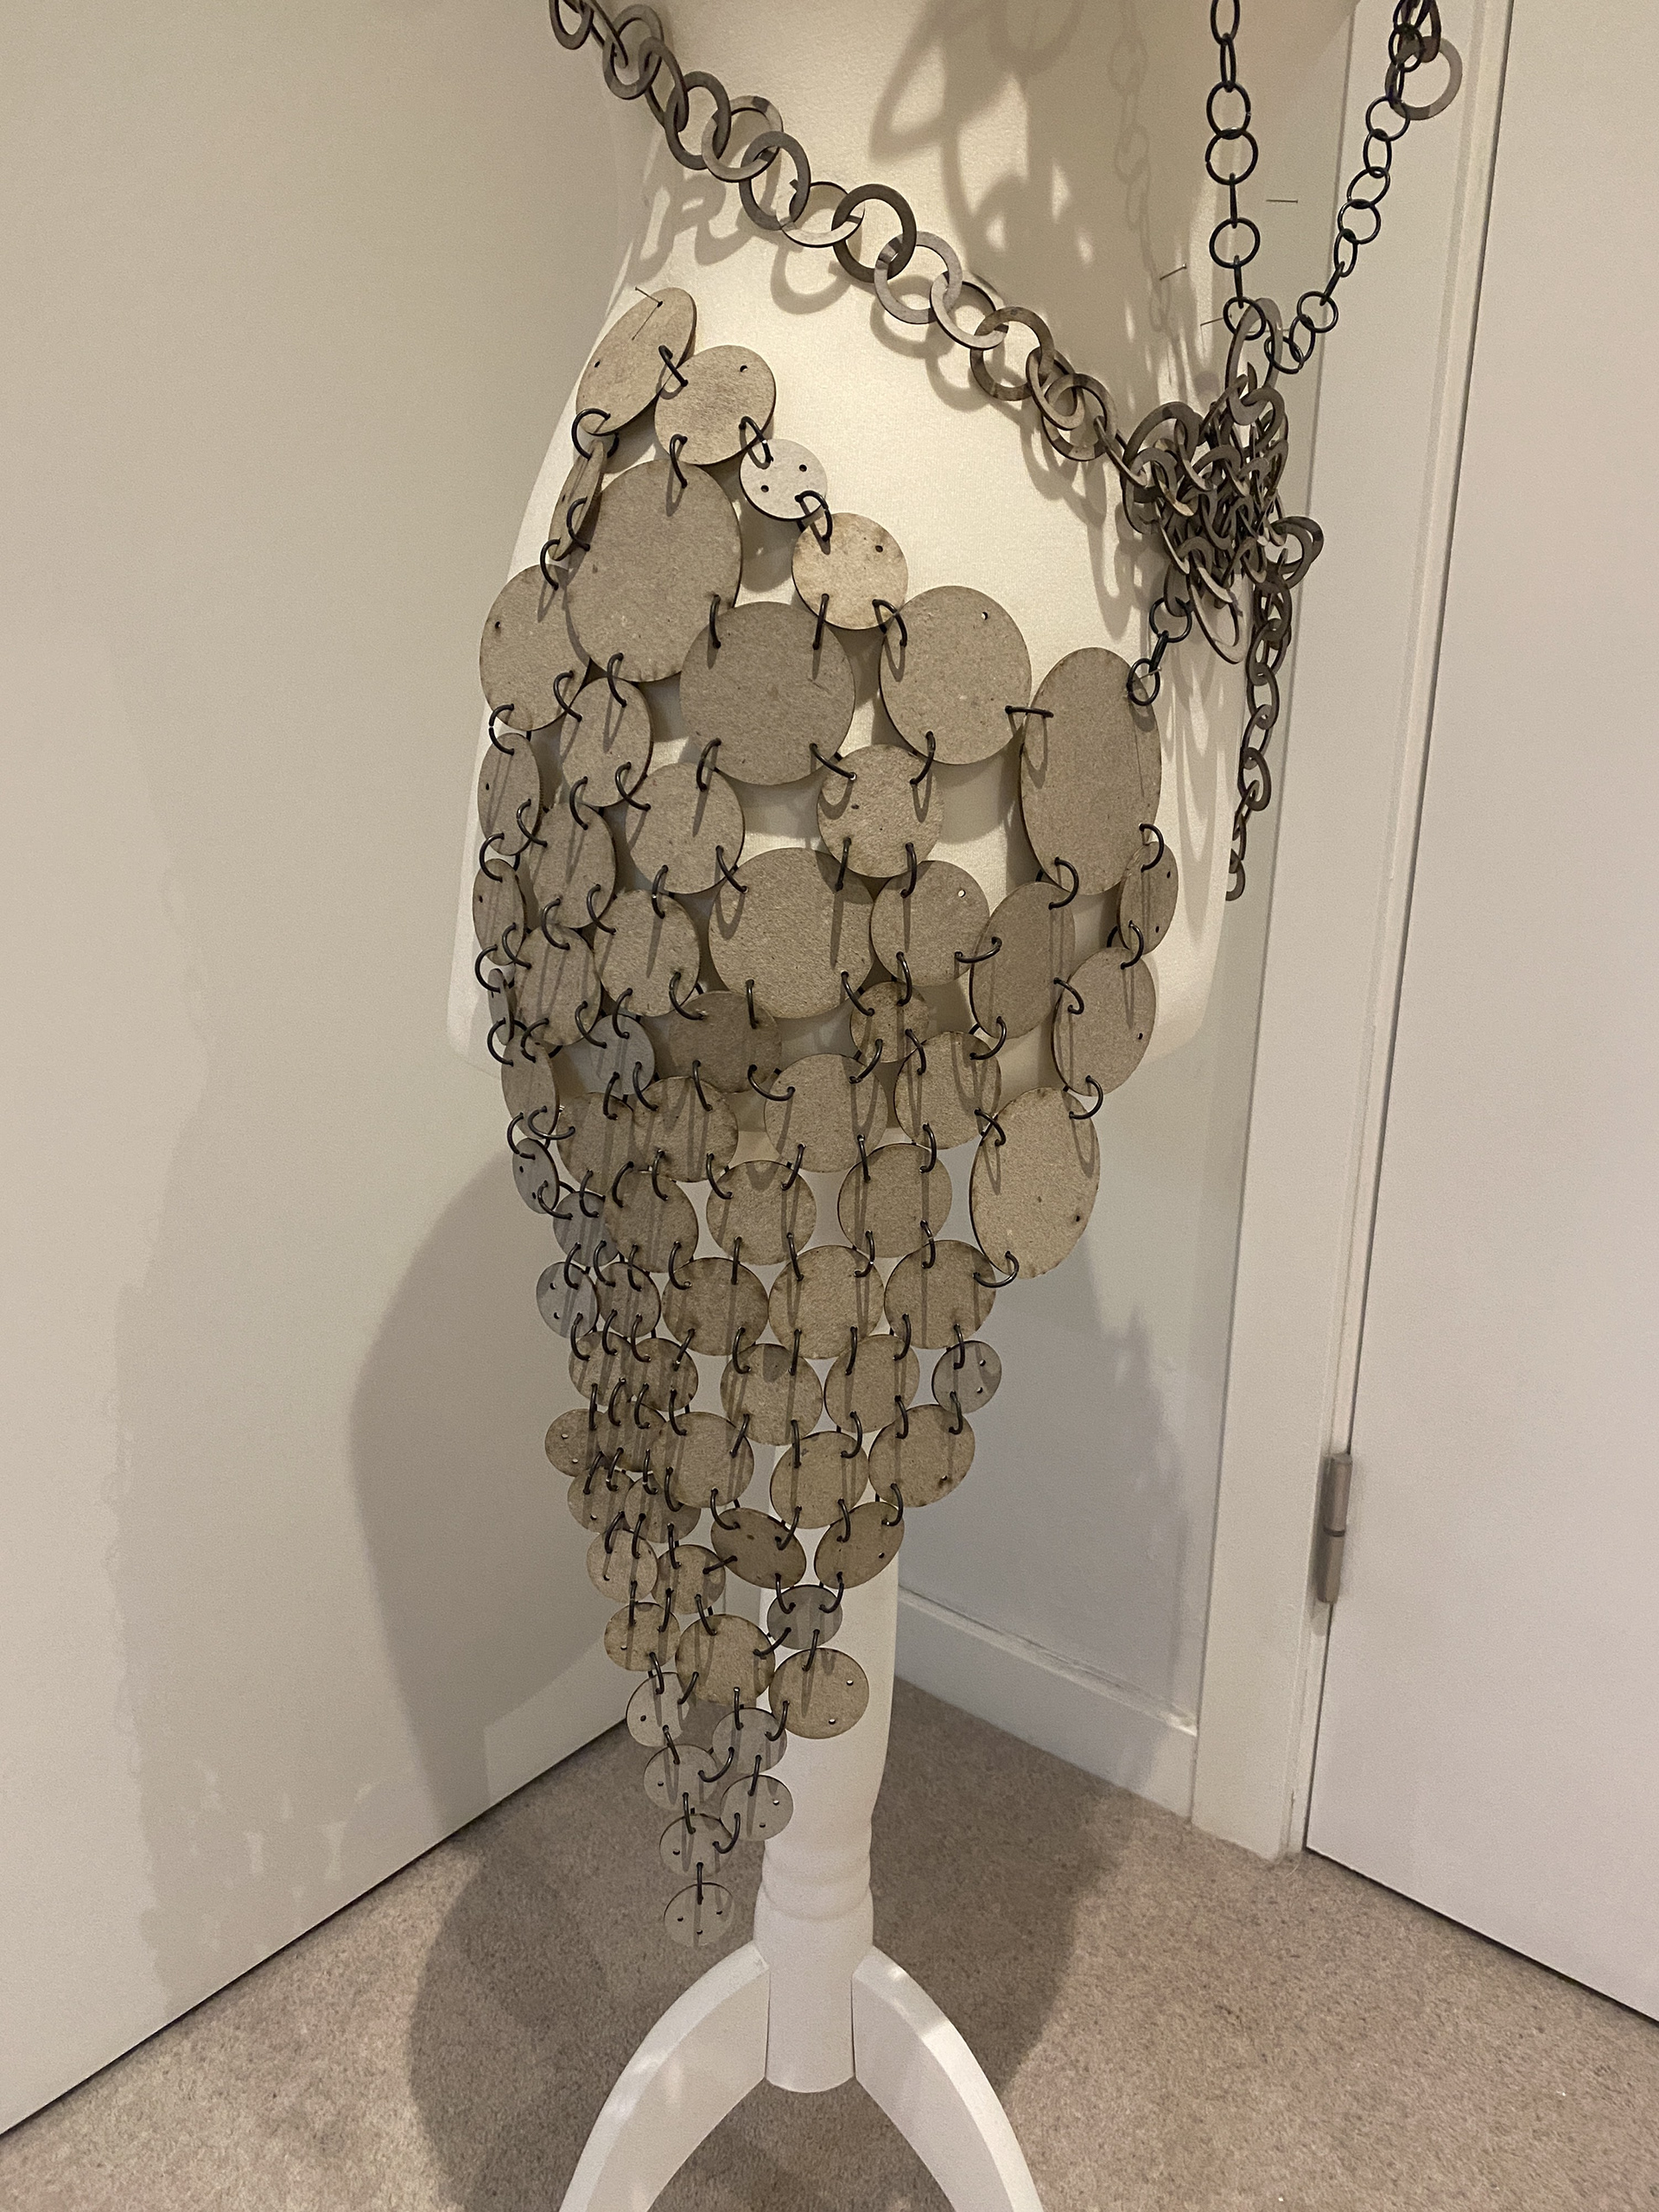
For the asymmetrical skirt, I needed to balance the size and weight of the piece, so I looked back to plate mail for inspiration. I applied a technique I explored in Unit X, where I used plates of varying sizes, sourced from the external diameter of the links, to build a cascading, flowing form. I used larger plates to create broad coverage and draw the eye, while smaller plates helped refine the taper.
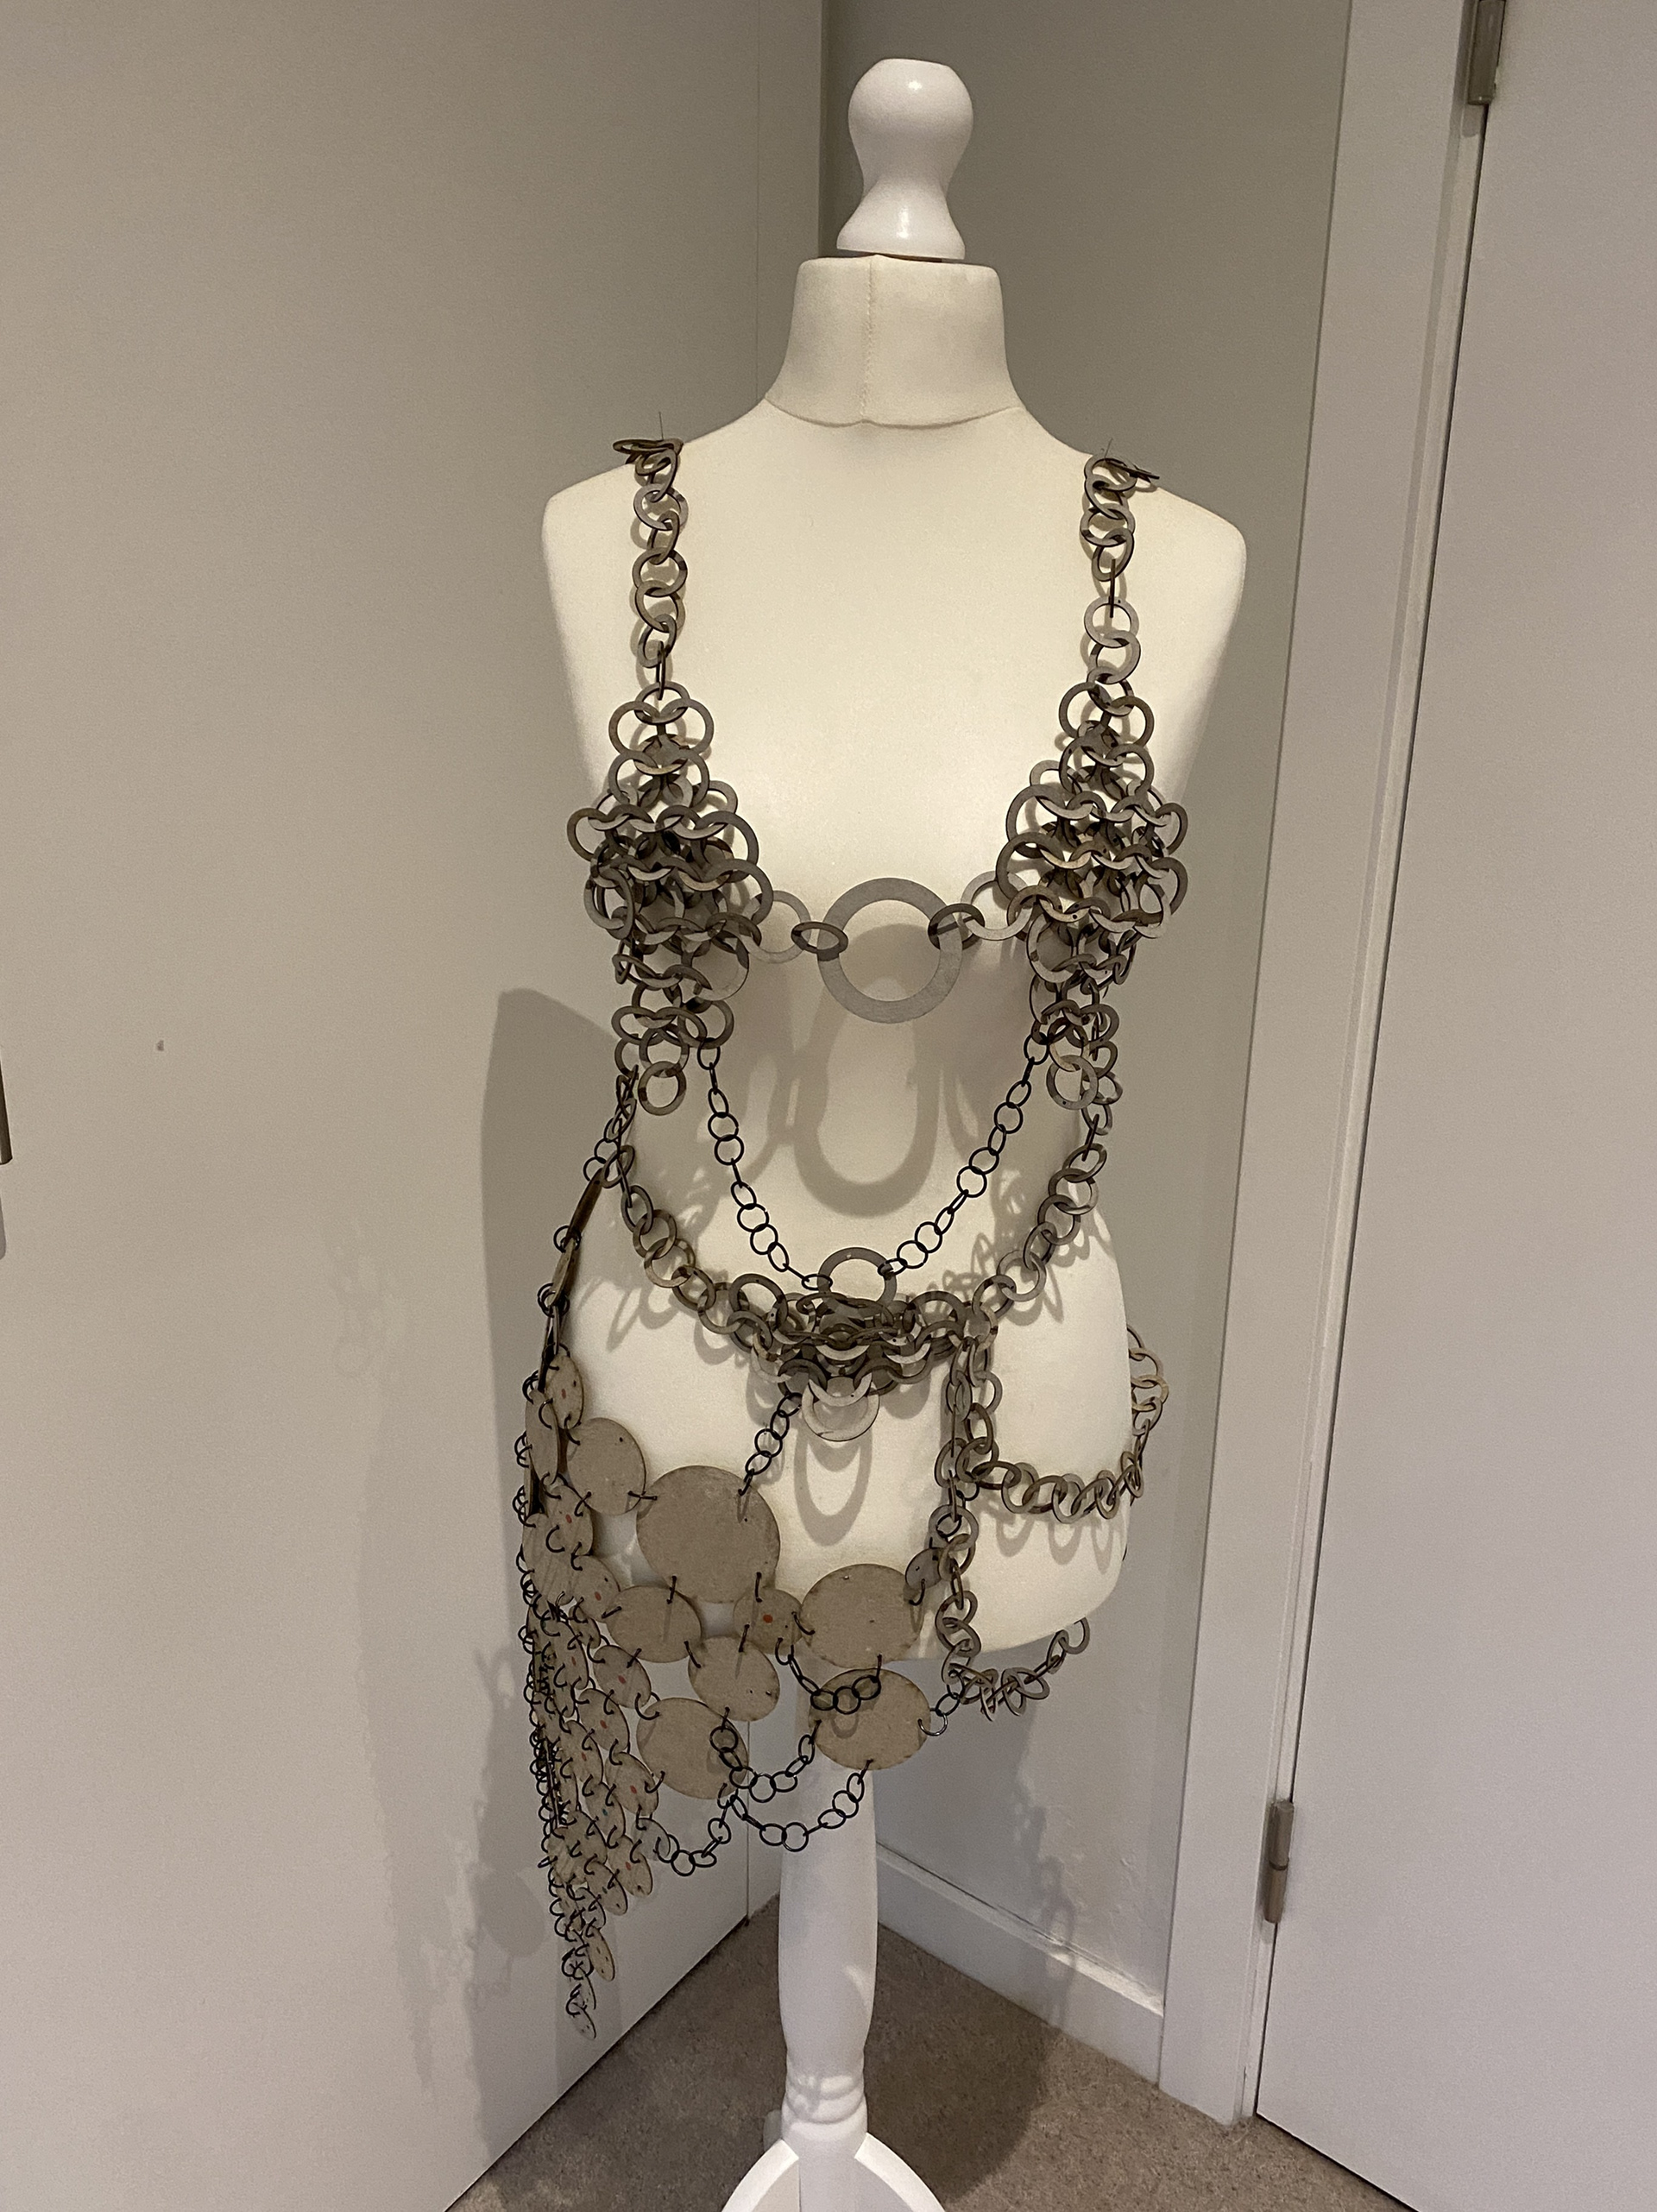

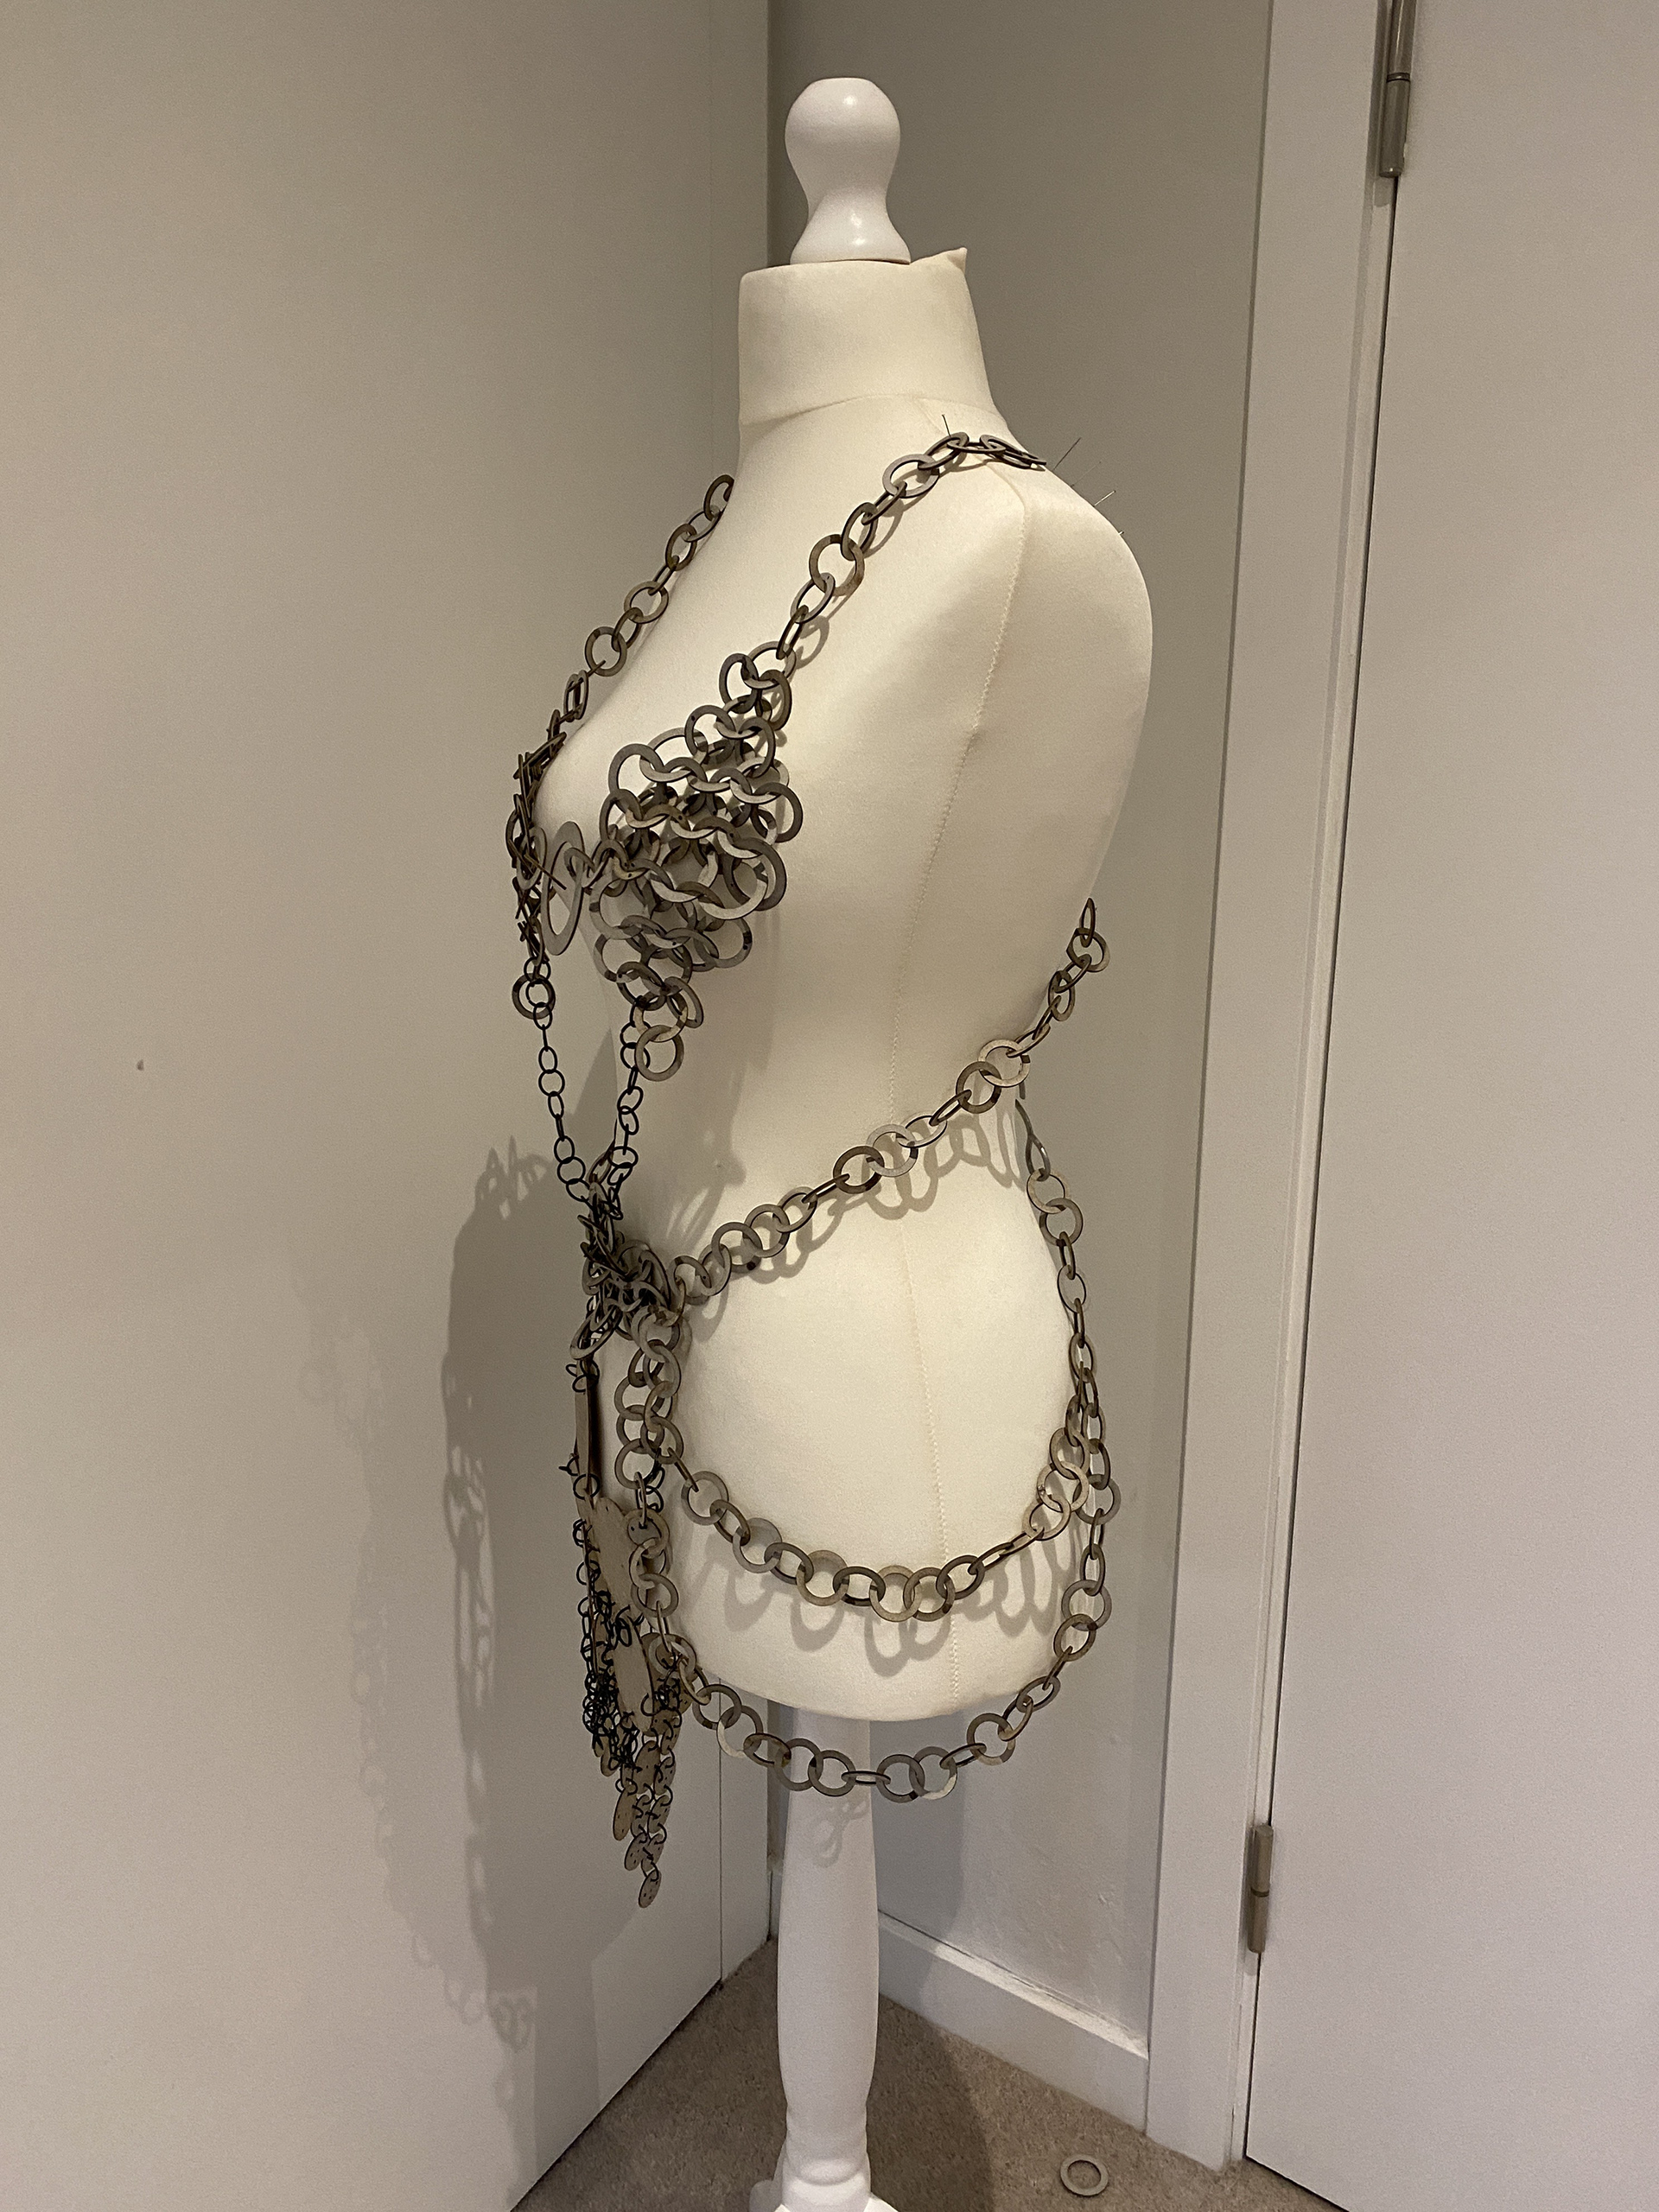
VIL gave me some feedback that she would prefer some more coverage around the crotch area. I did this by pulling the larger plates across the body from the skirt and added in smaller lengths of chain to smoothen out the taper.
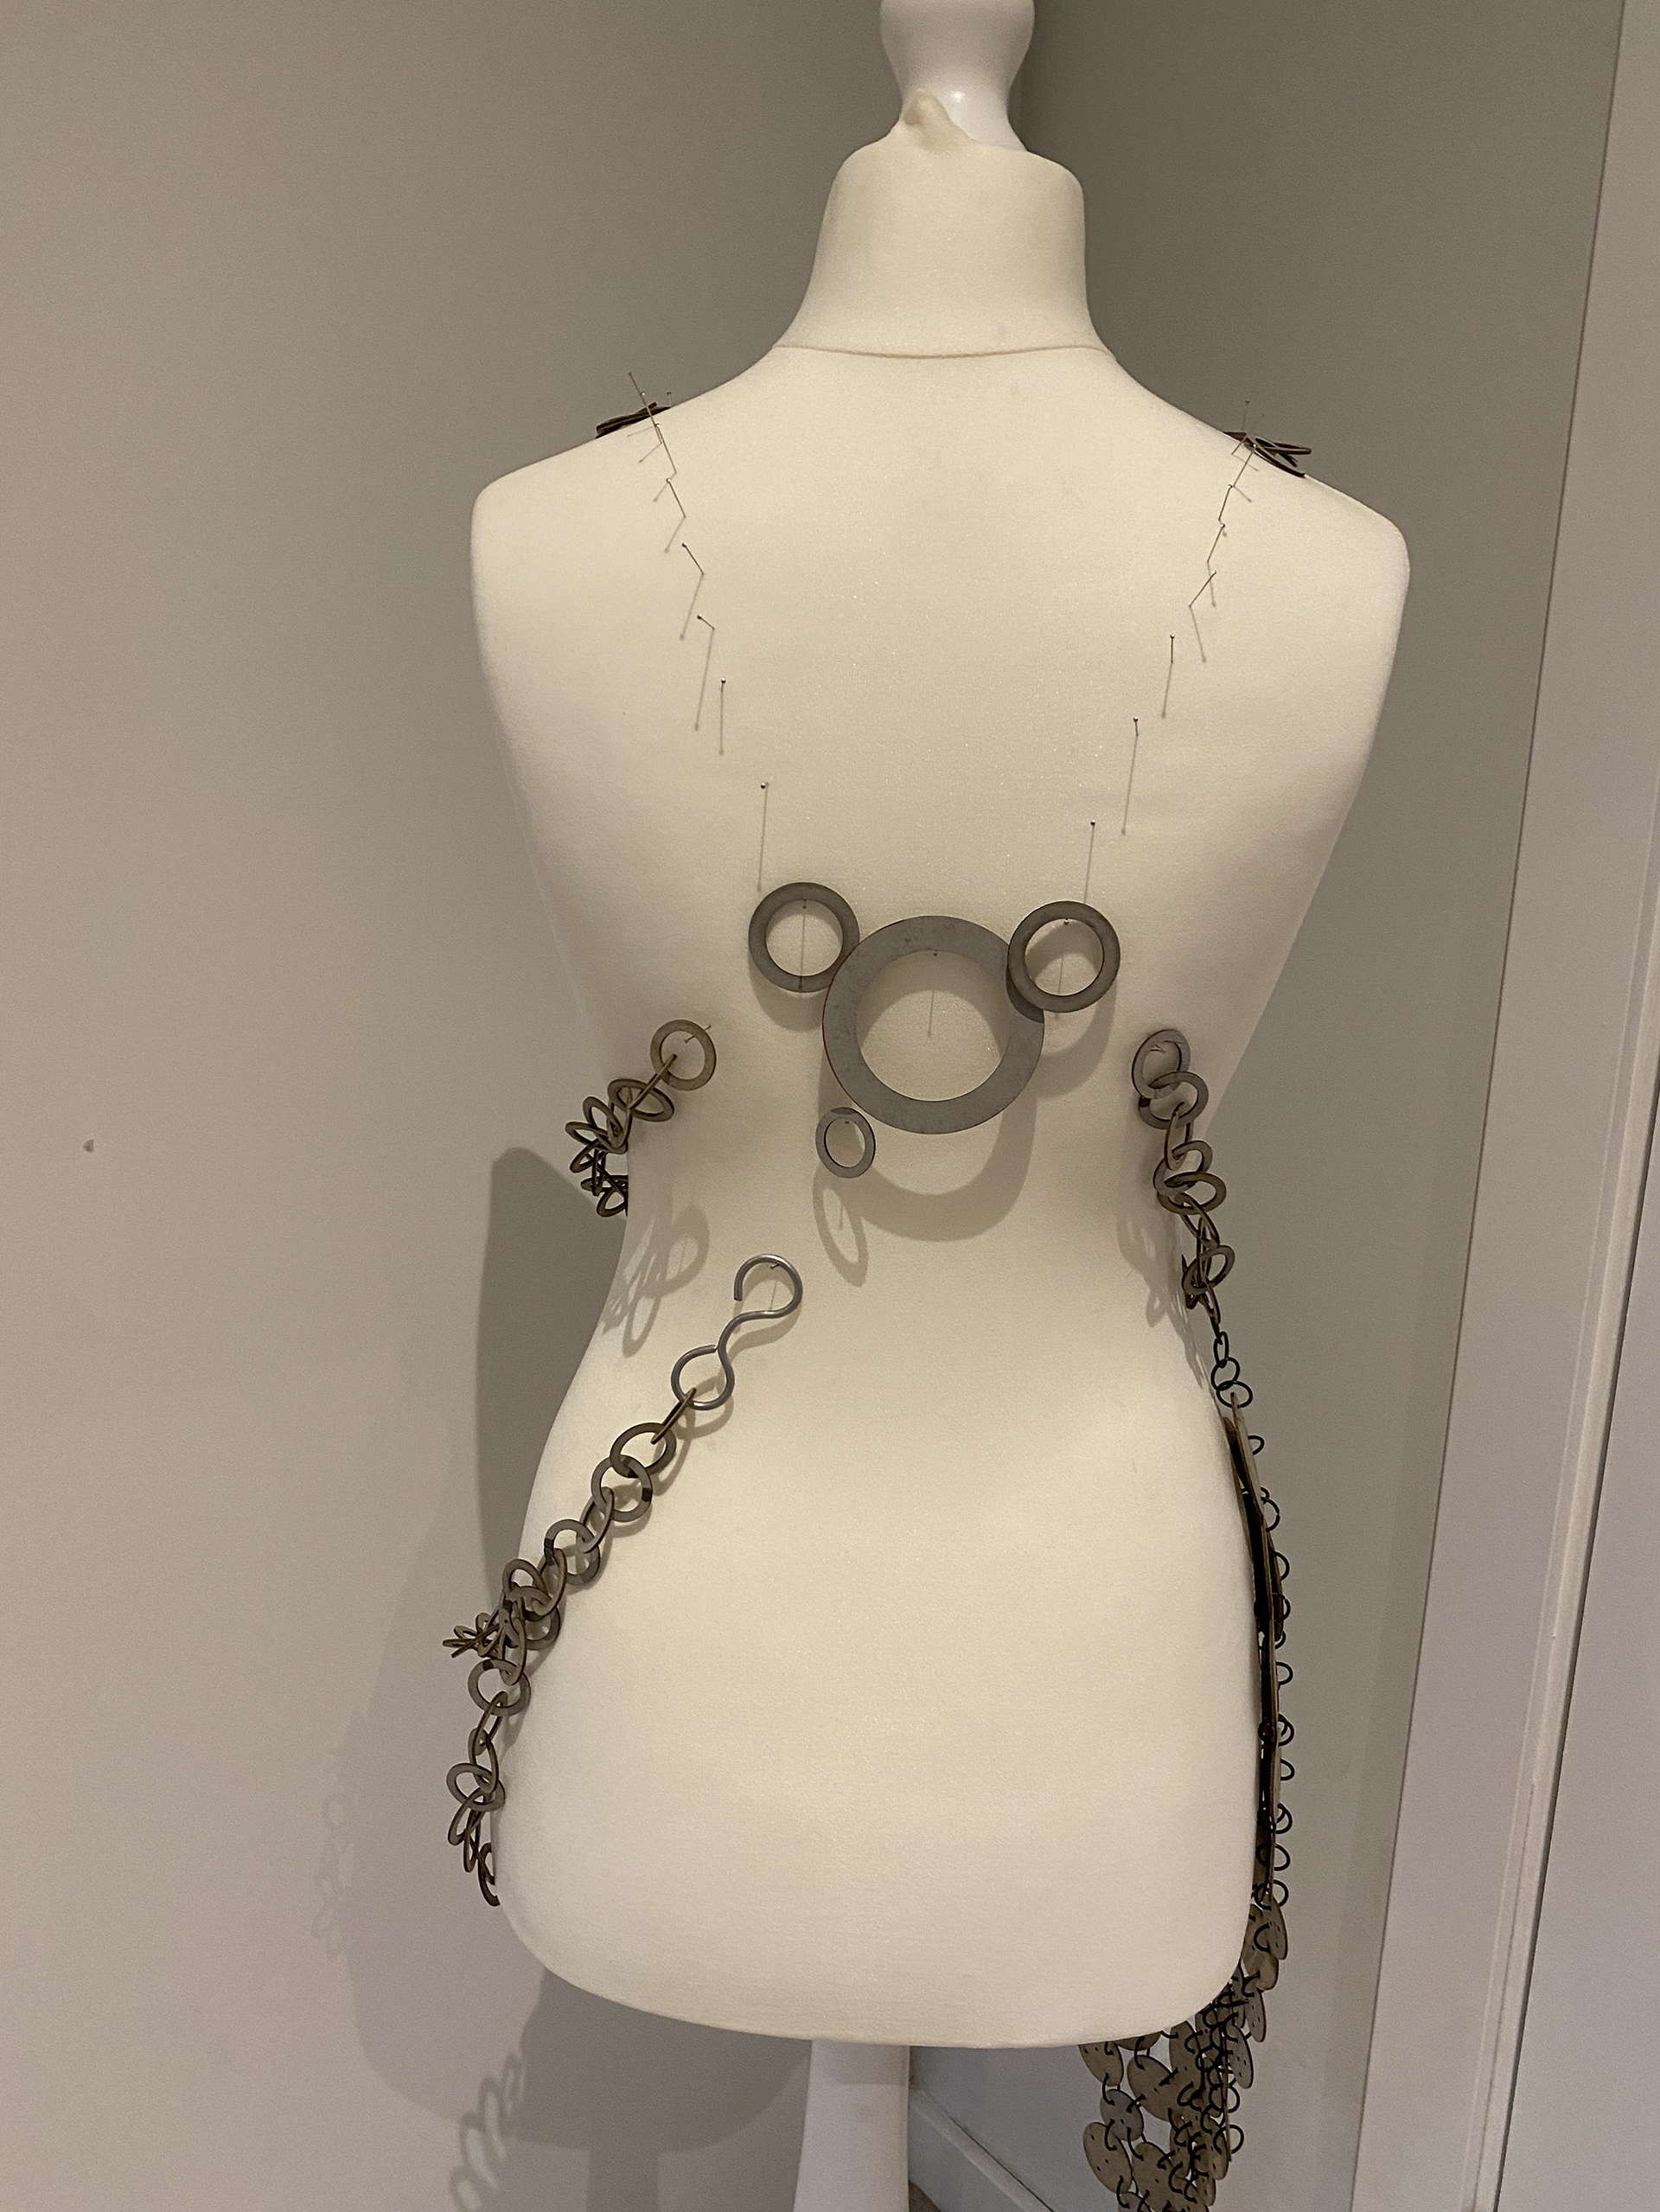


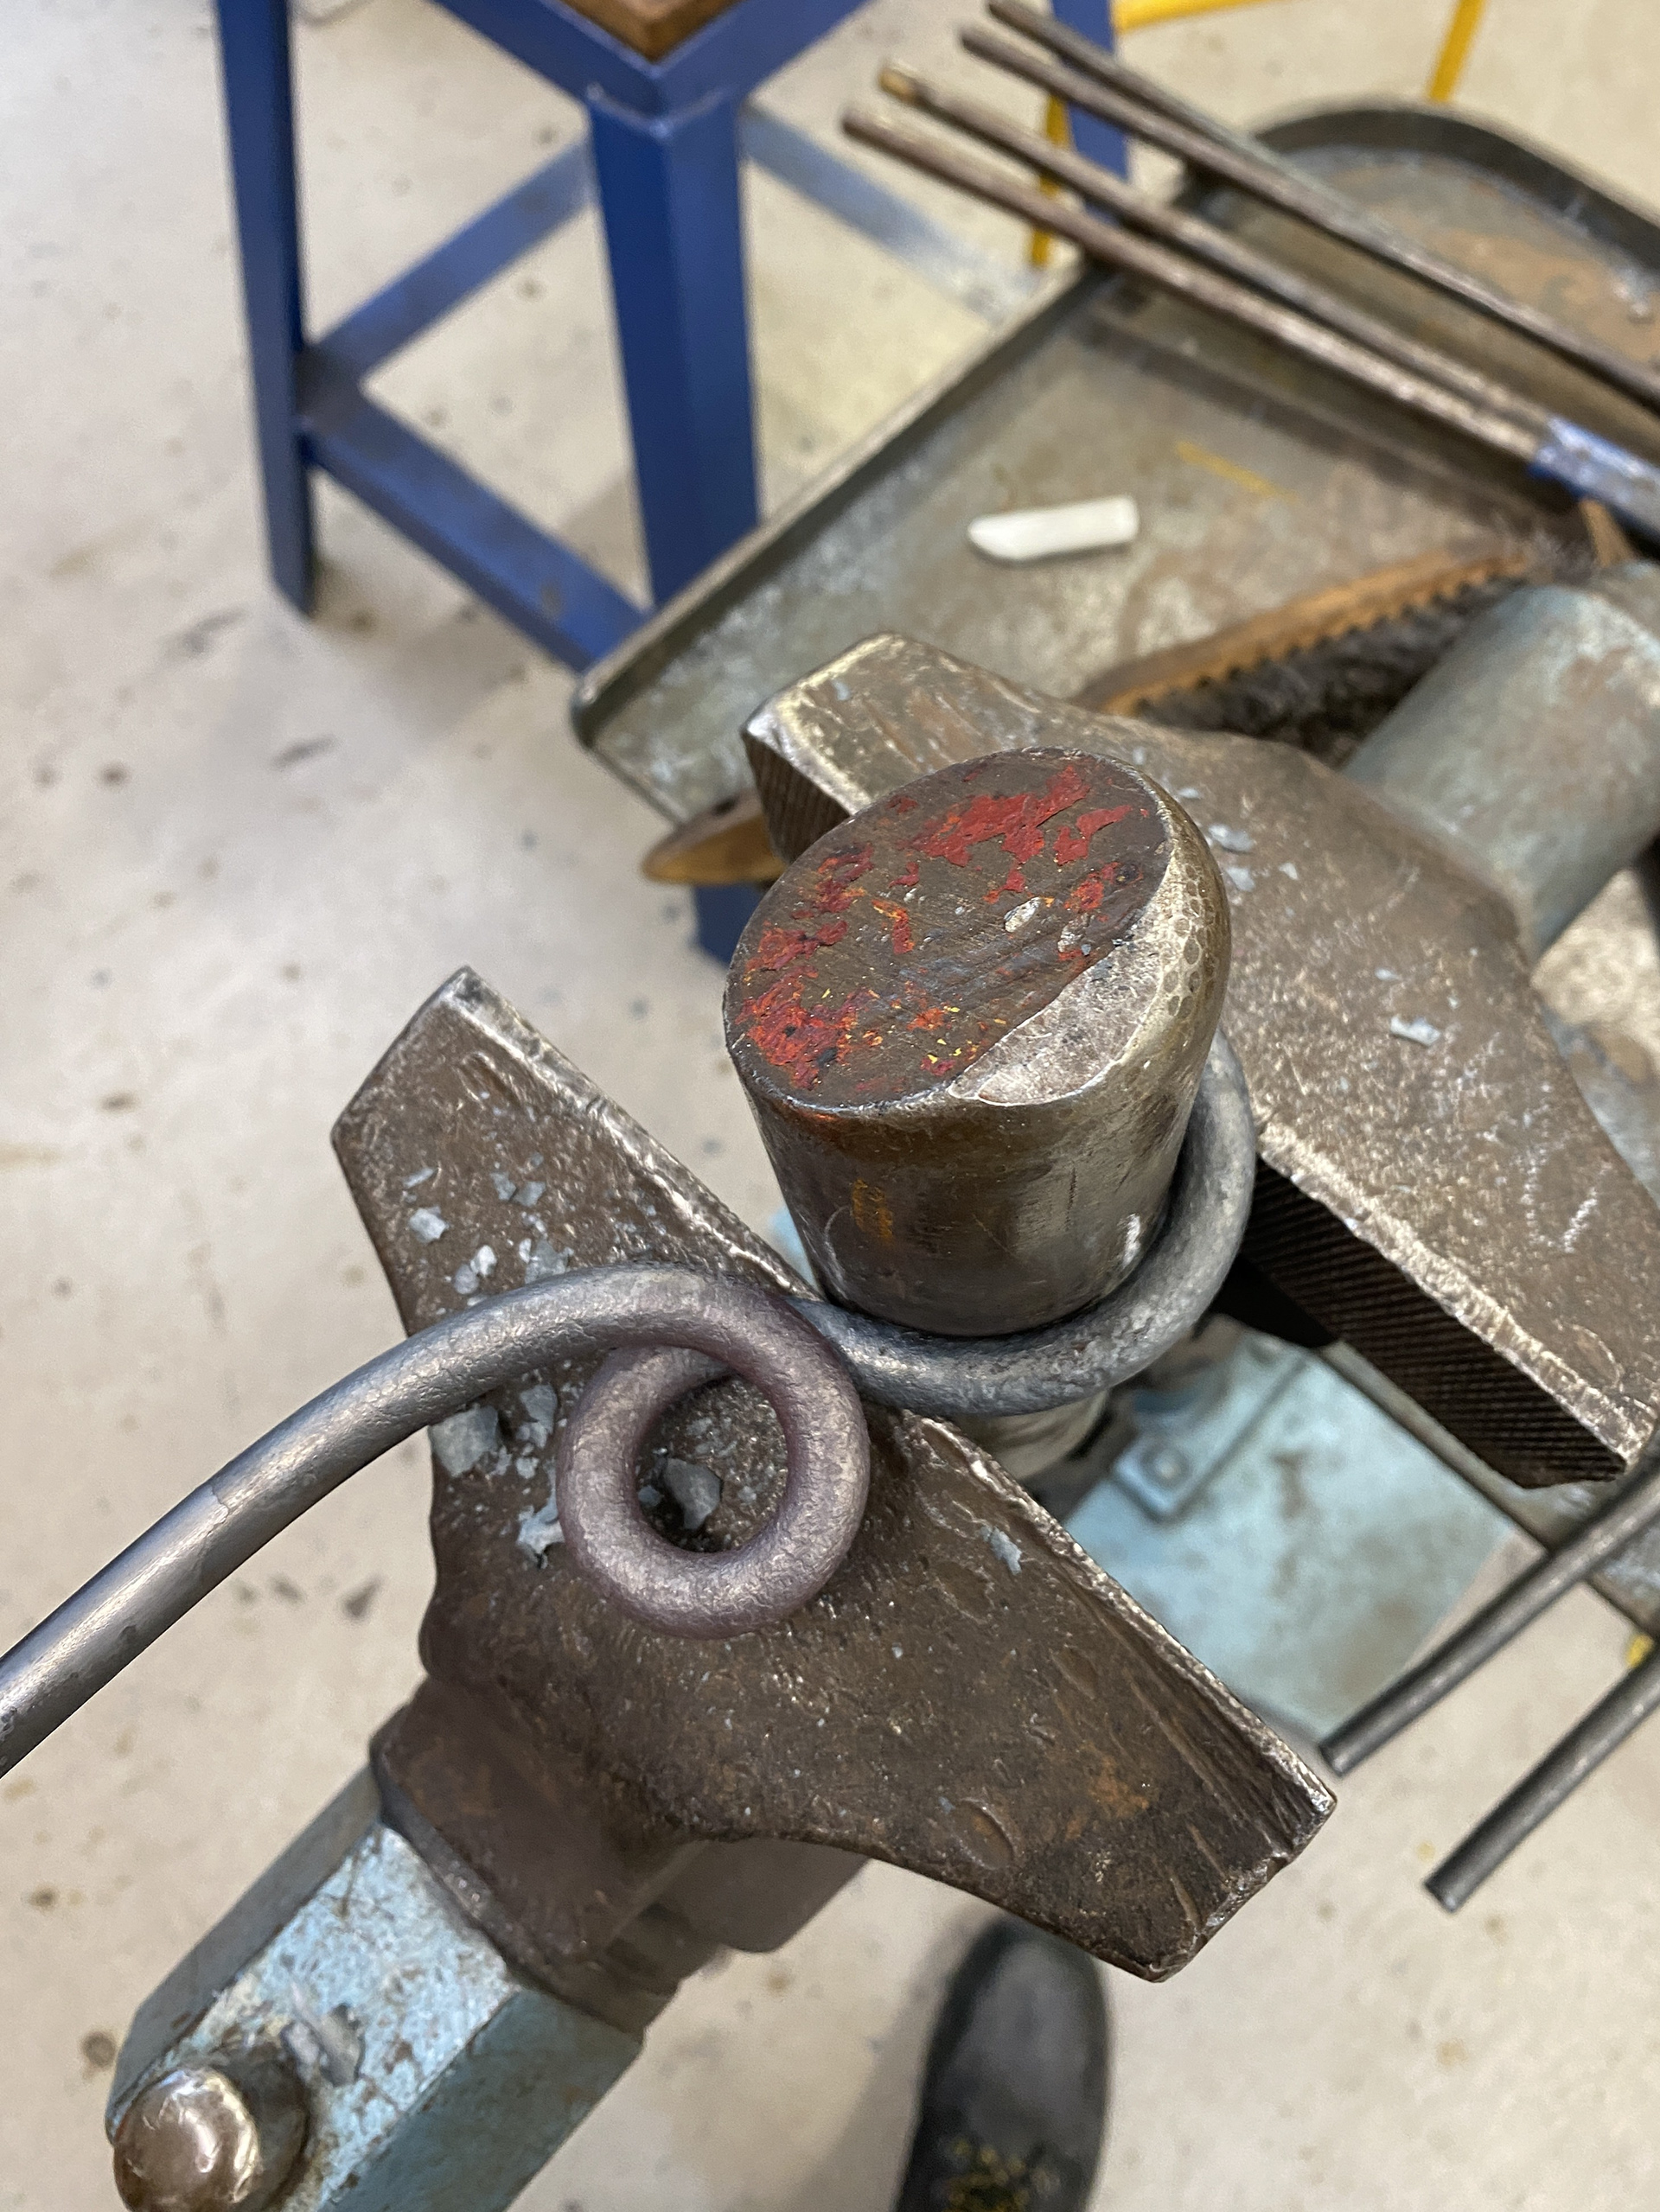
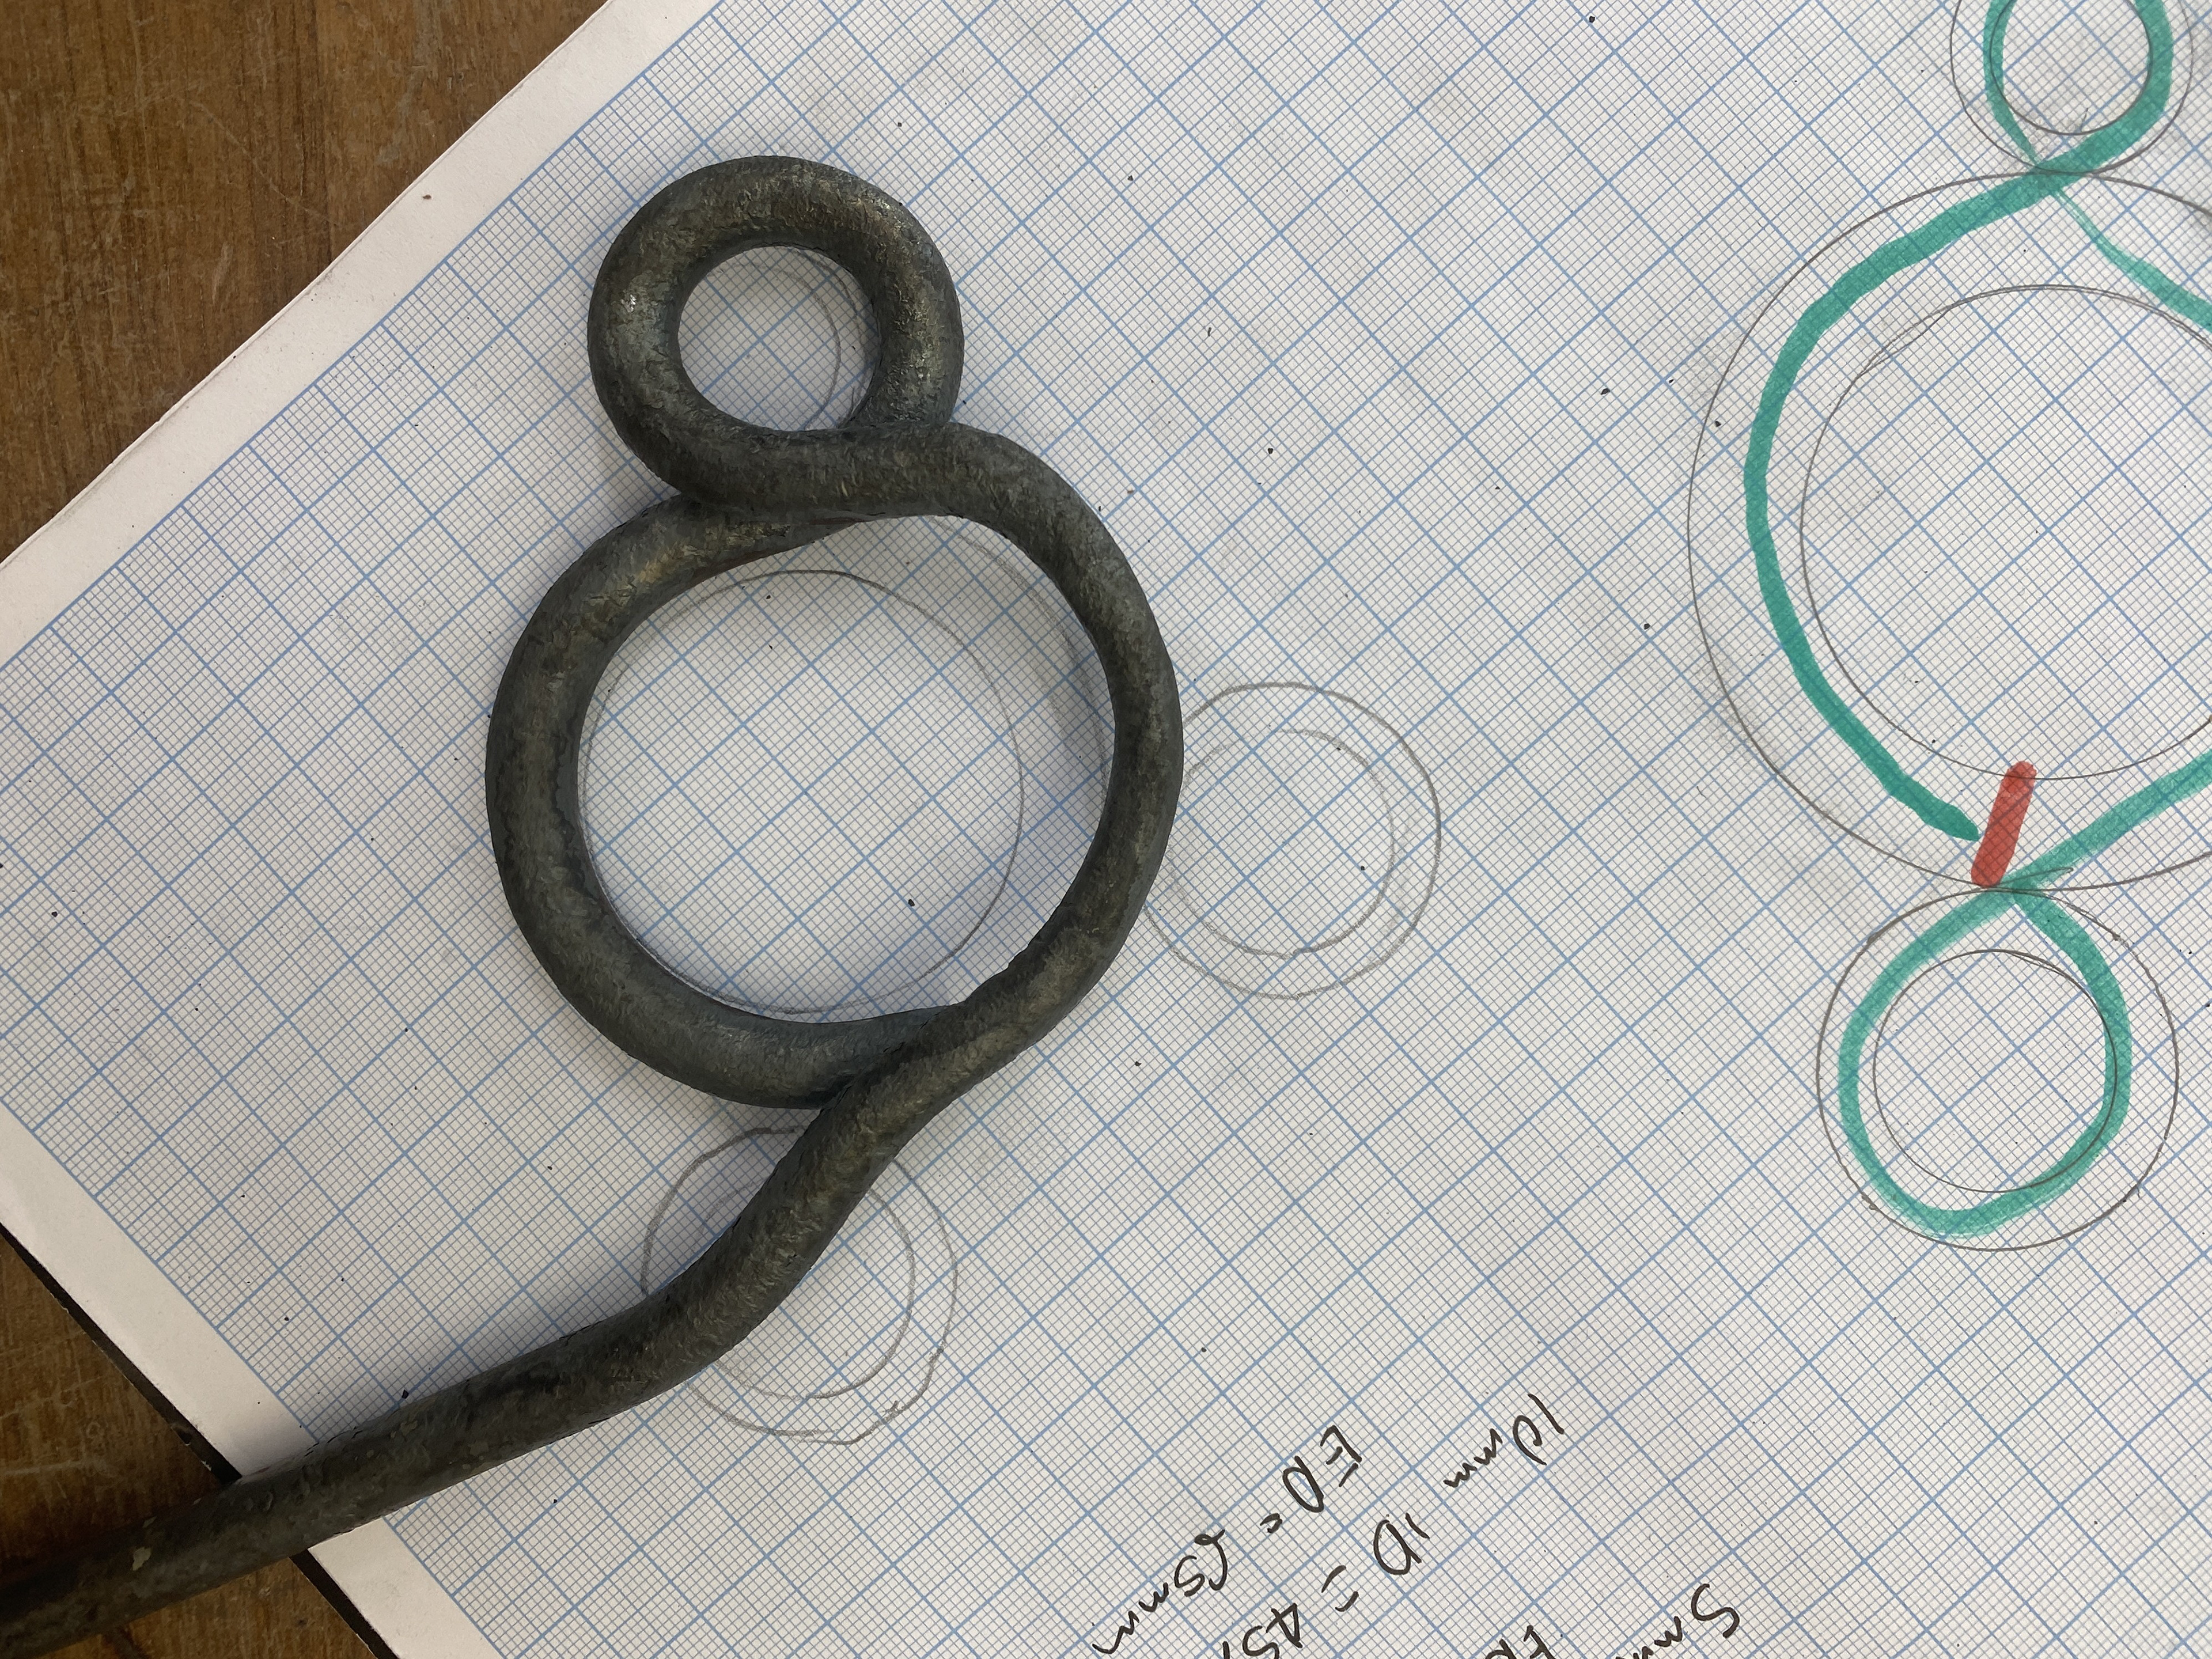
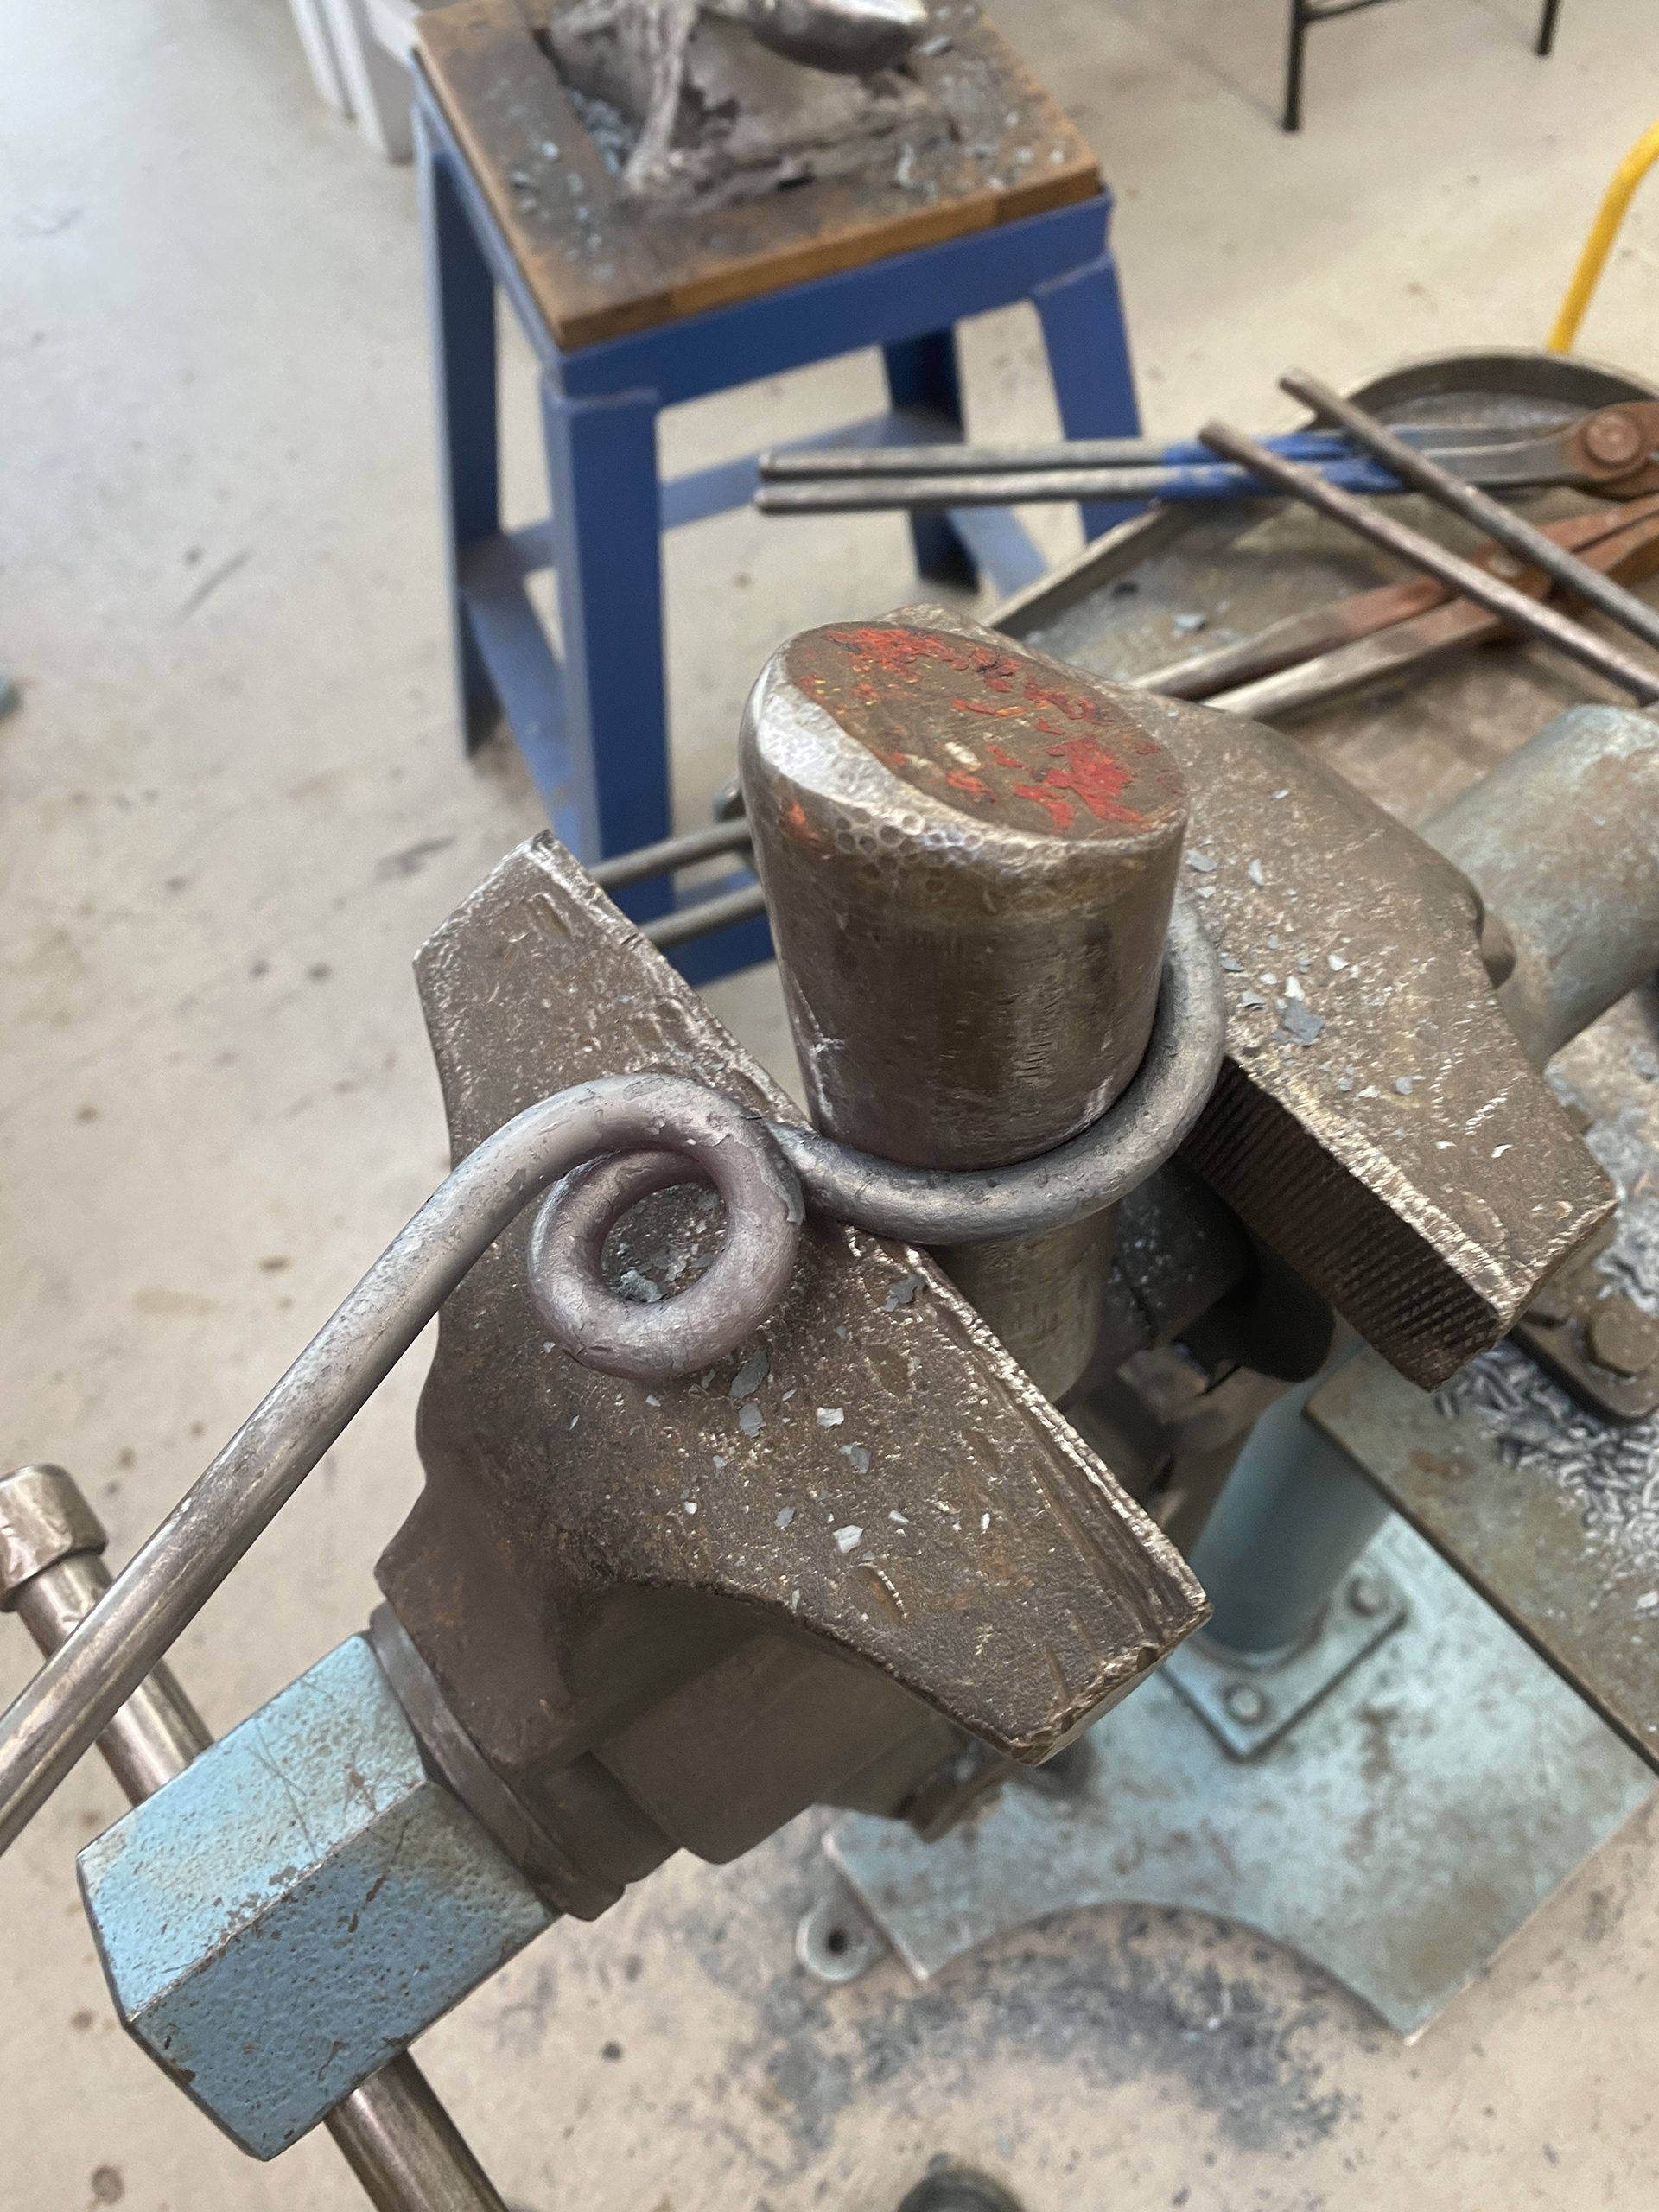
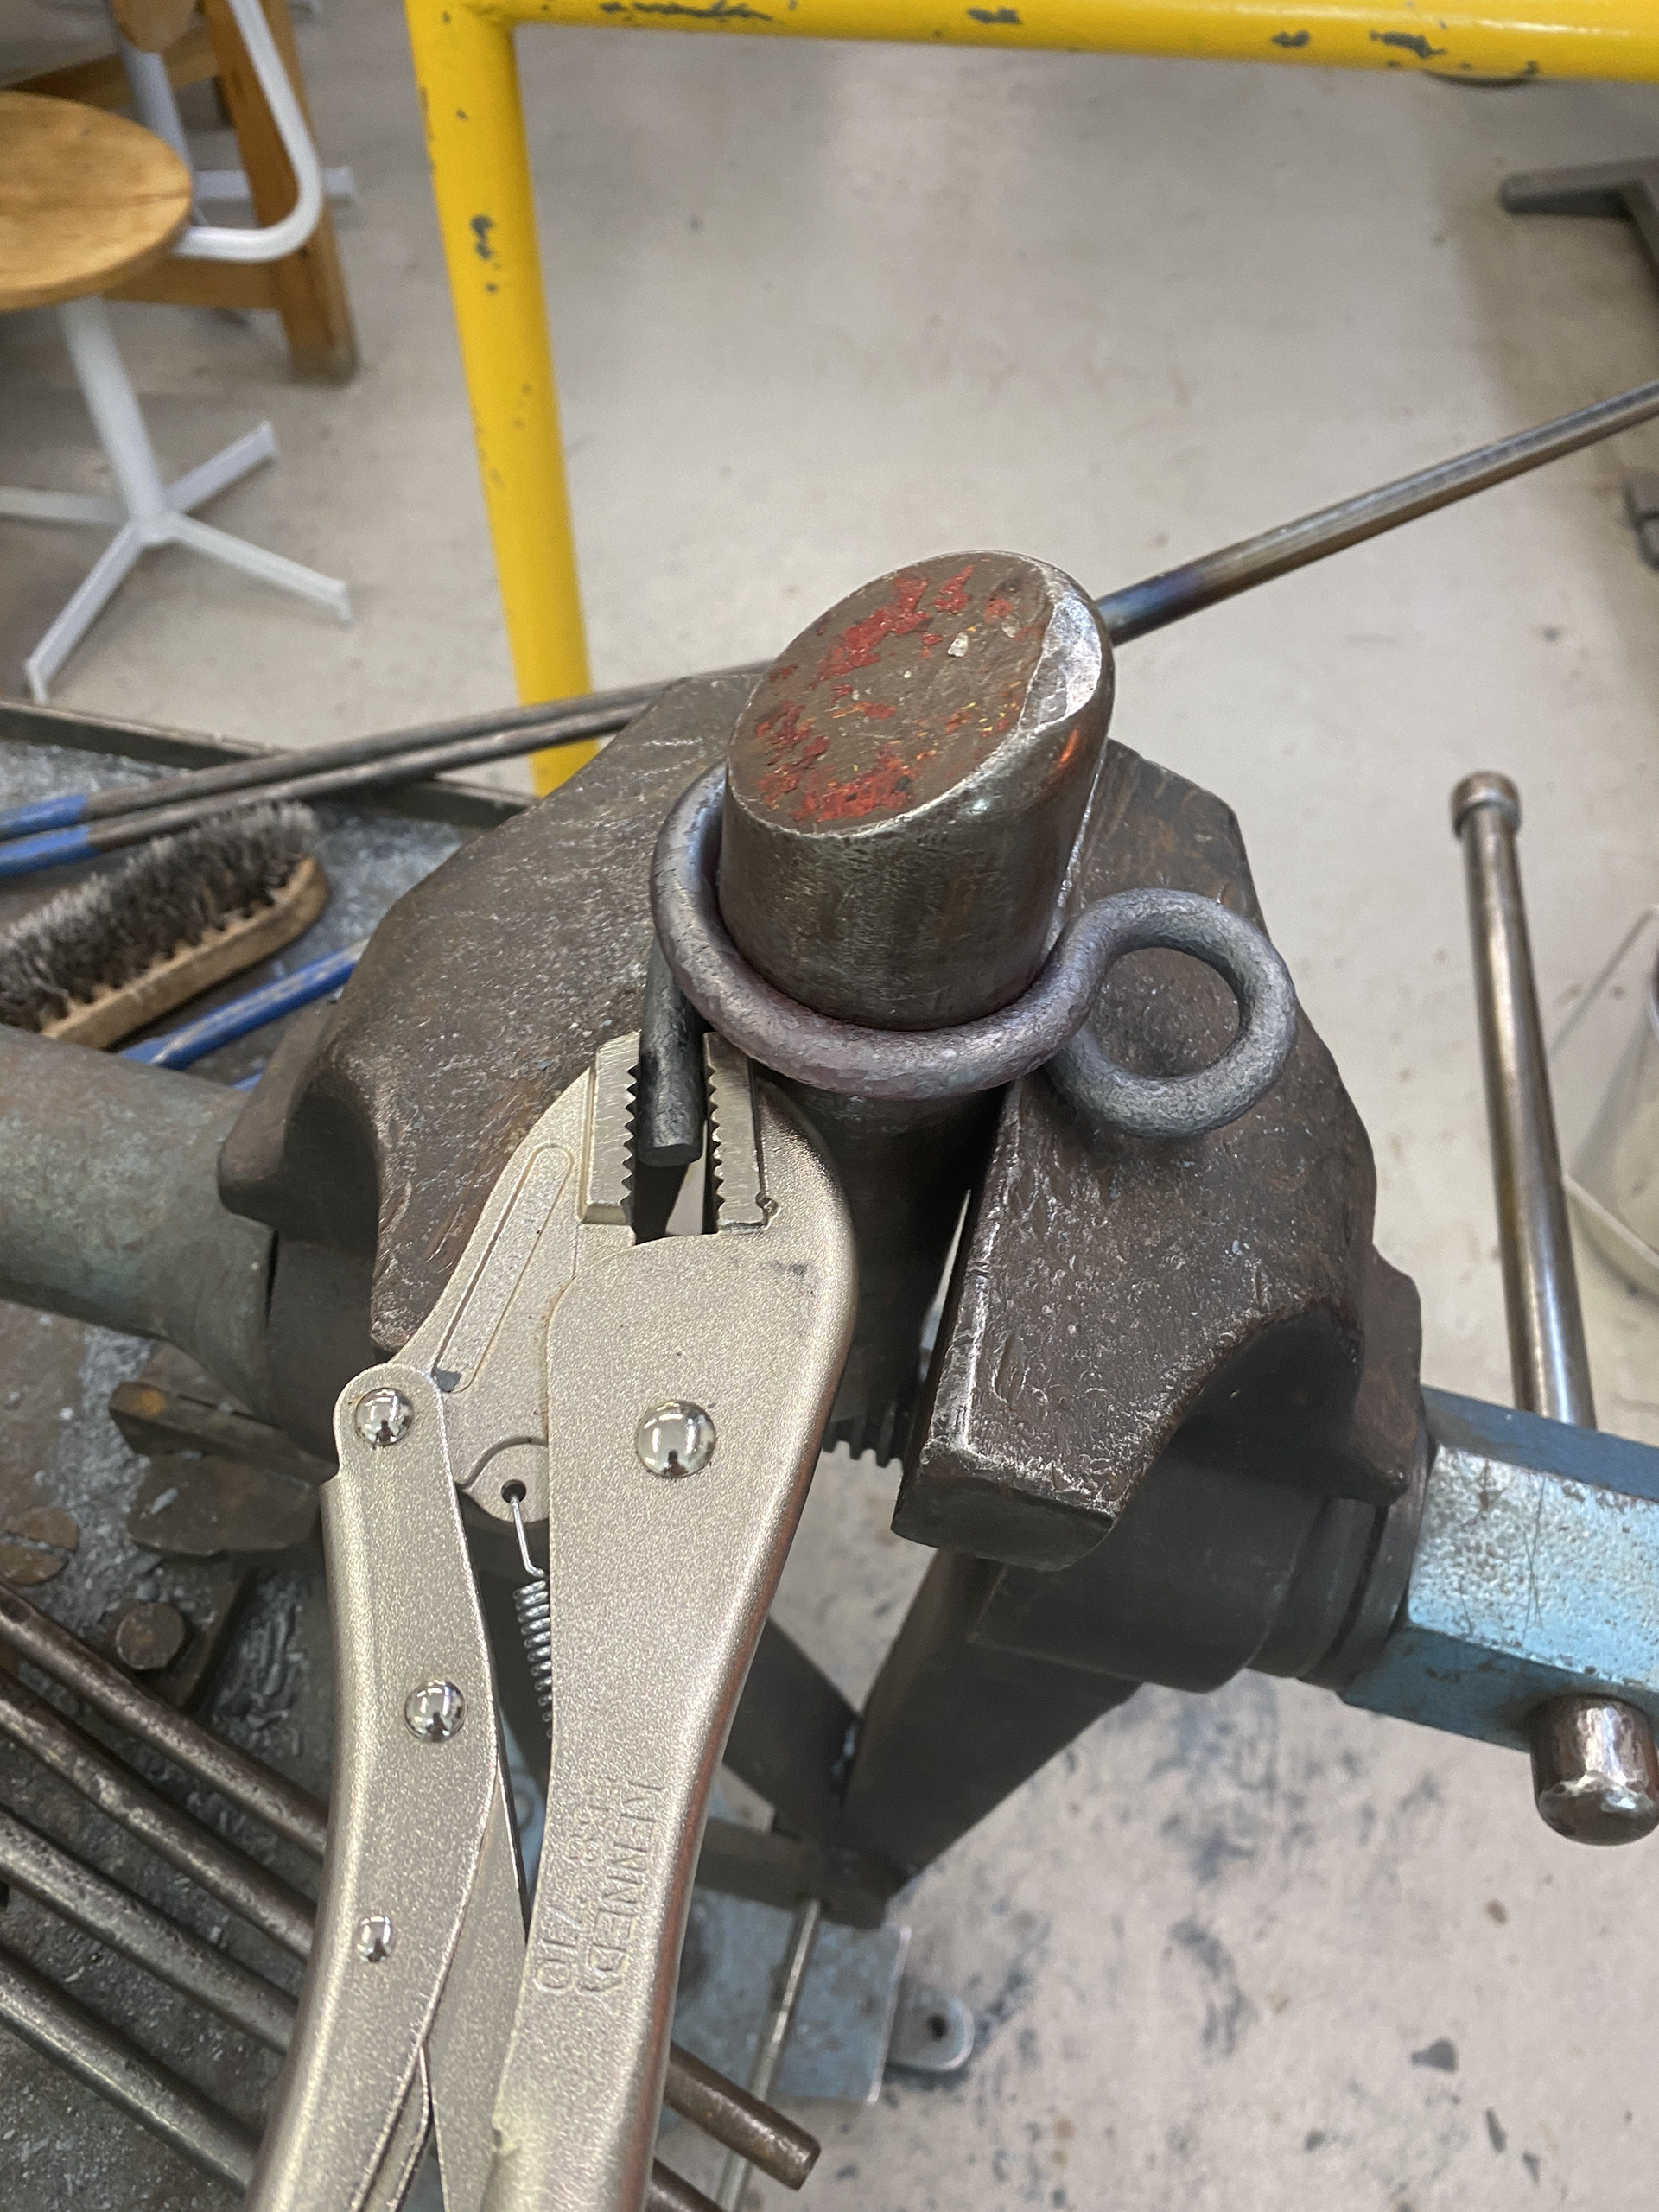
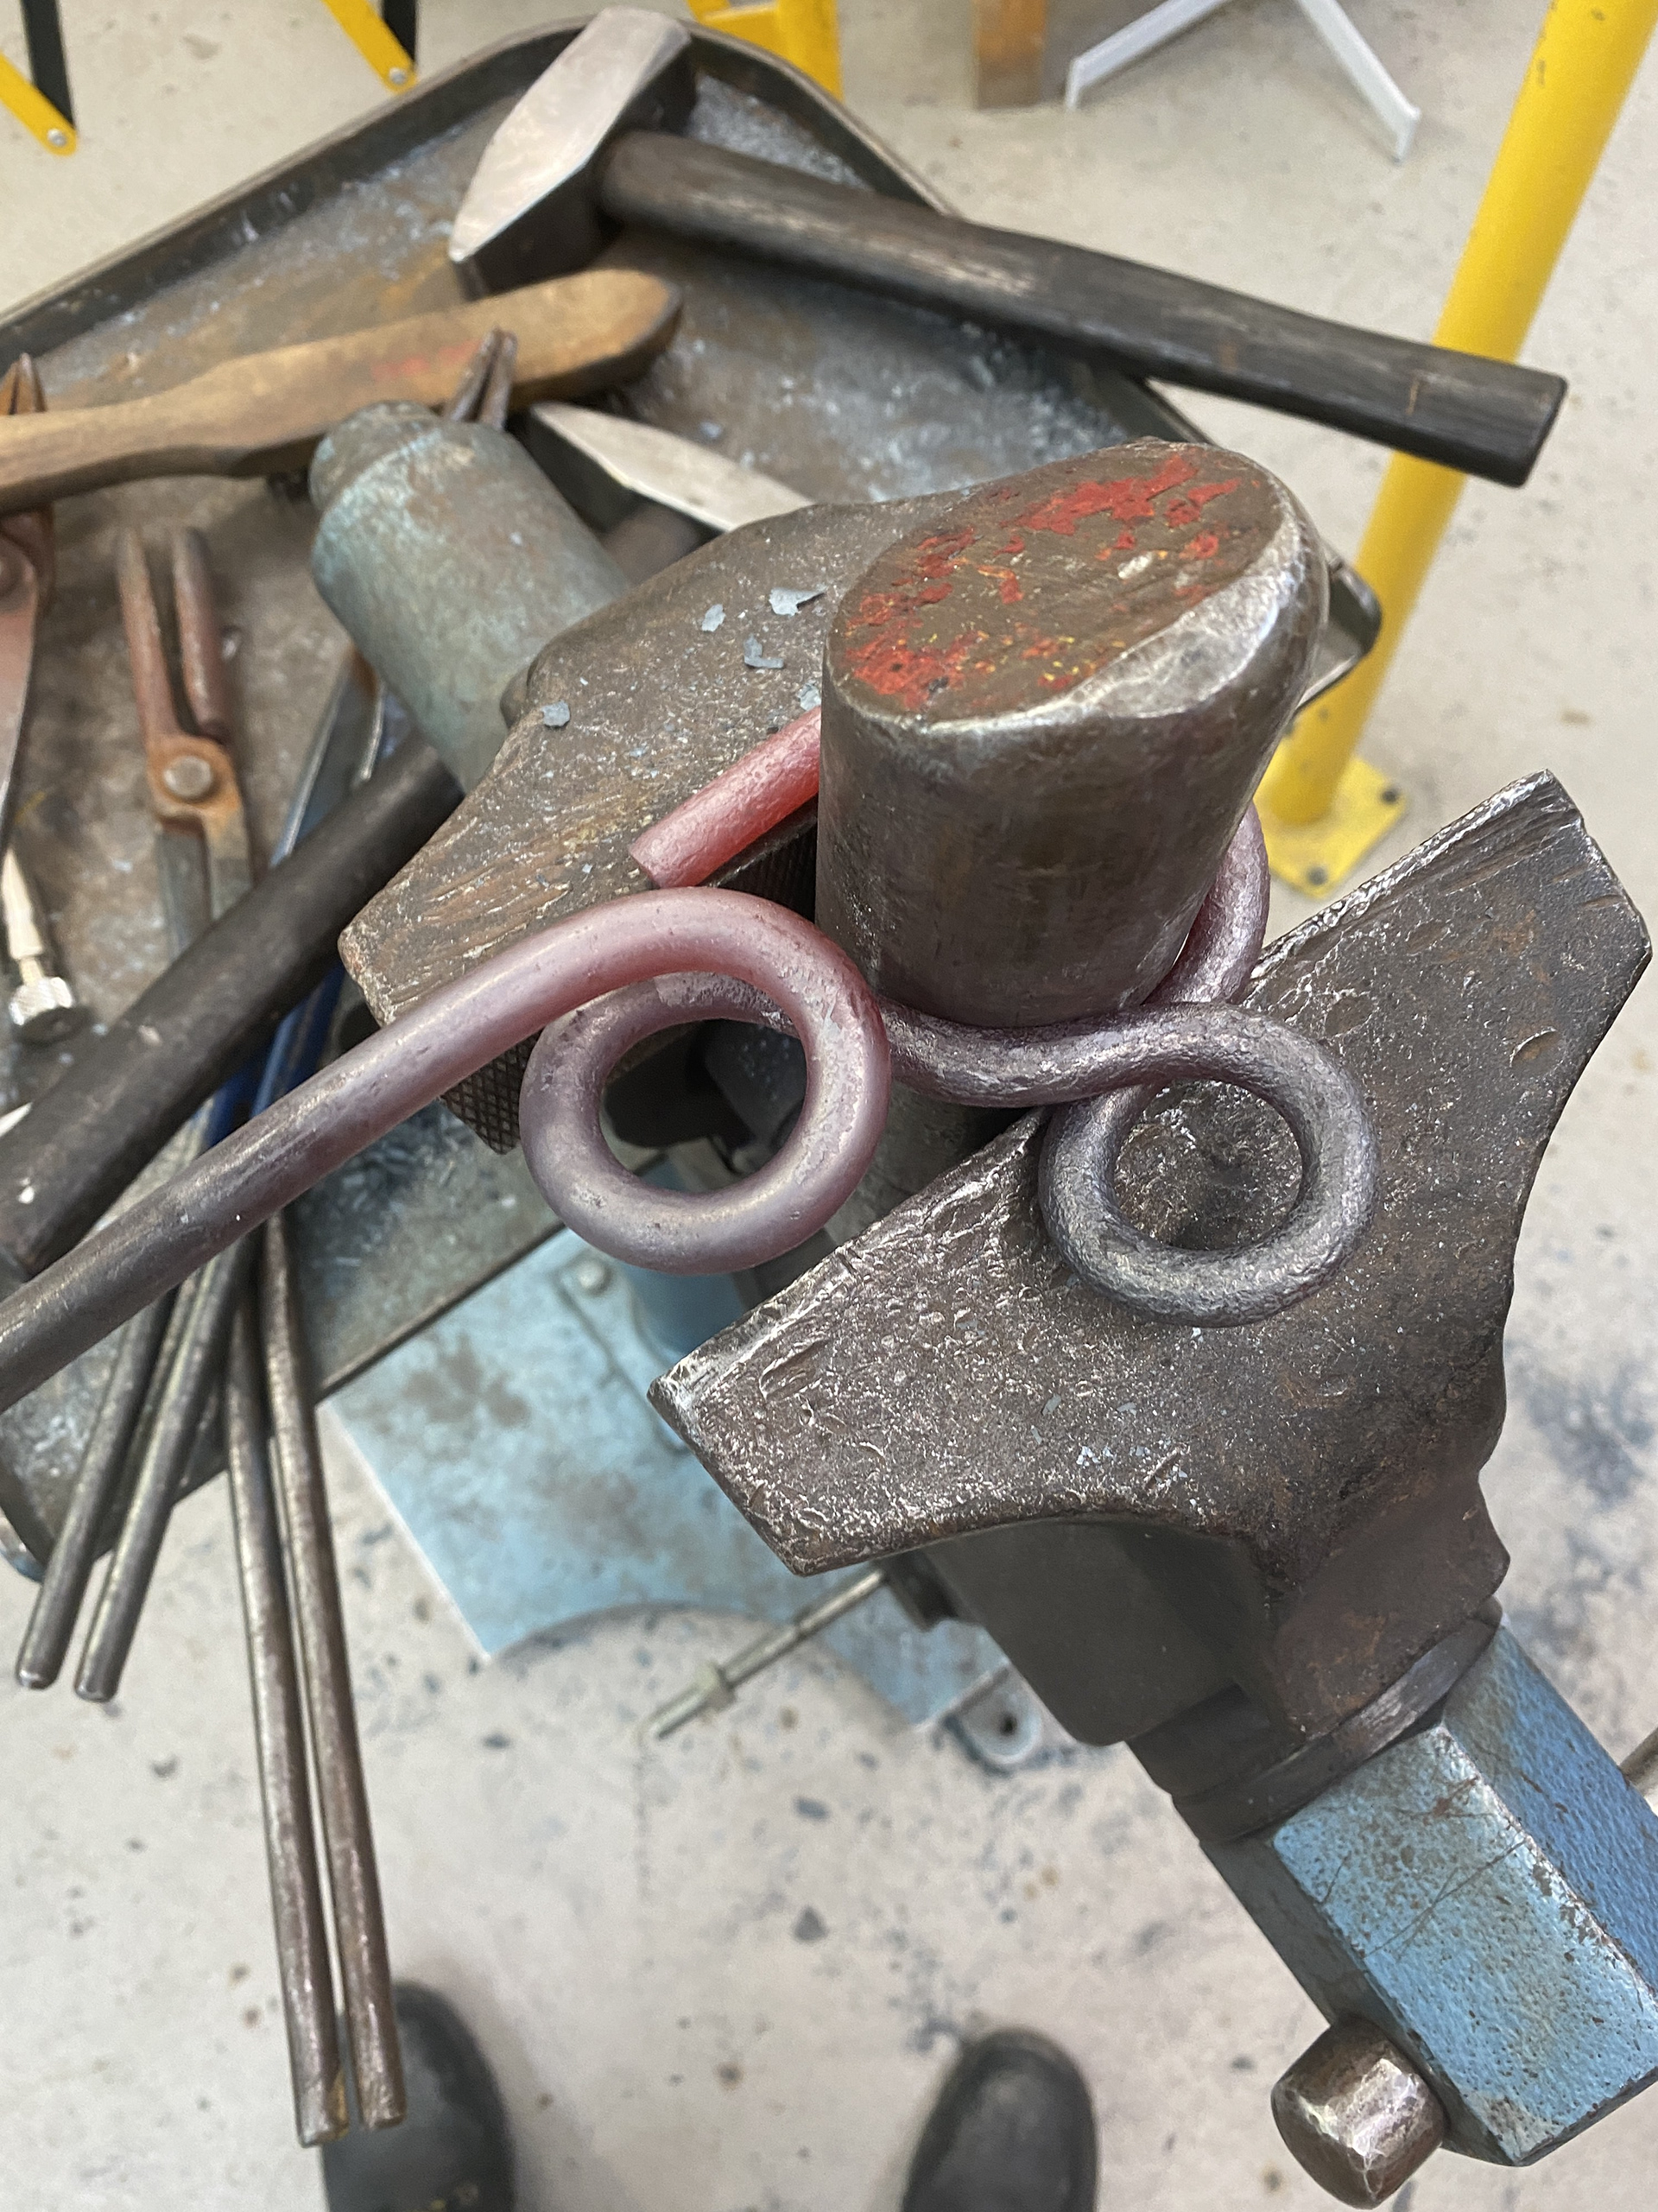
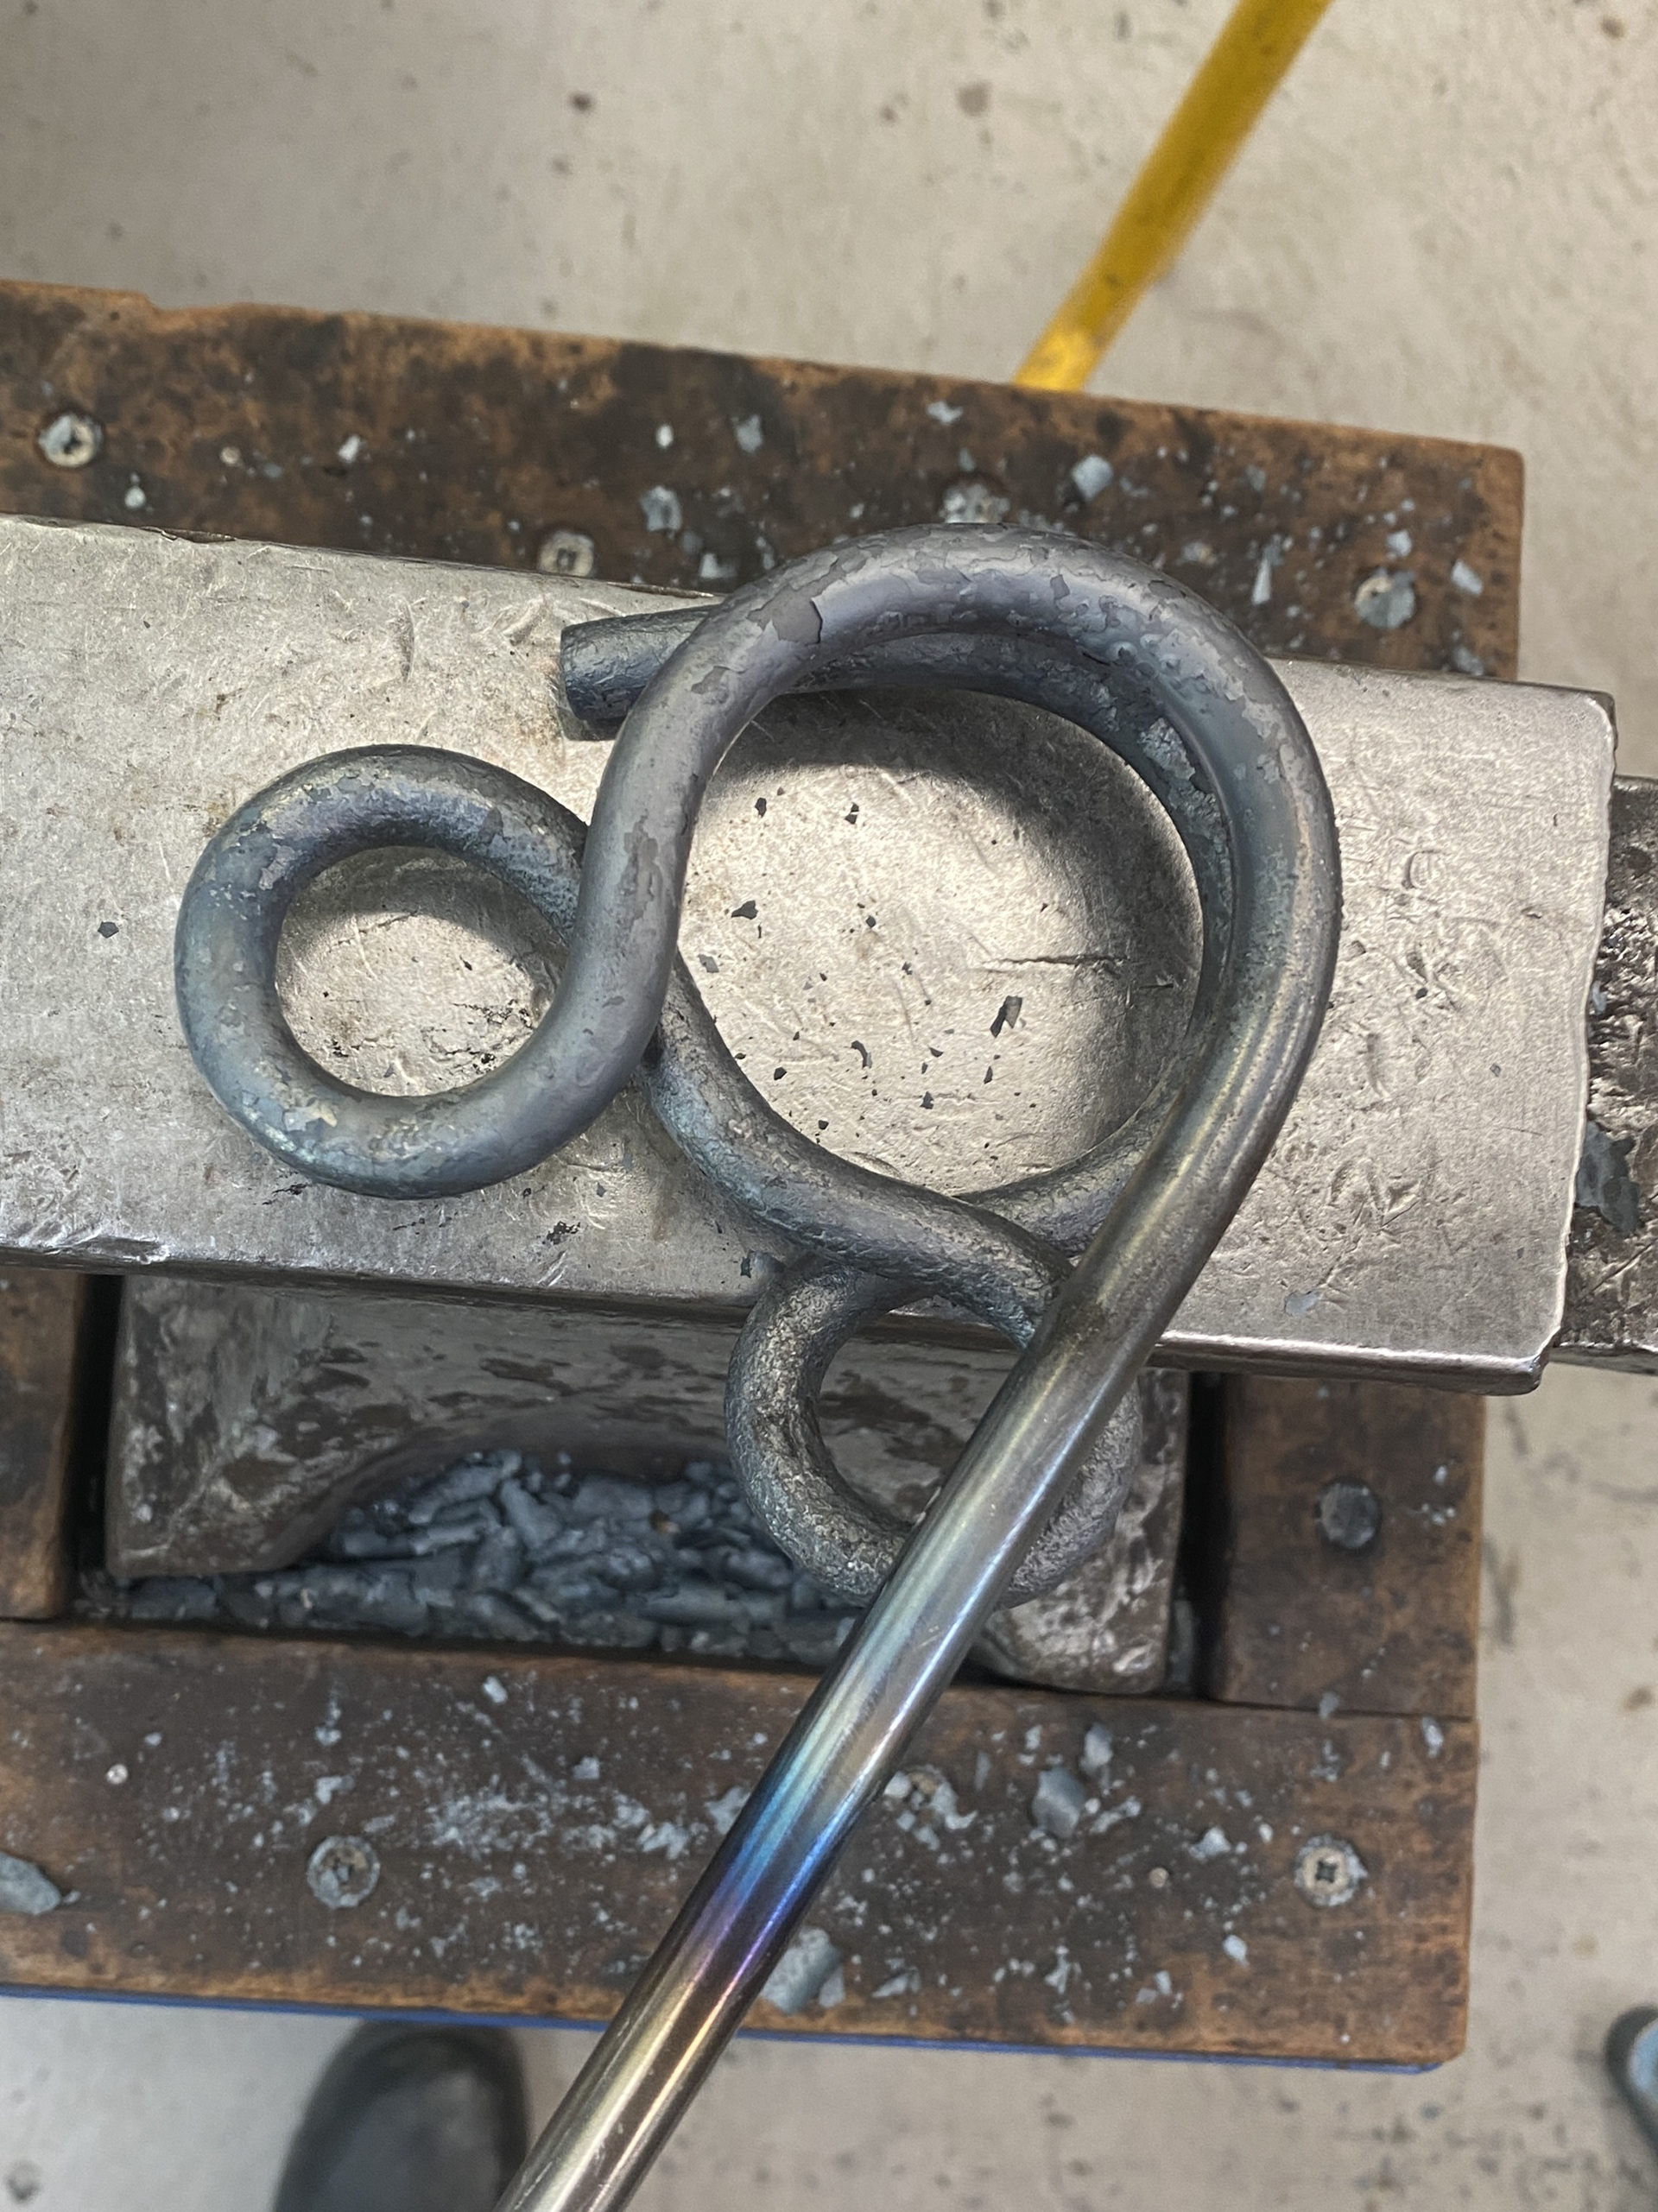
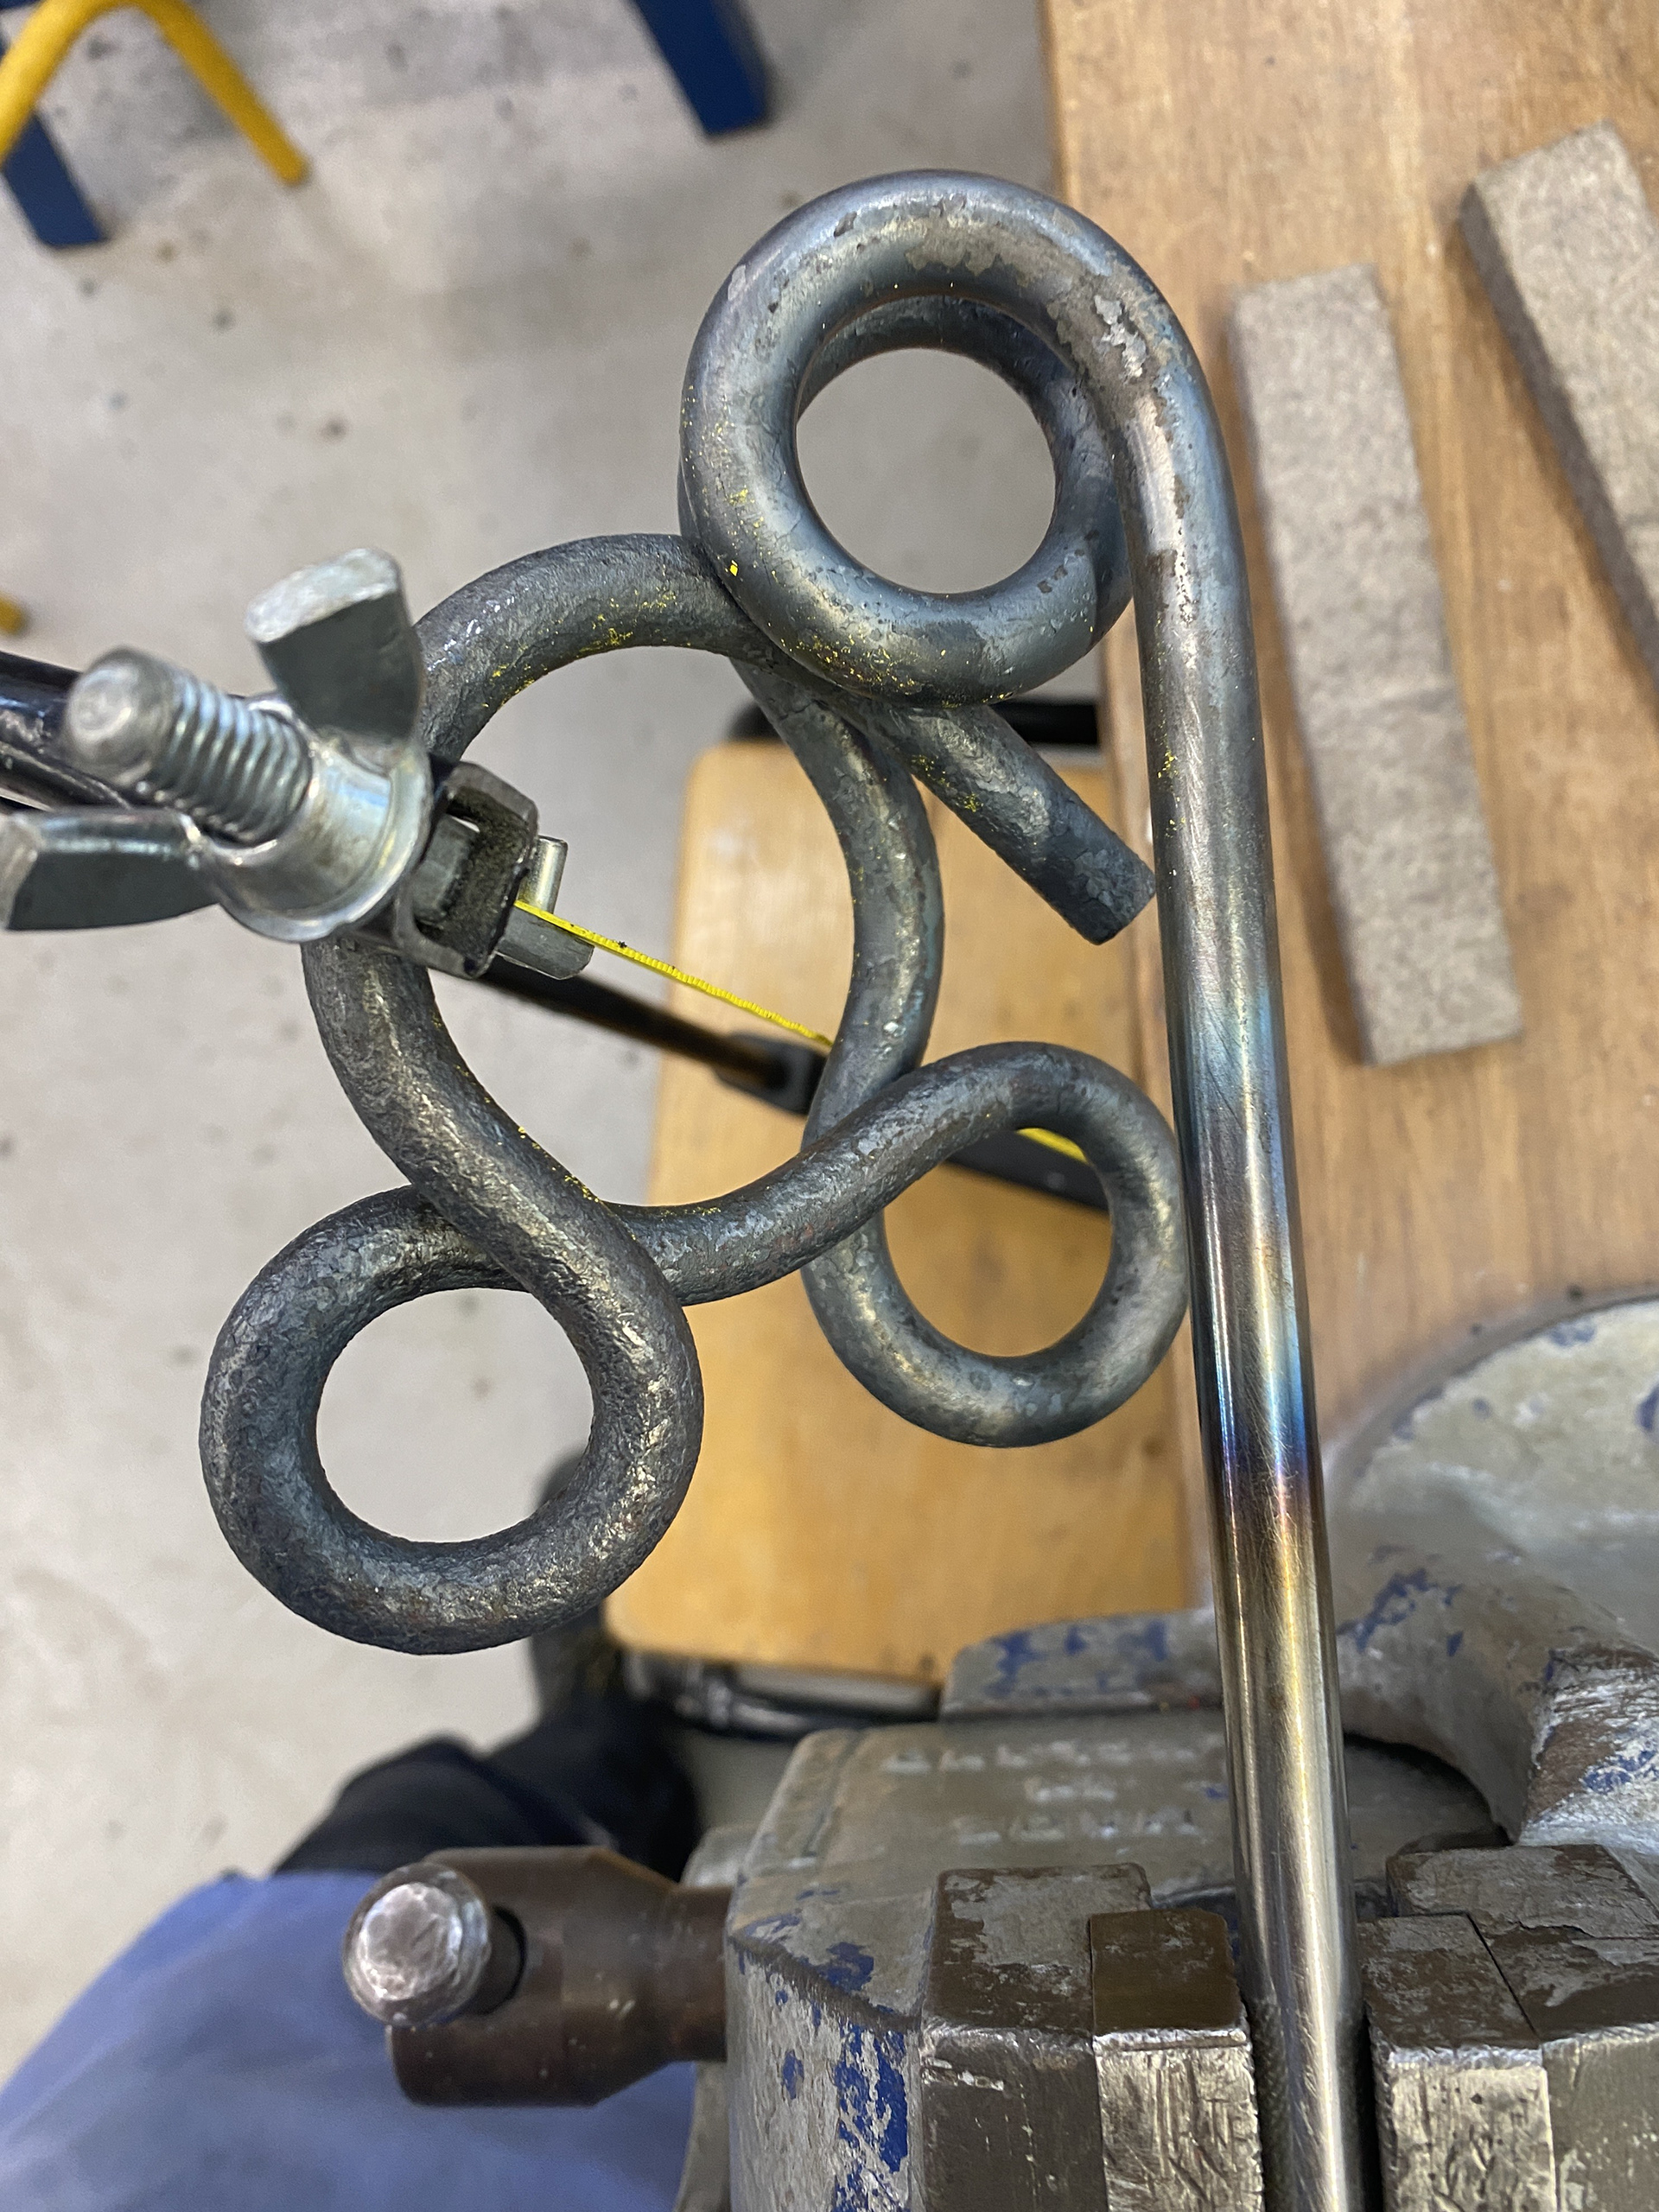
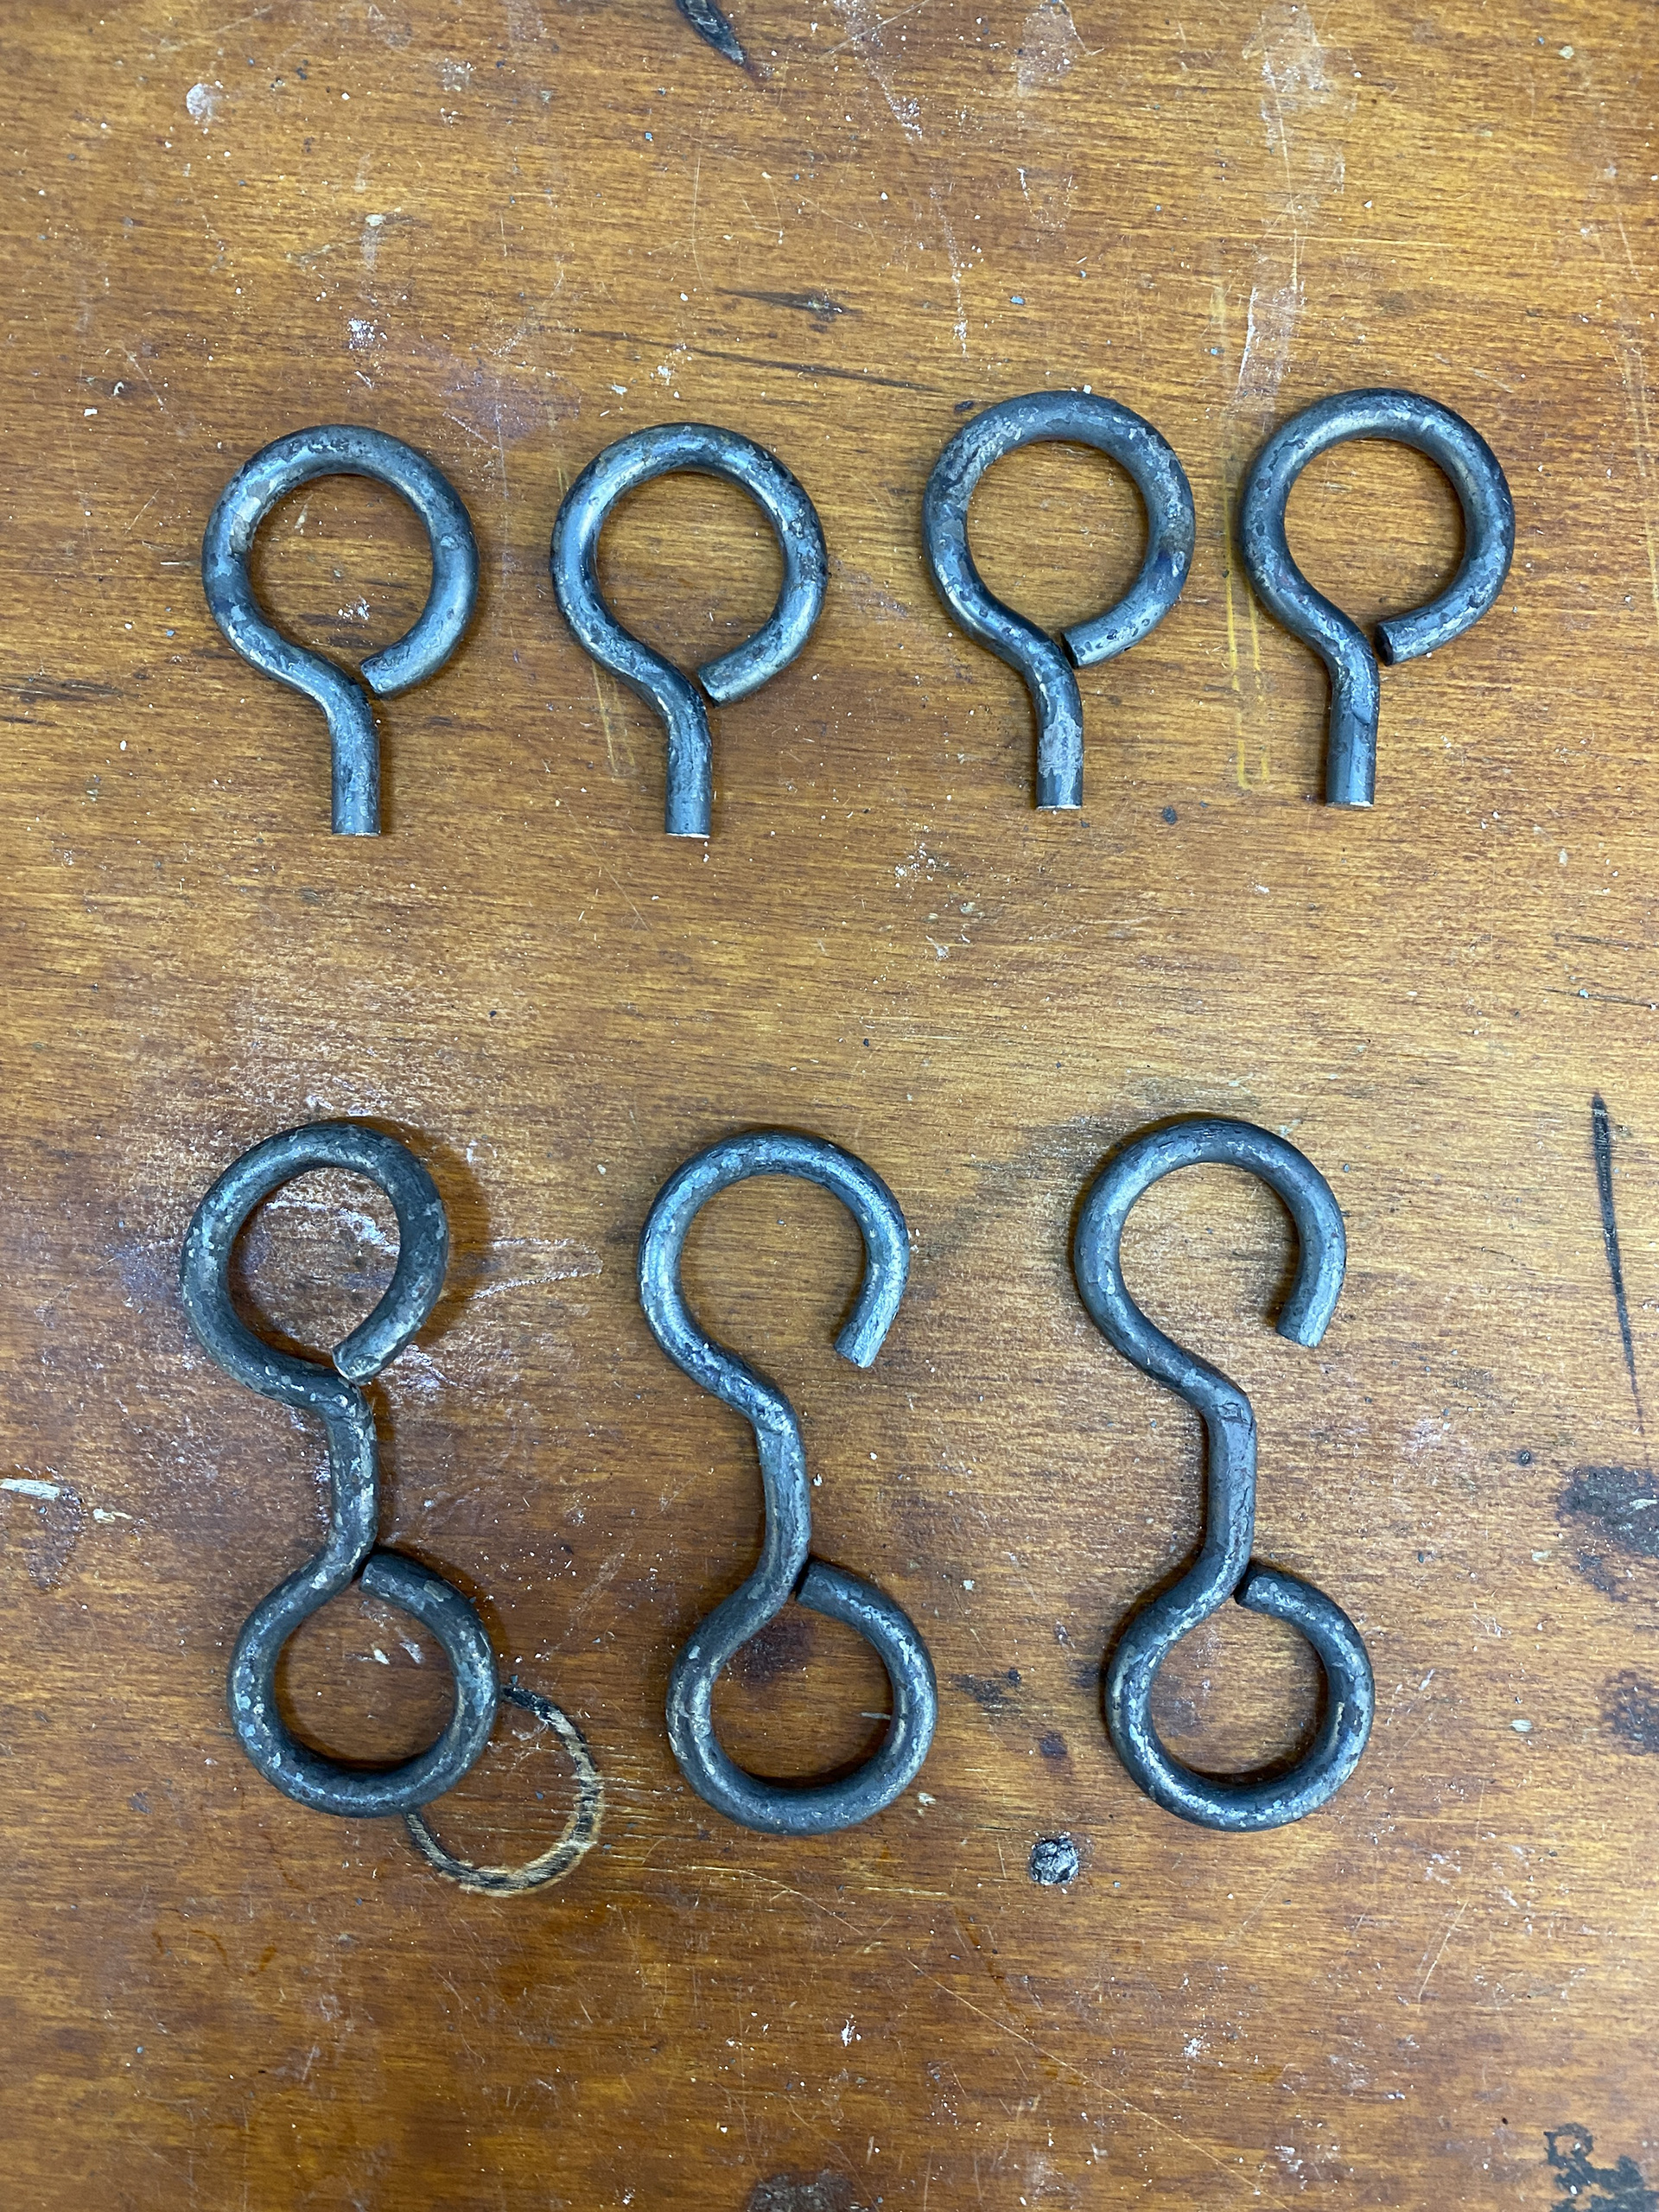
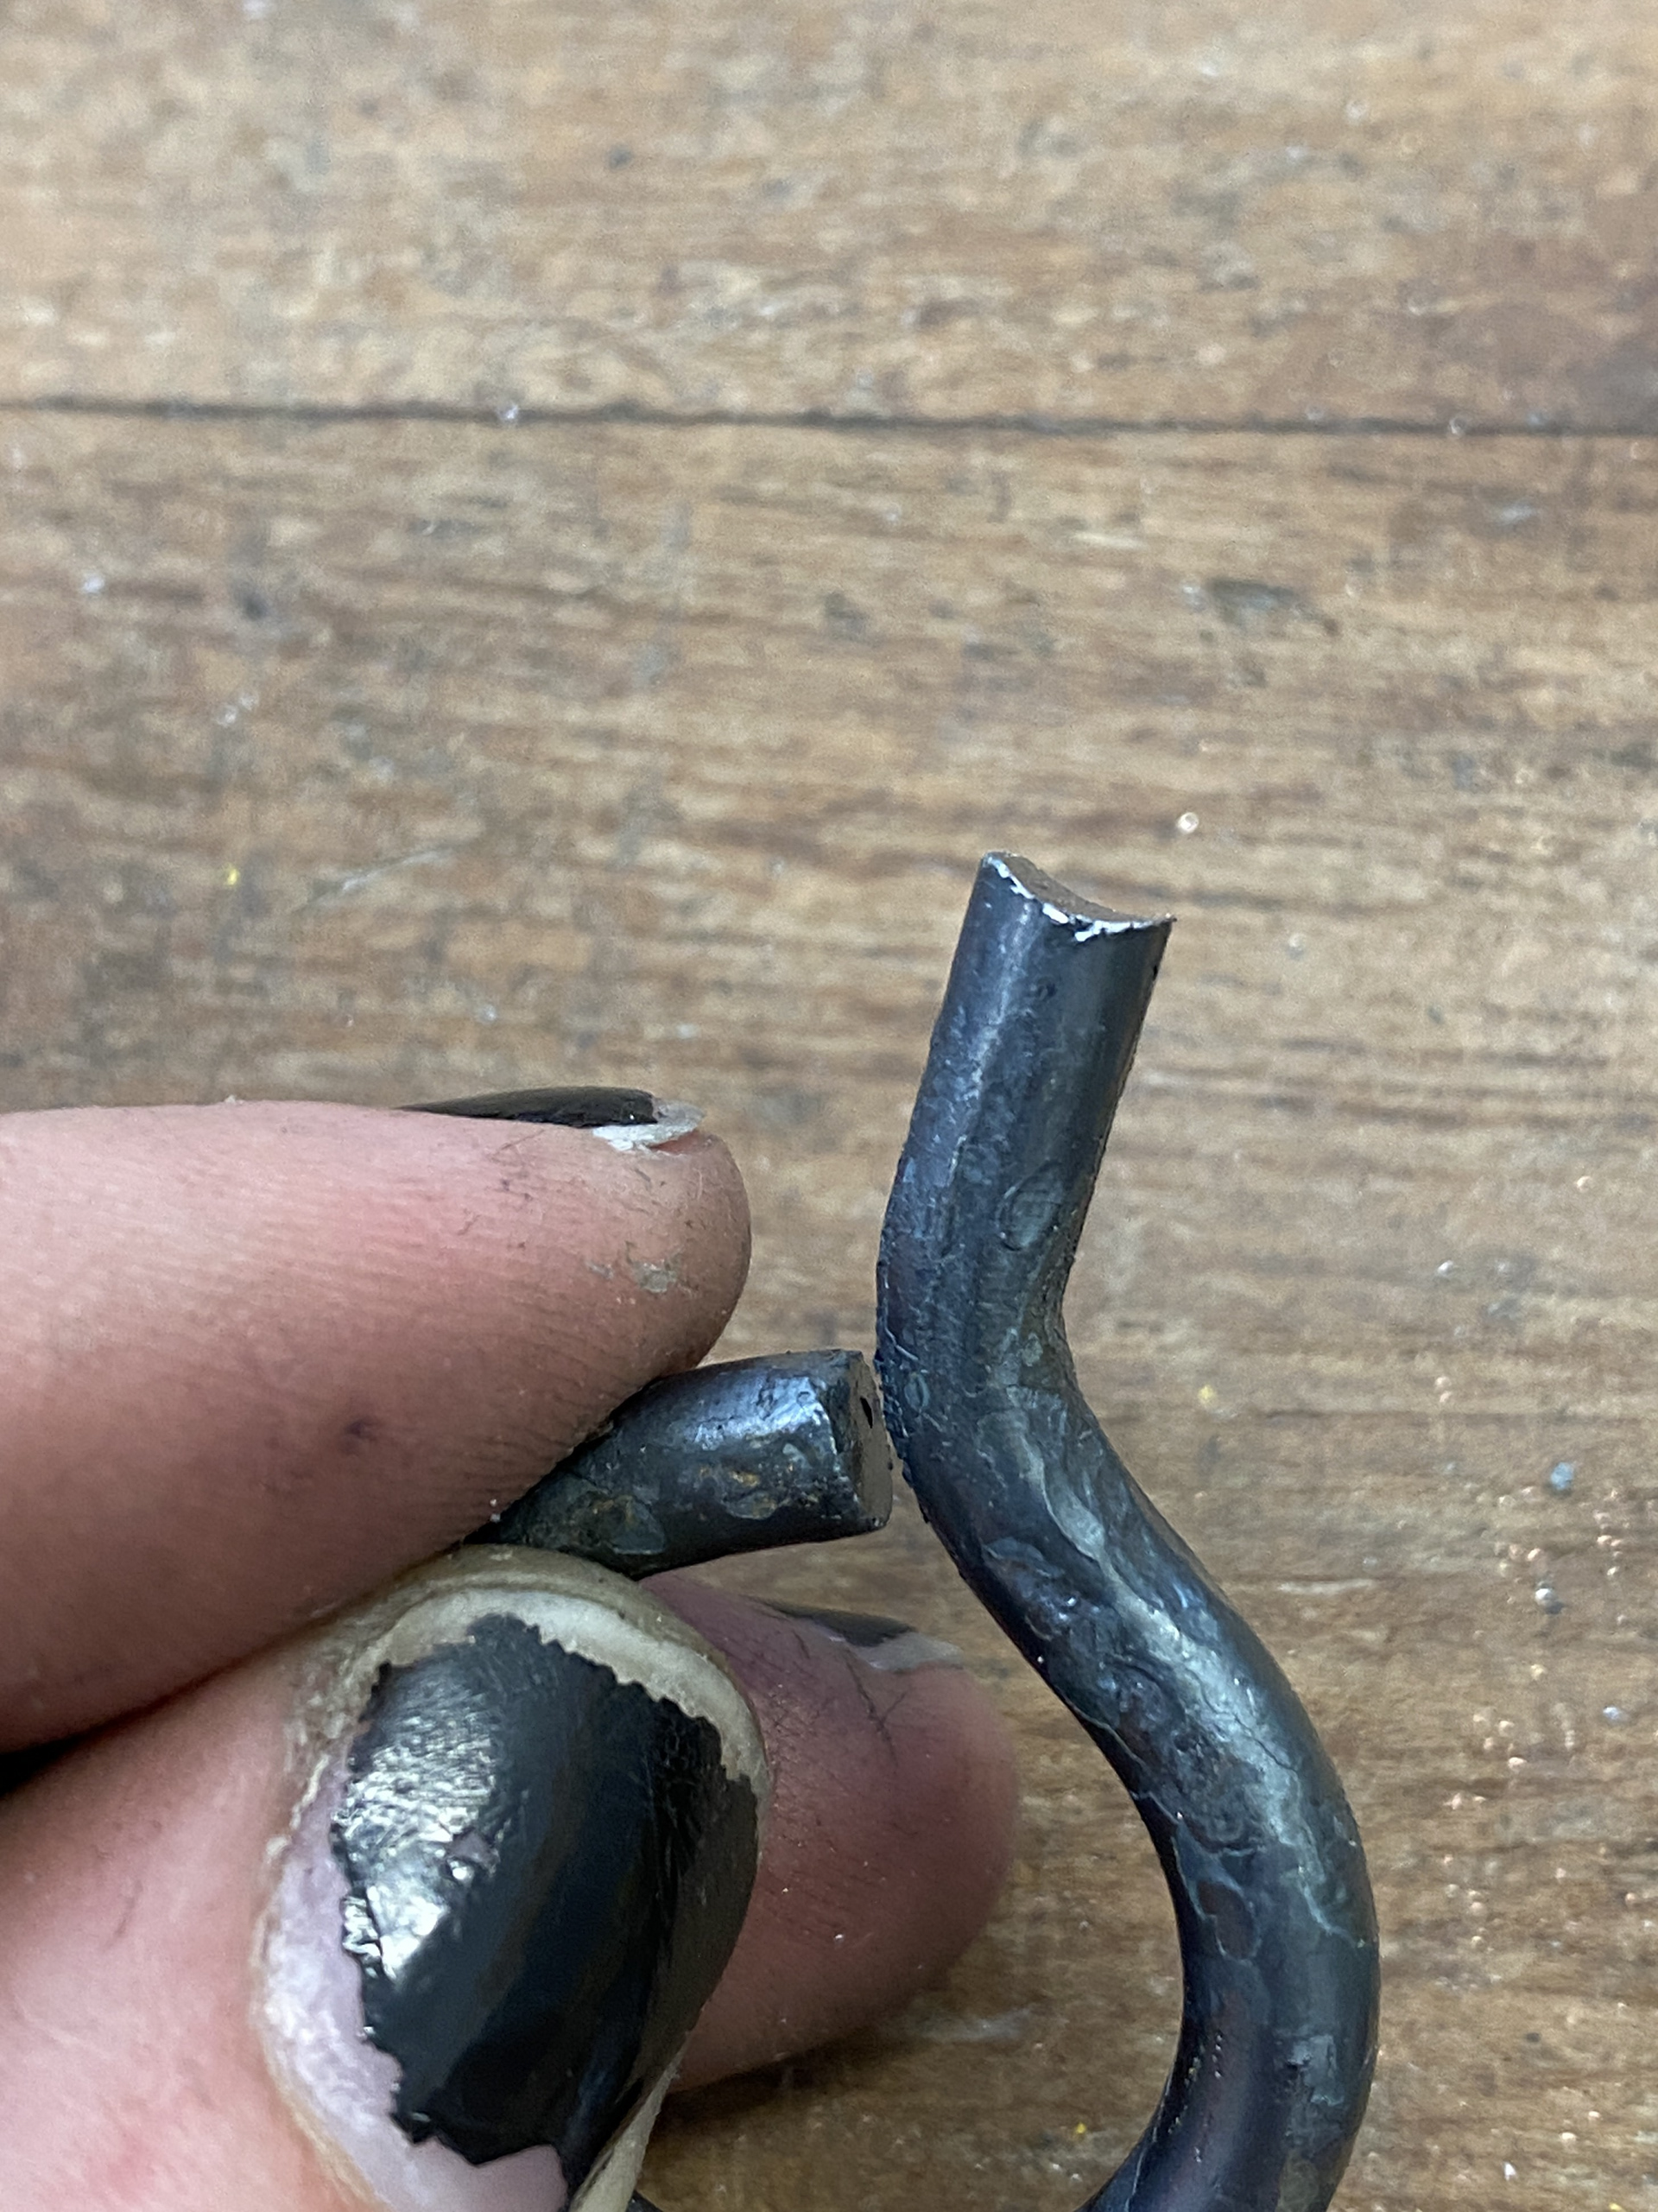
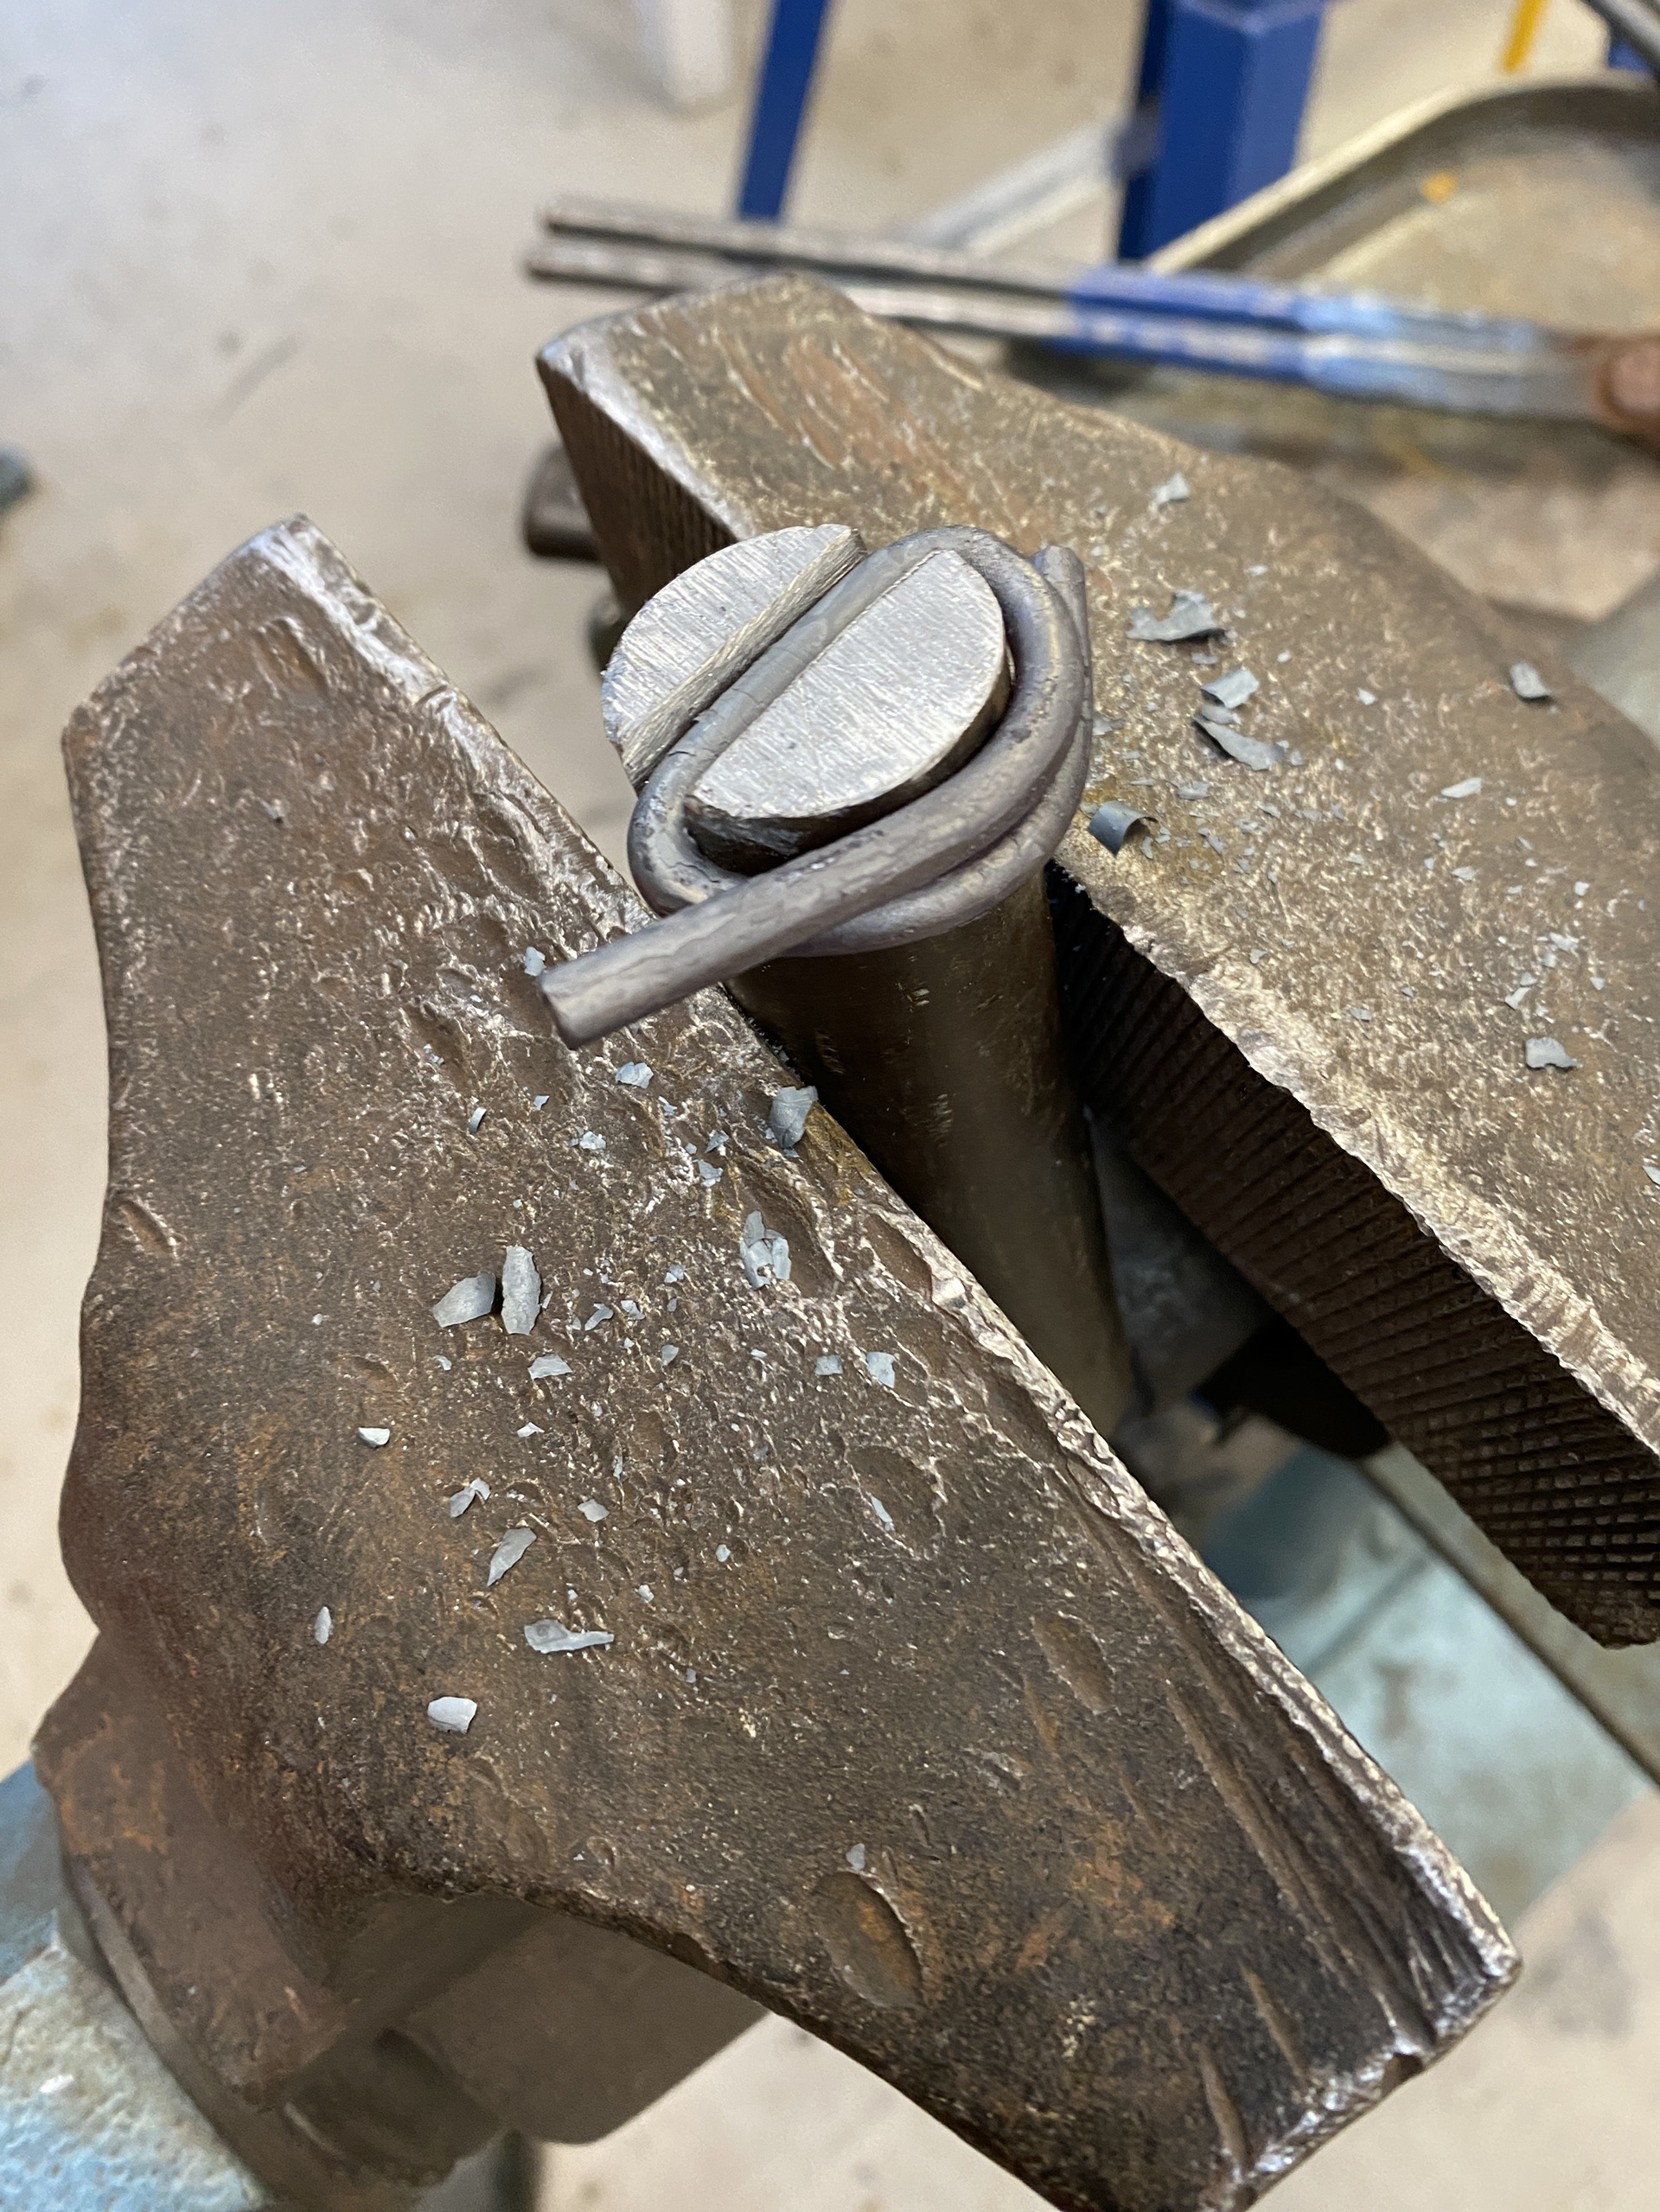
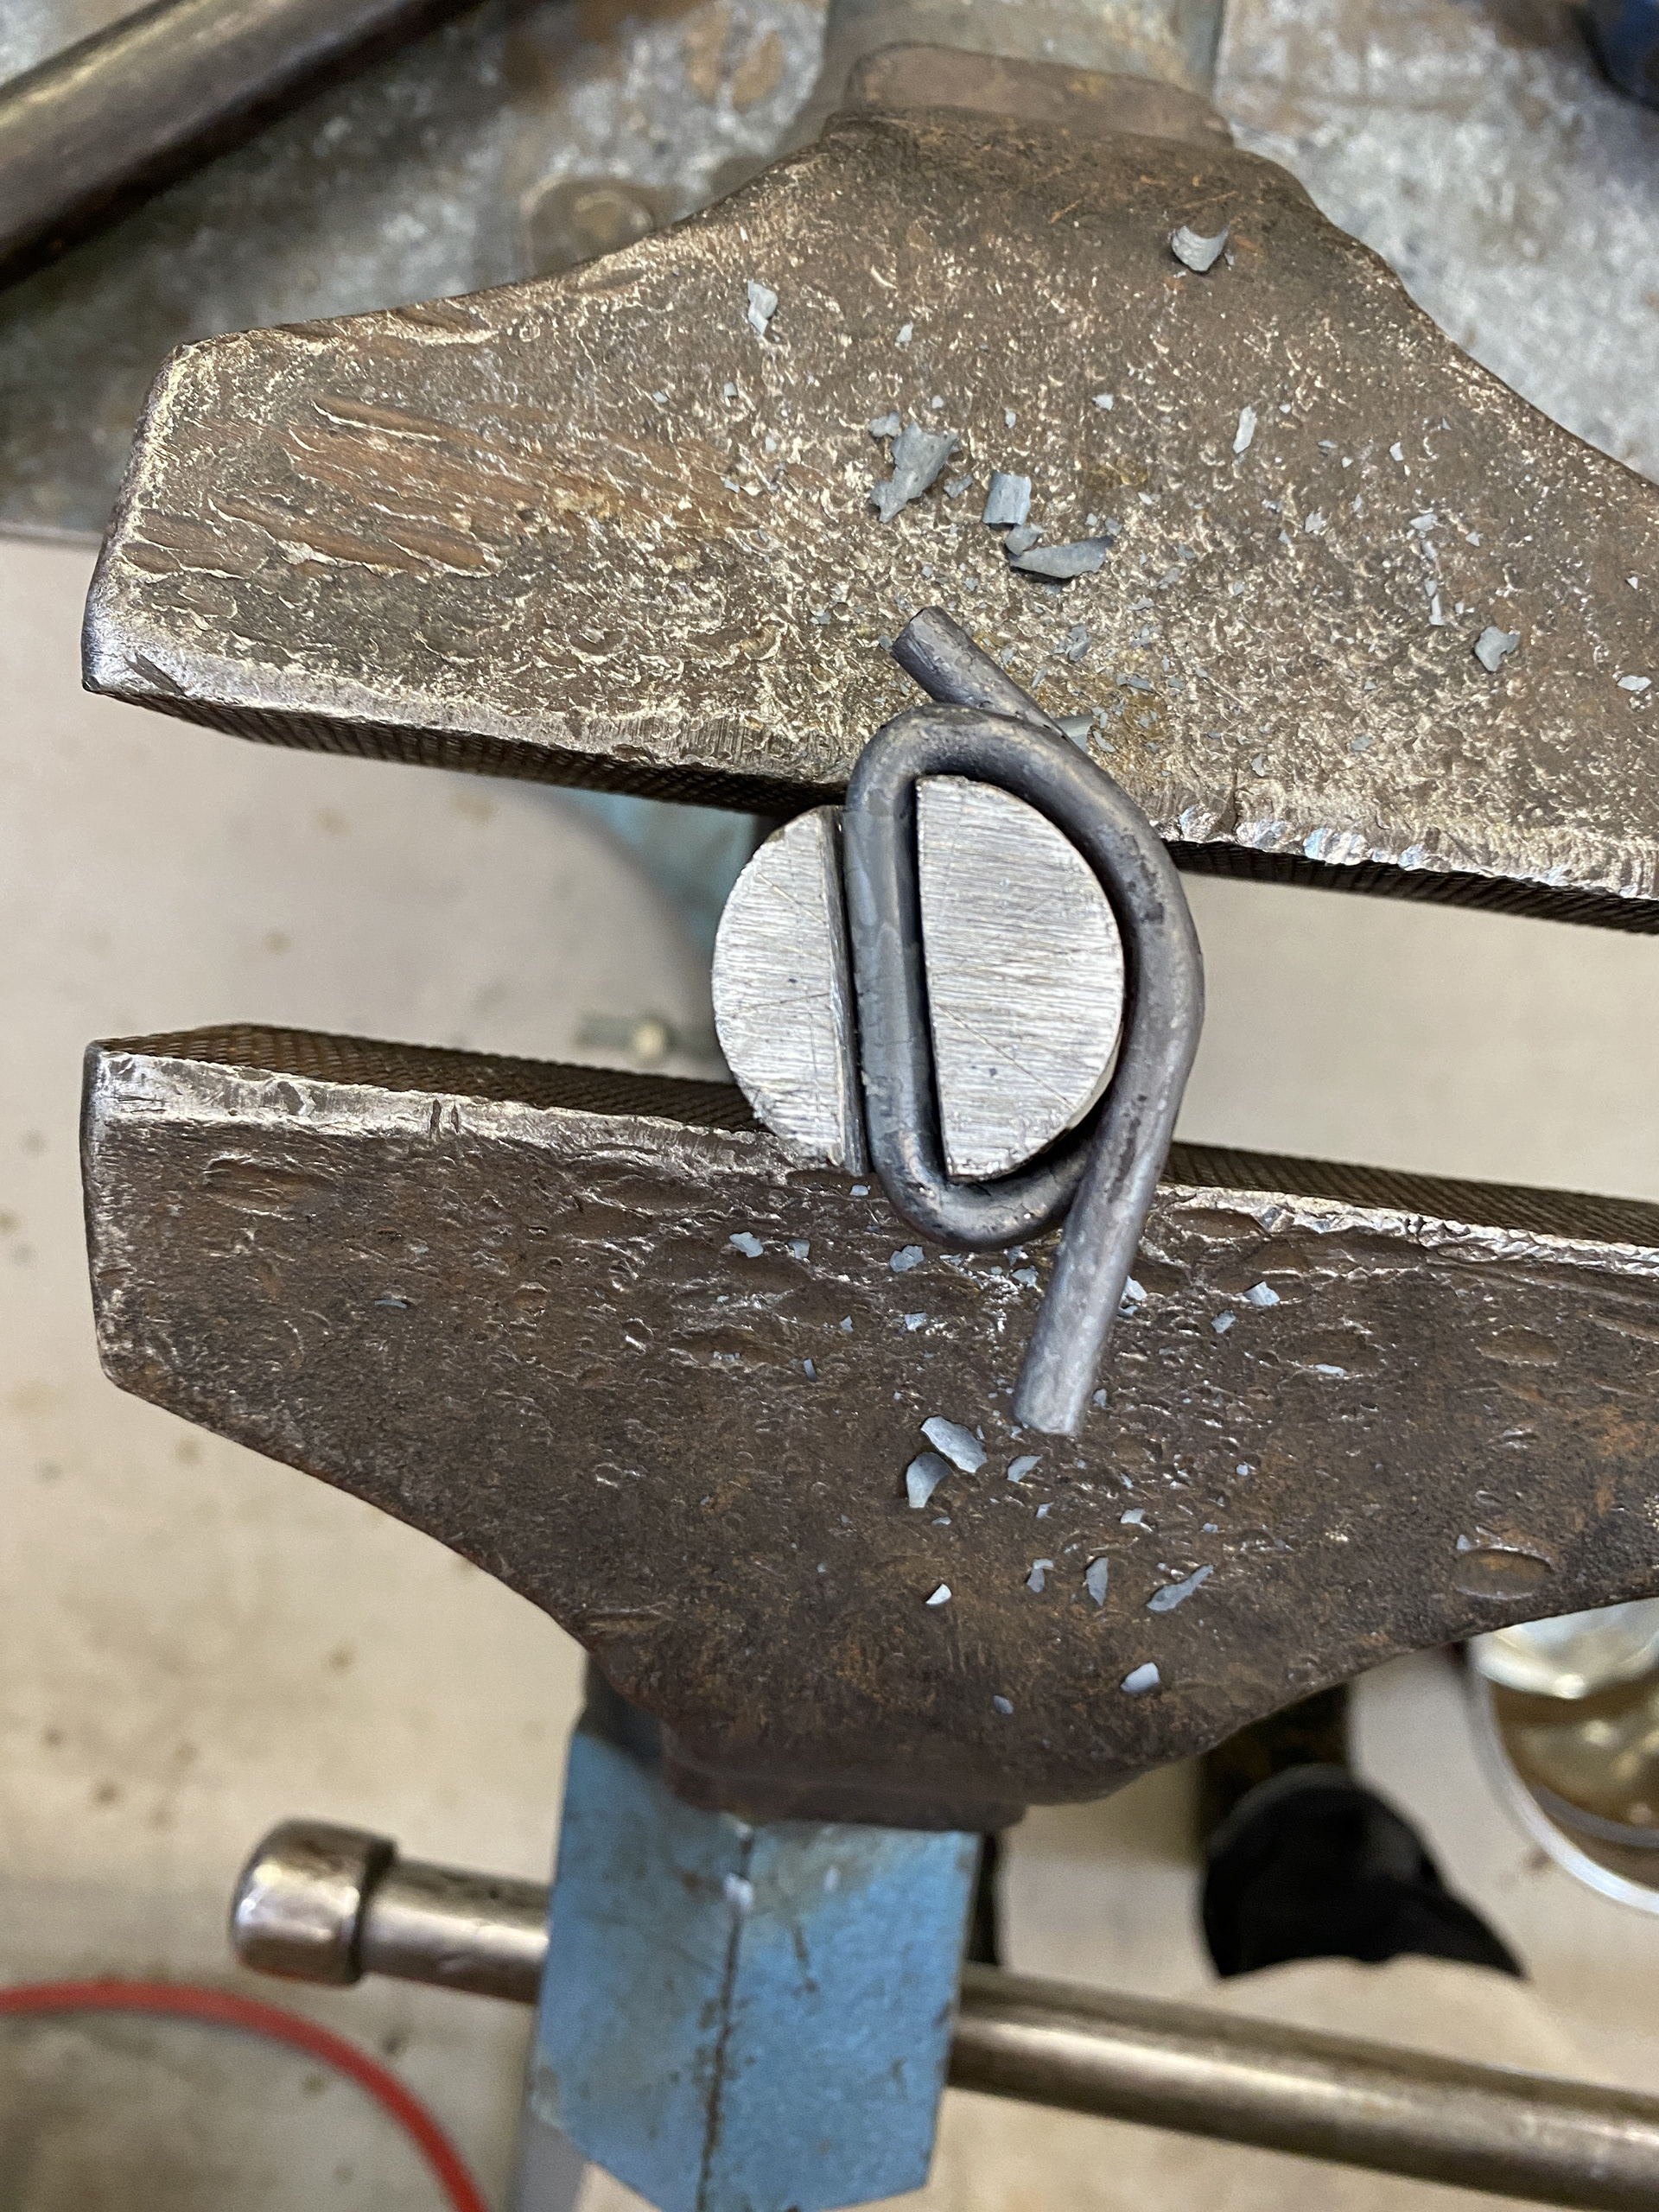
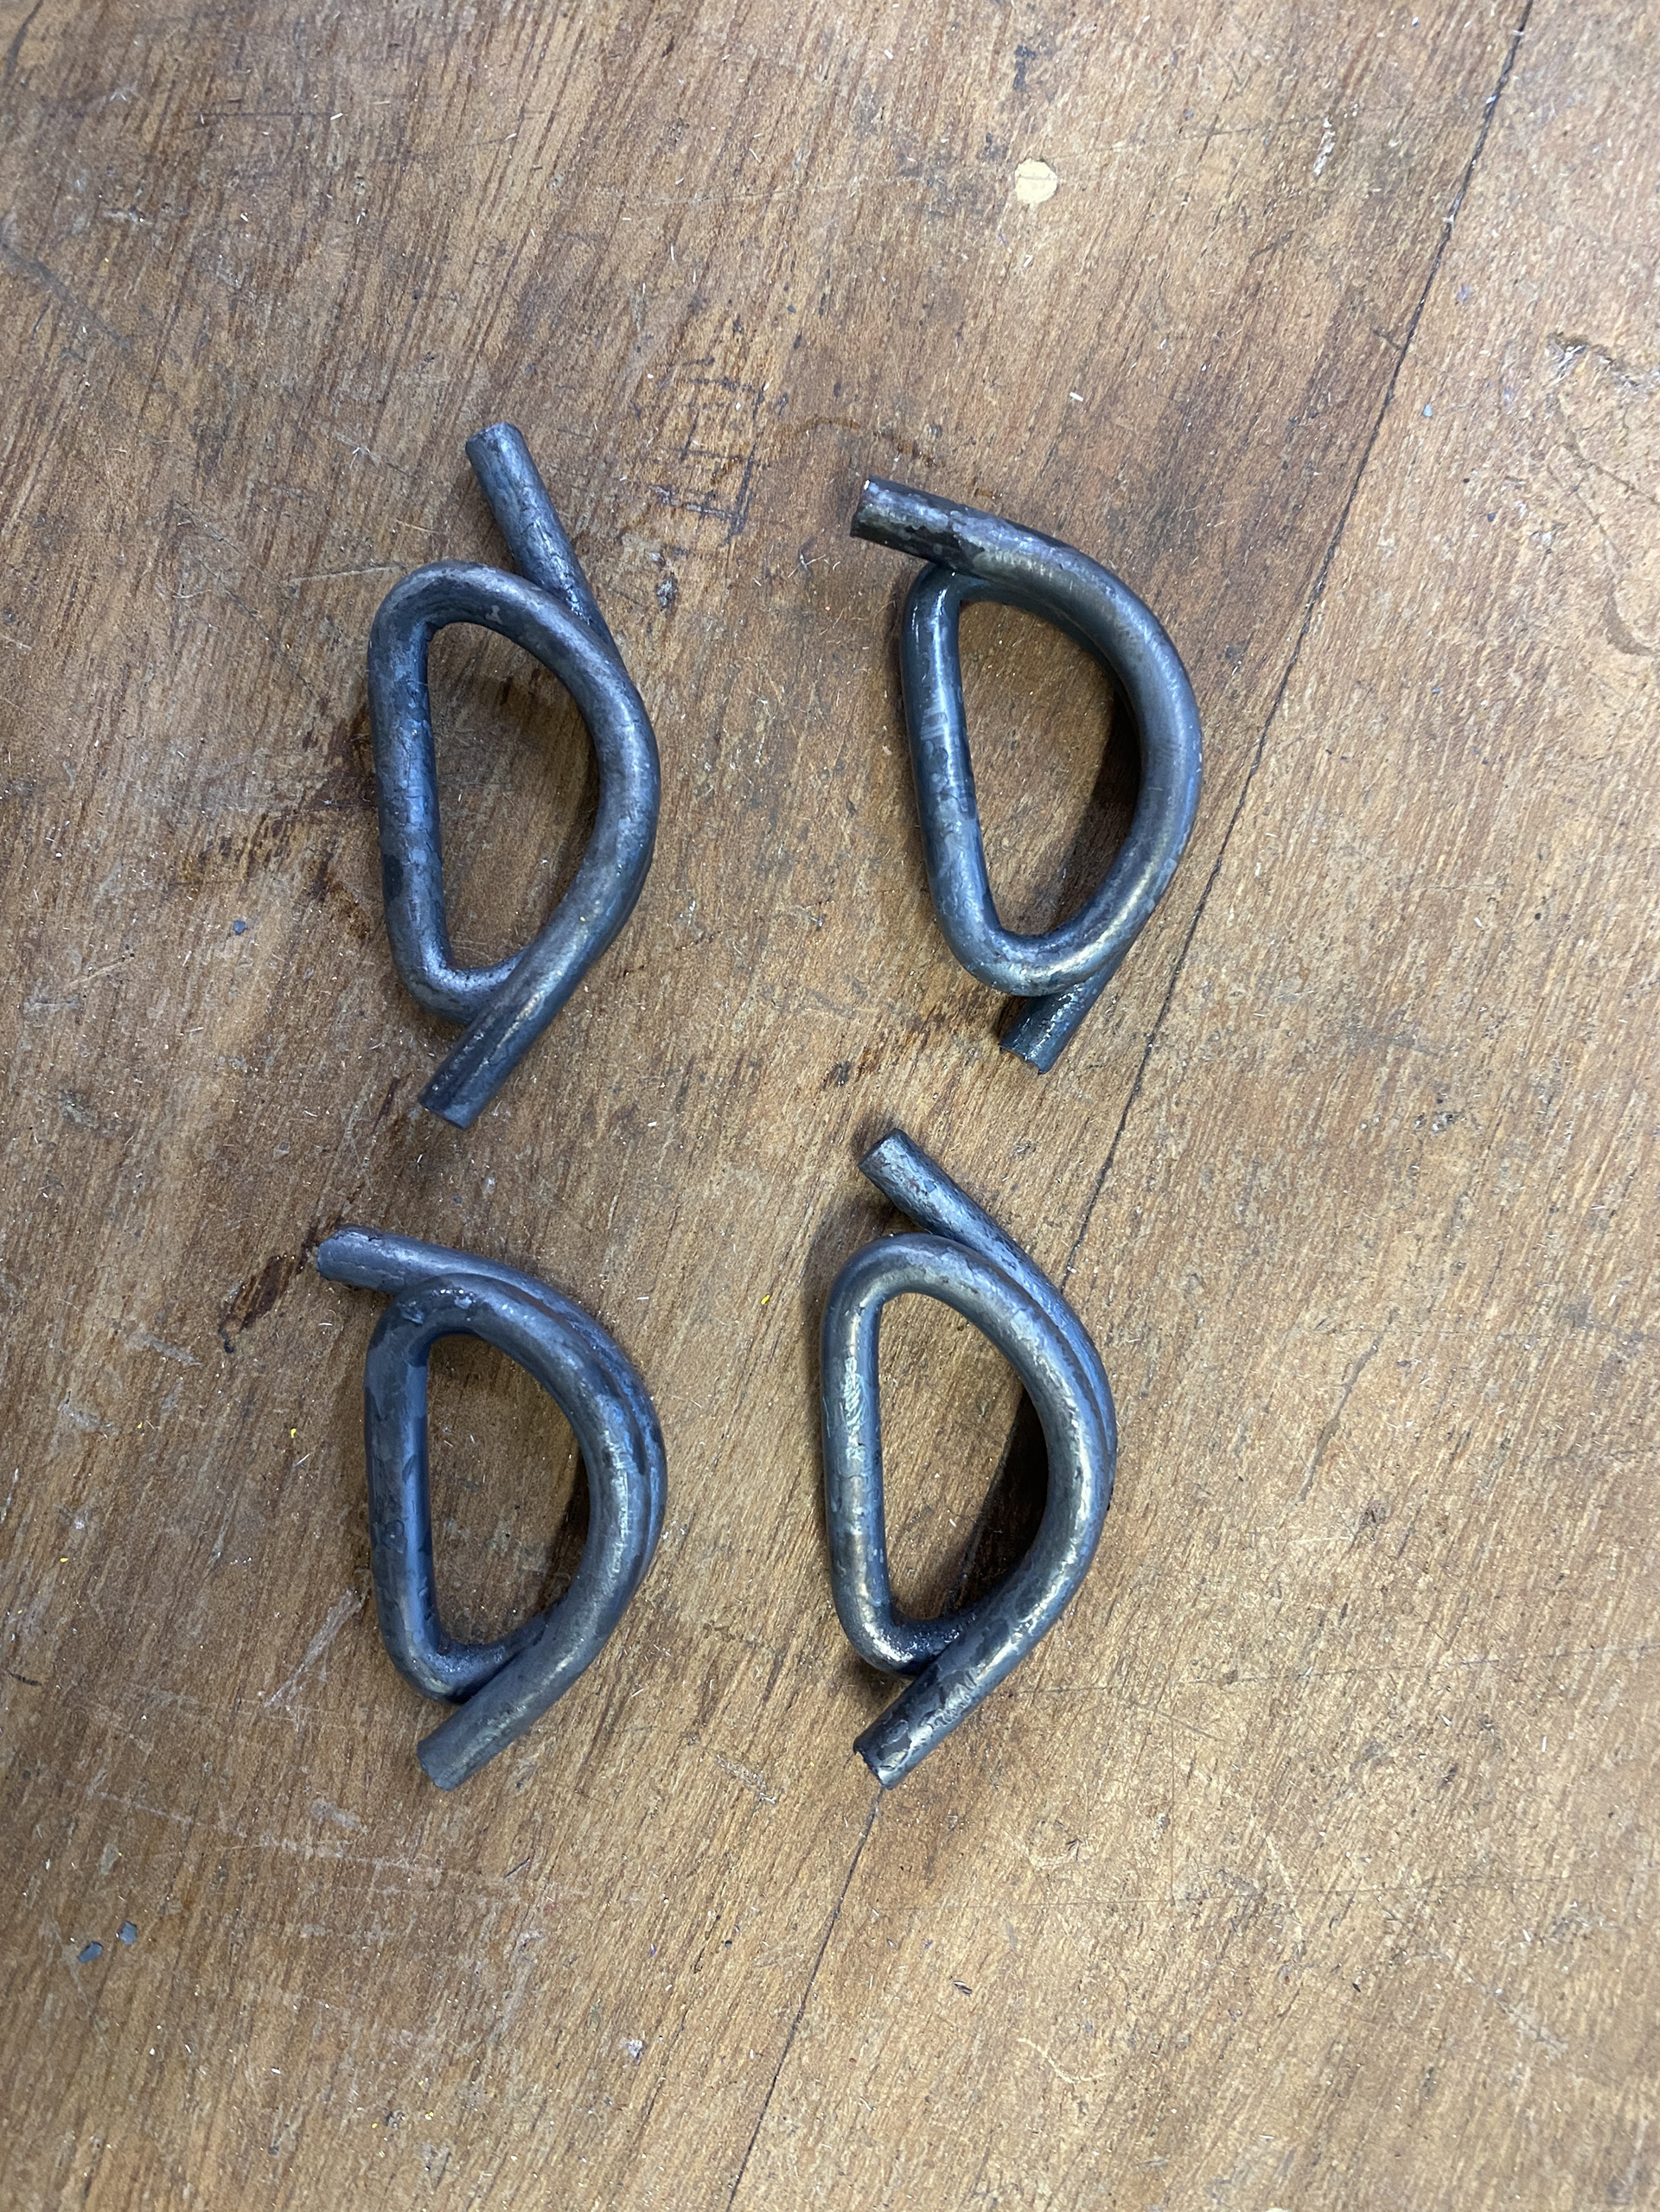
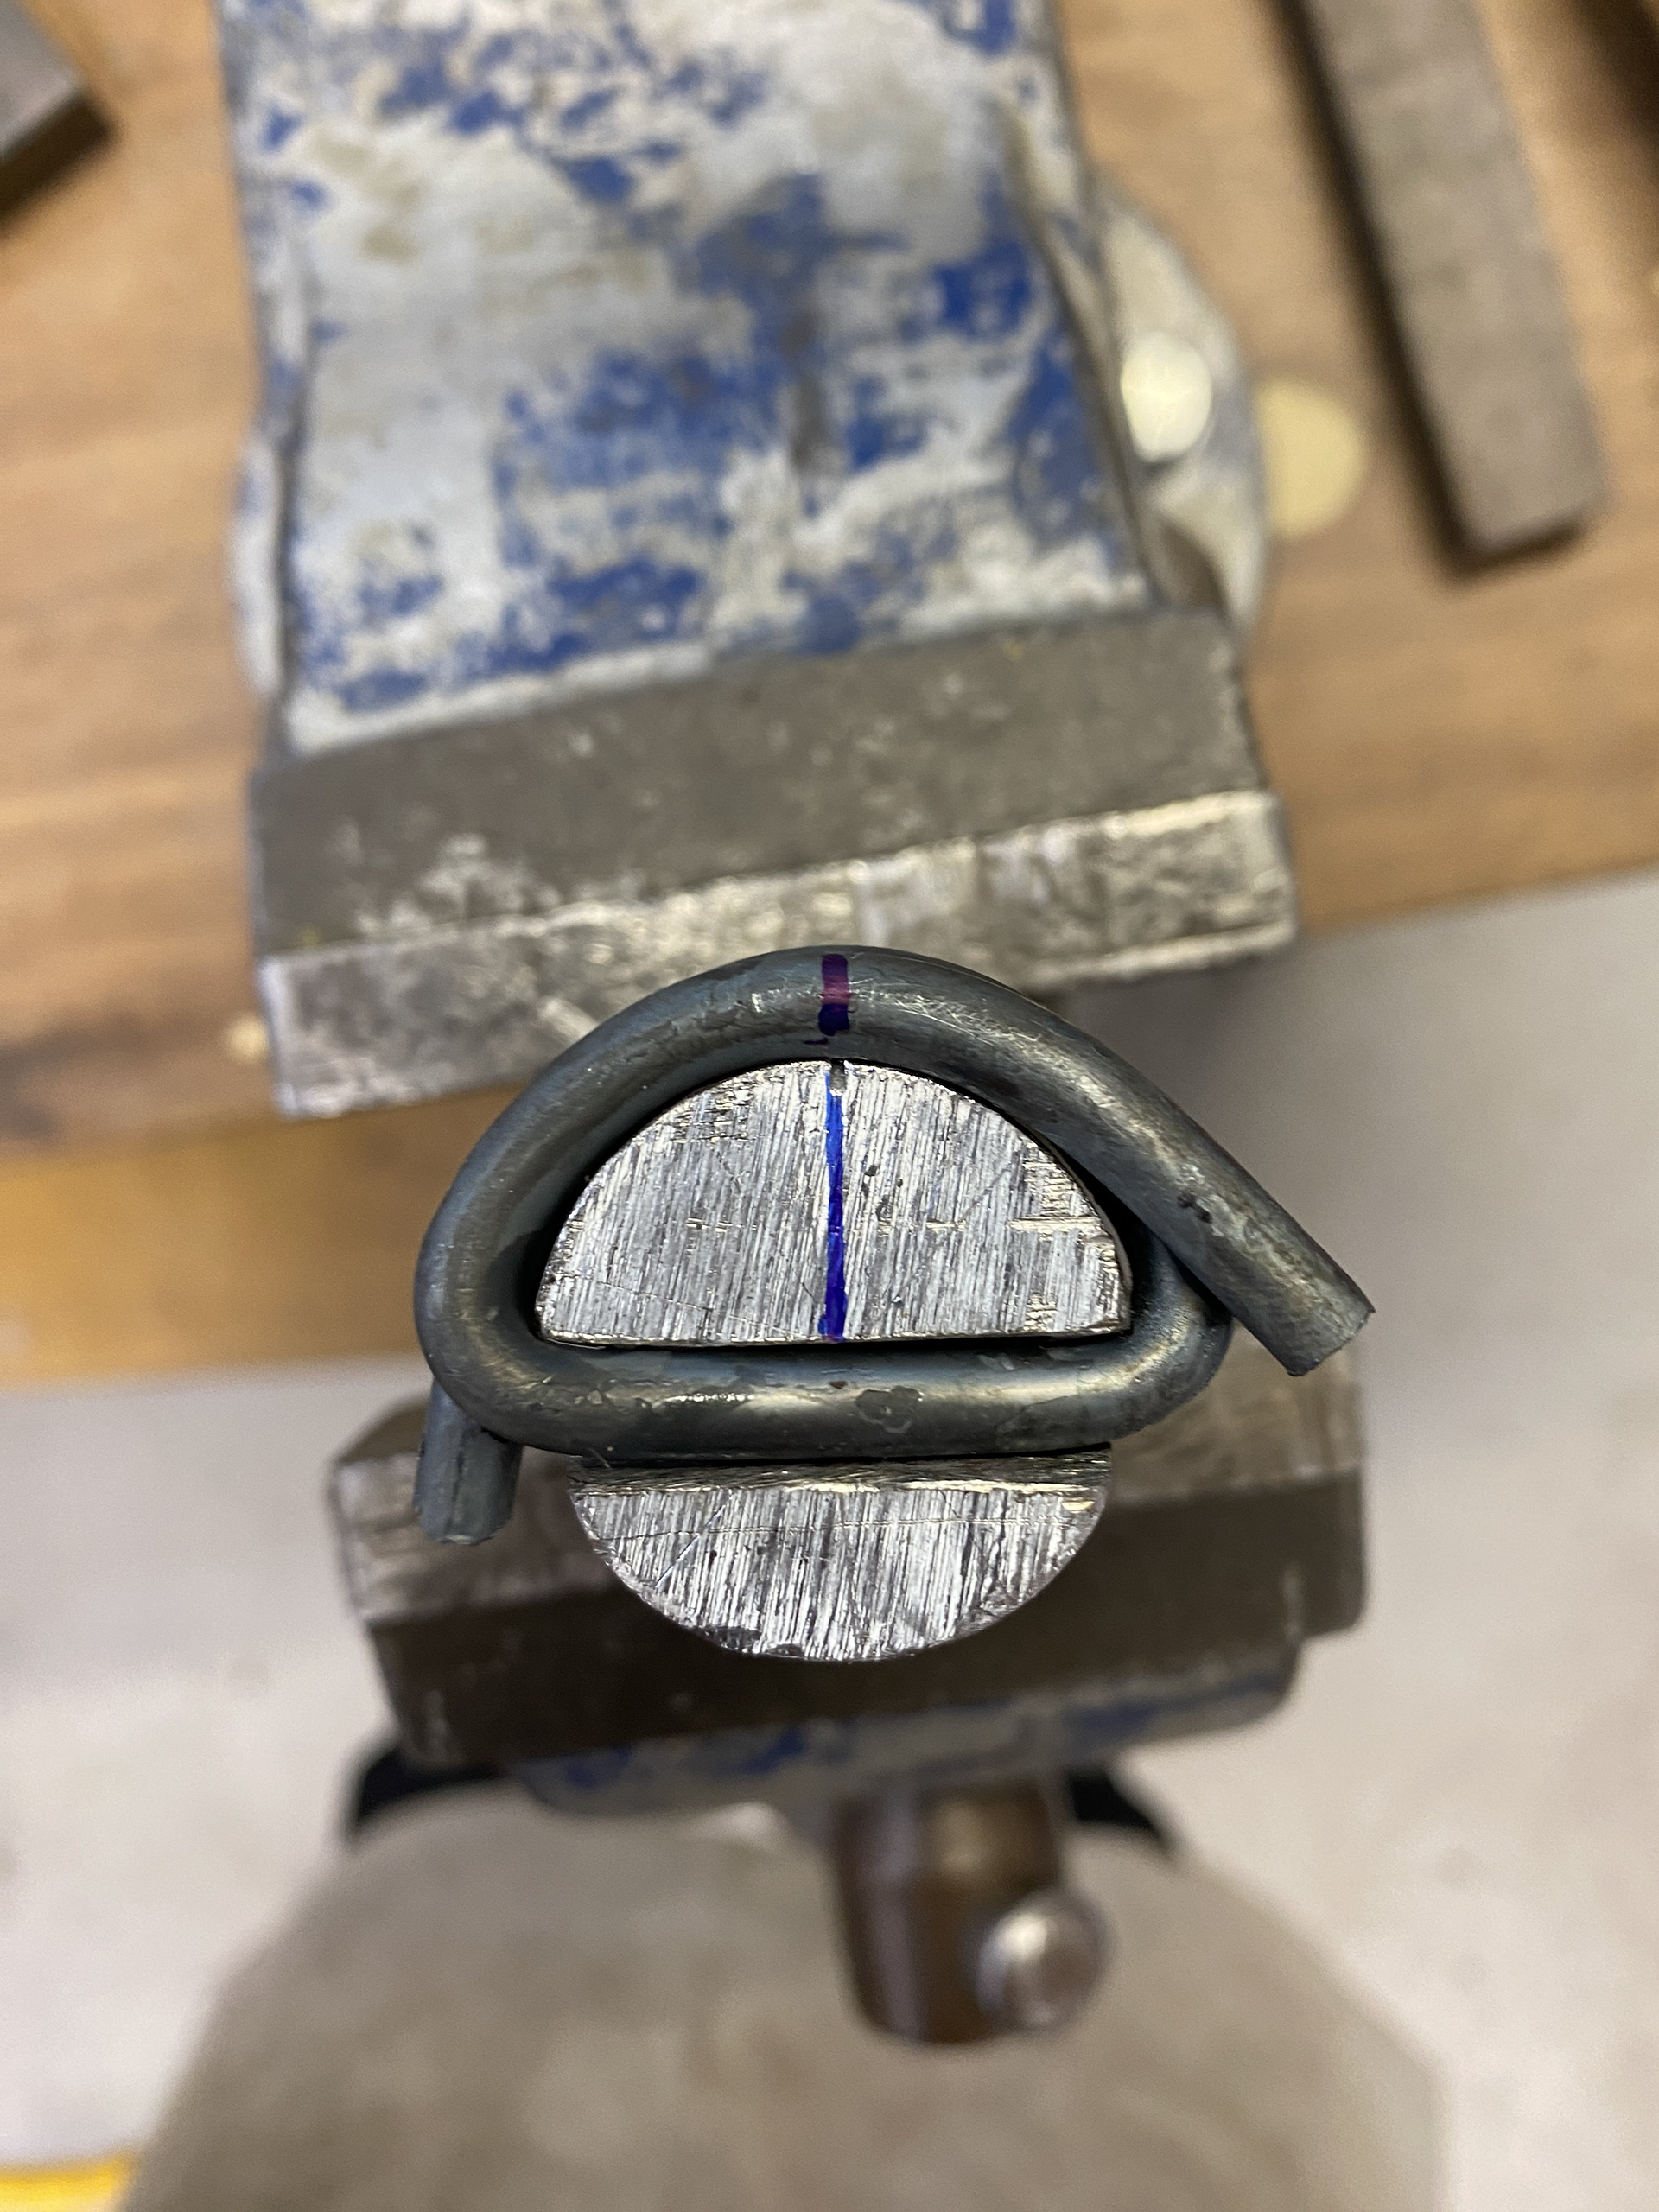
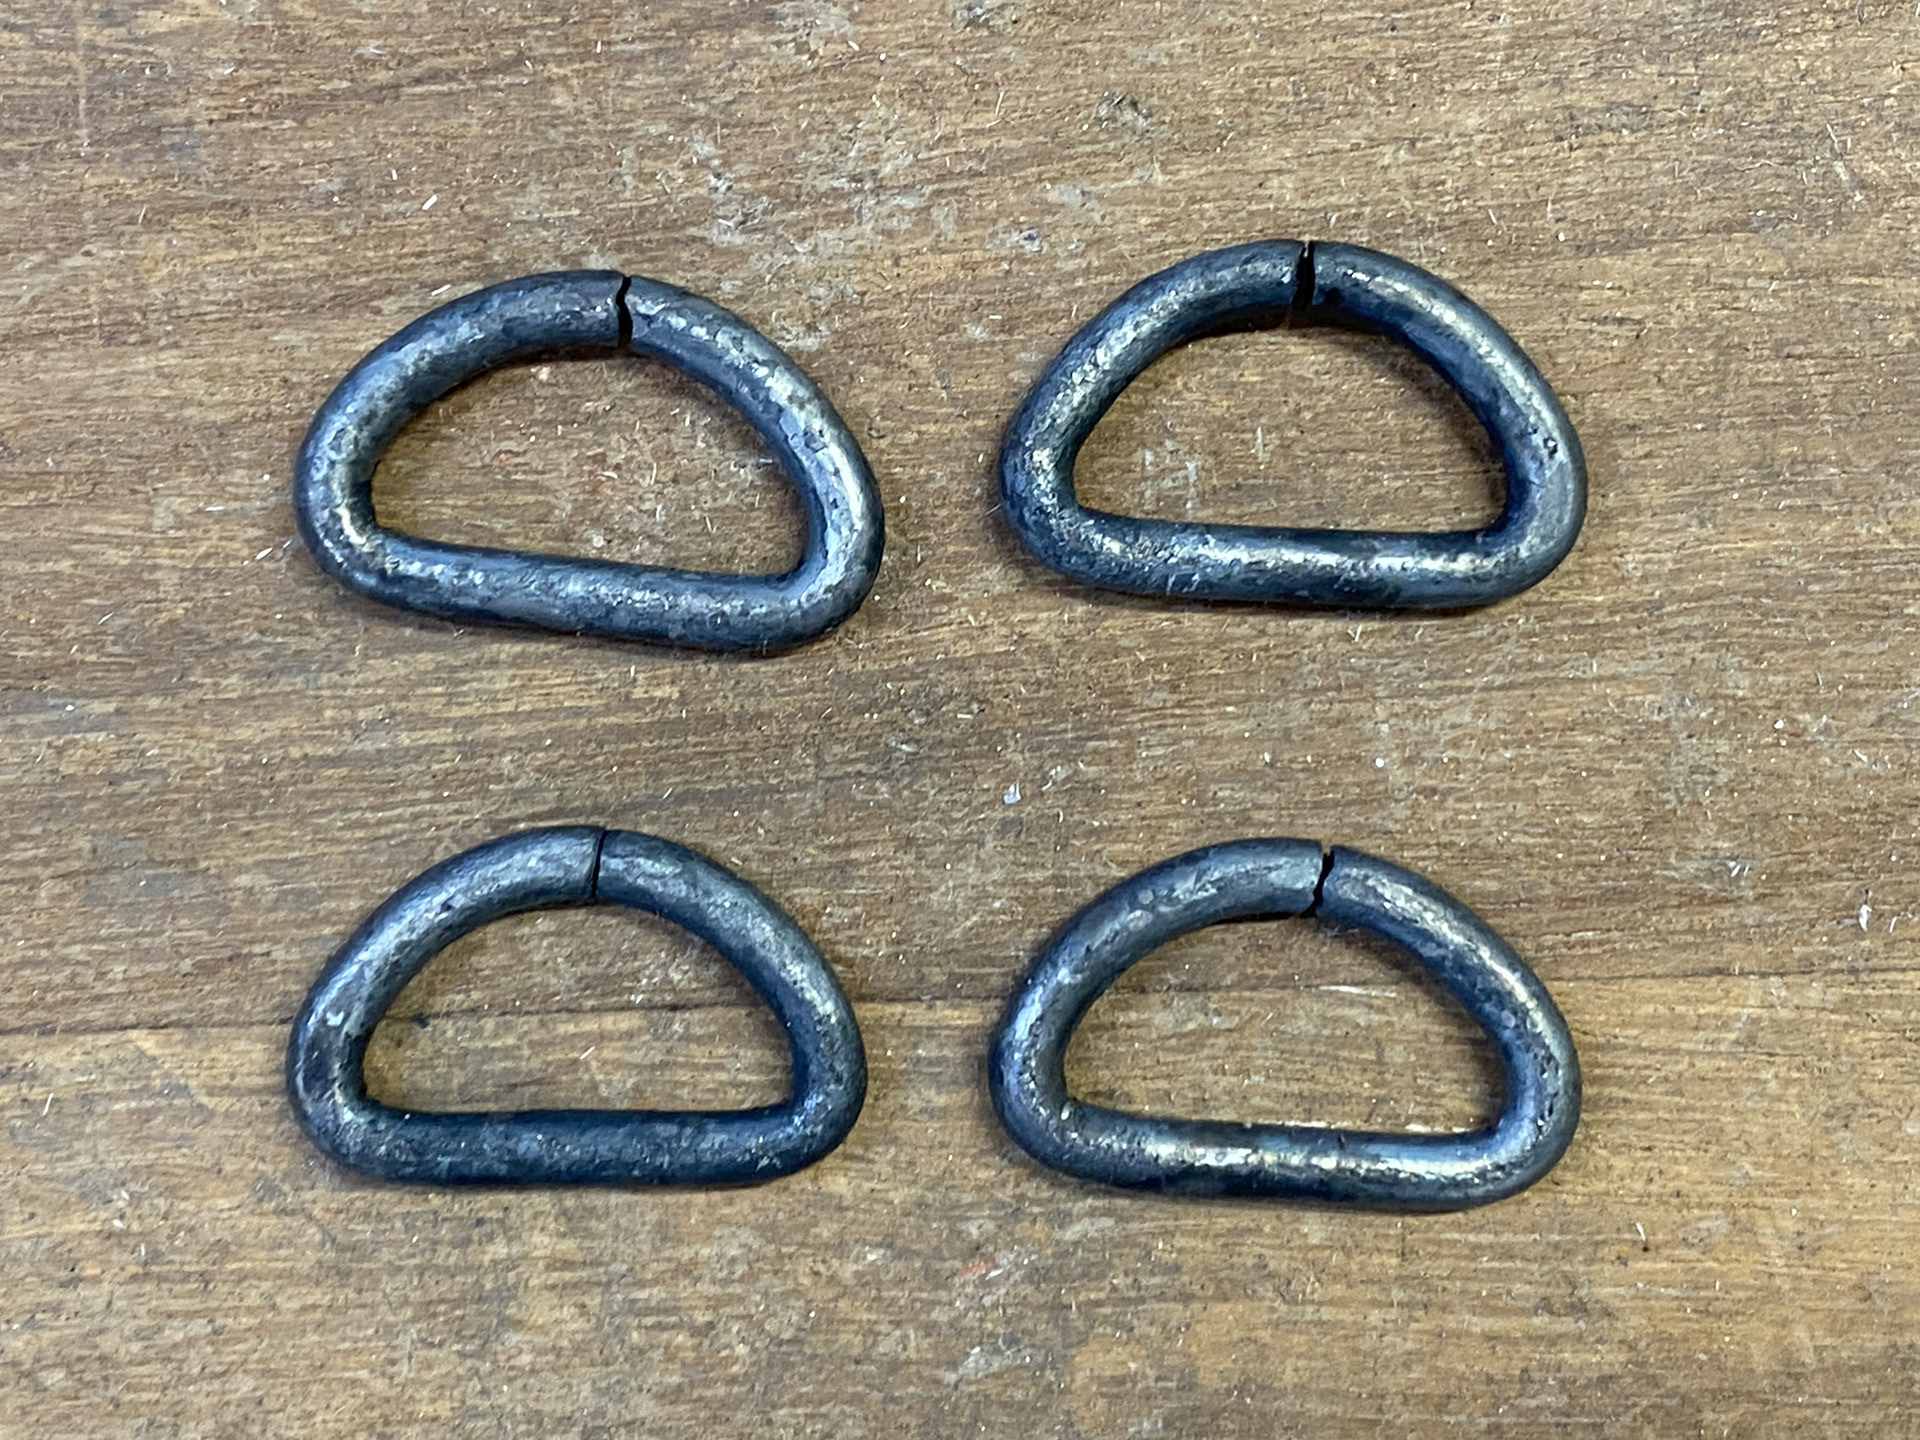
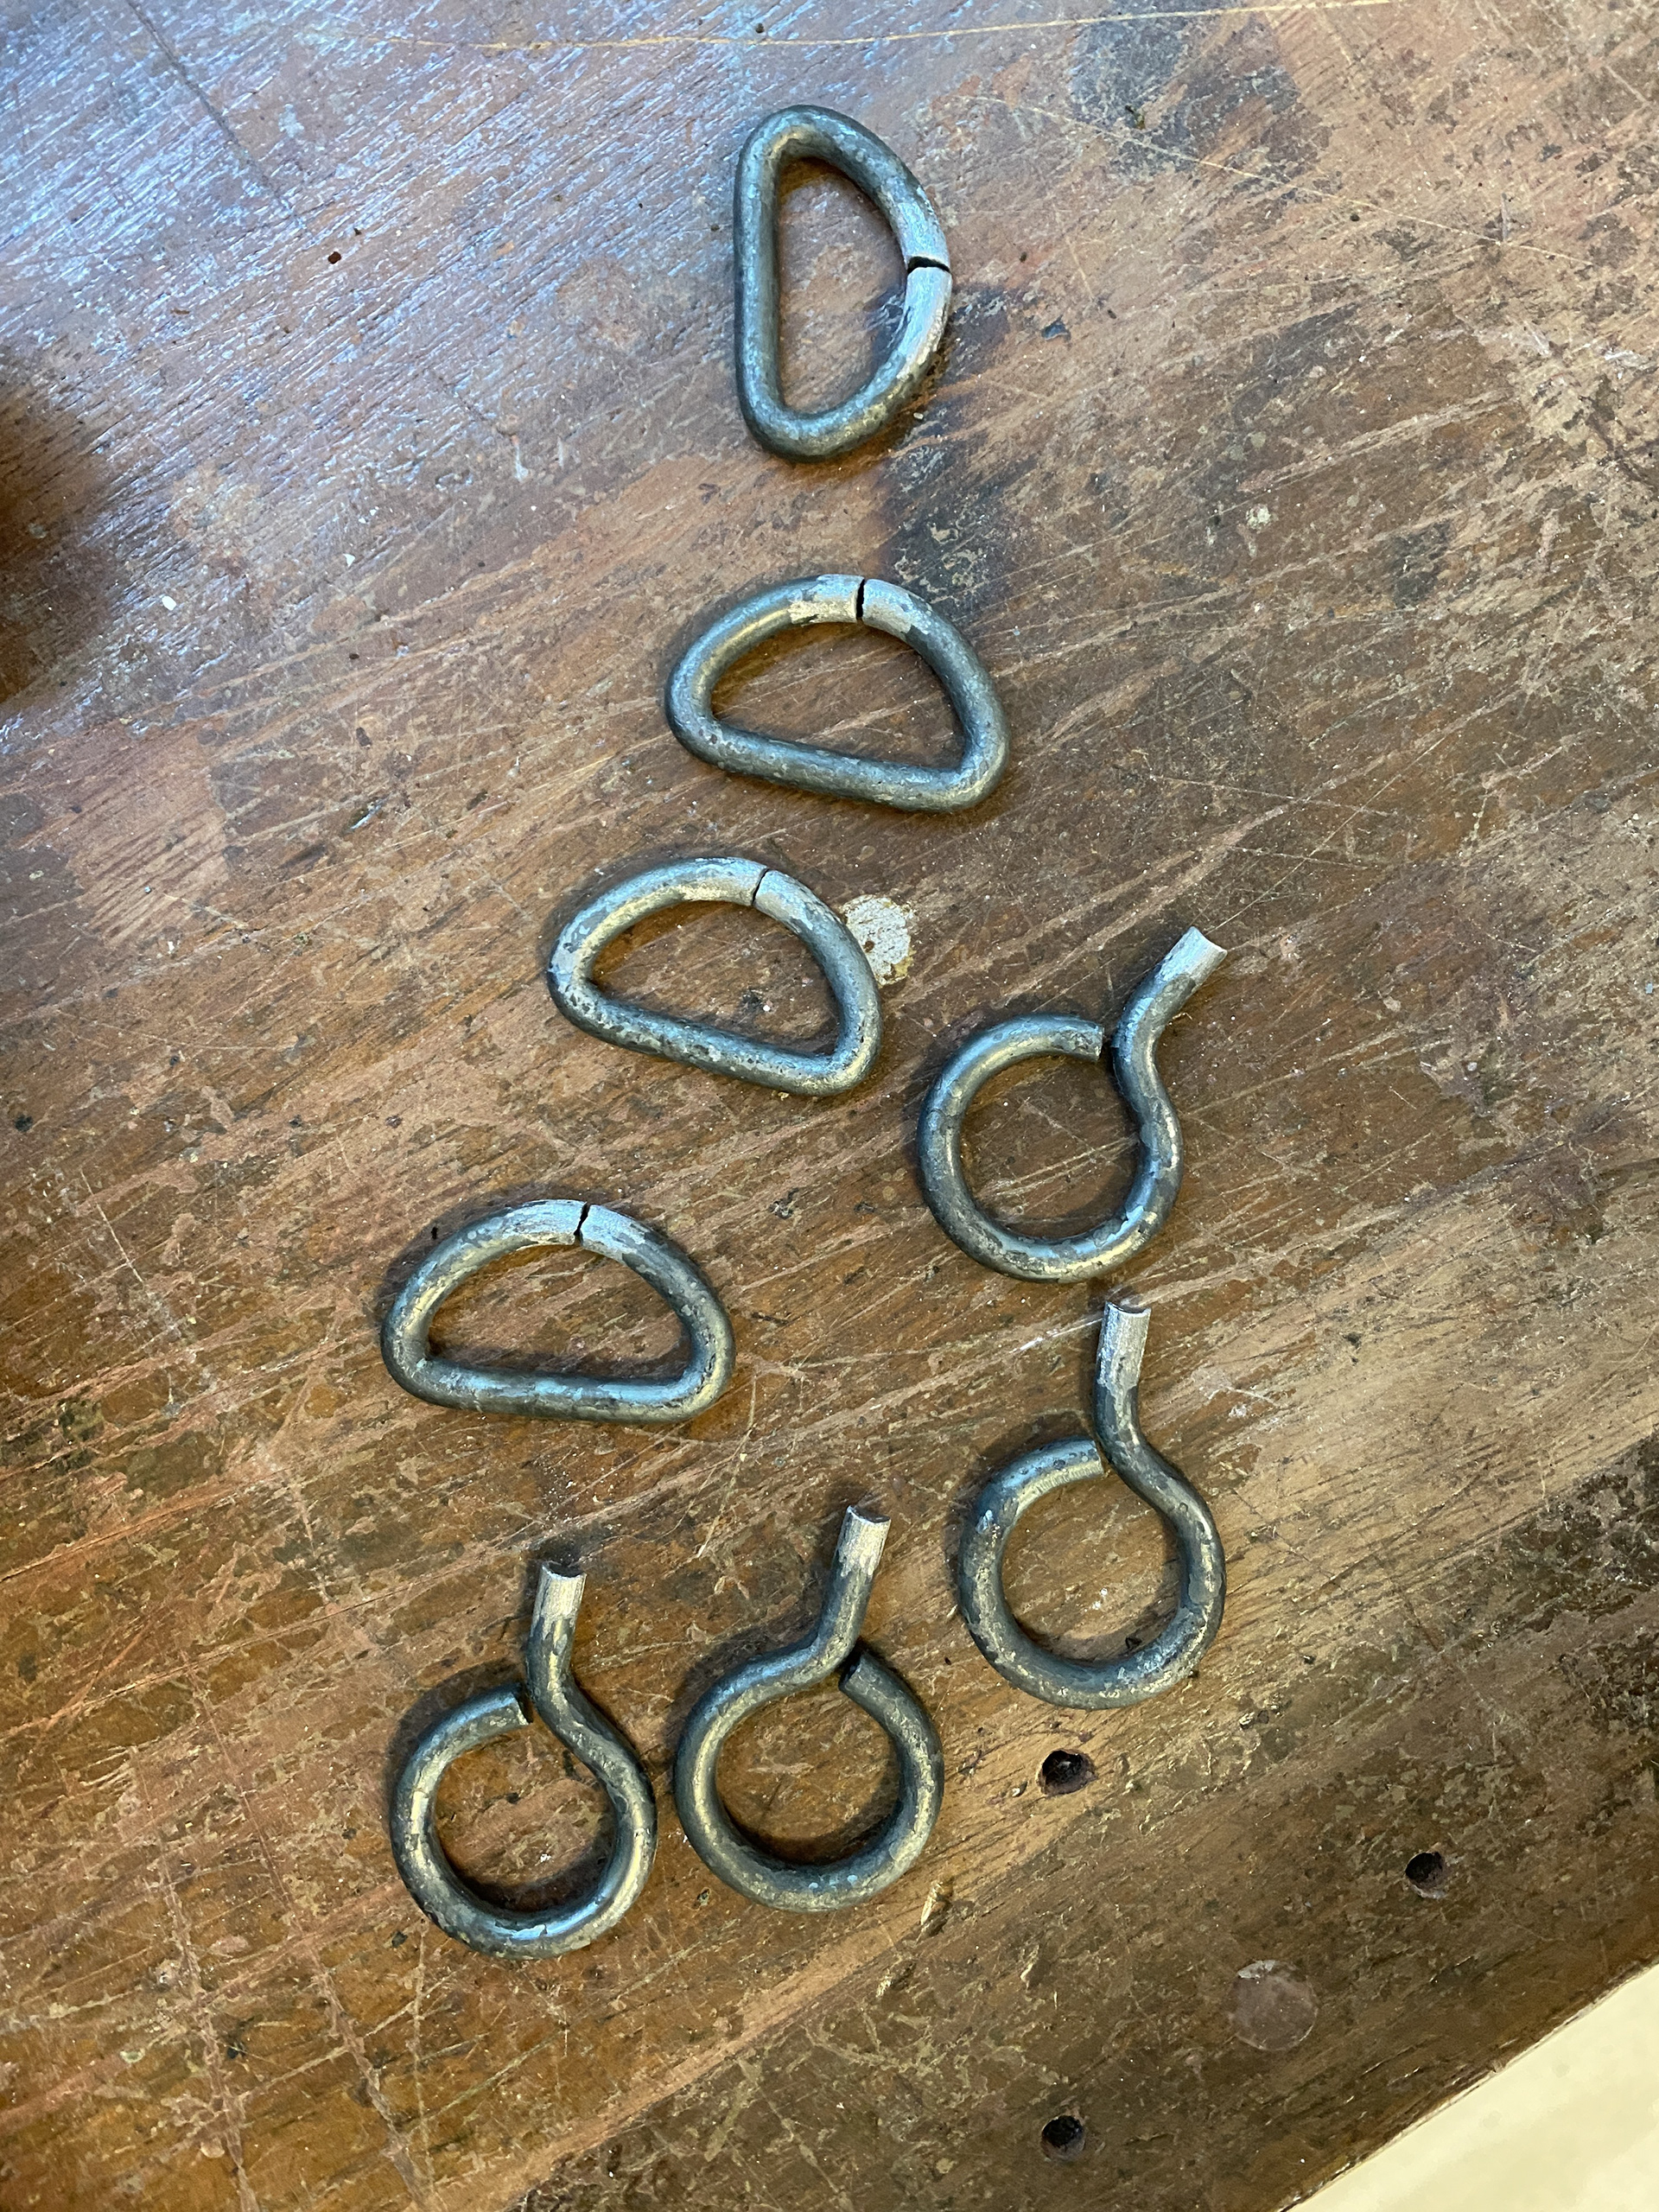
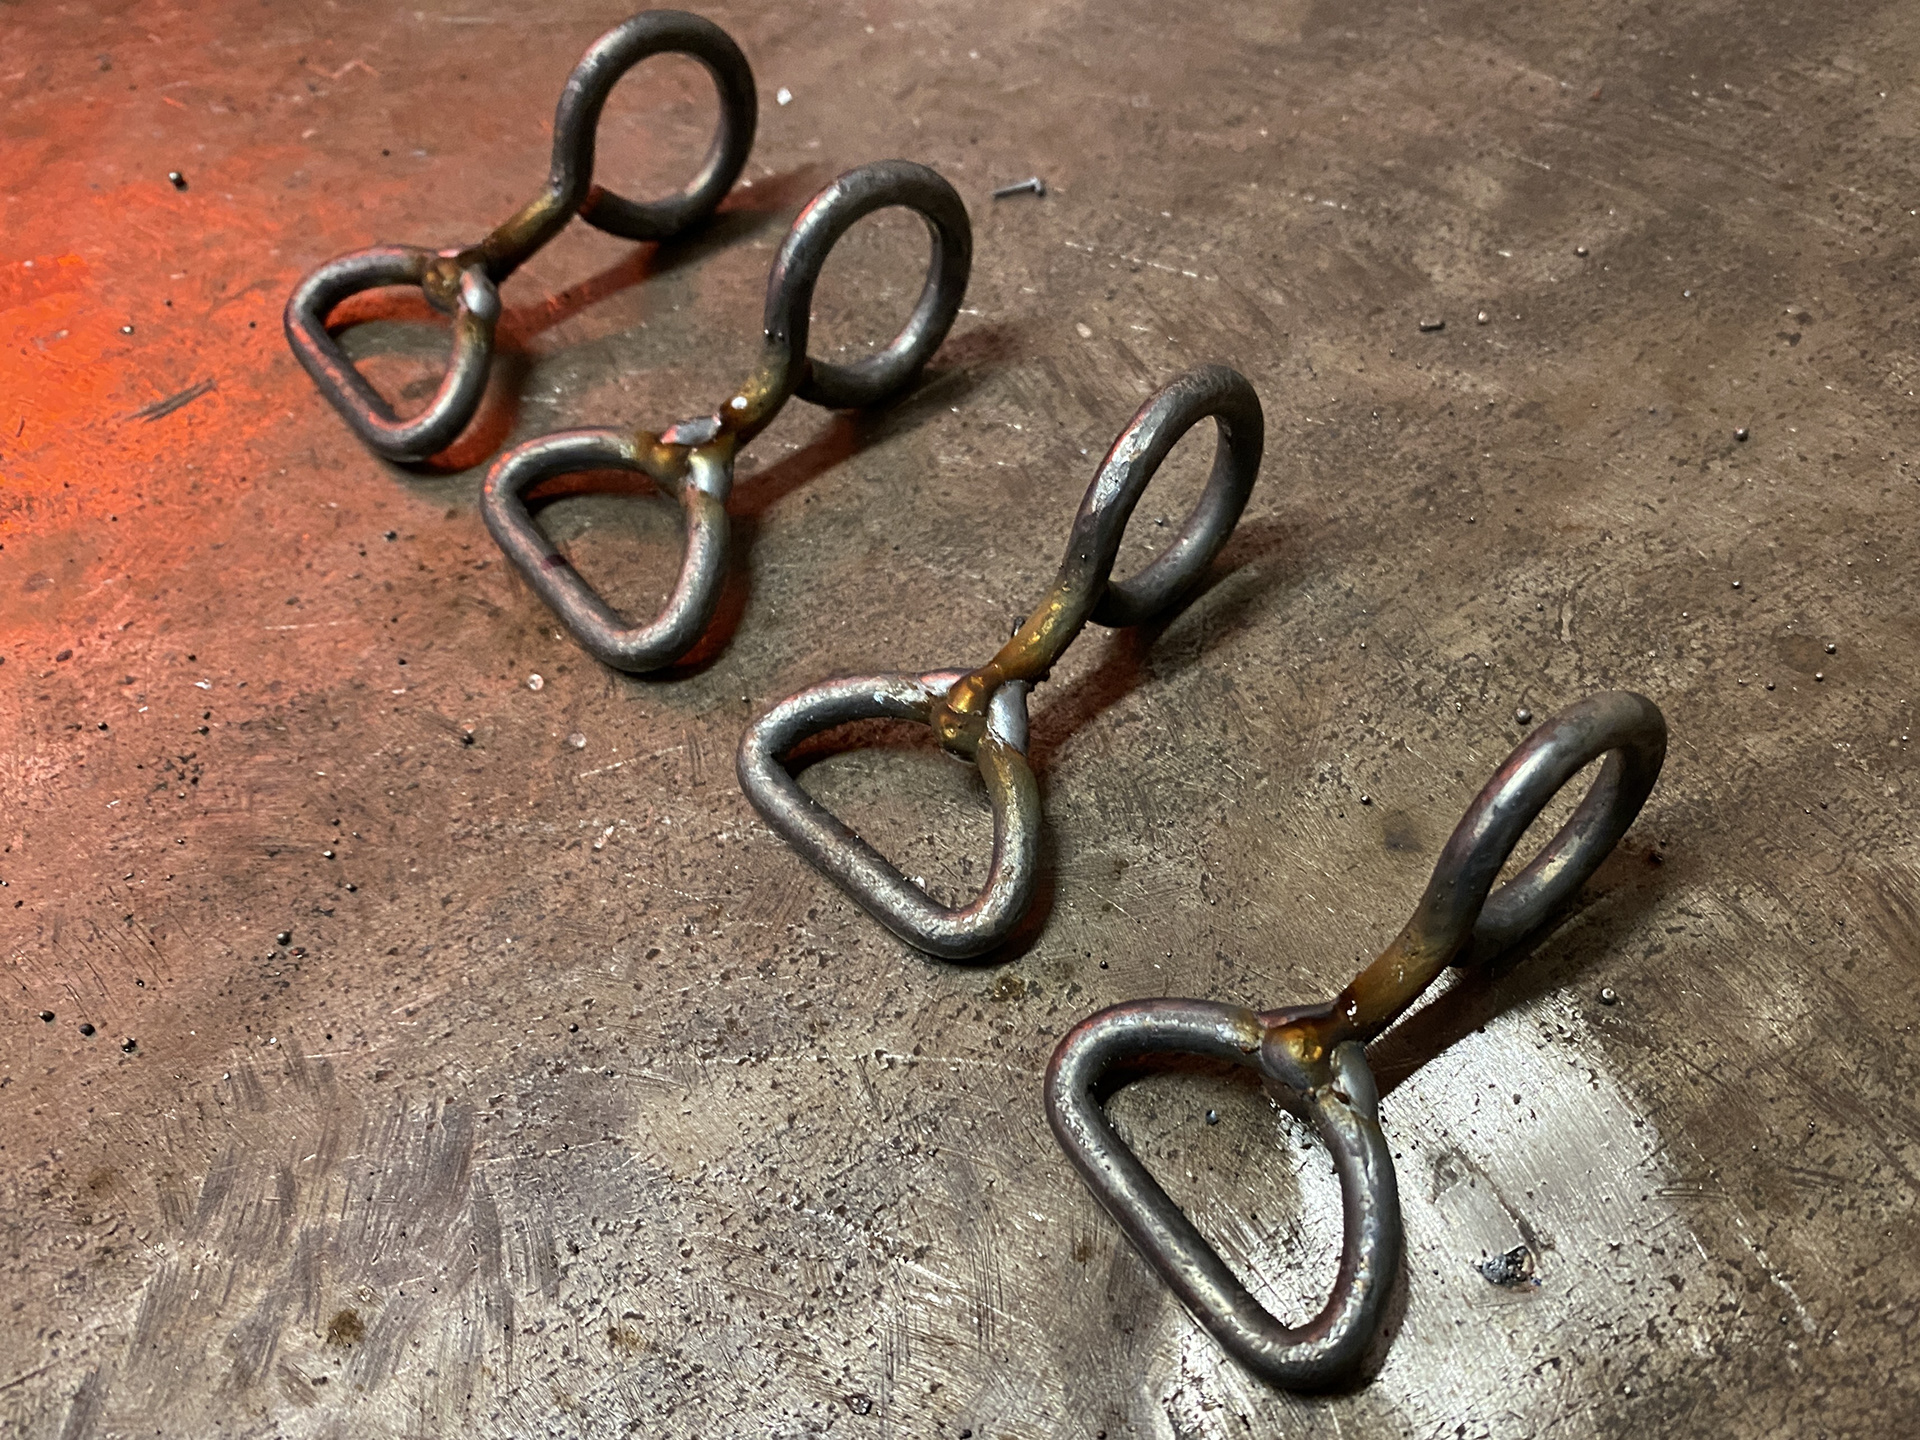
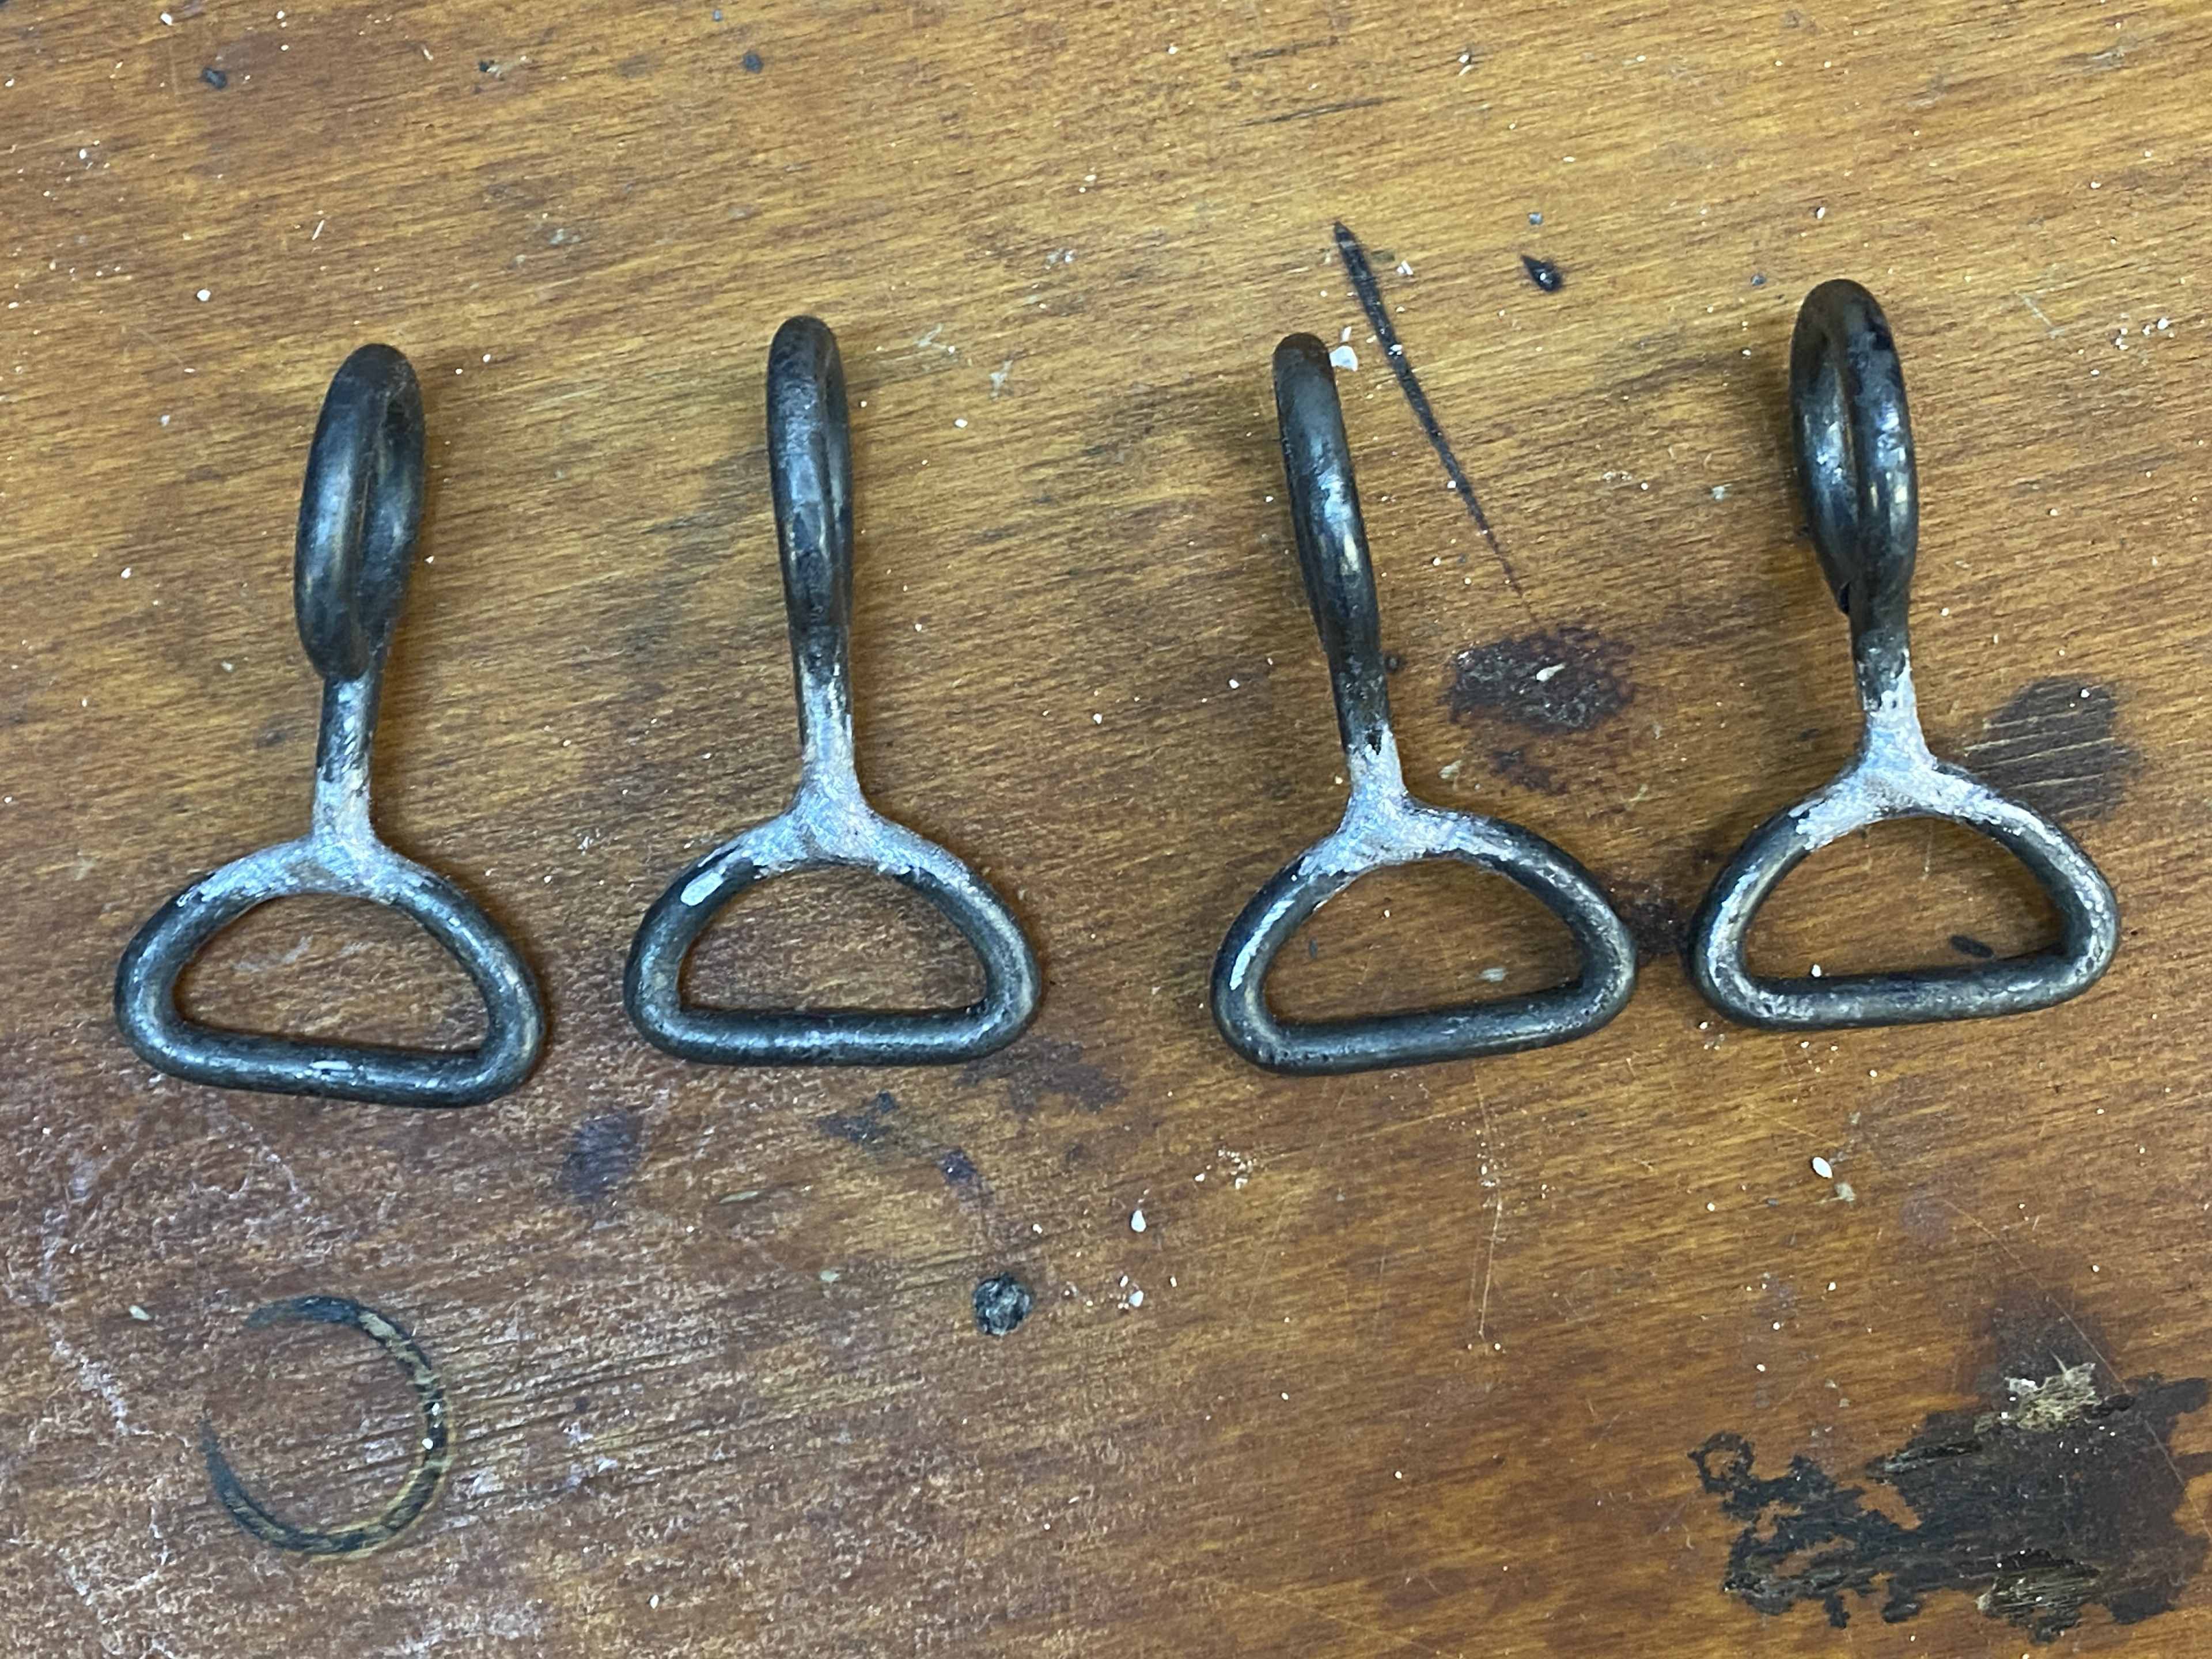
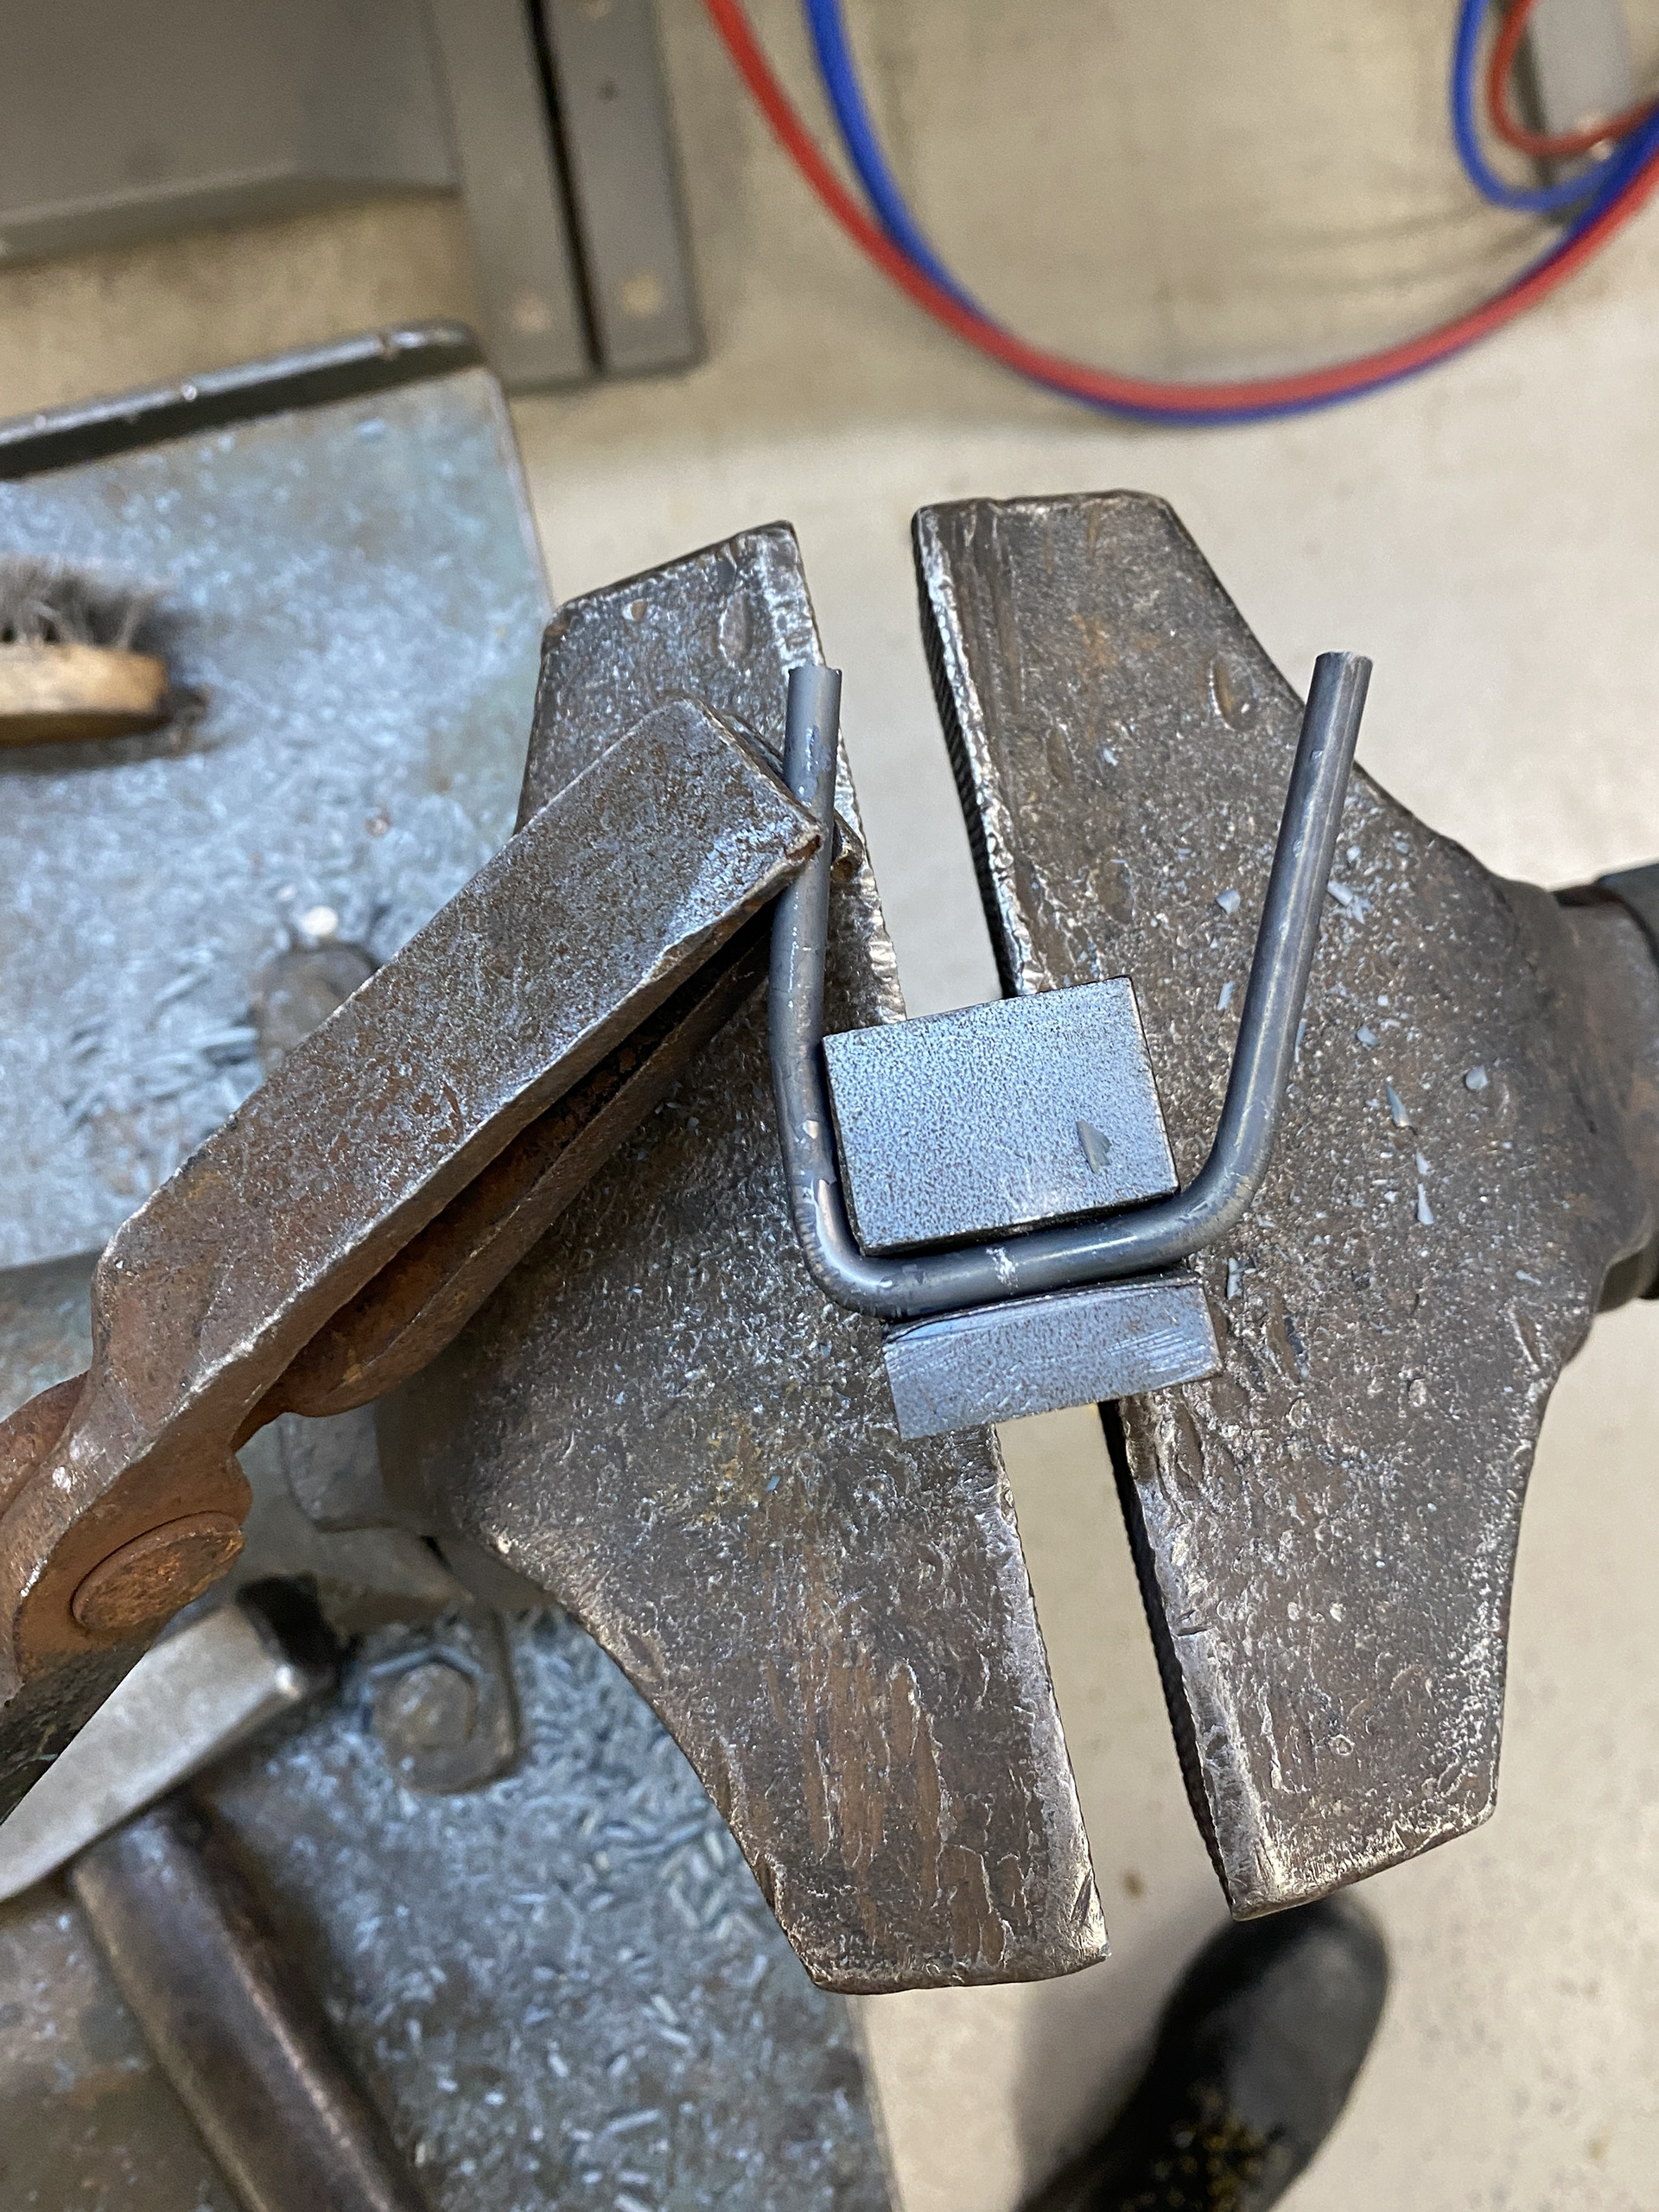
To determine how the piece would be secured to the body, I first marked all the points where the chains met. I found that they converged at one central point, with multiple areas requiring attachment. Initially, I wanted to use a single large link, but to position the chains correctly, separate linking points were necessary. As a solution, I designed a piece incorporating 4mm and 5mm links attached to a larger 10mm link. I then modeled the hooks and hardware needed for both permanent and temporary attachment to the clasps. For this, I drew significant design inspiration from my Unit X clasps, as they proved highly successful.
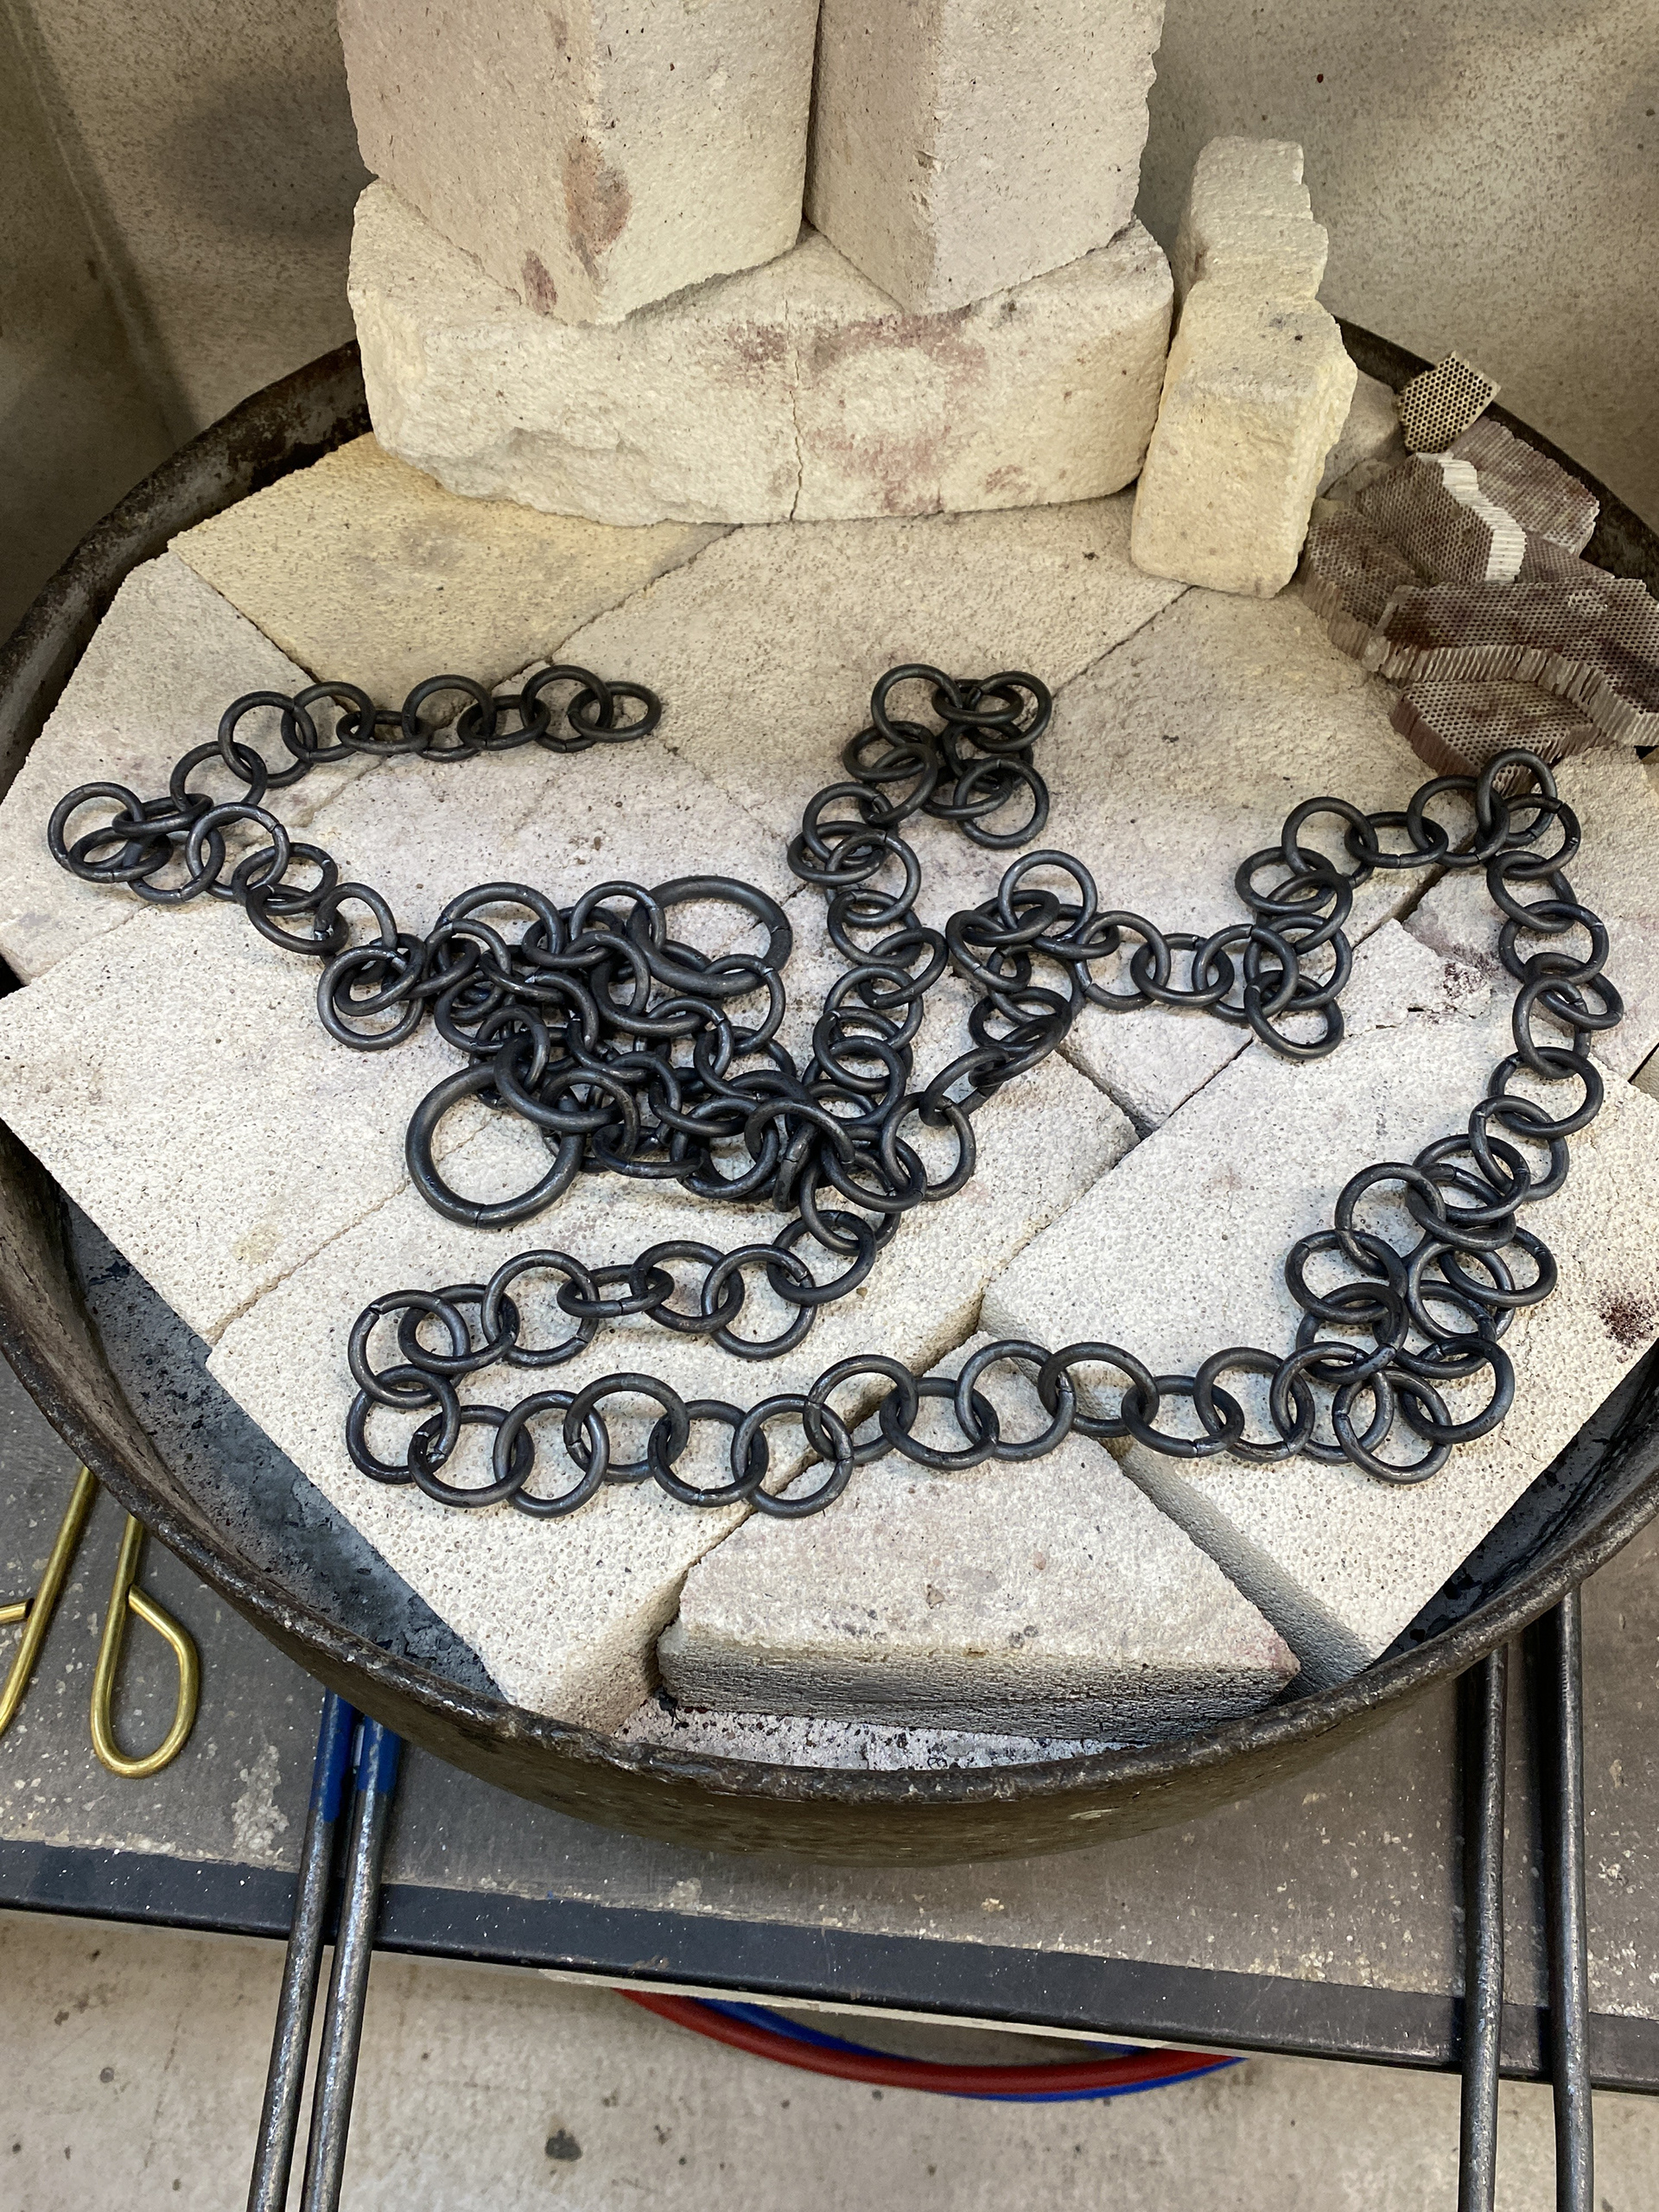
Making the piece
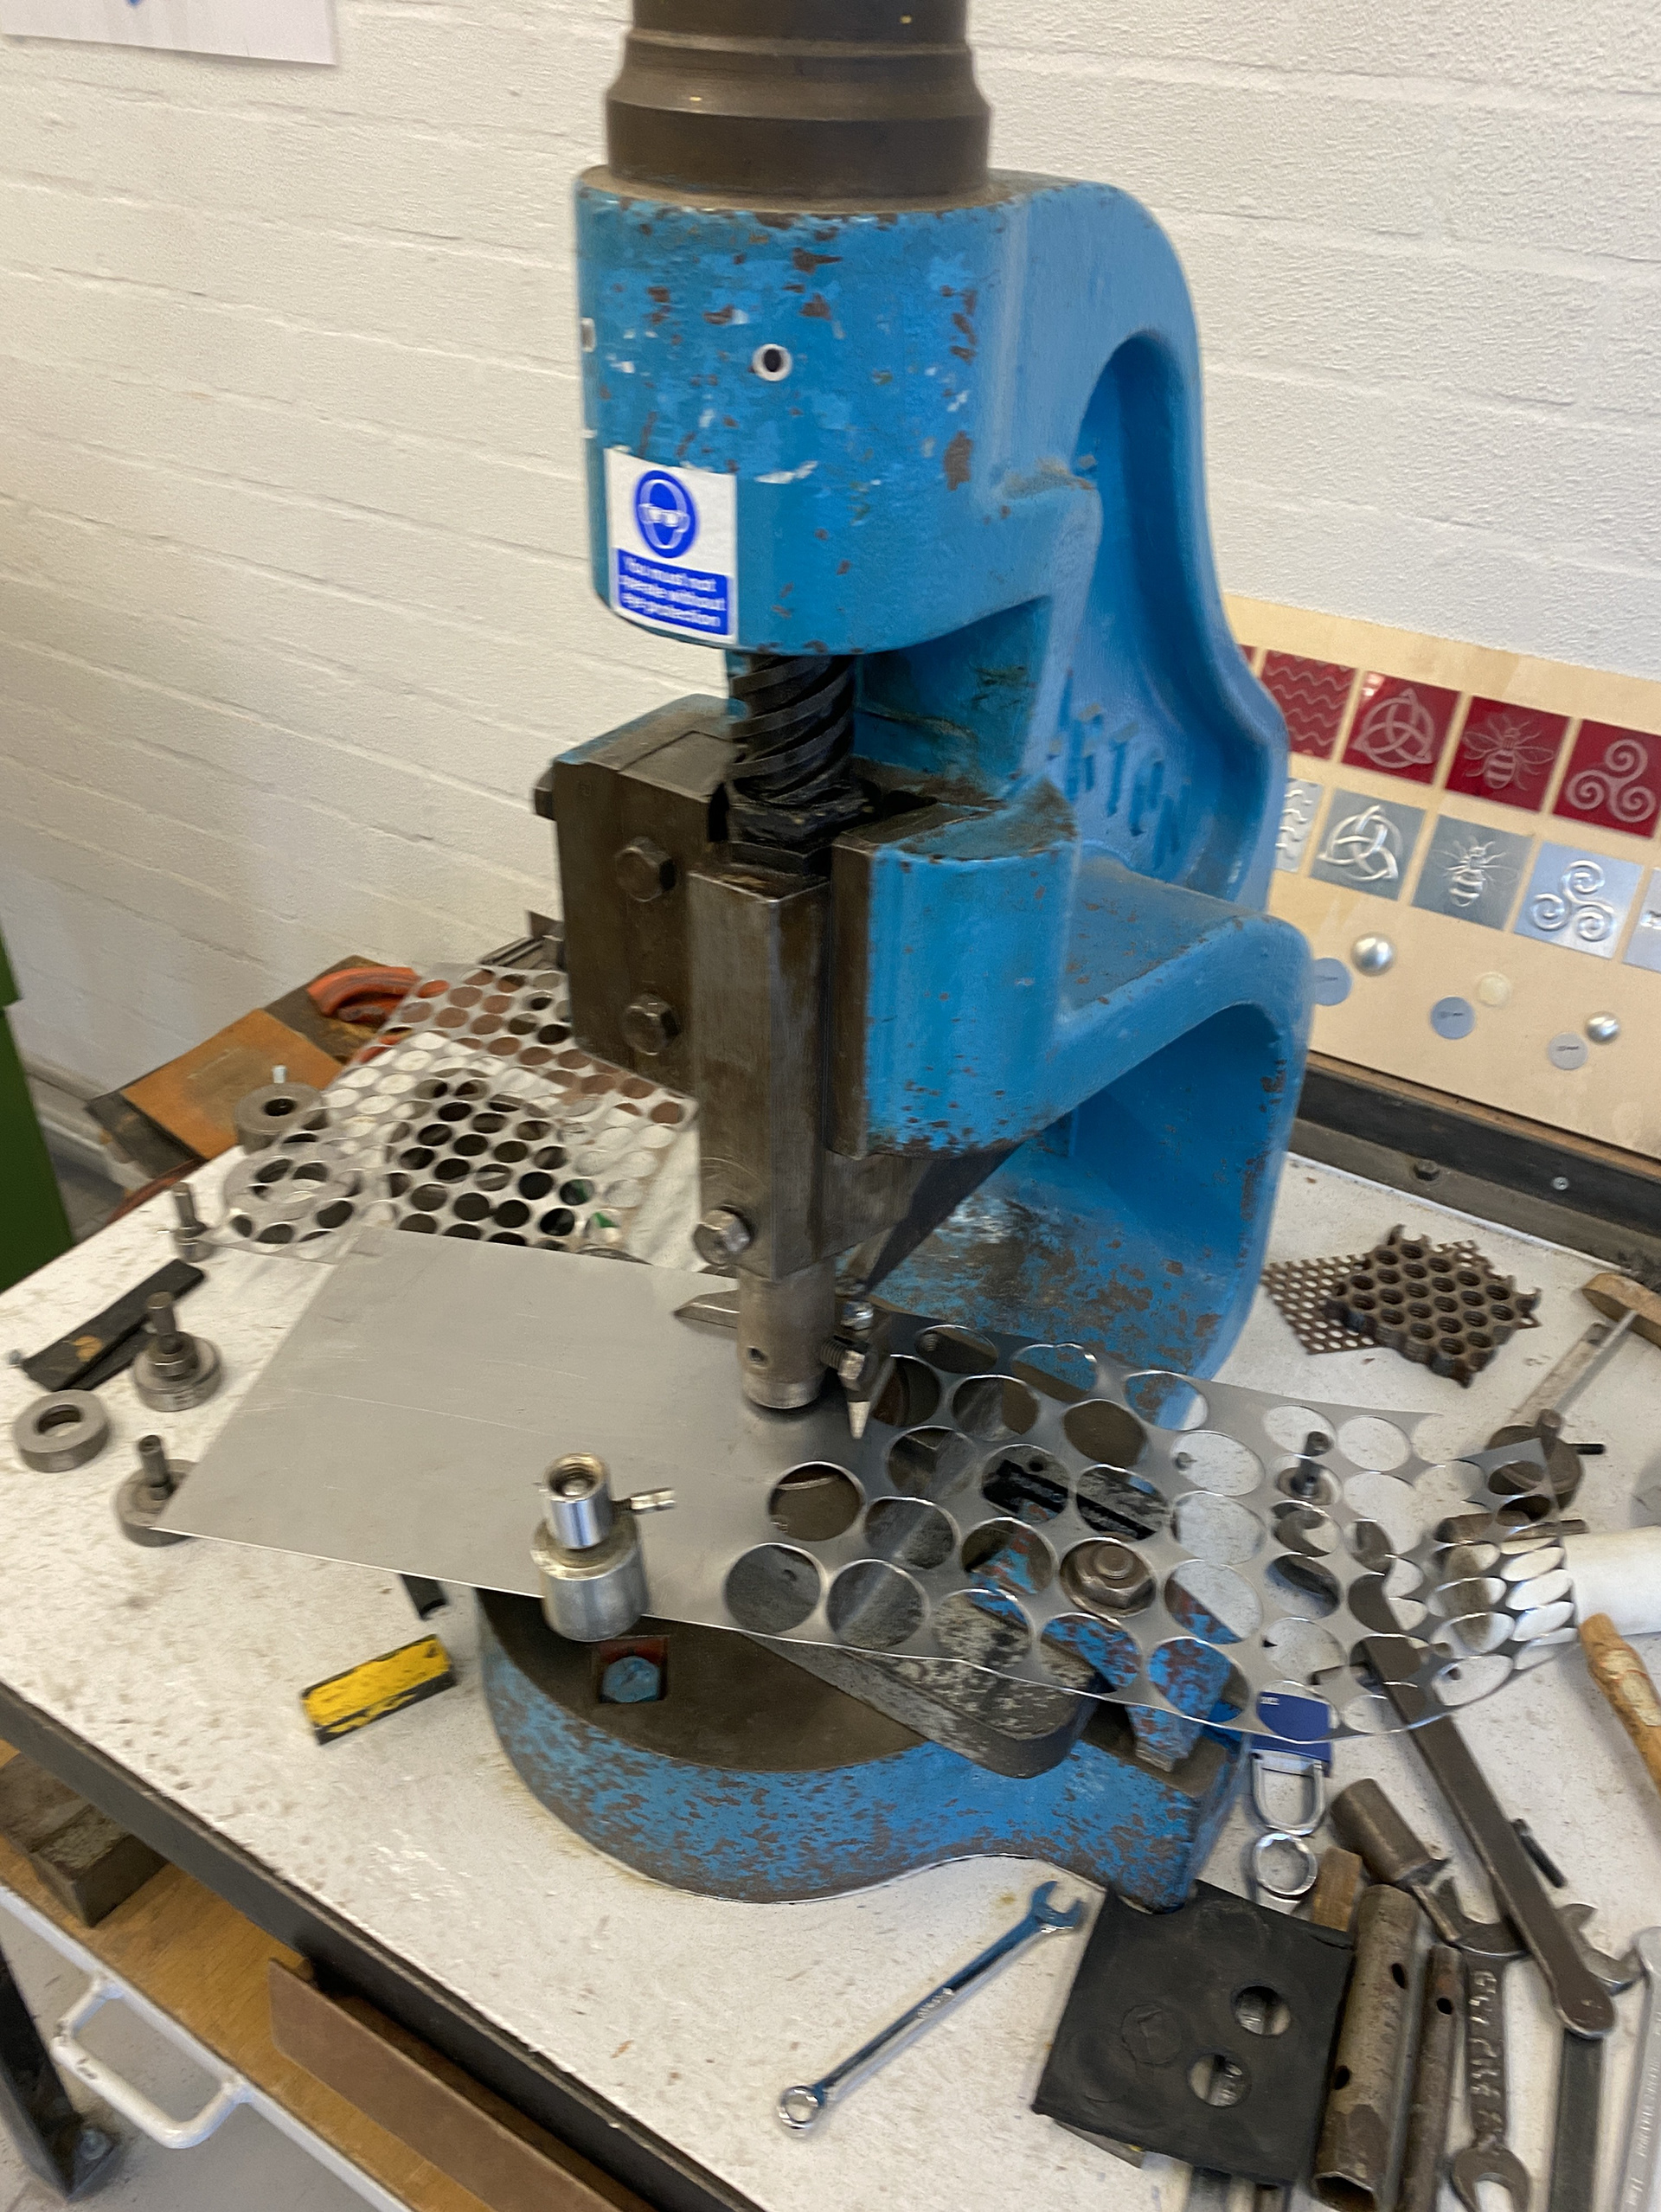
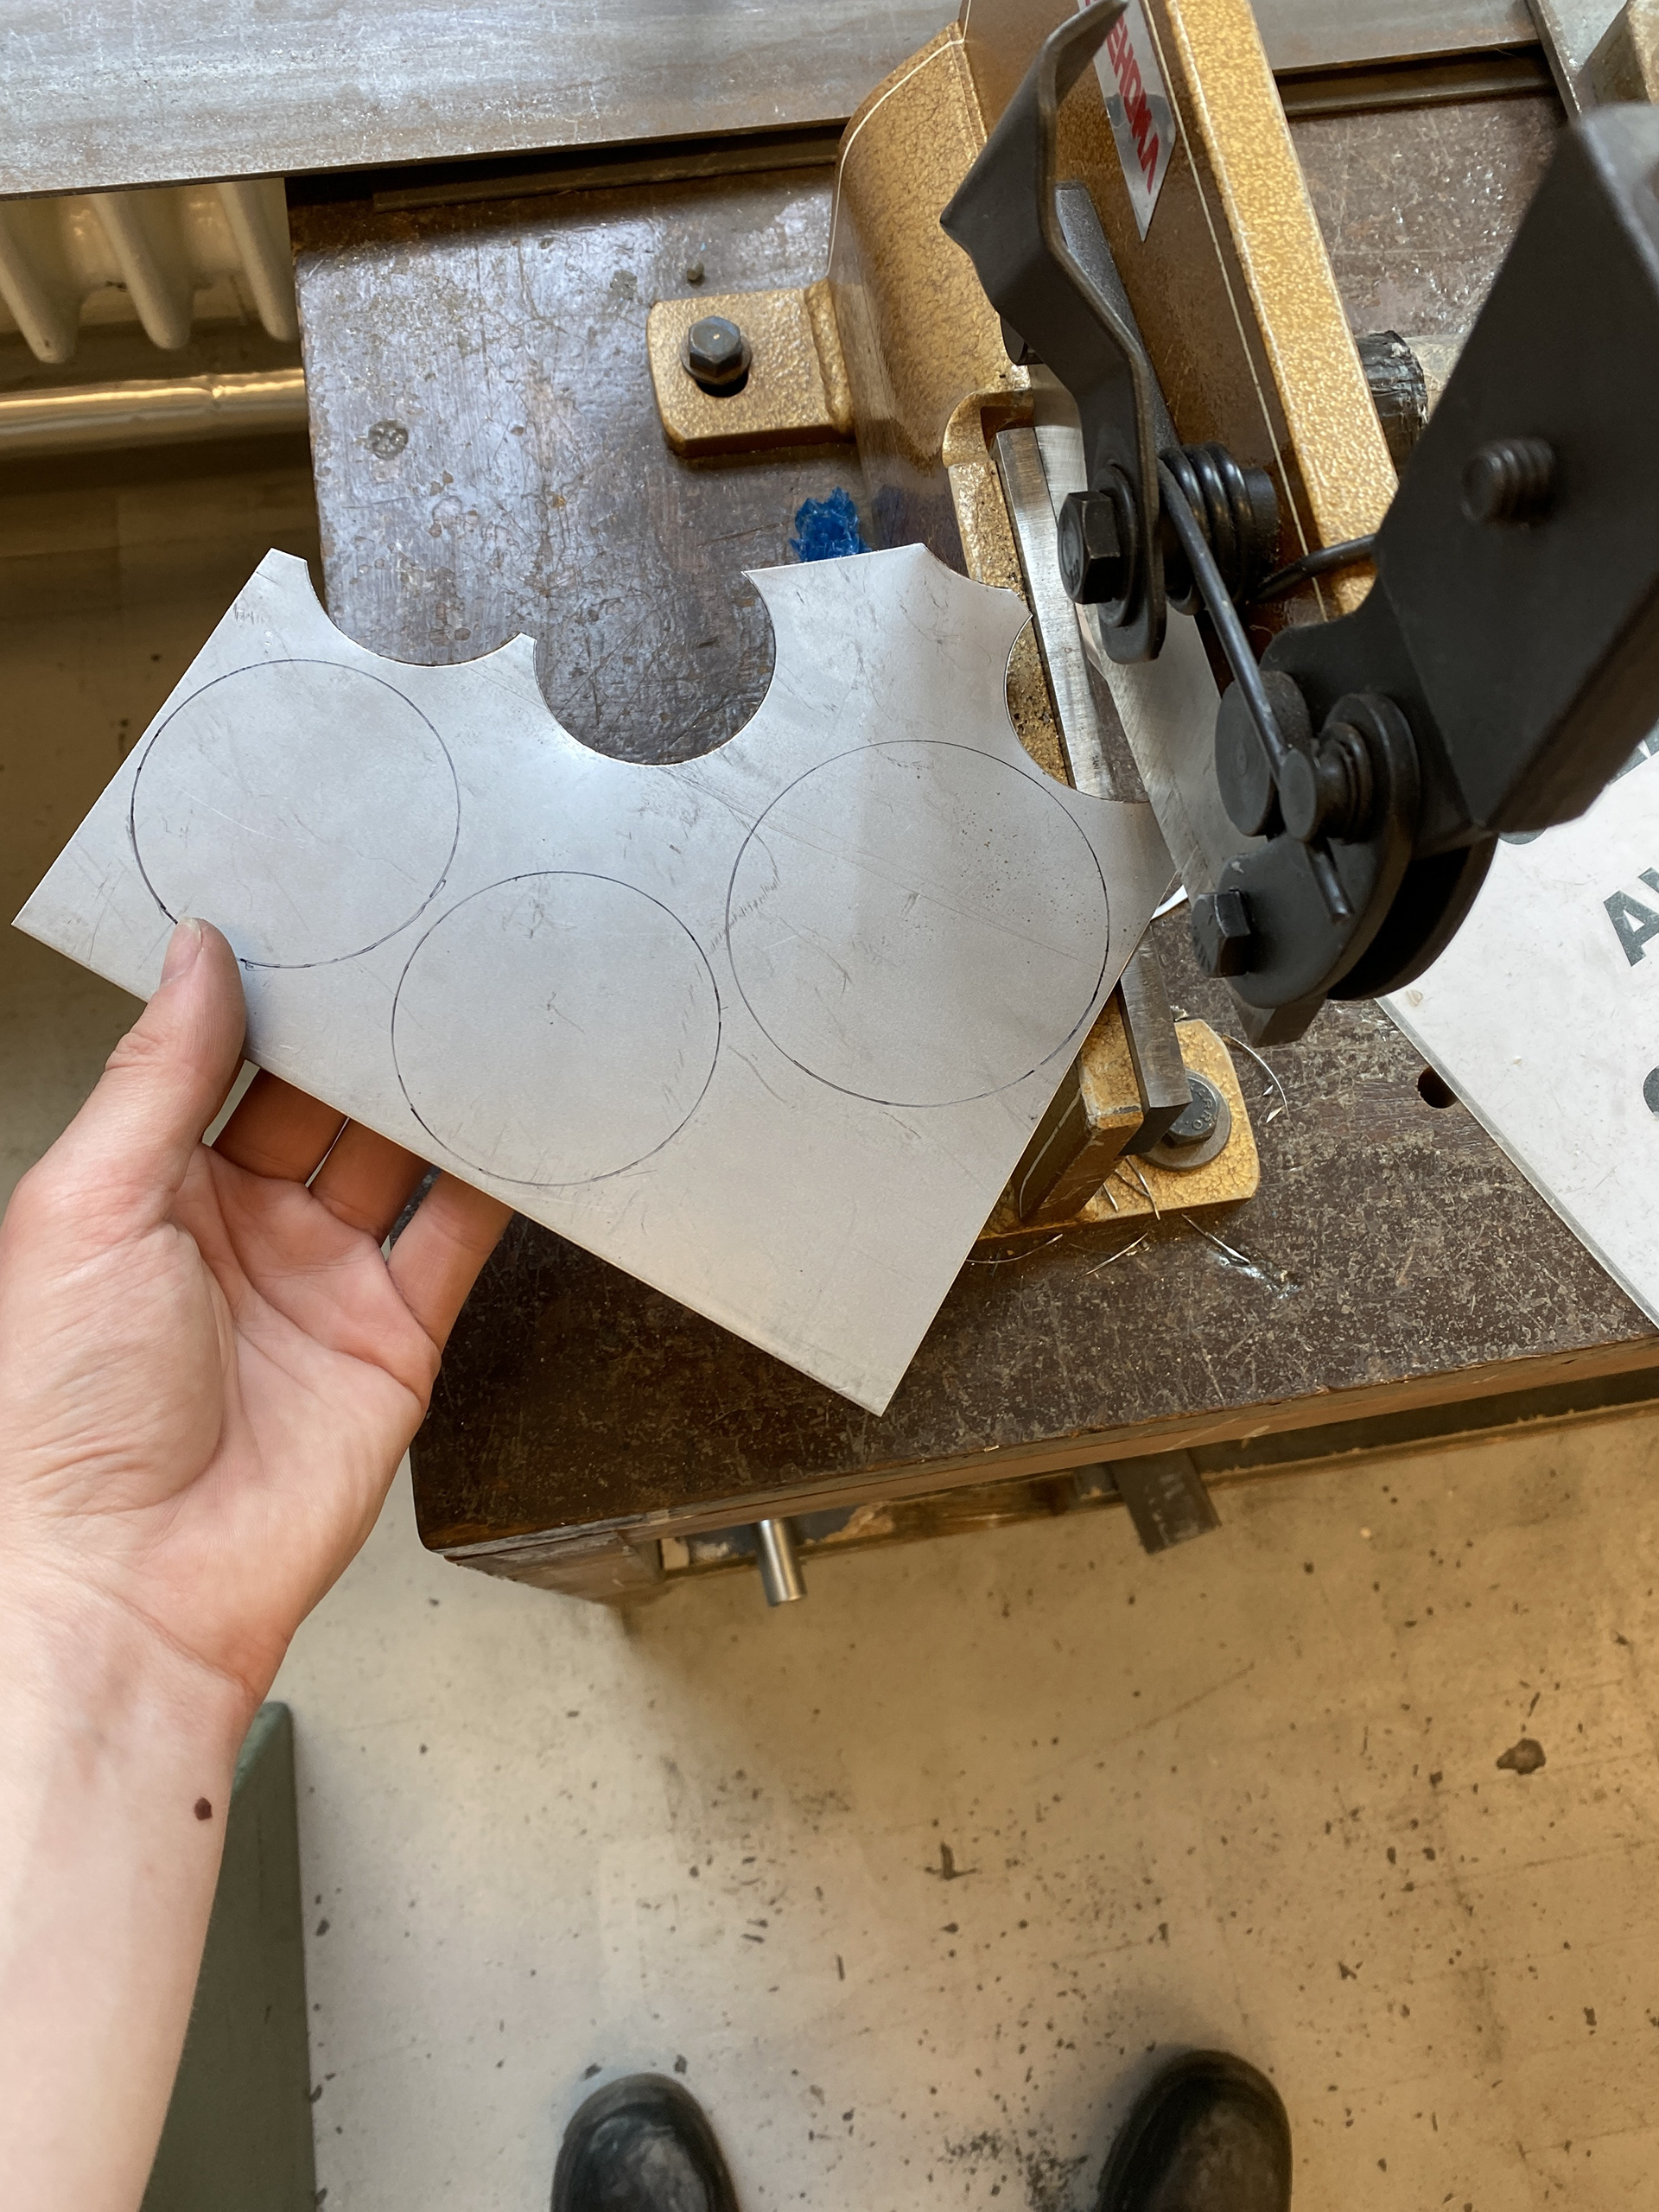
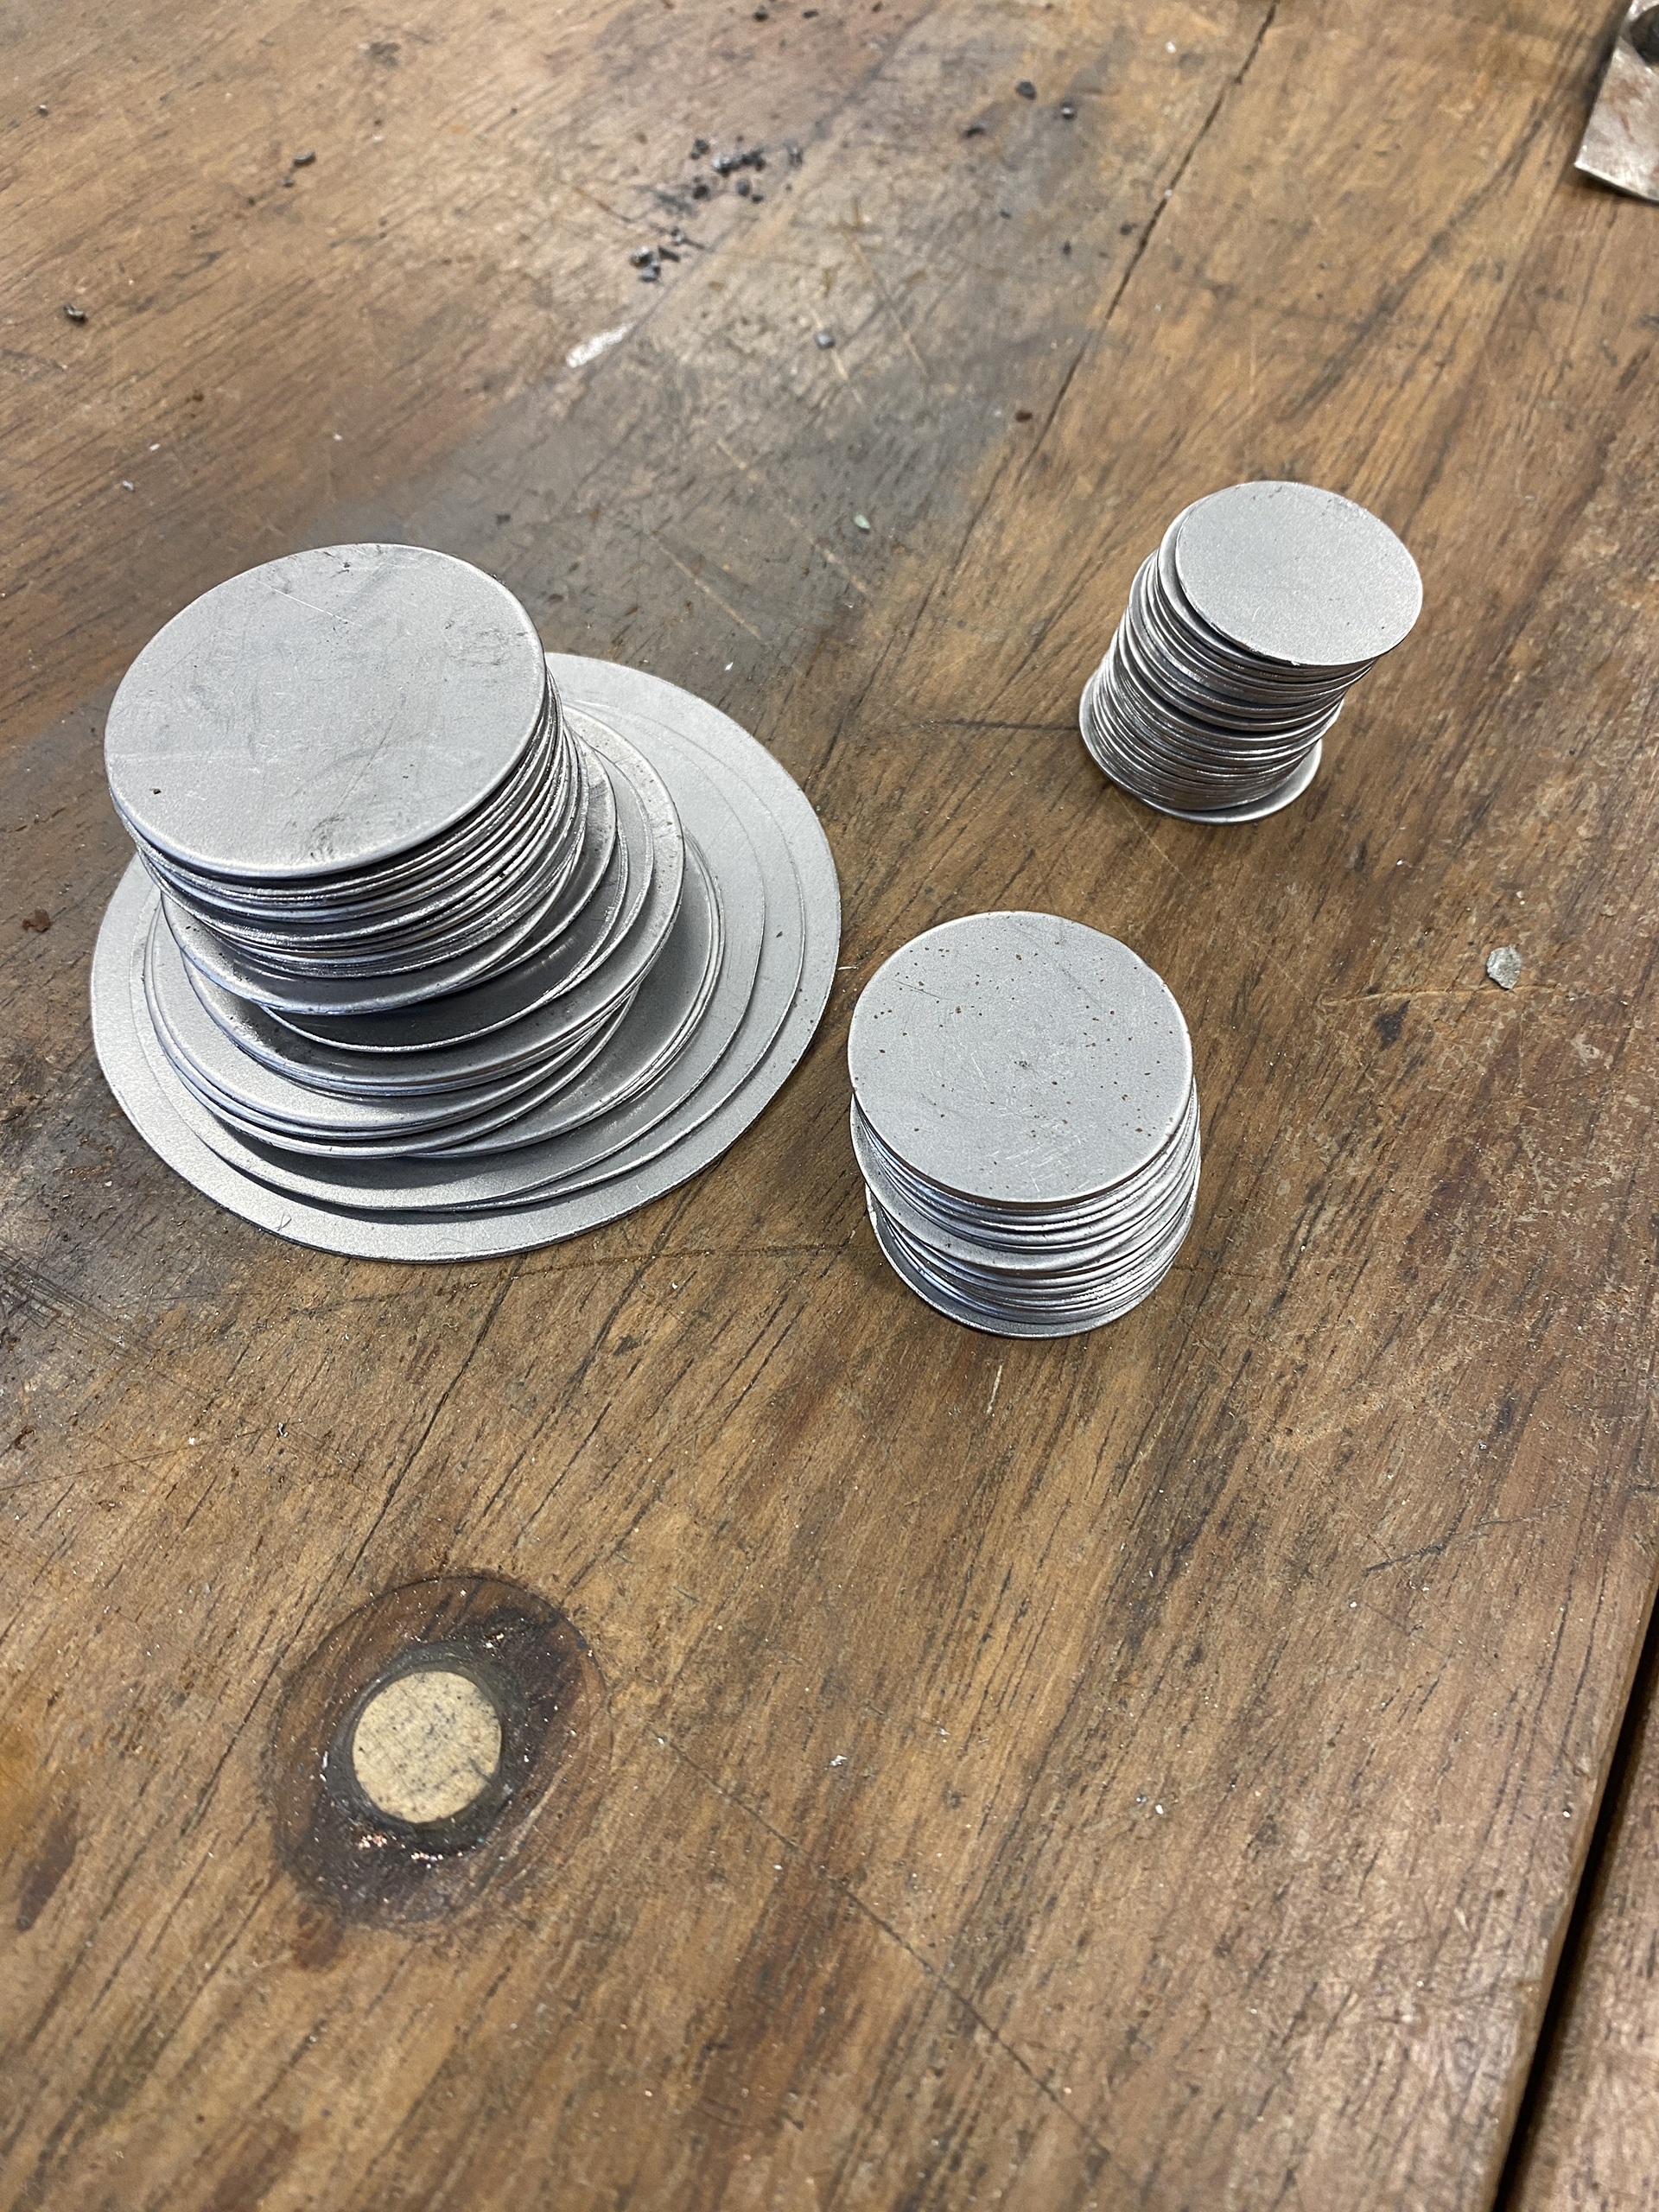
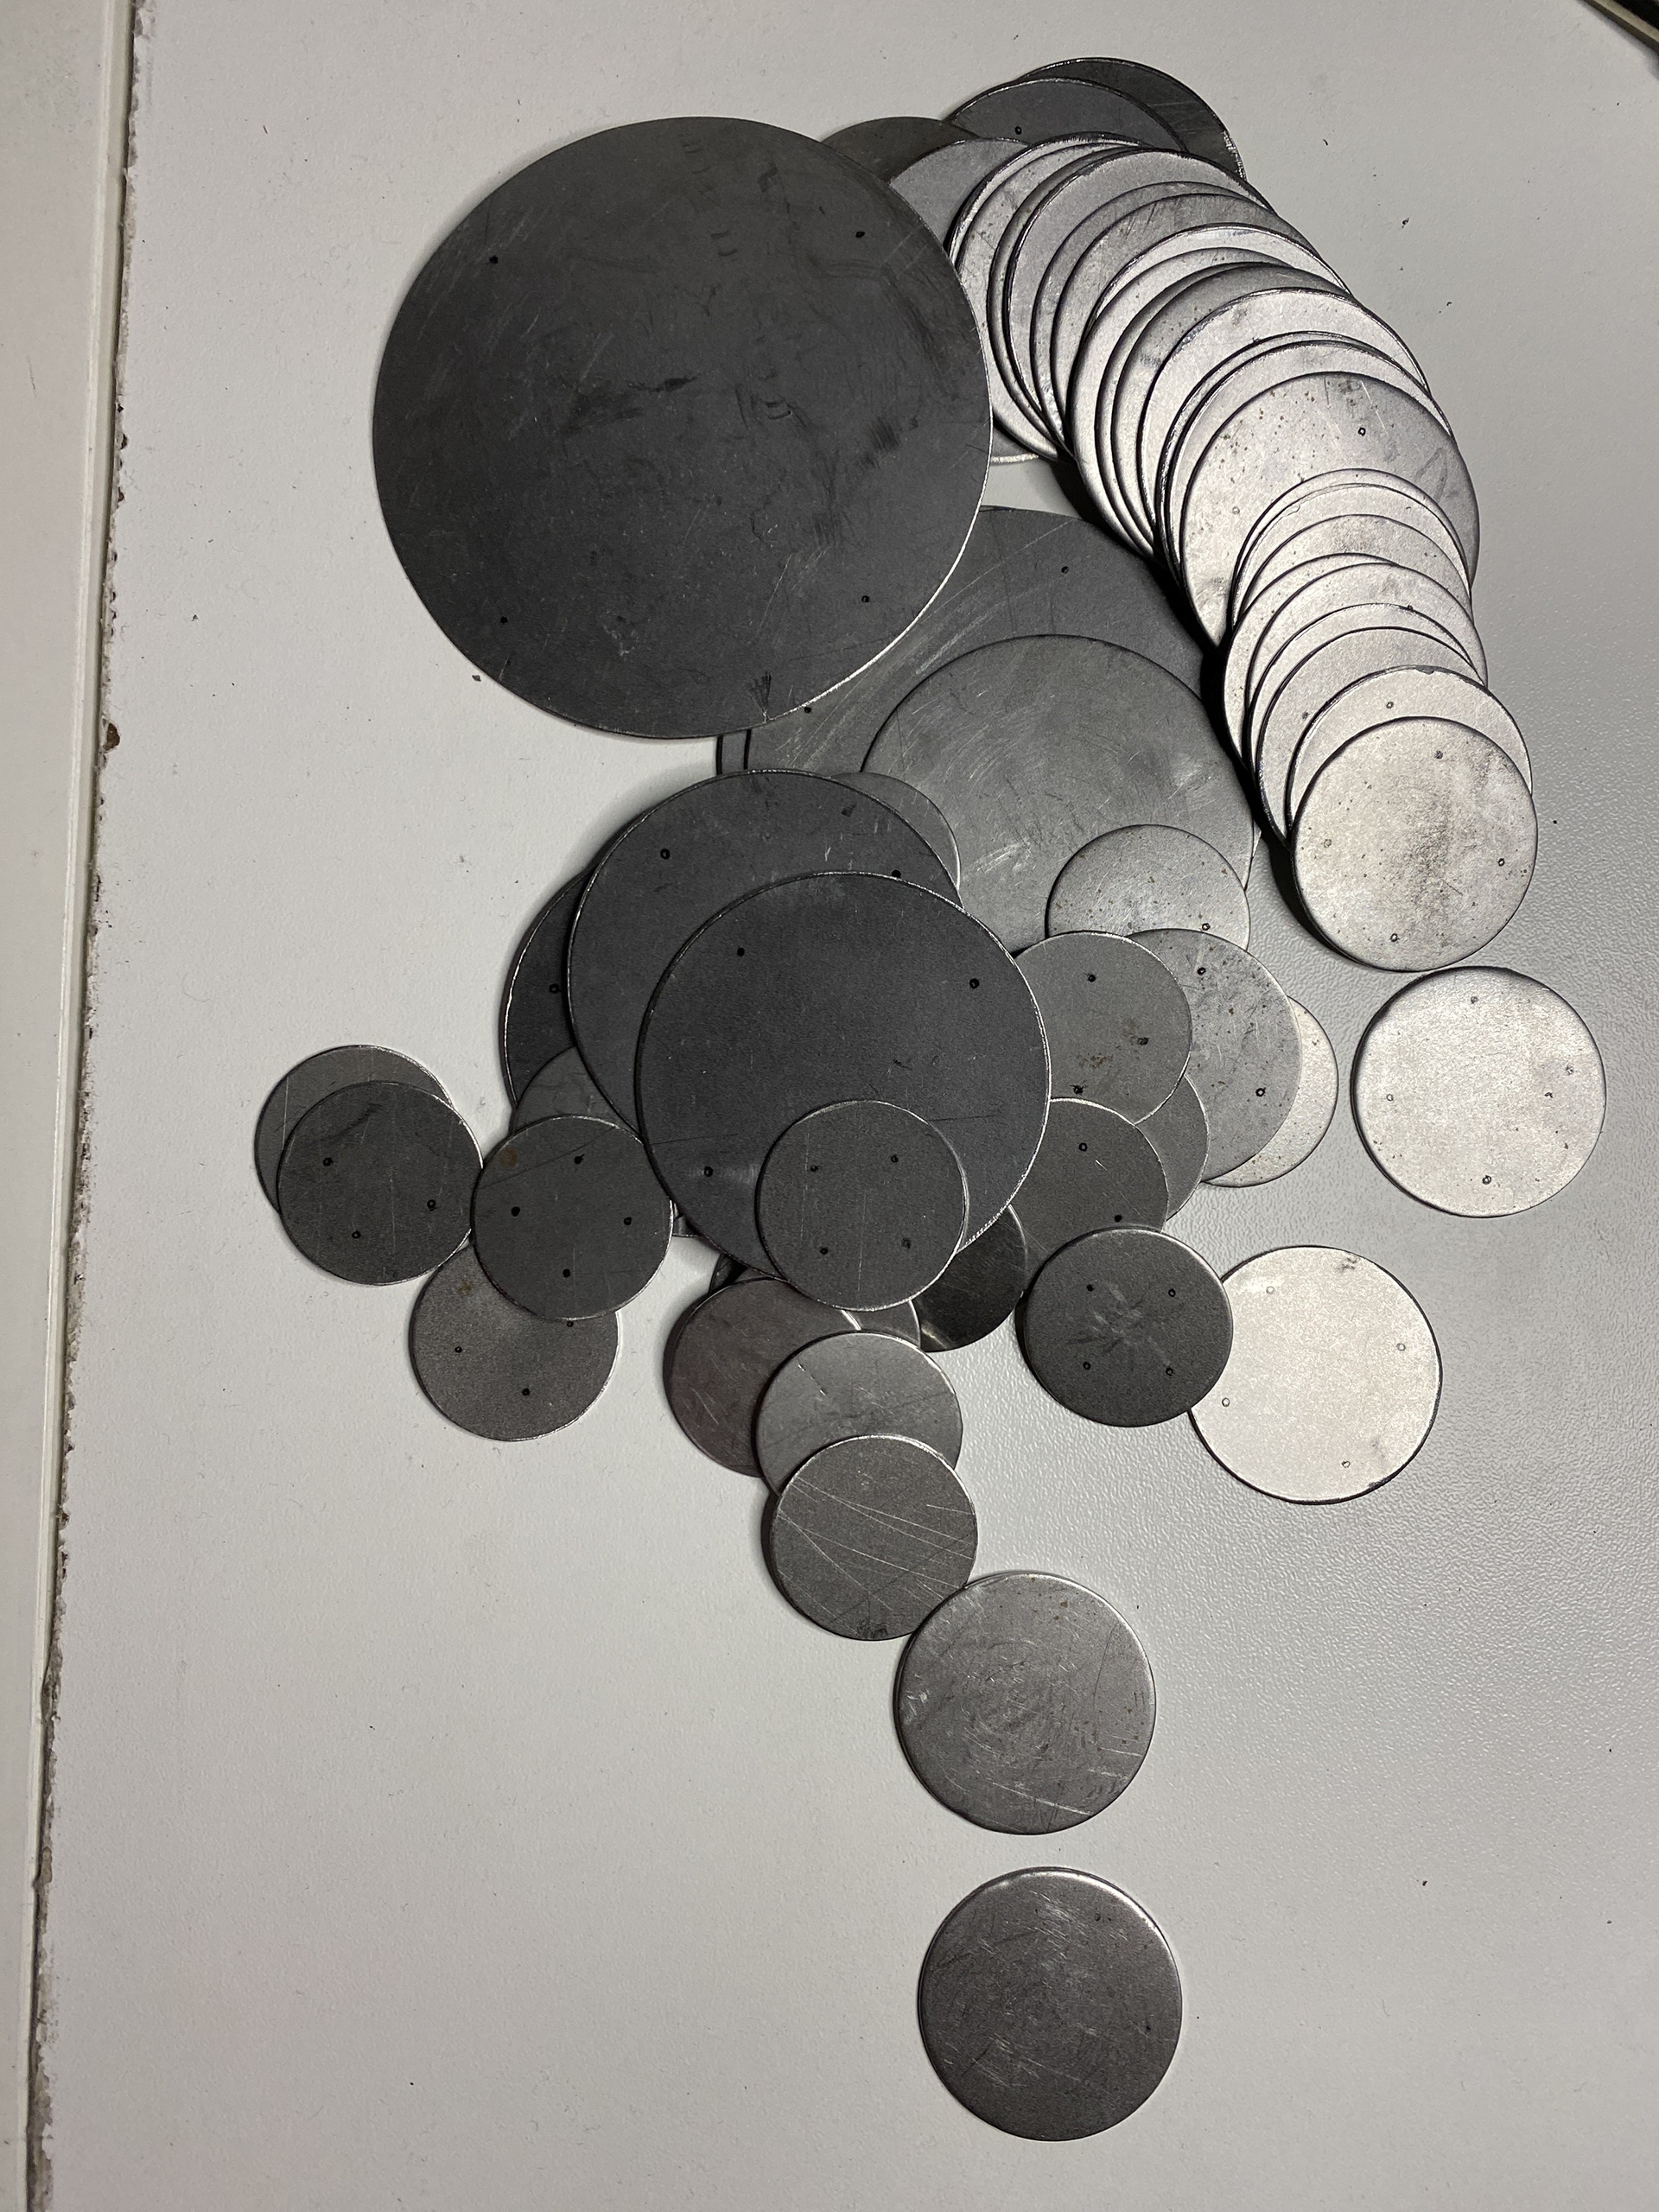
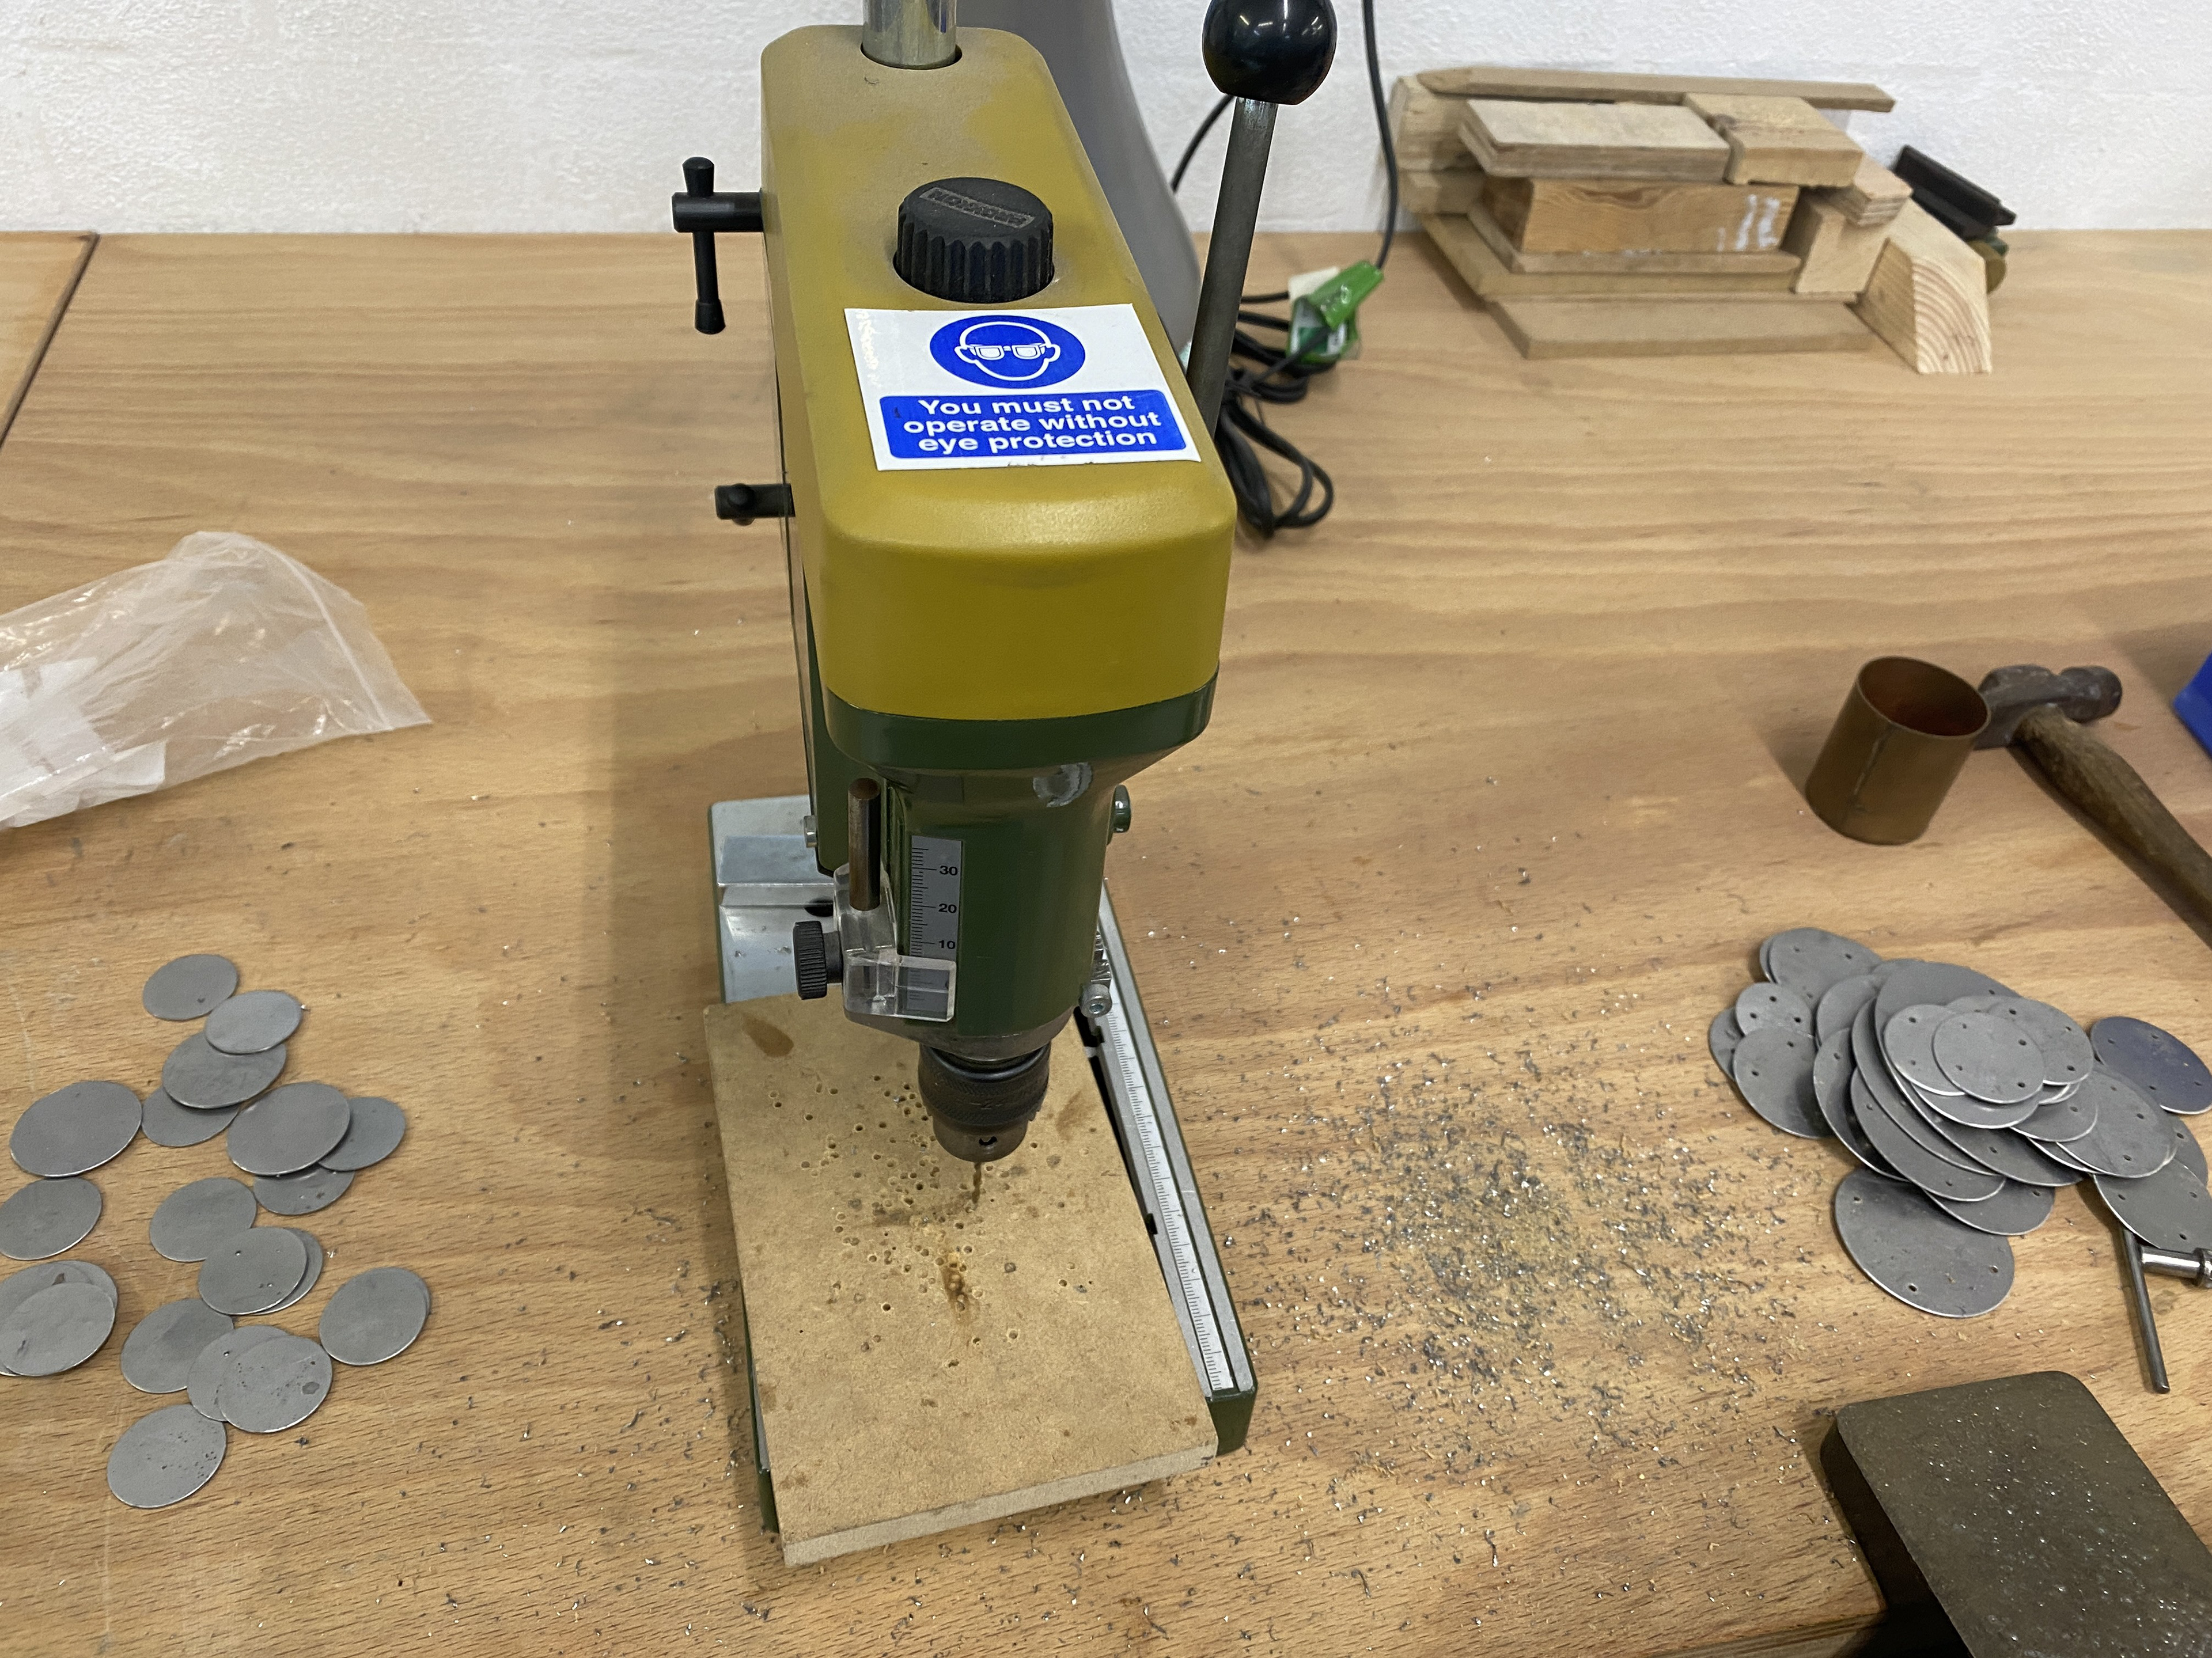
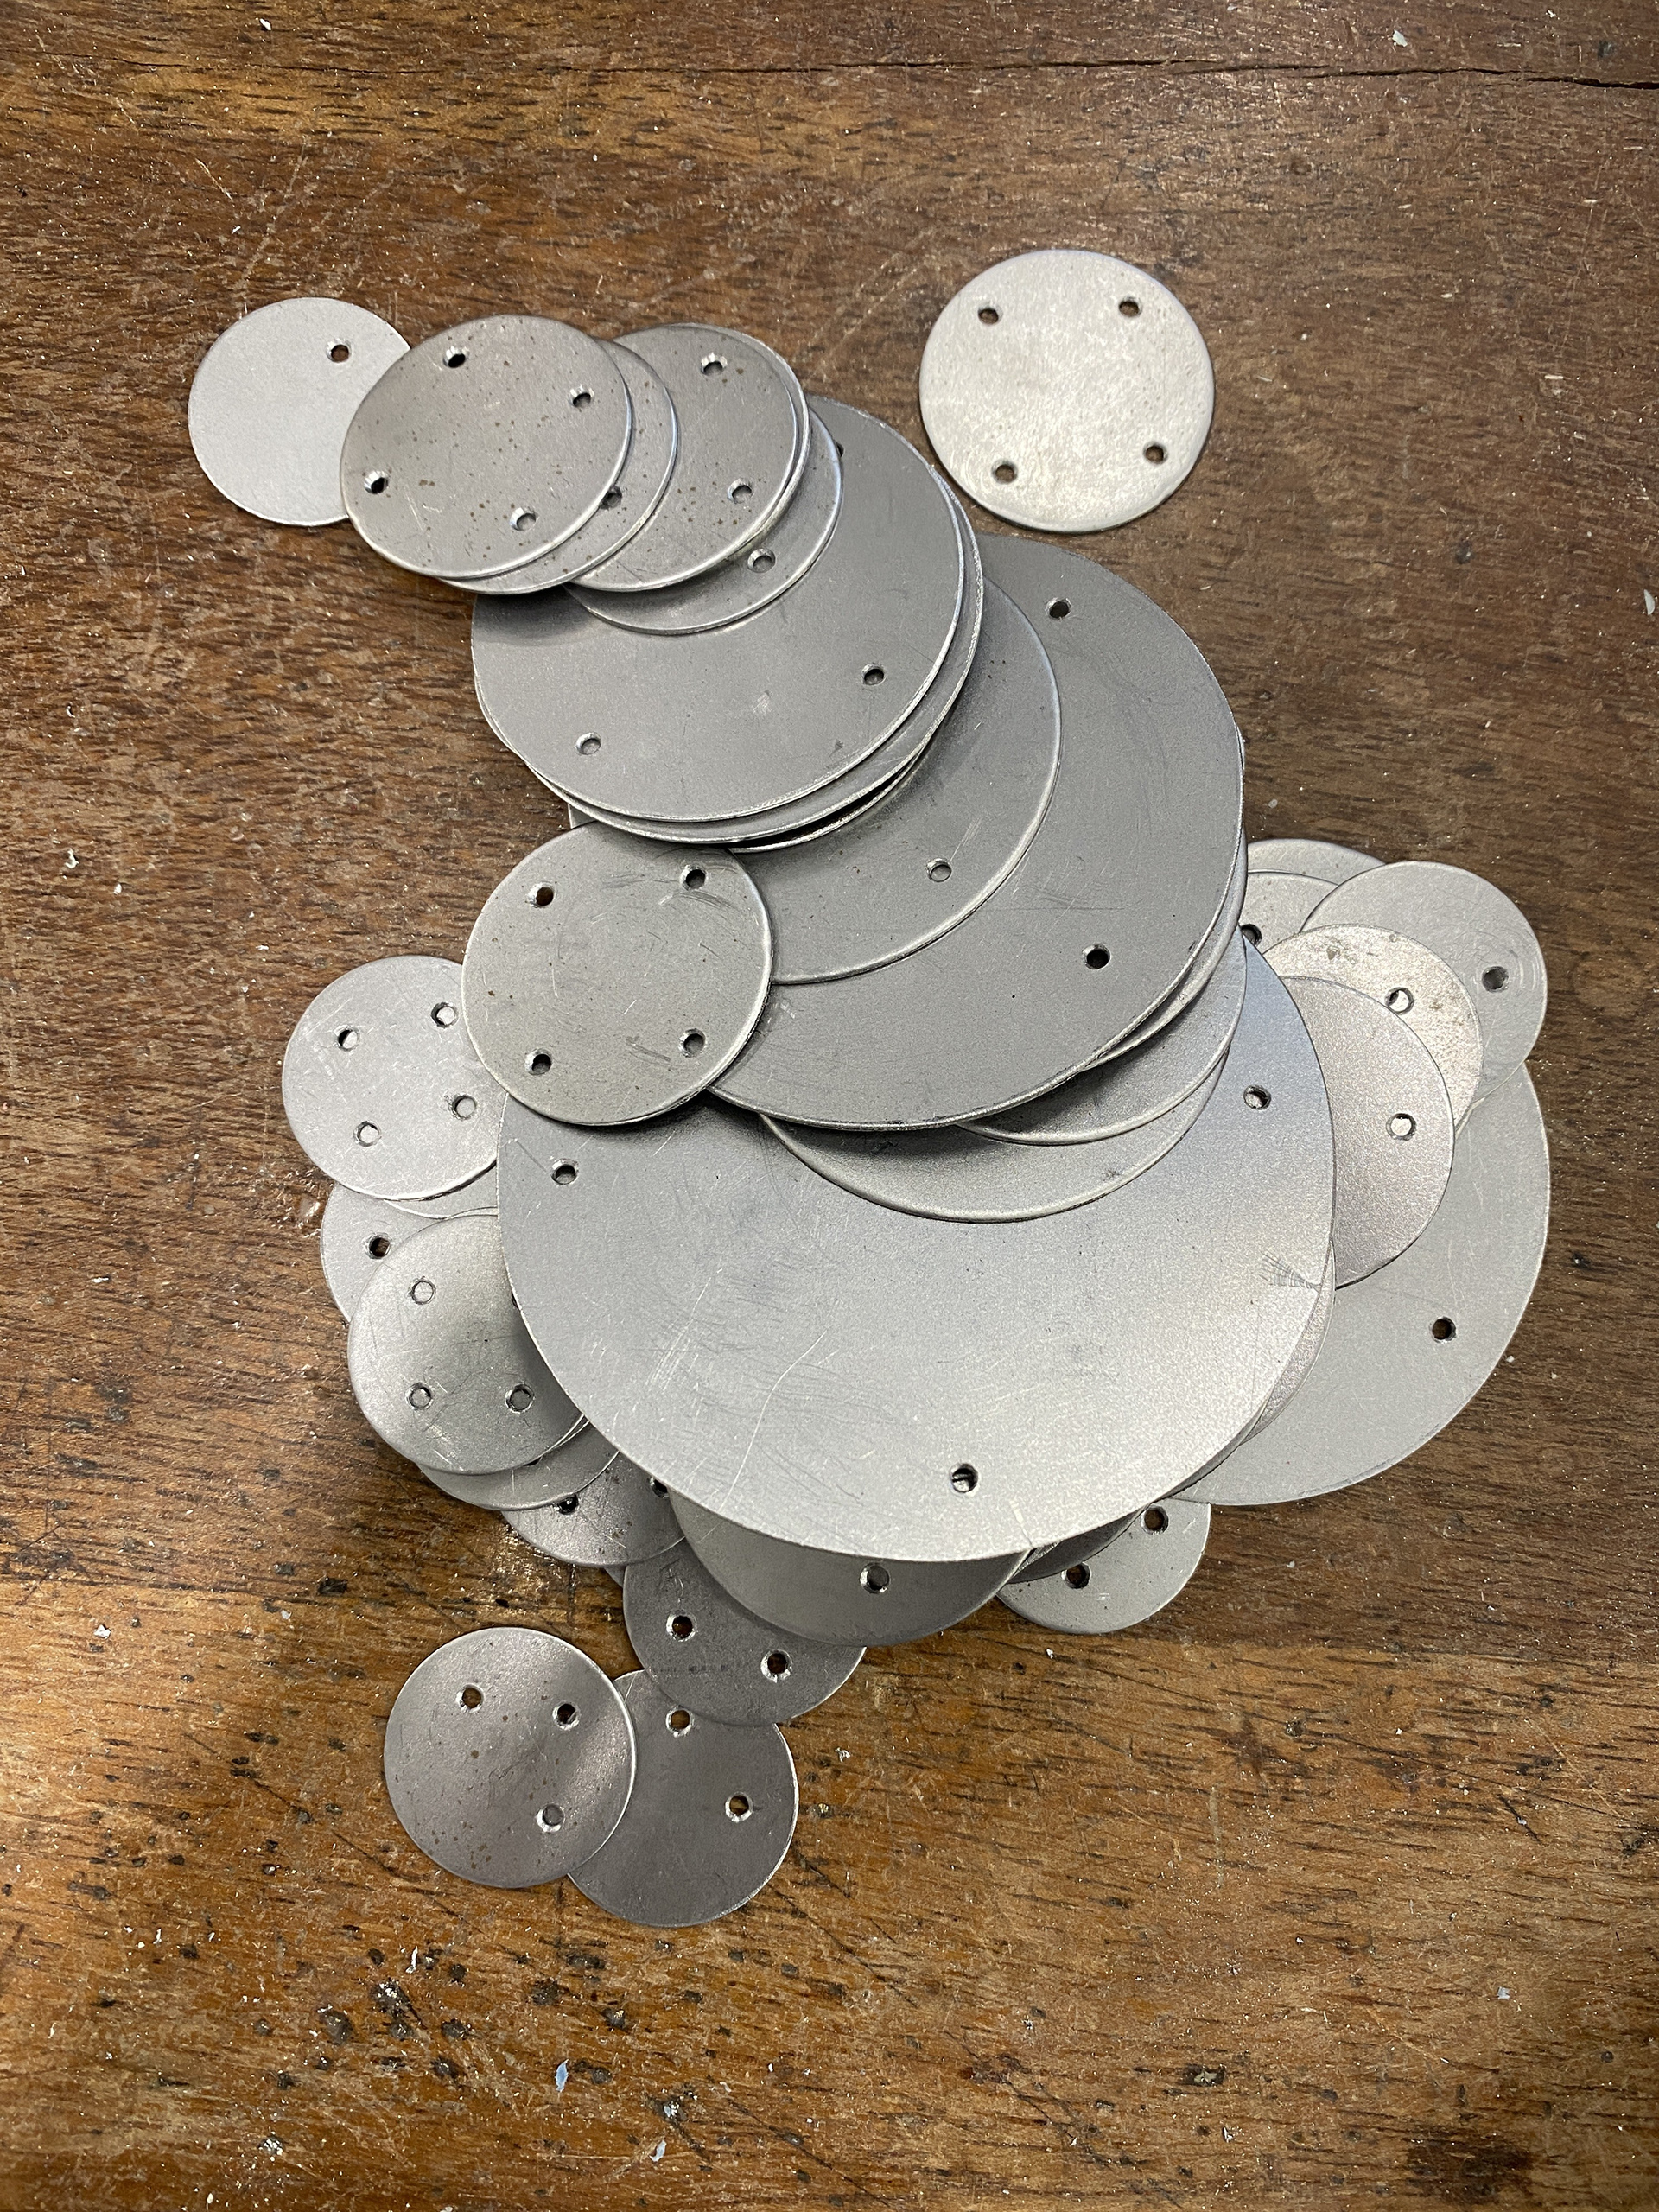
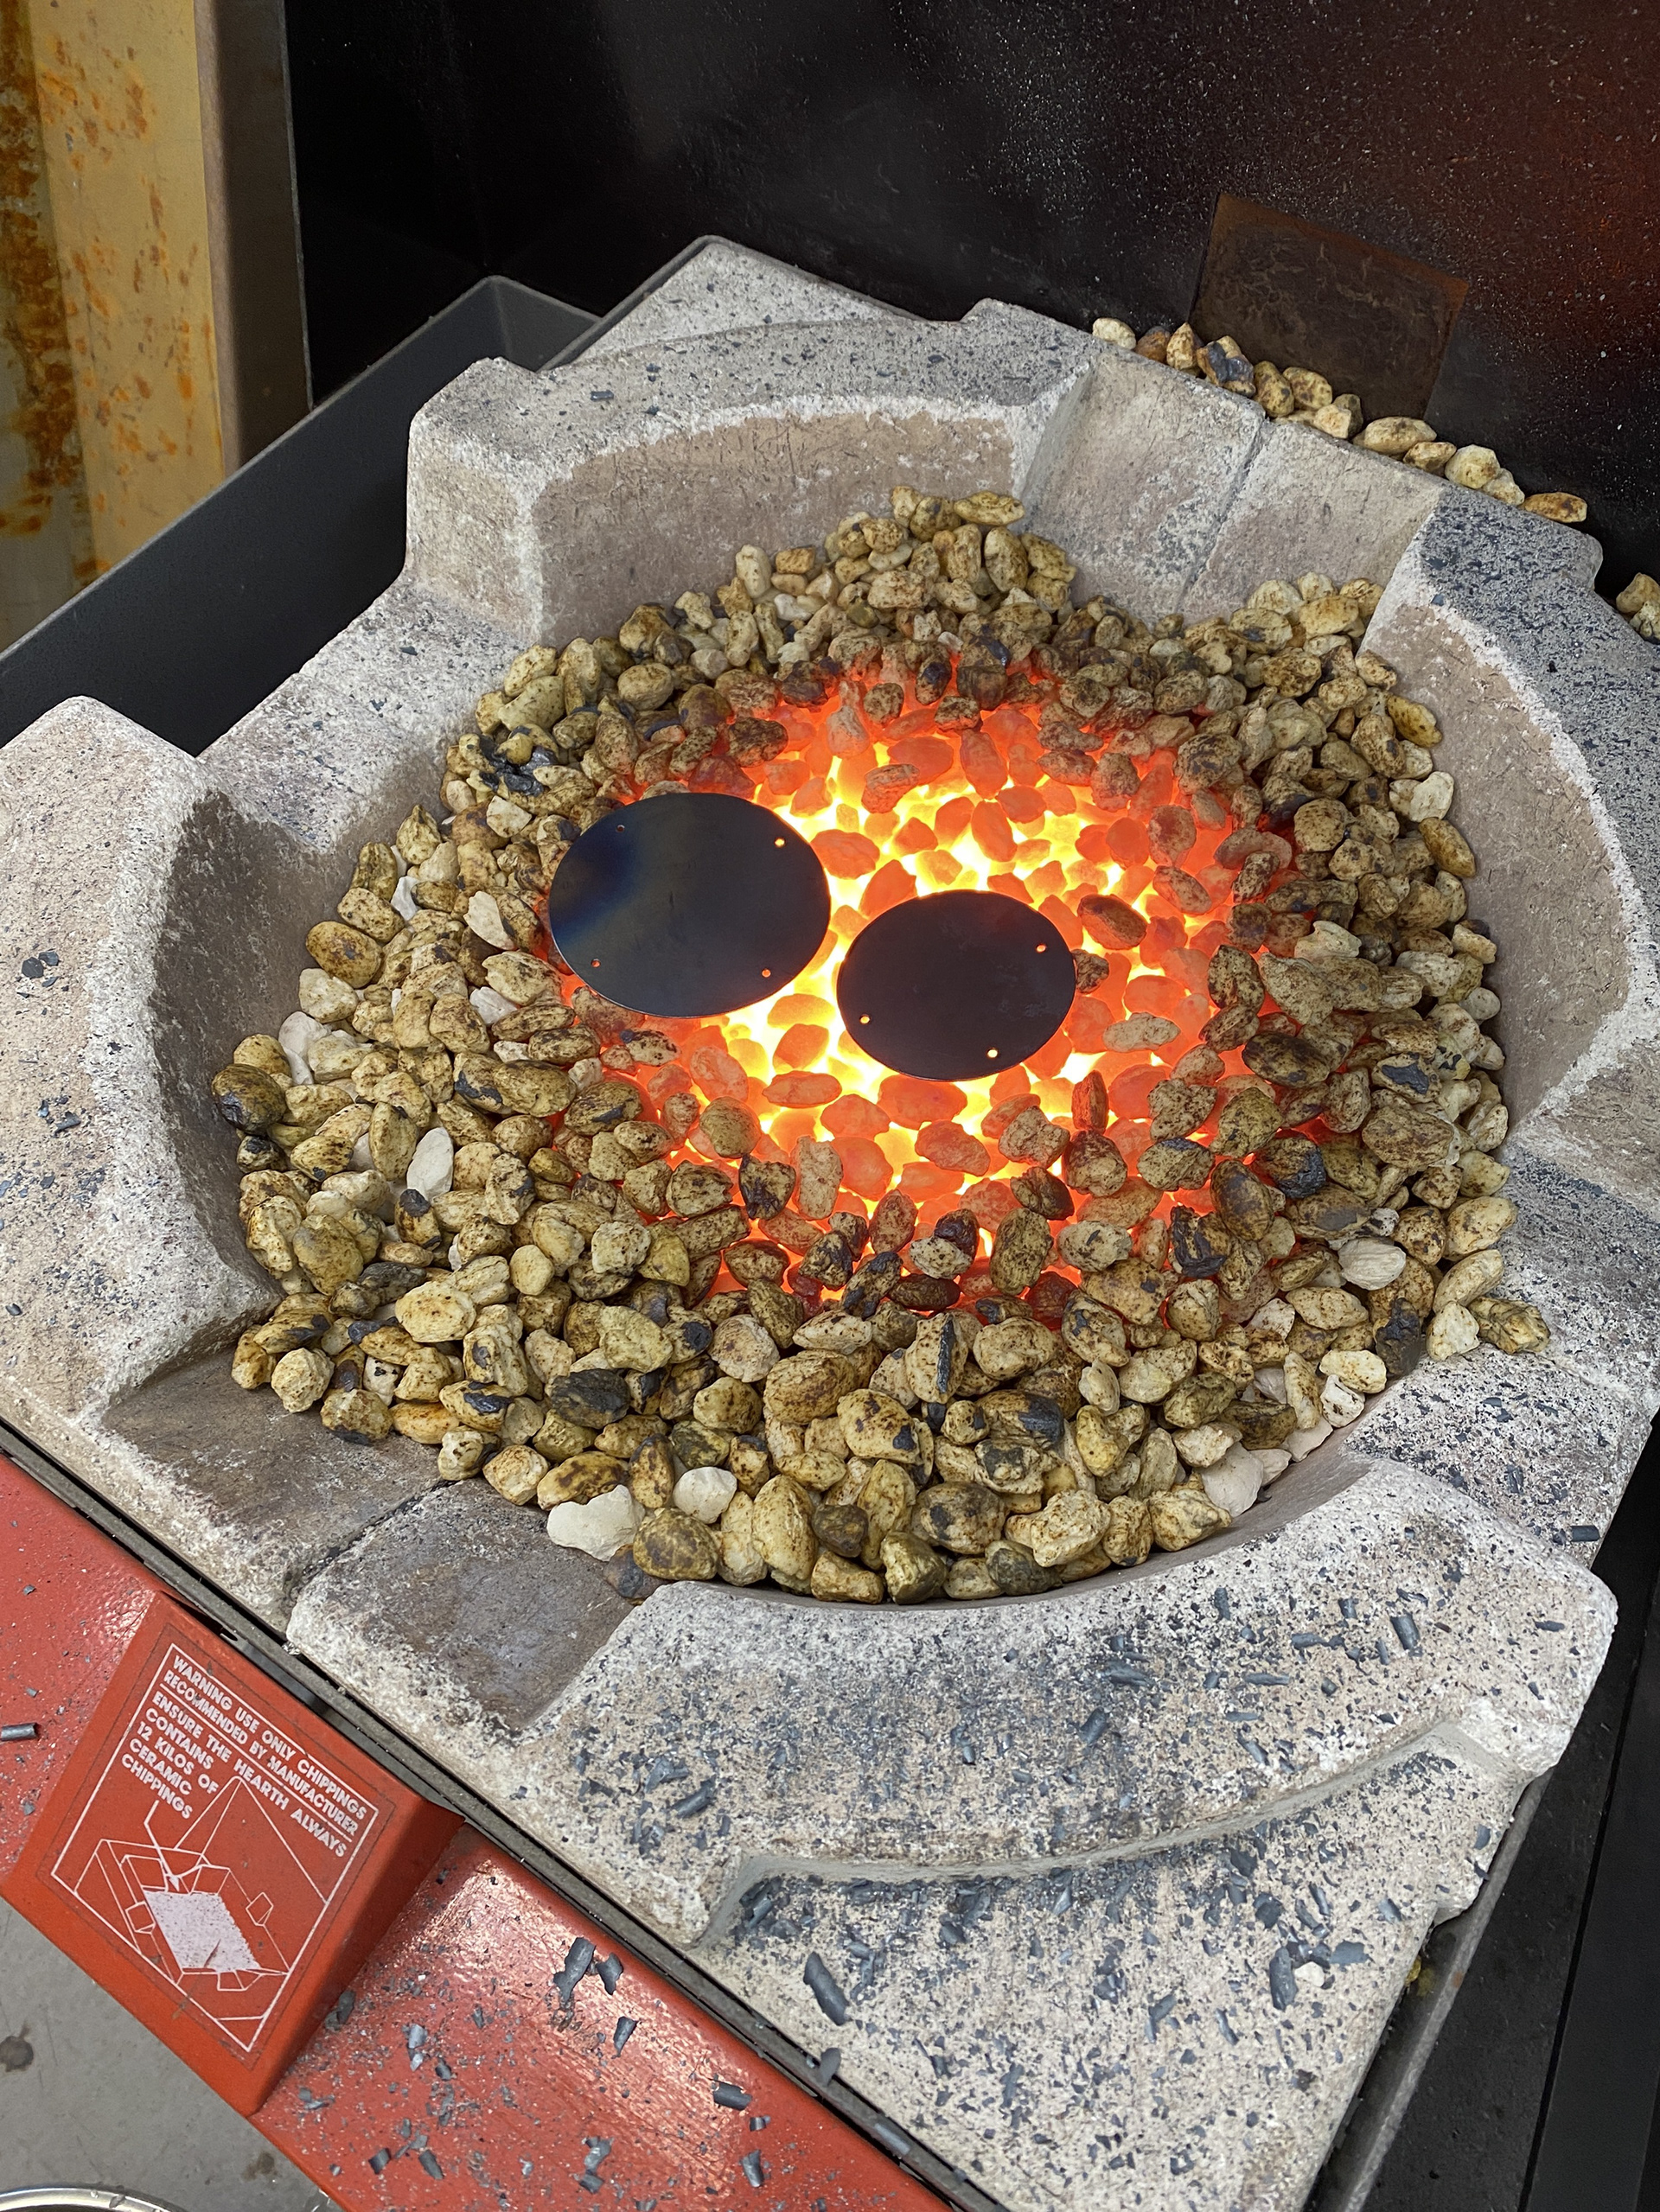
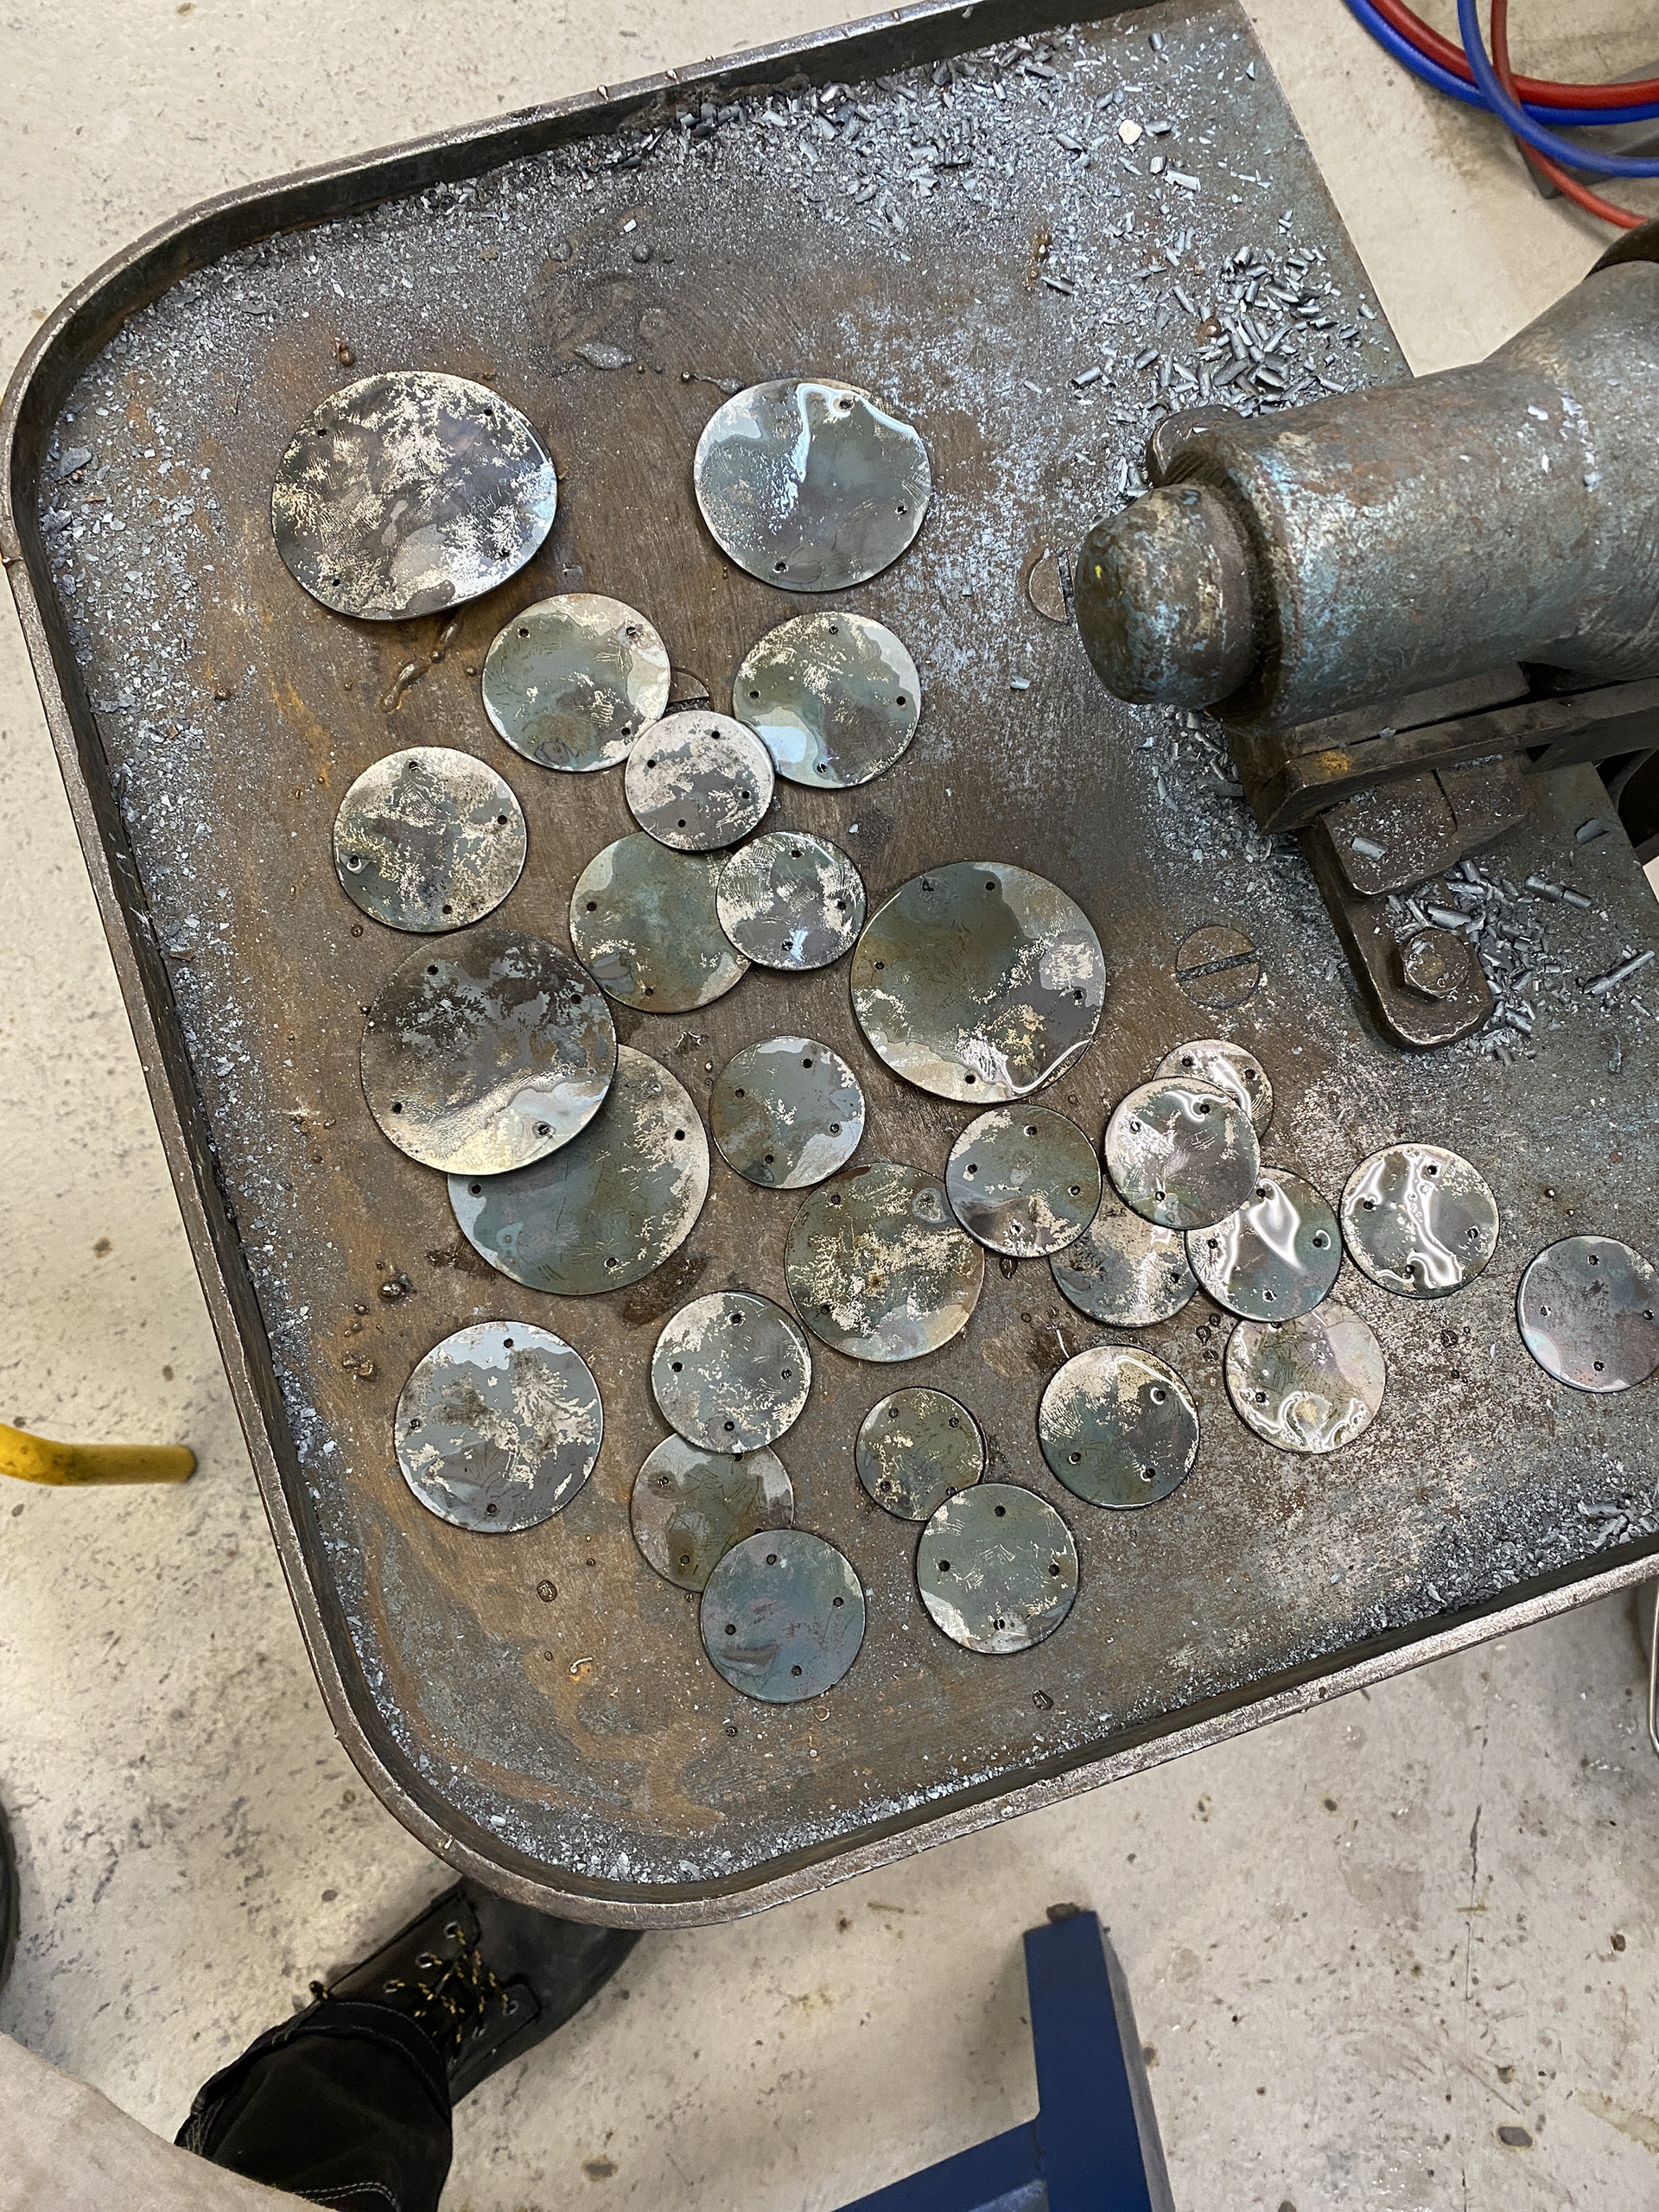
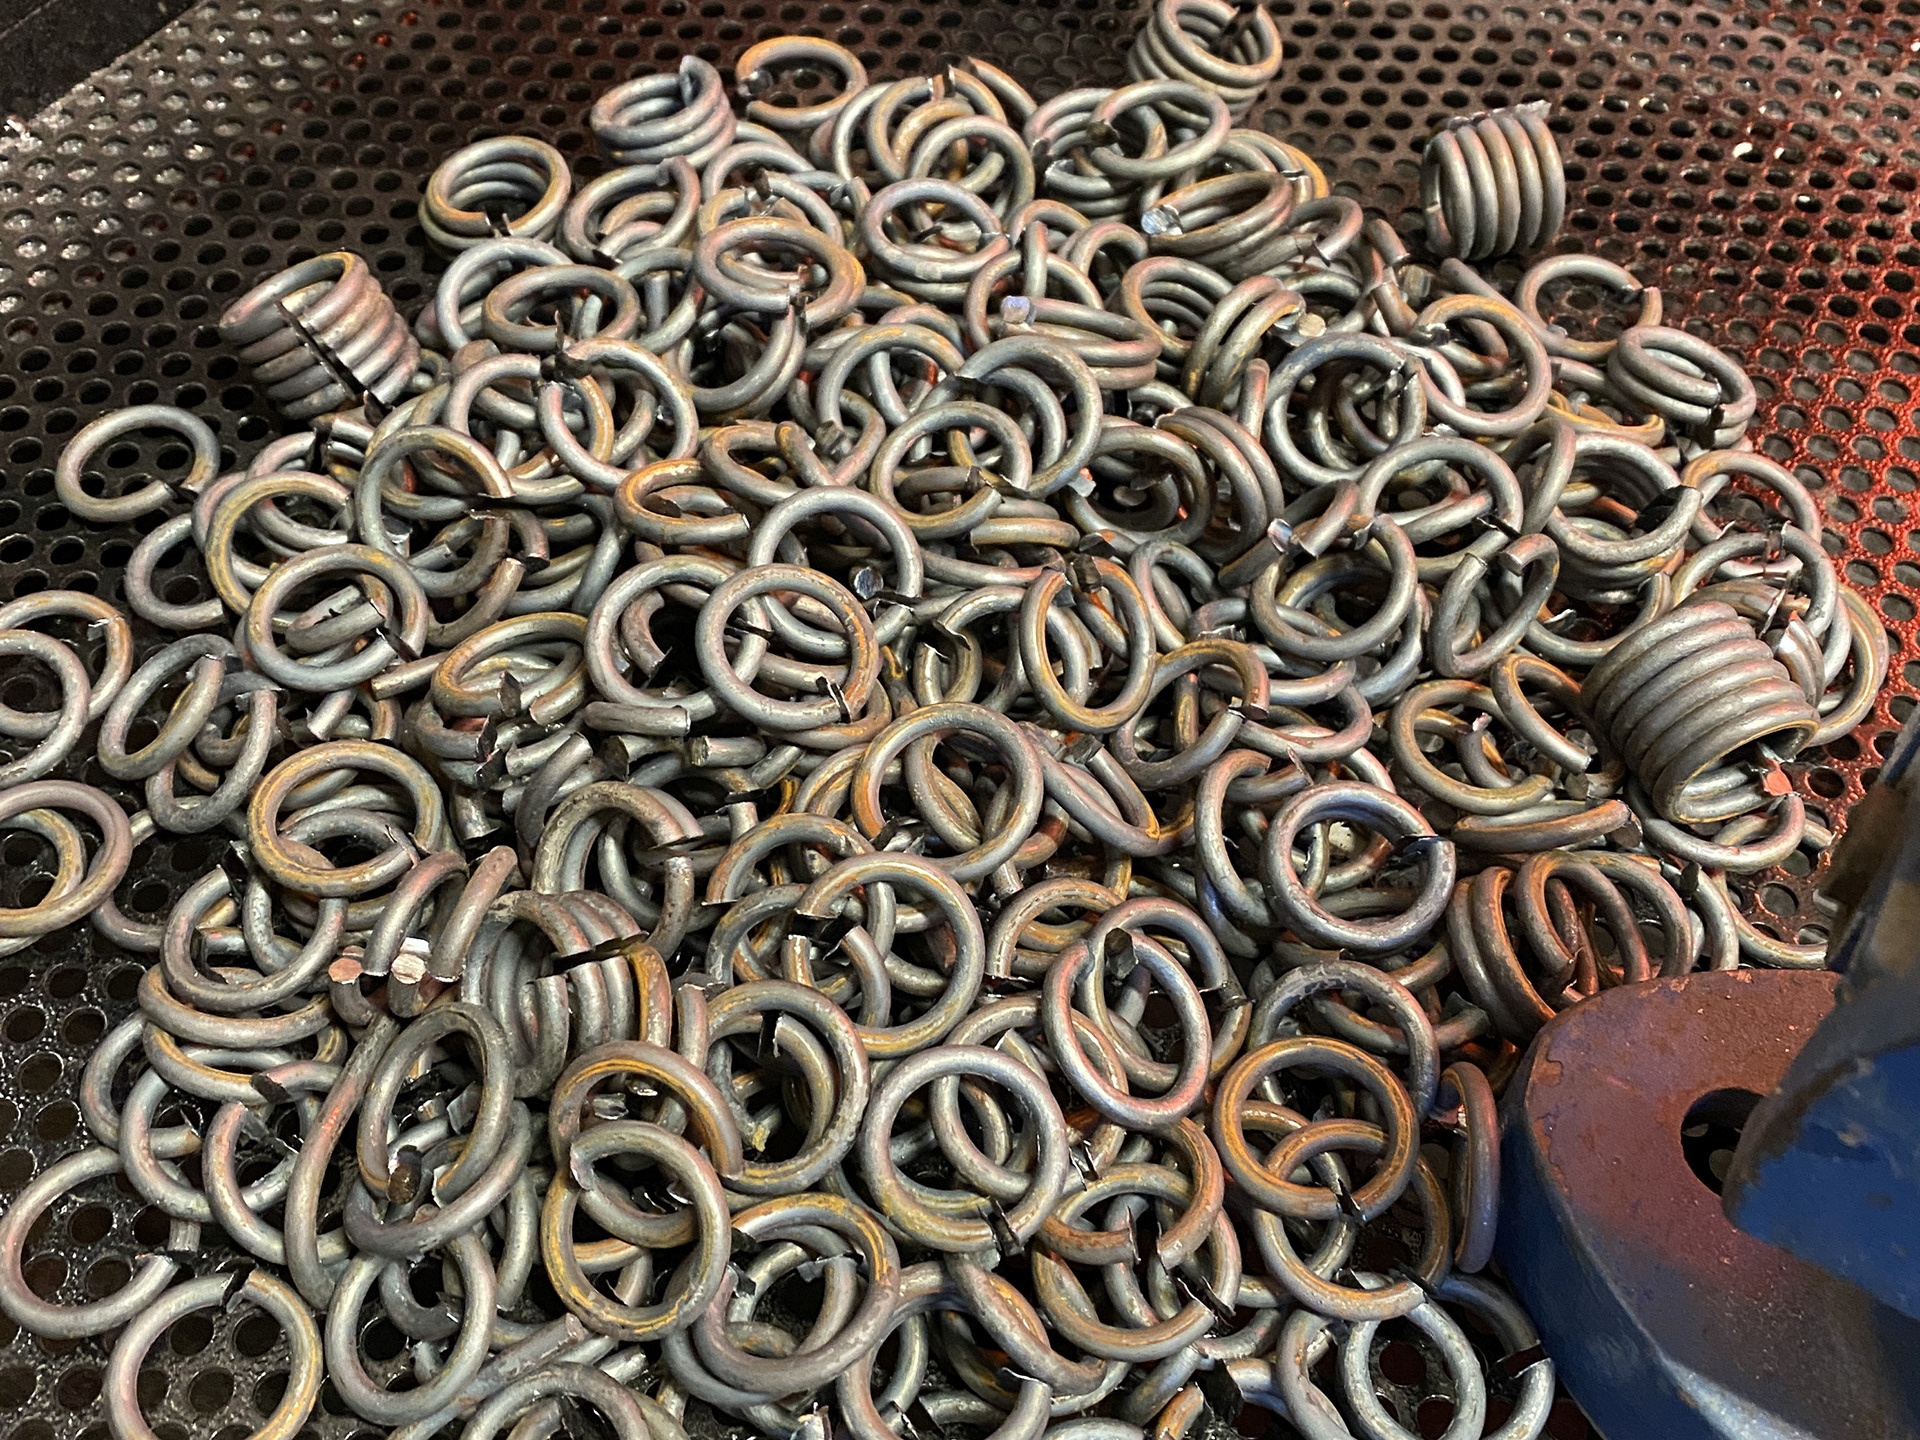
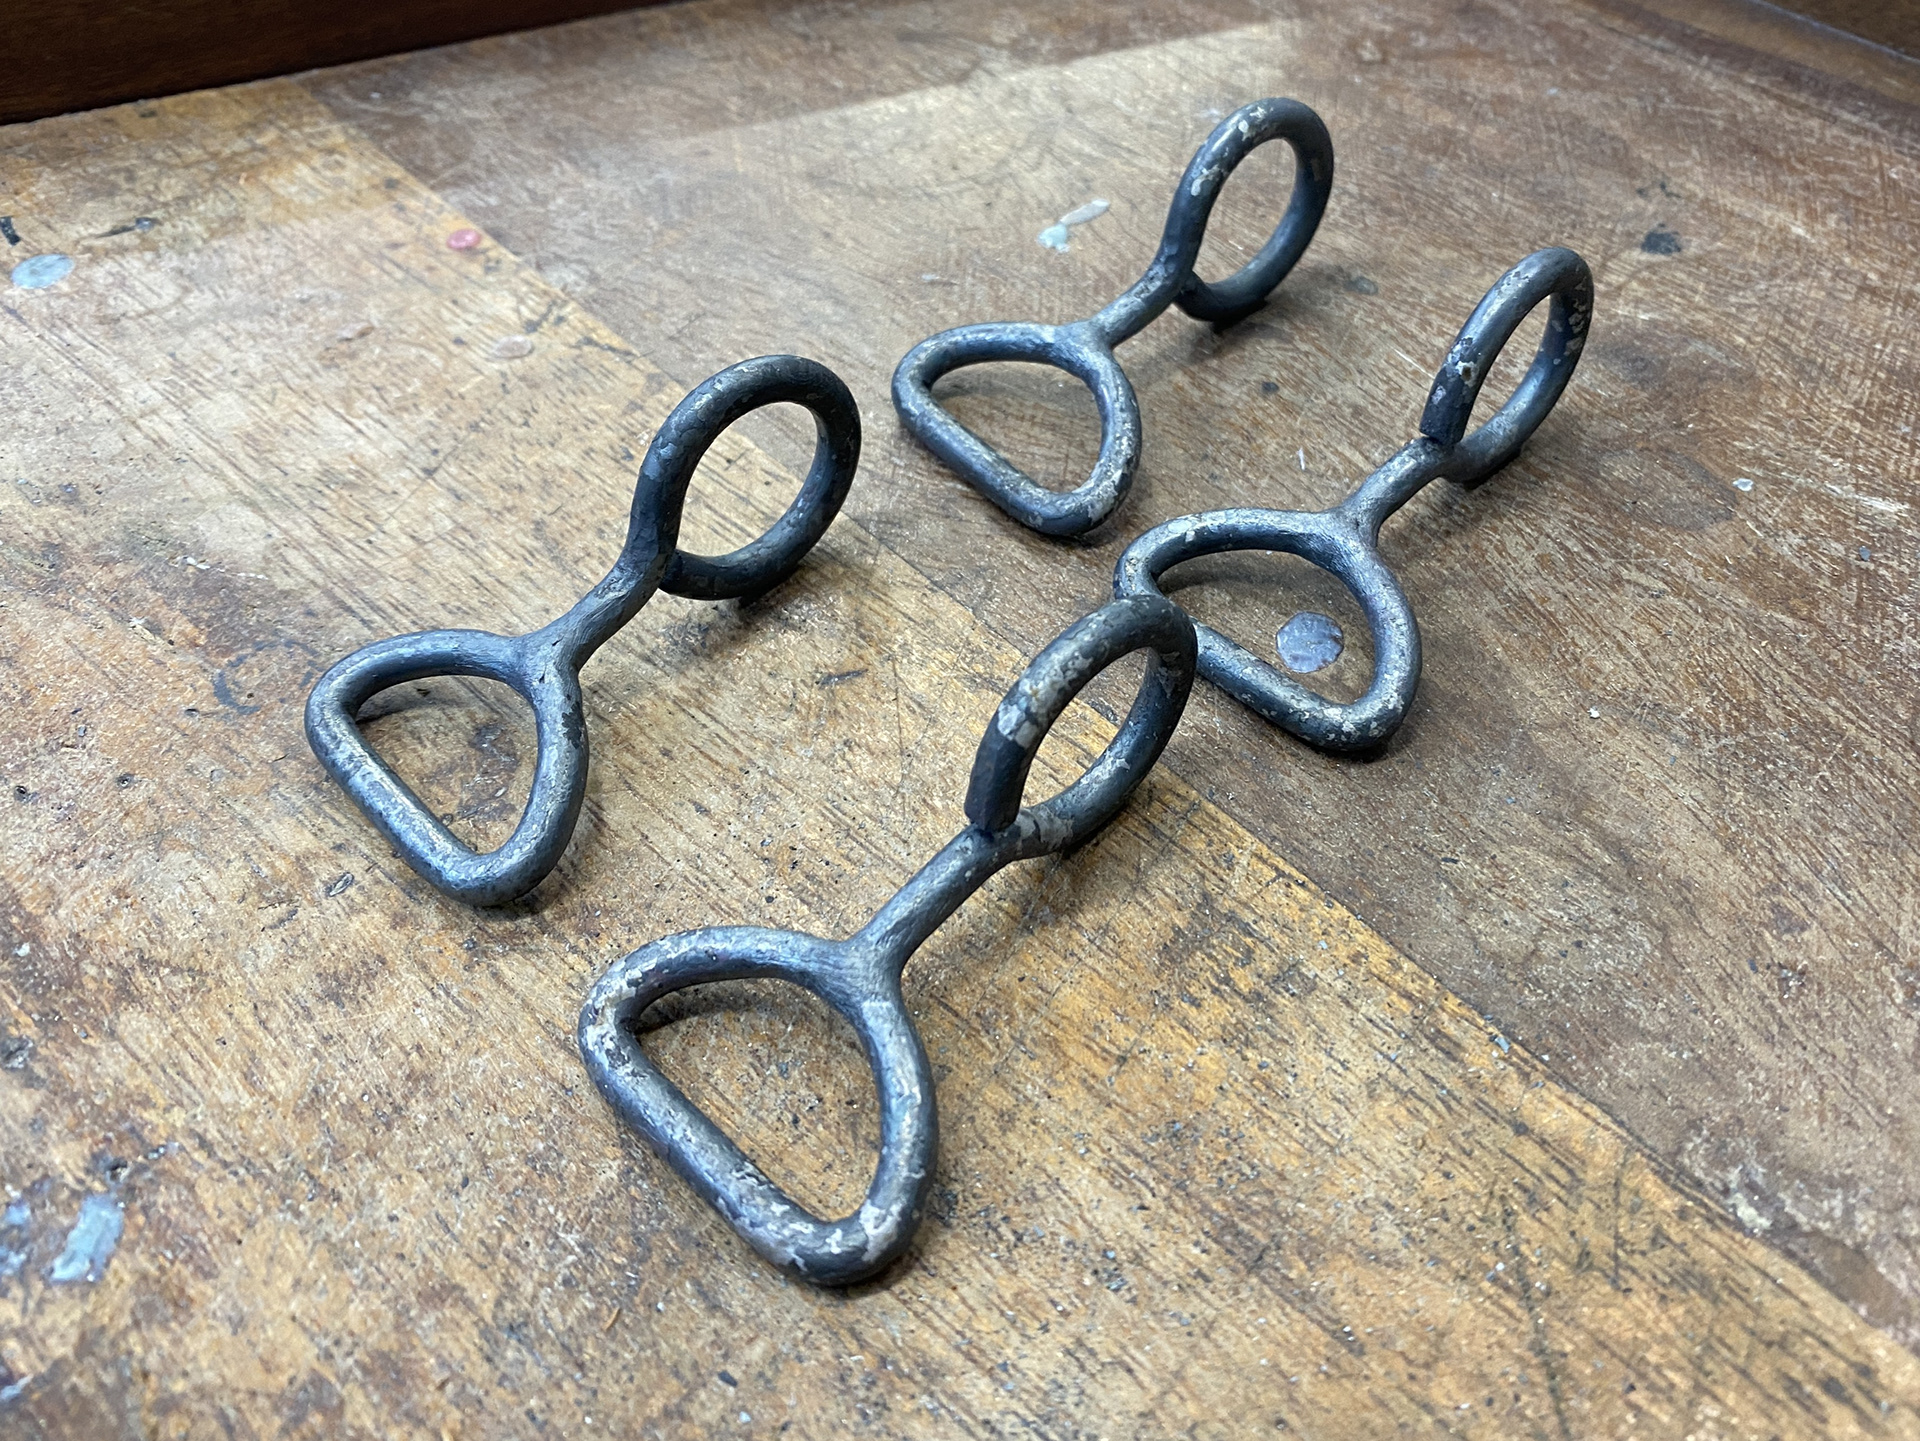
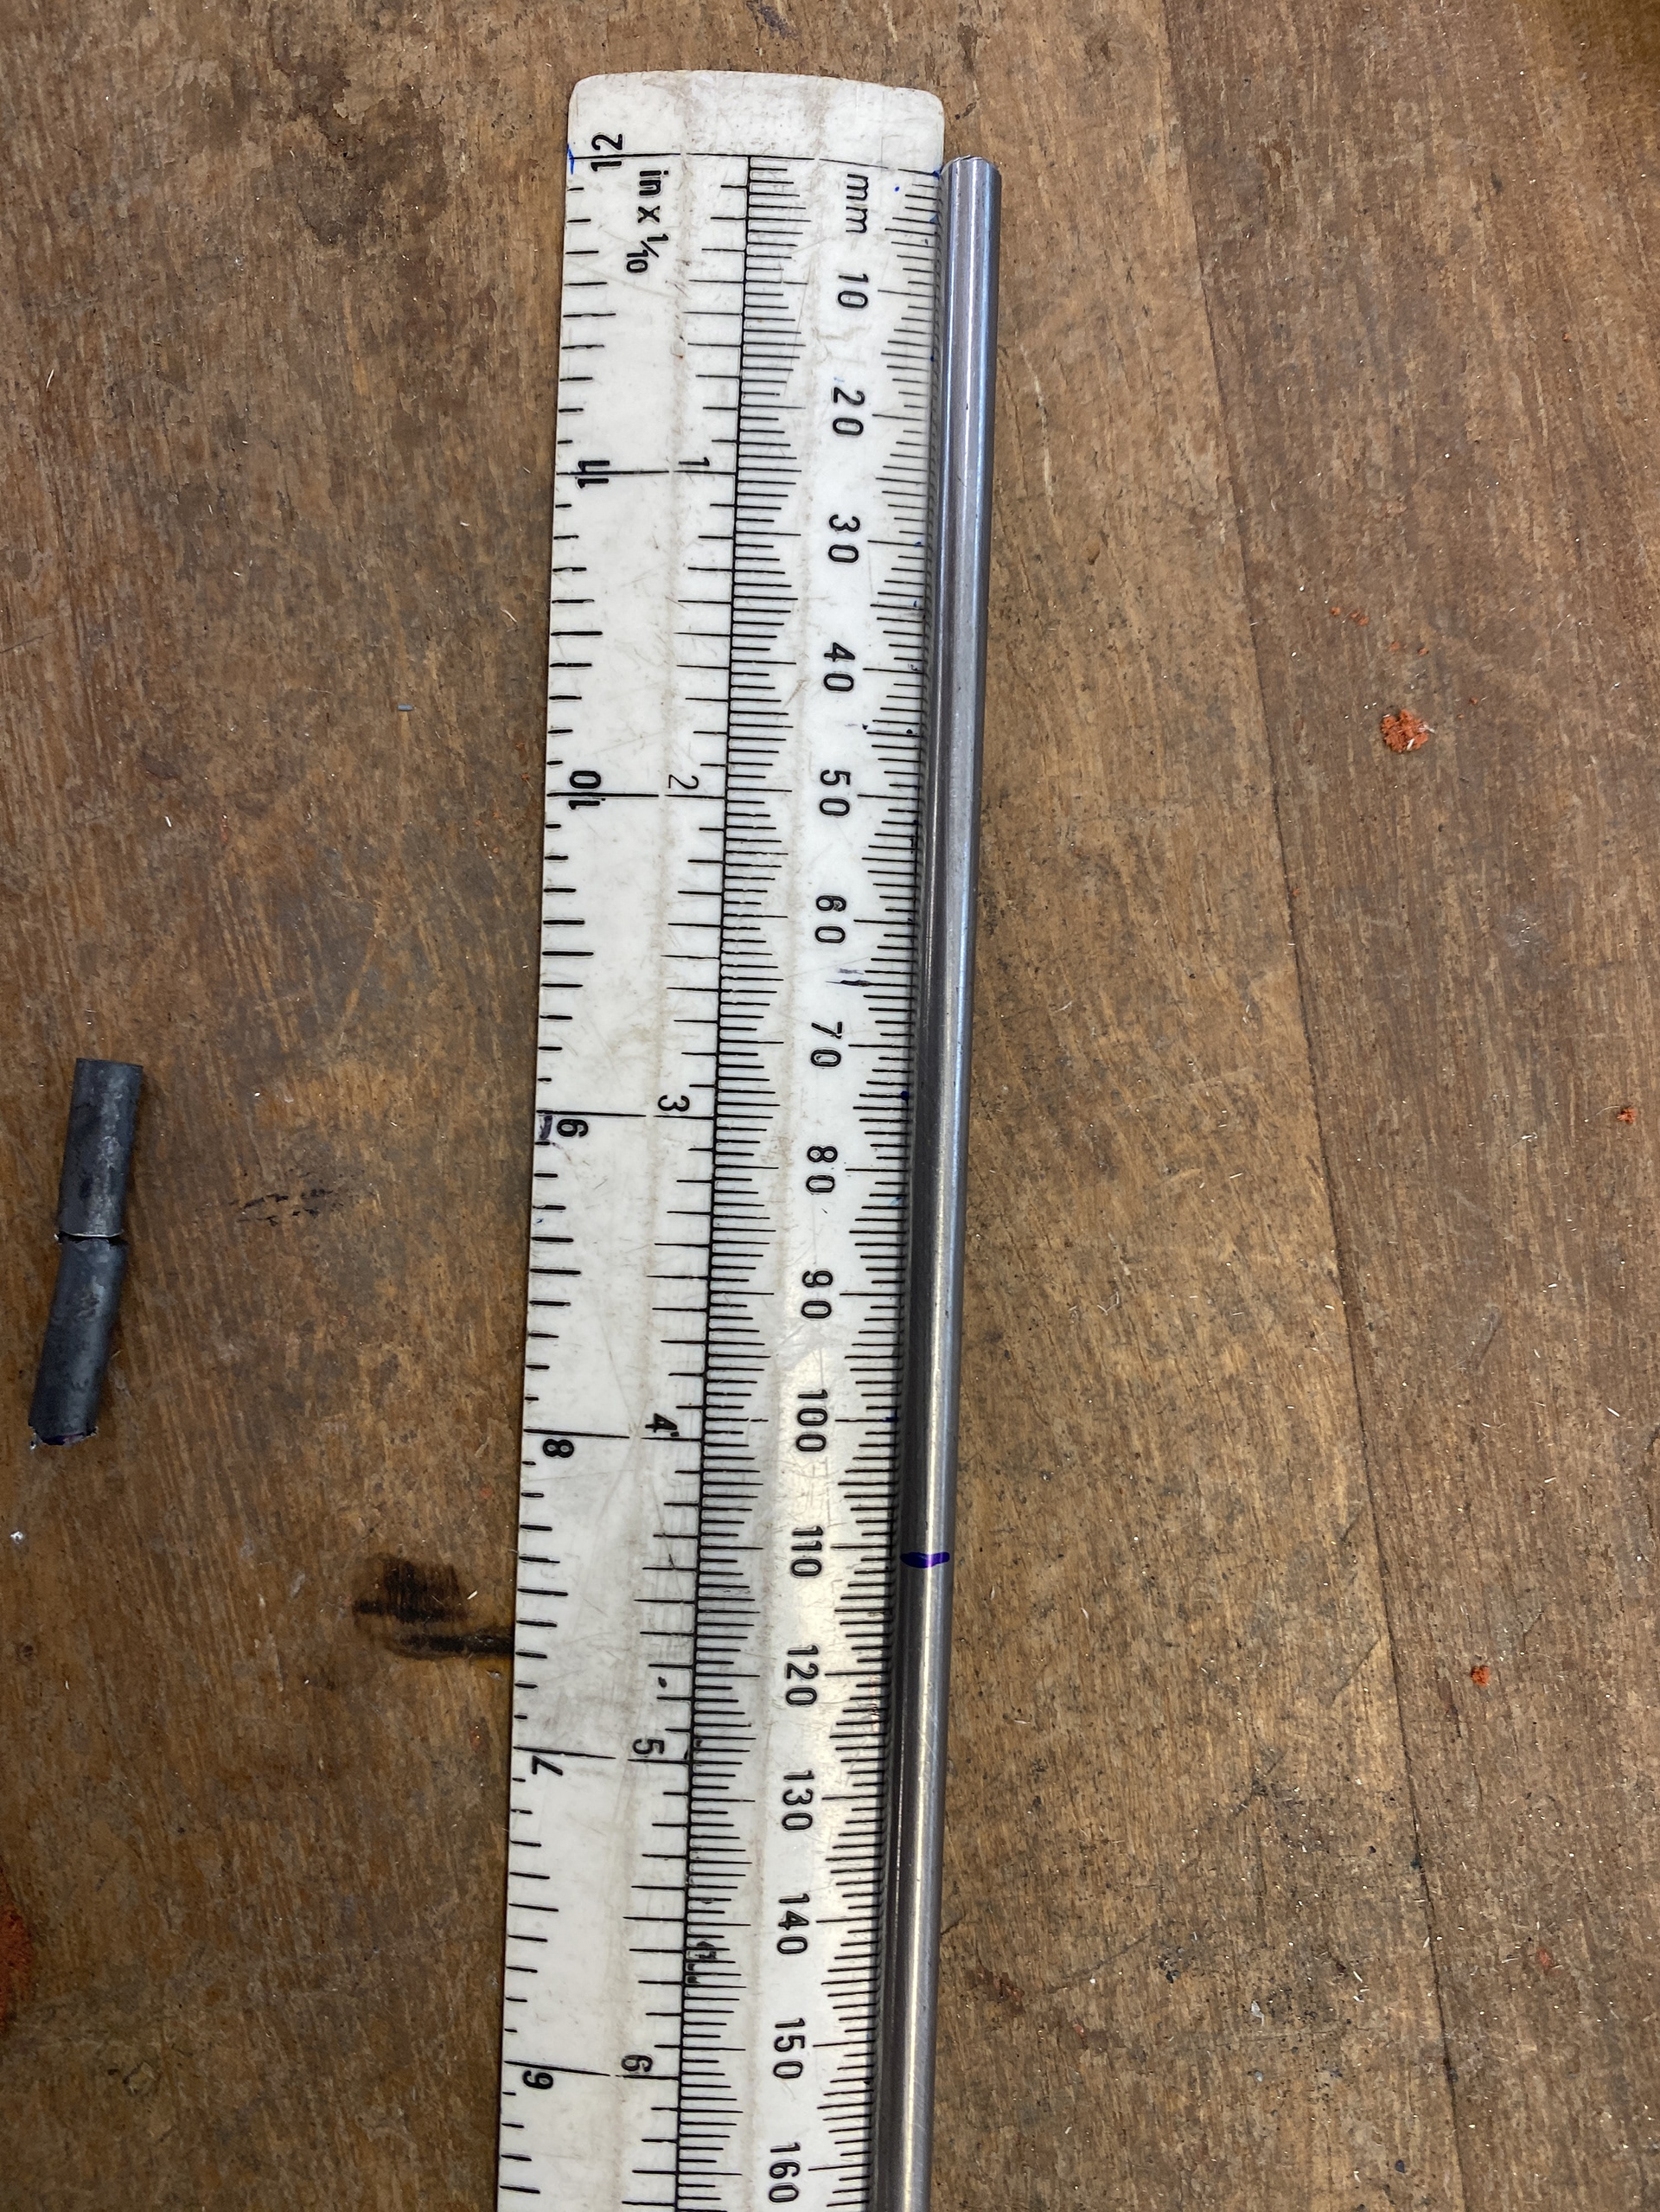
To make the plate mail I fly pressed out most of the circles, but some were too large for the dies we had so I hand cut them using a shear guillotine and refined them using files. I then marked and drilled the necessary hole before colouring them in the forge. The heating and quenching of the larger circles caused them to twist and warp, I fixed this by using a mallet to hammer them flat.
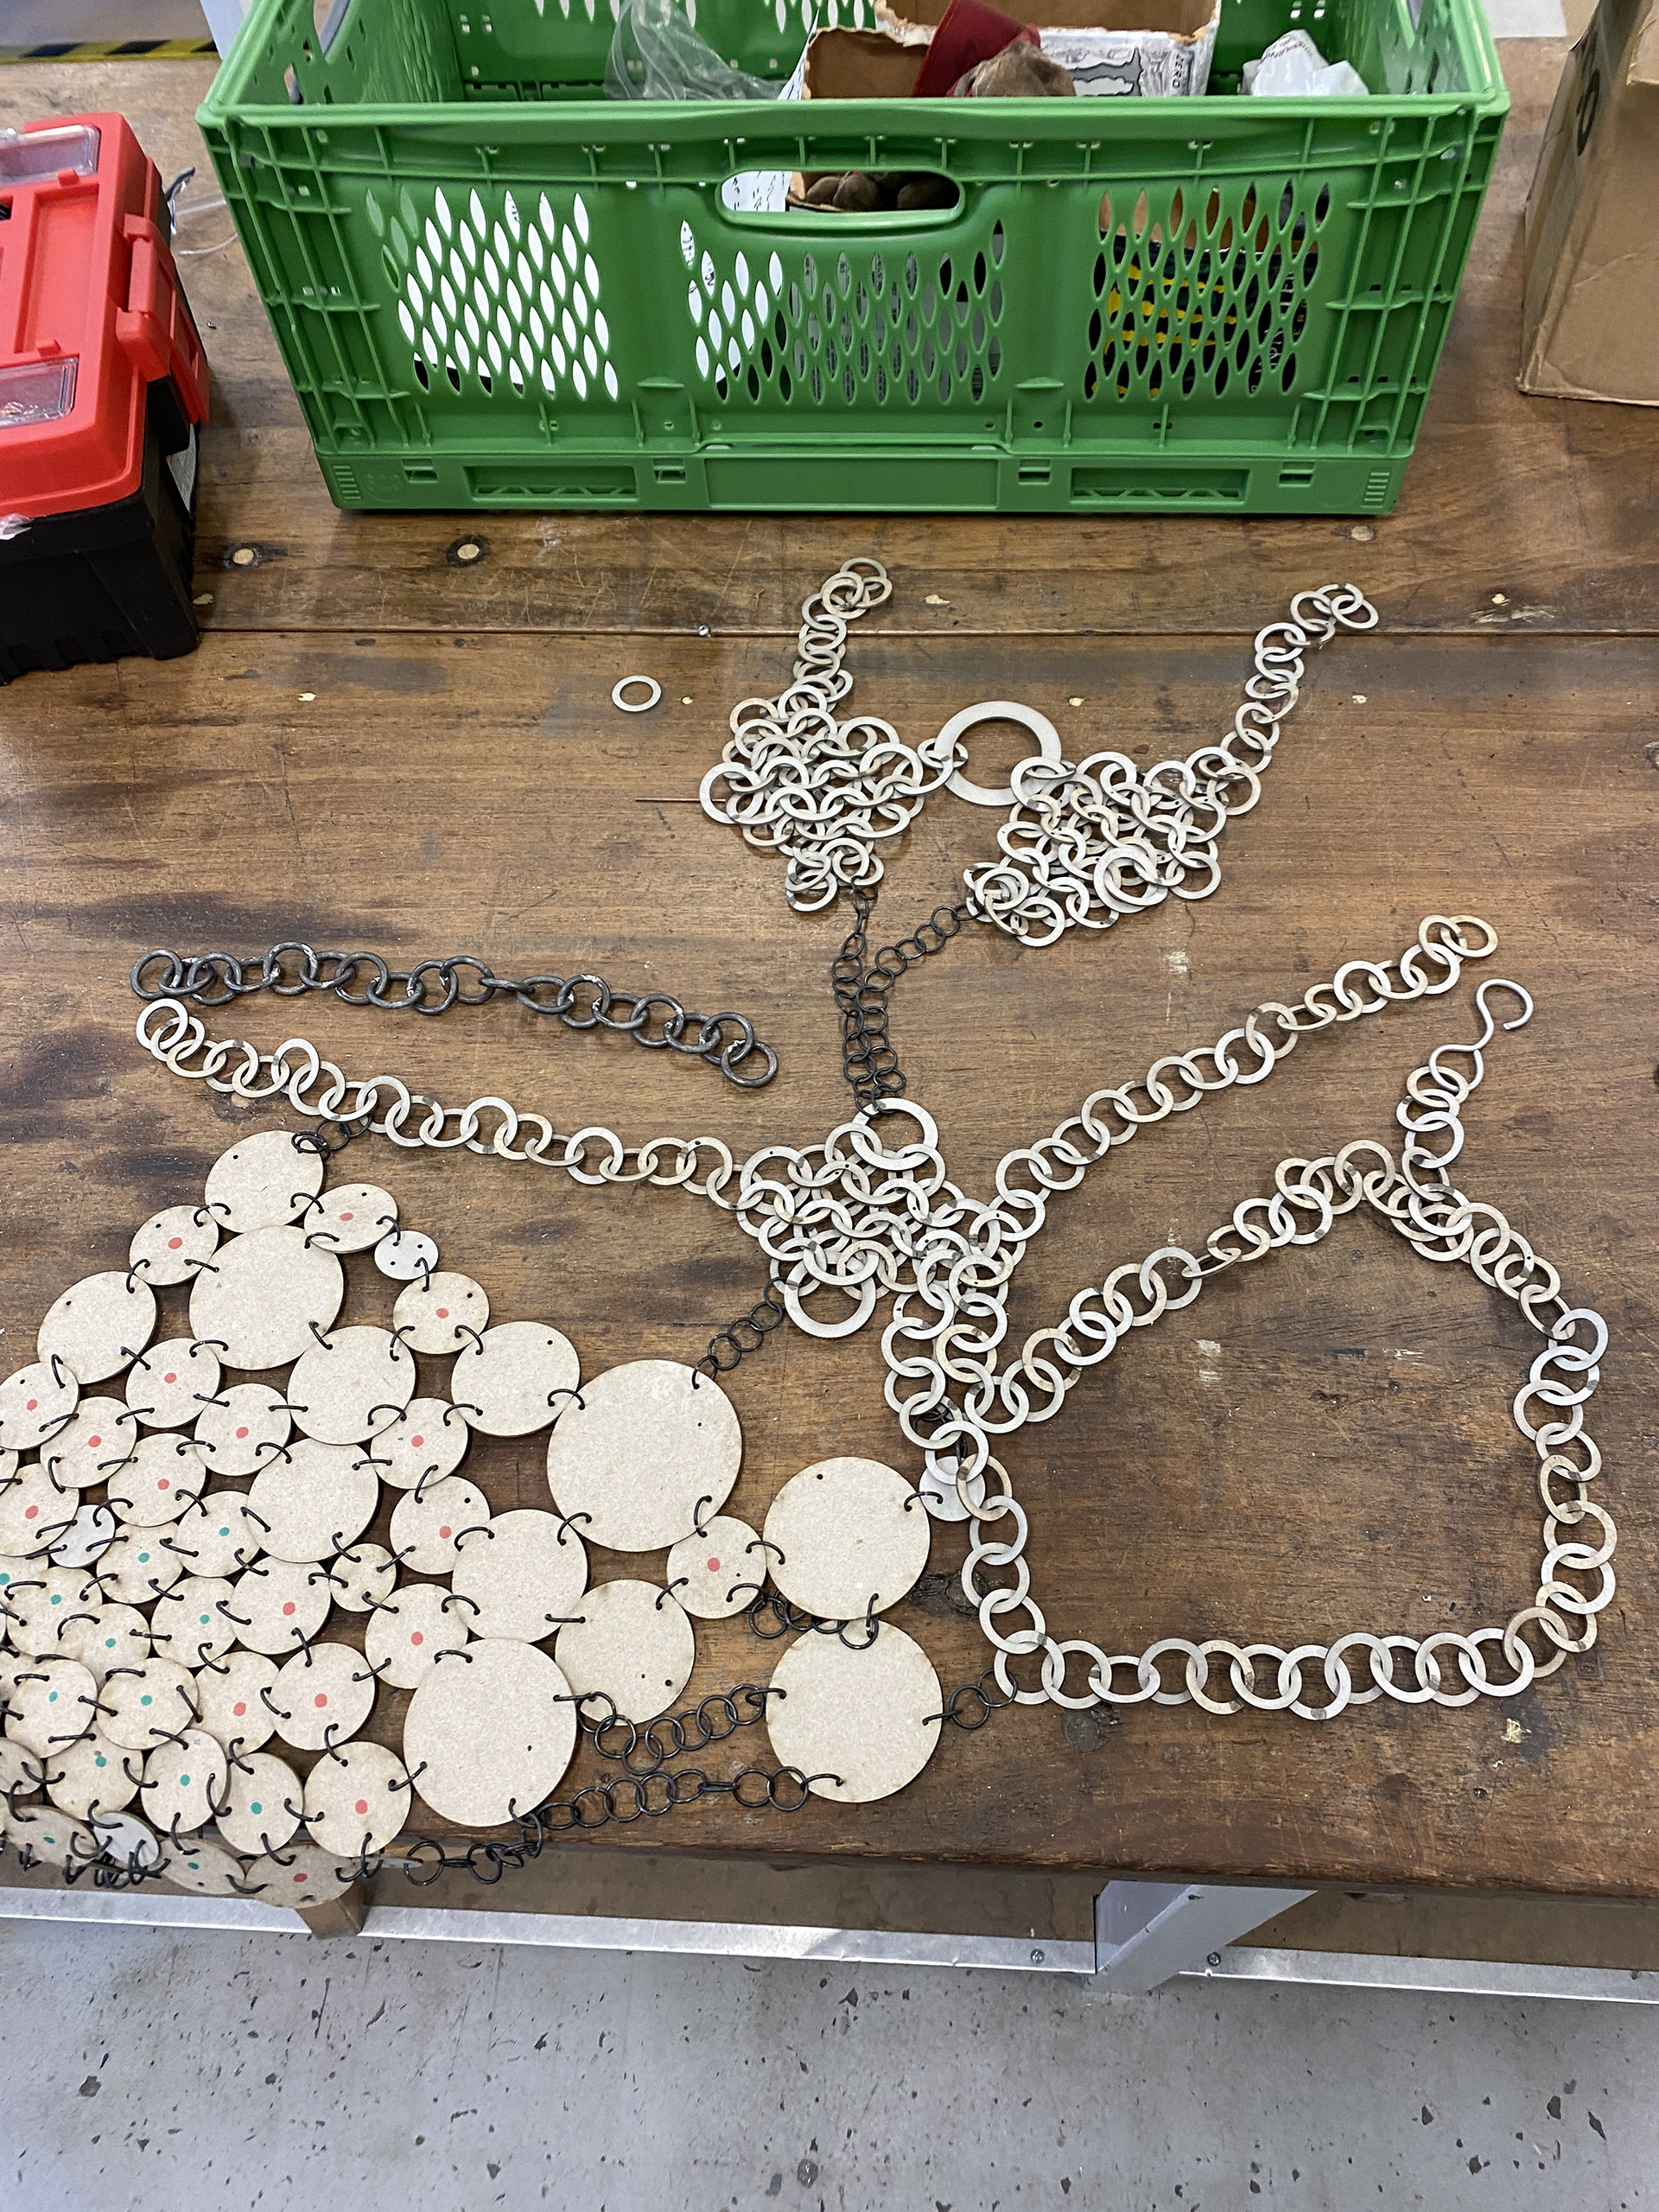
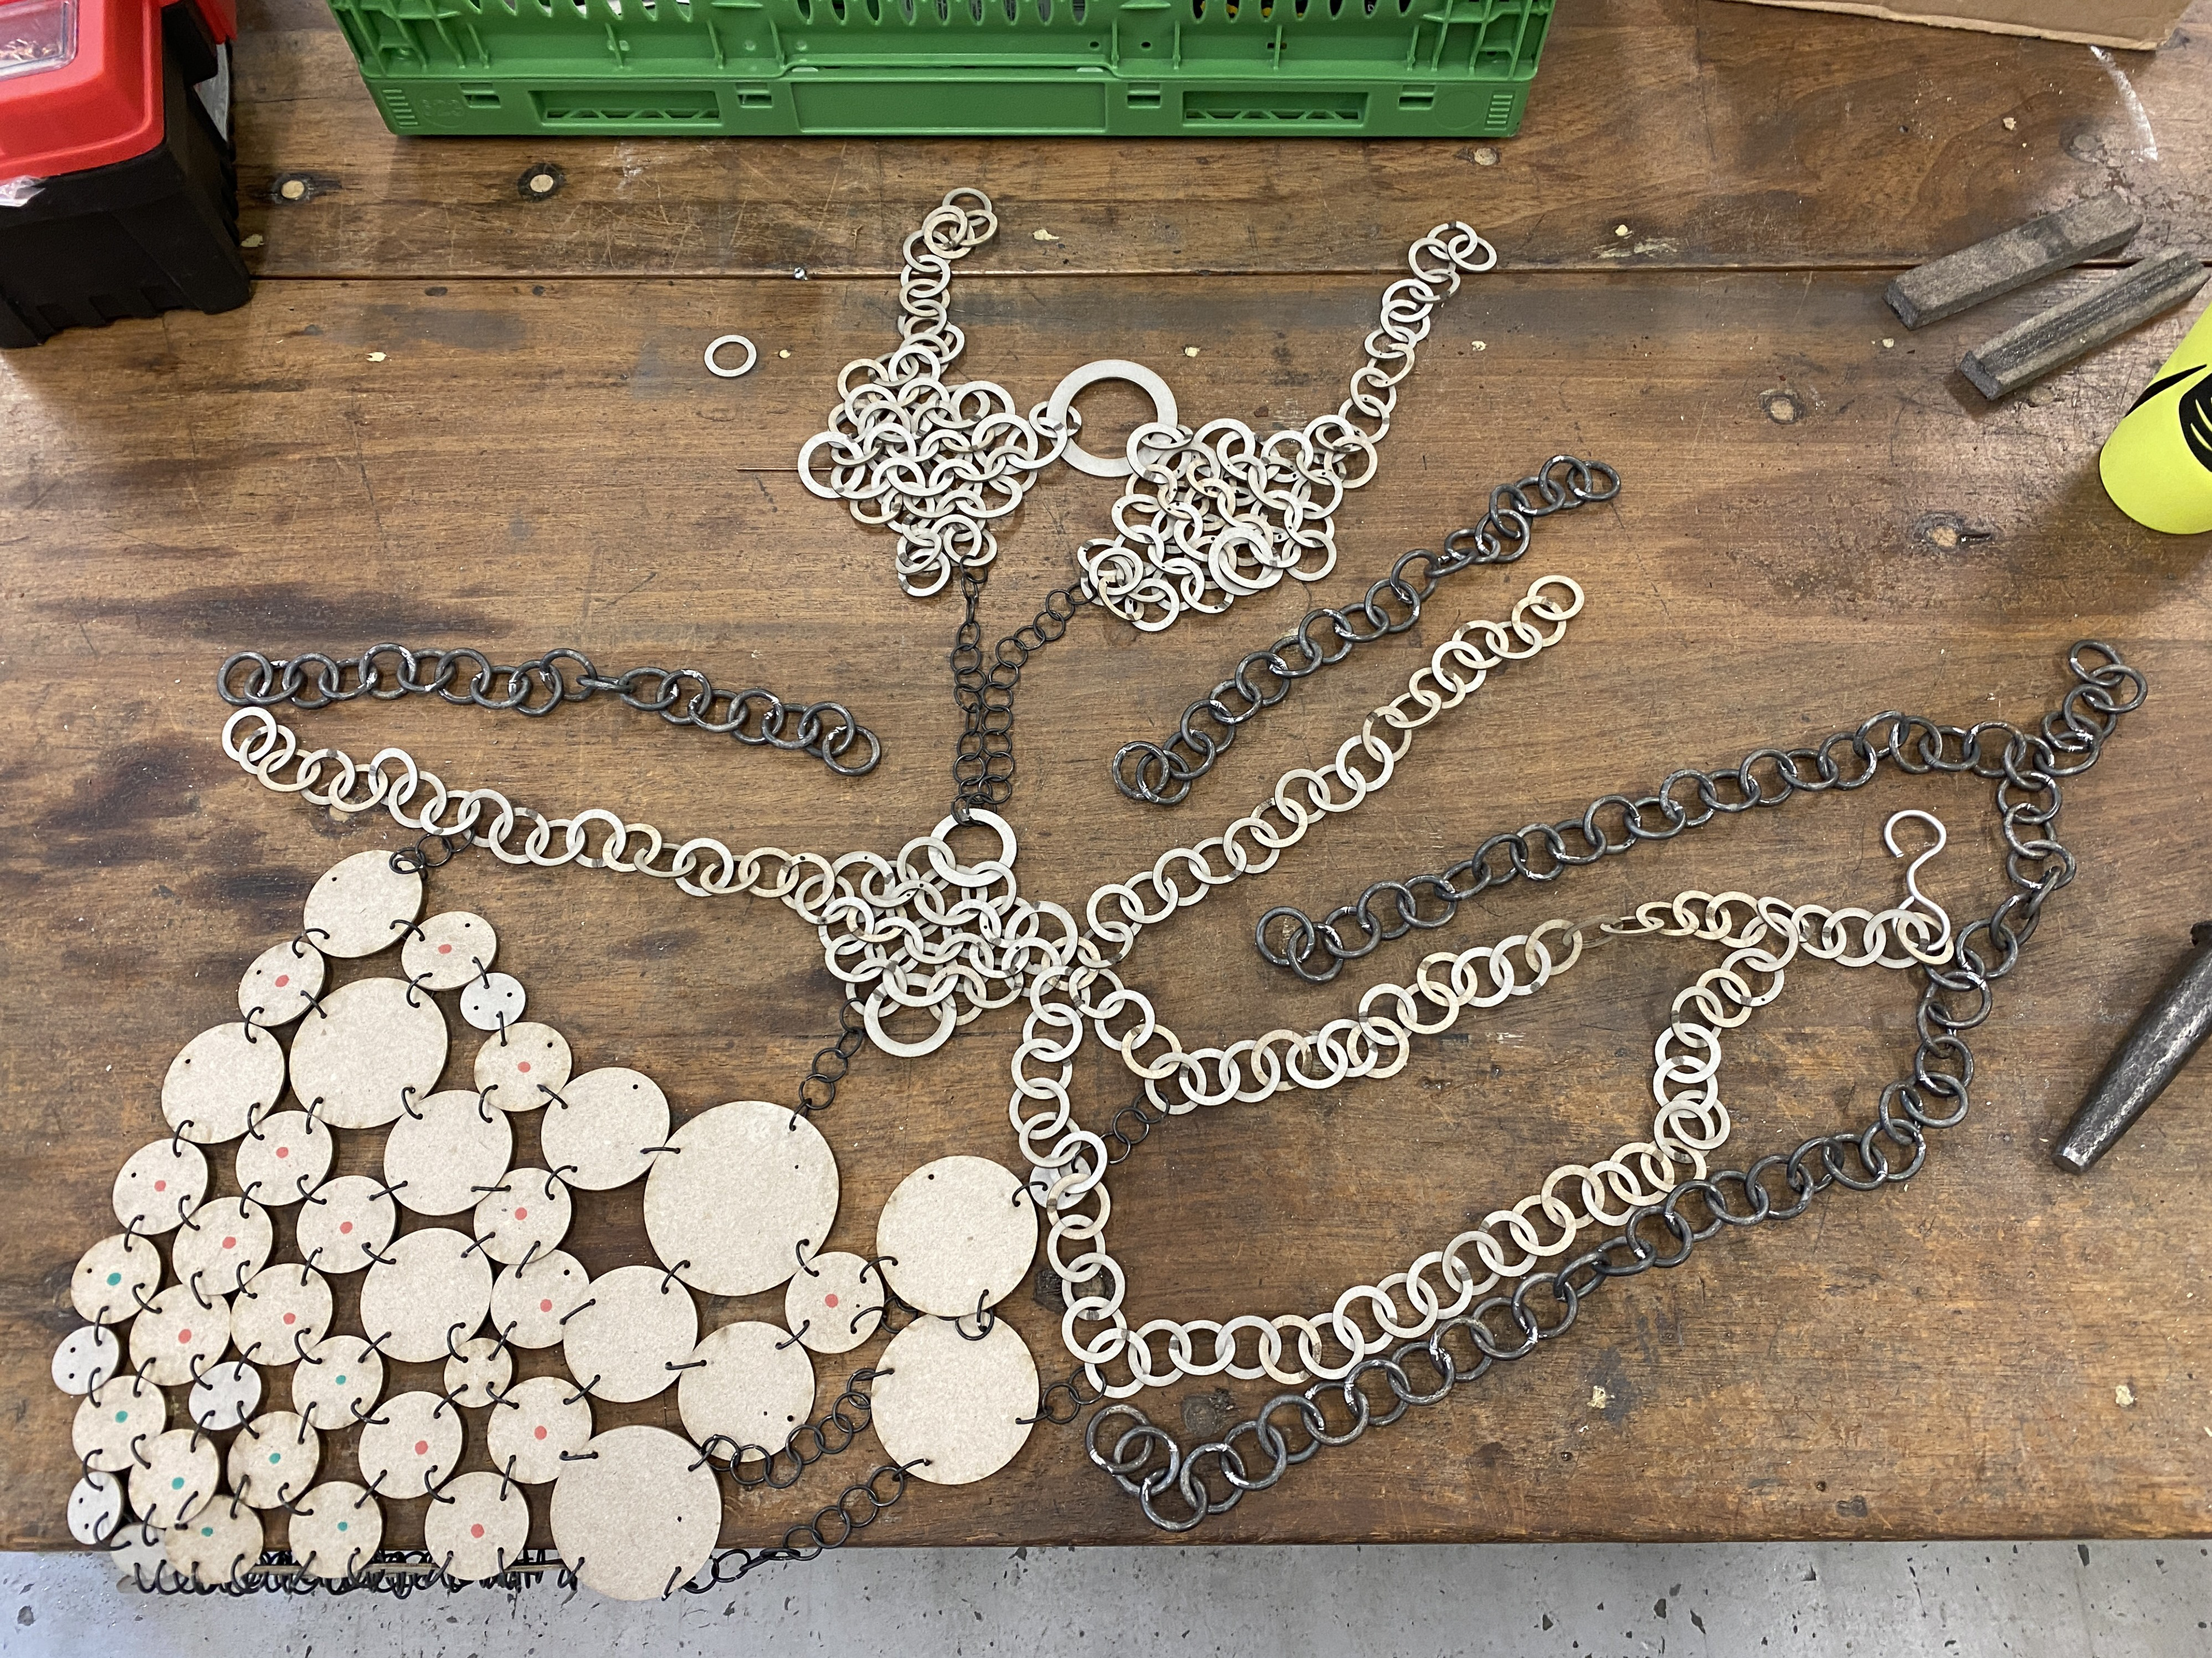

To make the top section of the piece I repeated my process of producing the links and weaved them together referencing the grey board model.


I then weaved together the plate mail using the 1.6mm jump rings before atatching it to the rest of the piece.
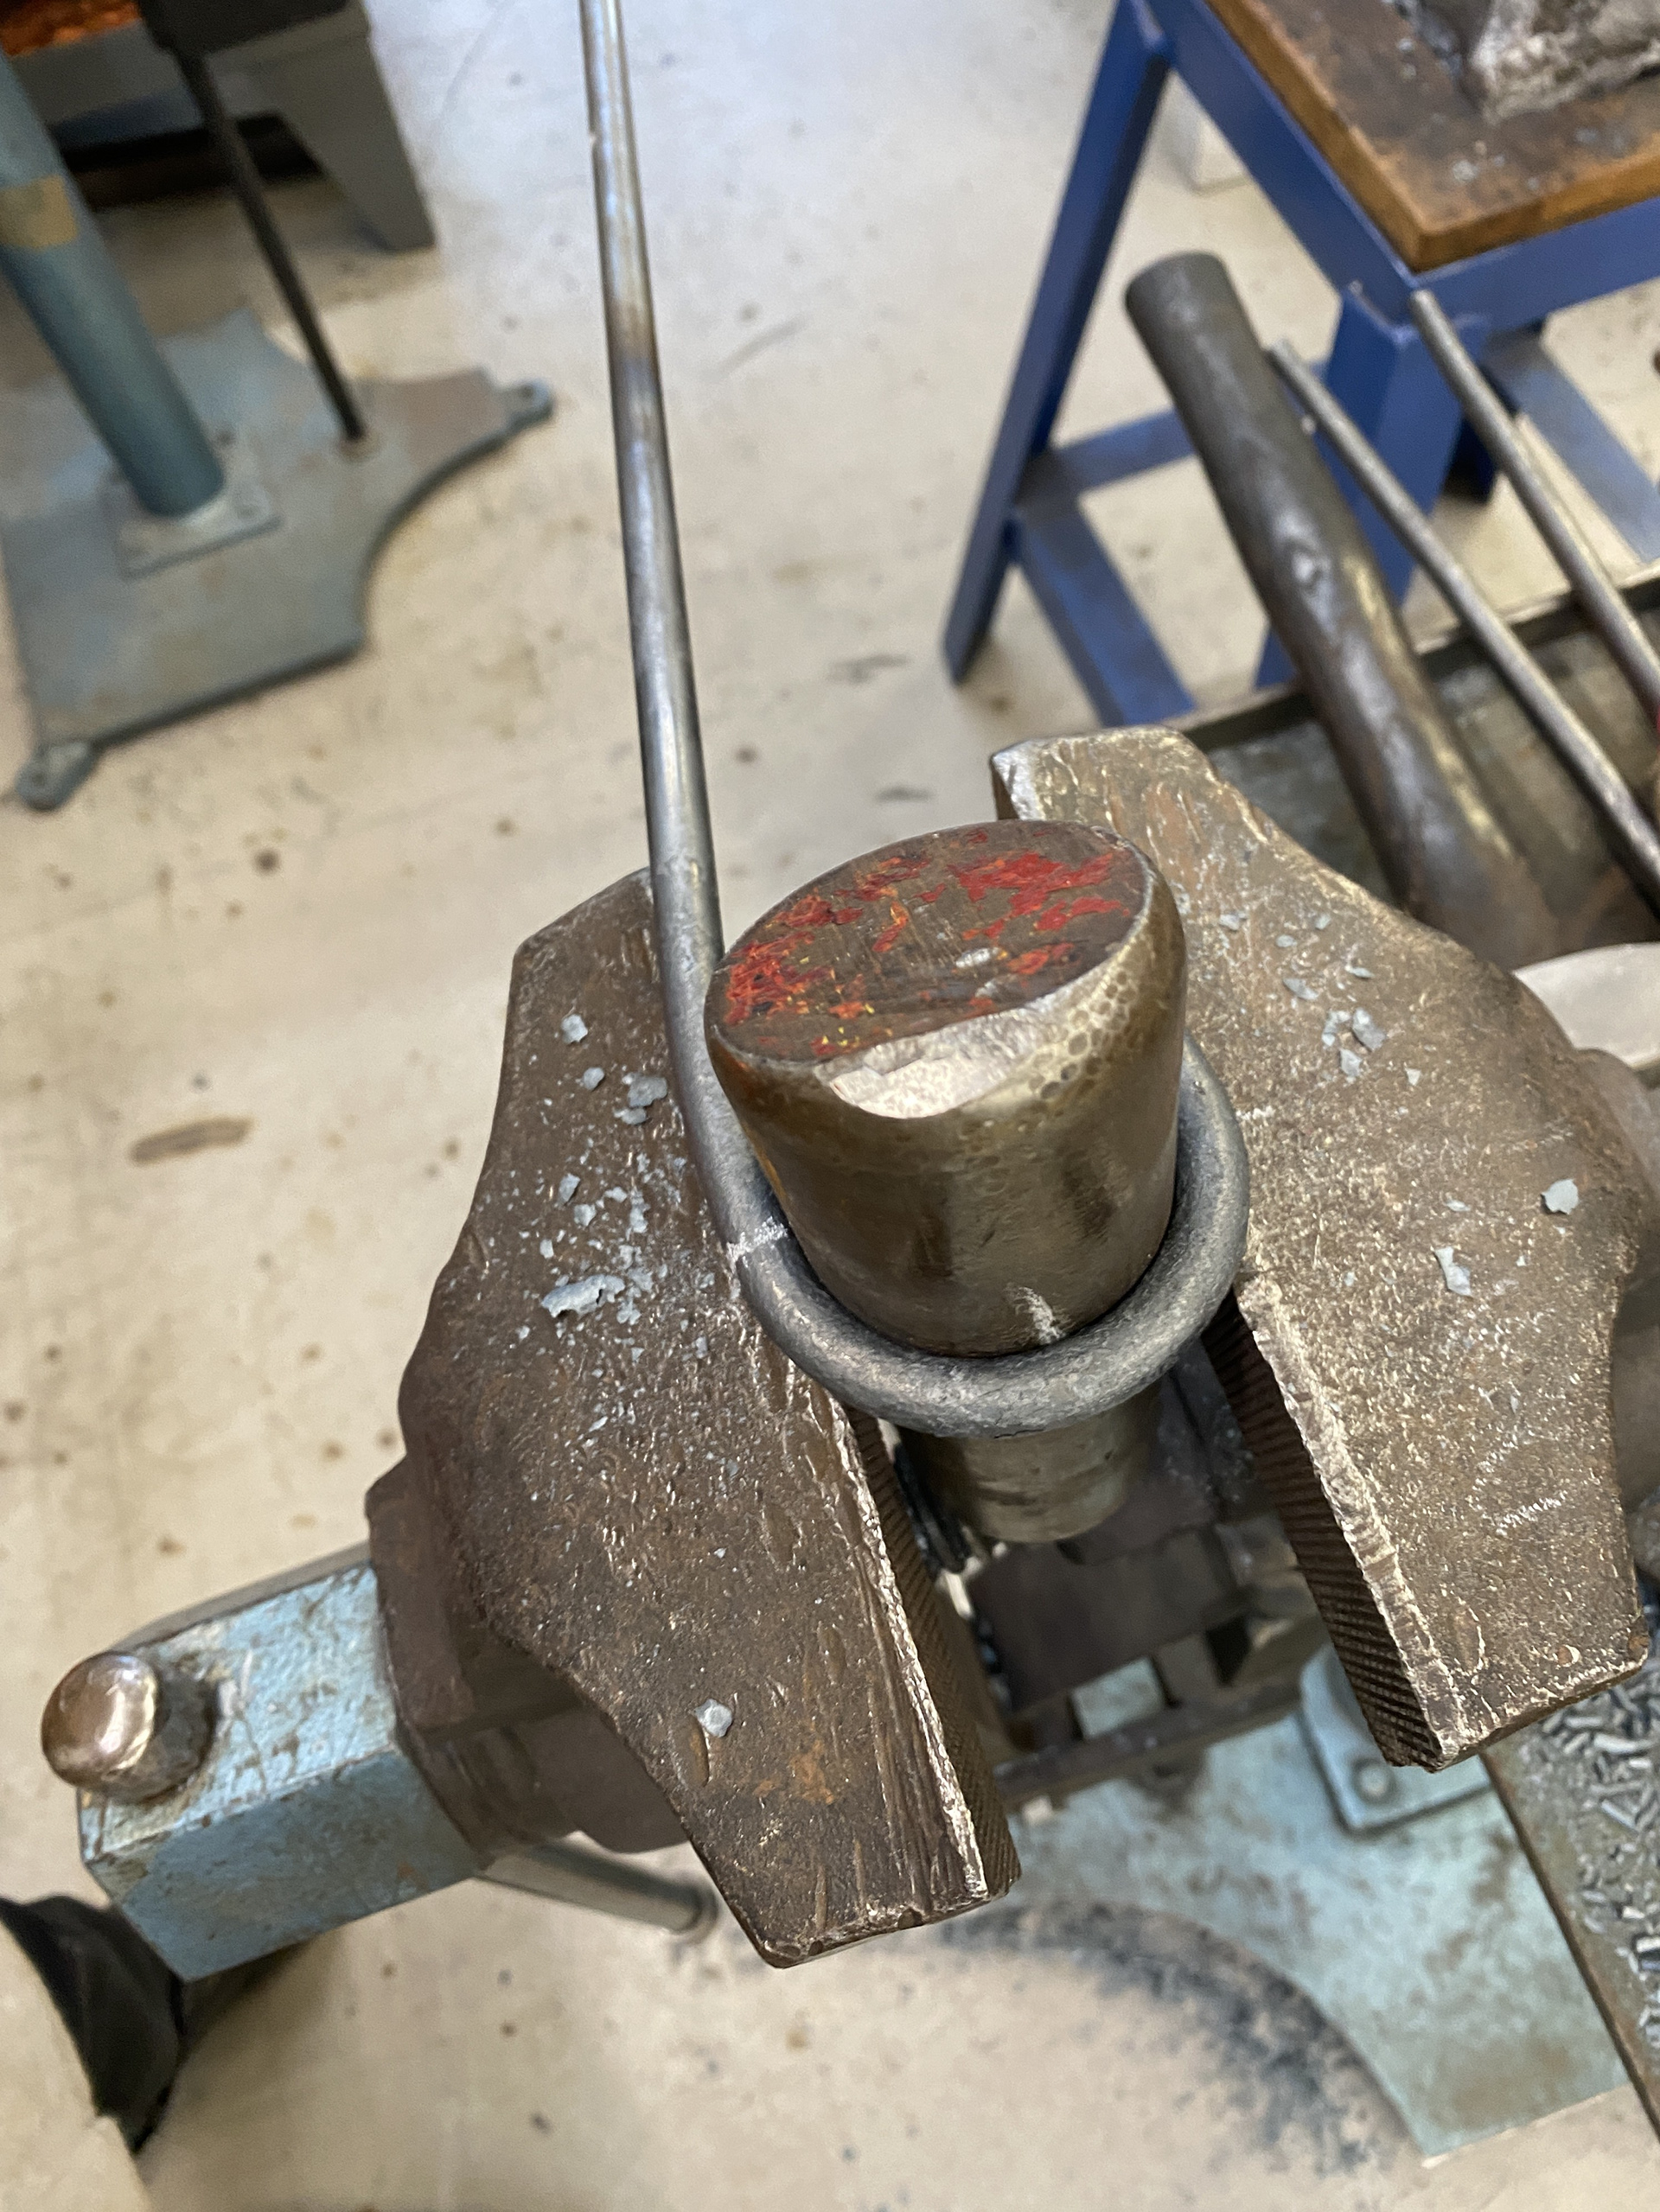

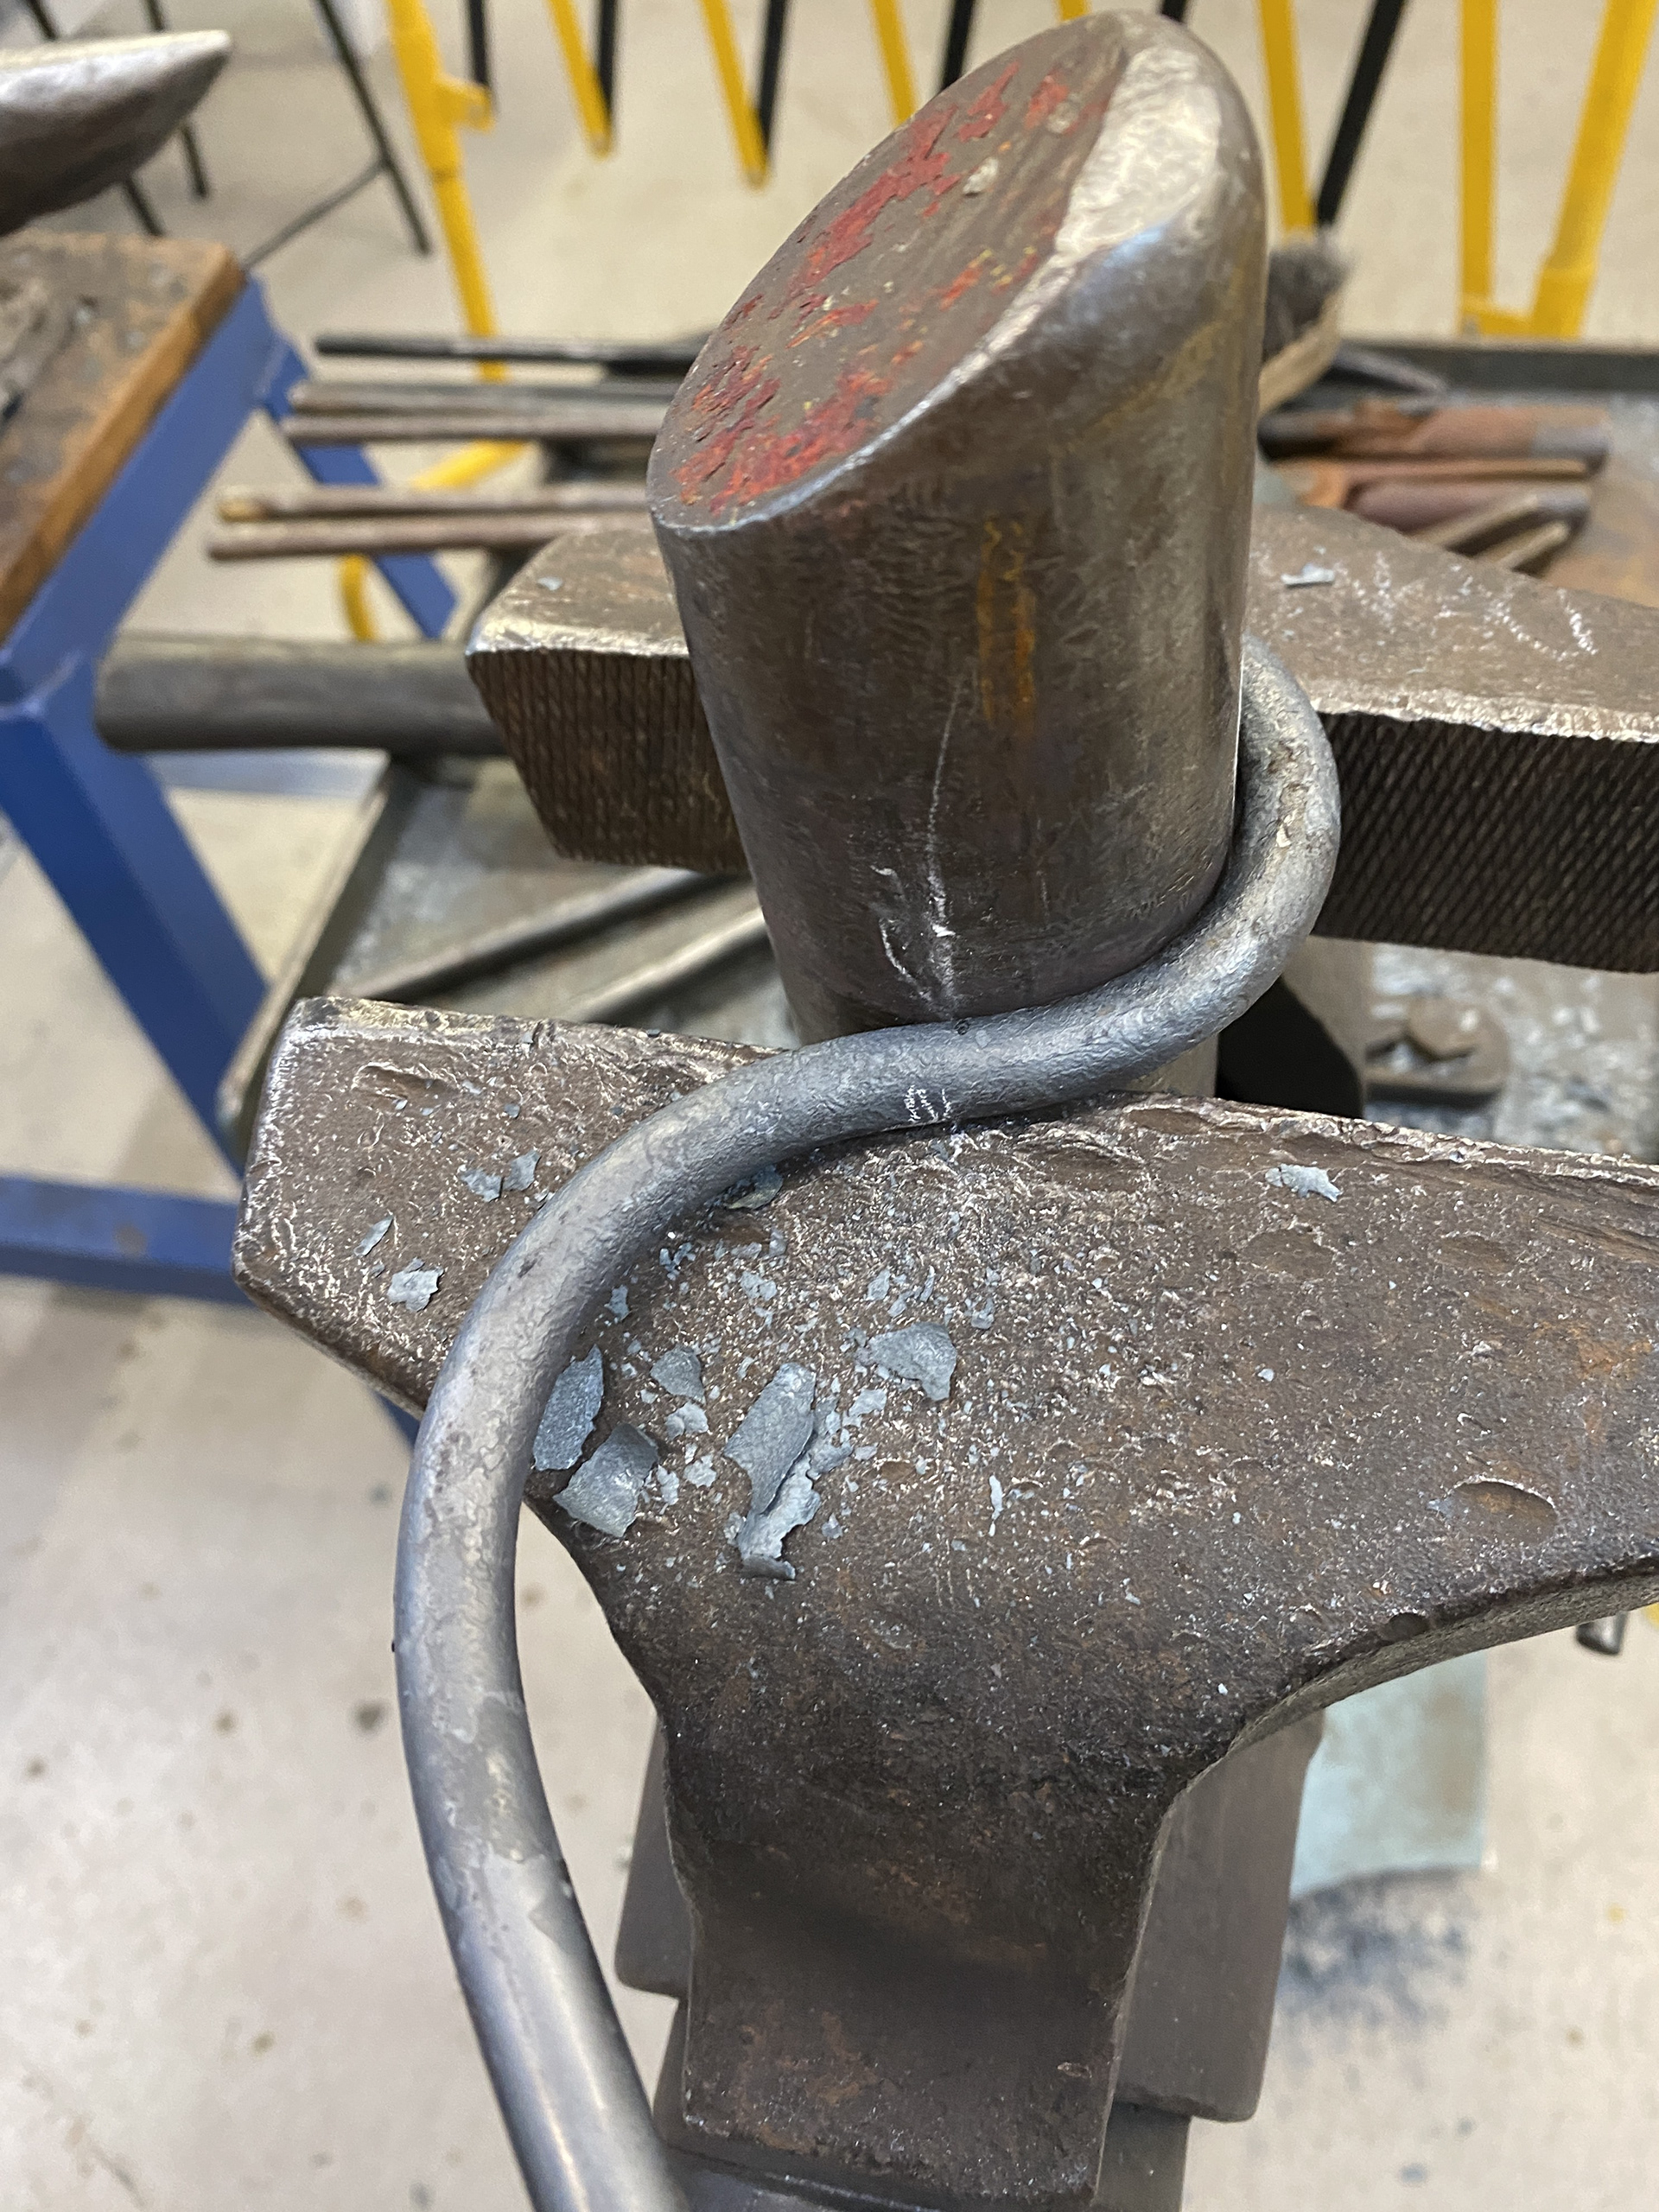
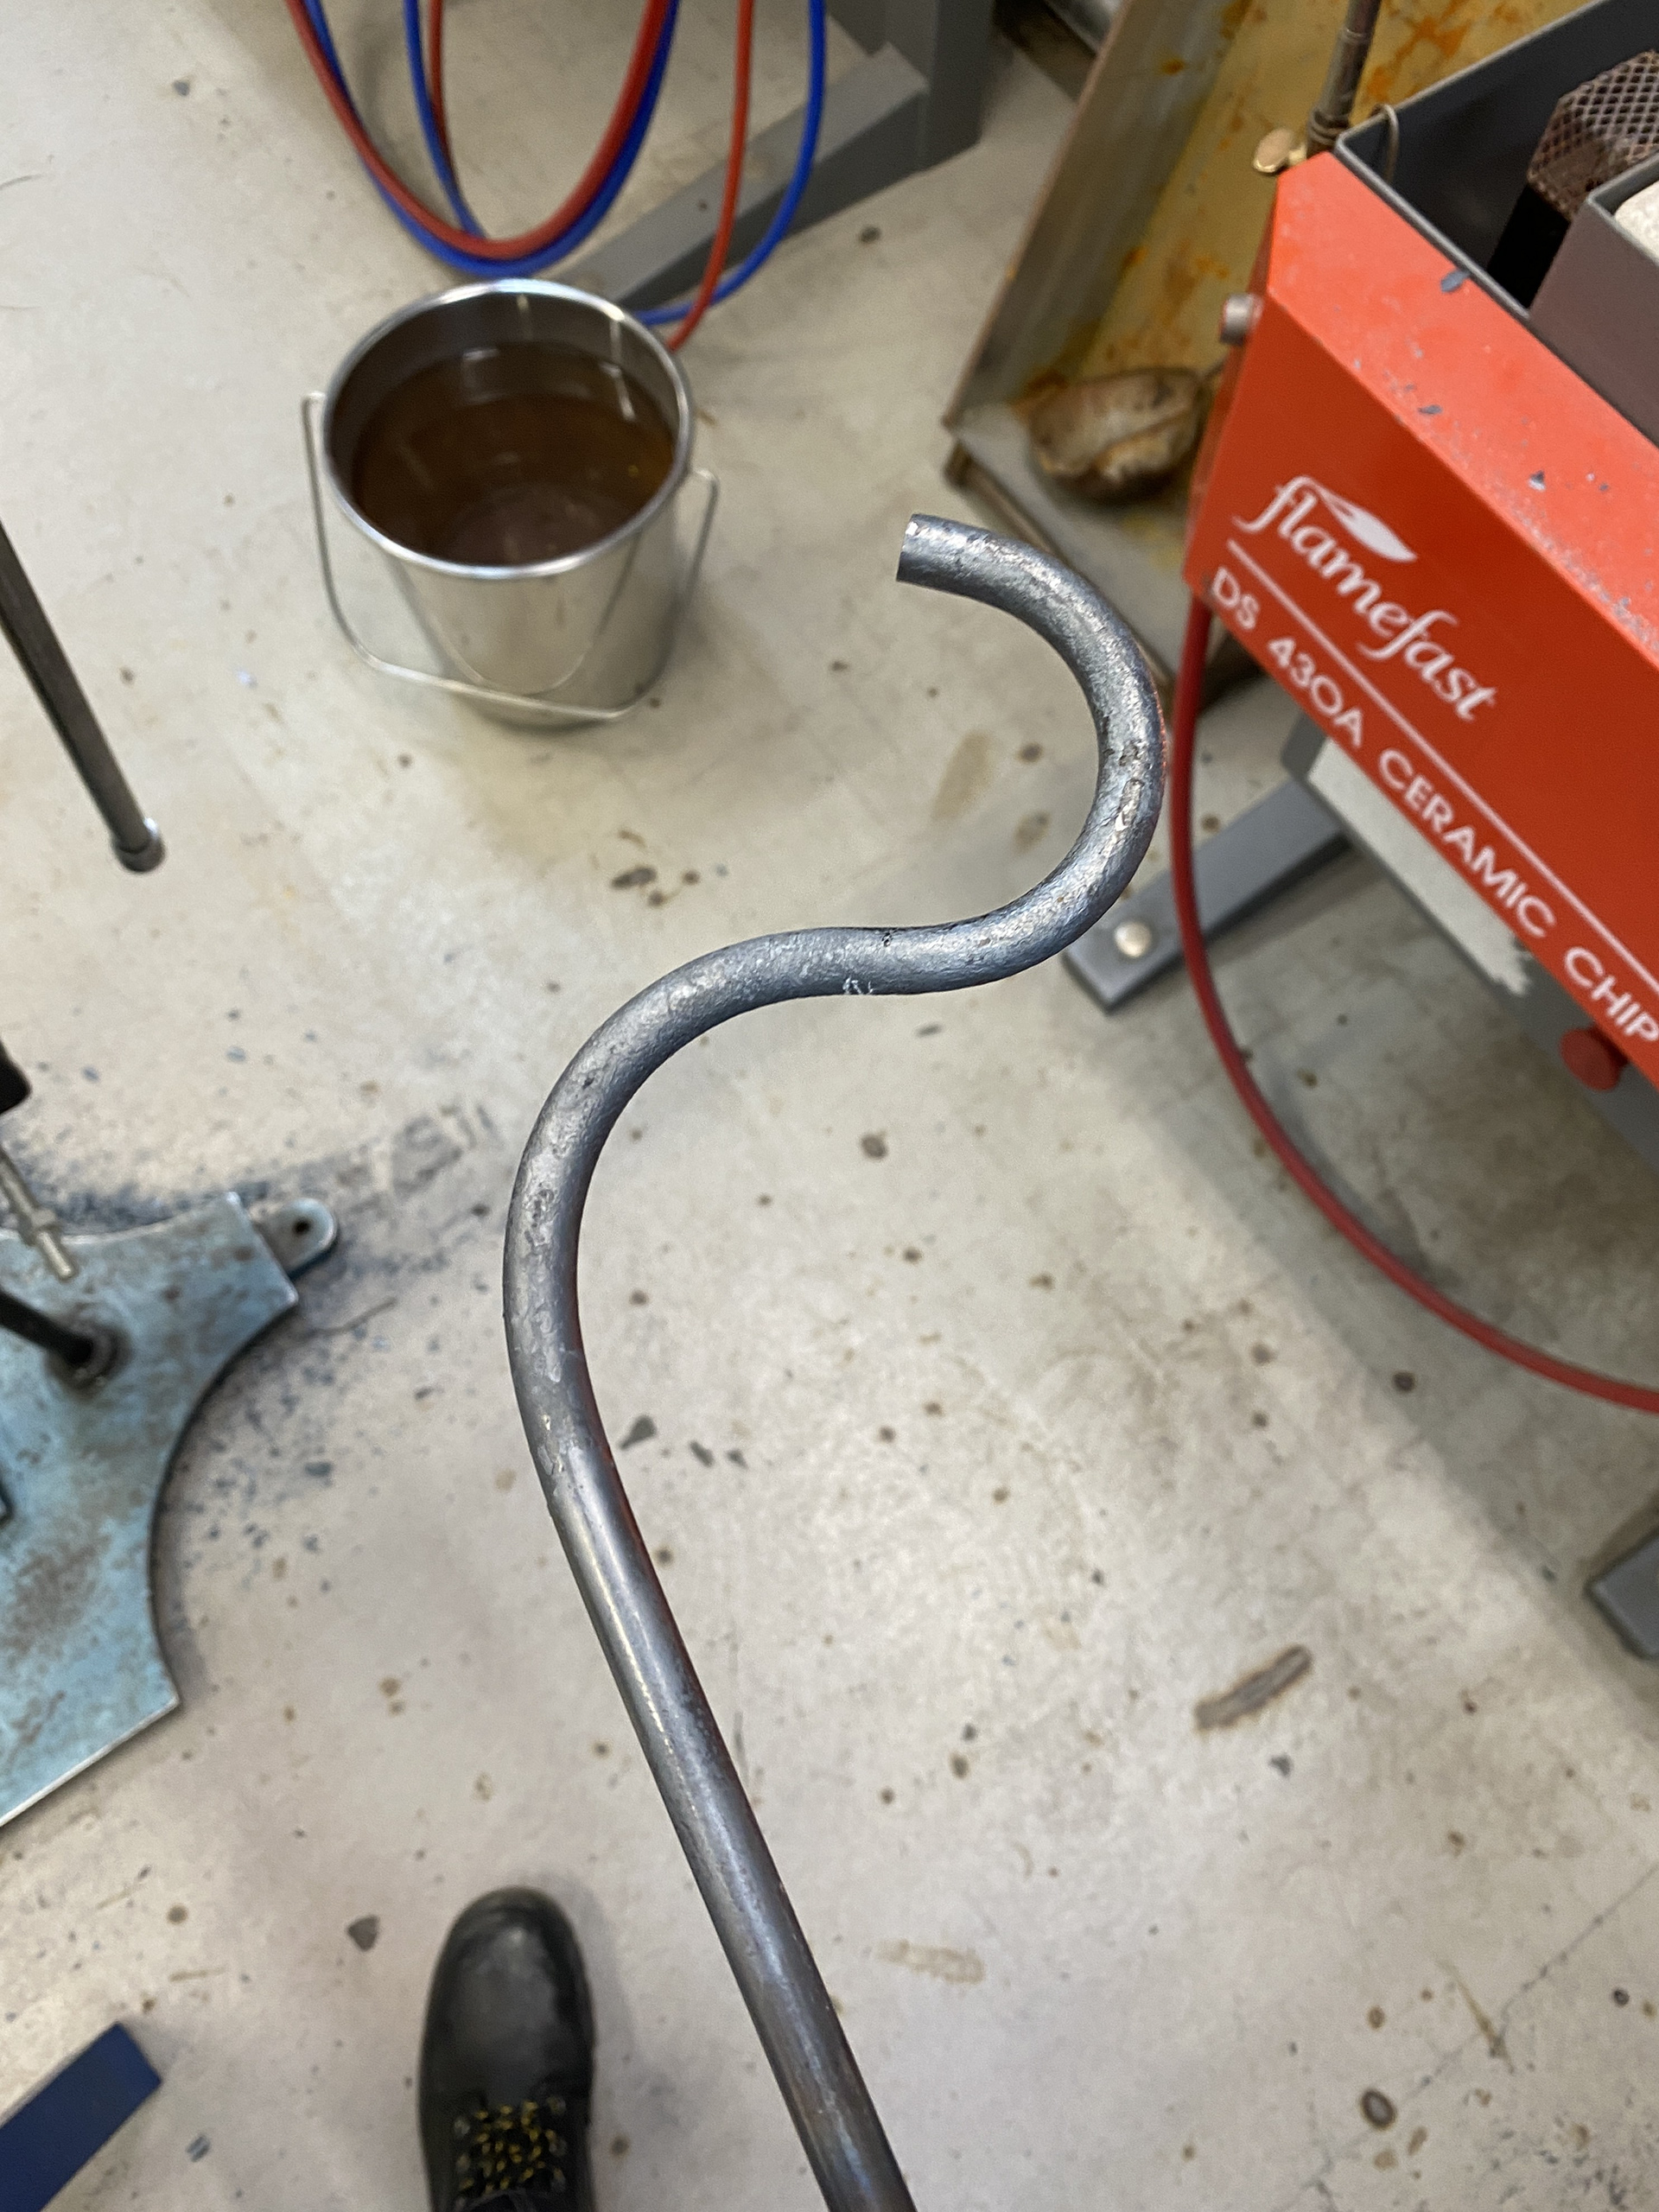


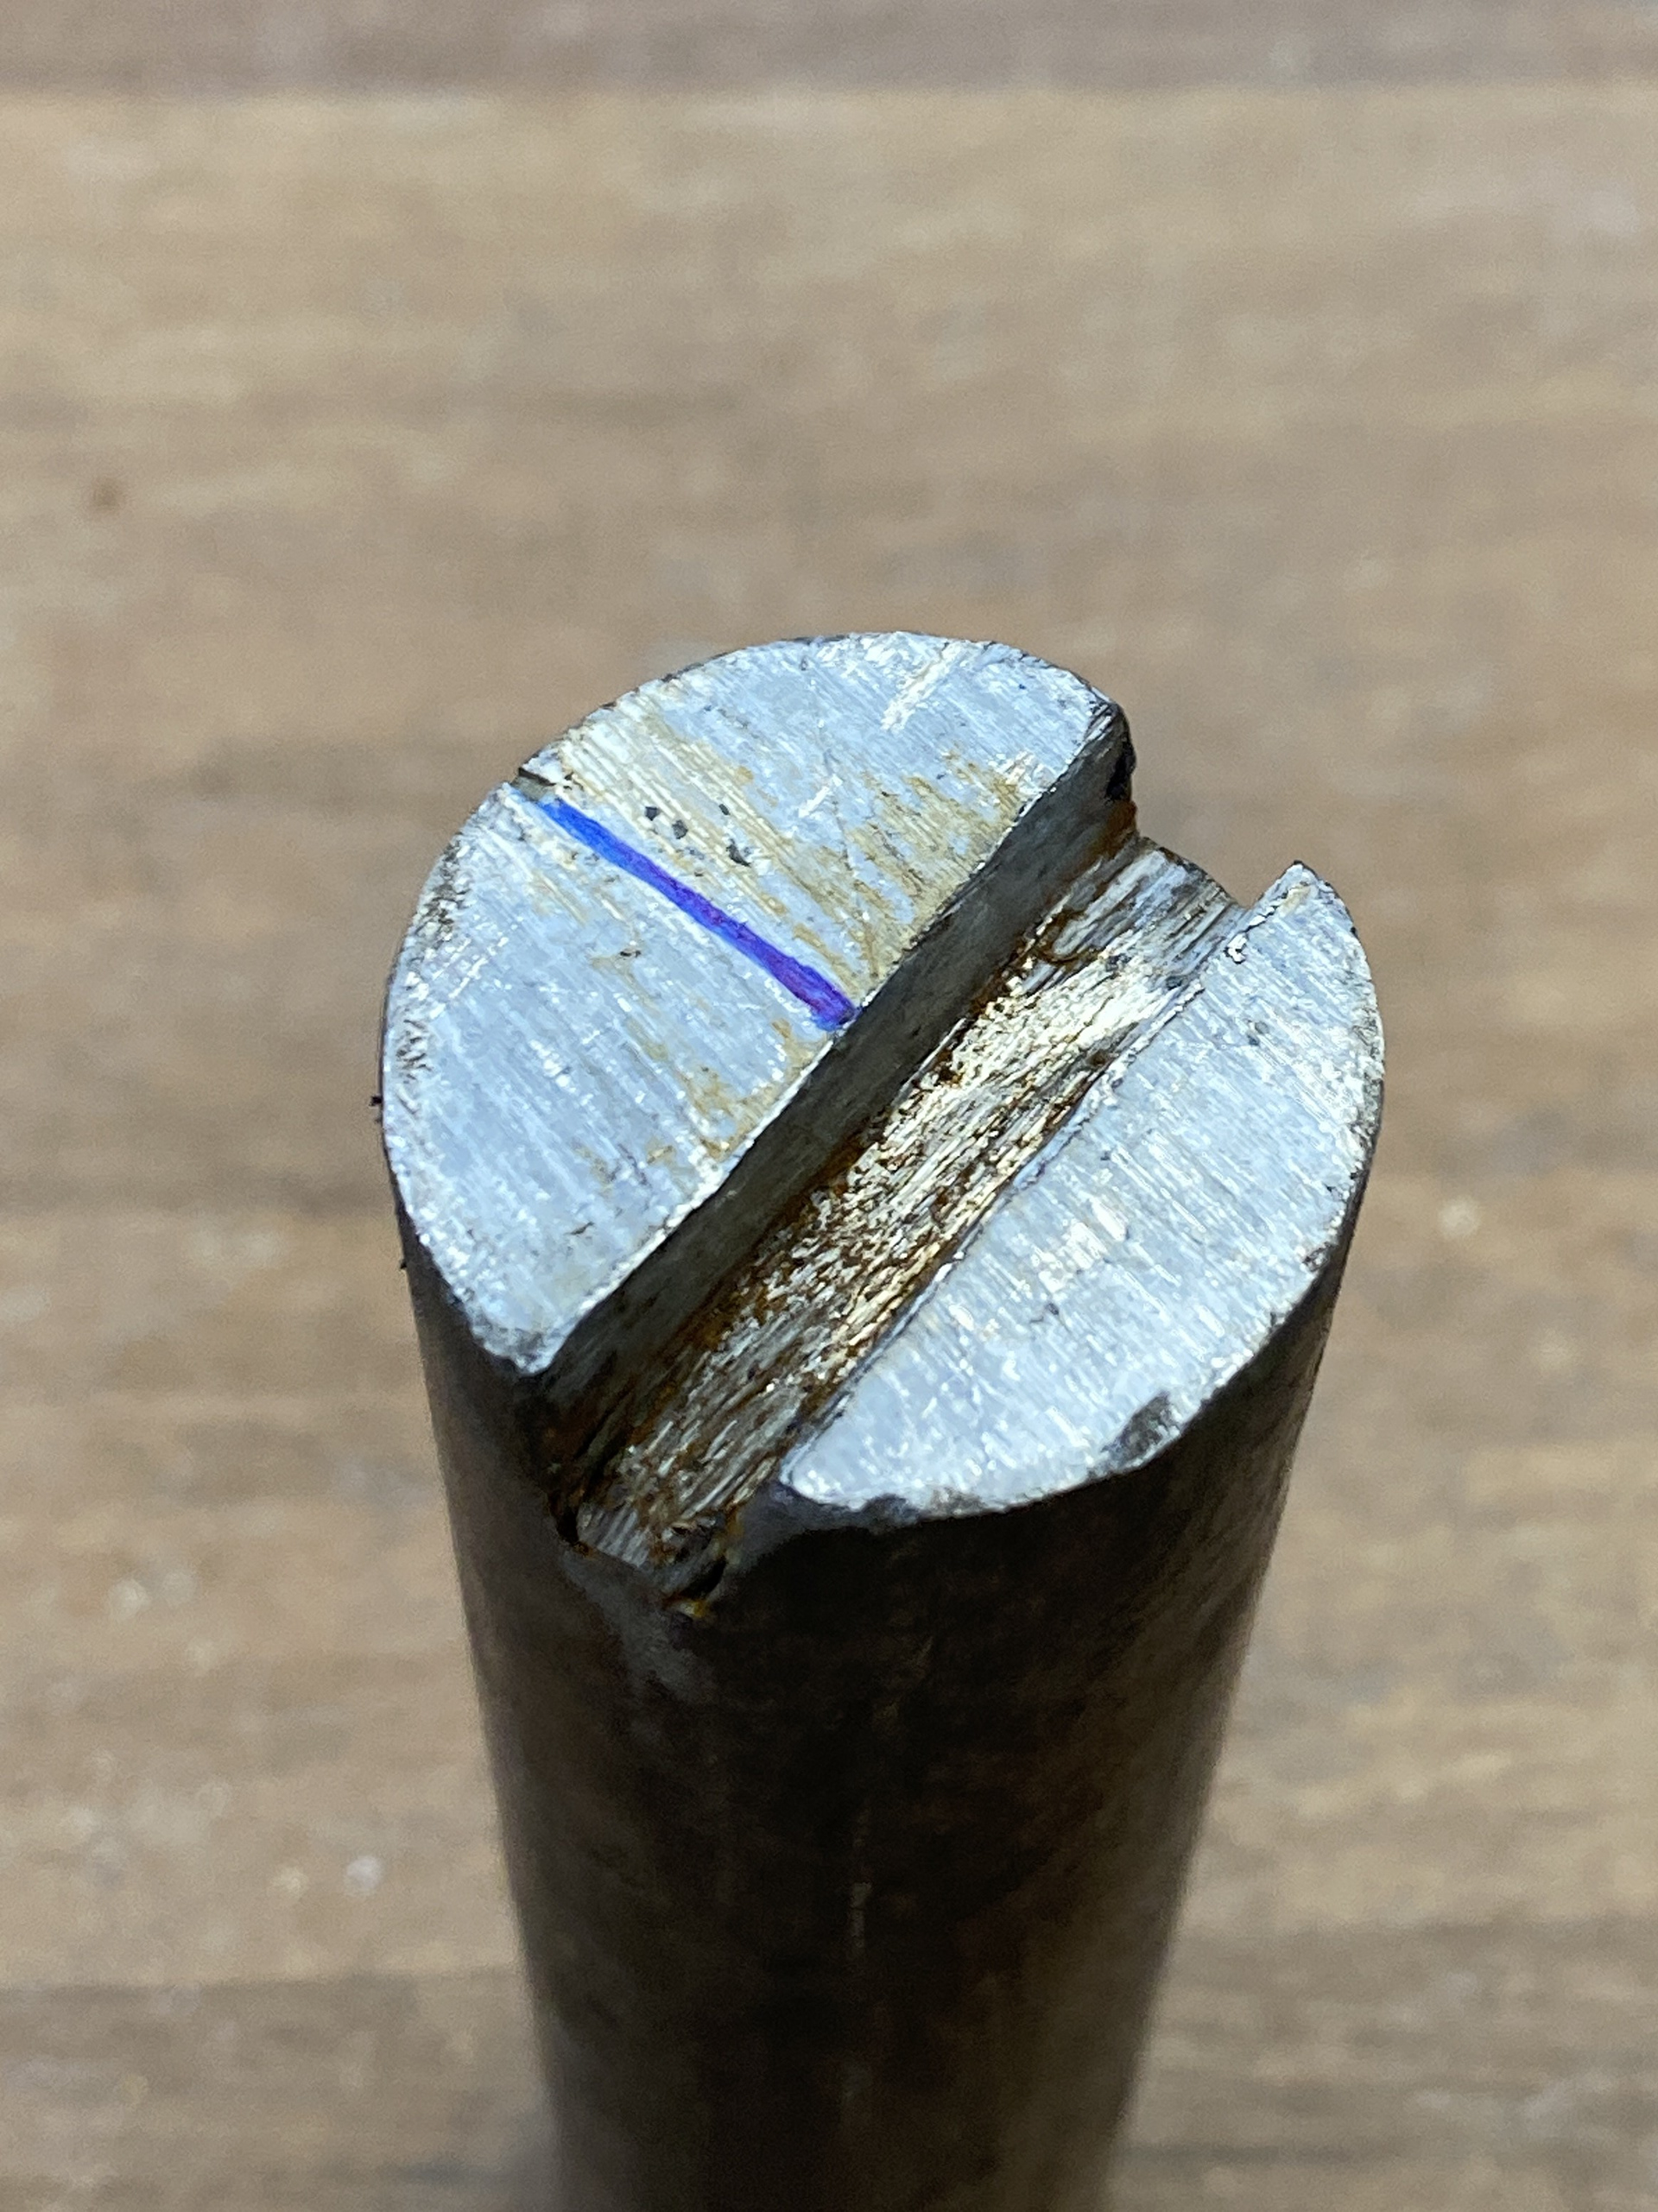
To create the main clasp at the back of the piece, I realized that evenly bending it into the designed form would be too difficult with the equipment available in the workshop. Therefore, I adjusted the shaping process by overlapping the rod.
I began with the larger main circle, first marking out the quarters where the loops needed to be placed on the stake using chalk. I then shaped the lower-right semicircle before bending the bar outward to form the first smaller loop. Although I initially aligned this correctly before forging the loop, the wrapping process caused it to become offset. Additionally, I struggled to twist the rod into position to continue forming the circle. After repeatedly testing different techniques, the material thinned out so much that I had to restart the process.
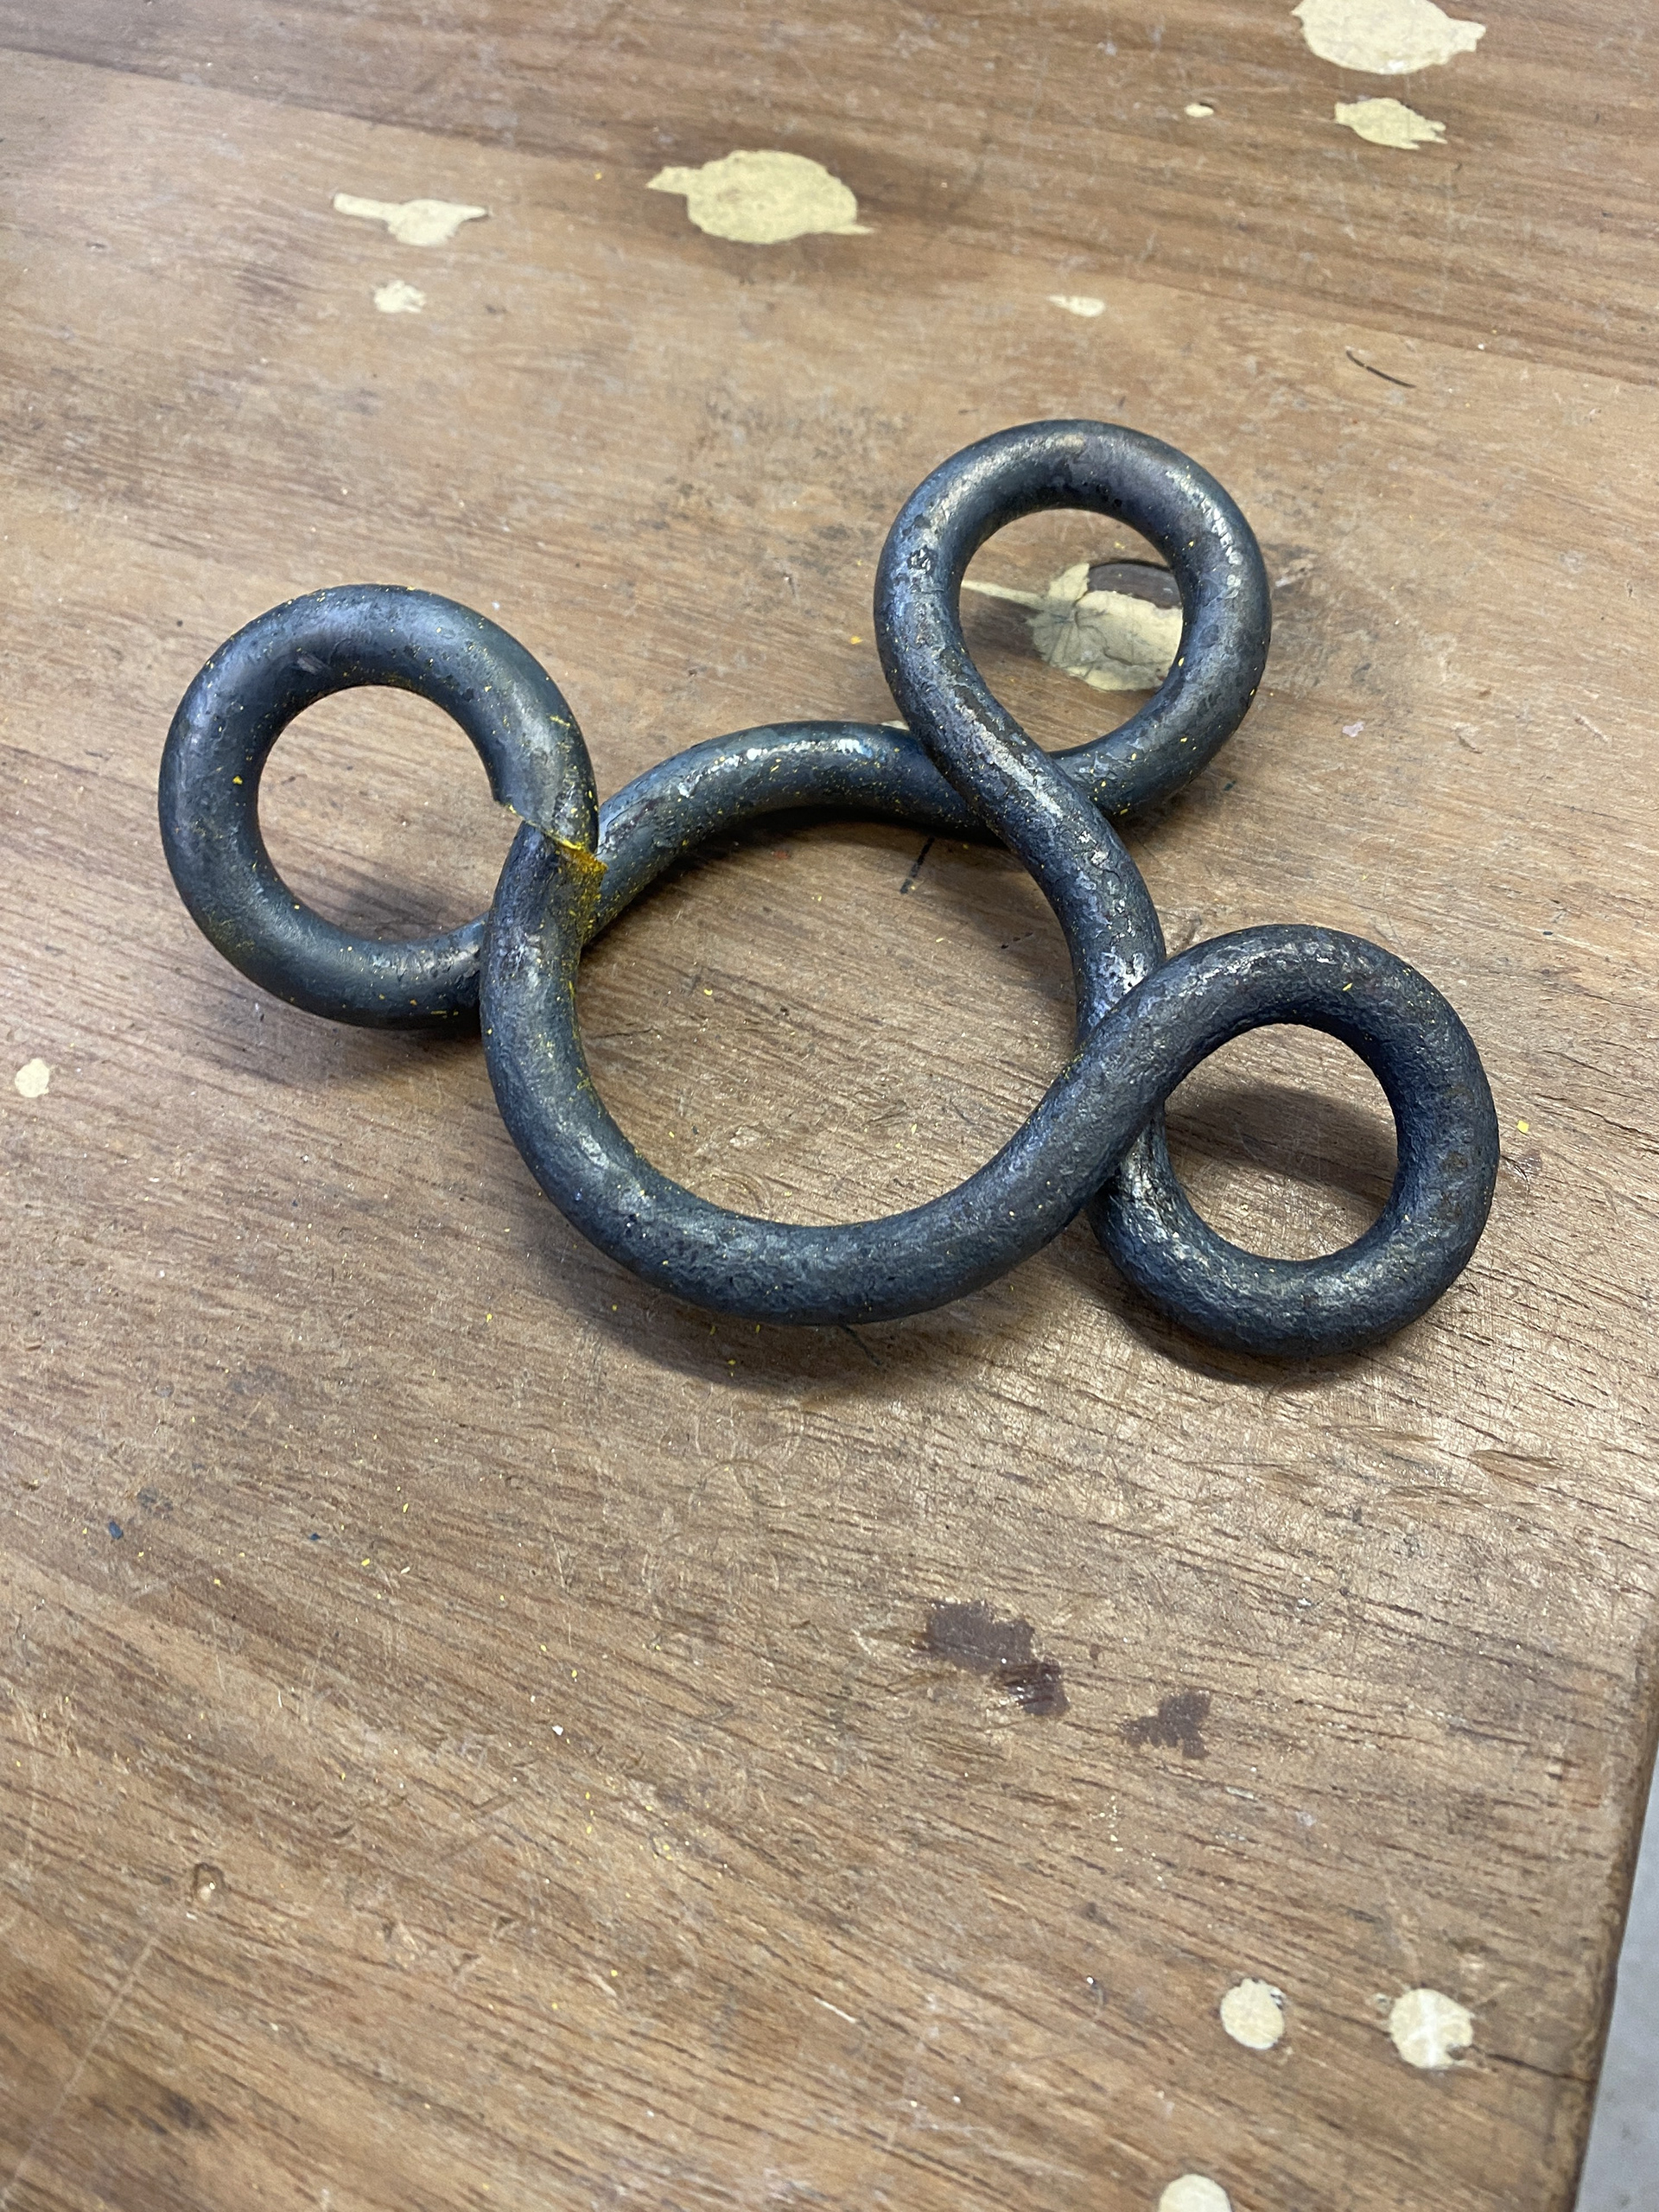
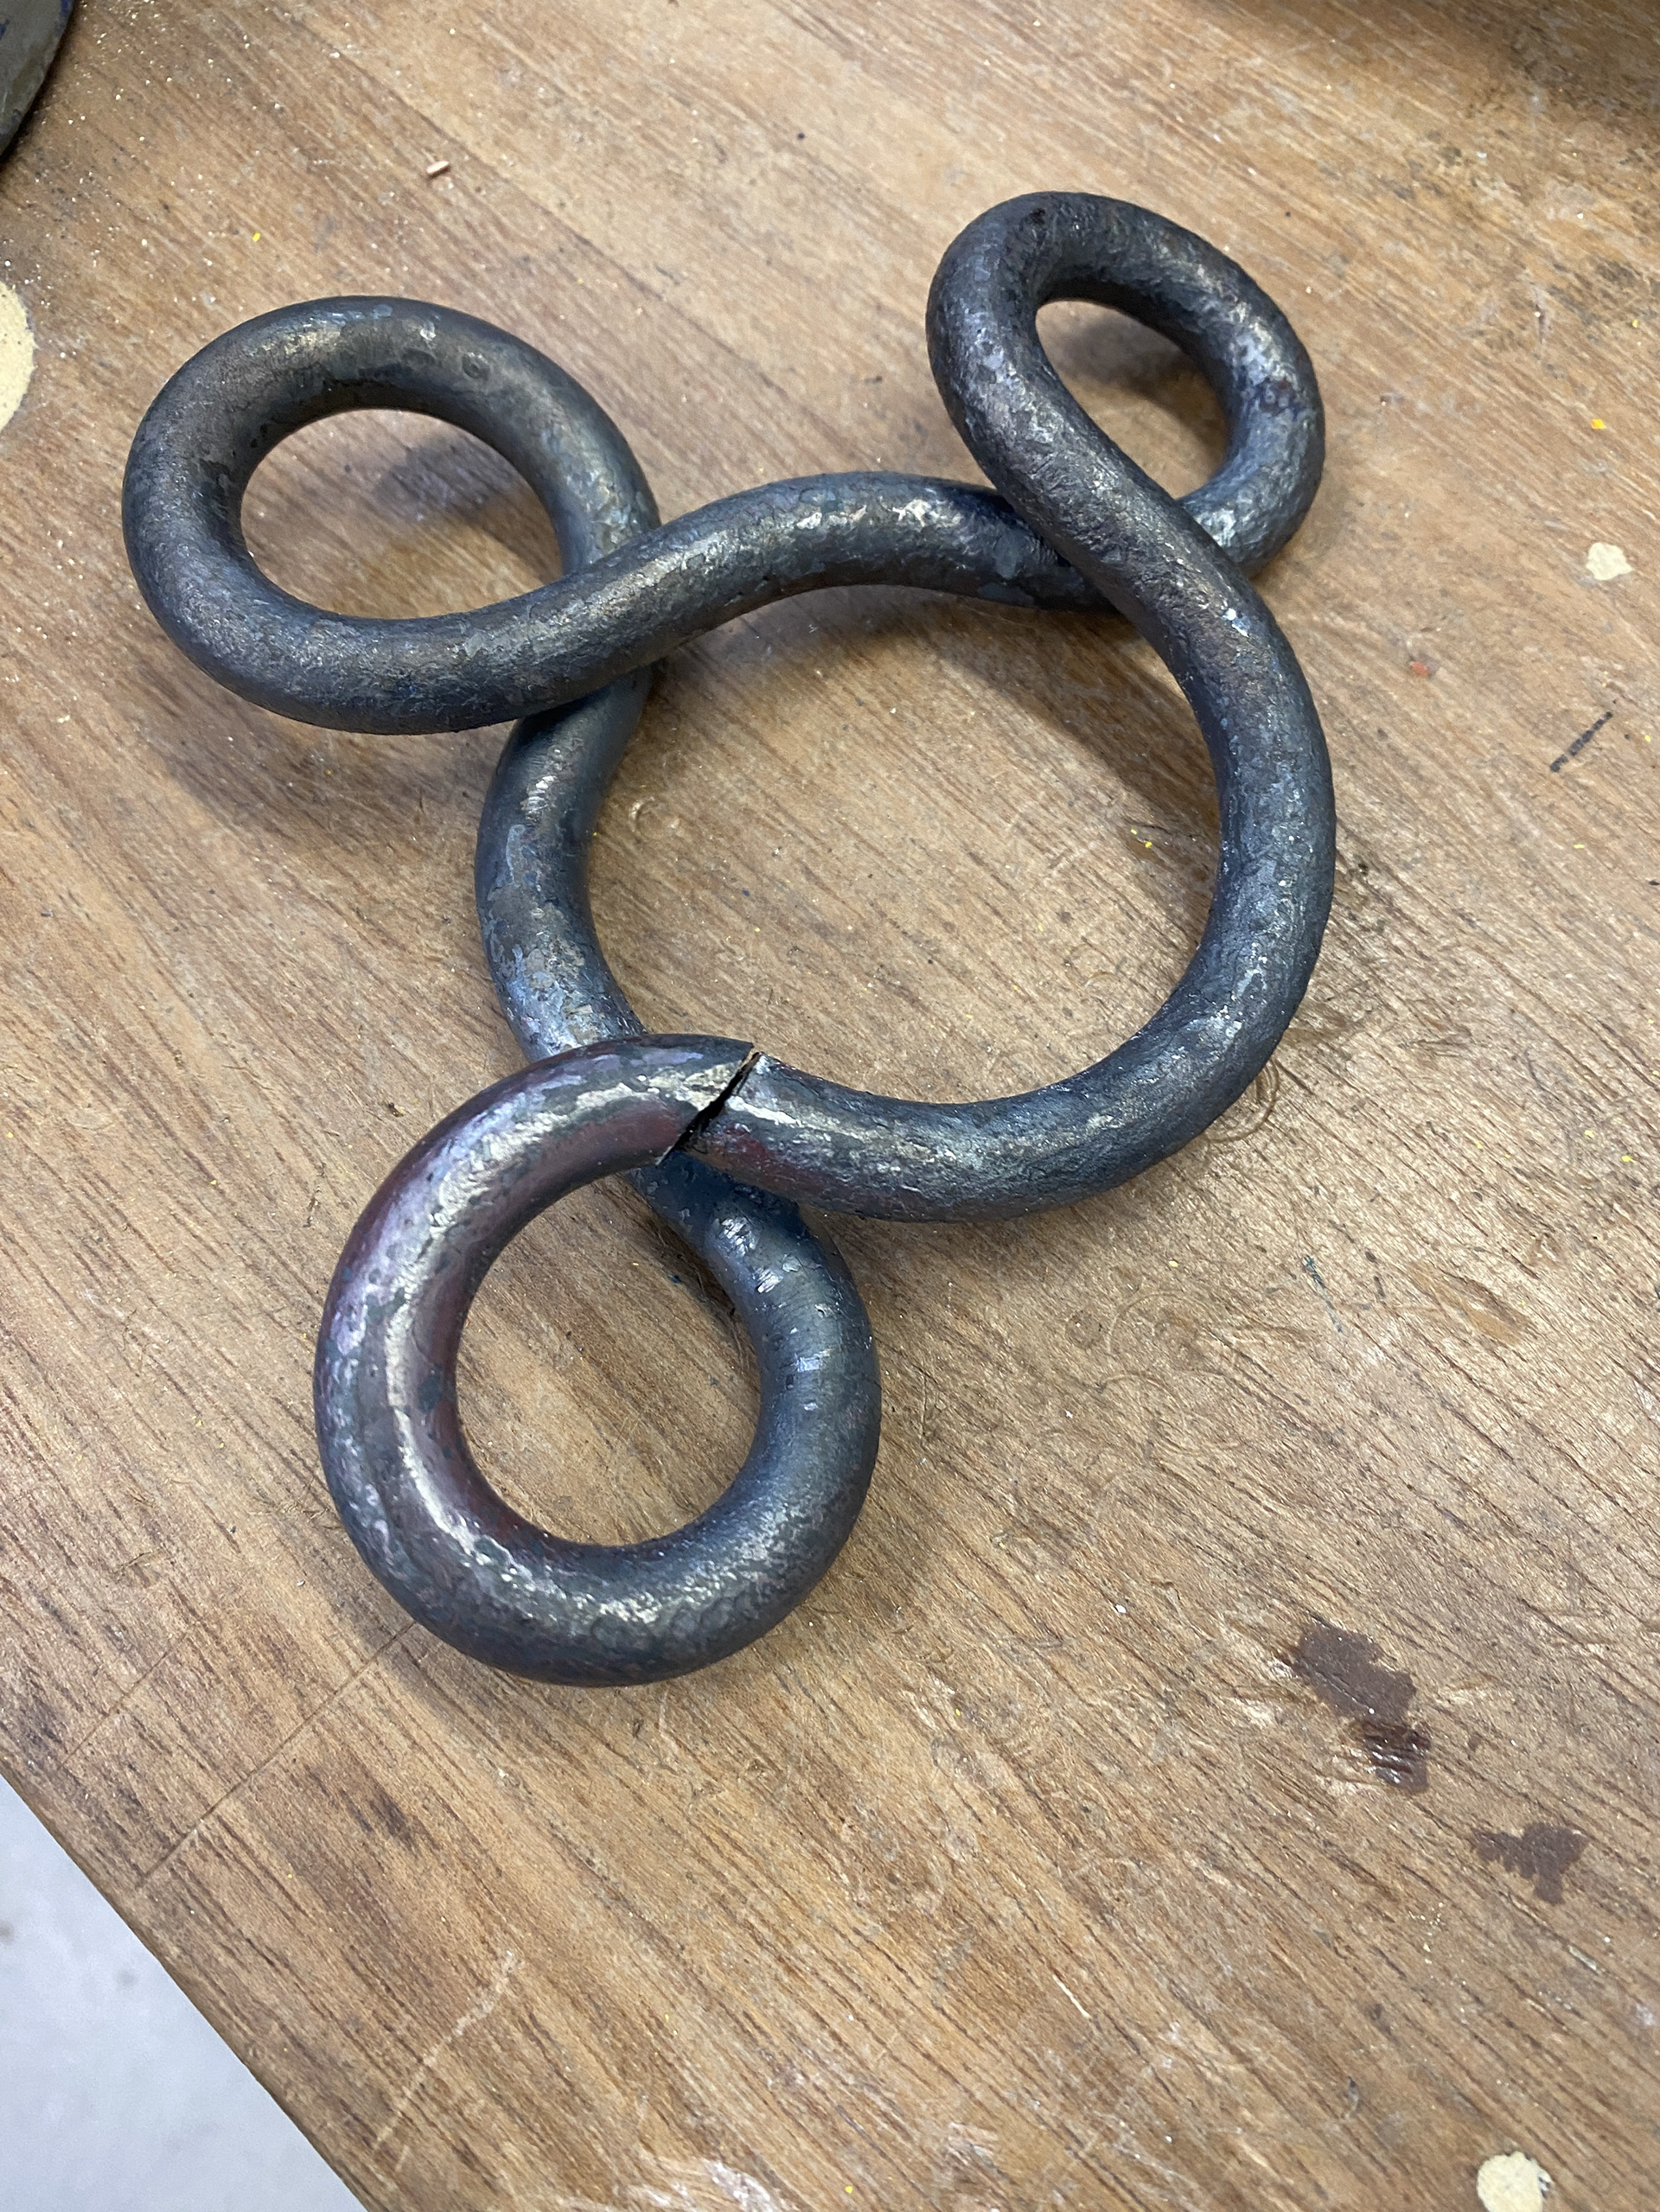
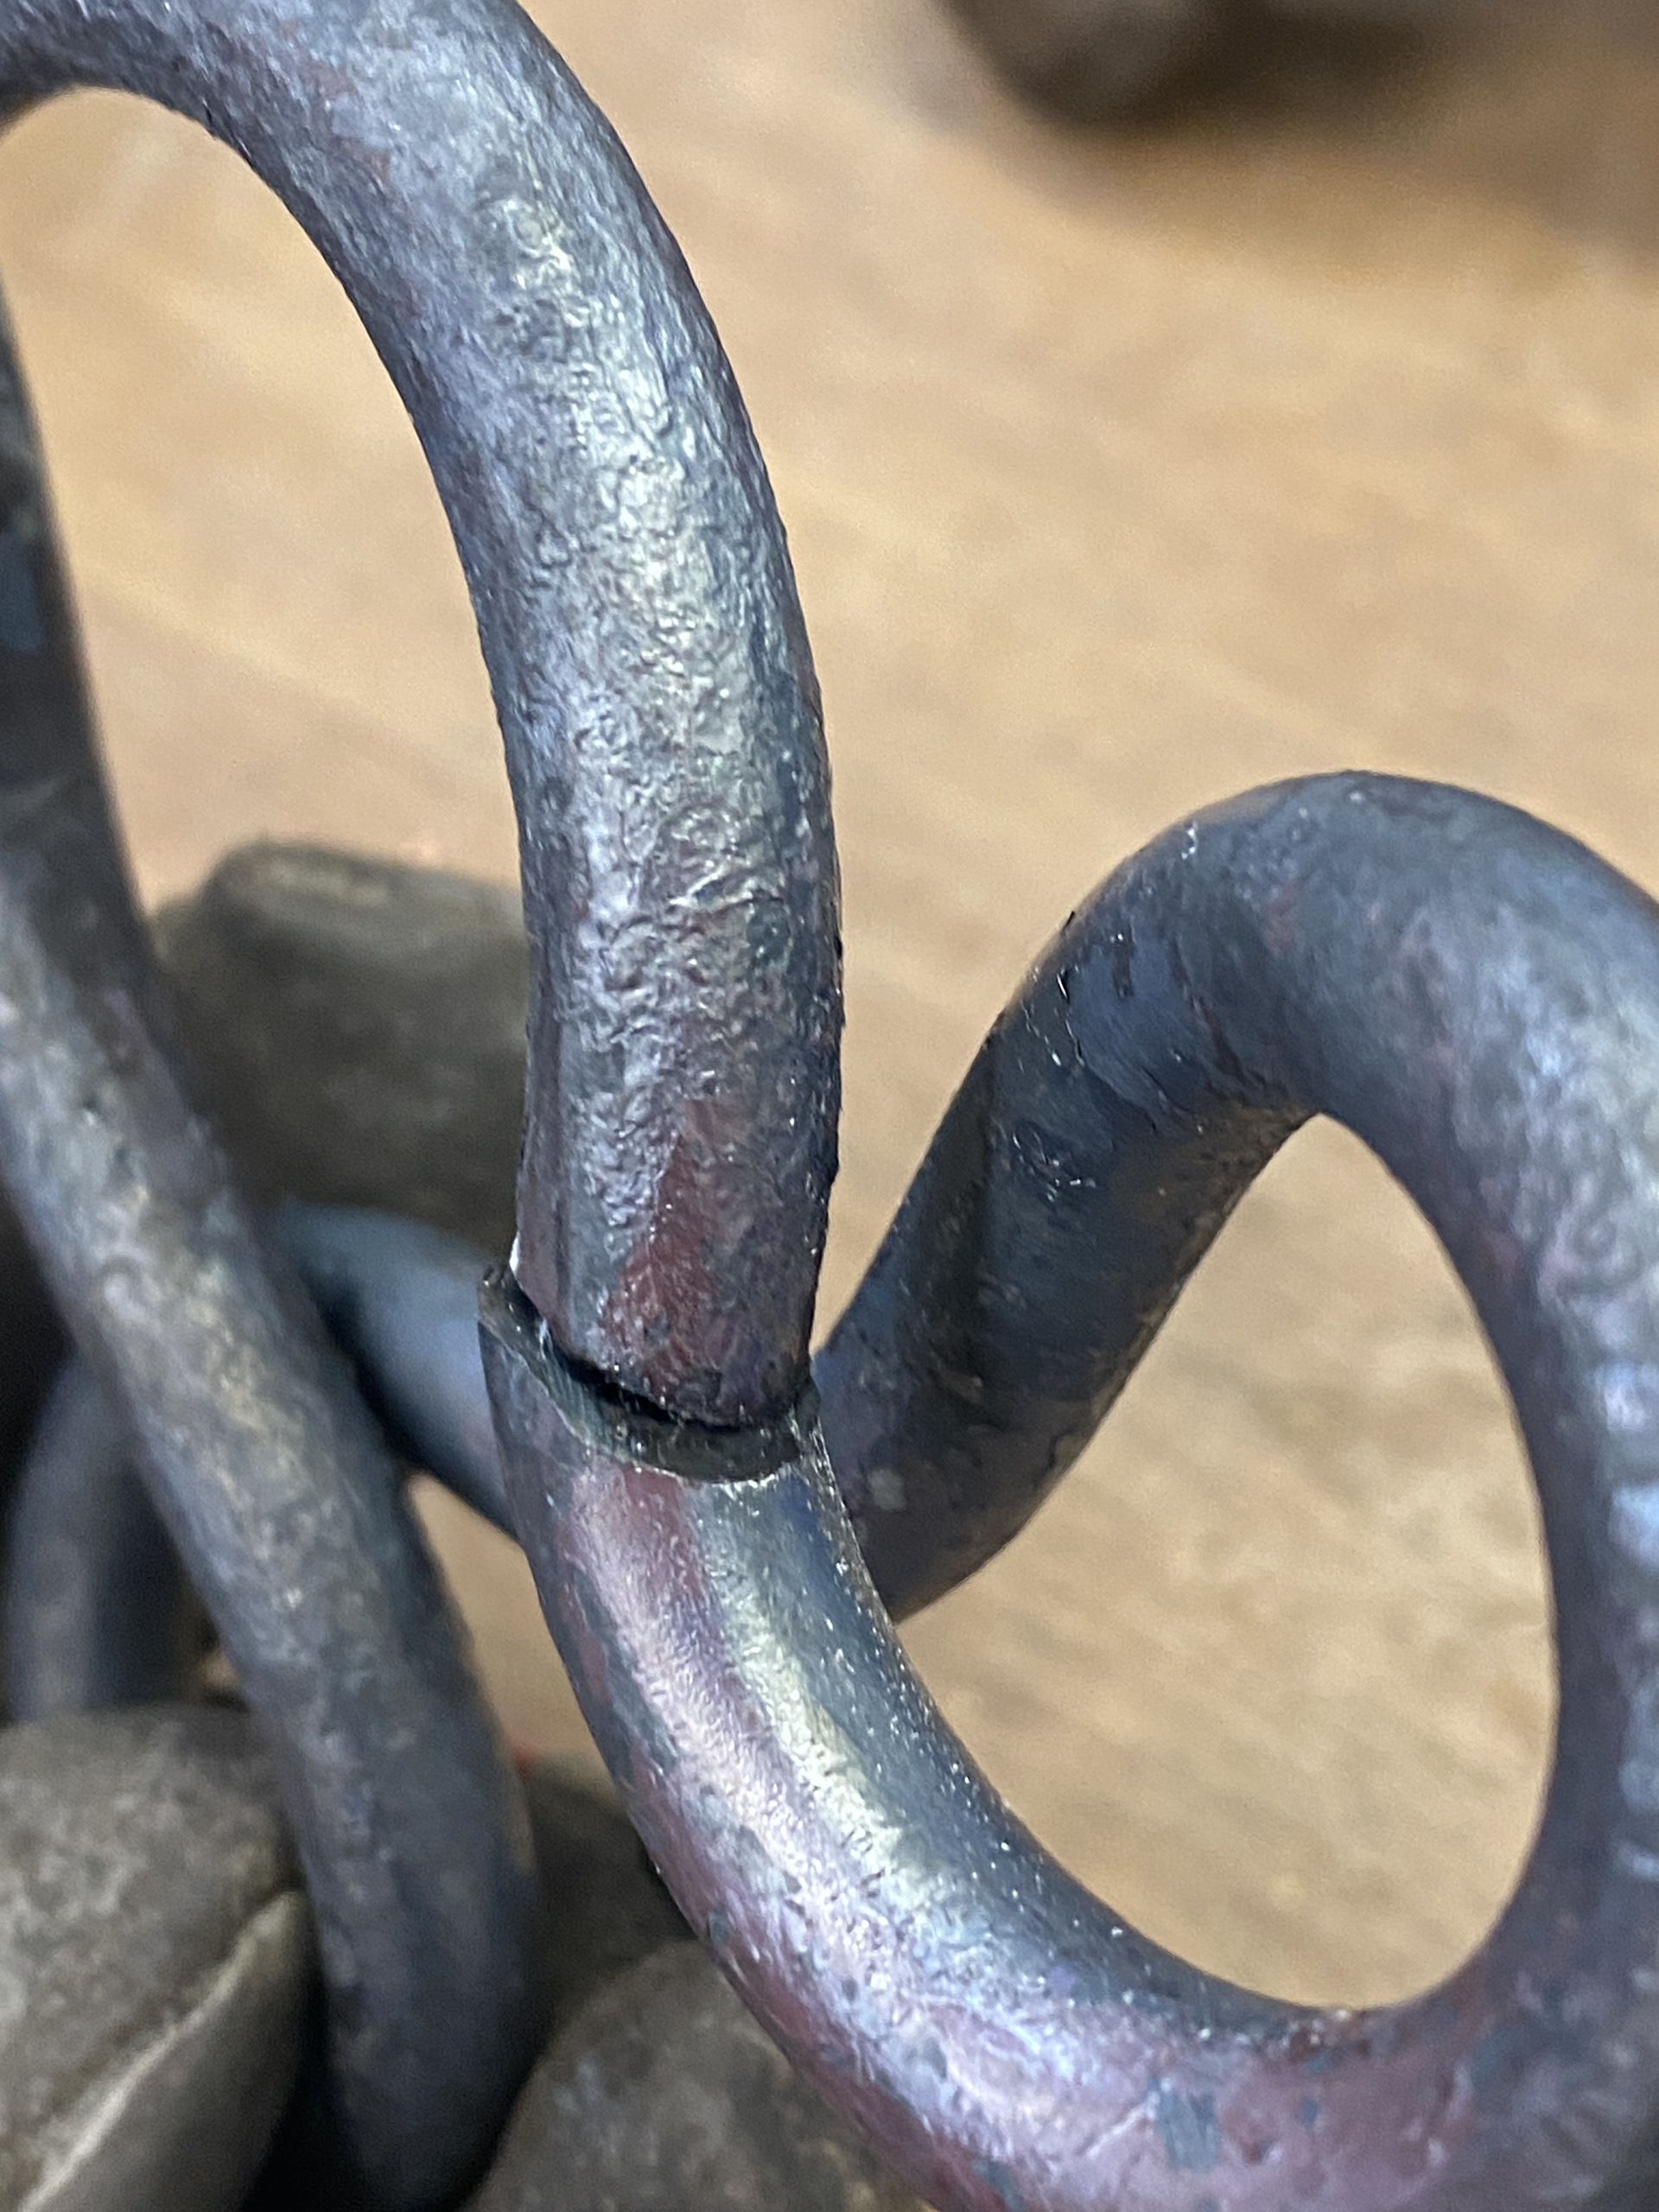
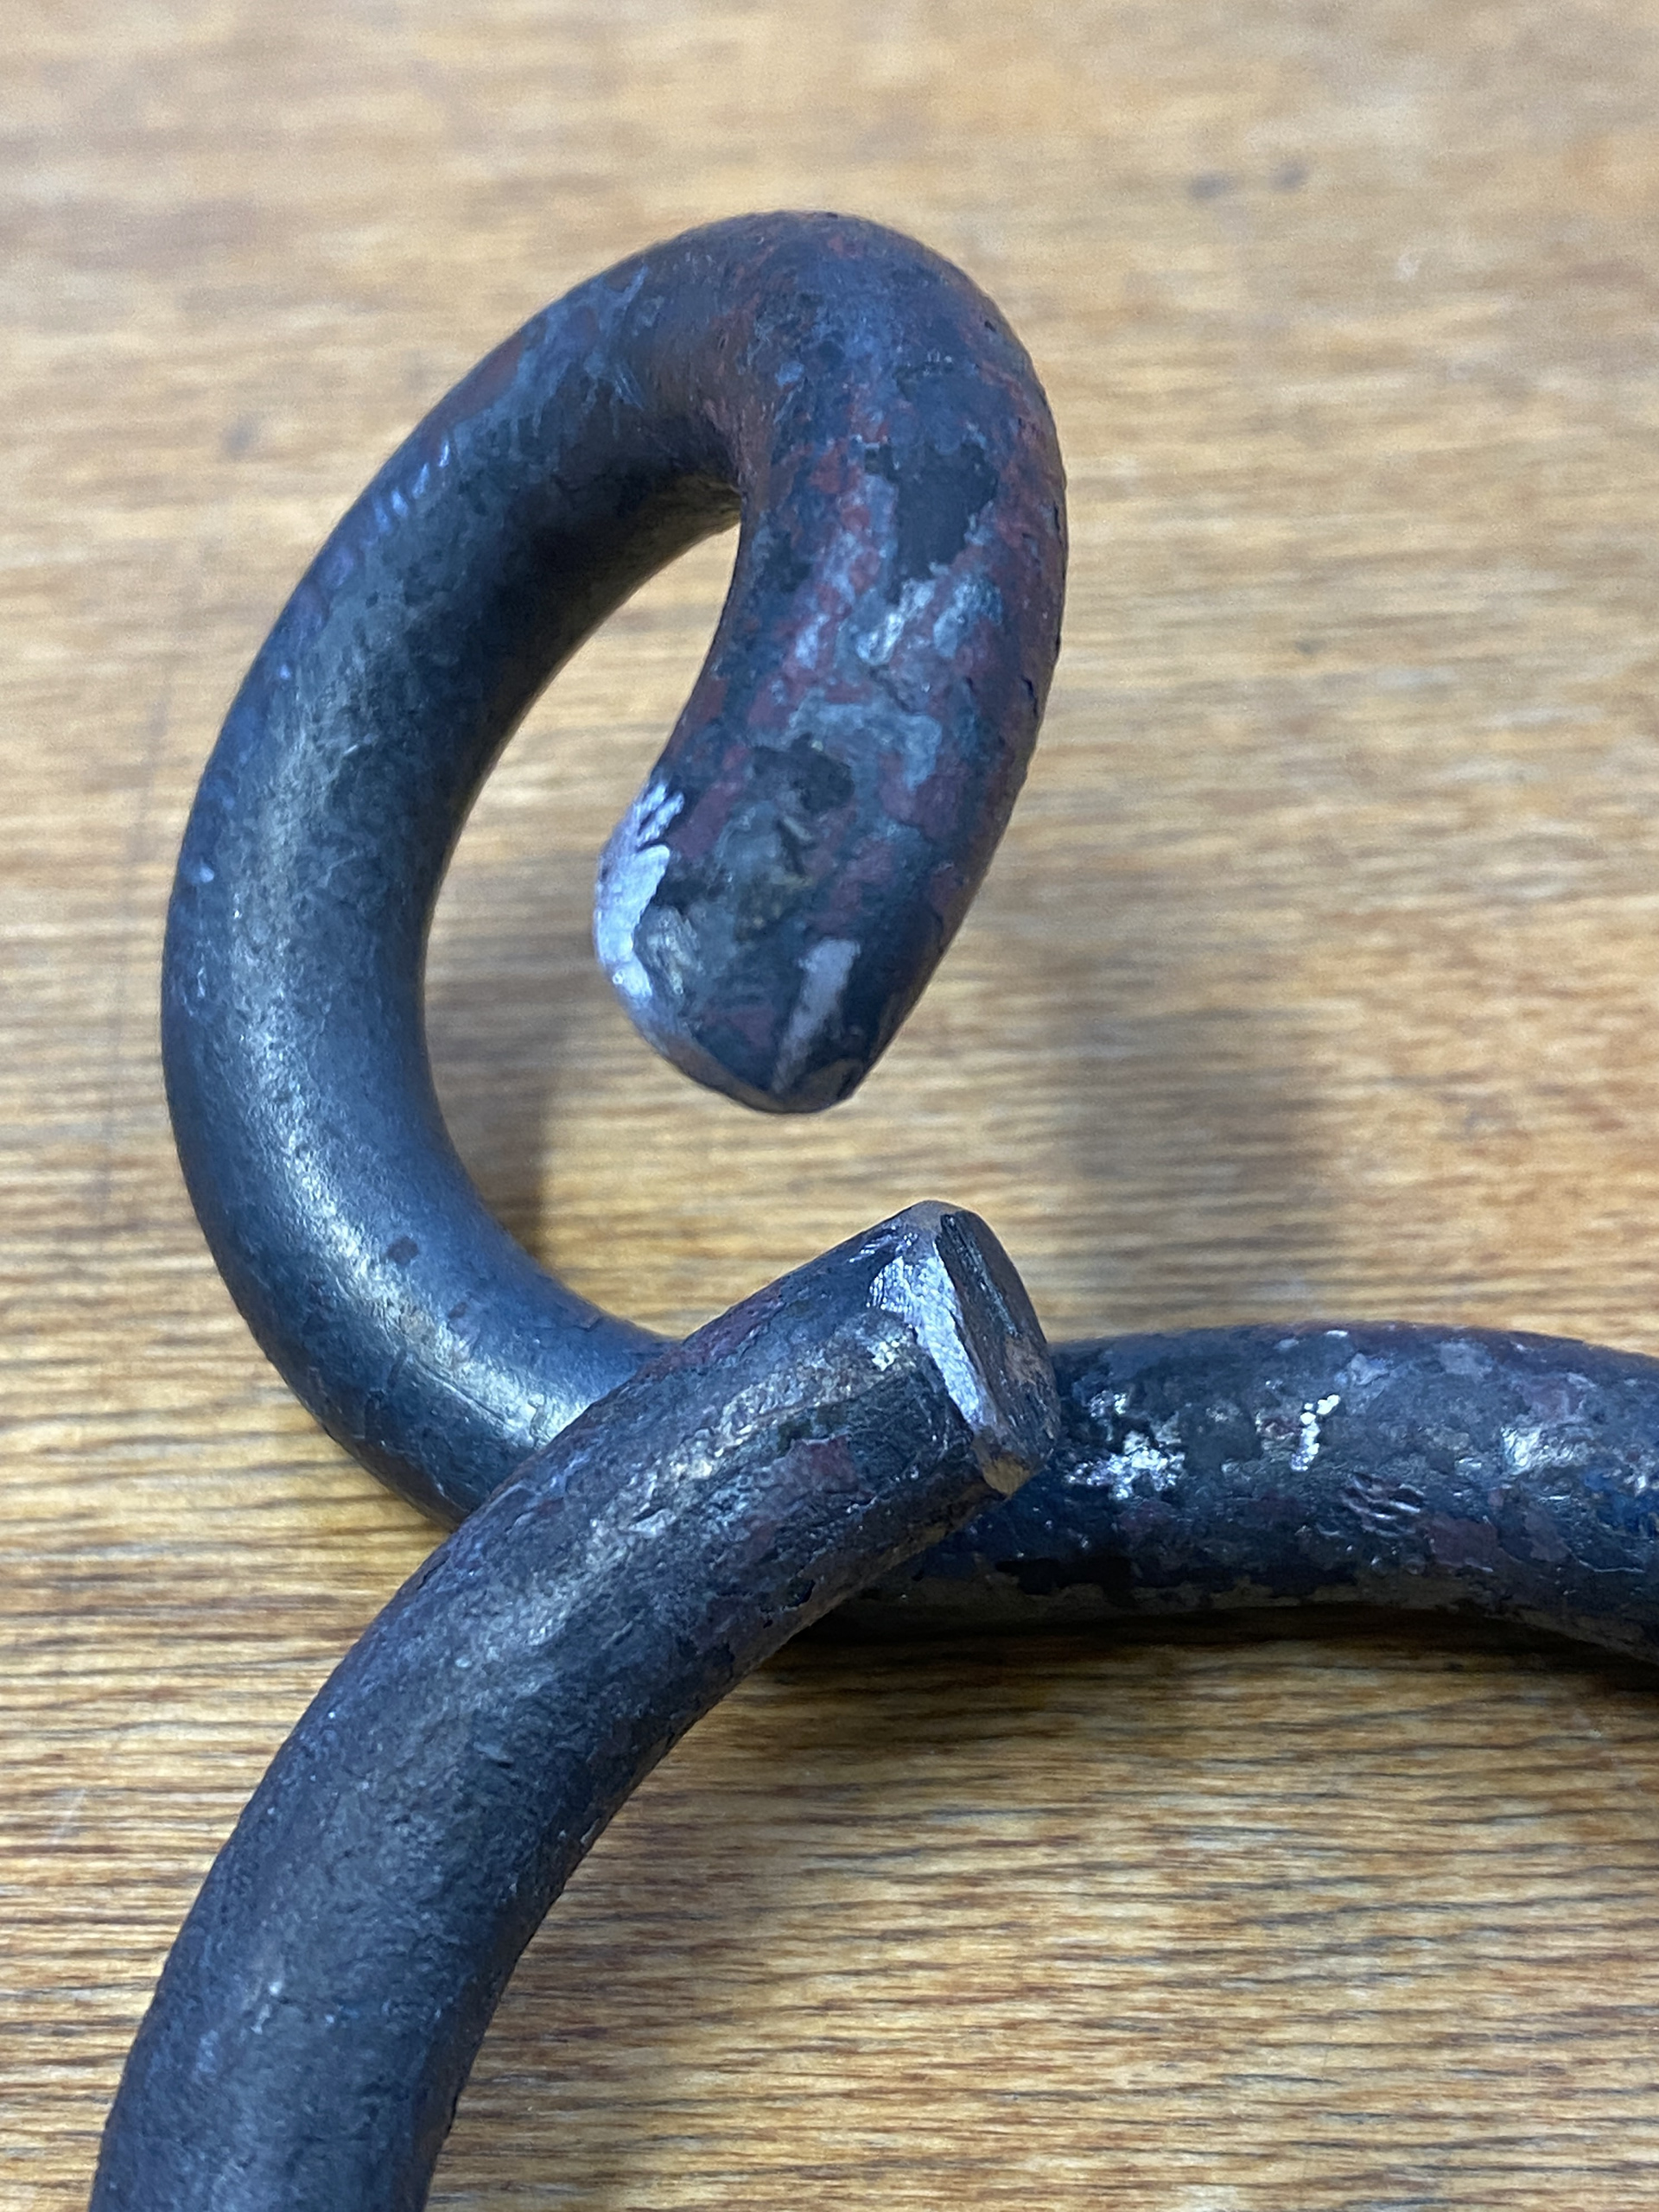
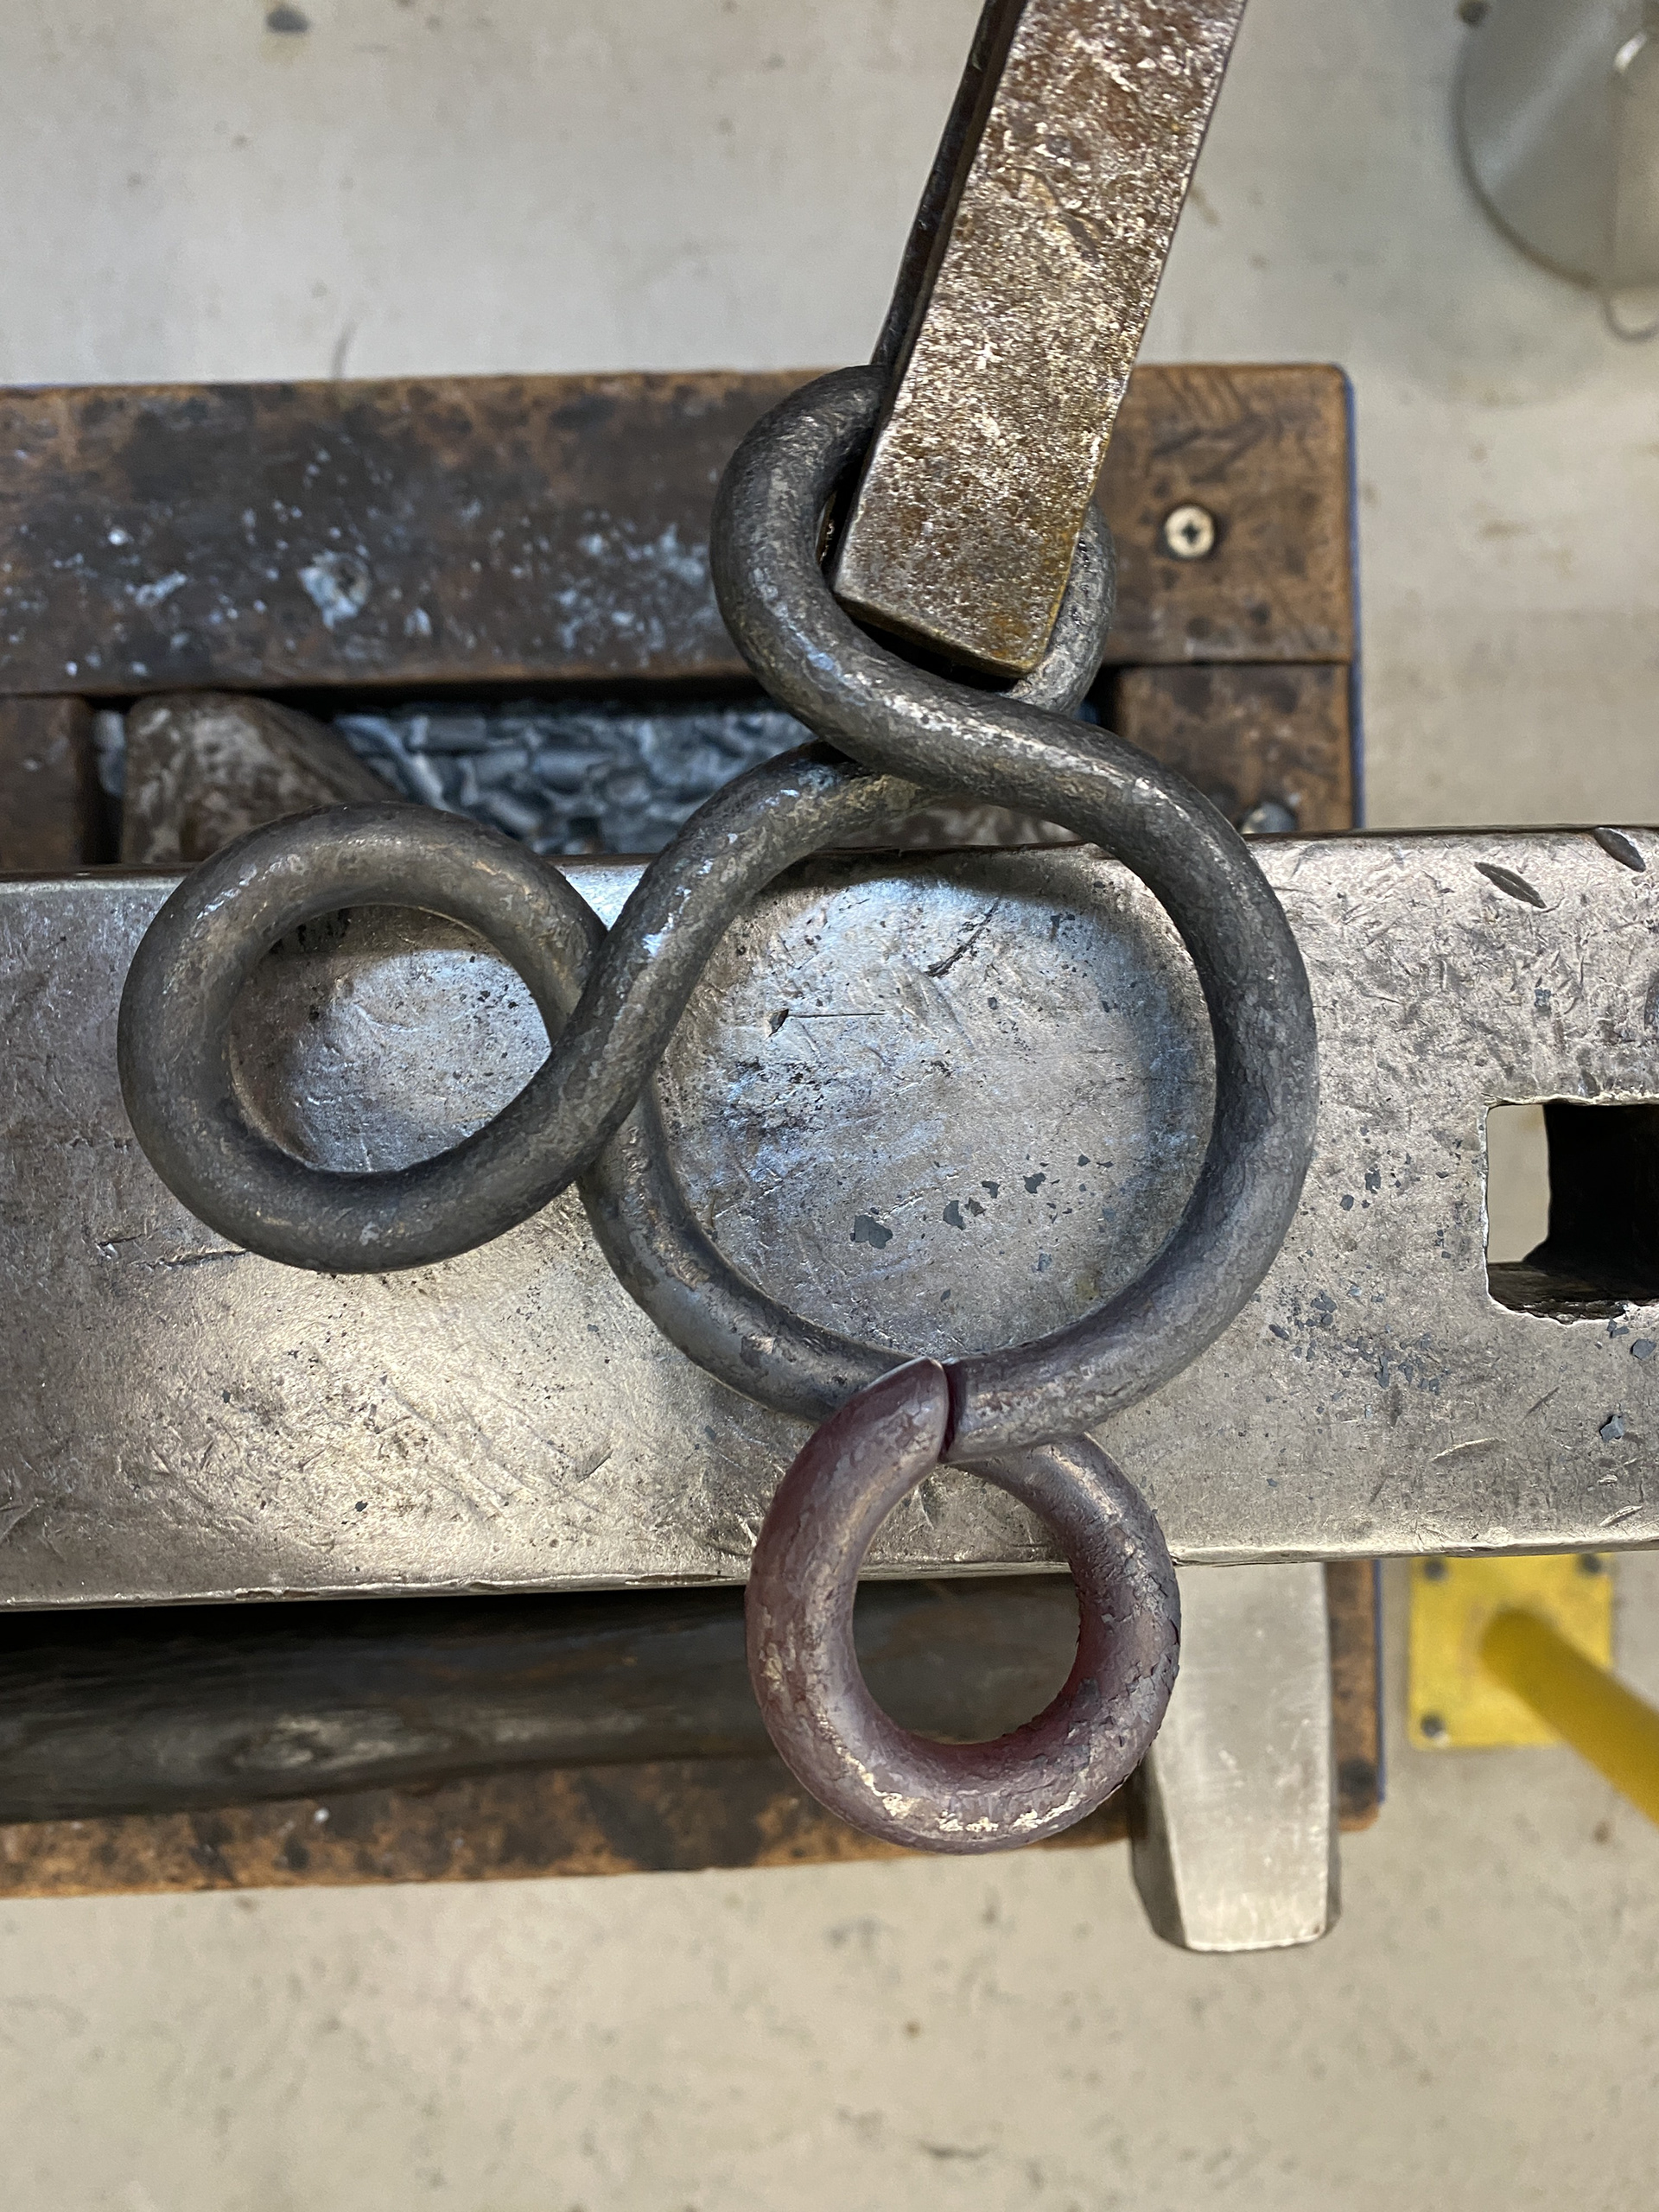
Having restarted the piece with fresh stock, I resolved my issues by separating the overlapping loops. This allowed me to directly pour water over specific areas for quenching without affecting sections I wanted to remain malleable. I then repeated the bending process, working between the smaller stakes to shape the loops and the larger stake to ensure proper alignment. Finally, I used a hacksaw to remove the excess material.
Despite my best efforts, I found that the first area I formed had slightly reduced in diameter, creating a lip between the two meeting ends. To smooth this transition, I used a pendant drill before closing the piece back together
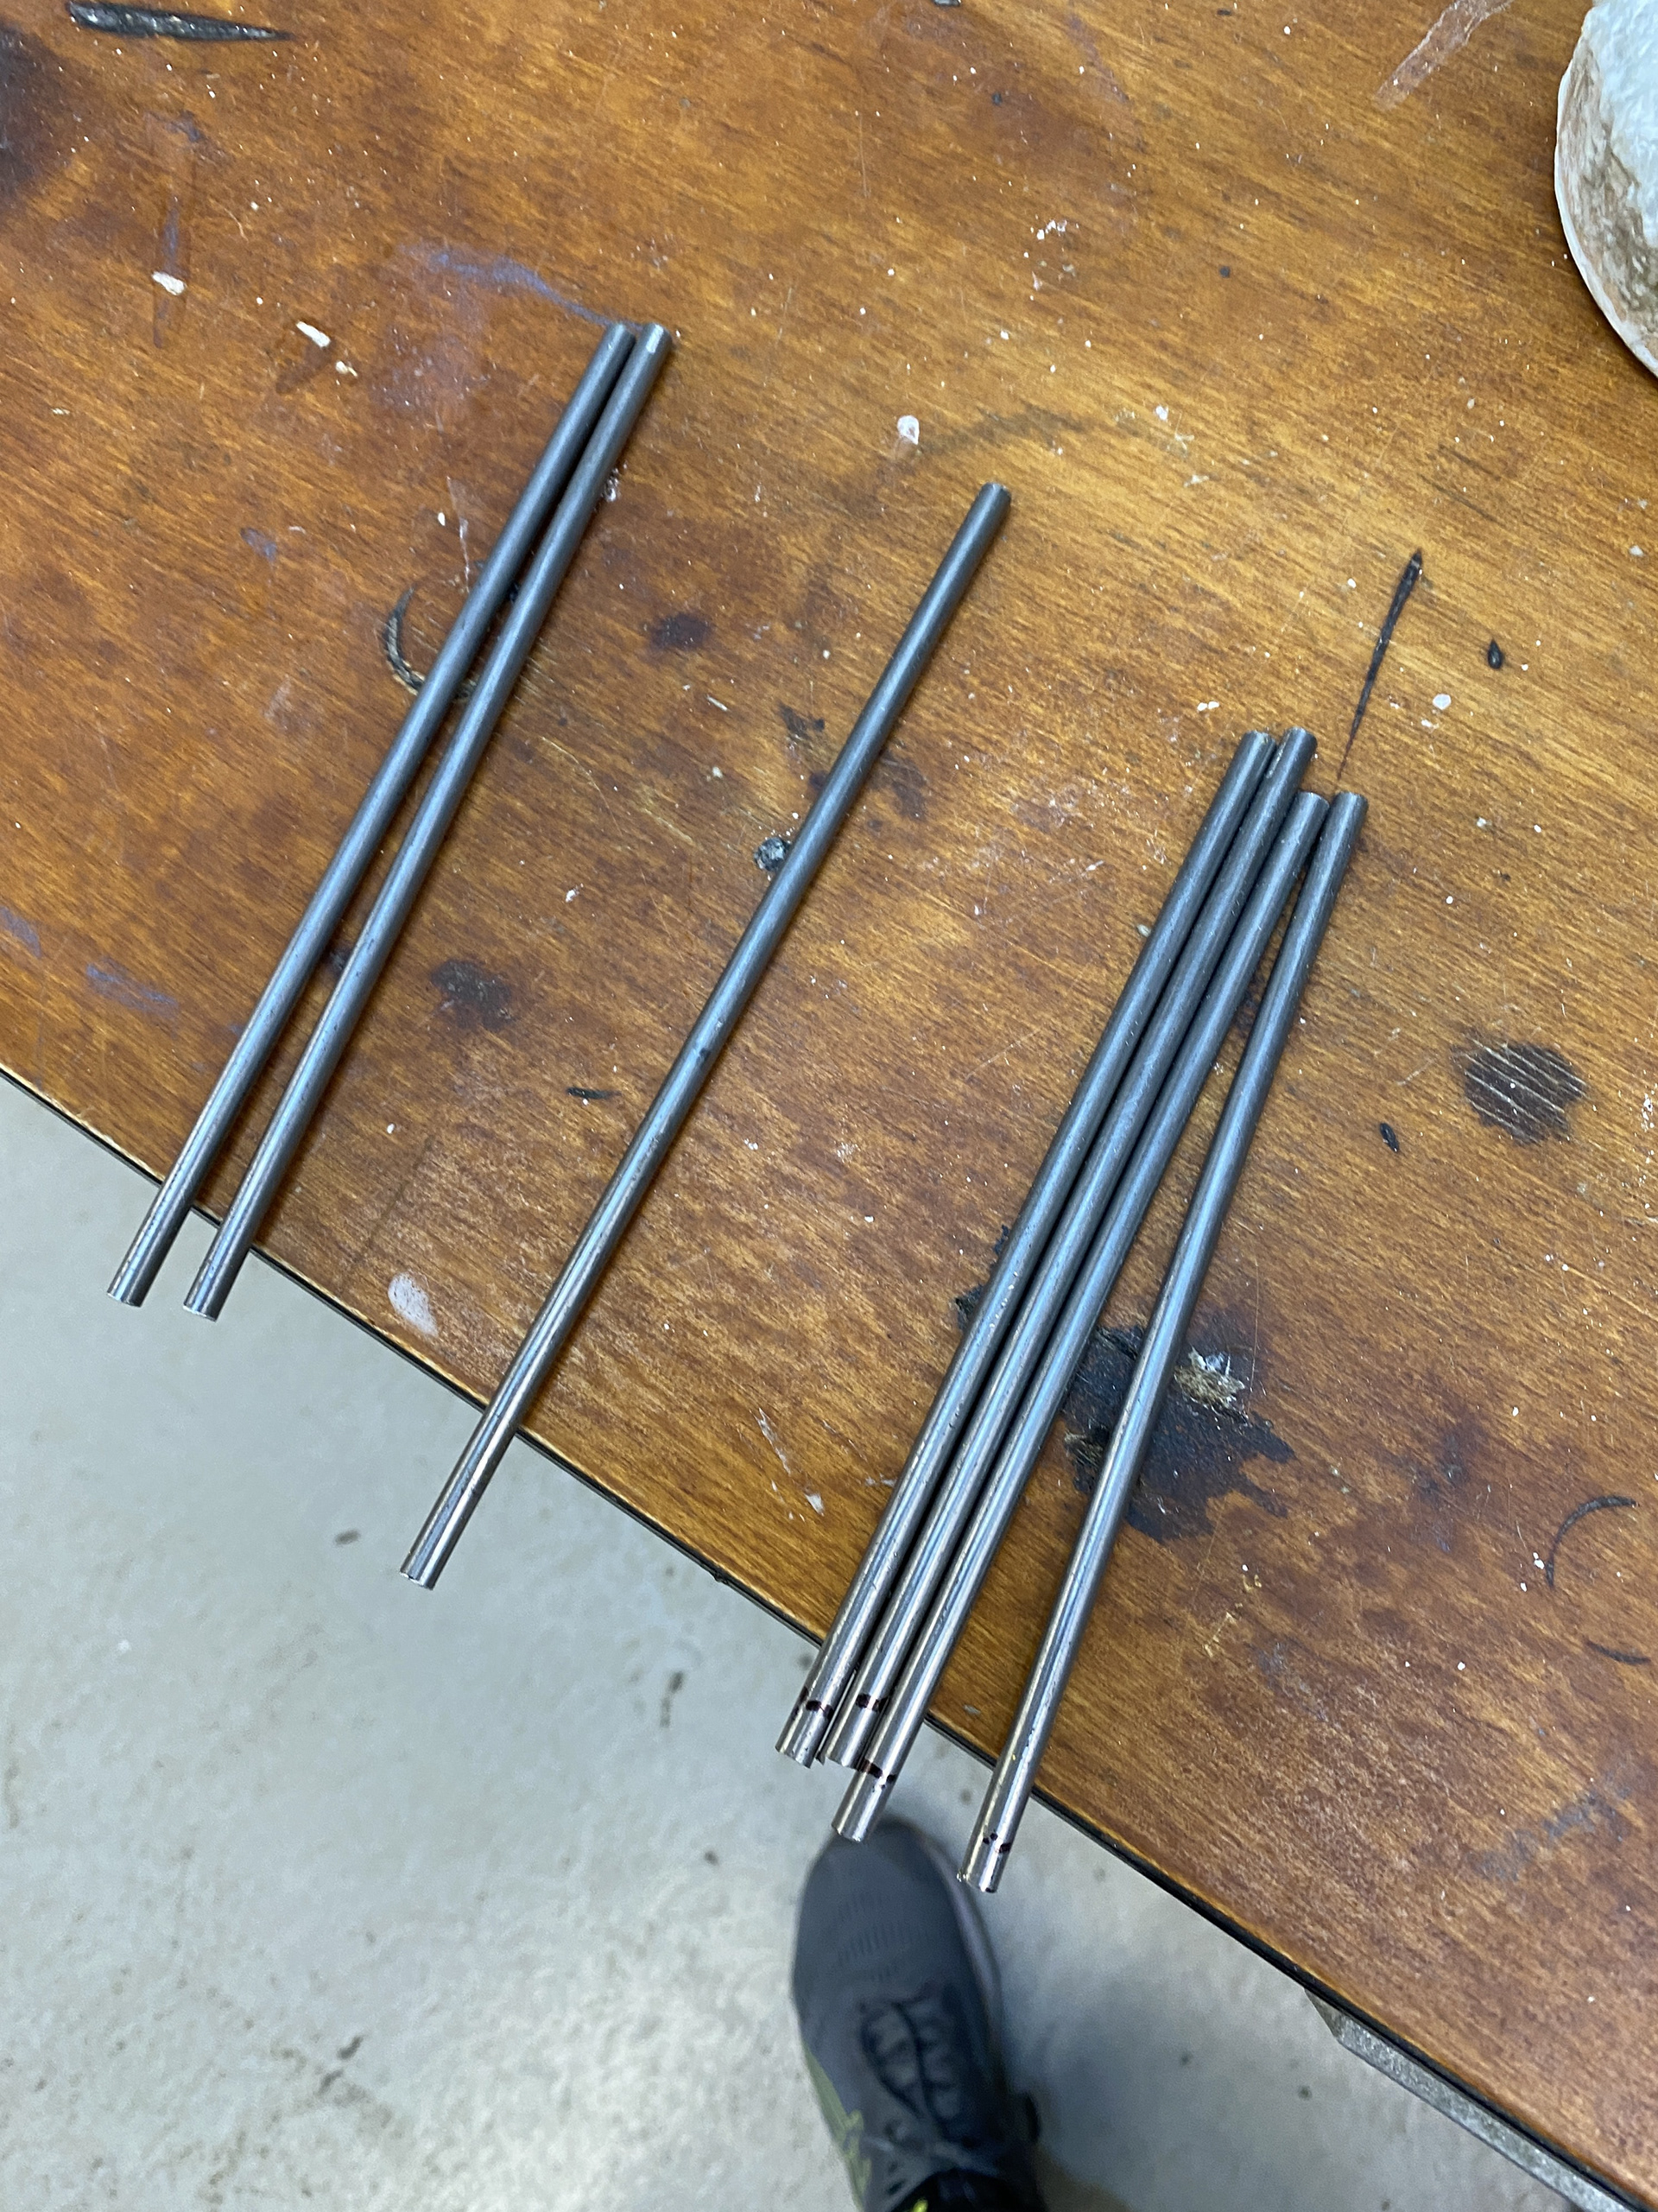
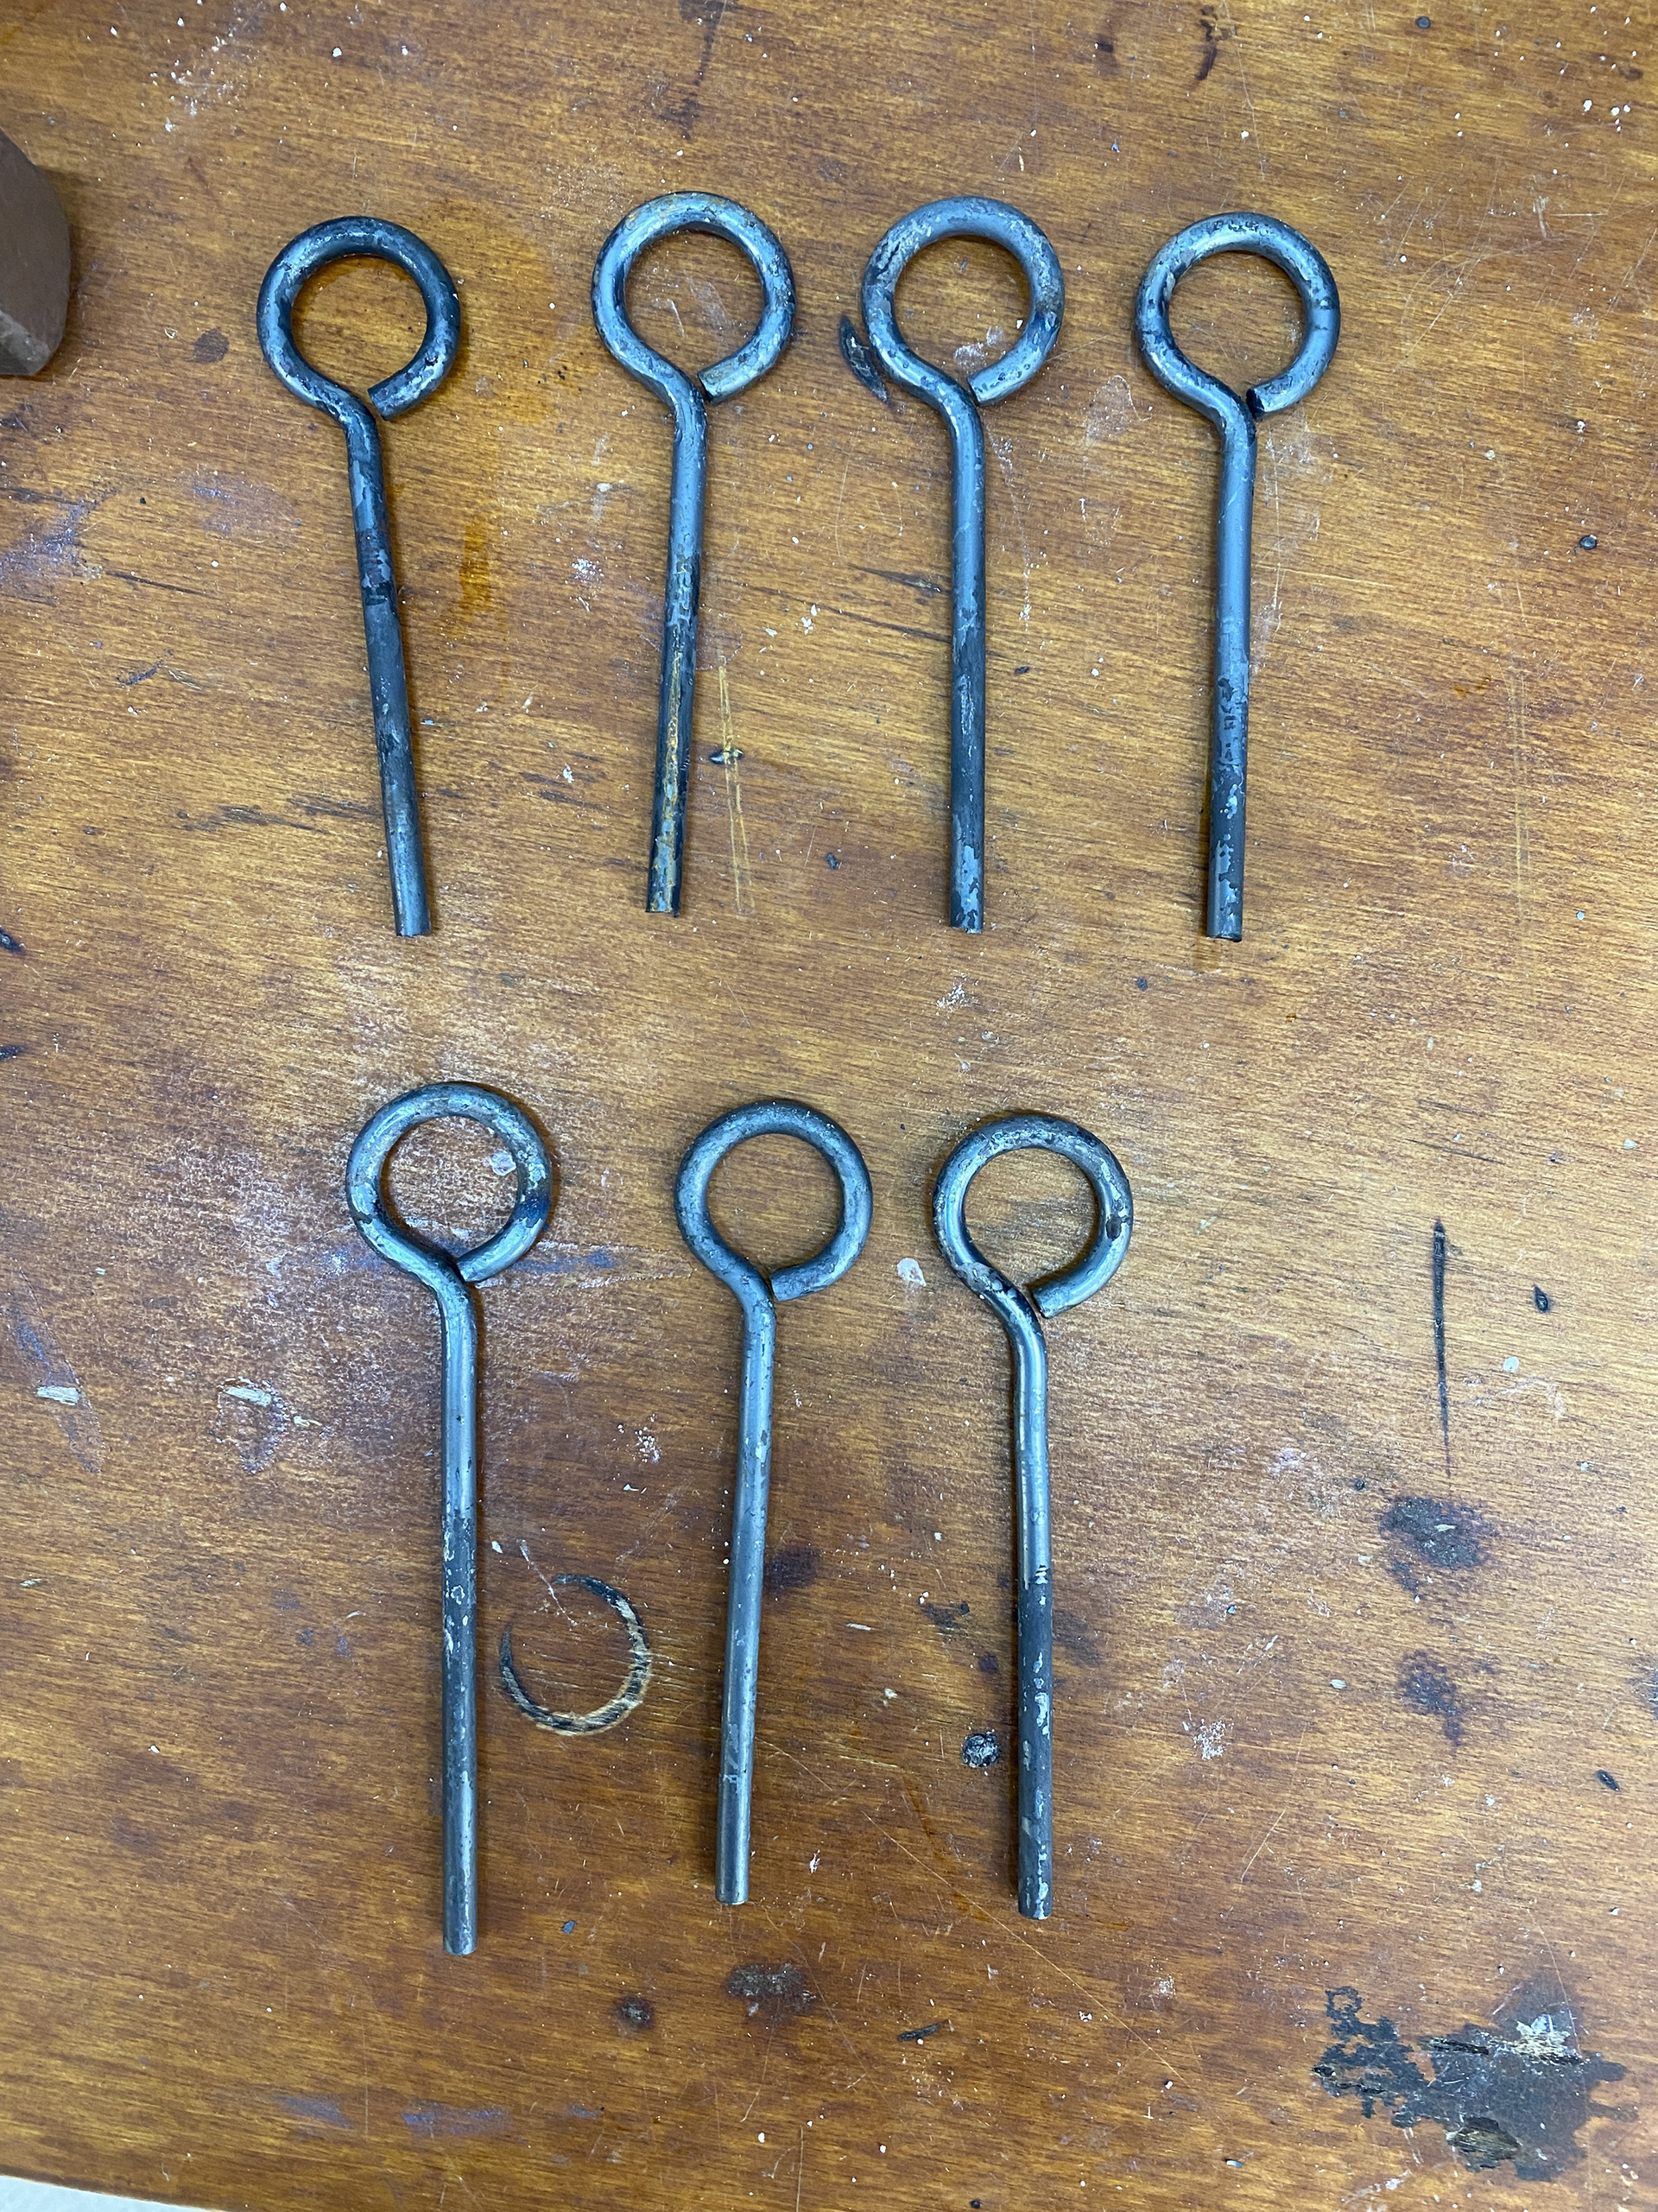
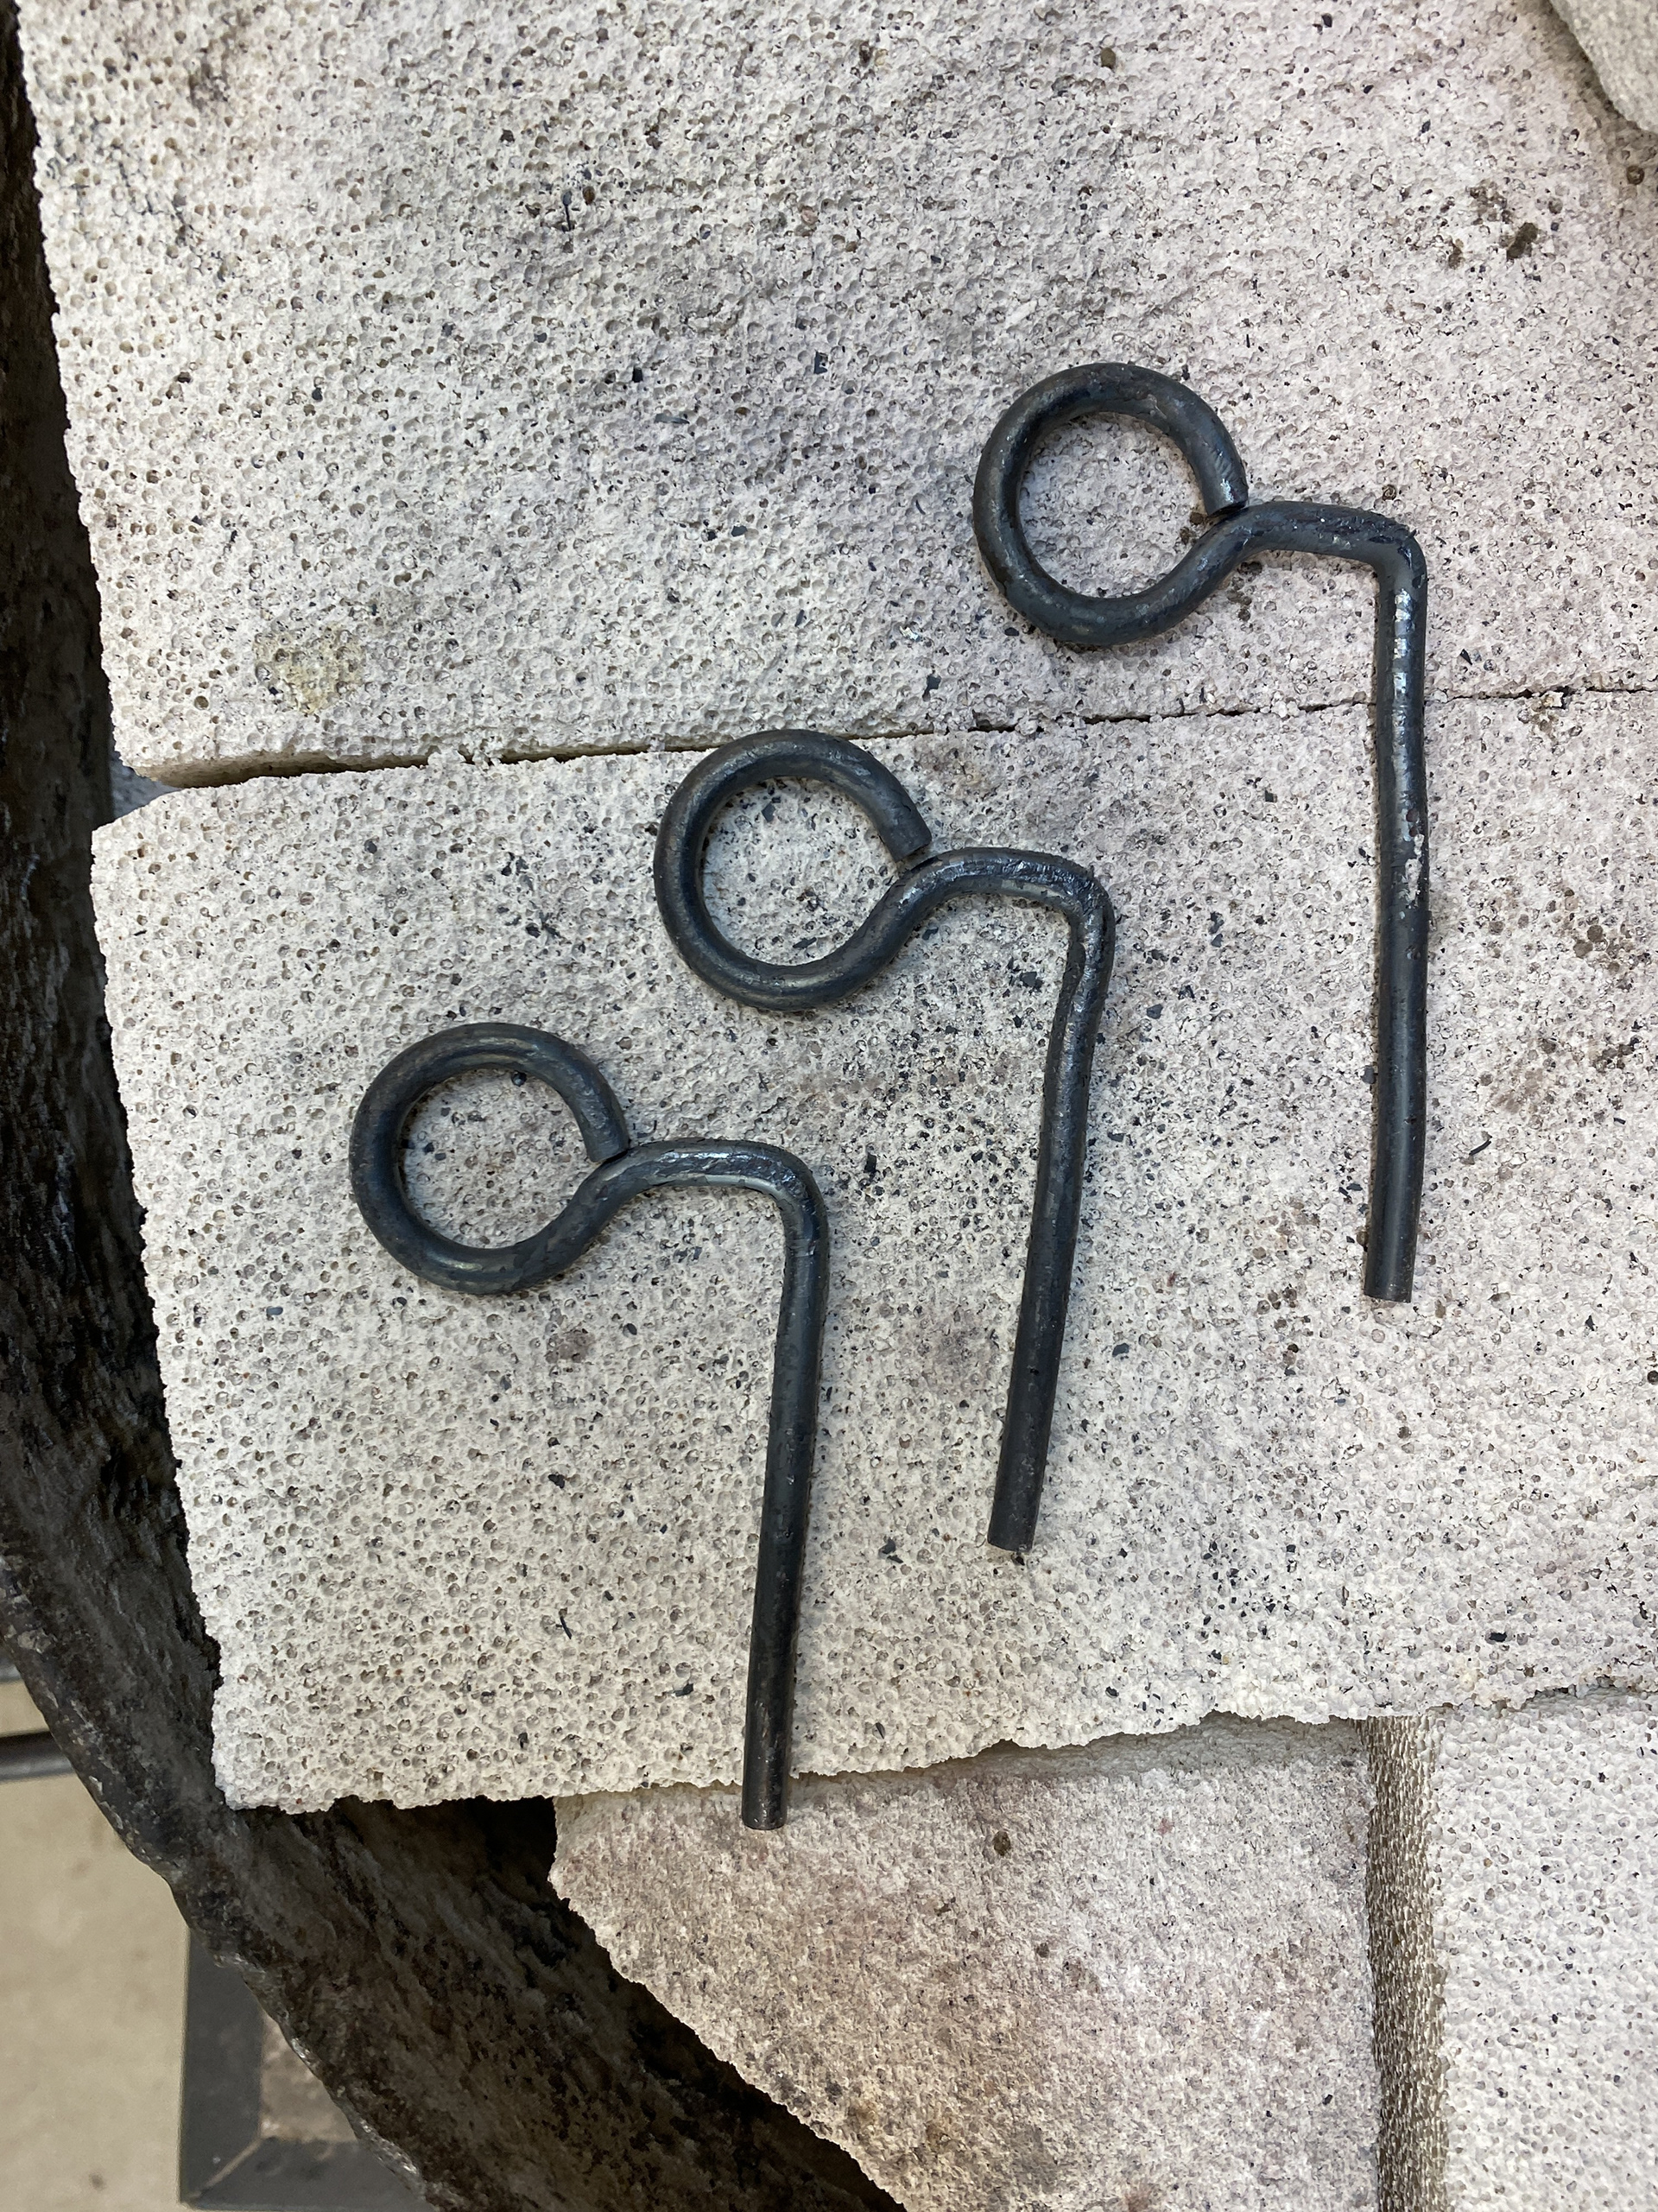

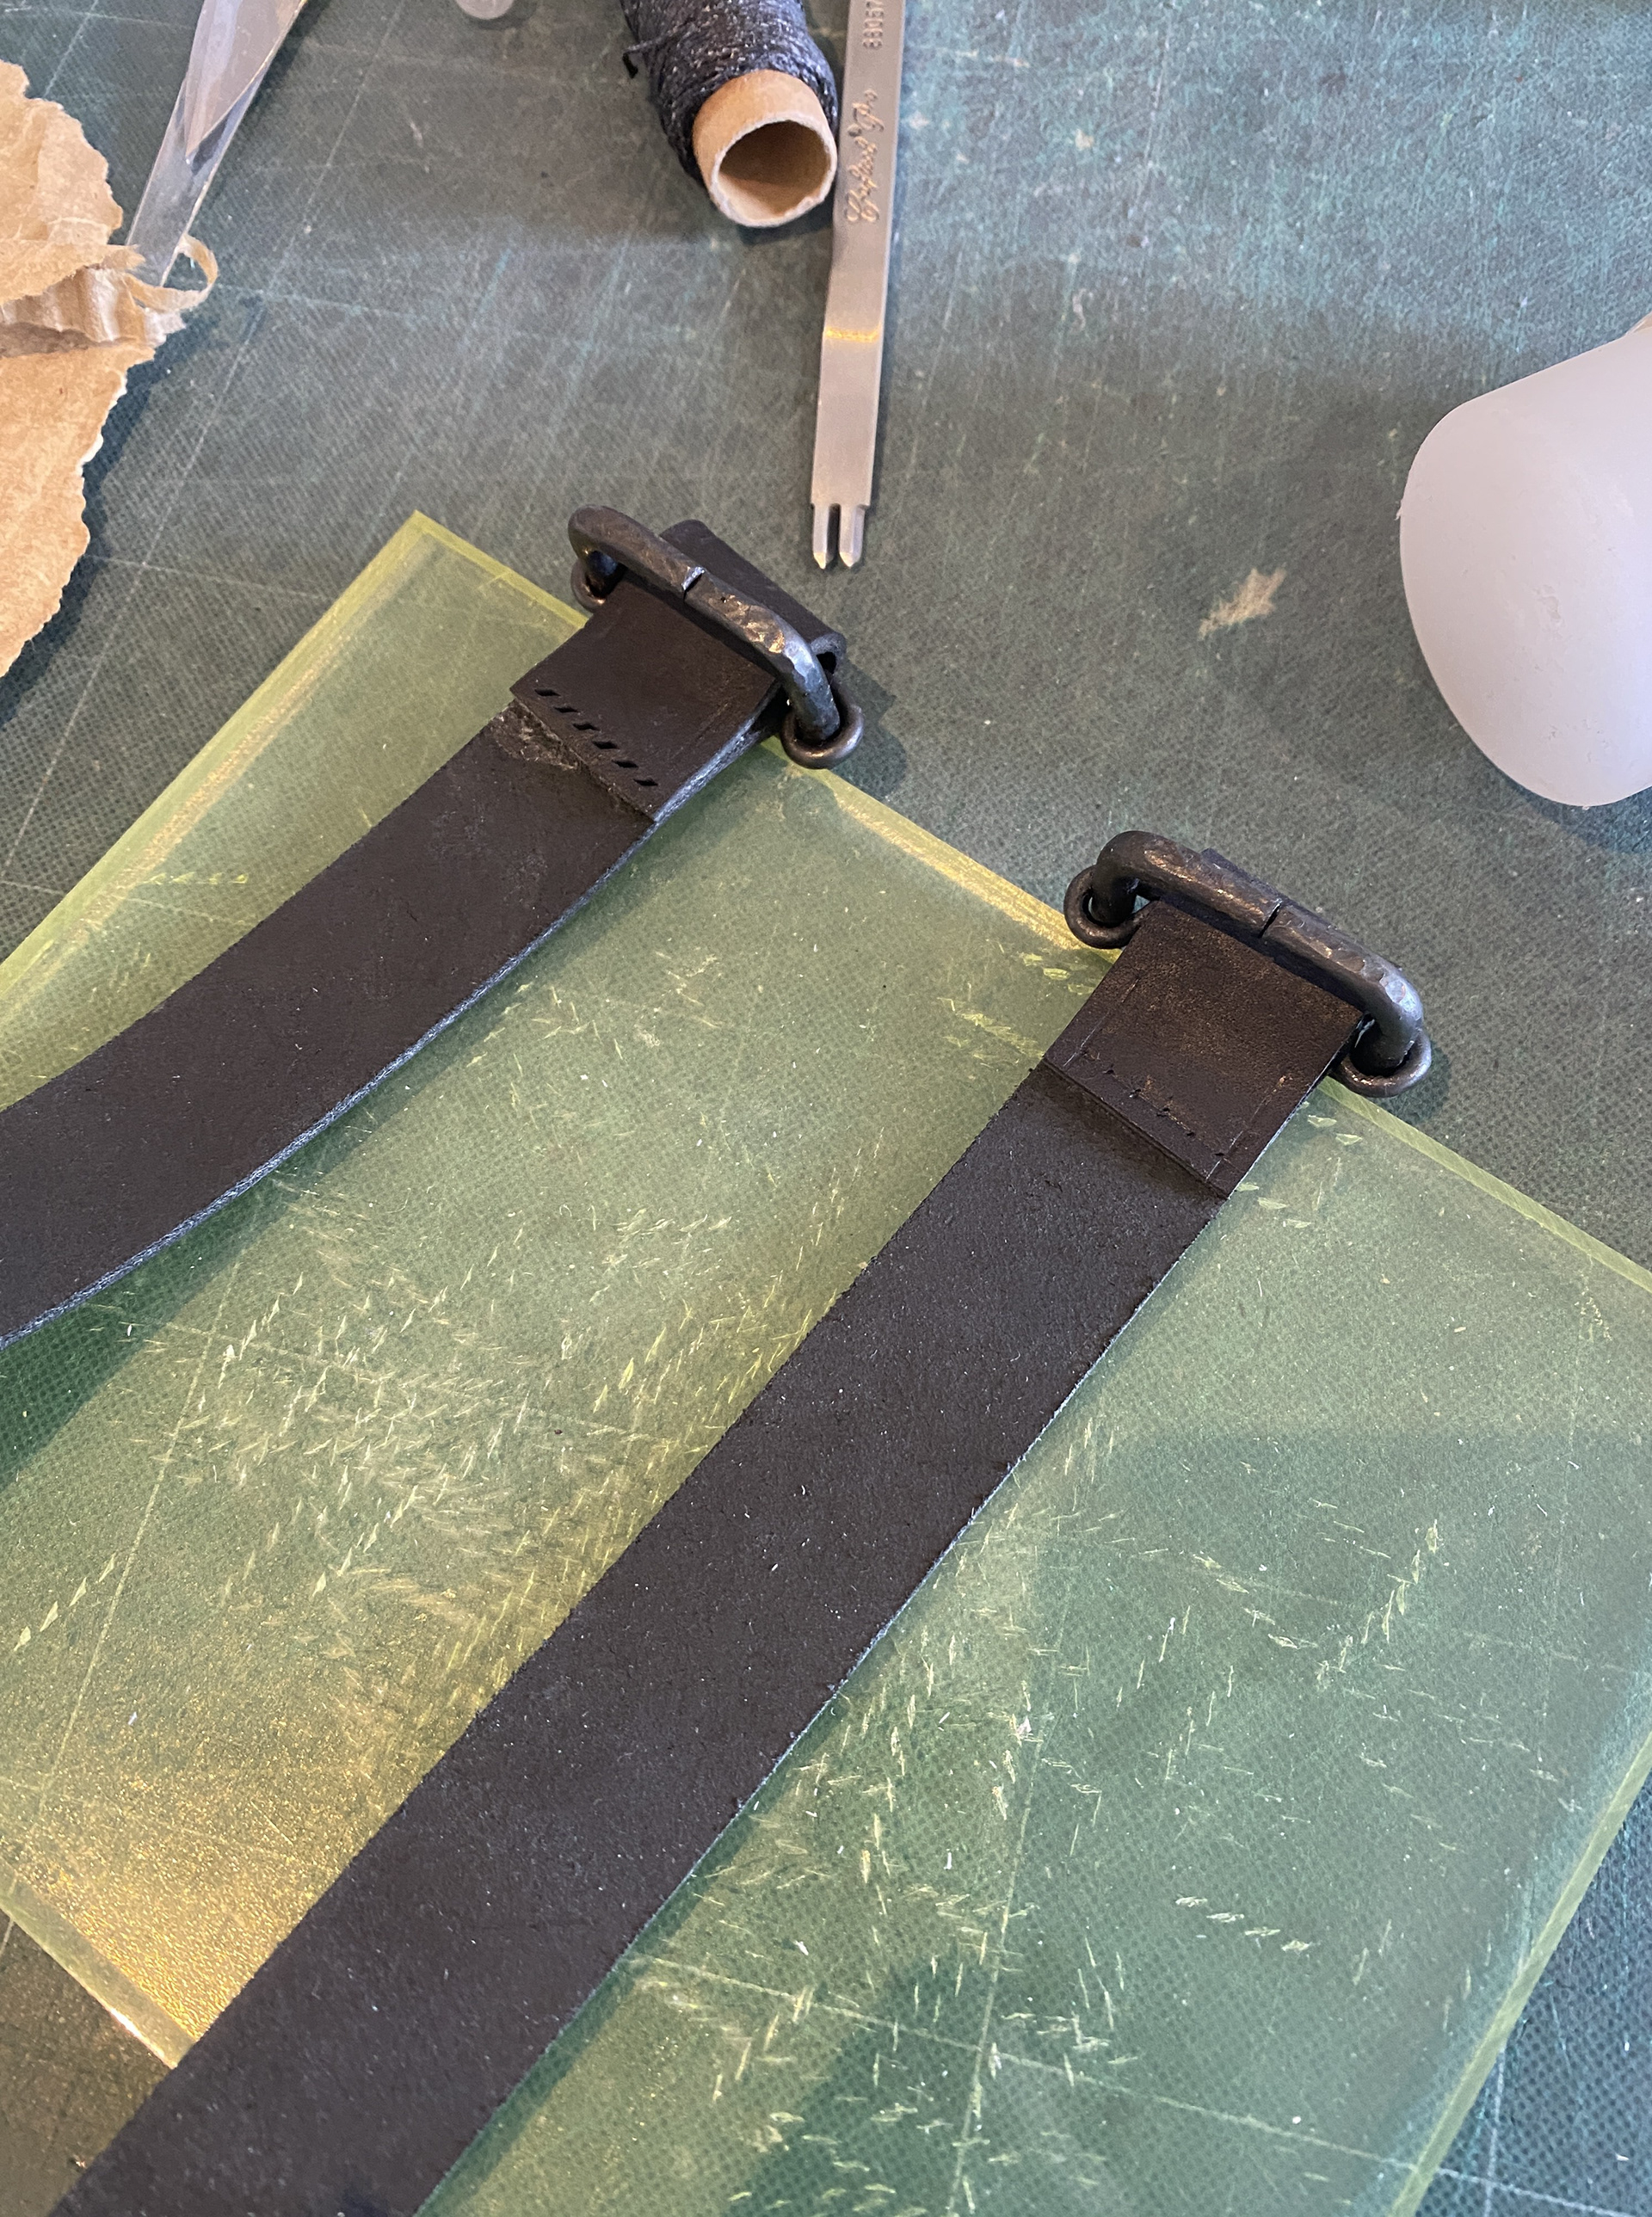
I used the same methods to form the hooks as I did for the rest of the project. Additionally, I made extra eyelets to connect the belt straps to the chain. After that, I trimmed the excess material and filed it into a rounded profile, creating a cleaner connection for attaching a formed piece of steel to serve as the belt loop.
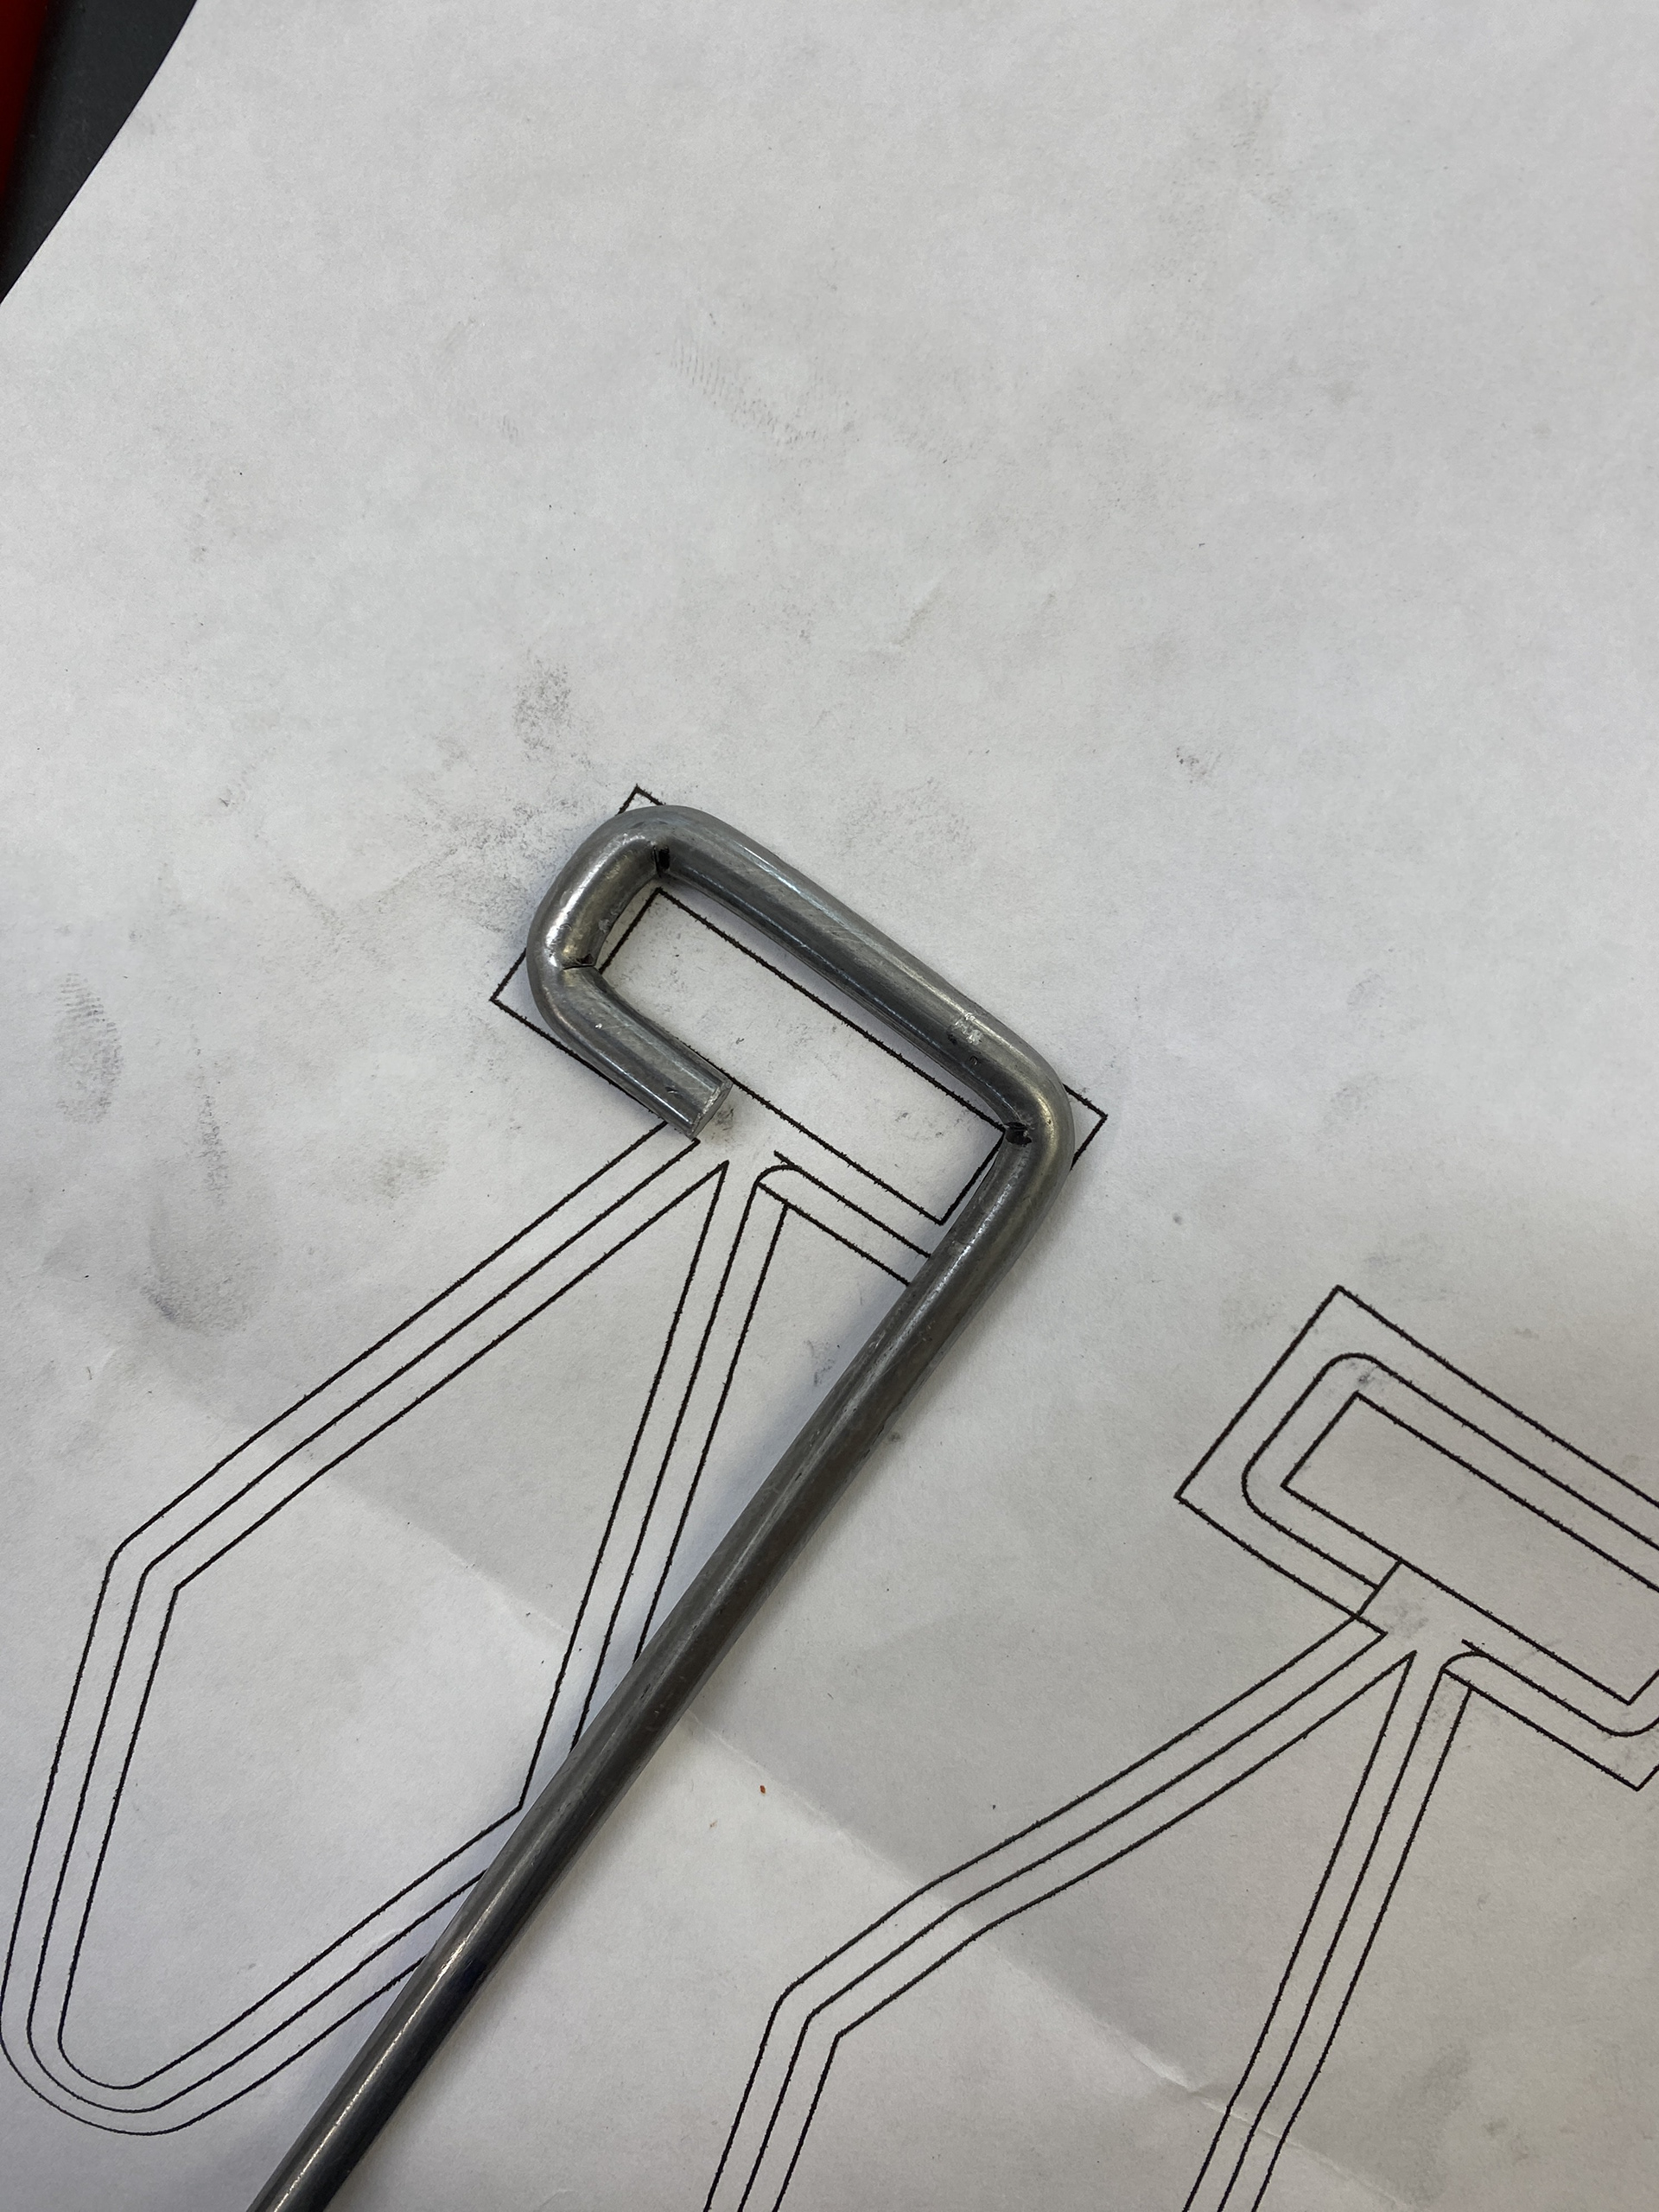
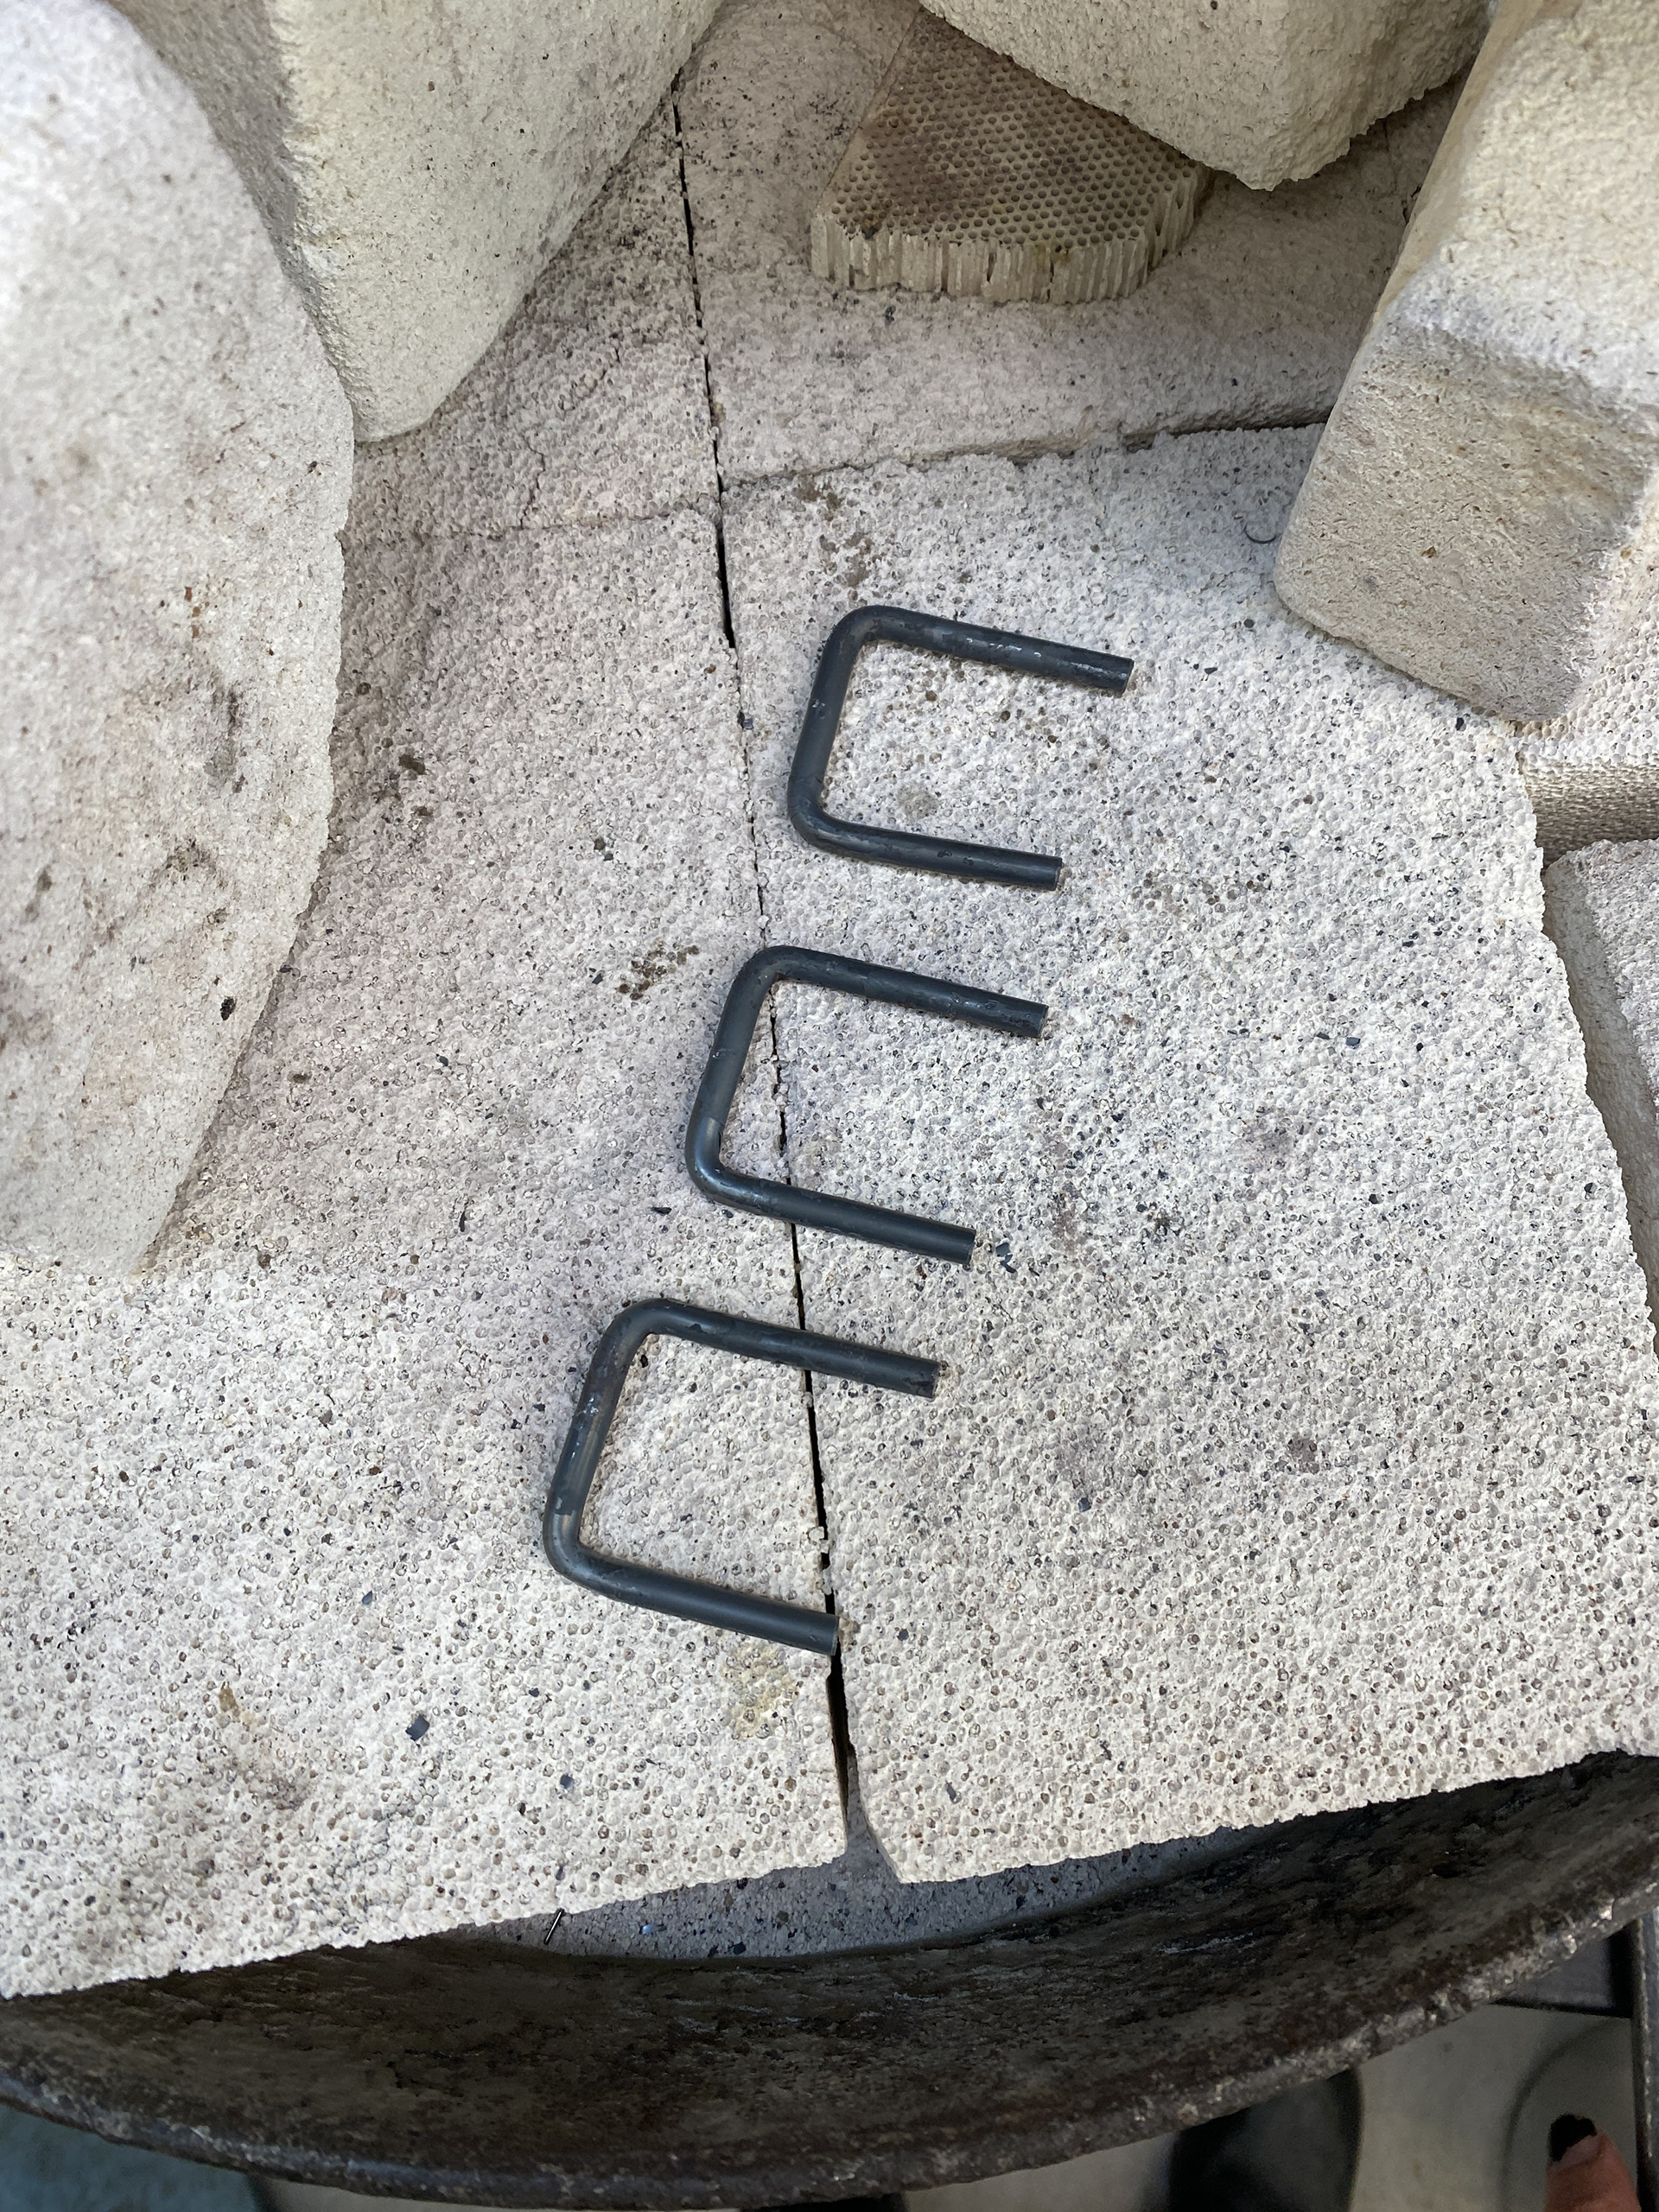
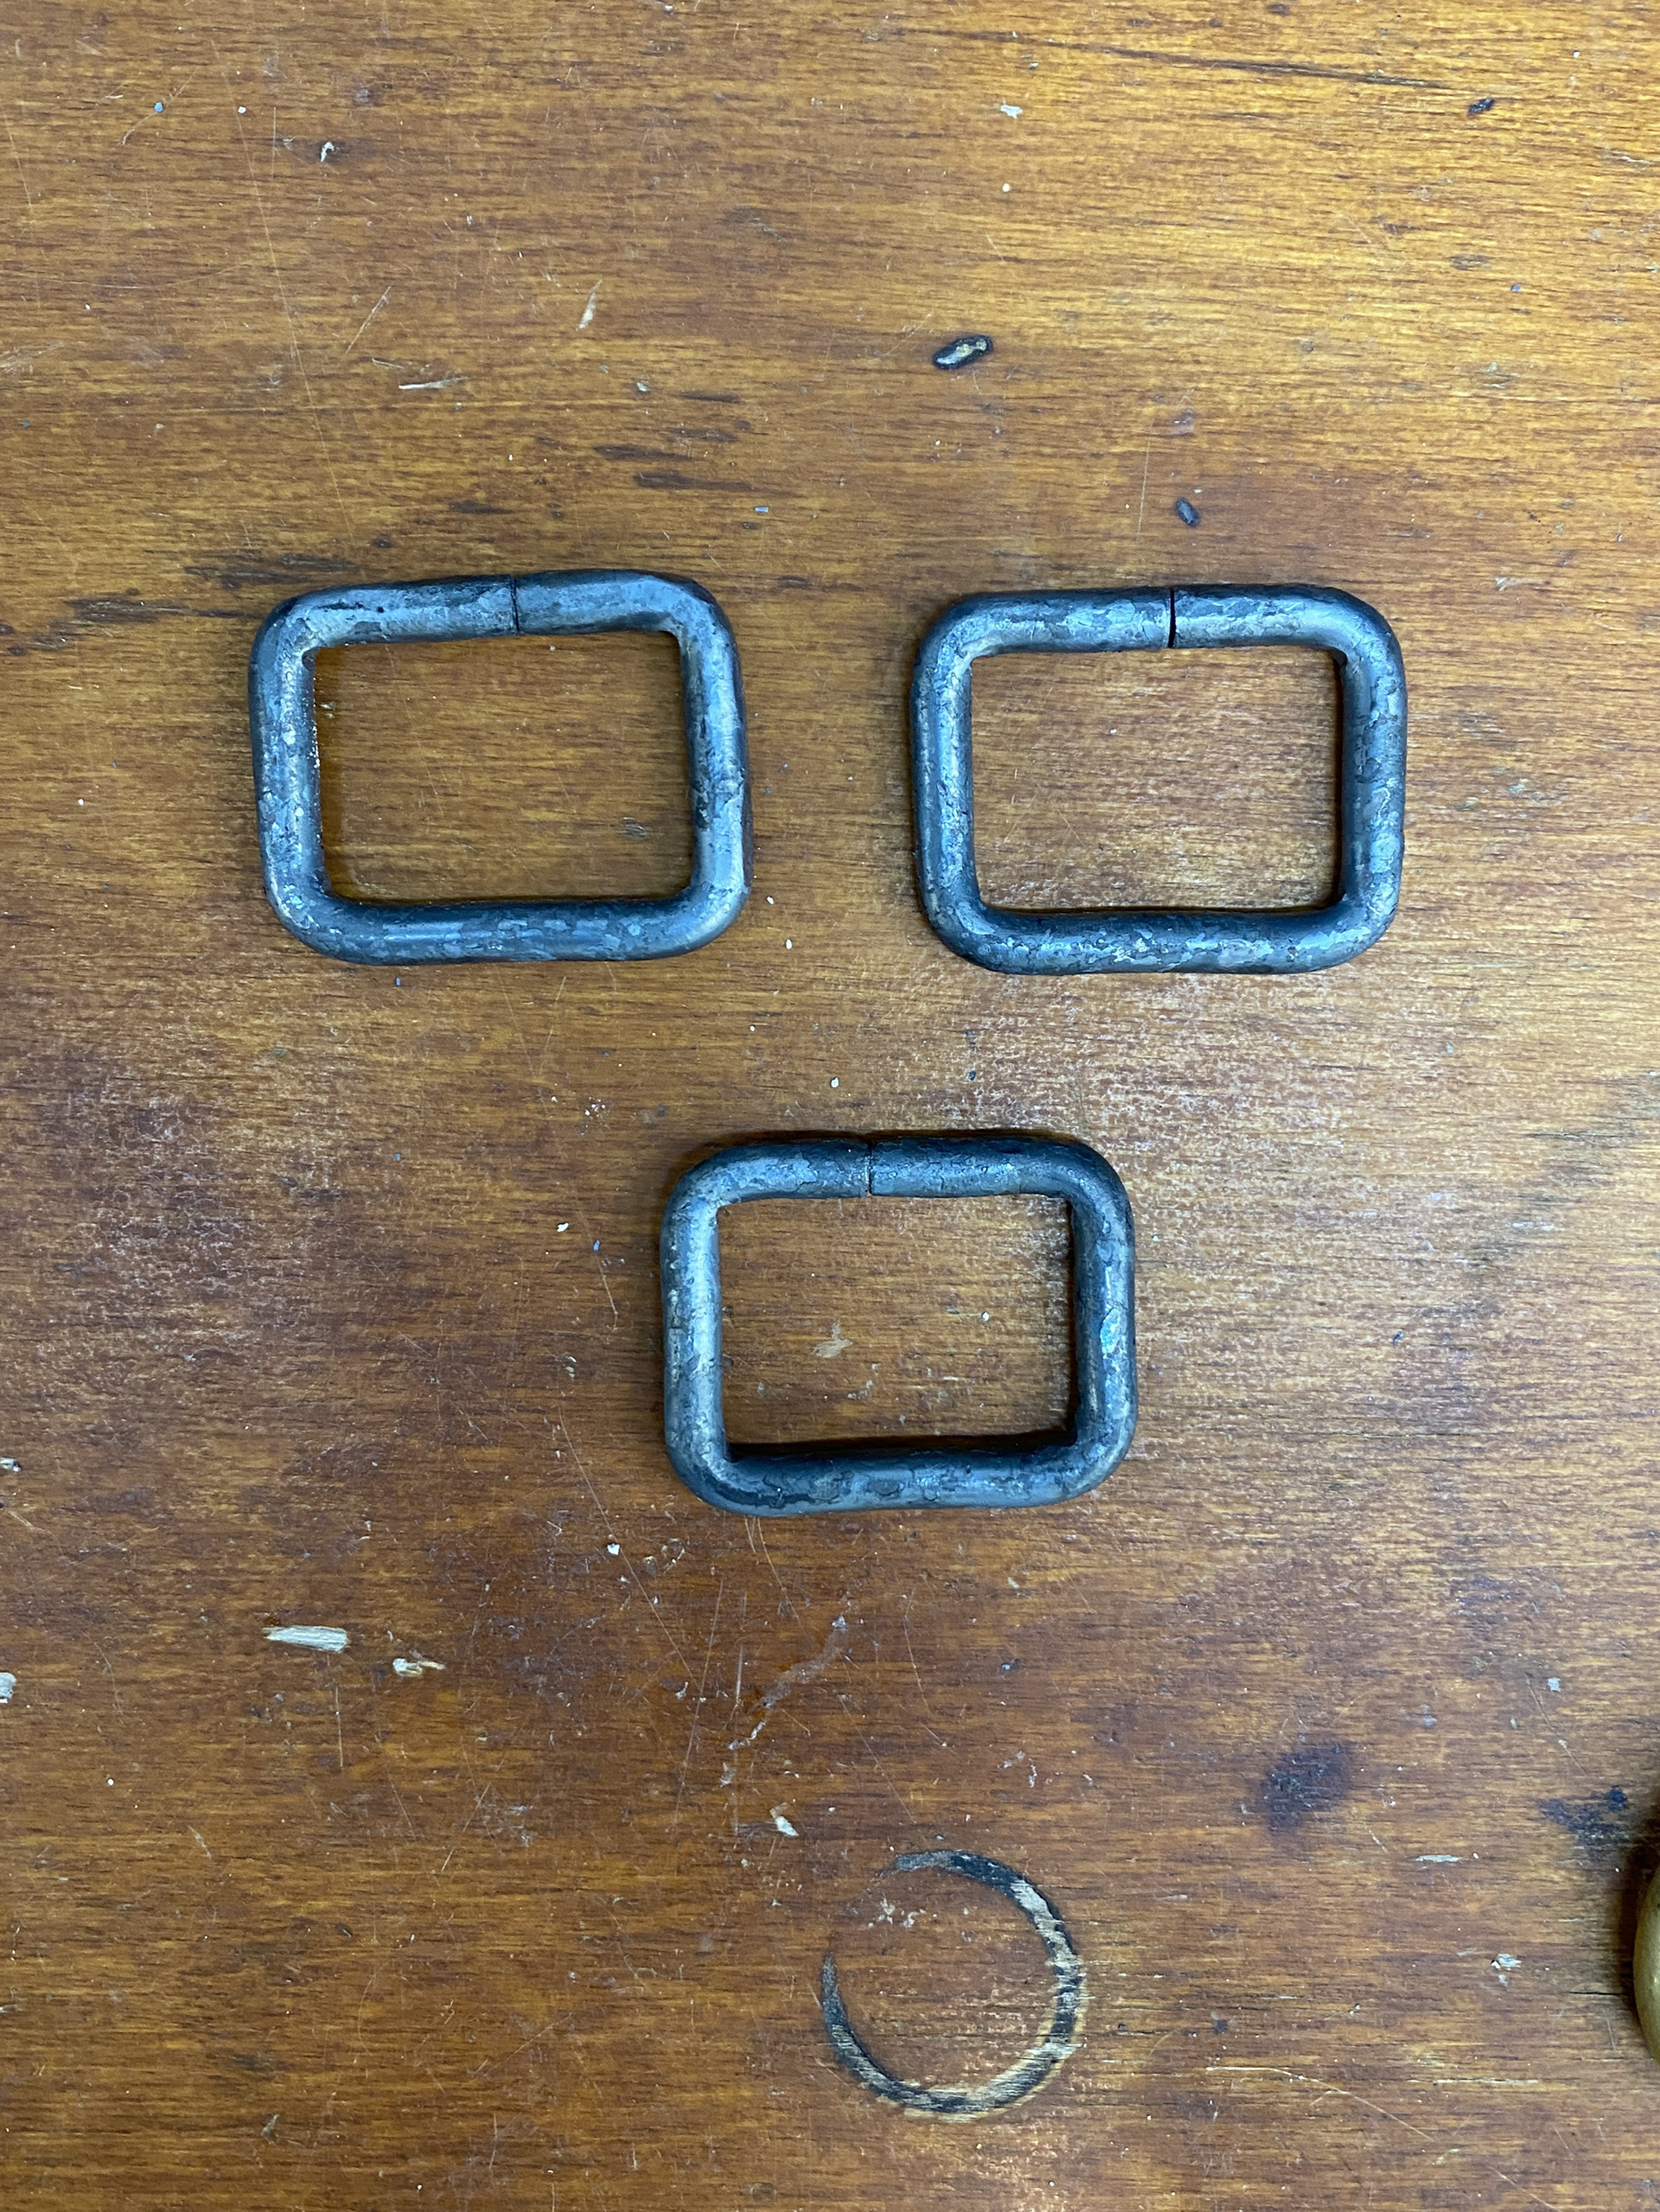
To form the piece that attaches to the belt, I returned to the methods I used in Unit X. Initially, I attempted to cold, hand bend the 5mm steel into a rectangle, using a template to ensure it was square. However, this approach did not produce consistent results, and the pieces often turned out skewed. To resolve this, I switched to a semicircular design, which was not only easier to shape but also better aligned with the overall design language of the piece. I cut a slit into a 30mm round bar to create a custom stake, allowing me to hot bend the semicircle with overlapping ends before trimming the excess material at the center.

I then welded these components together and clean up the transitions using the pendant drill.

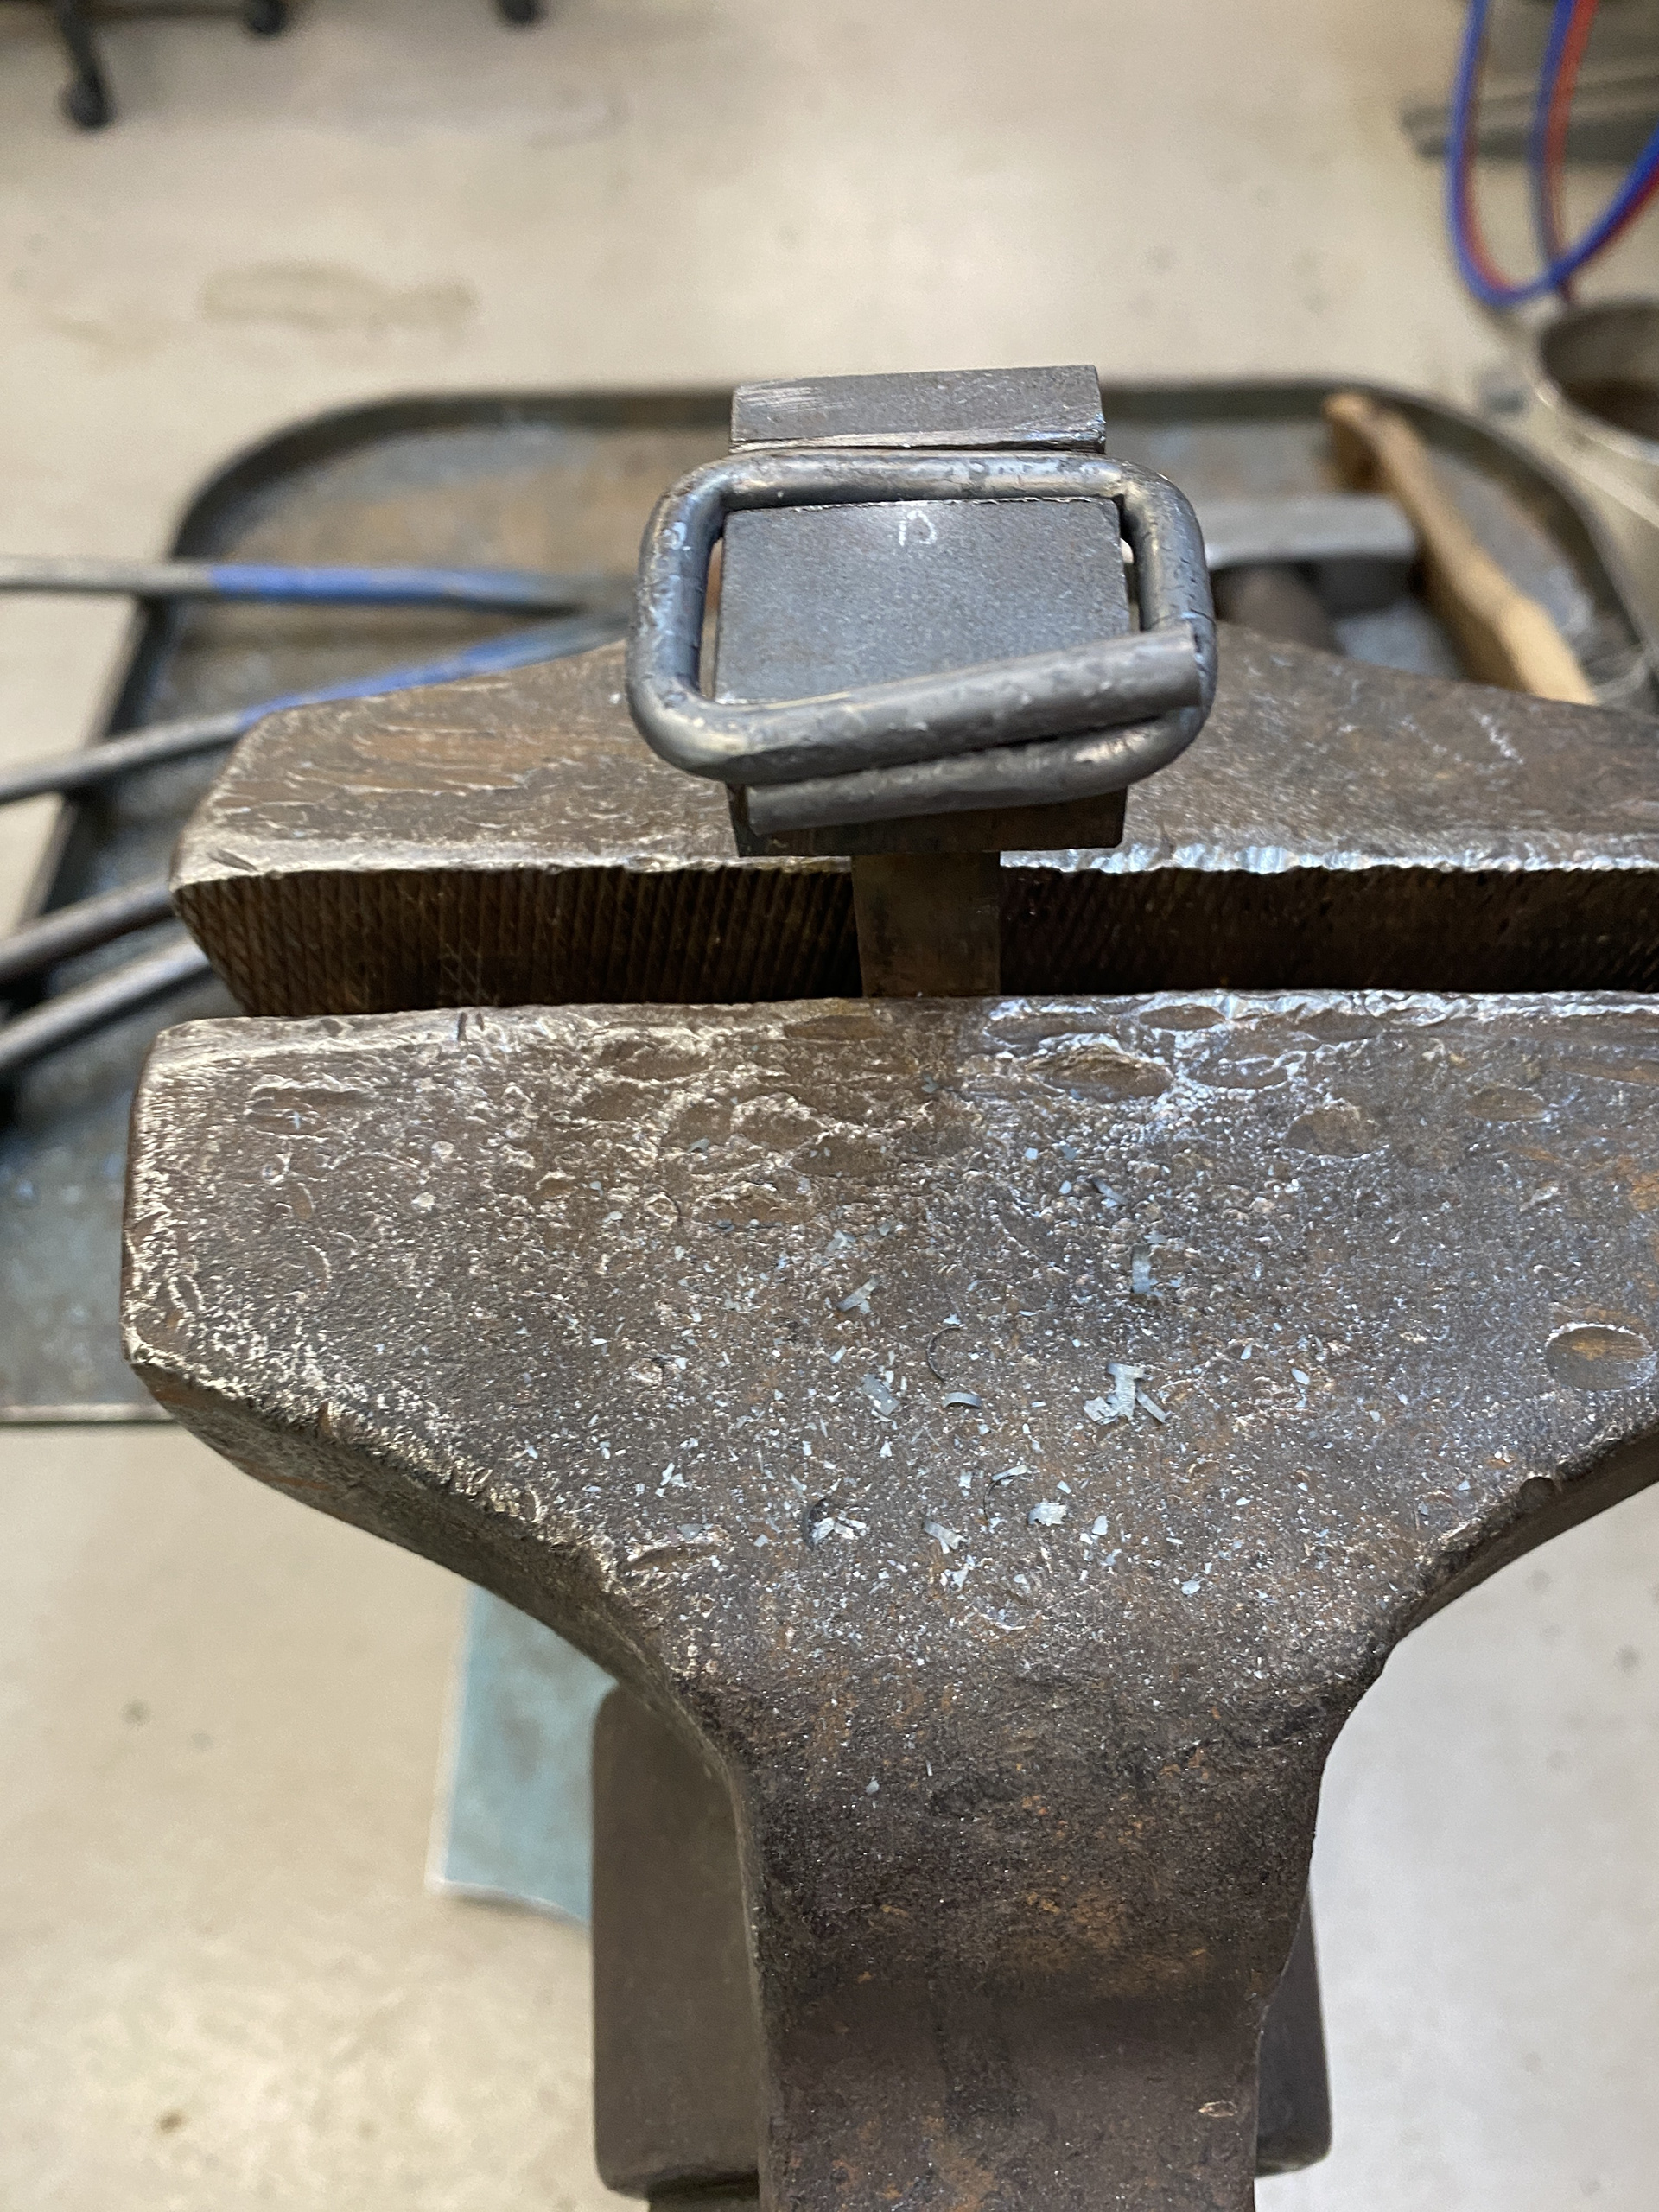
Once again, I used the design from Unit X to make the slider buckle as I found it effective. I decided to make another custom jig to consistently form the rectangle.
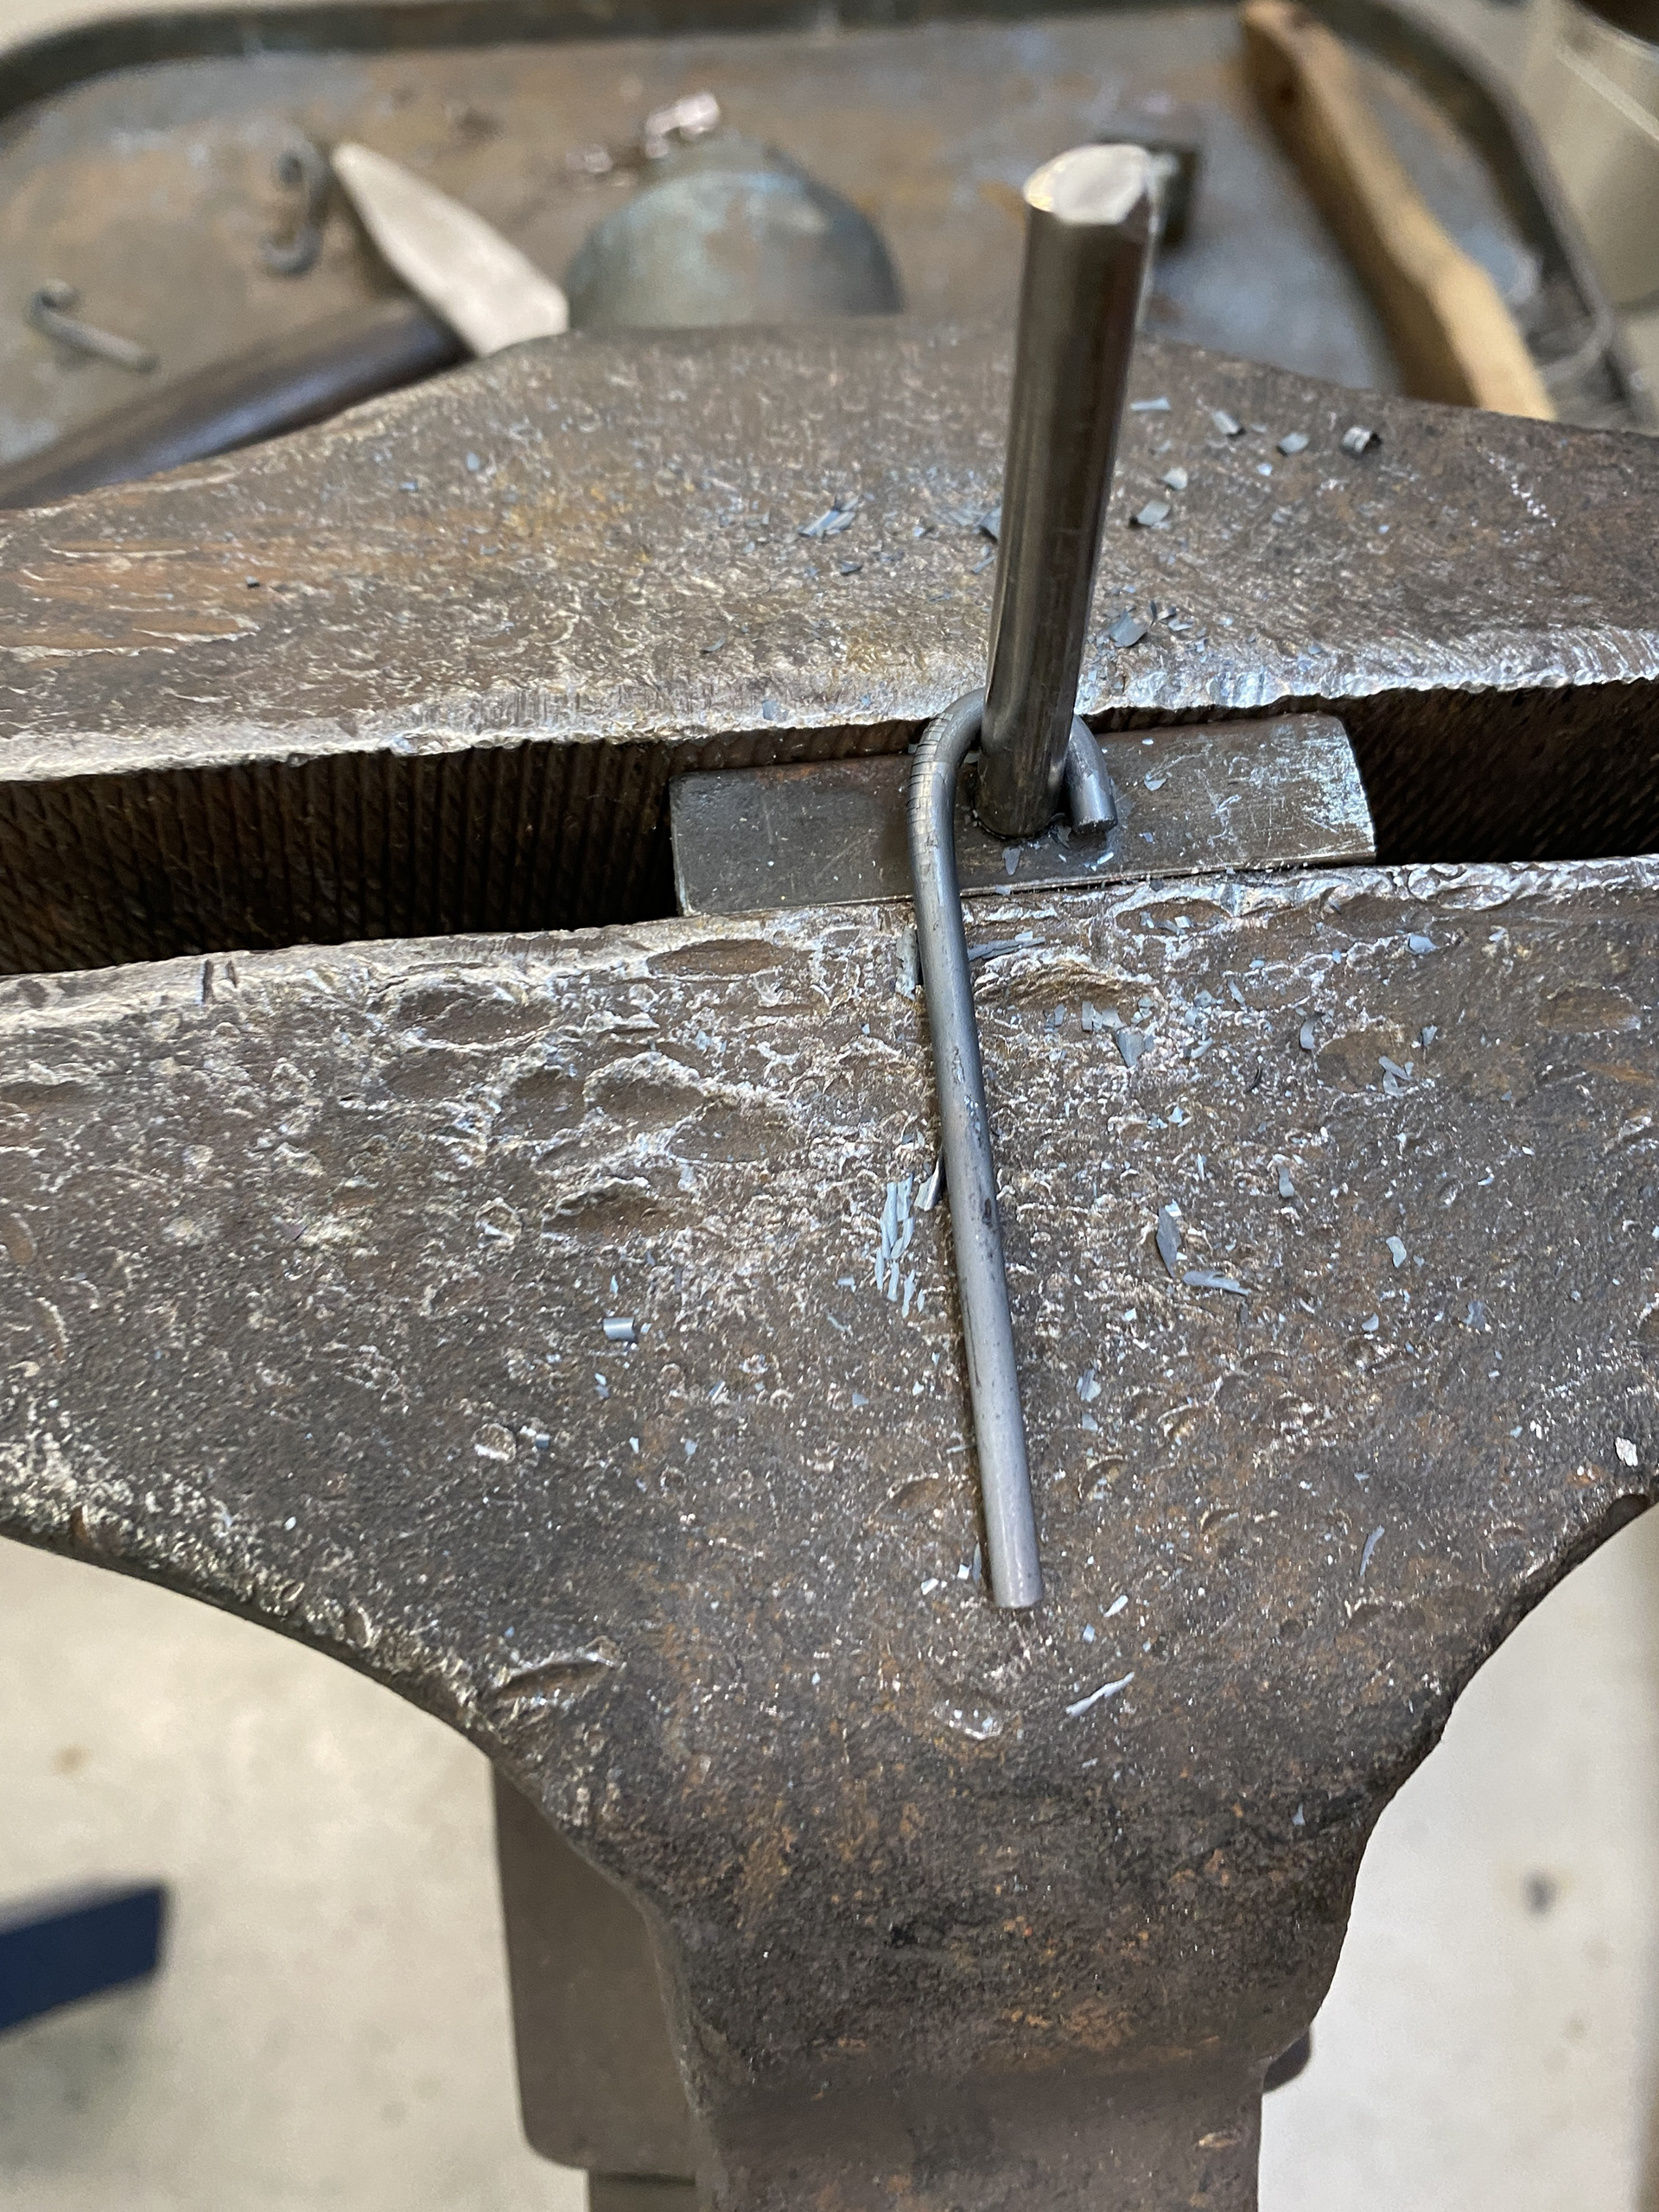
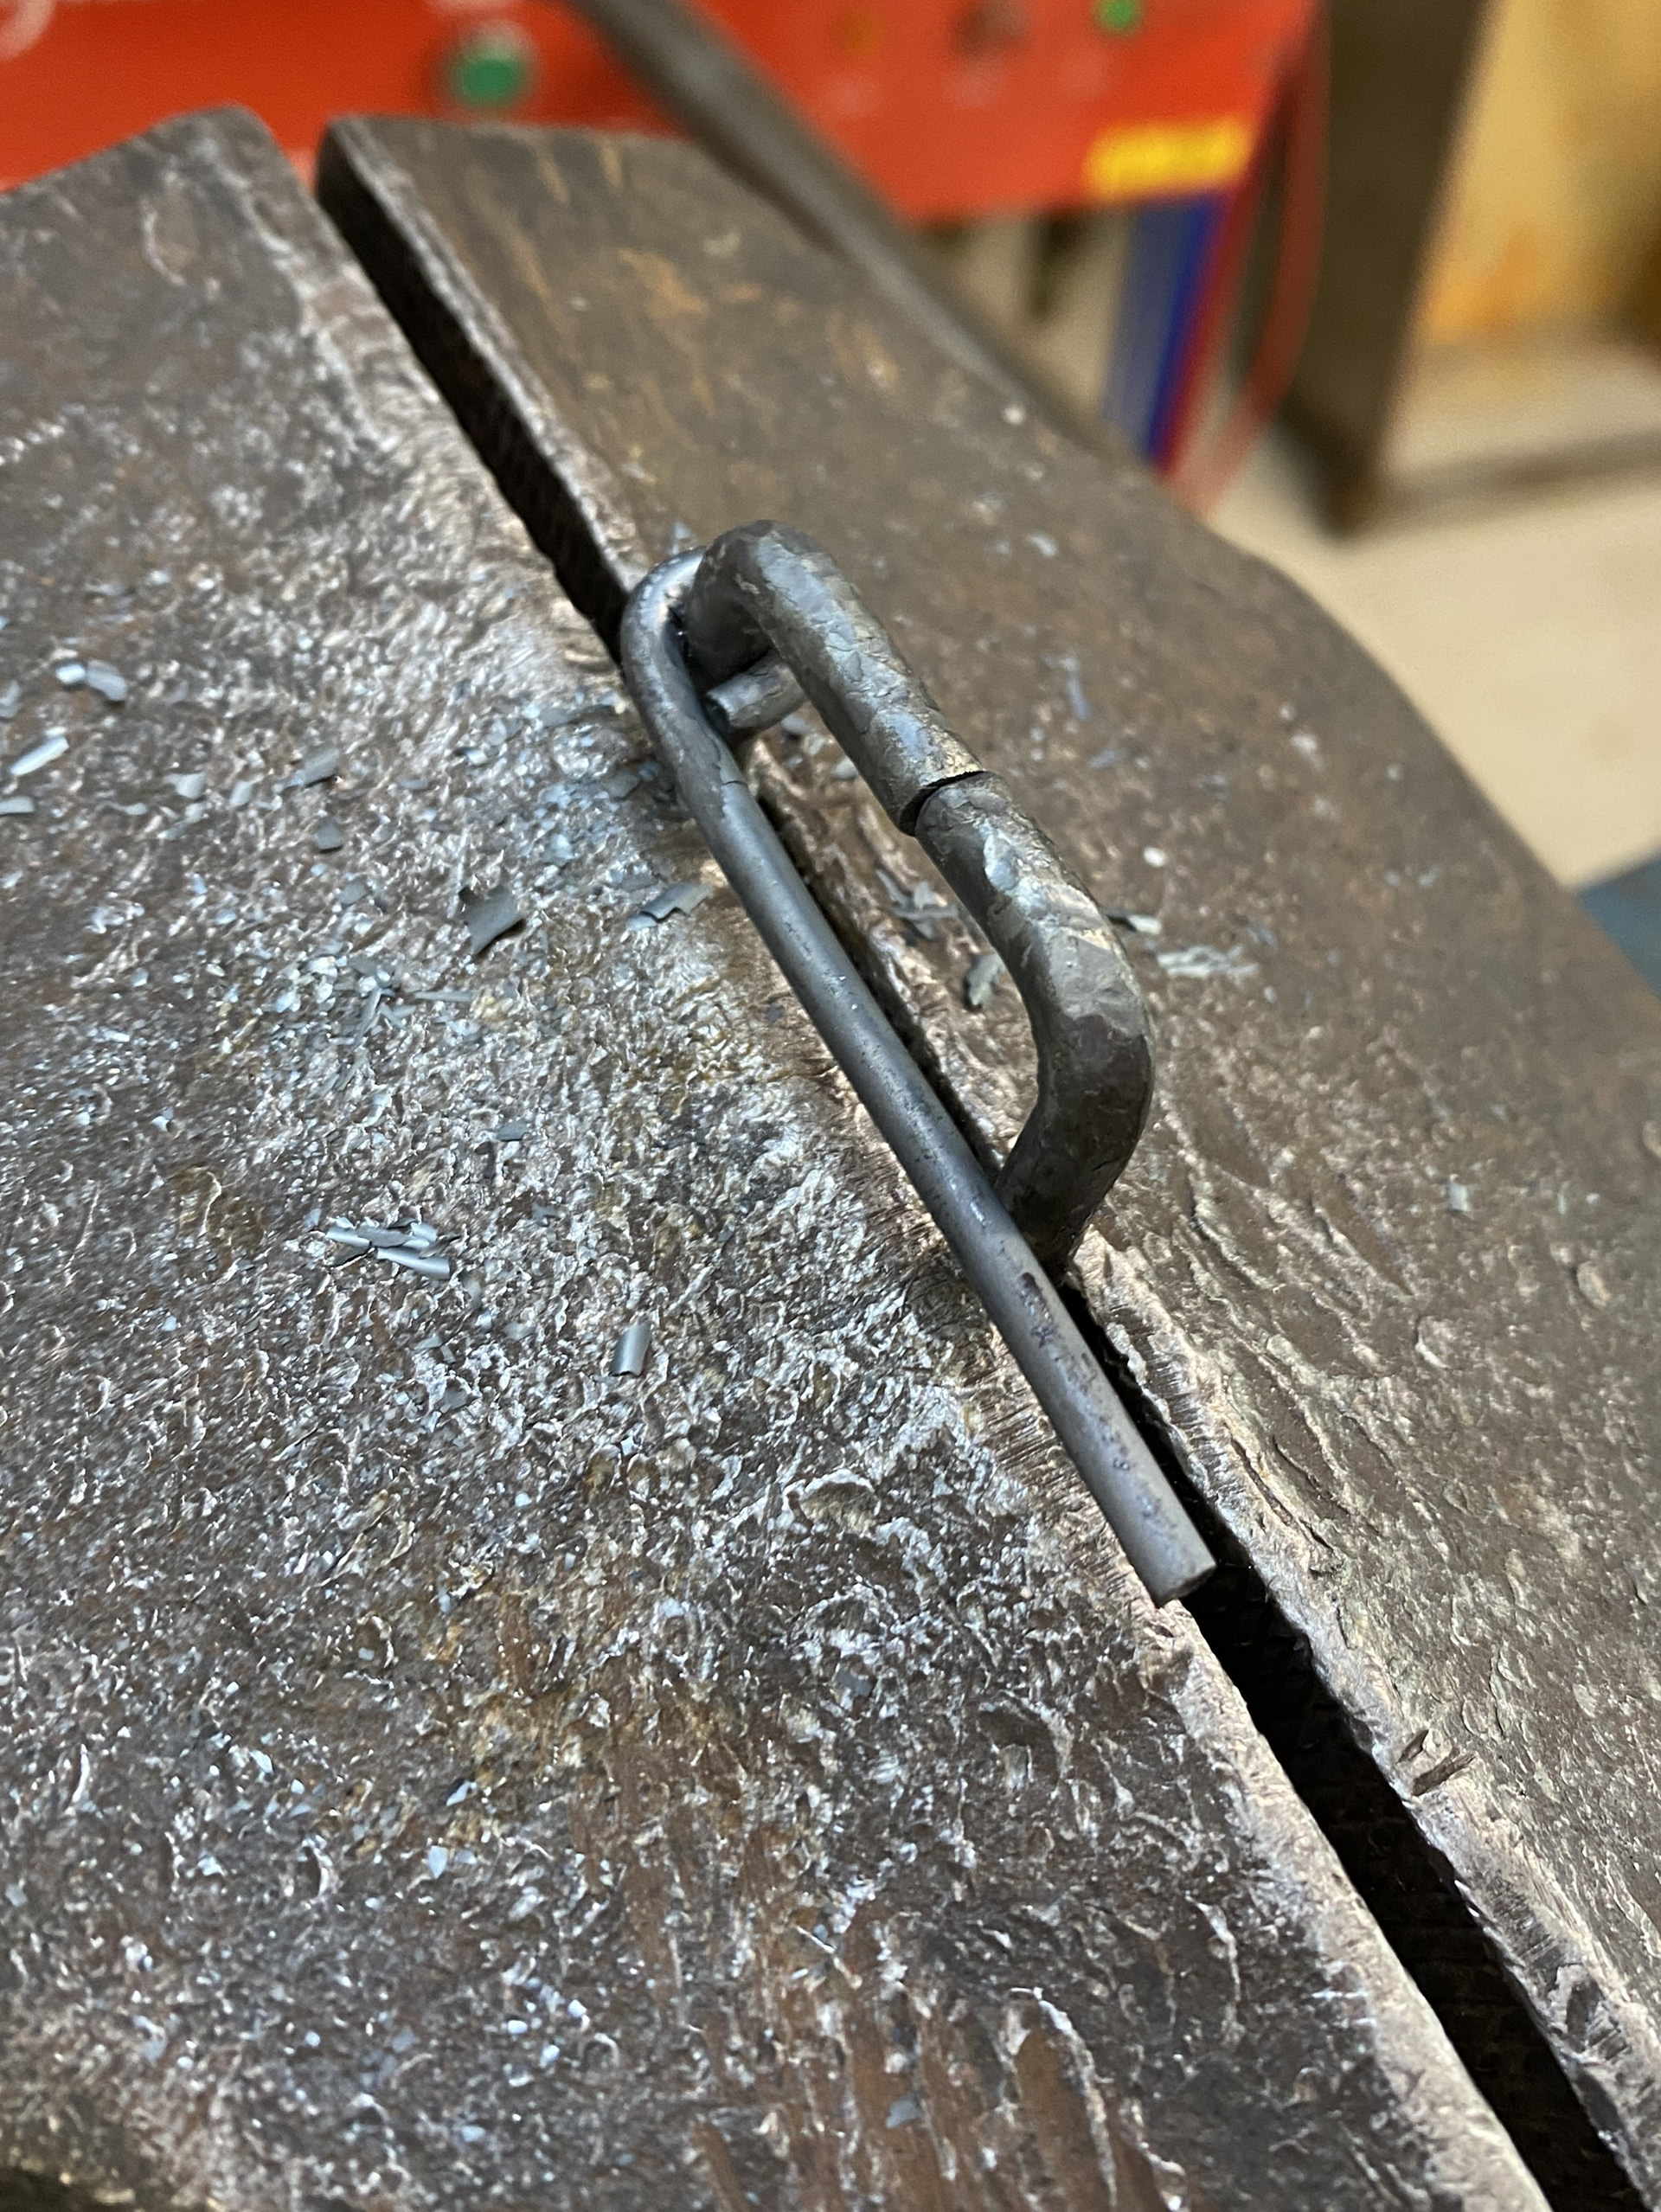

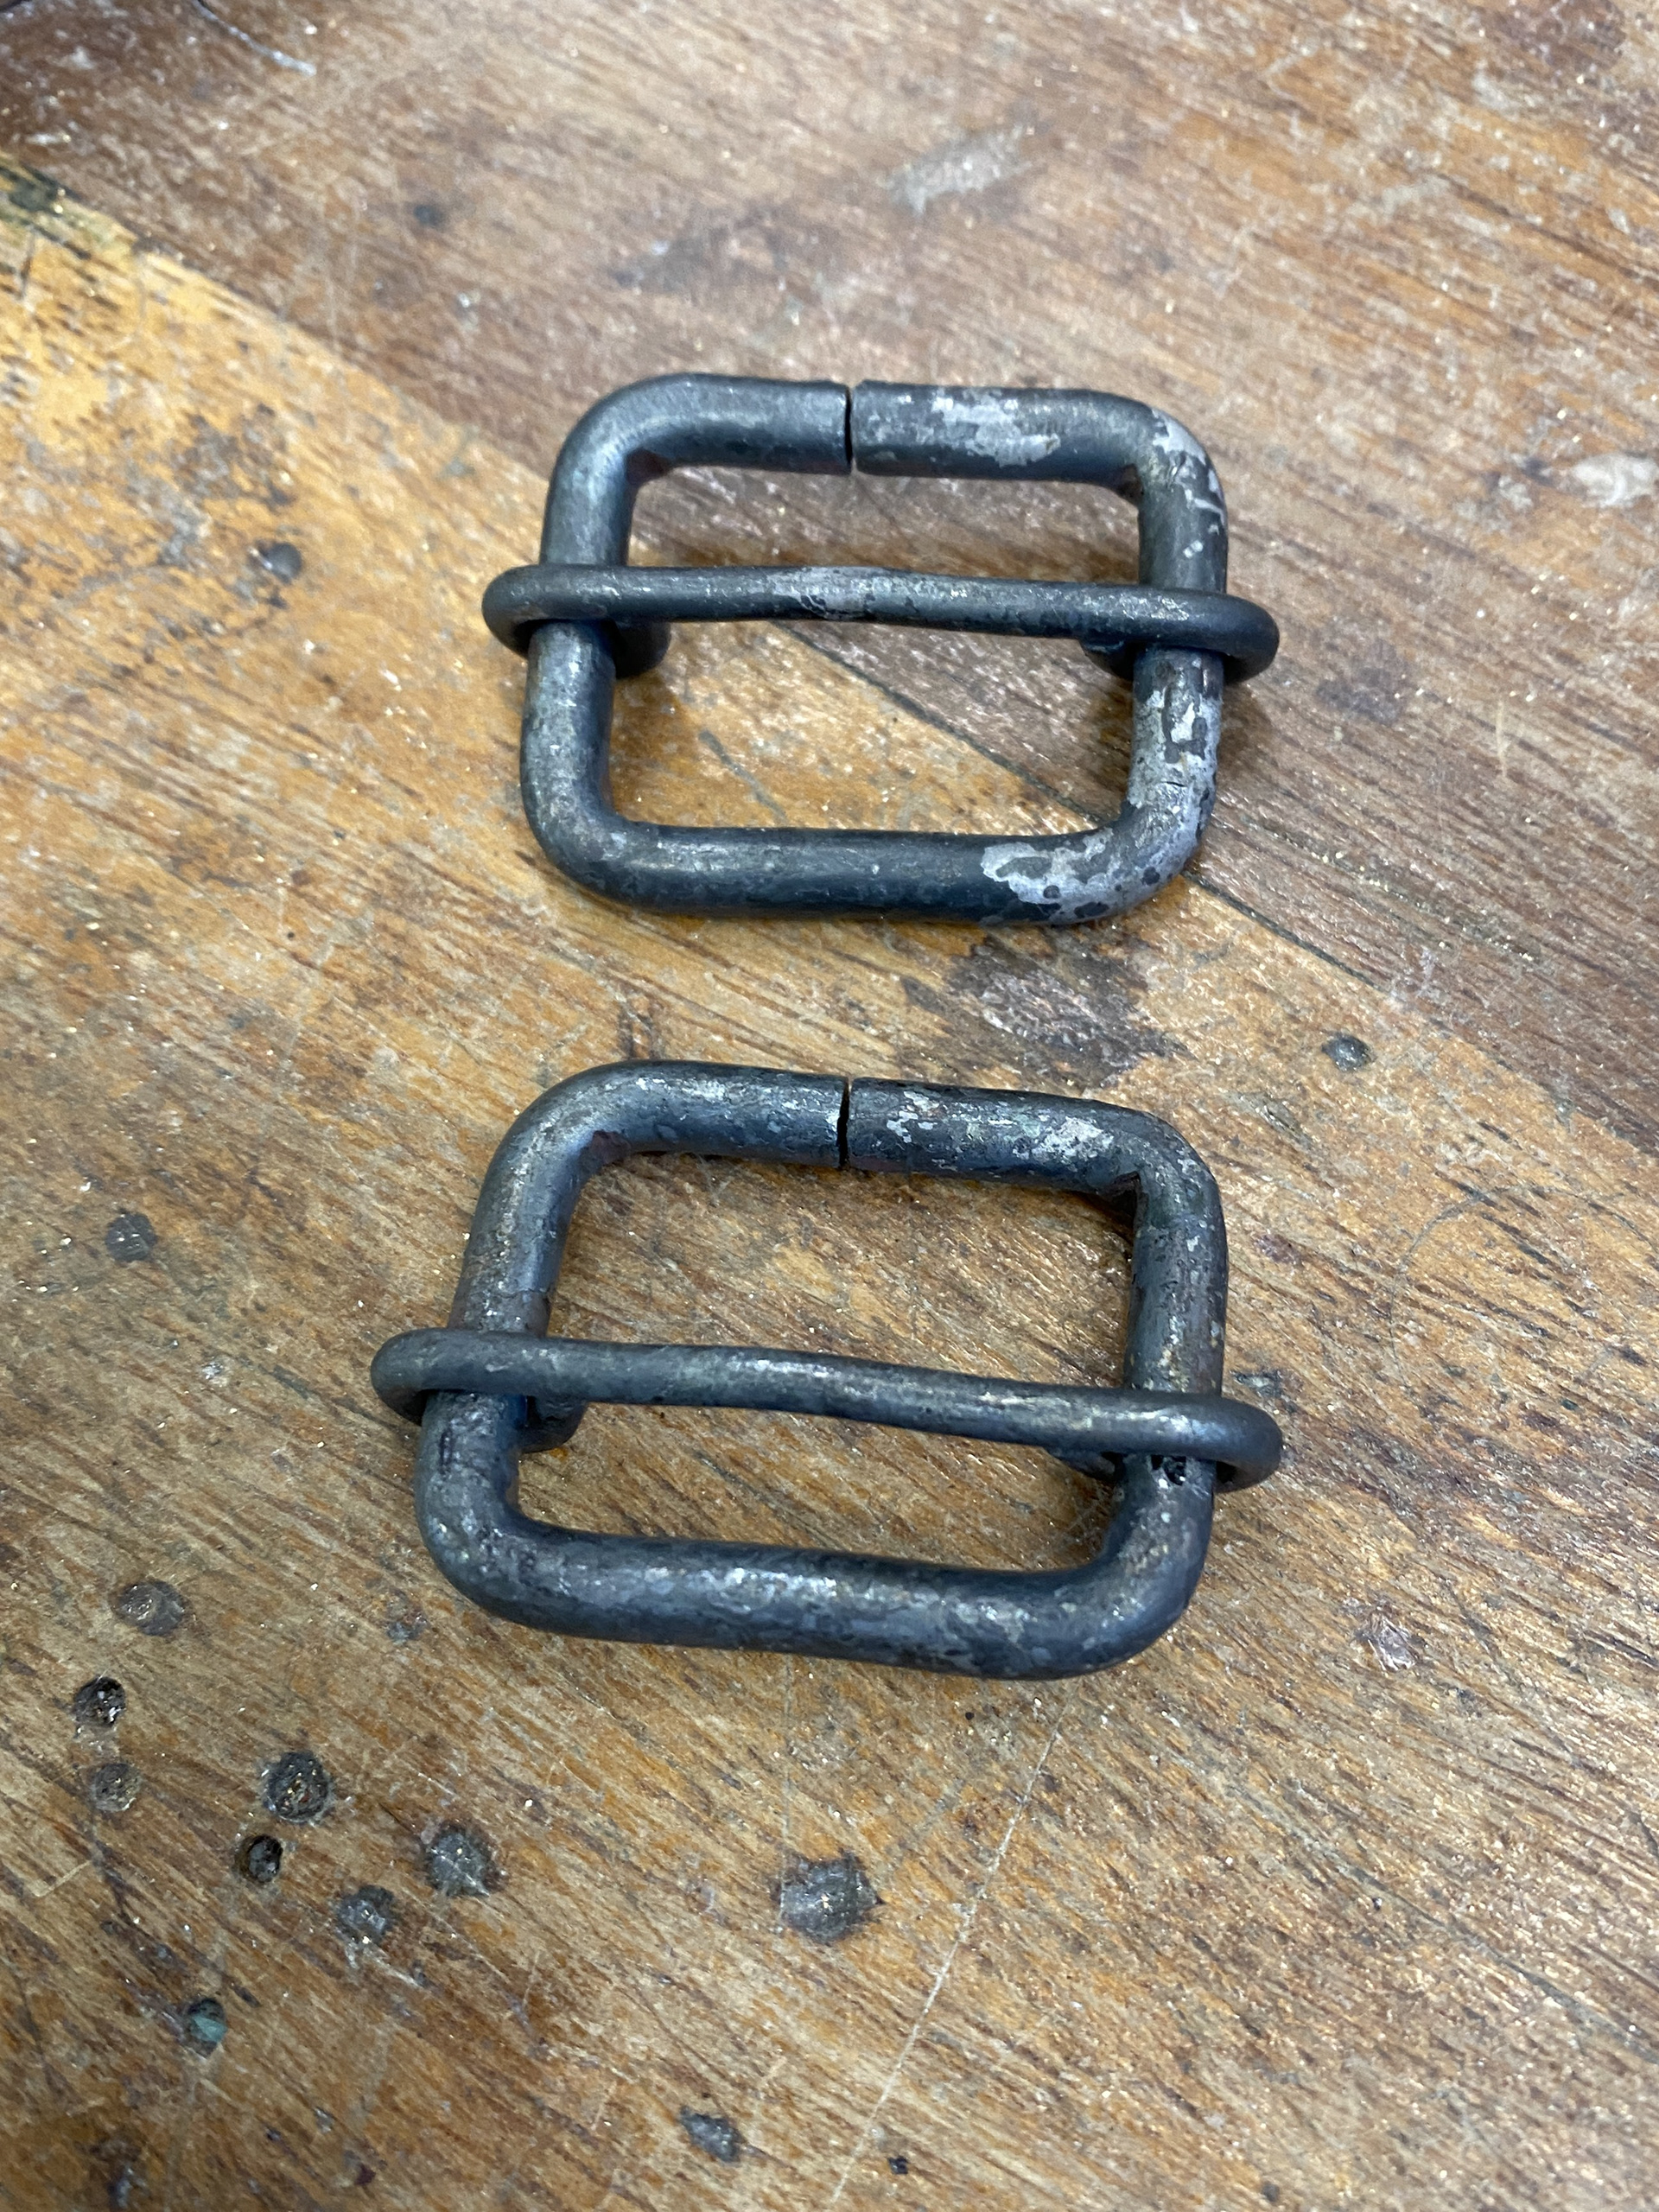
To complete the slider buckle, I formed the central piece using the methods from Unit X. Previously, I had difficulty starting the eyelet because the stake was too small and slipped in the vice. To solve this, I created a custom stake by welding it through a square steel block, allowing the vice jaws to grip it securely.
To finish the piece, I attached the hardware together and added the leather straps. To ensure that the stitching was square and uniform across the piece I glued the leather together and used dividers to mark out the stitching.
Before the photoshoot we did a fitting to ensure that the piece was positioned on the body correctly. During this I took out a few links to pull different sections of the mail over the desired areas. Additionally, one issue that we discovered was the chest areas tended to slip about and needed securing. I added in a length of 1.6mm chain stretching from the sides of the bra pieces under the to the arms to the back of the staps. This ensured a snugger fit and gave VIL the confidence to move freely. Finally, we used this time to discuss the curation and styling of the photoshoot.