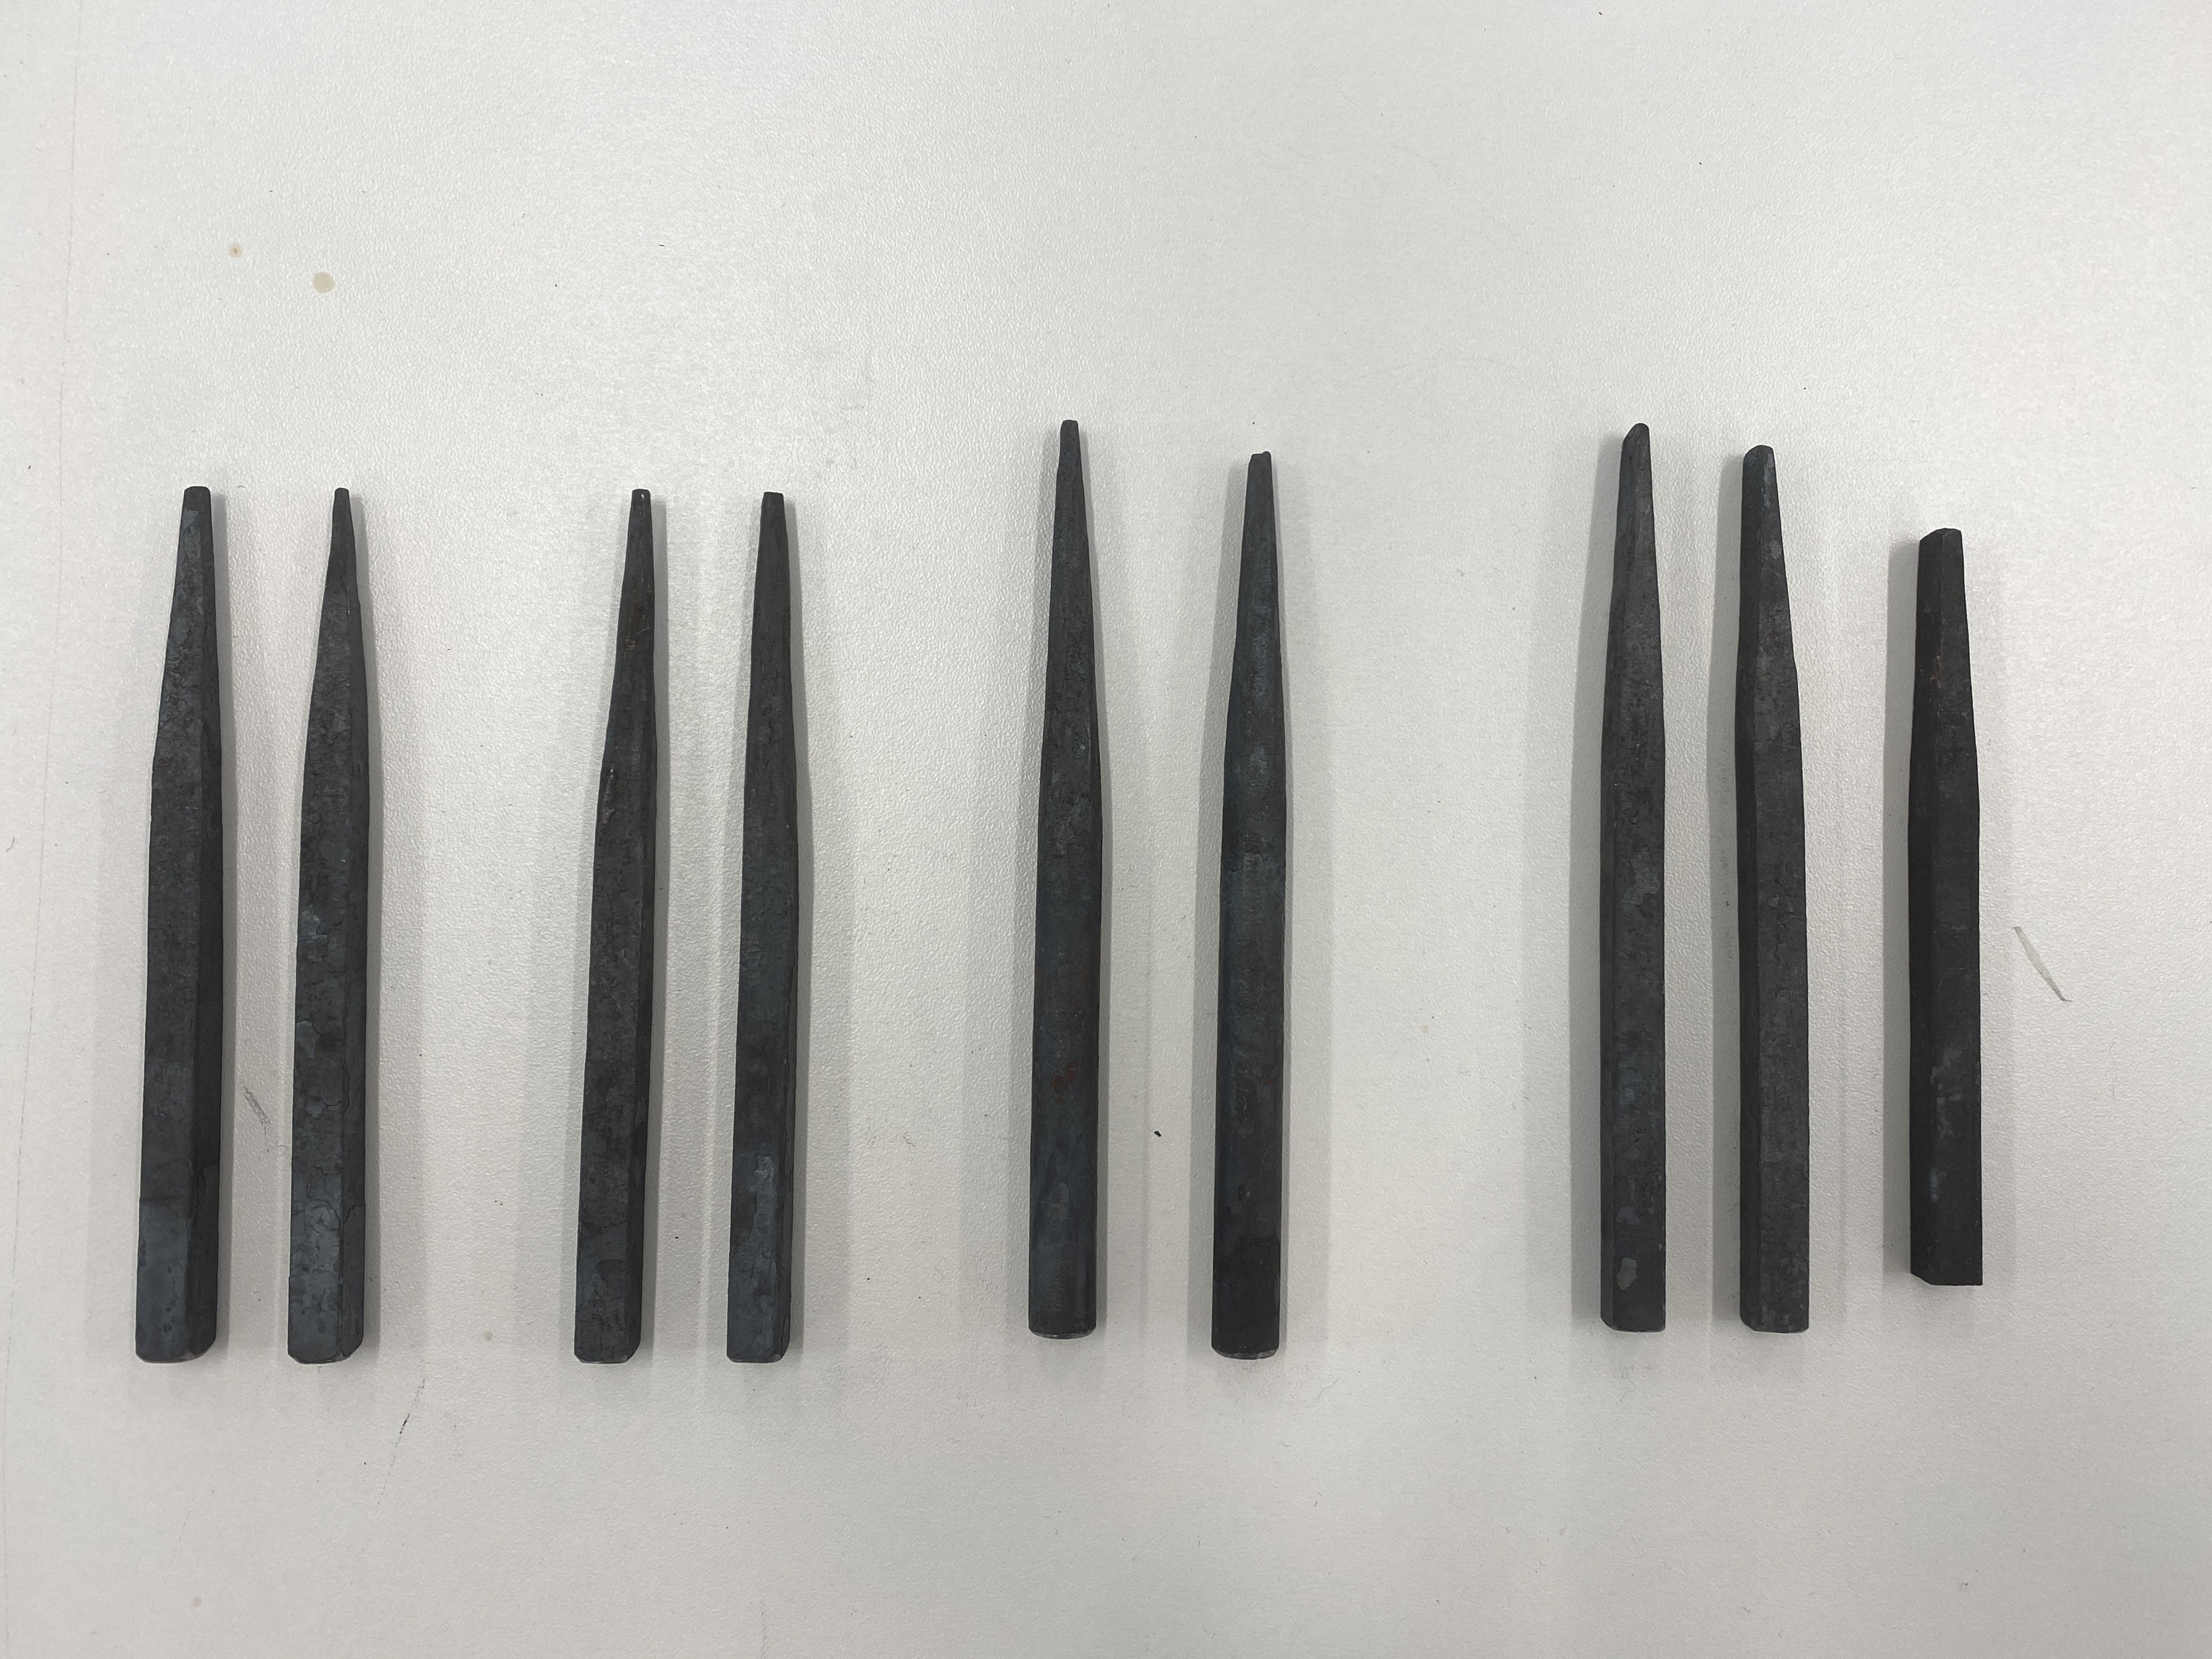
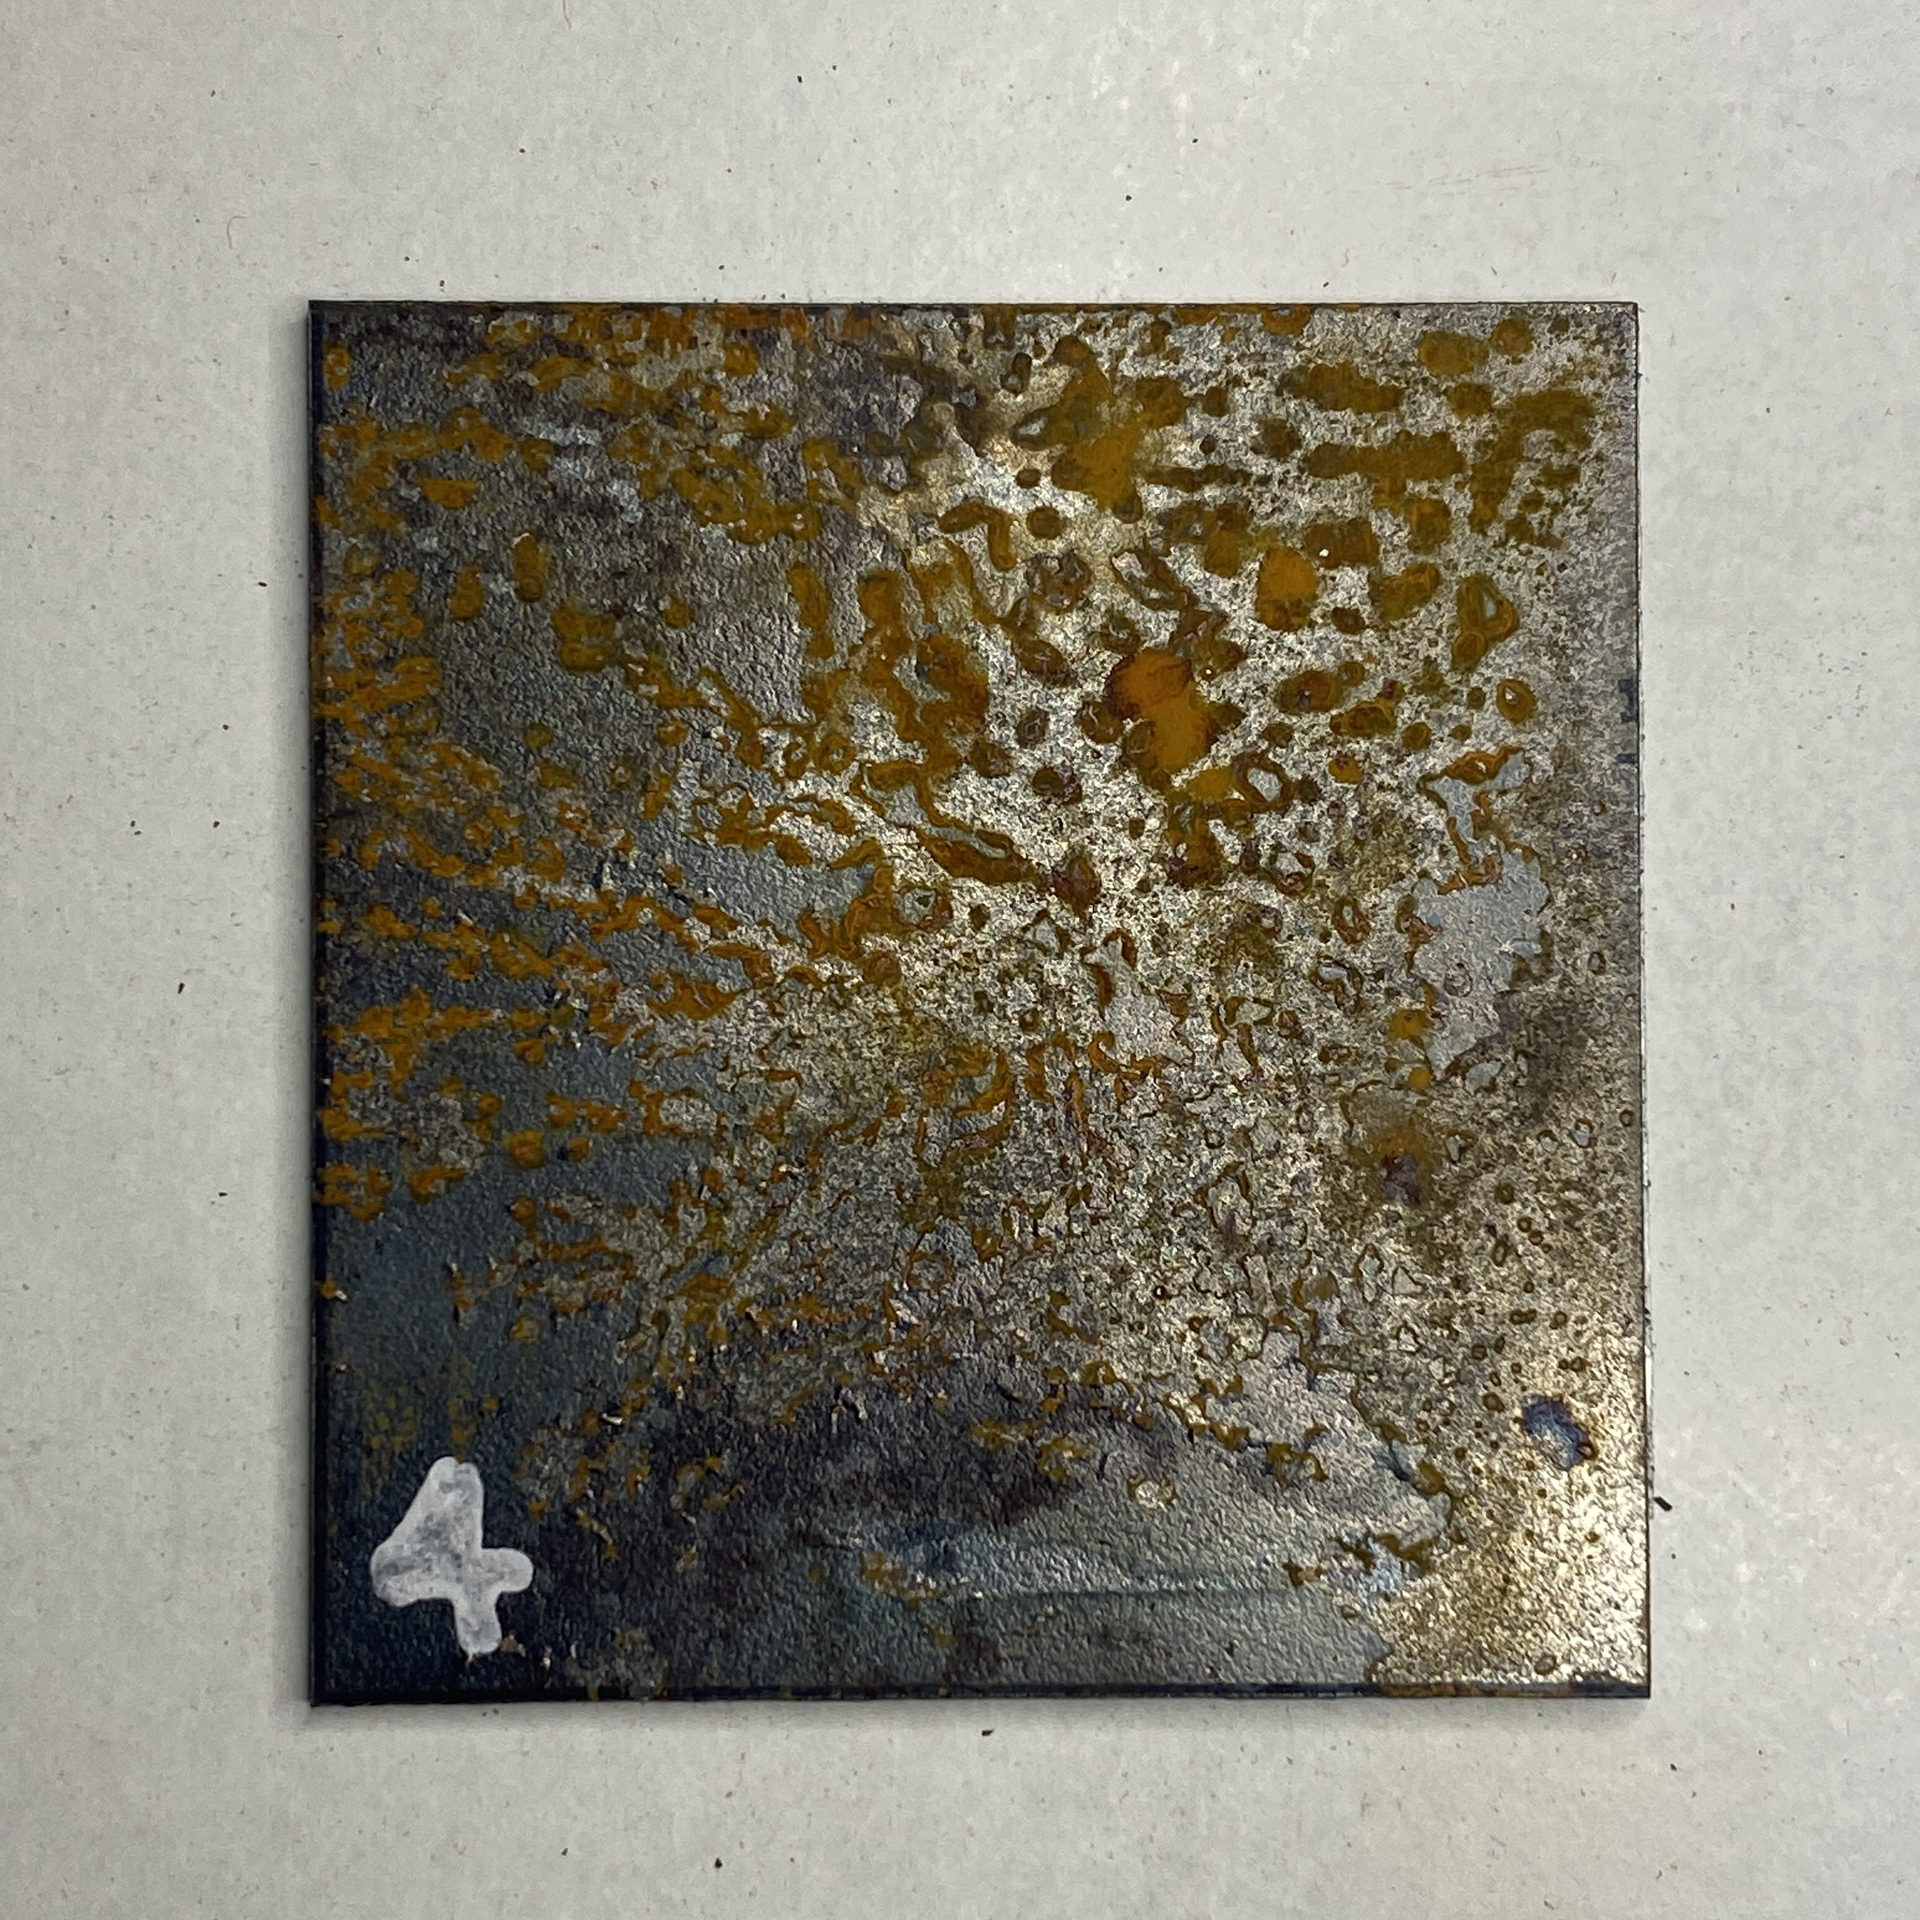
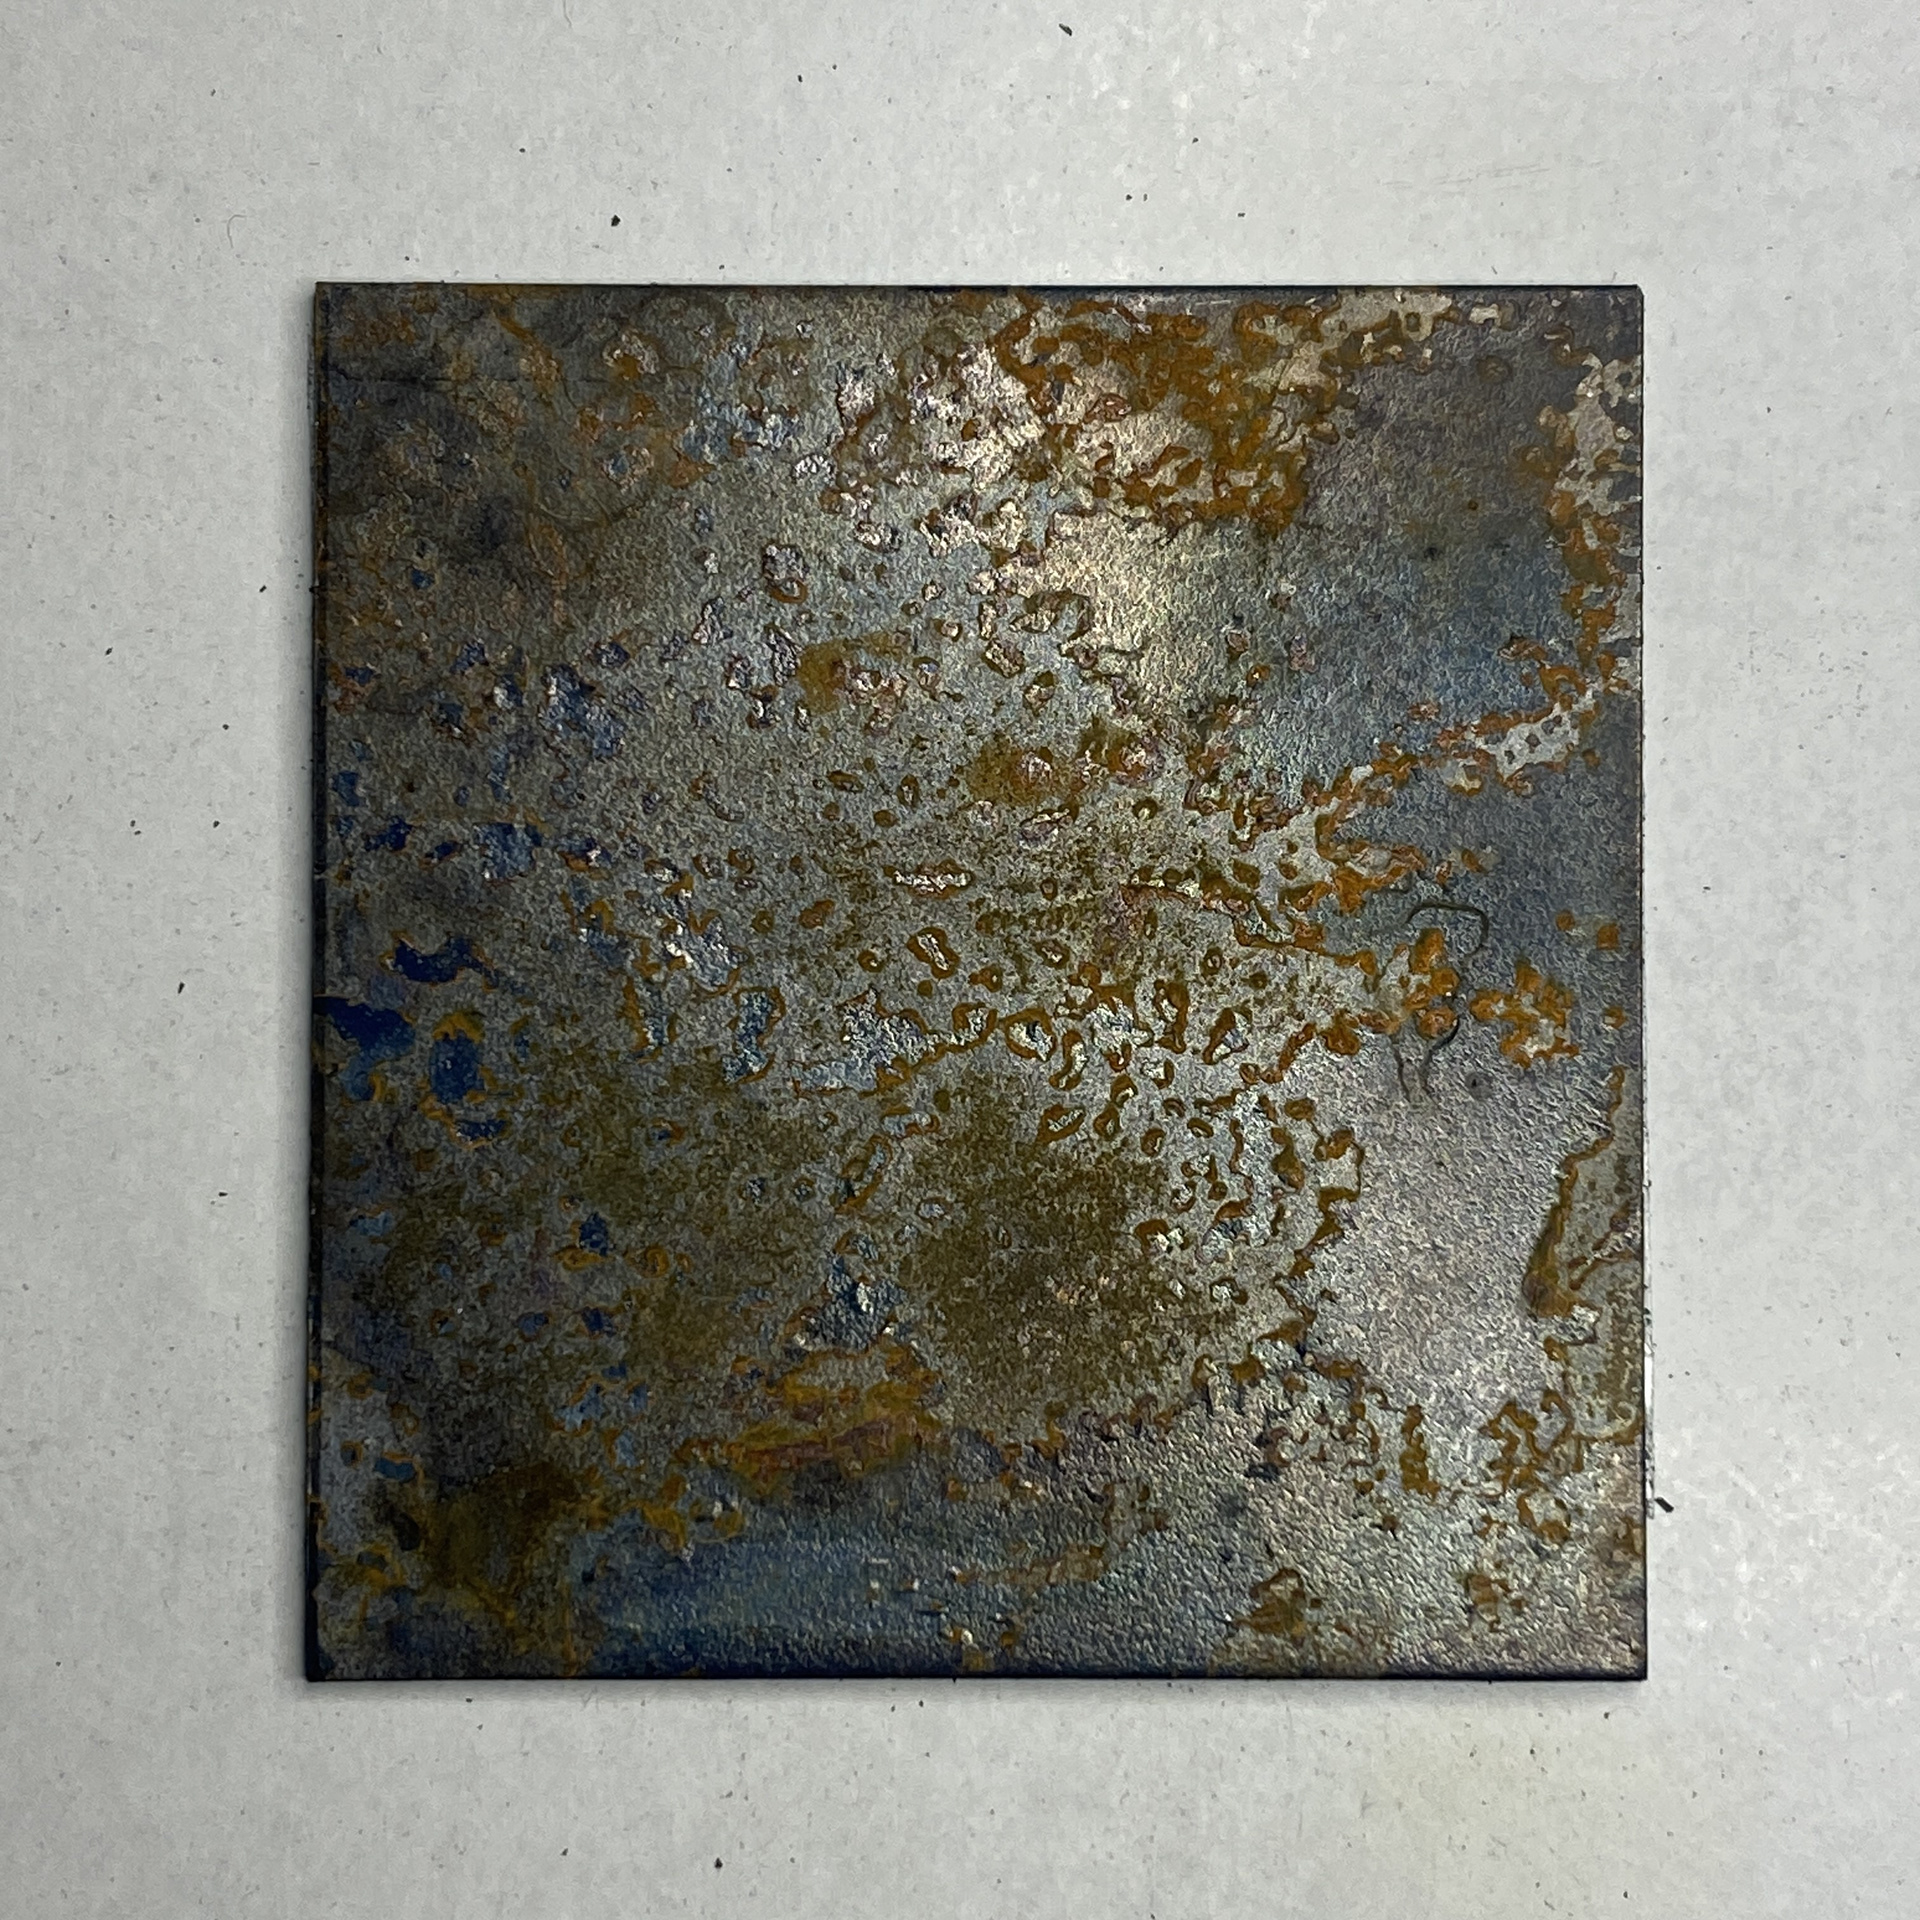
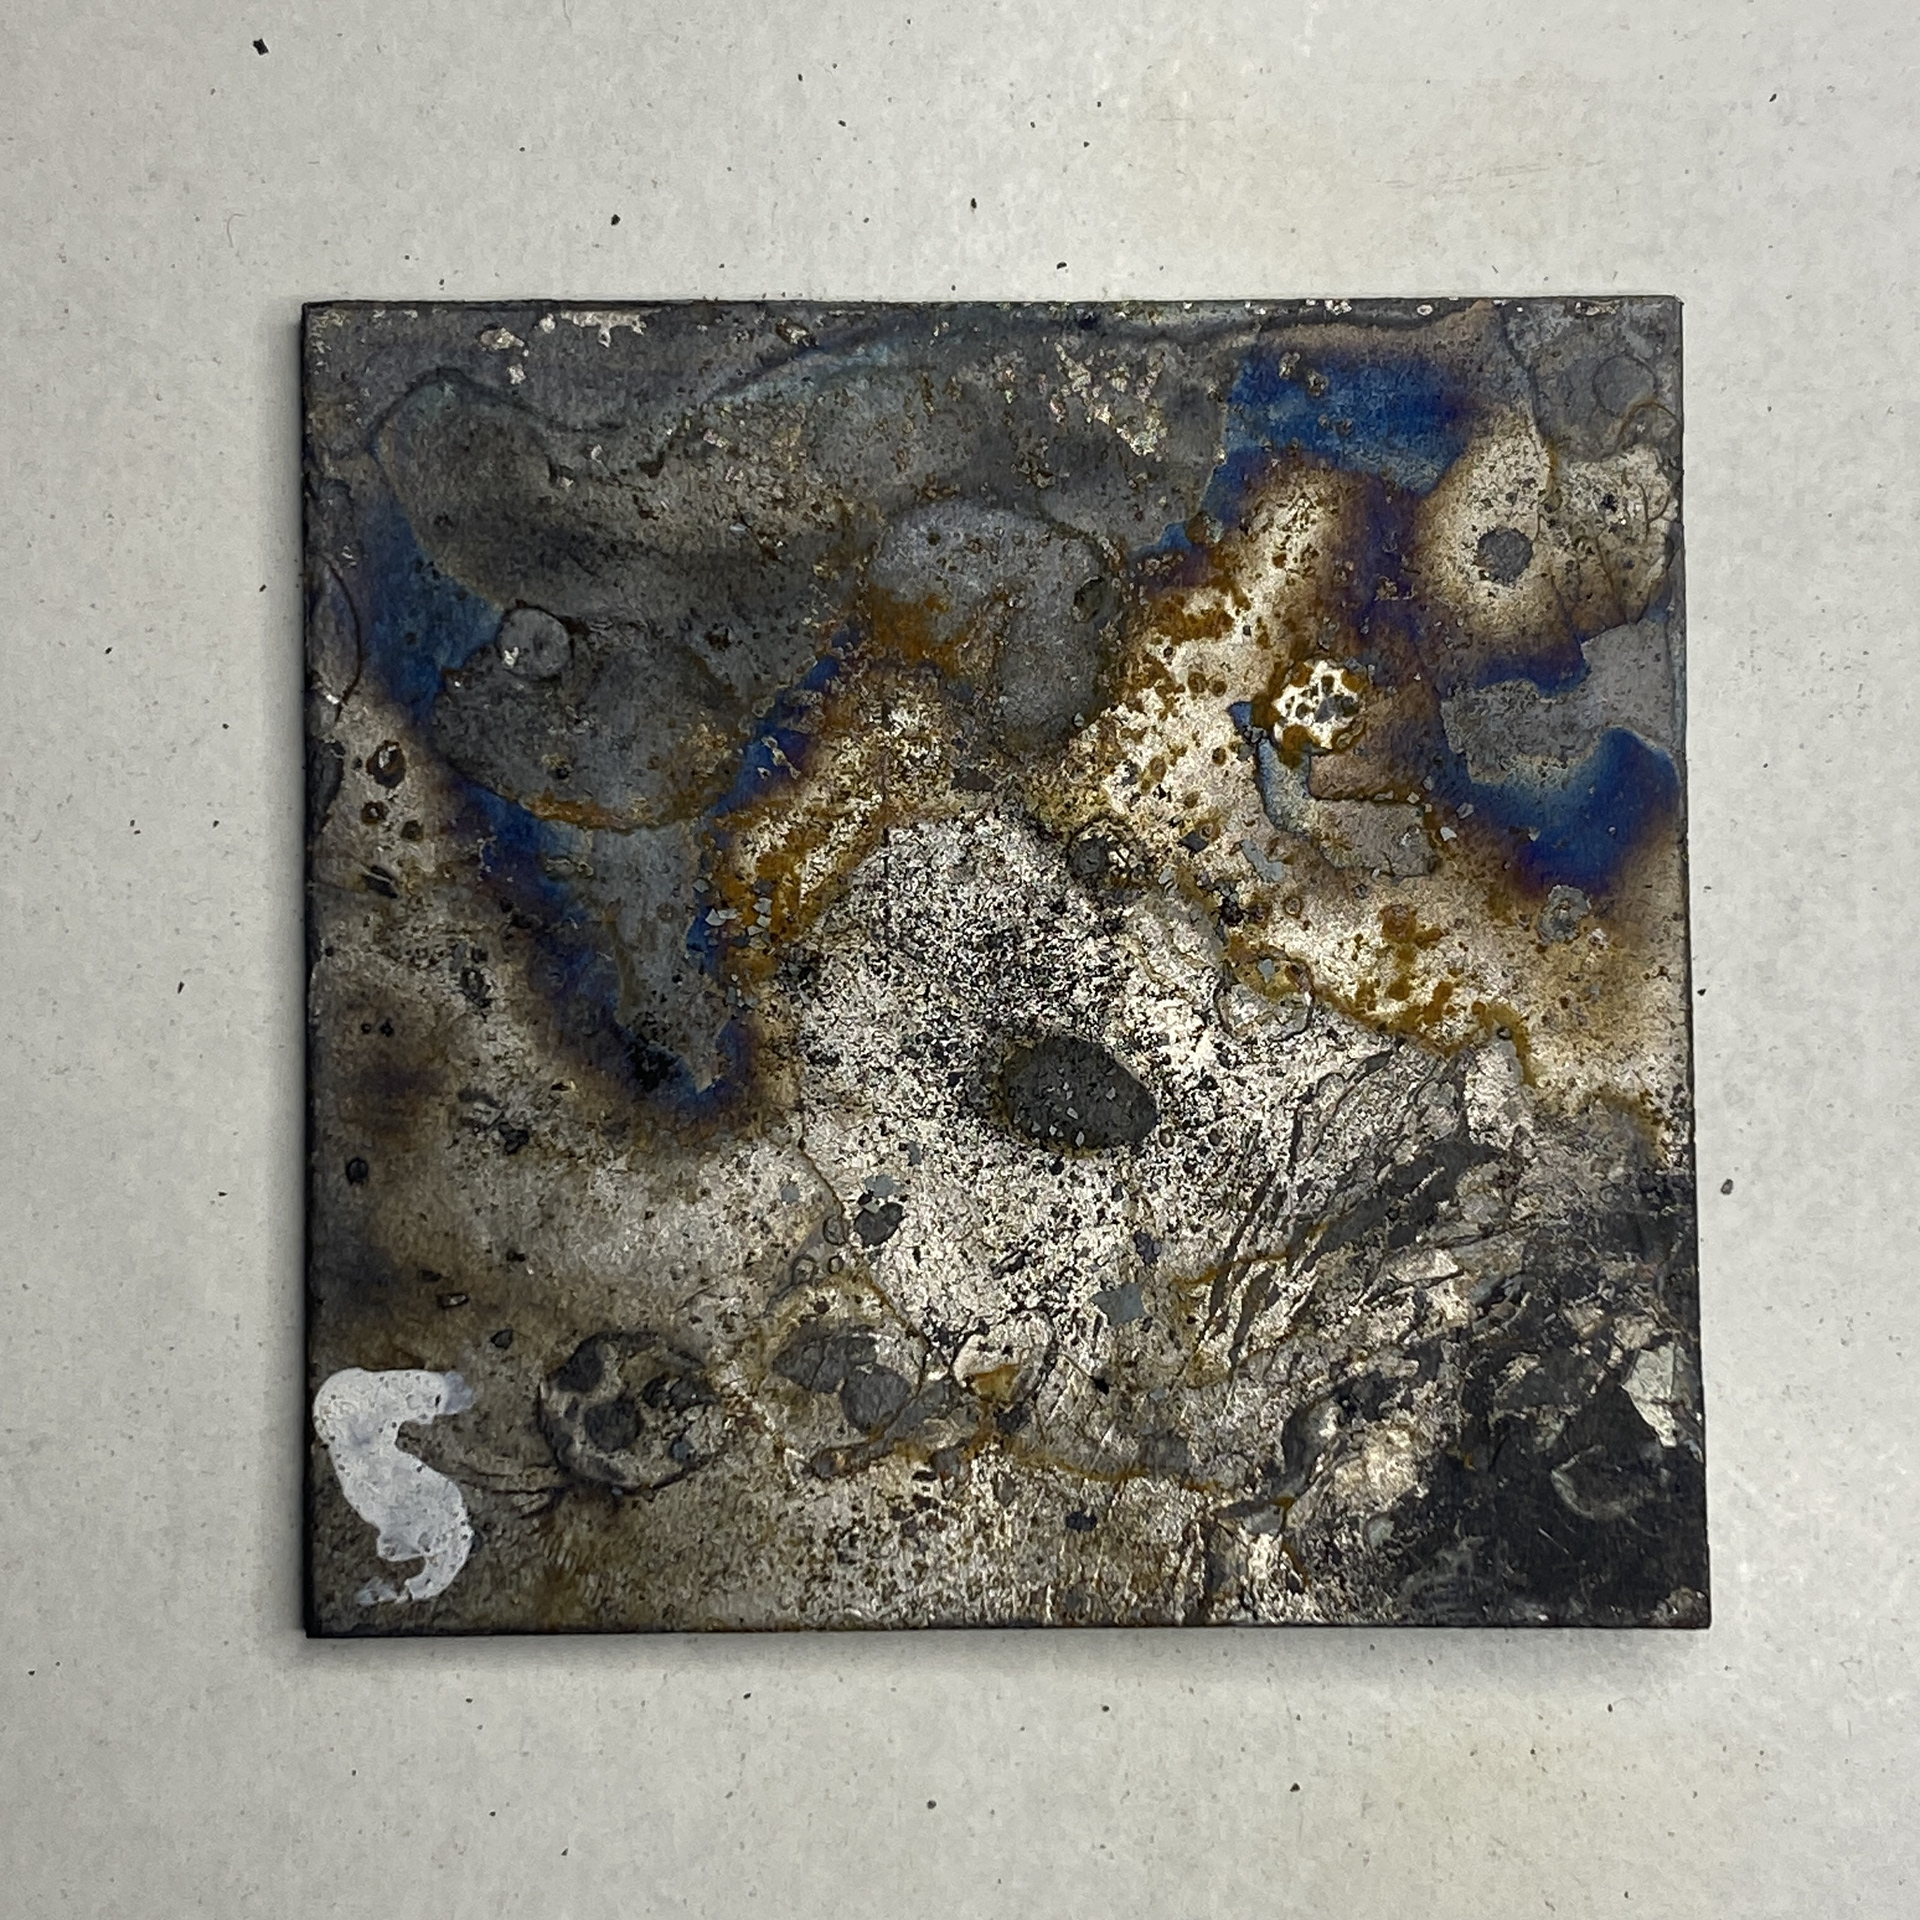
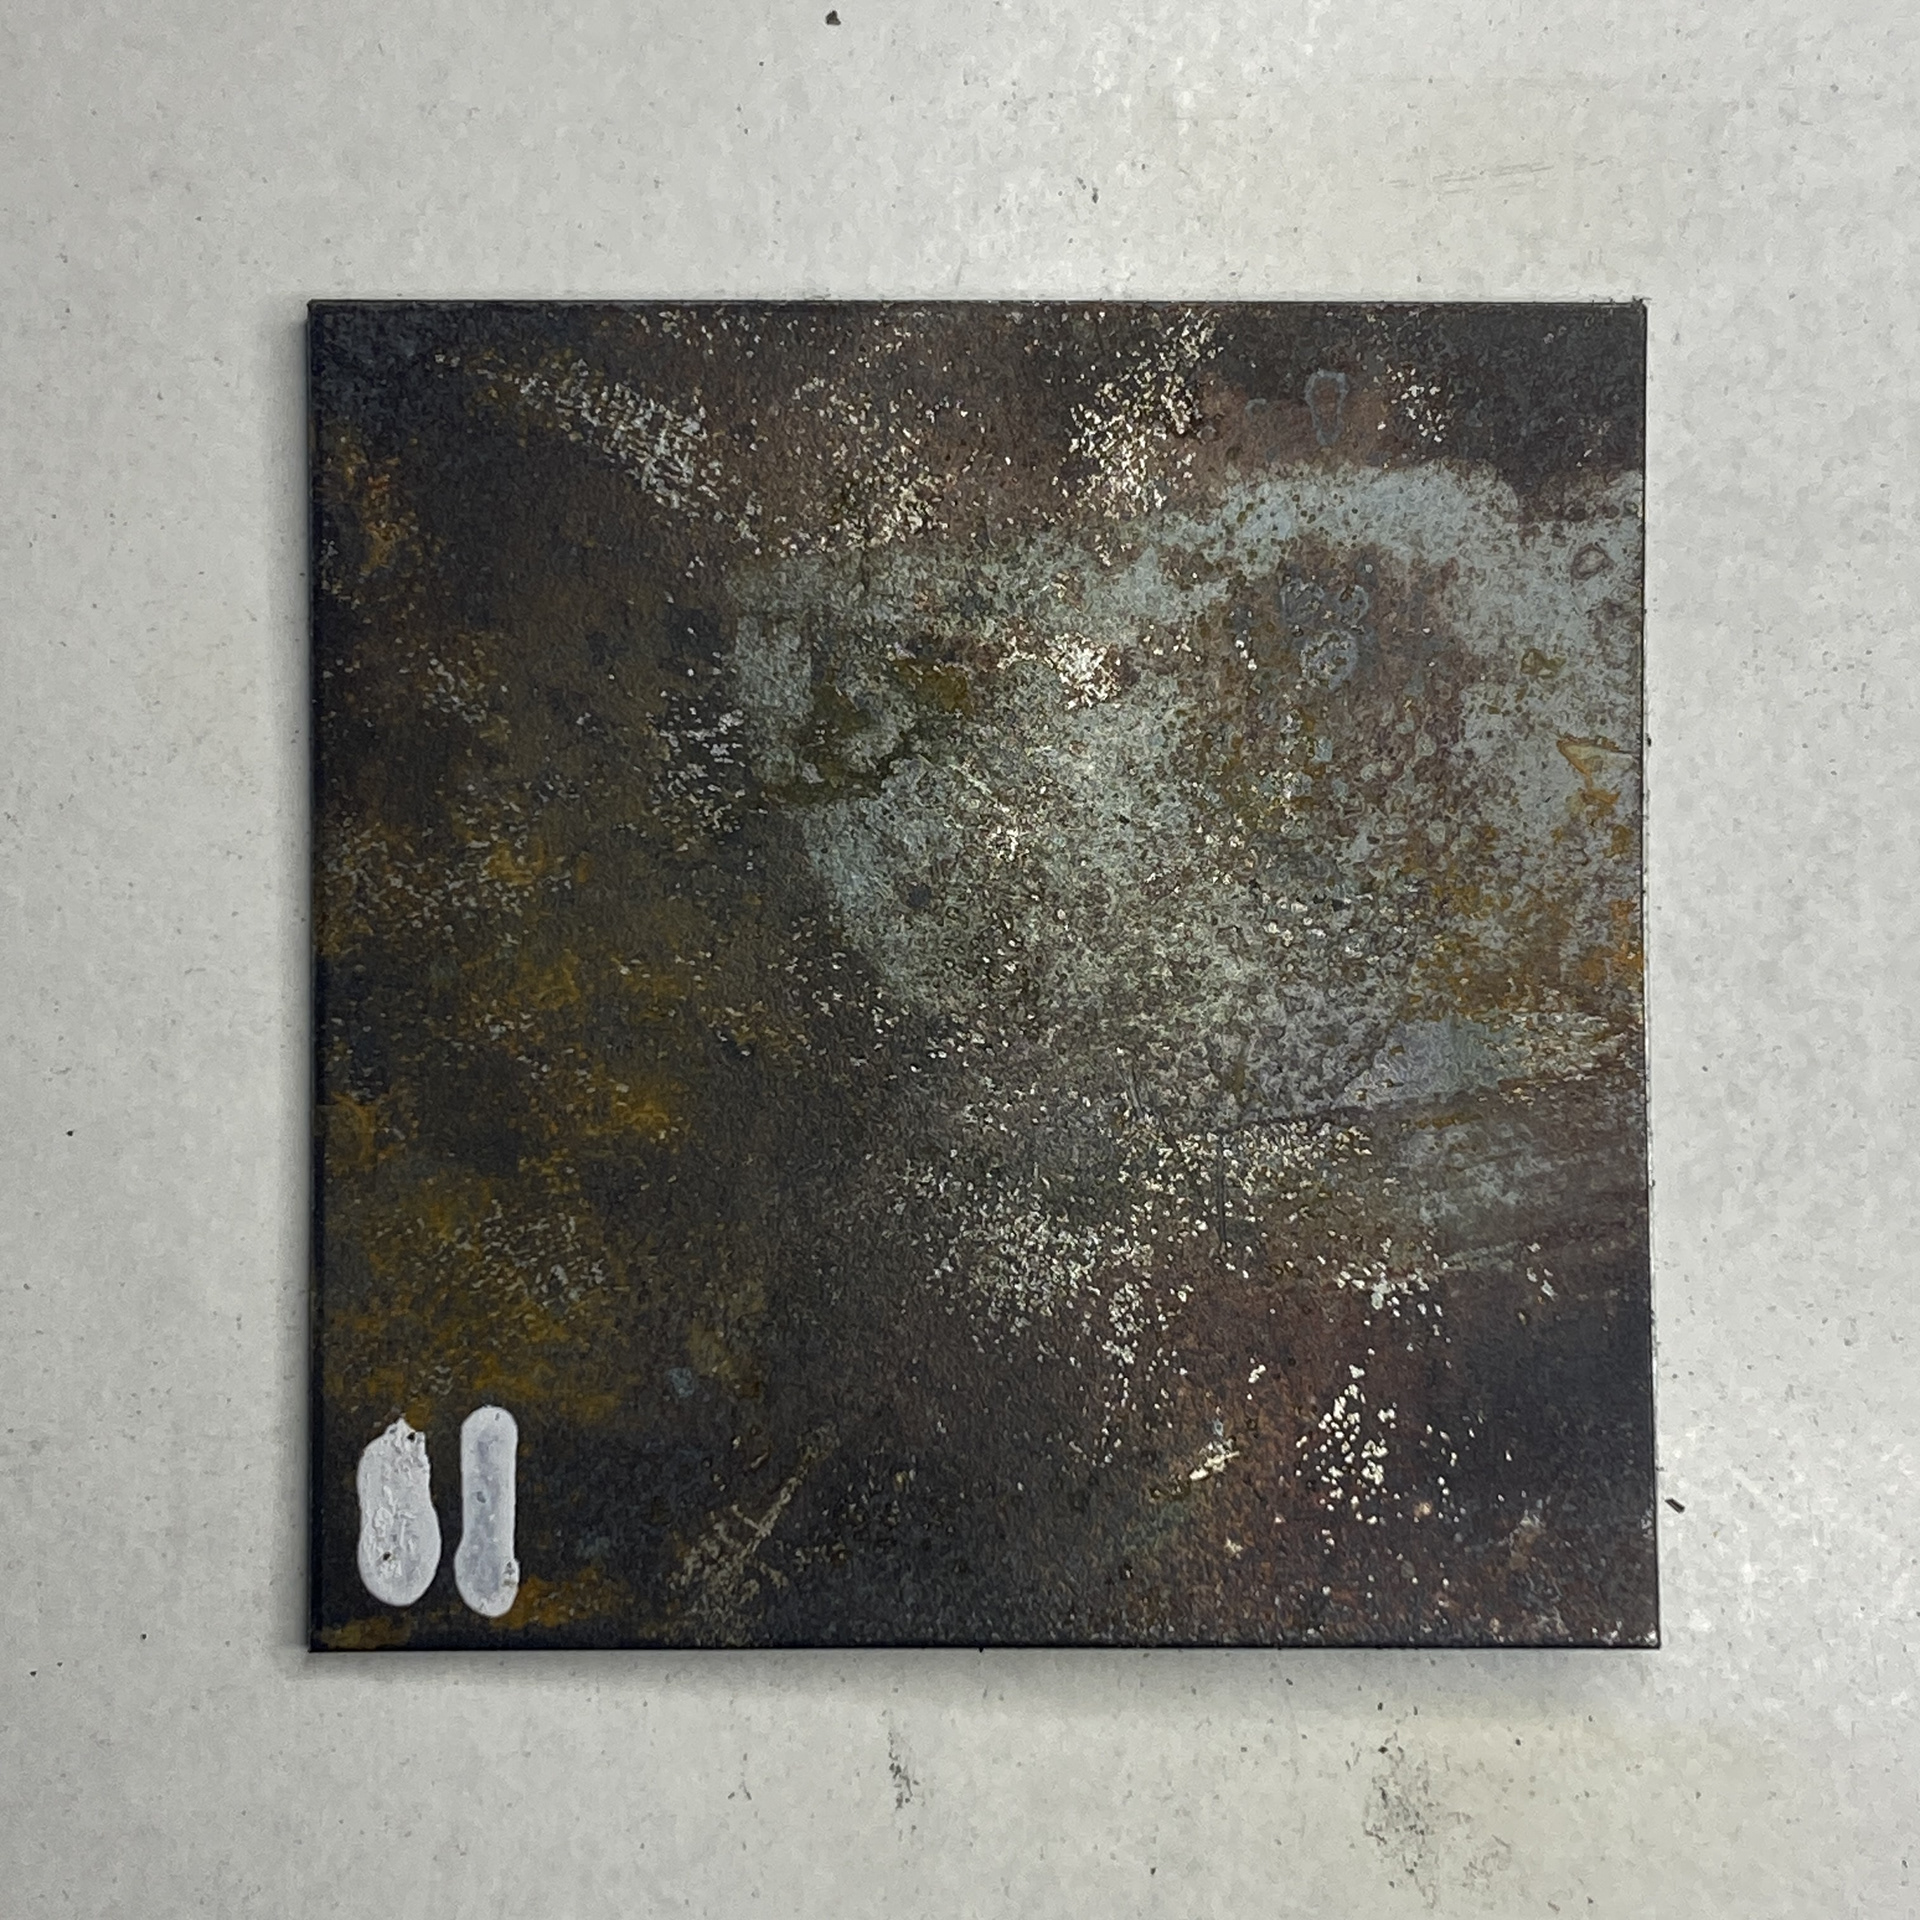
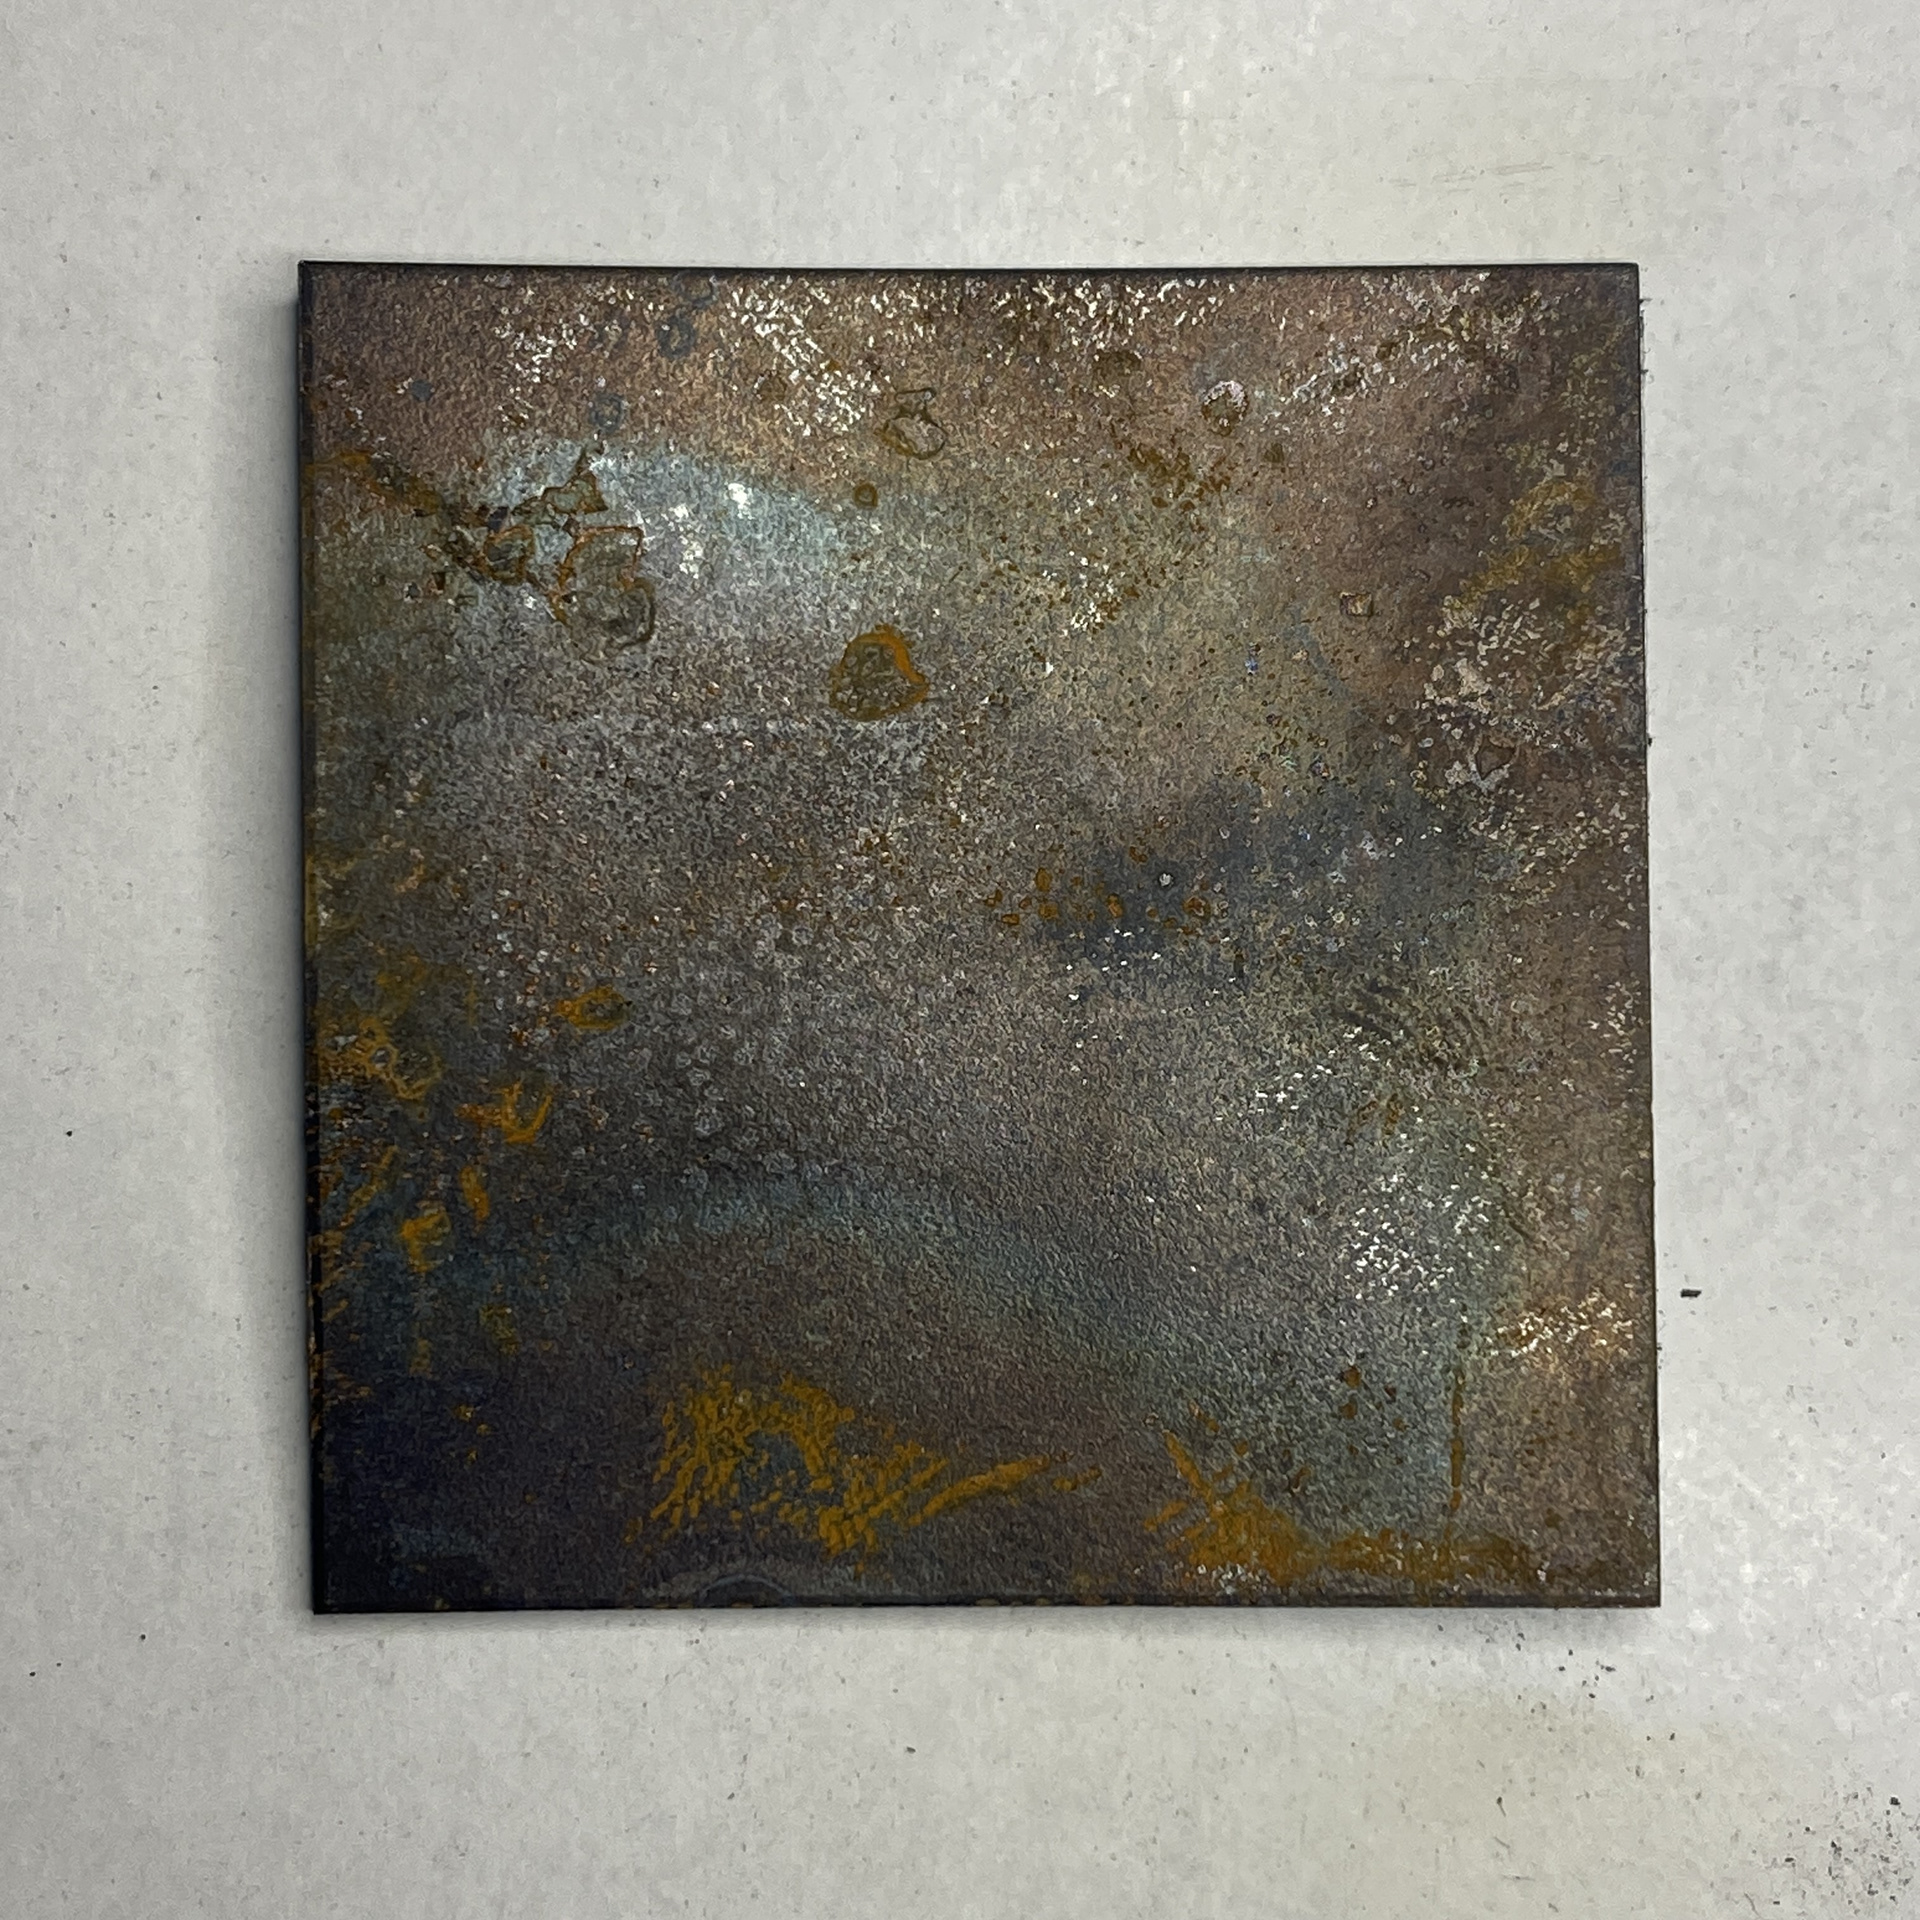
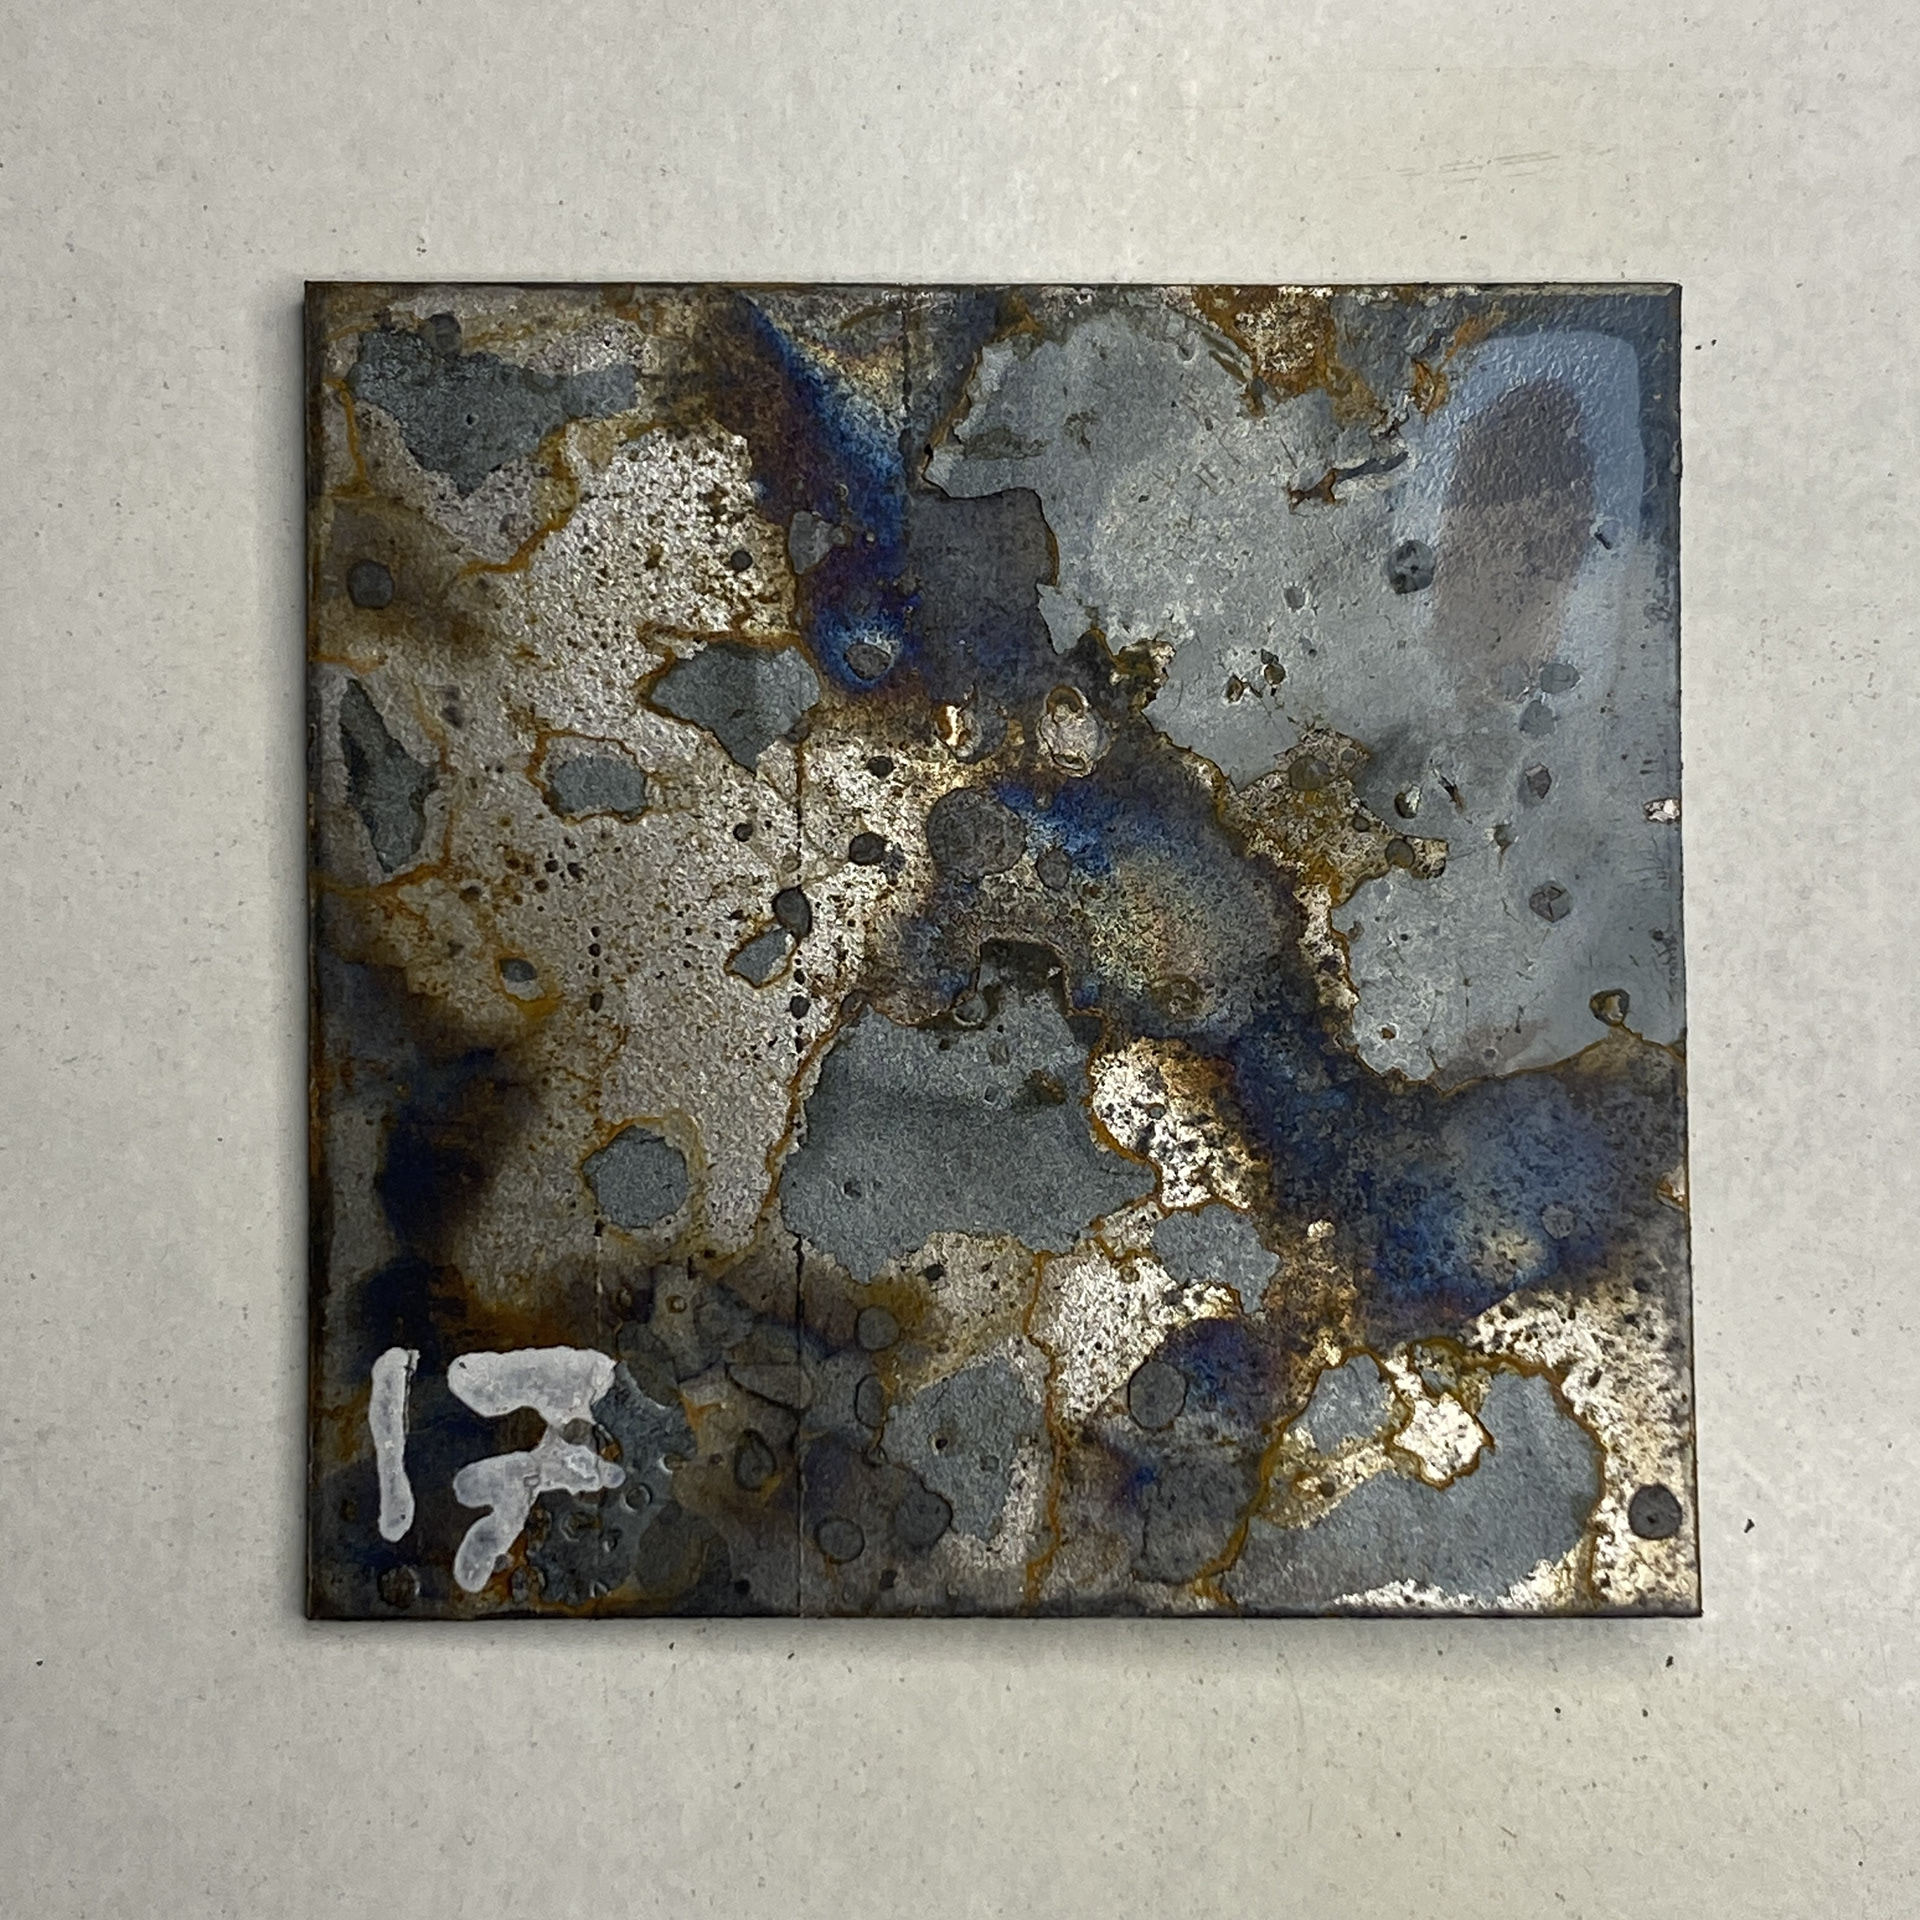
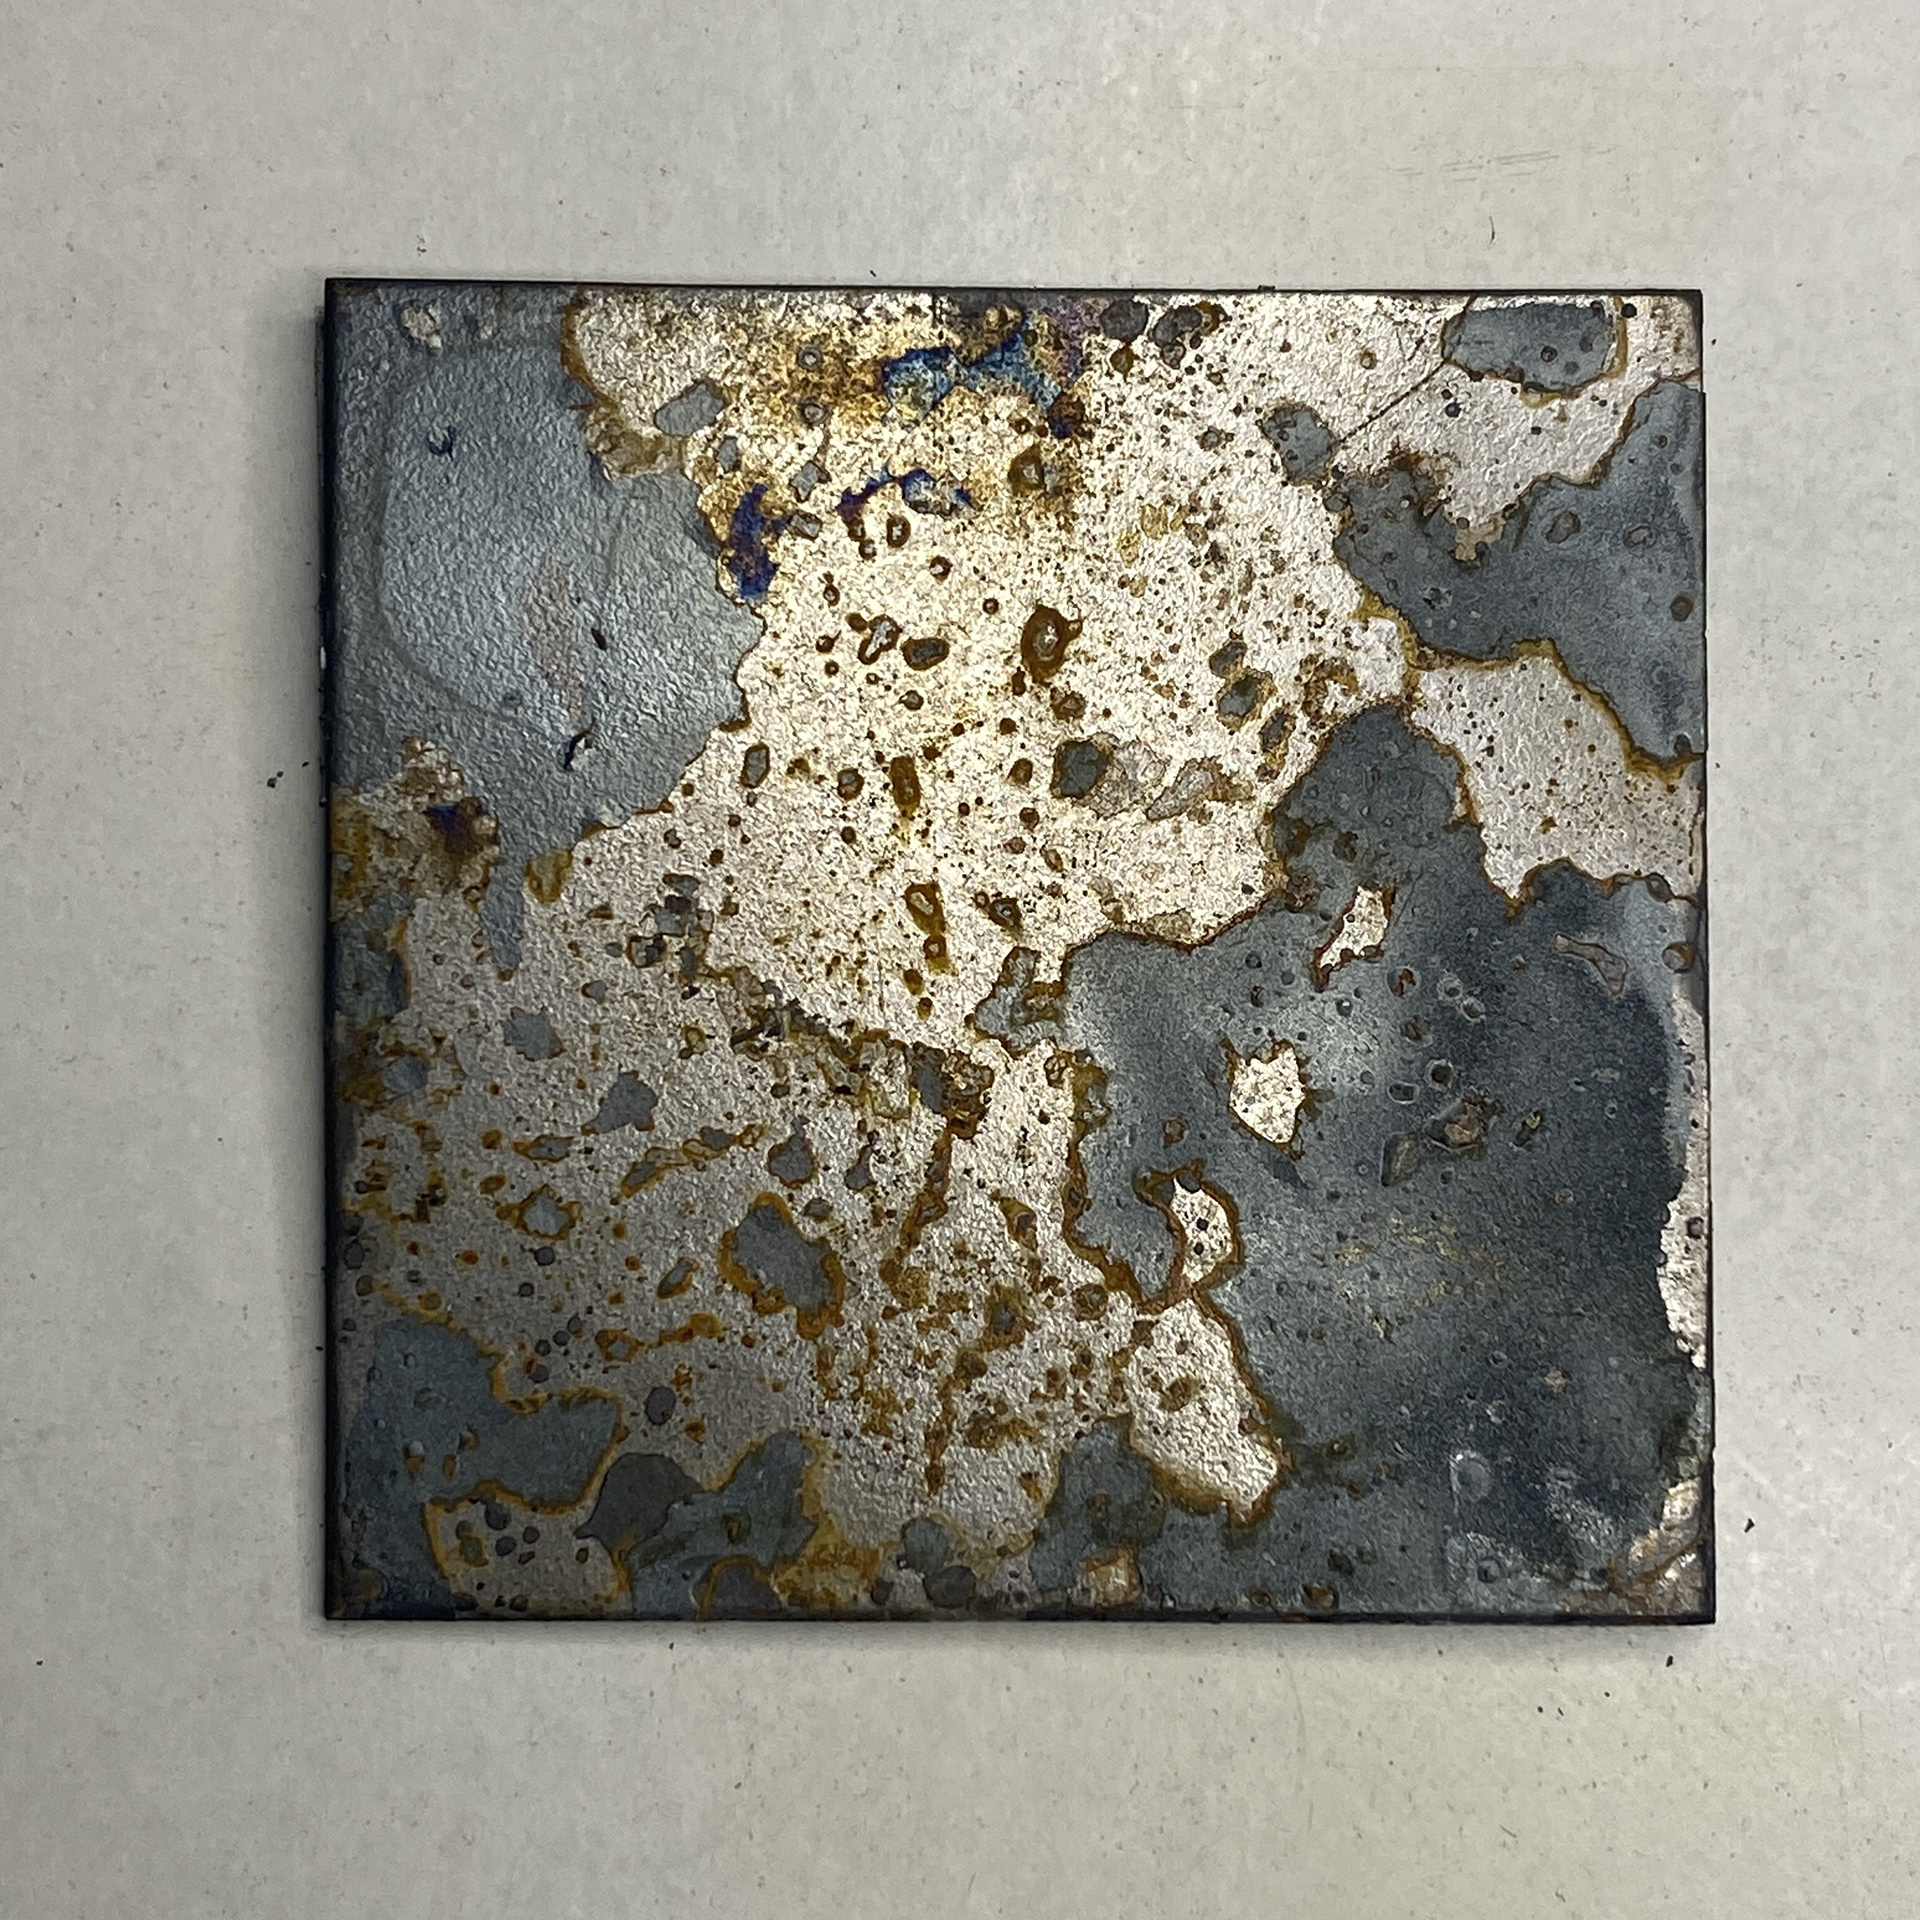
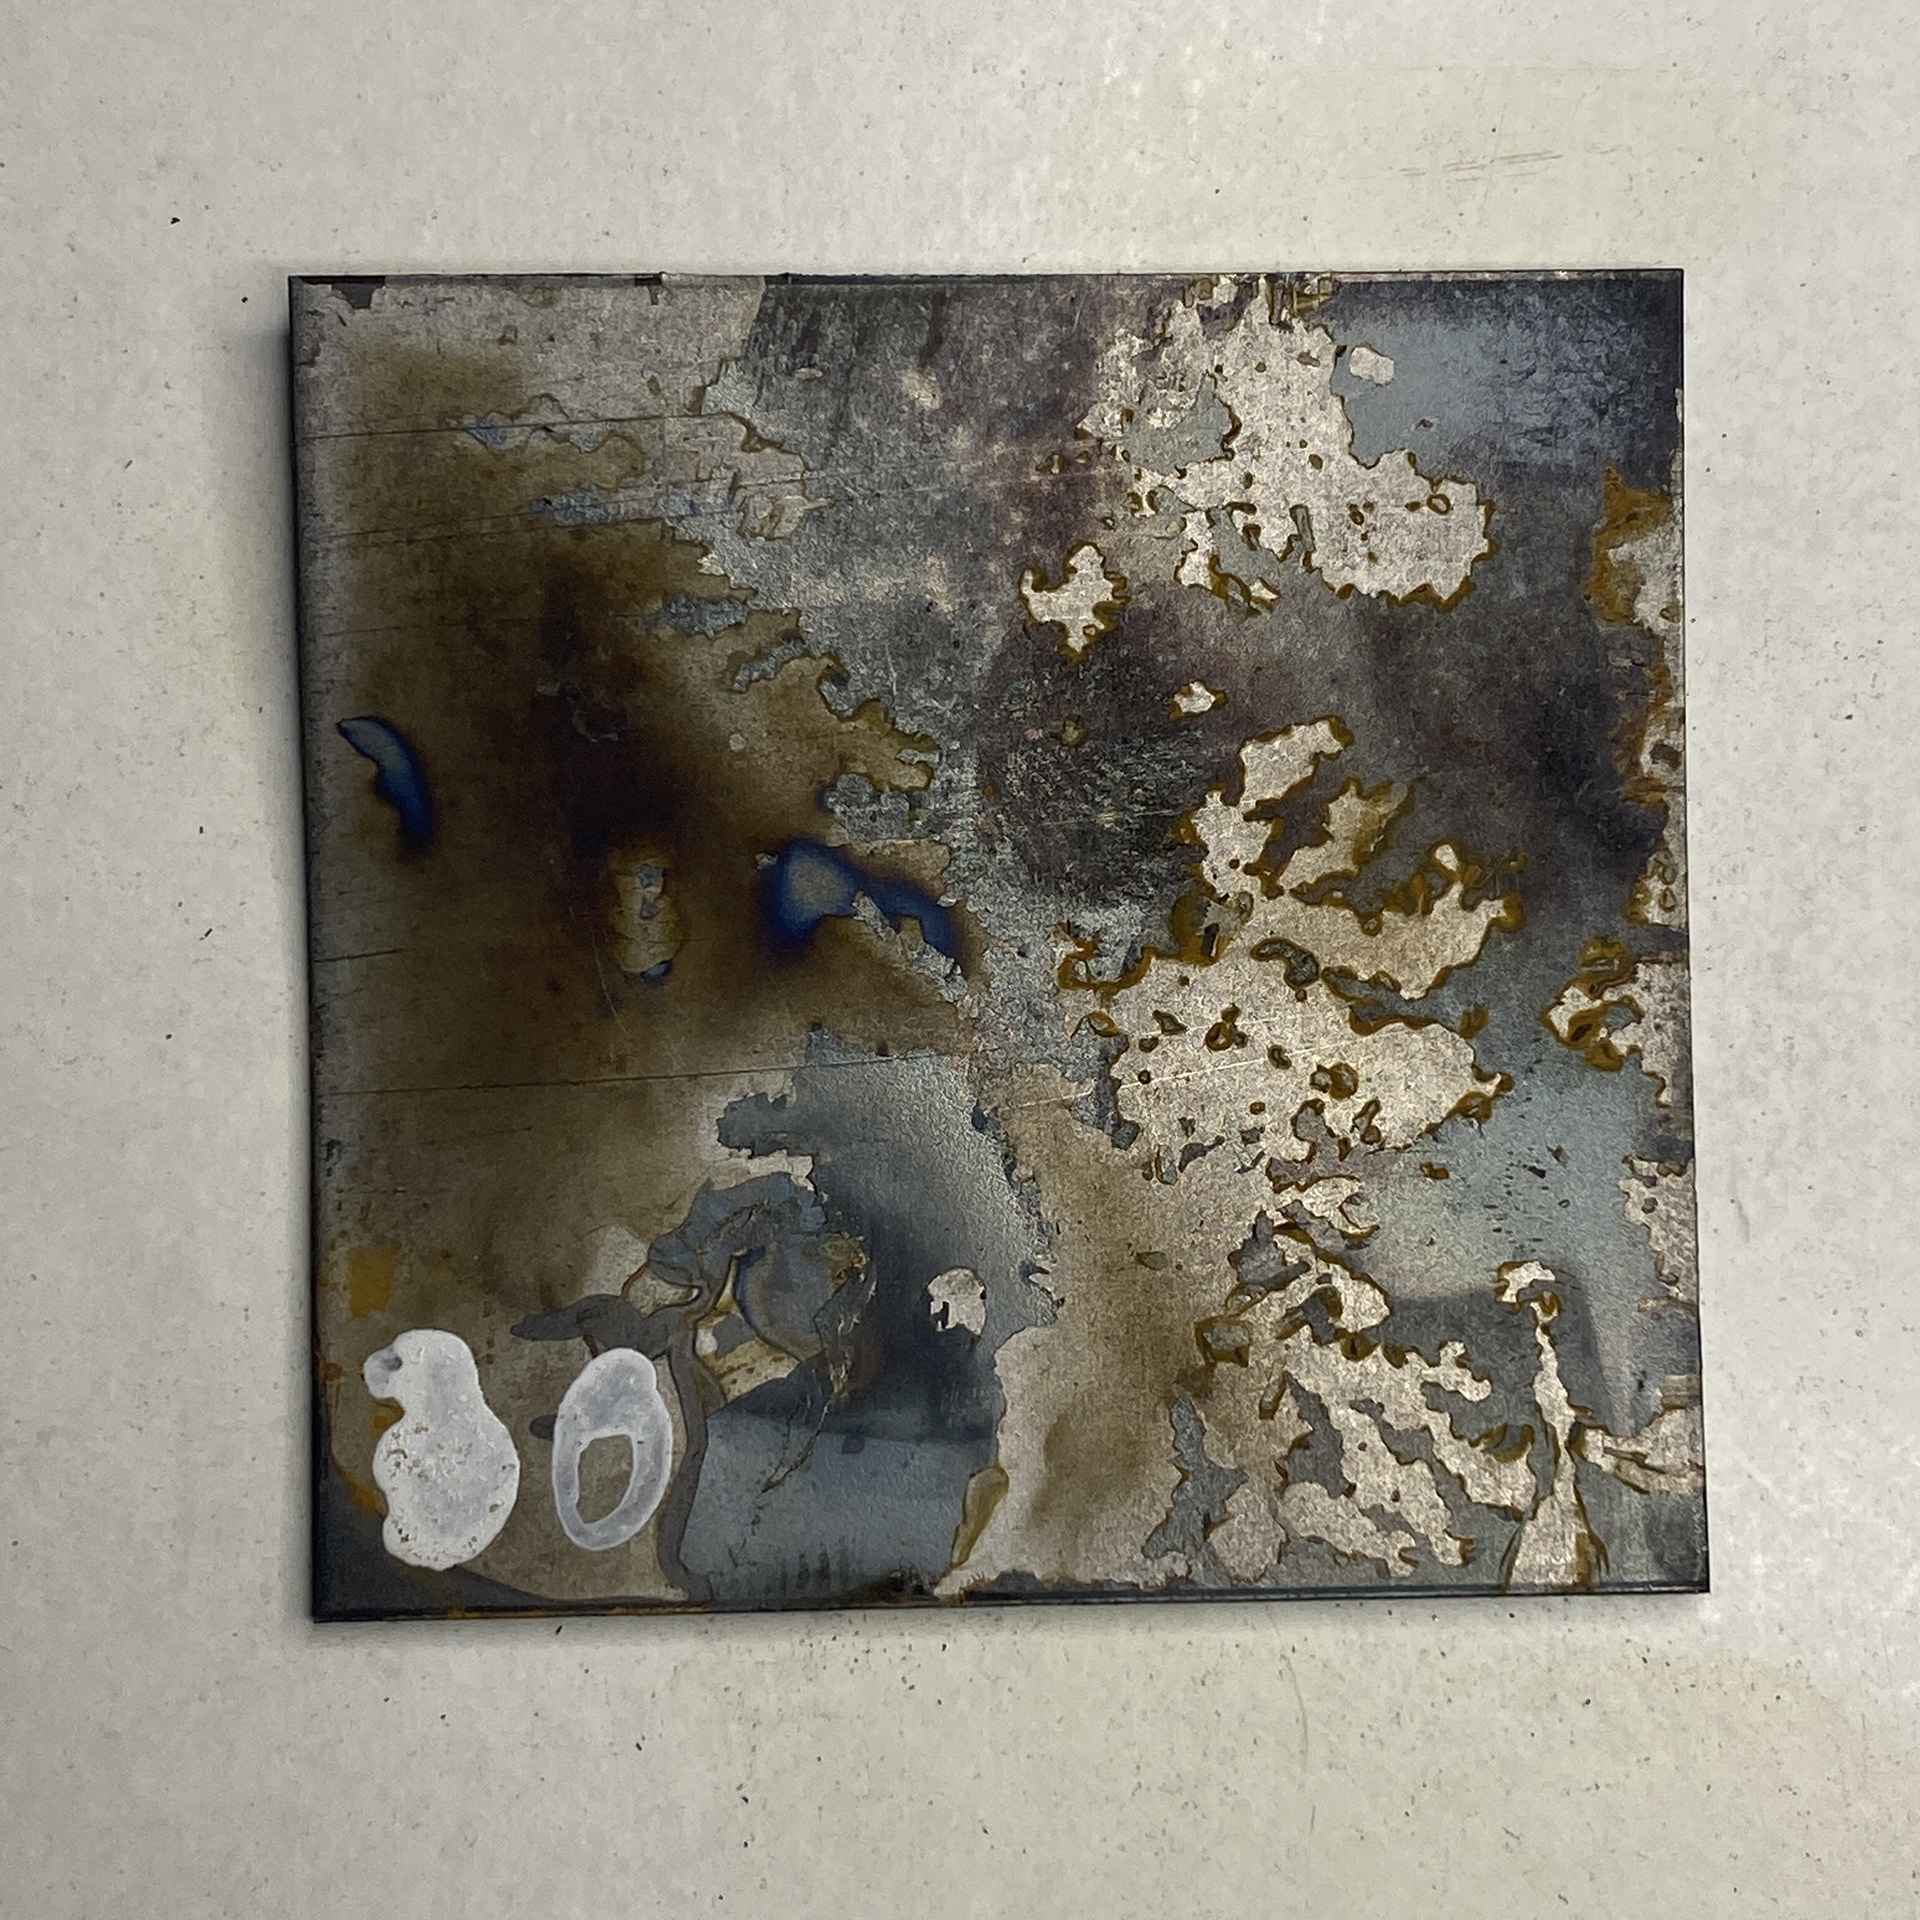
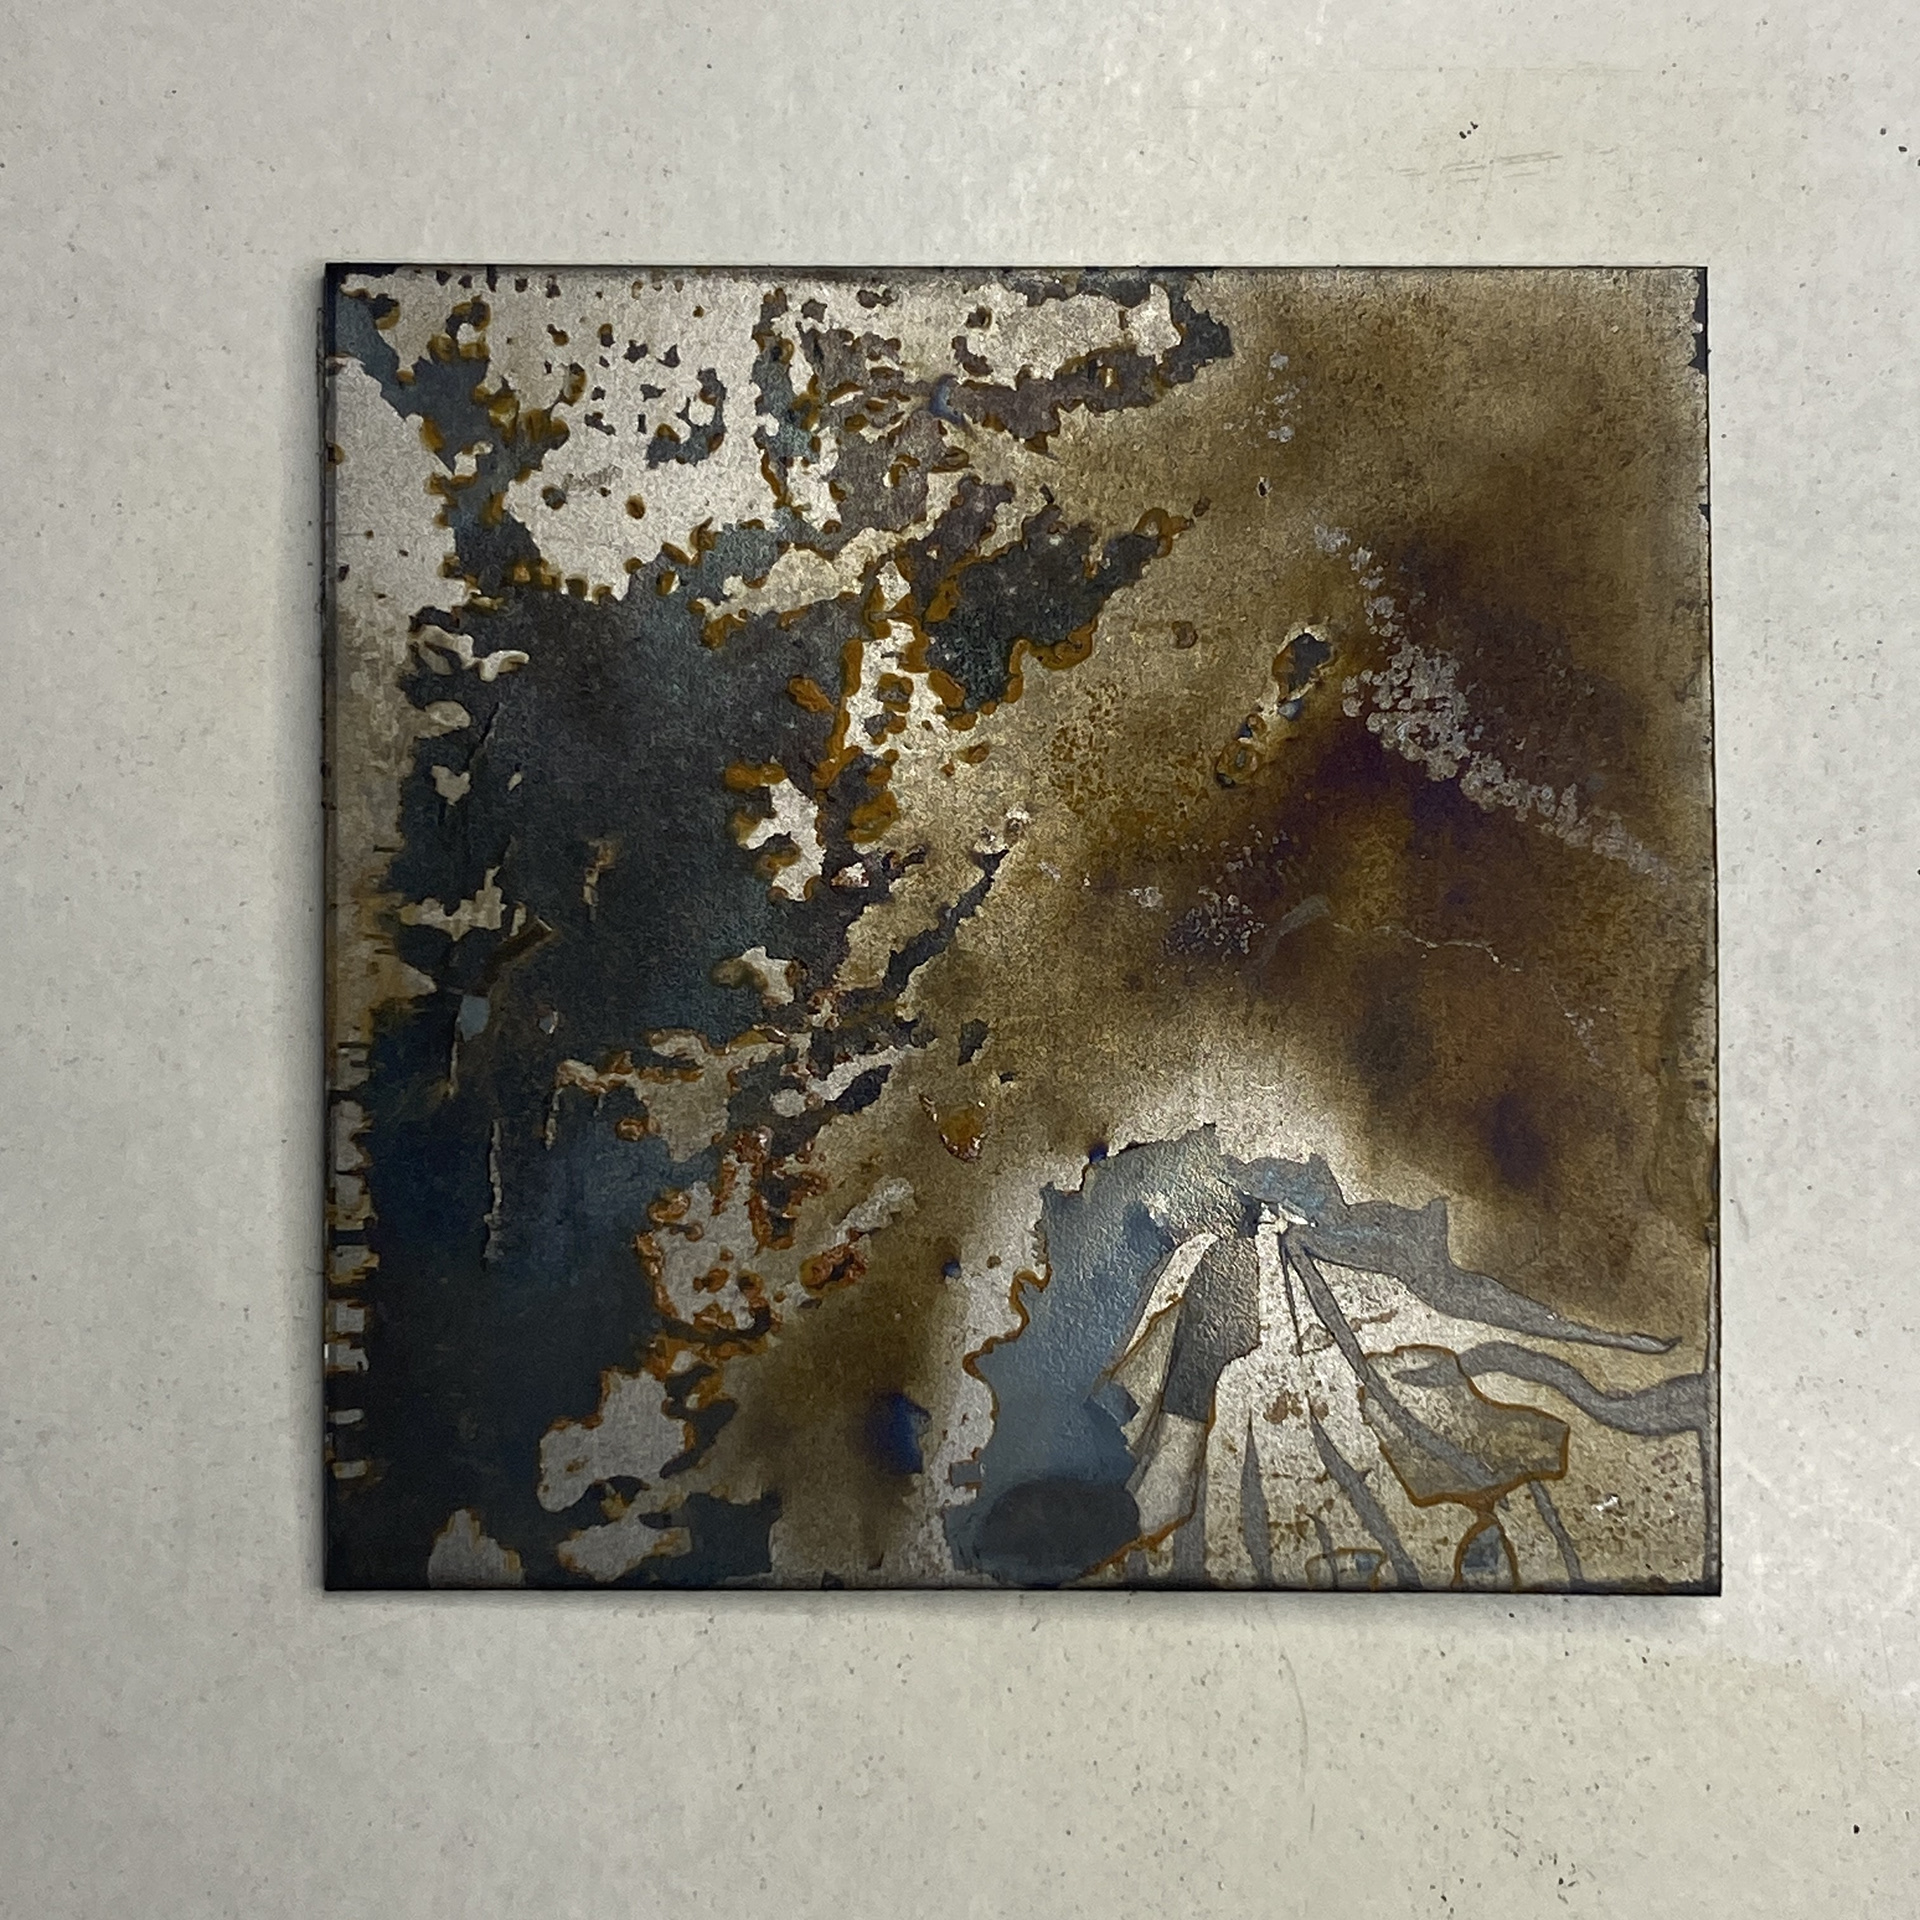
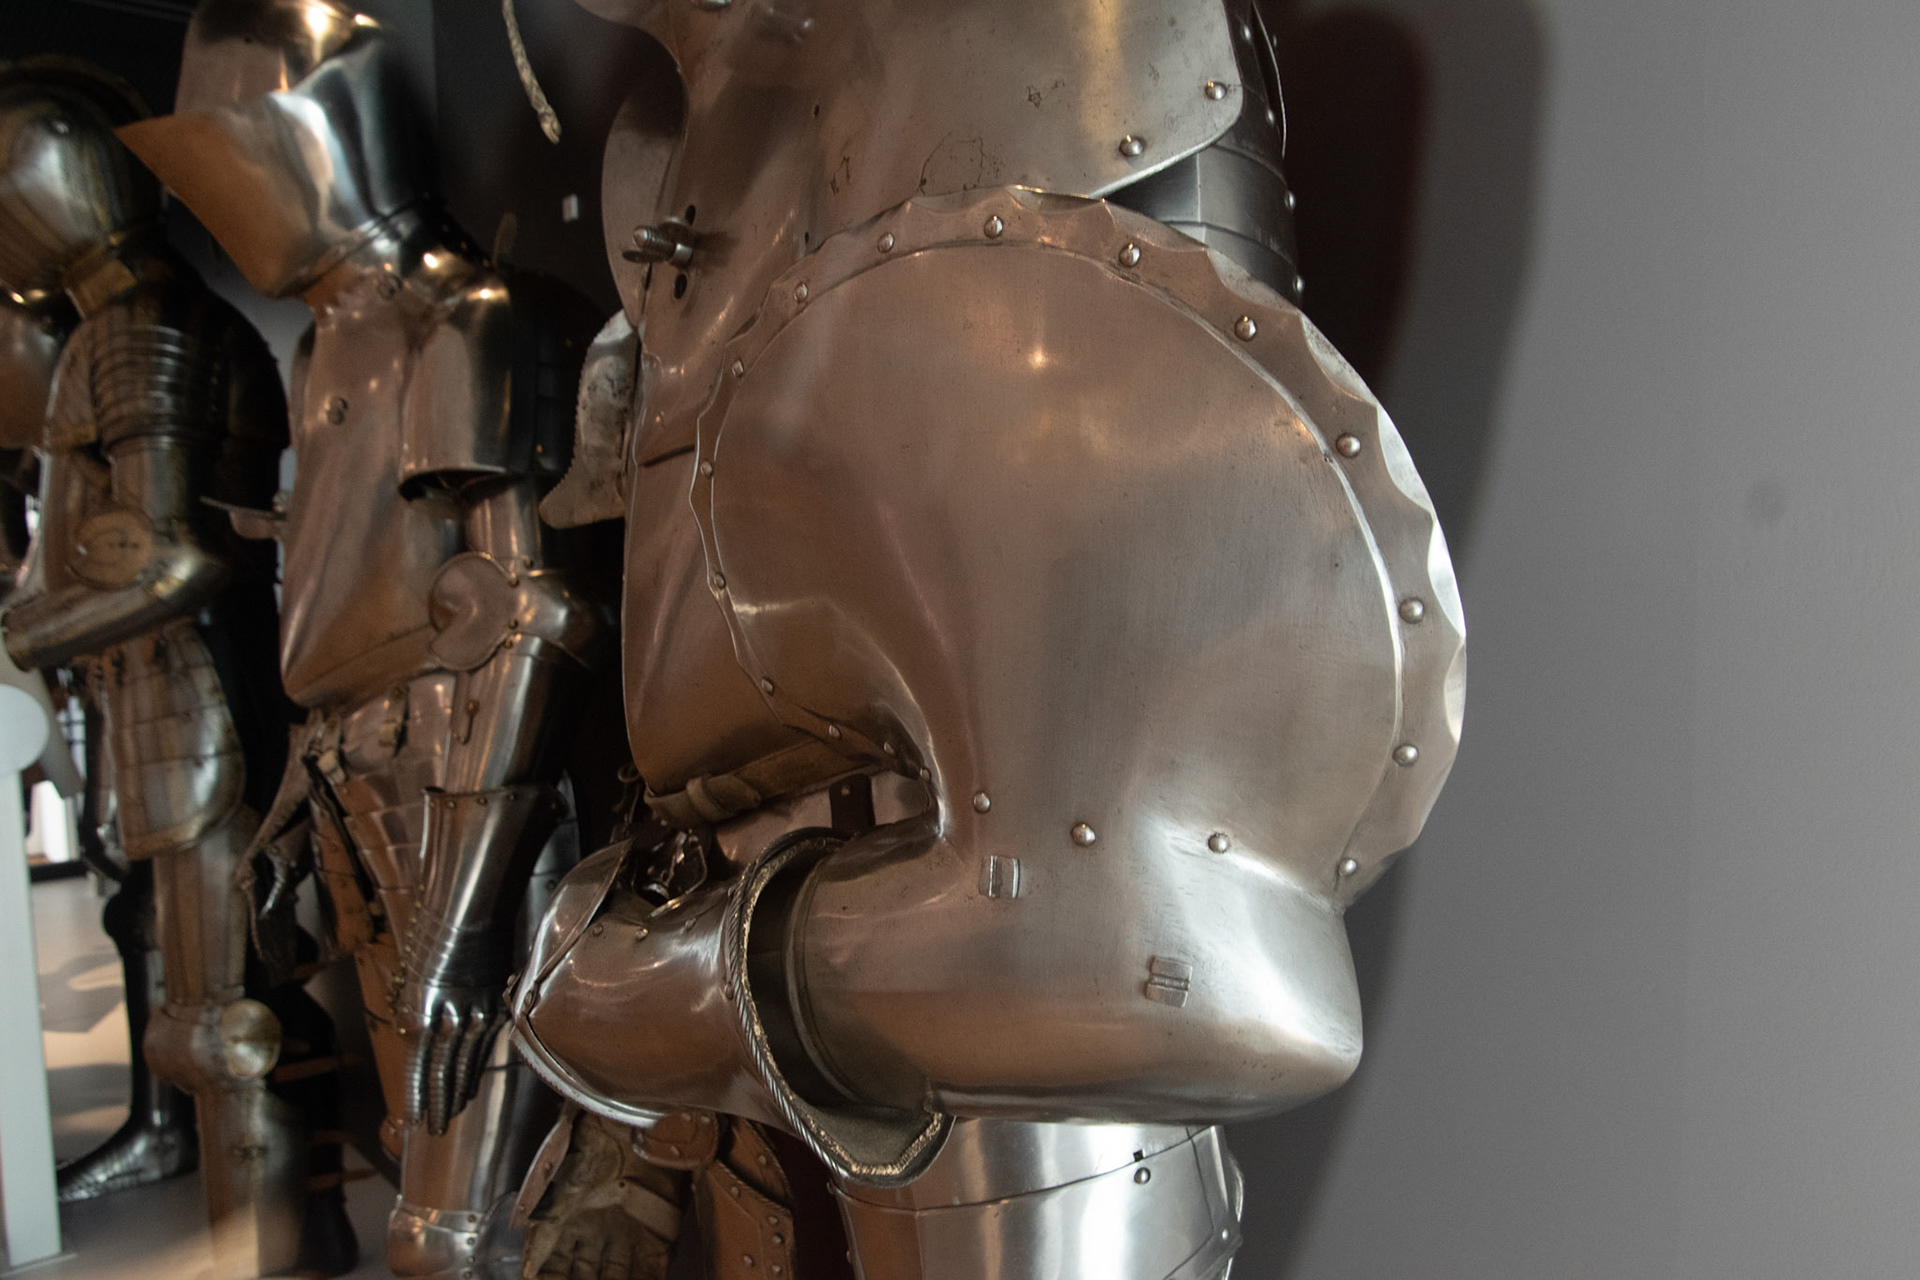
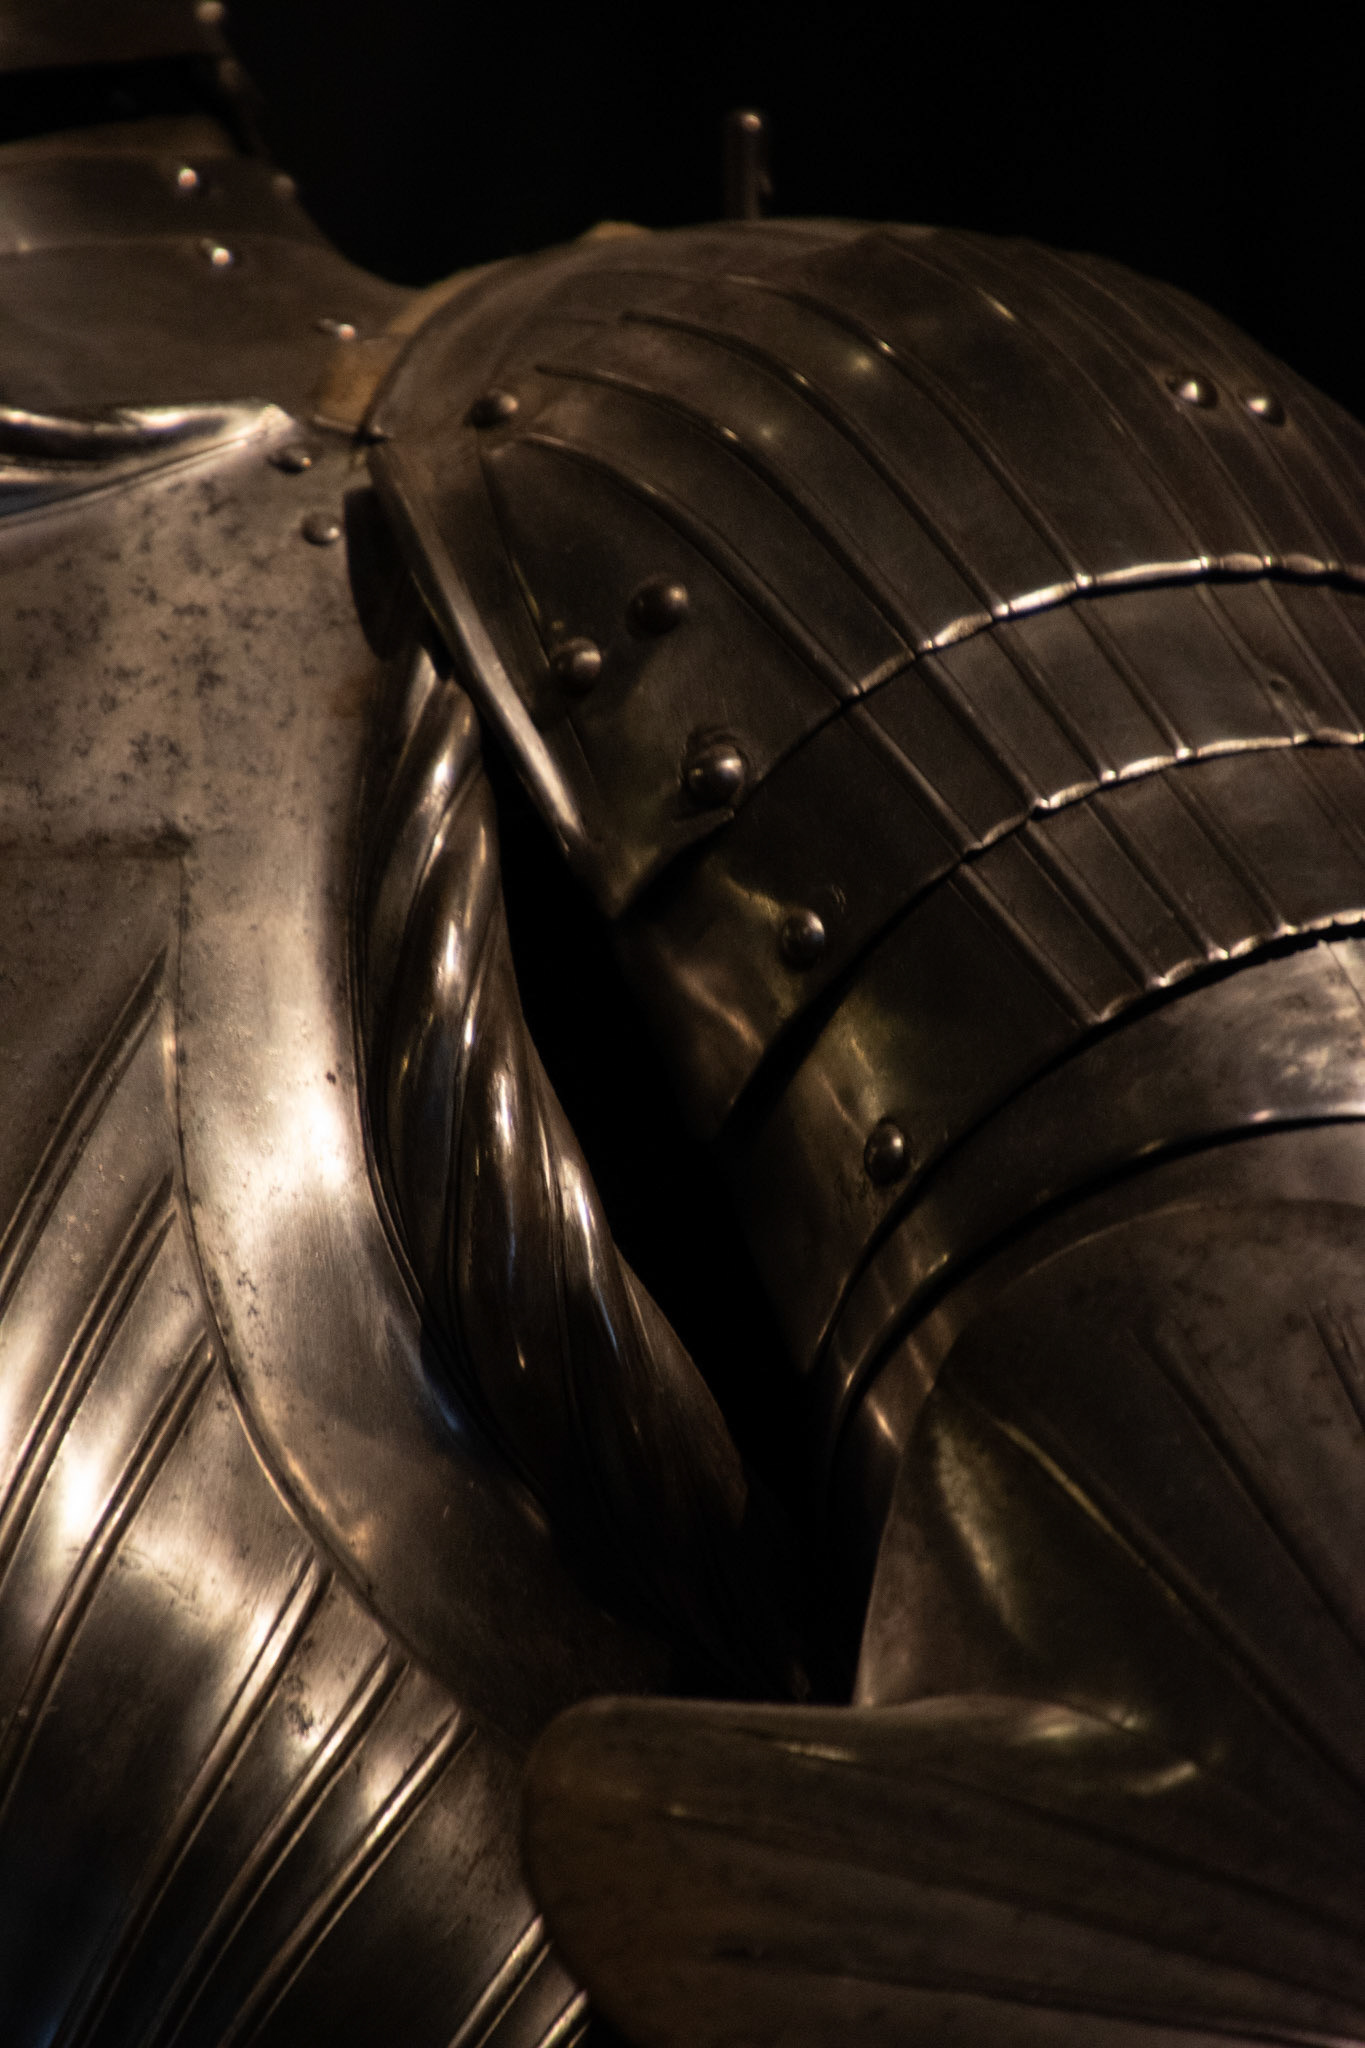
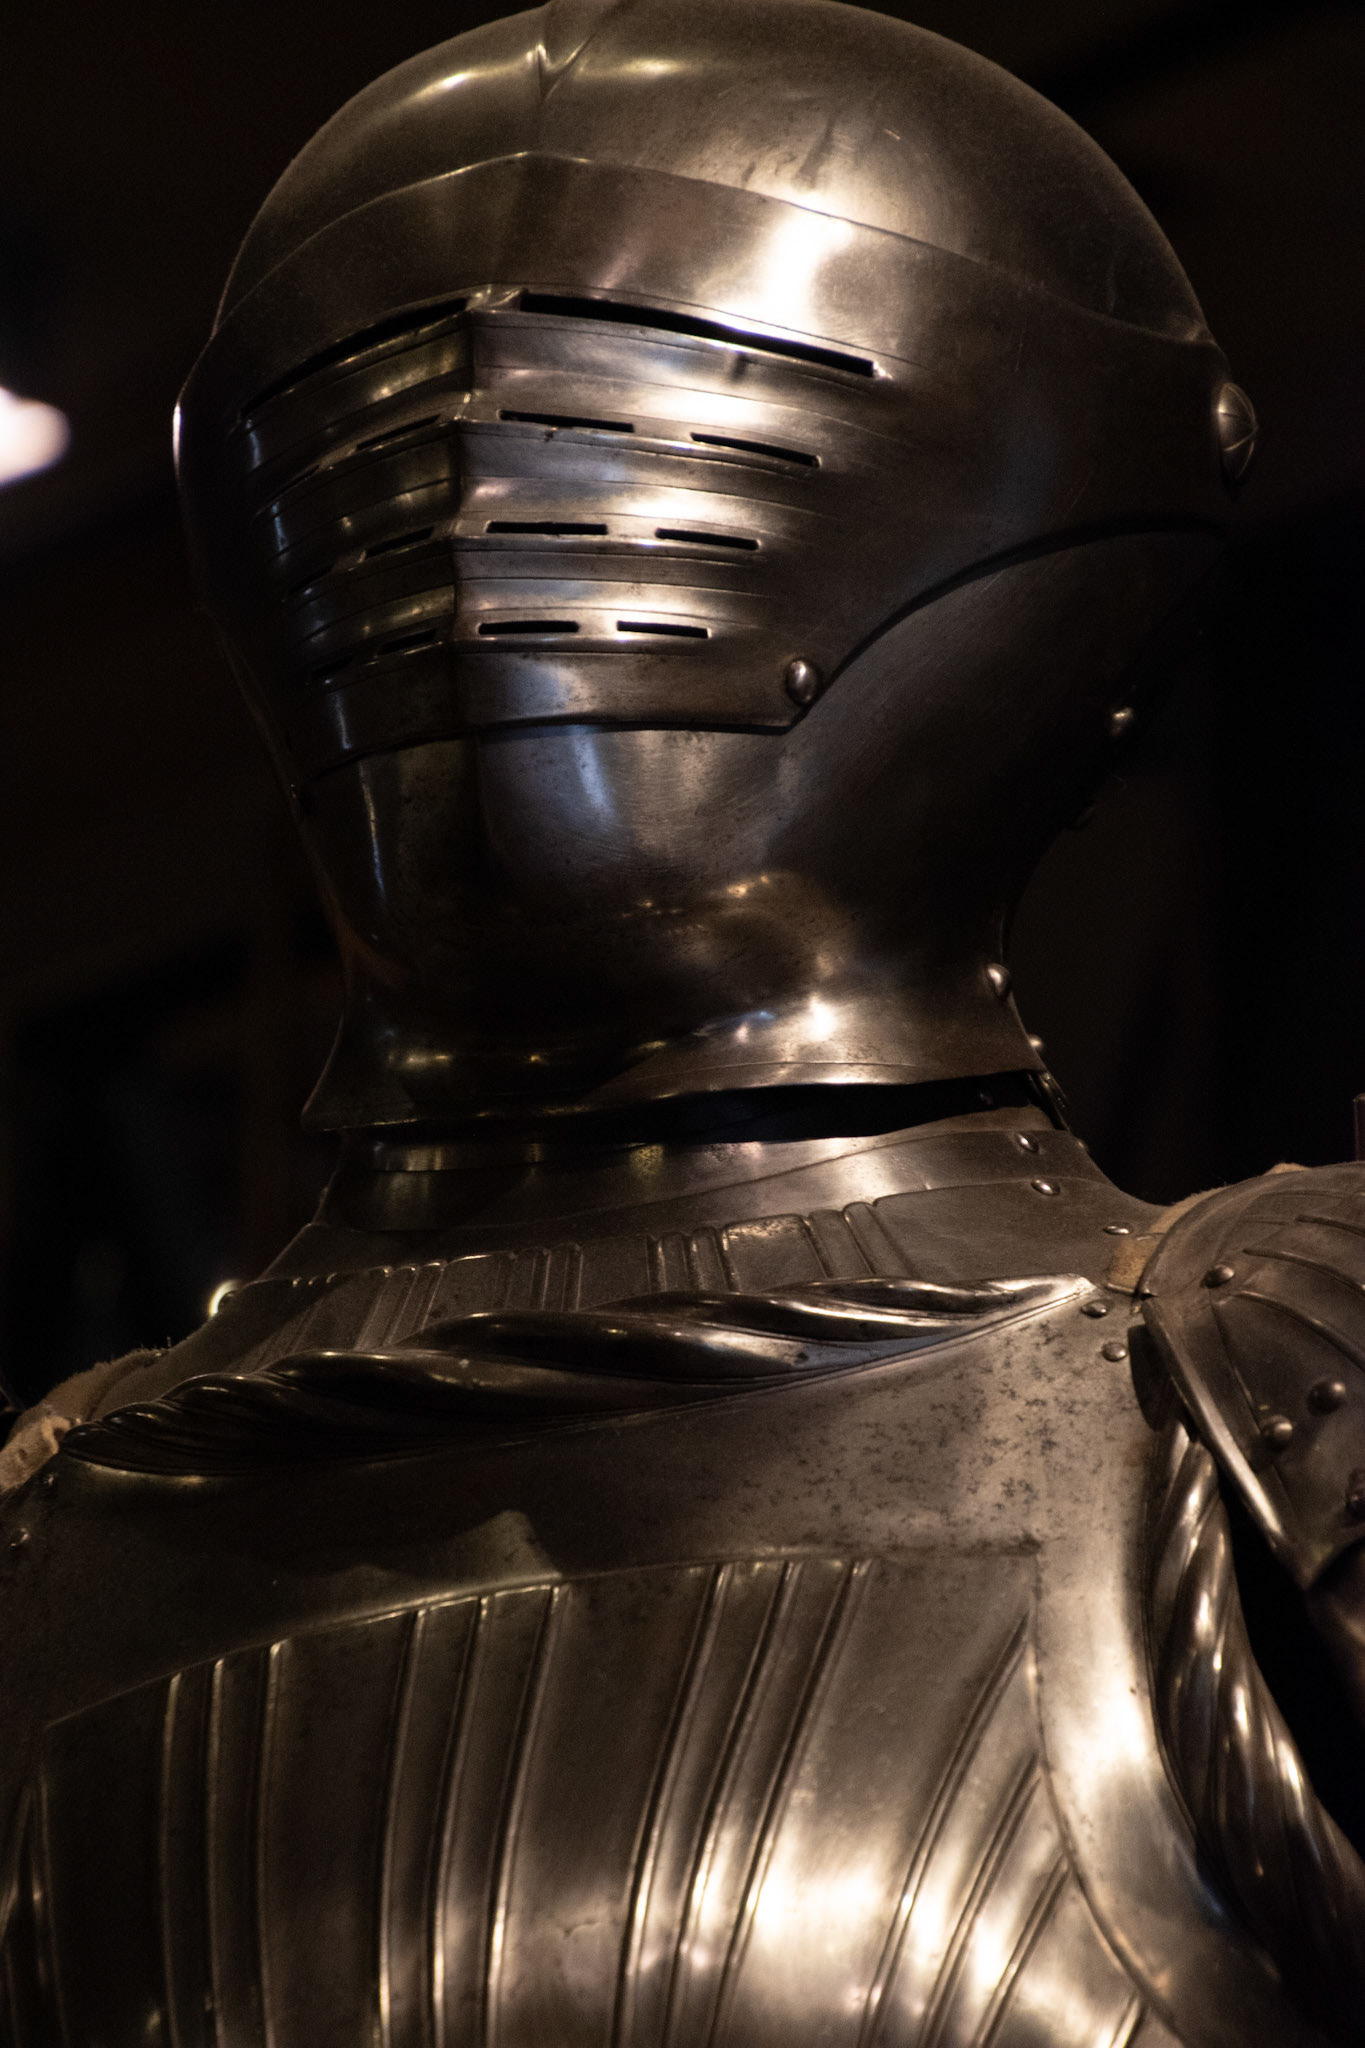
Testing forge Patina
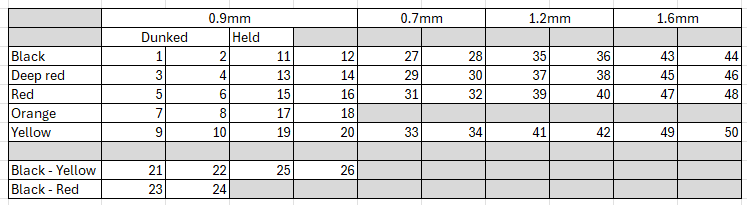
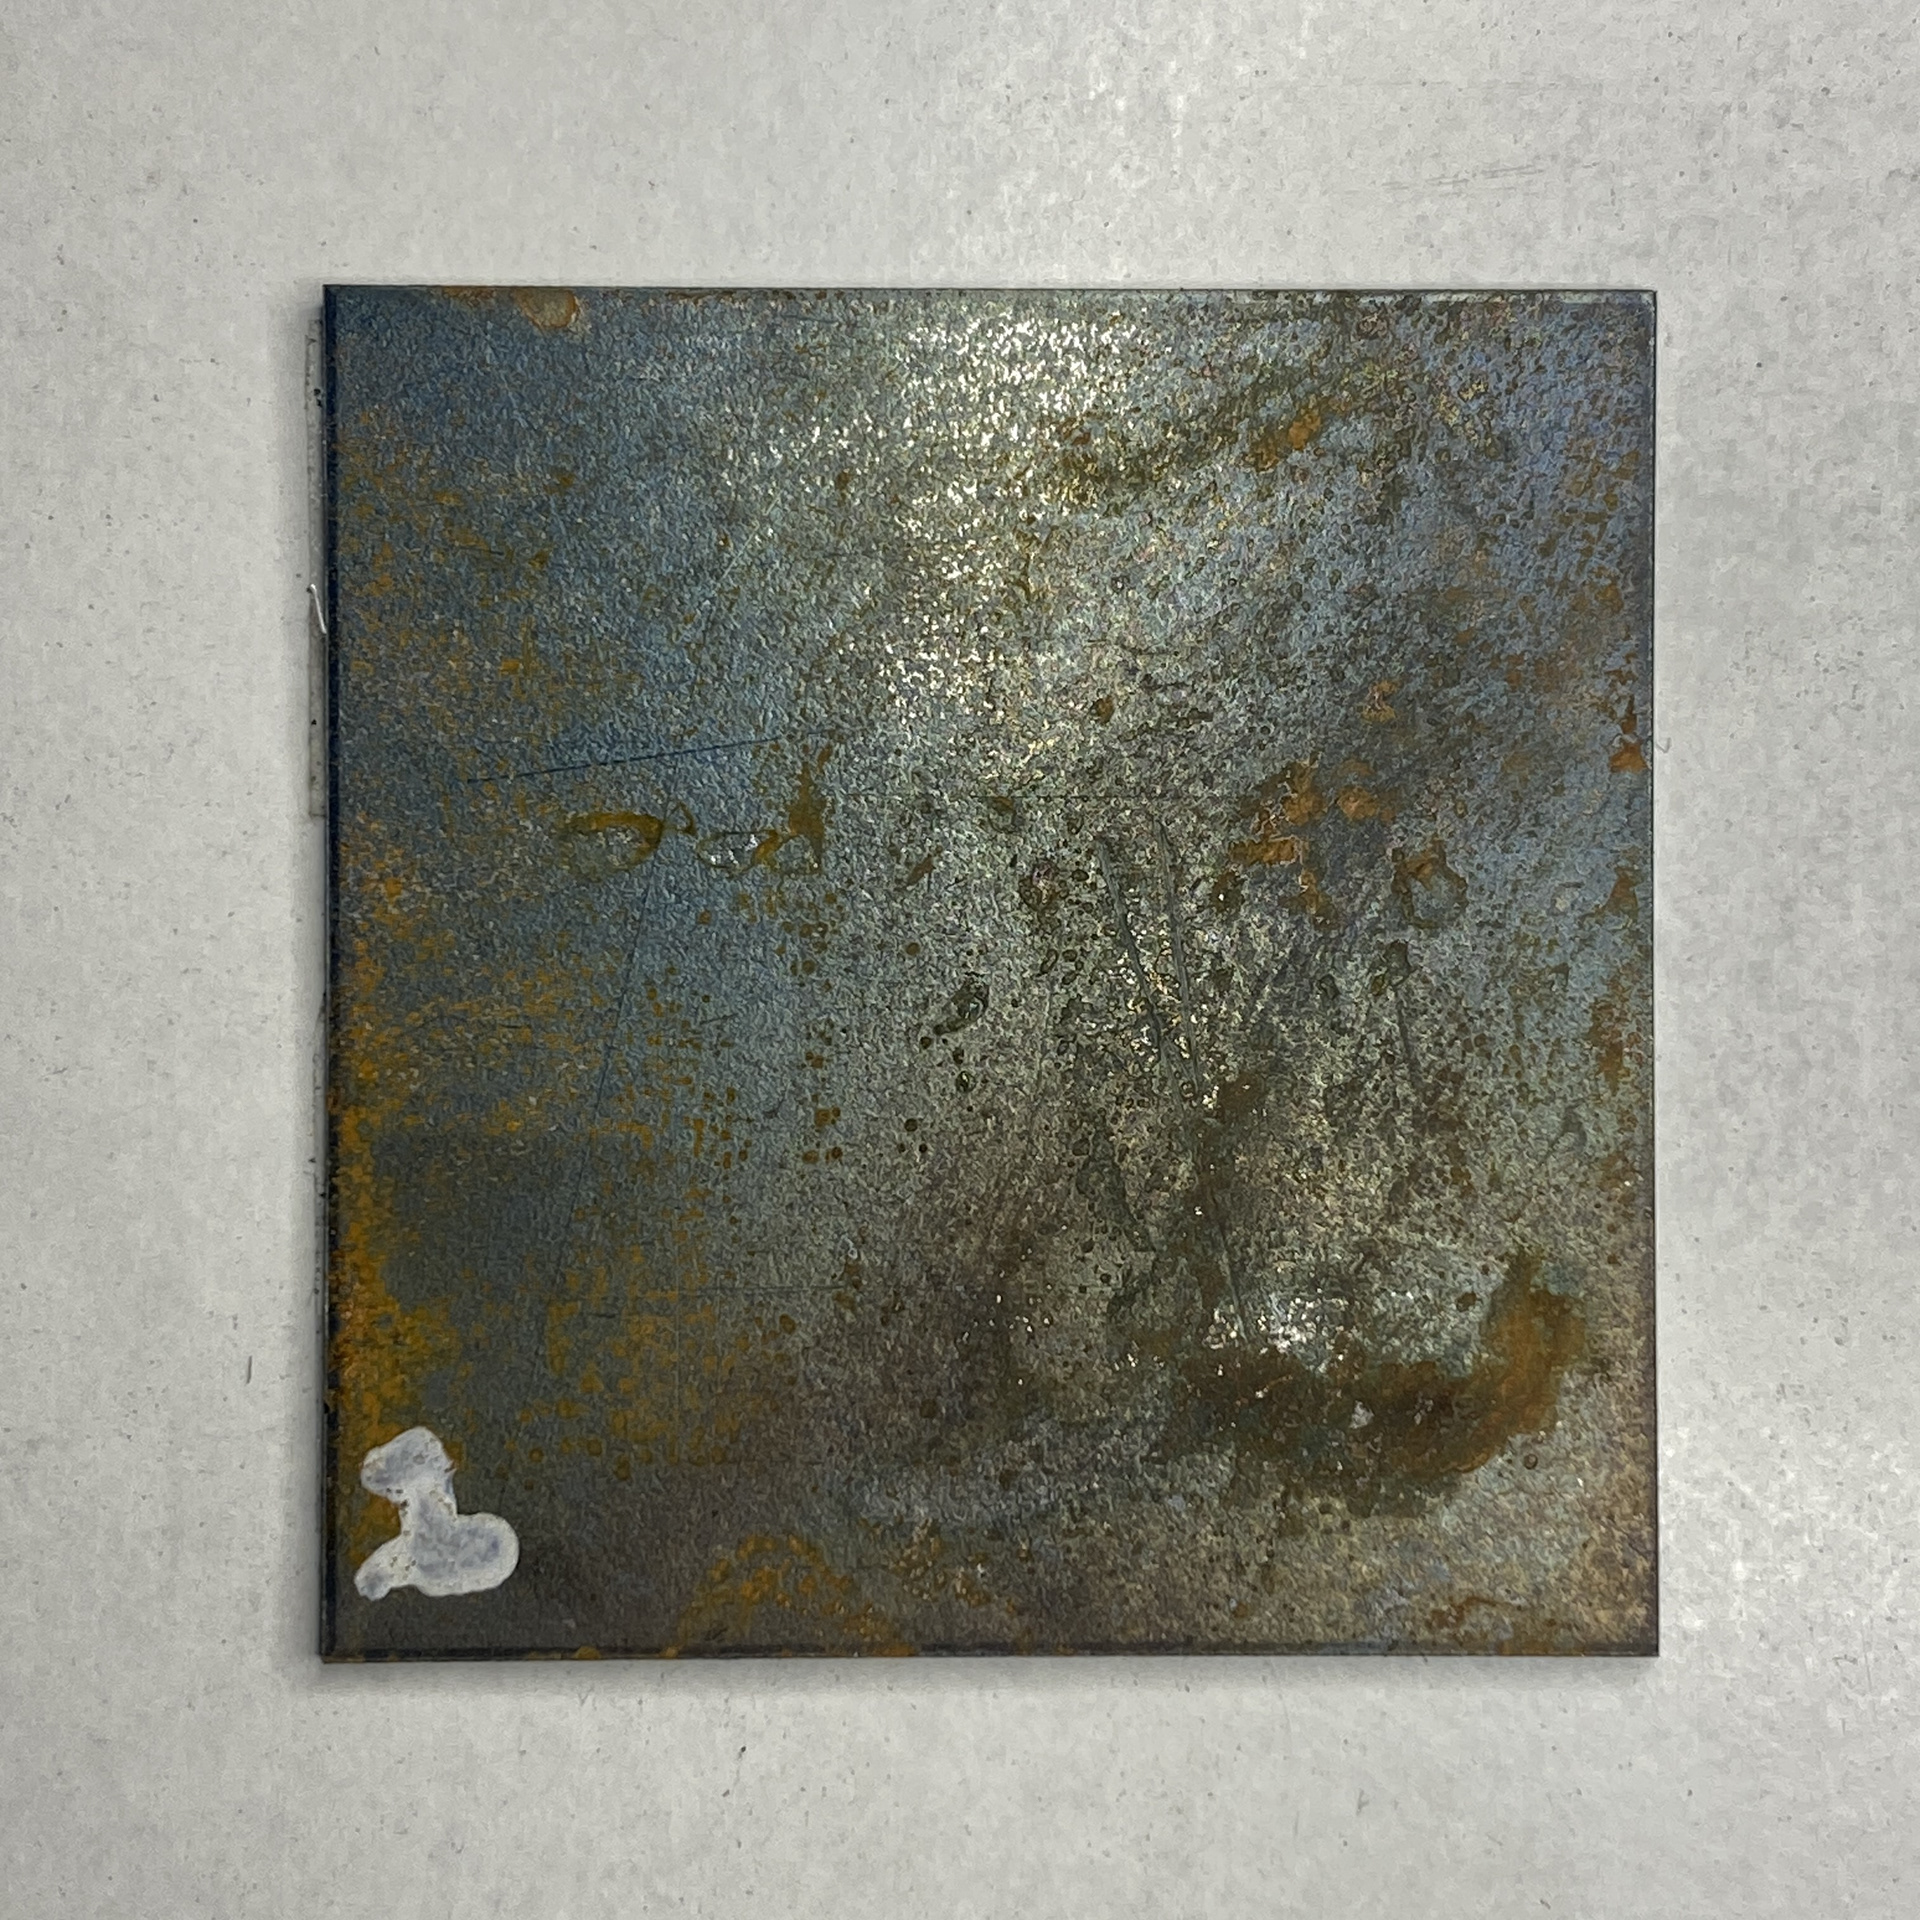
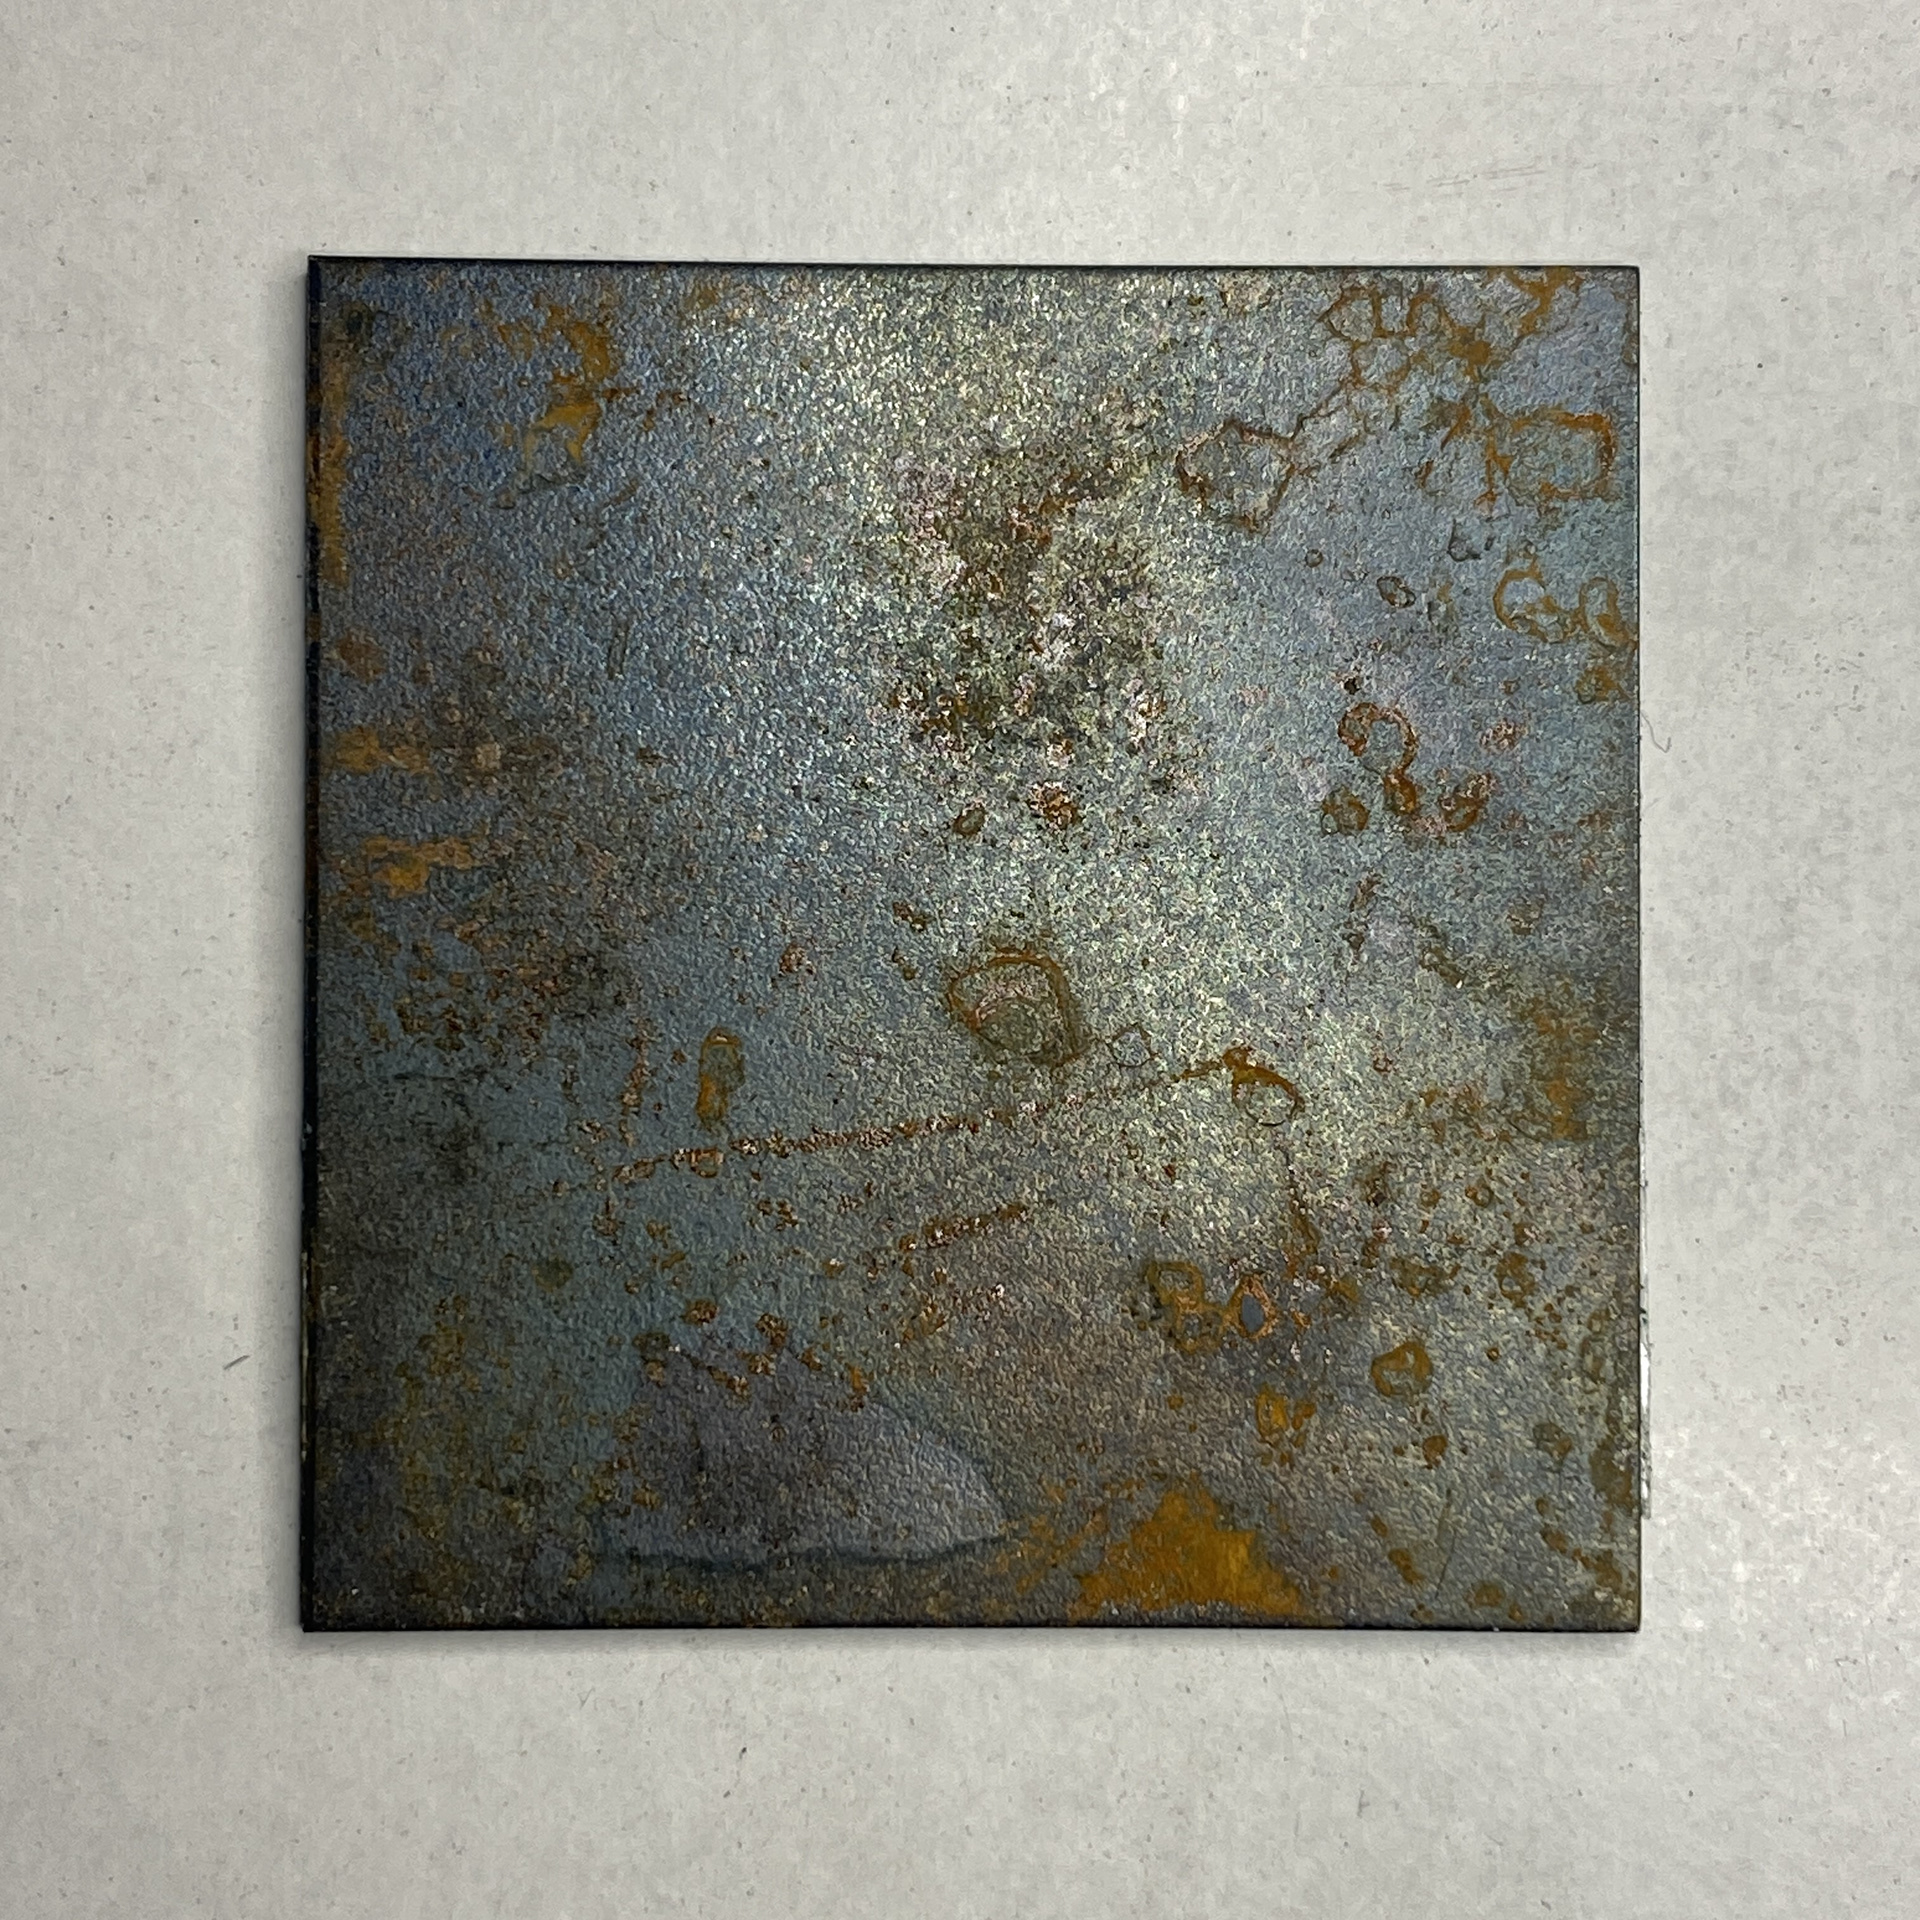
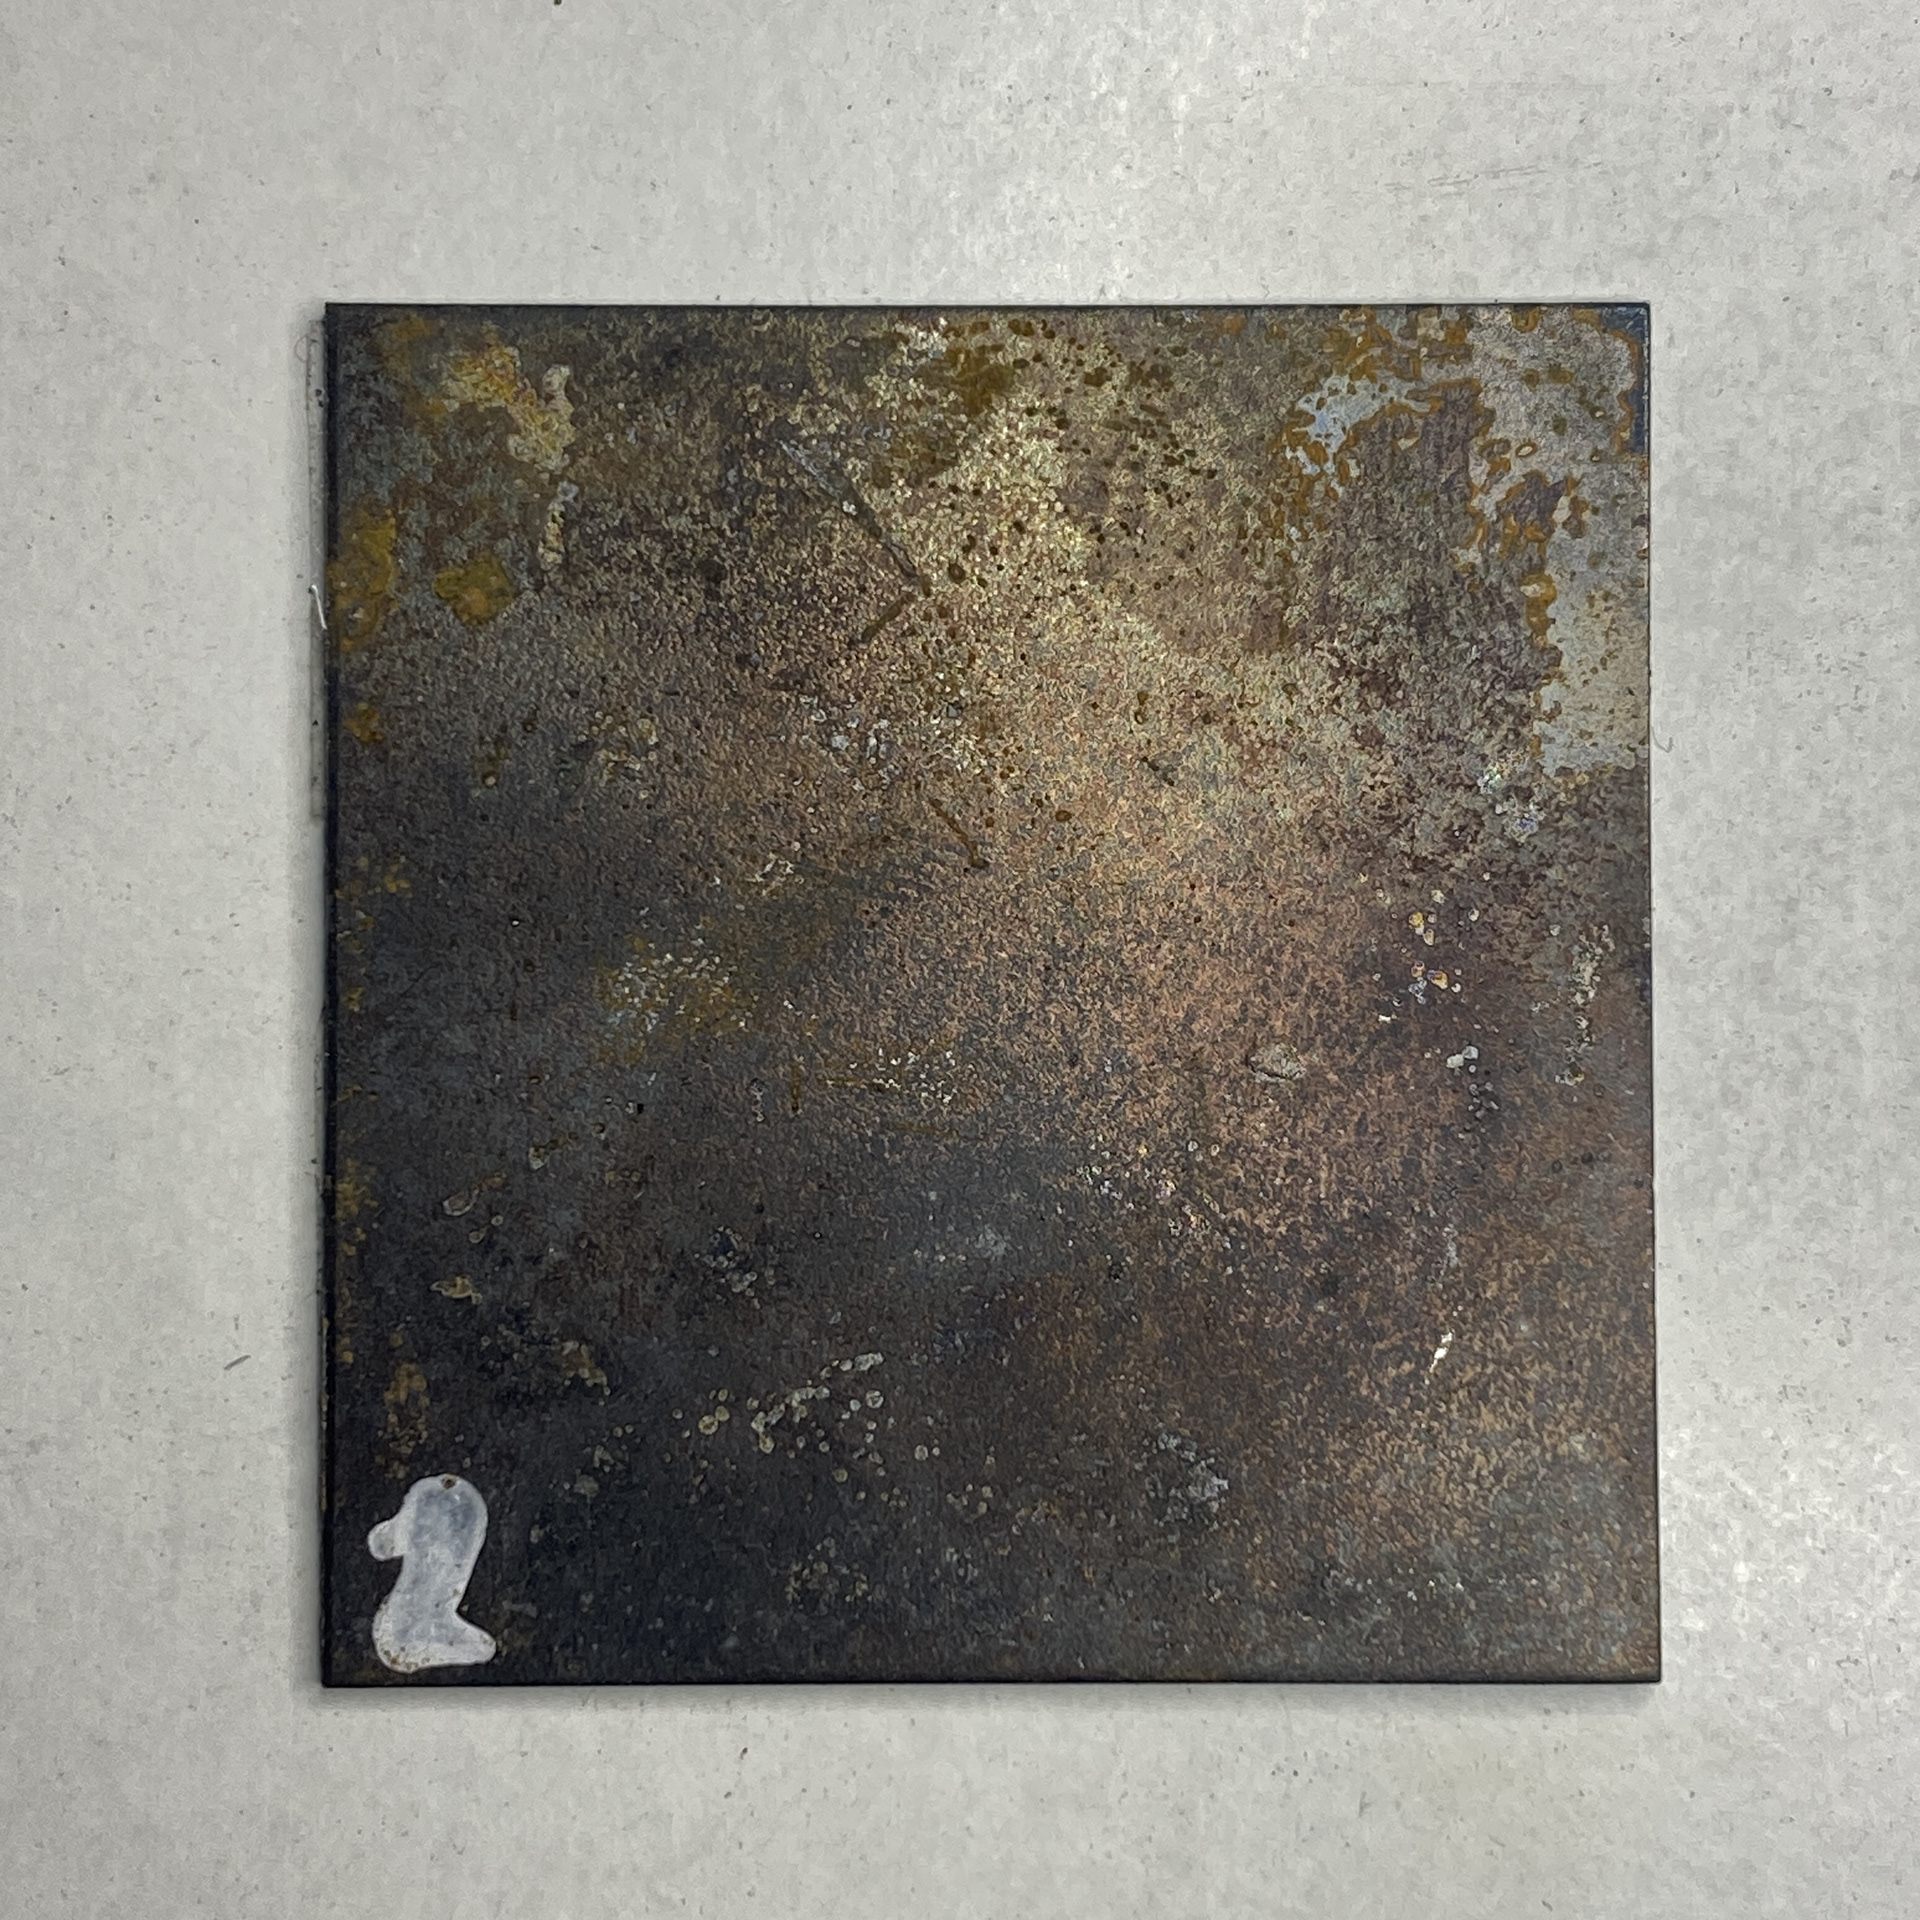
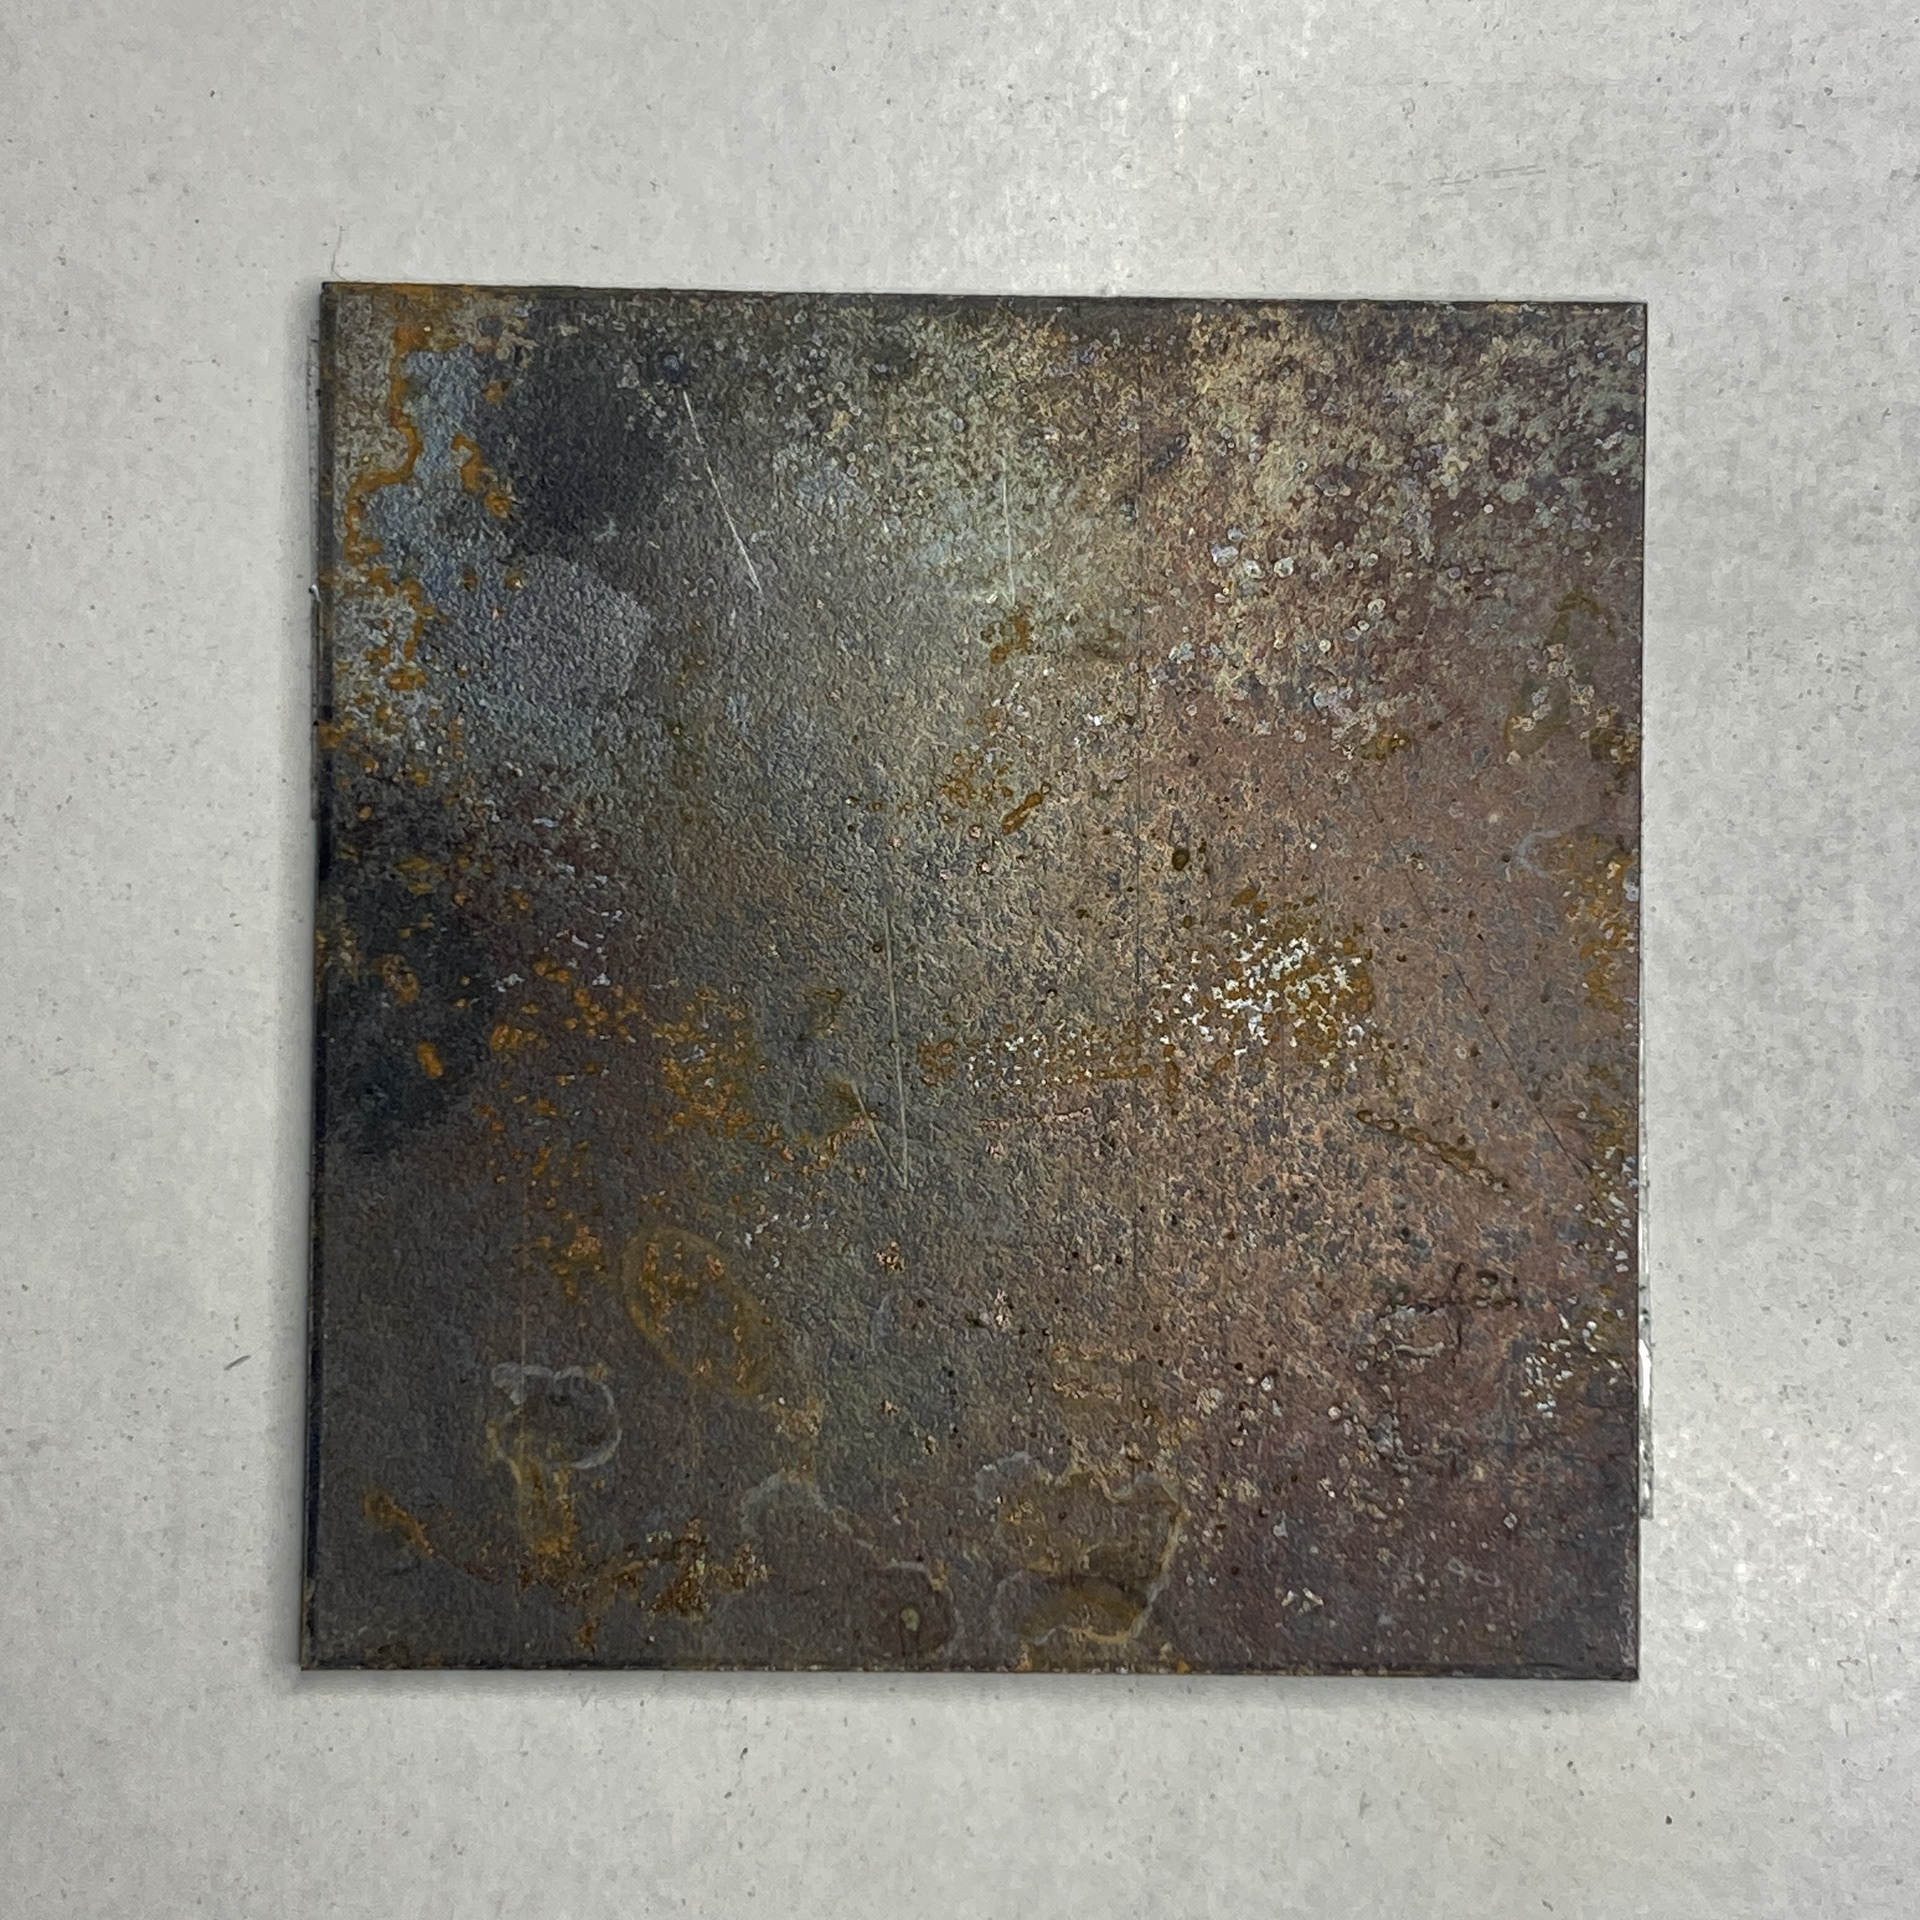


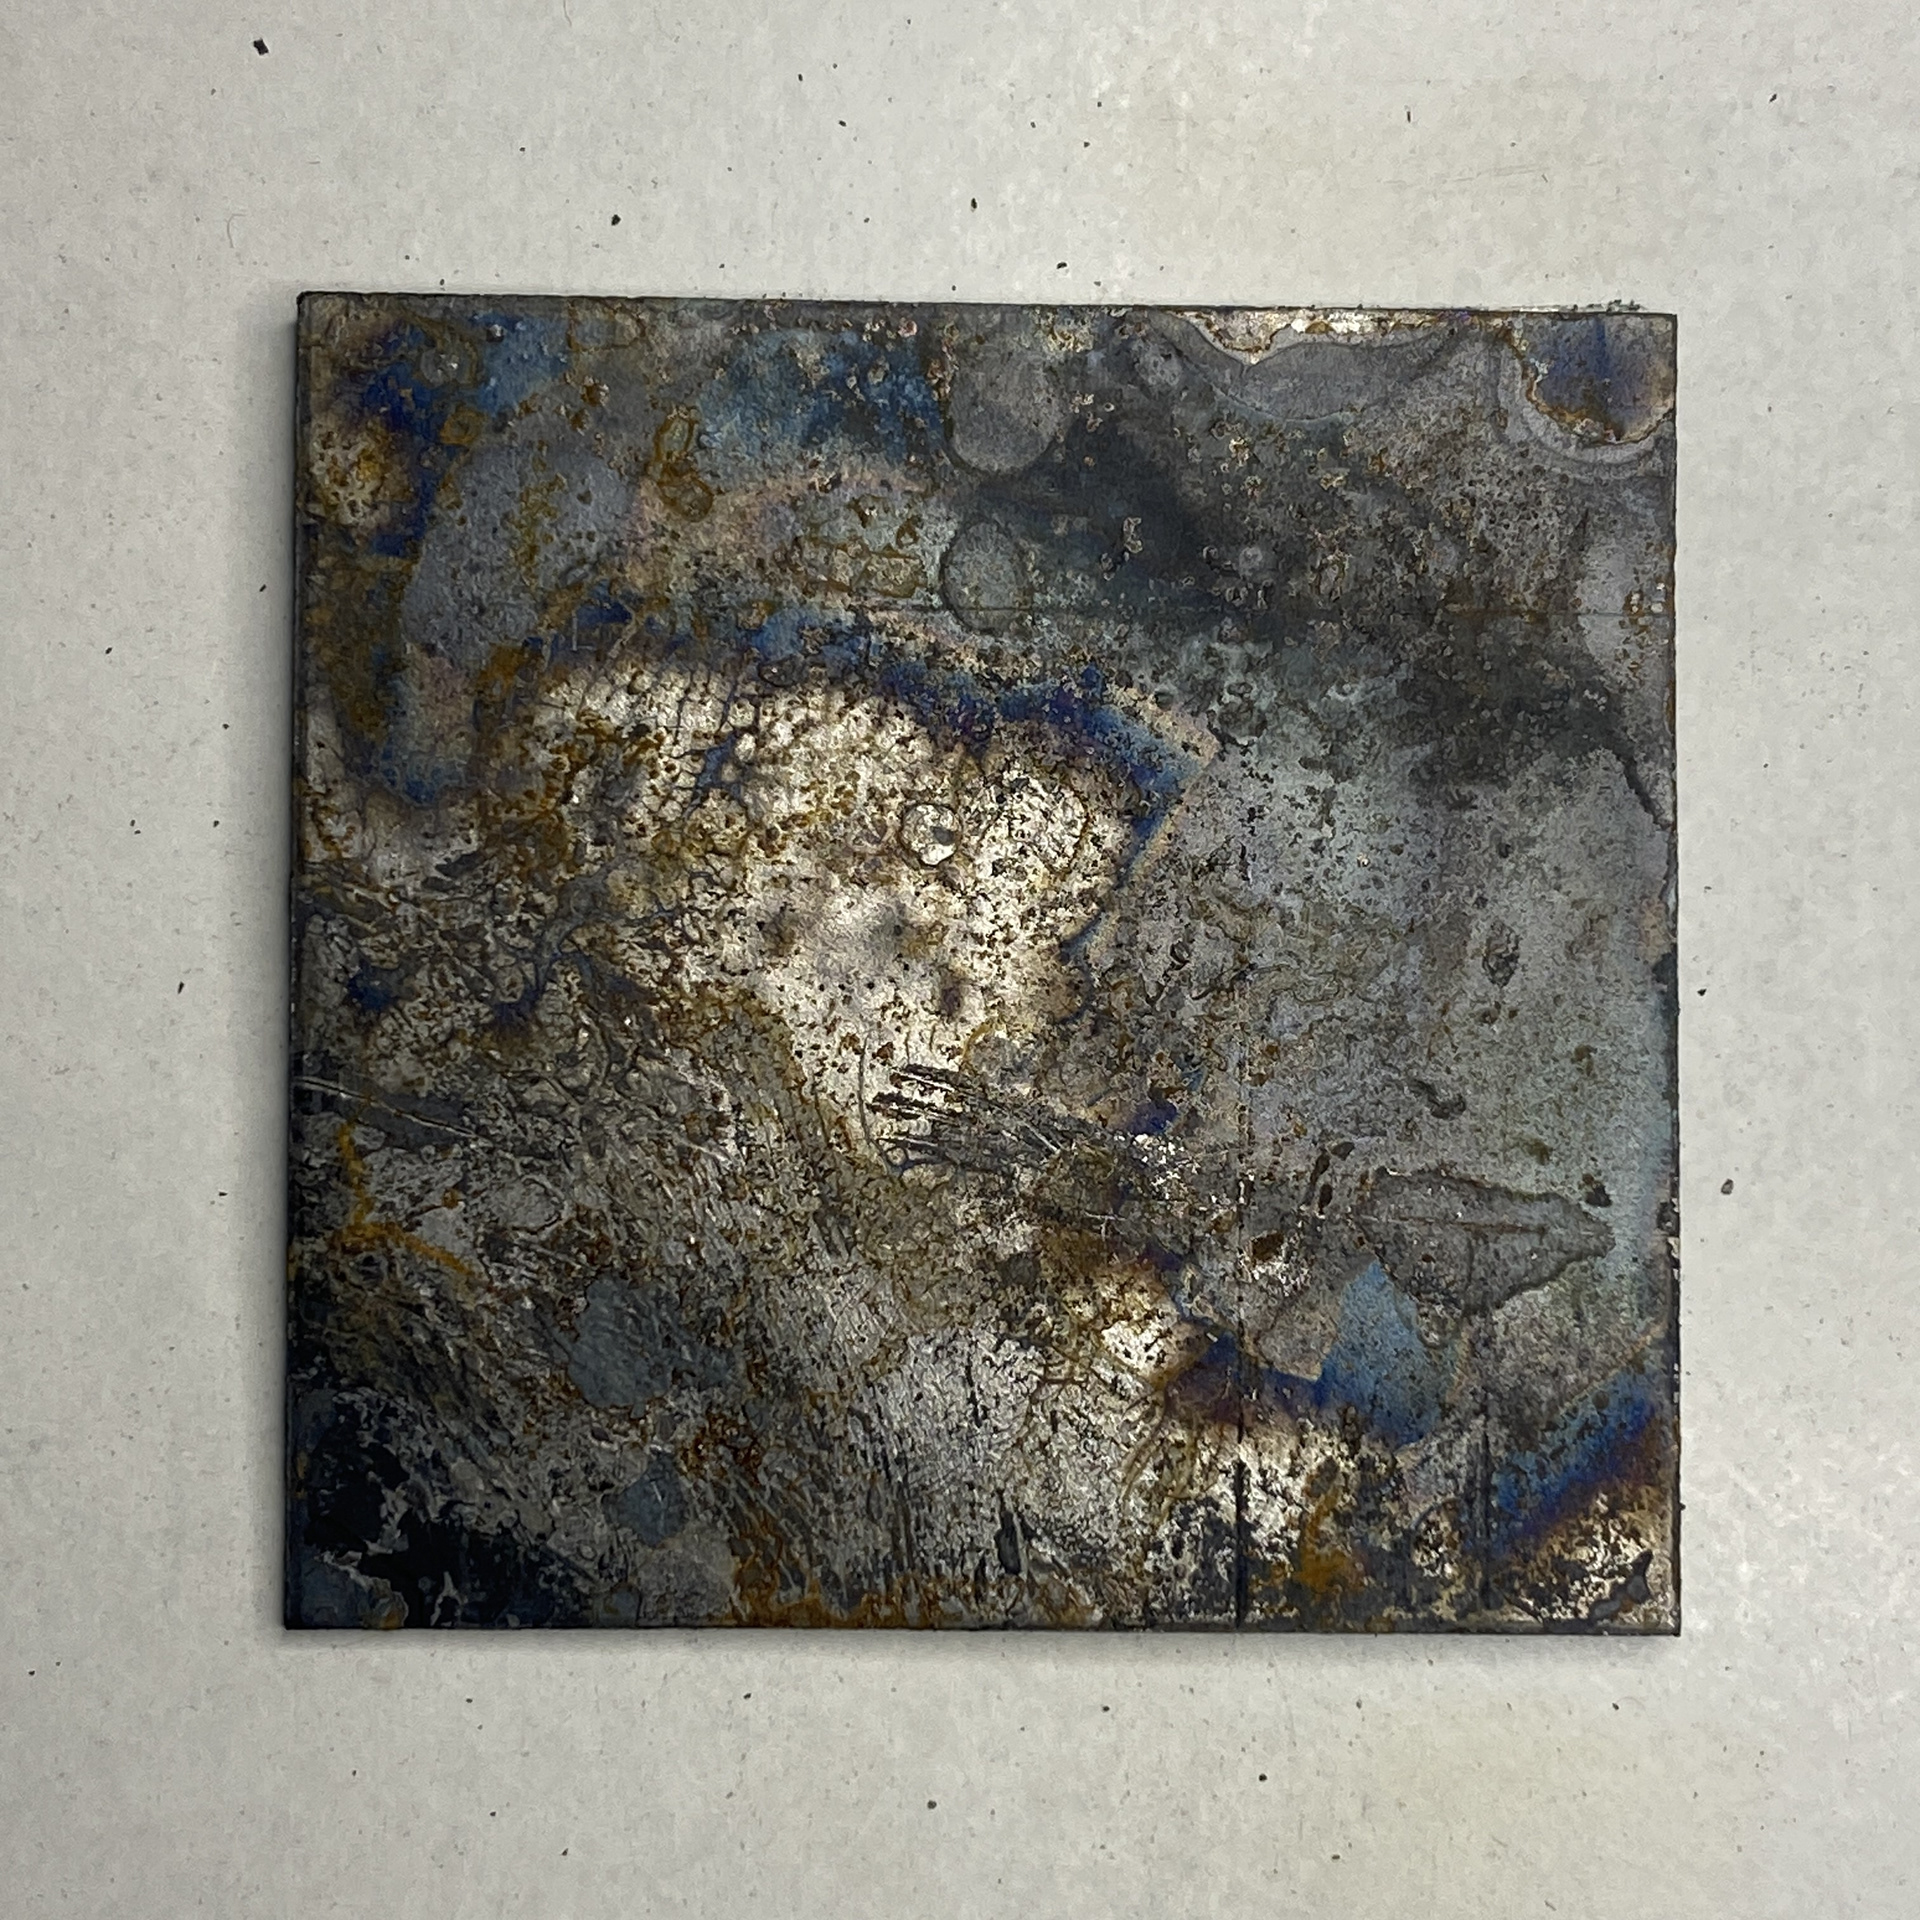
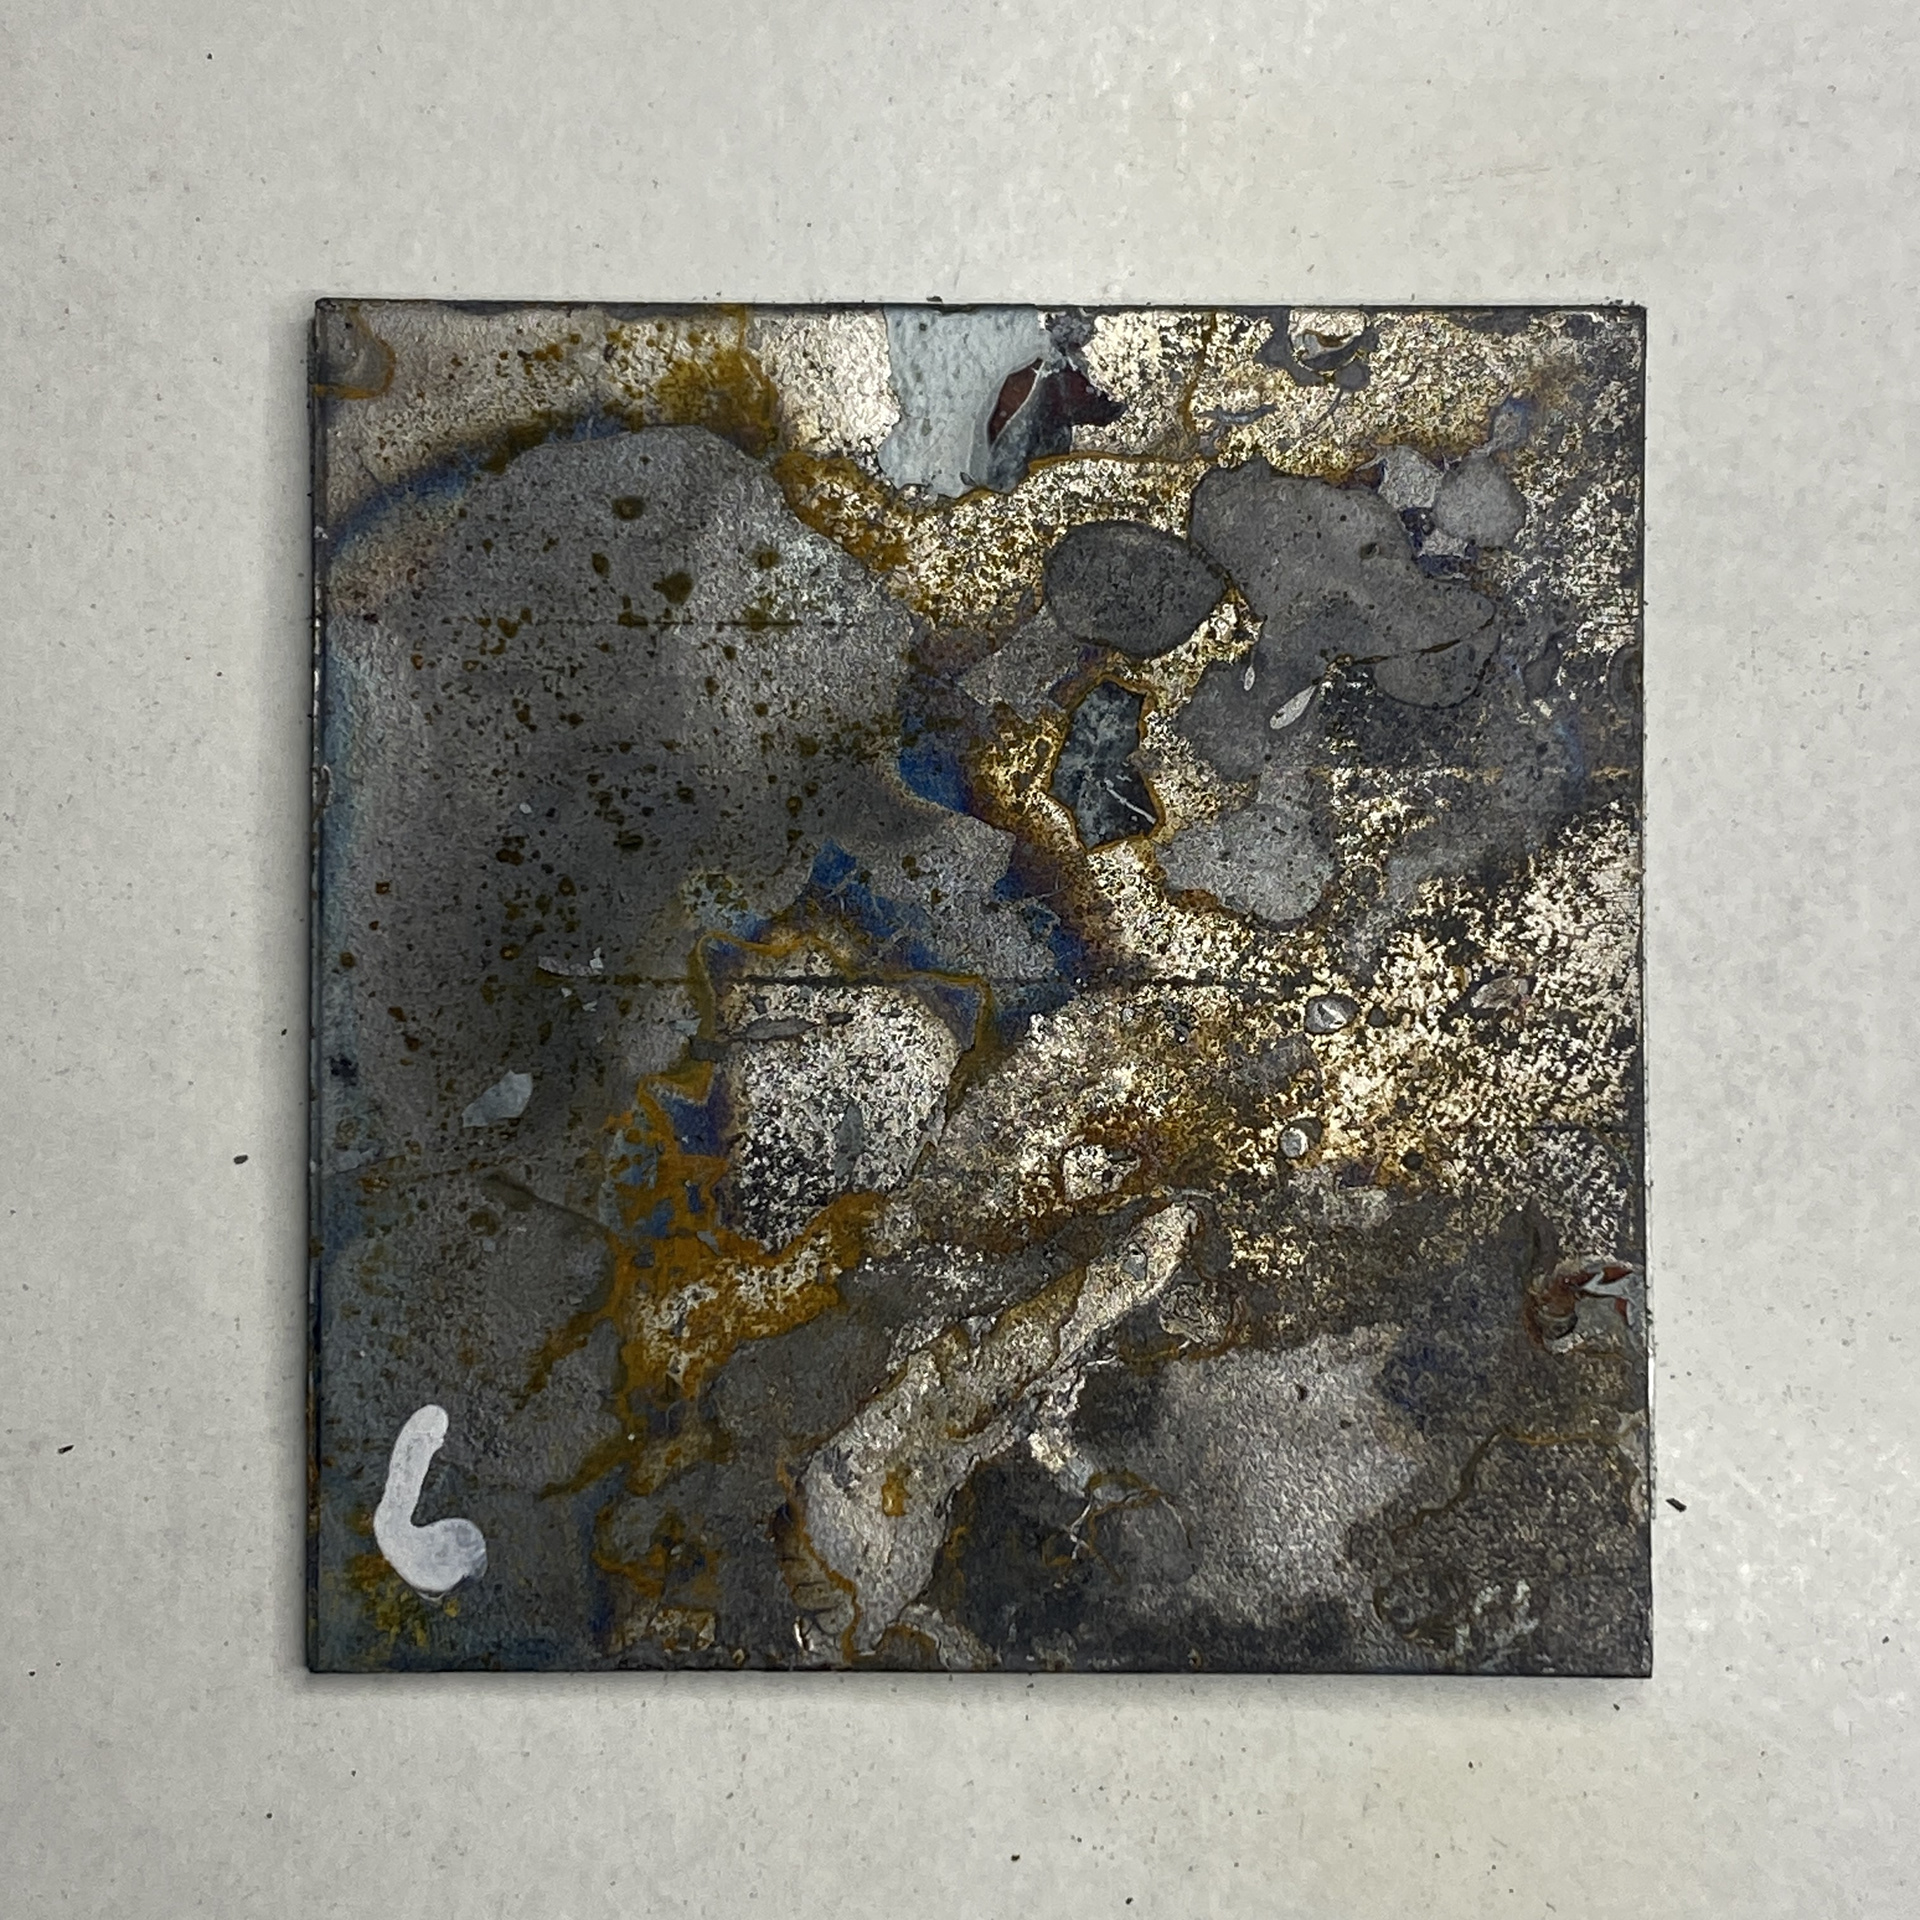

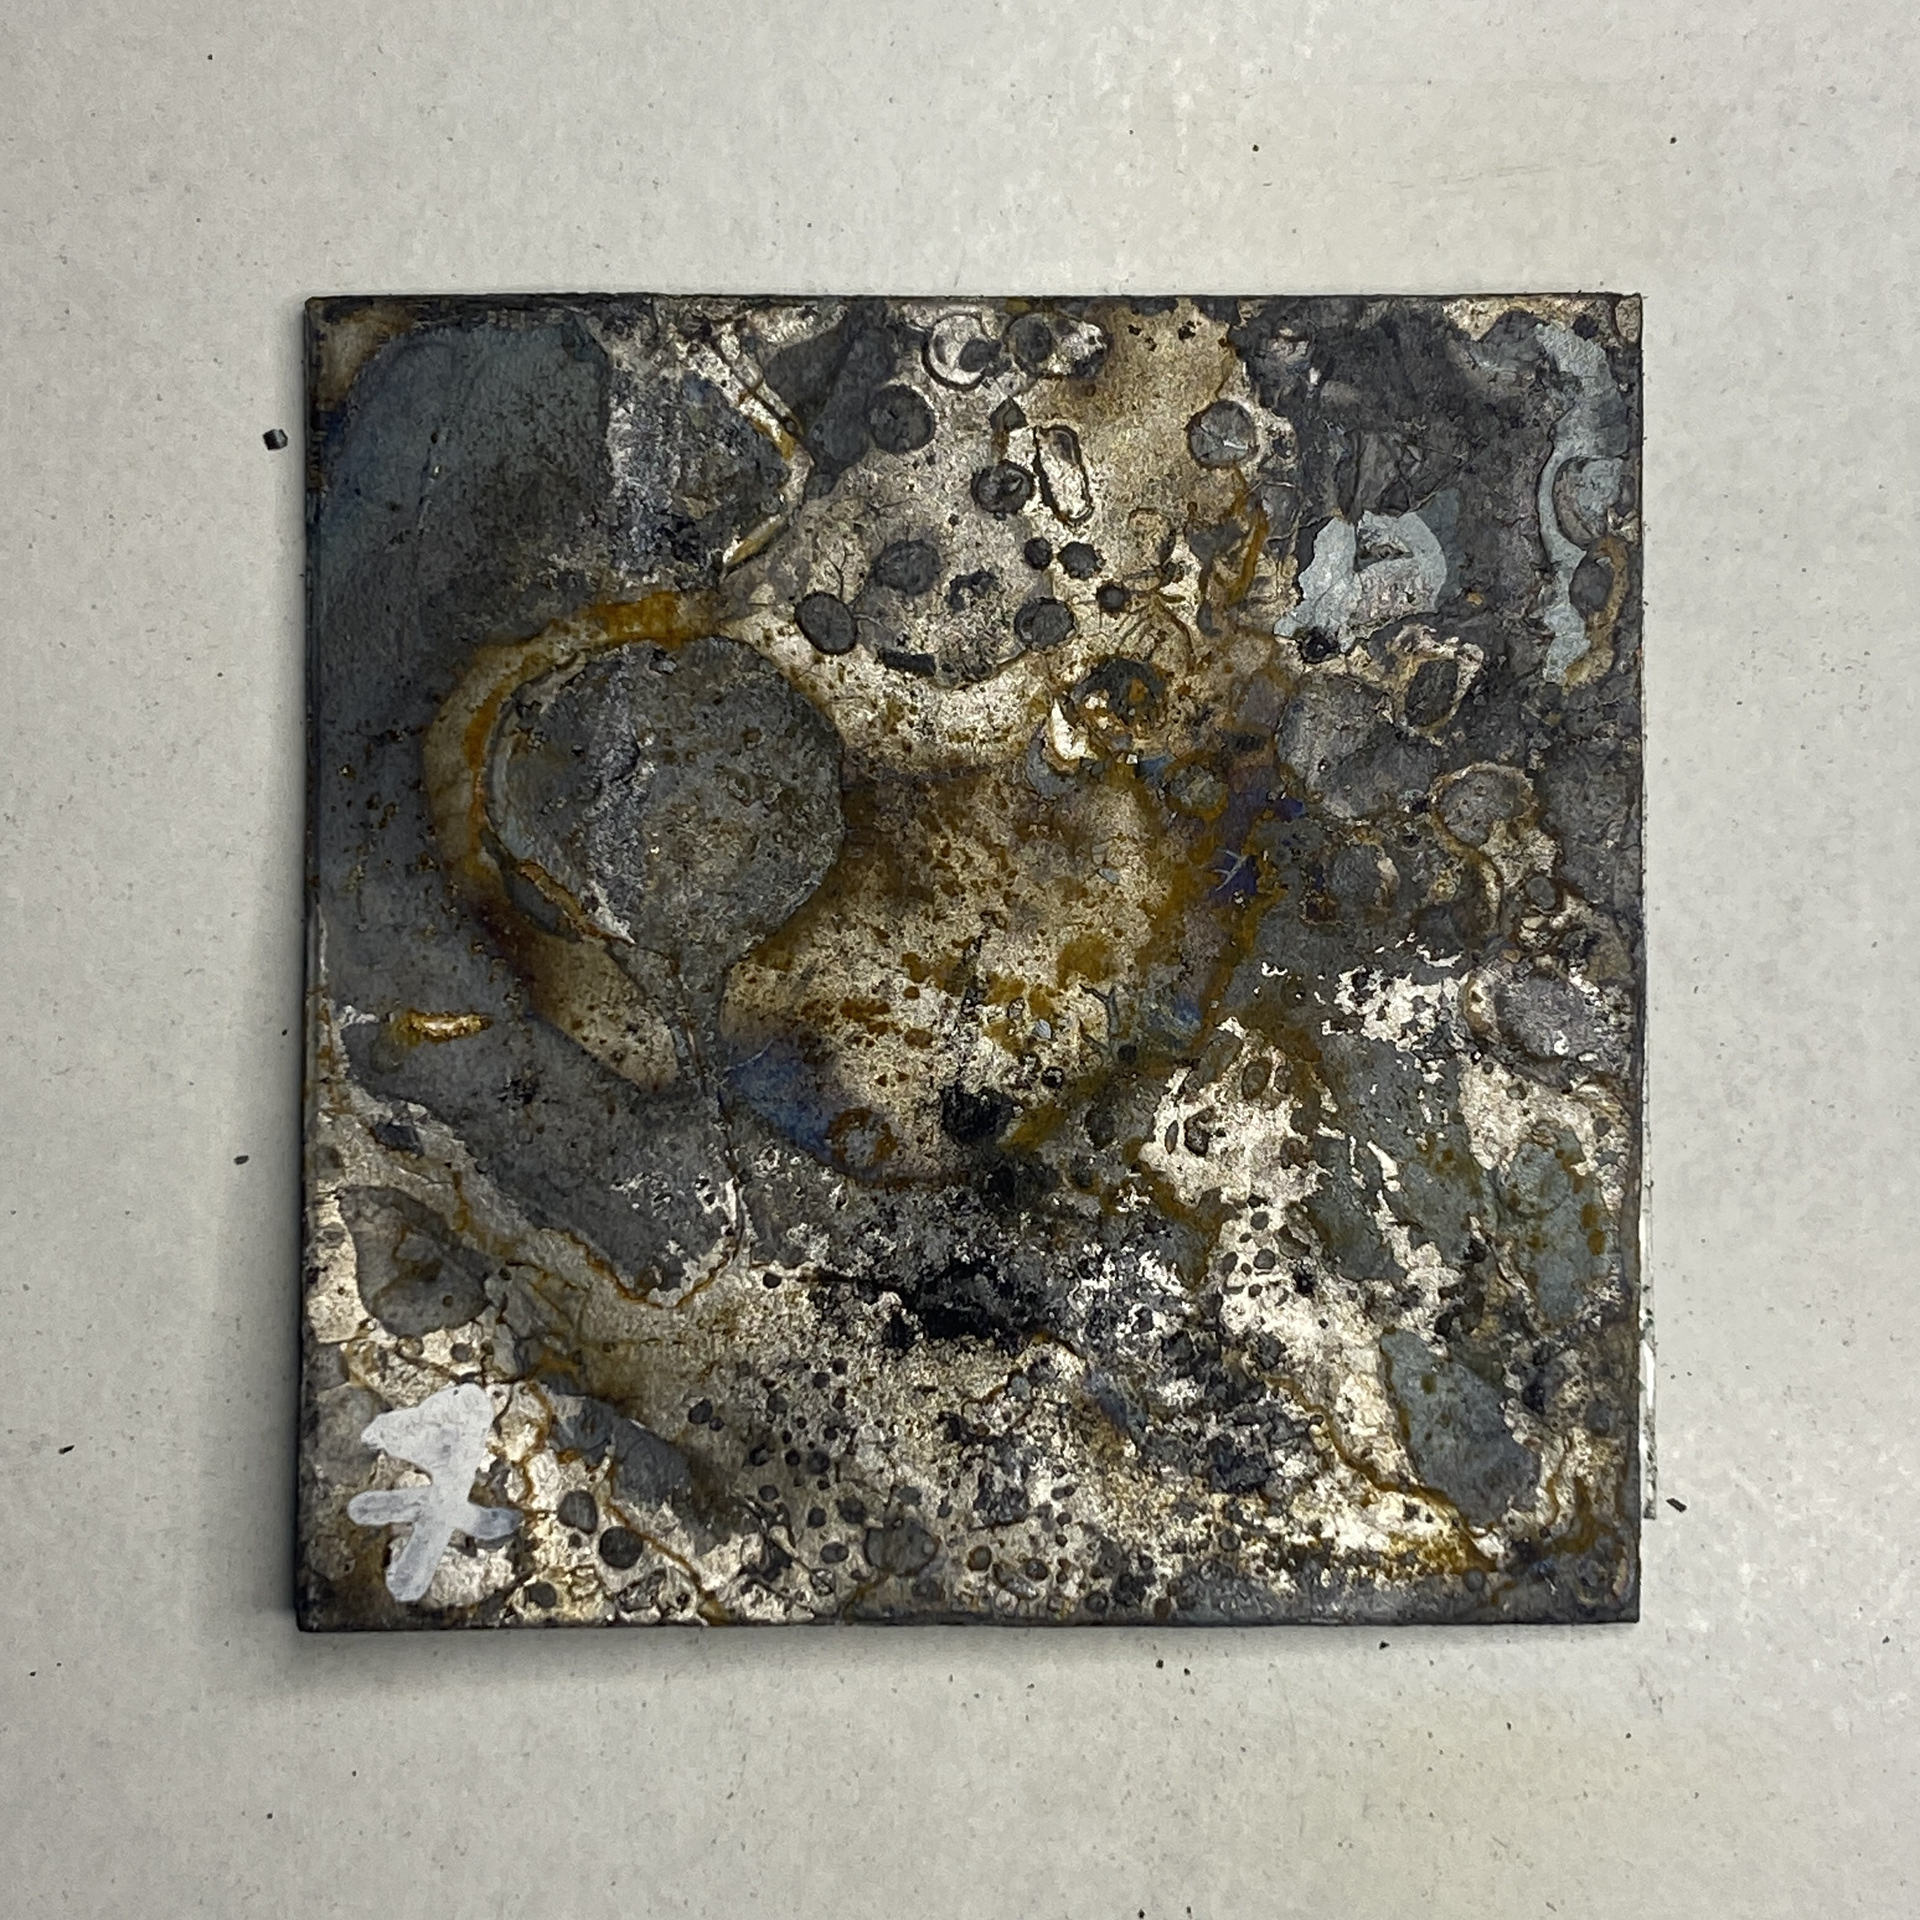
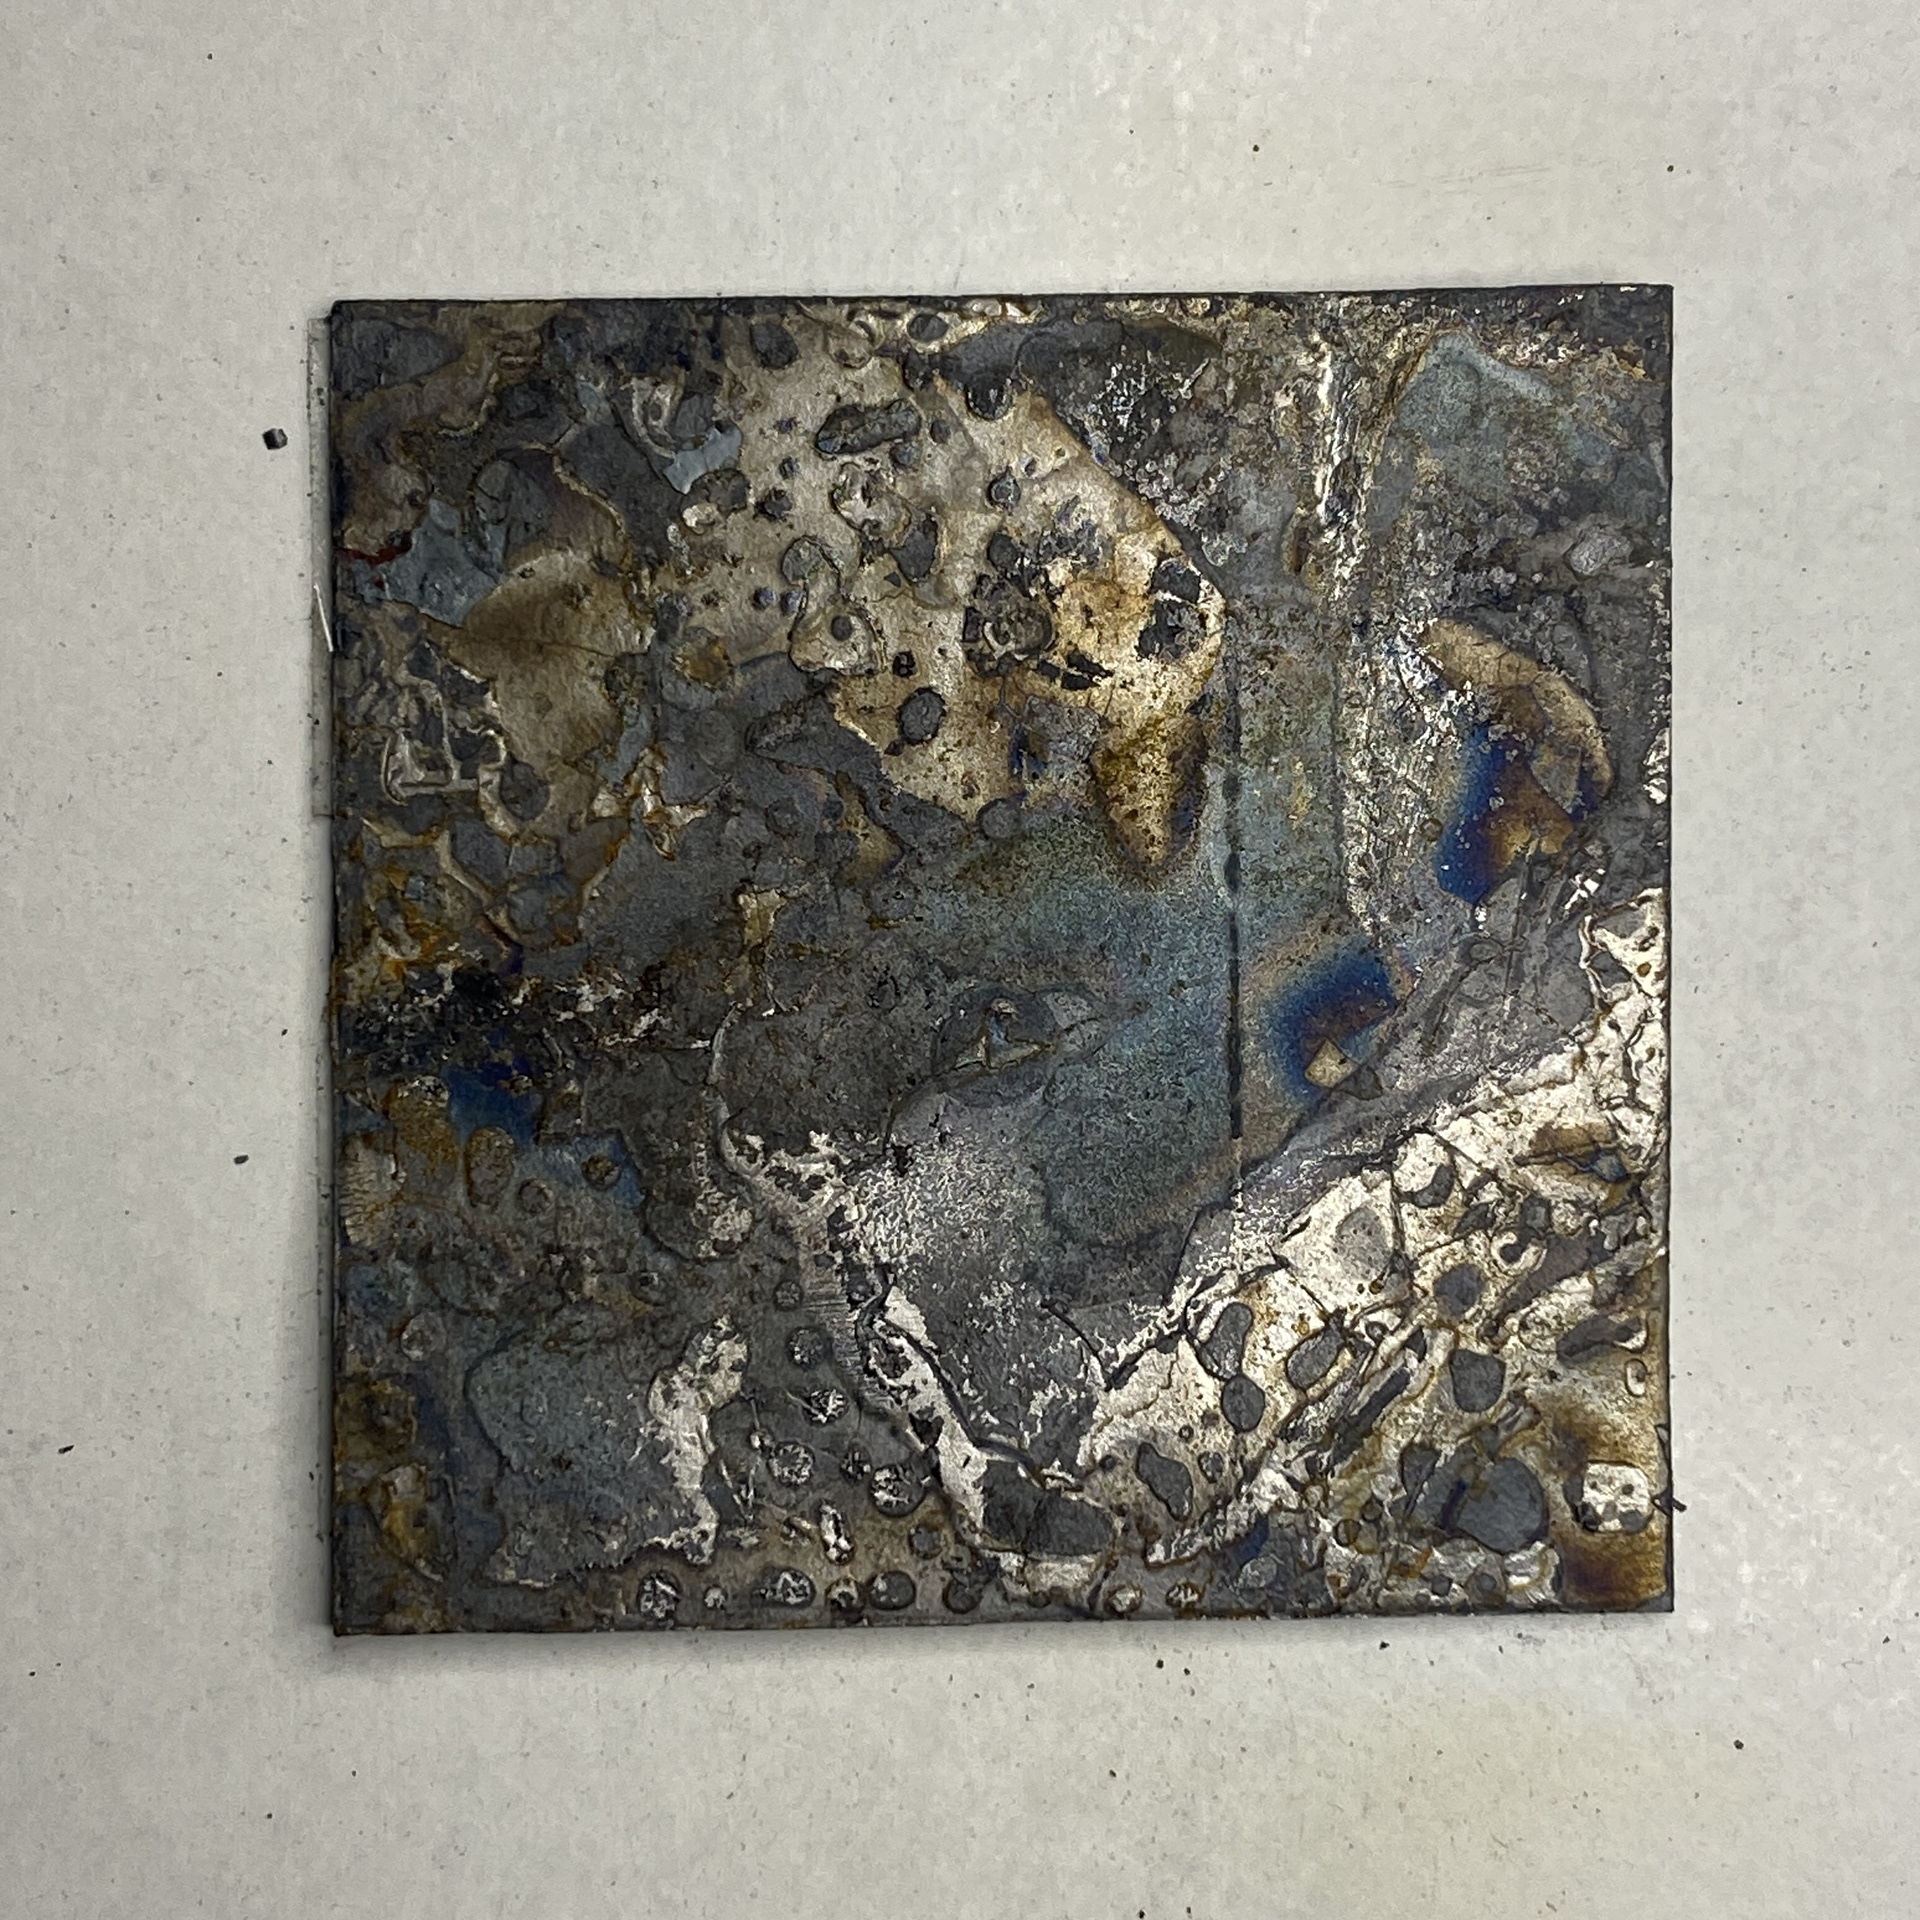
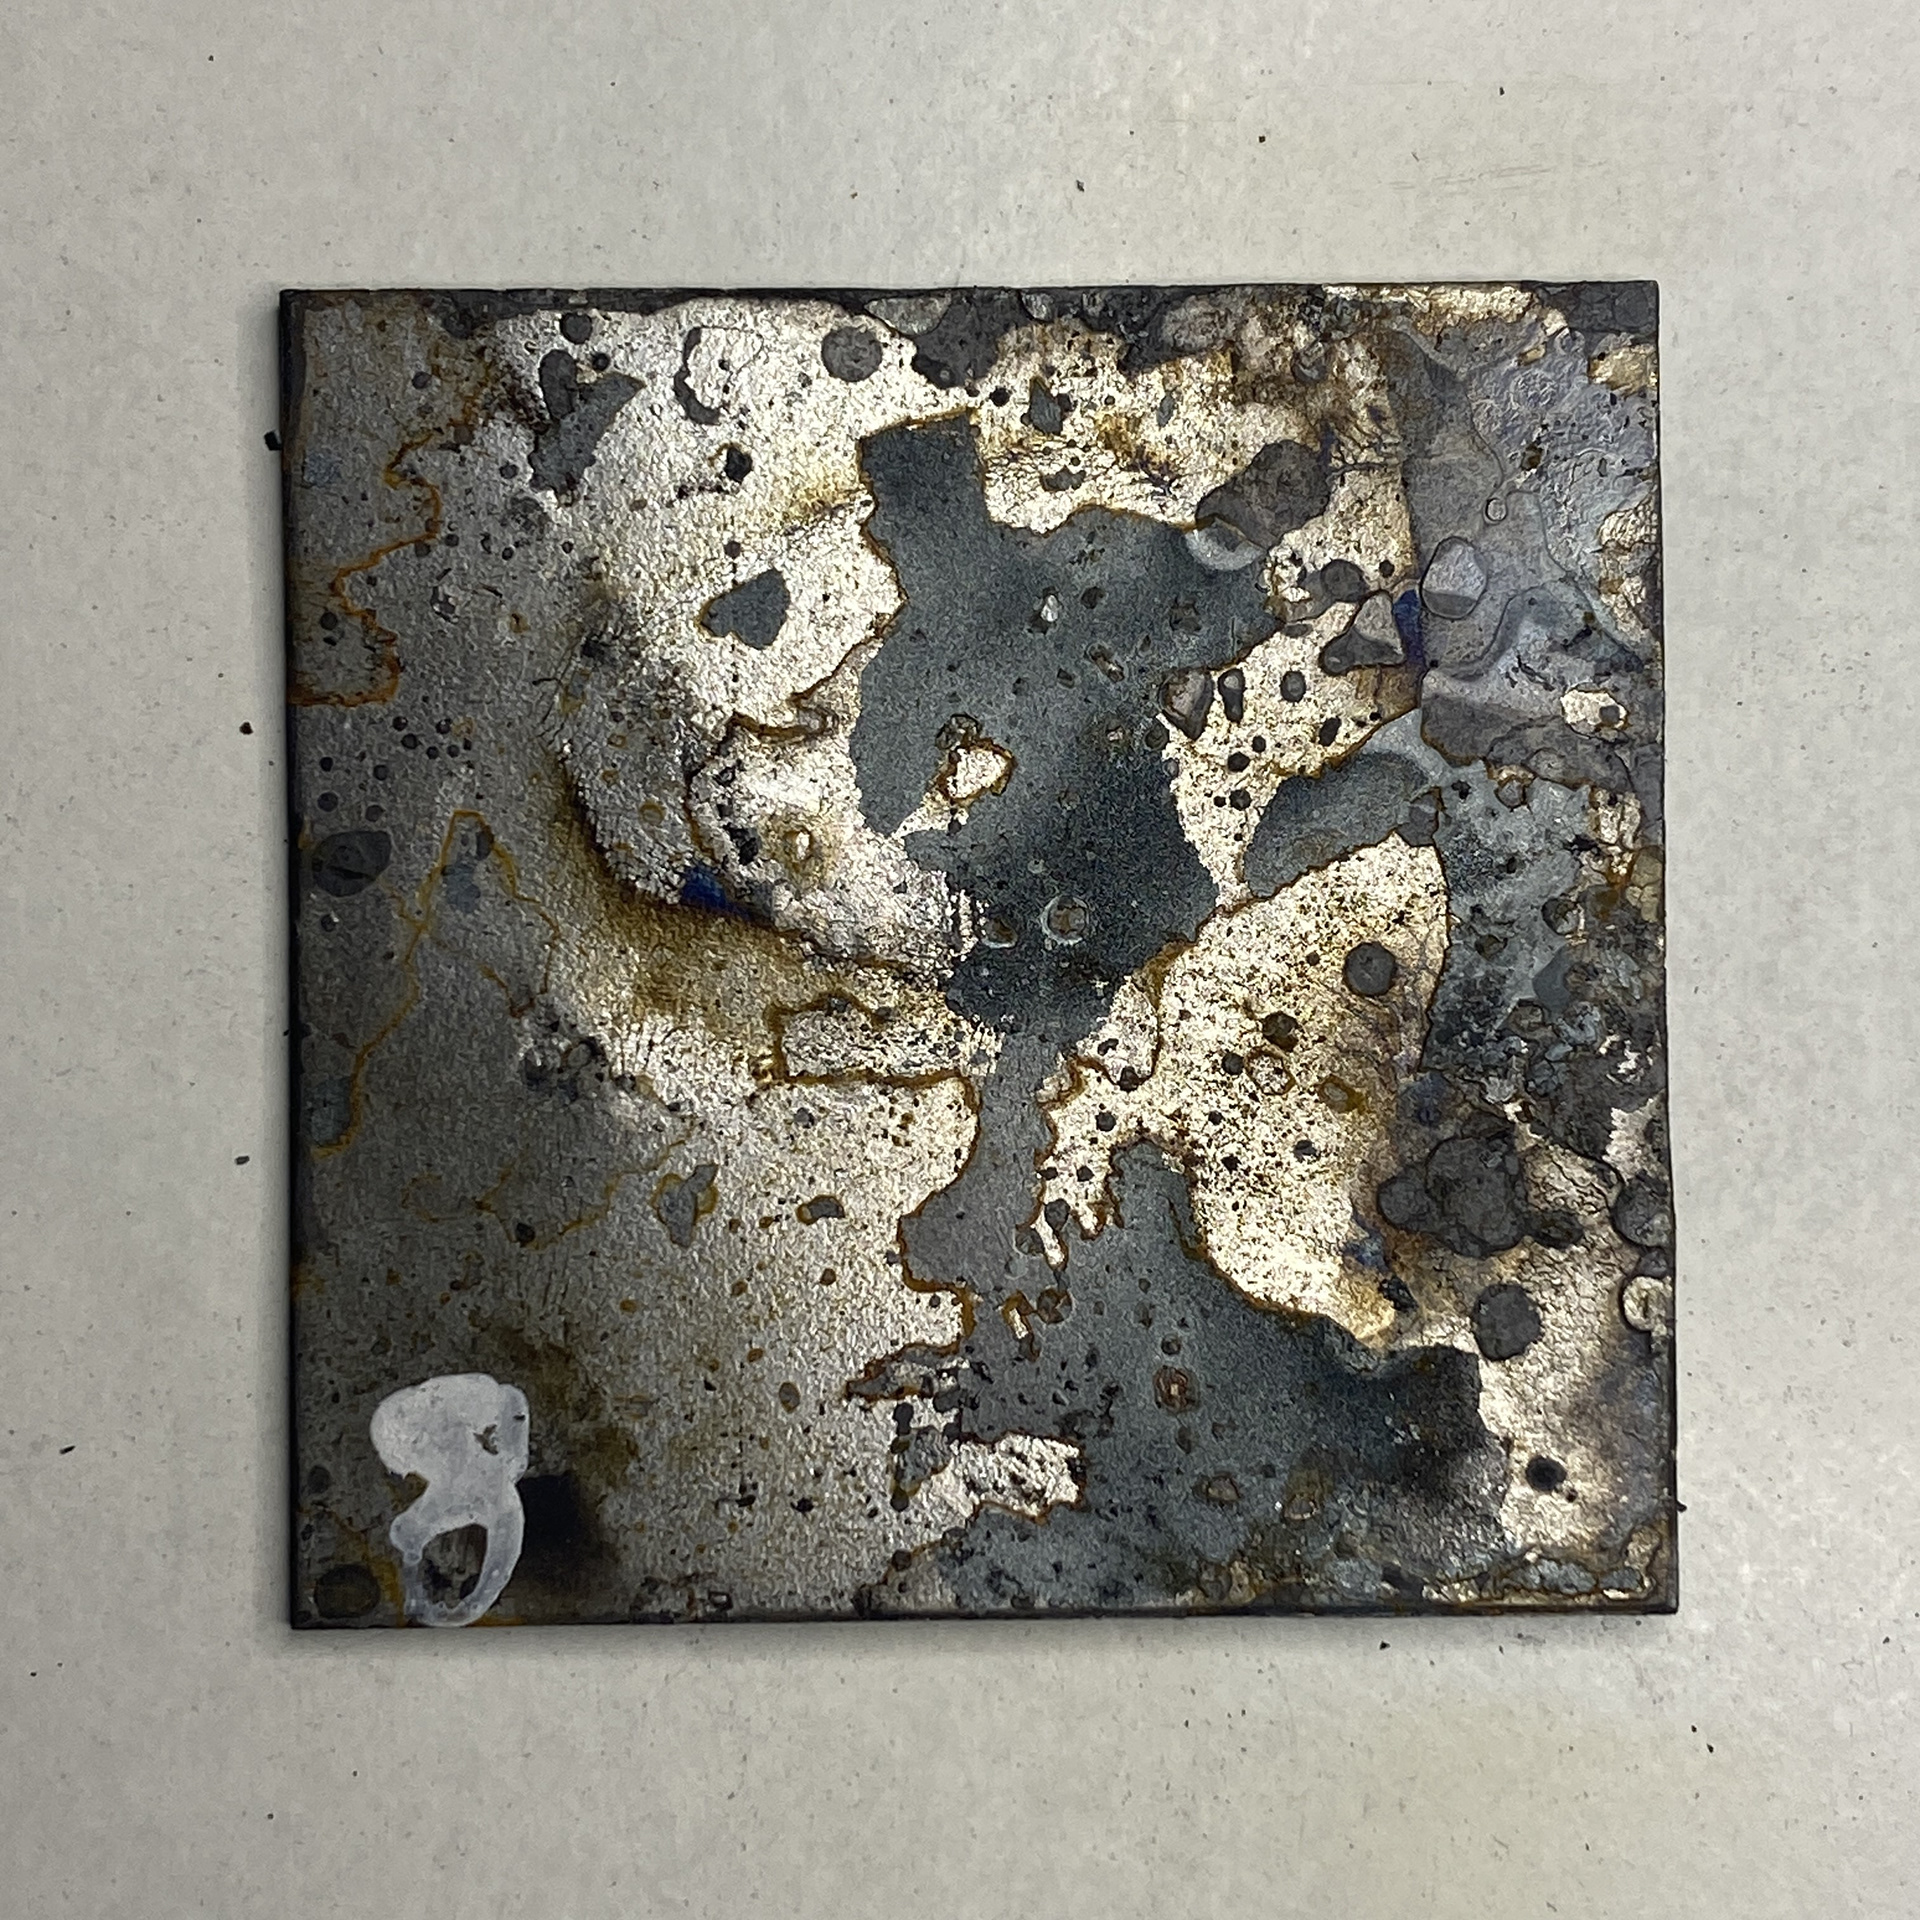
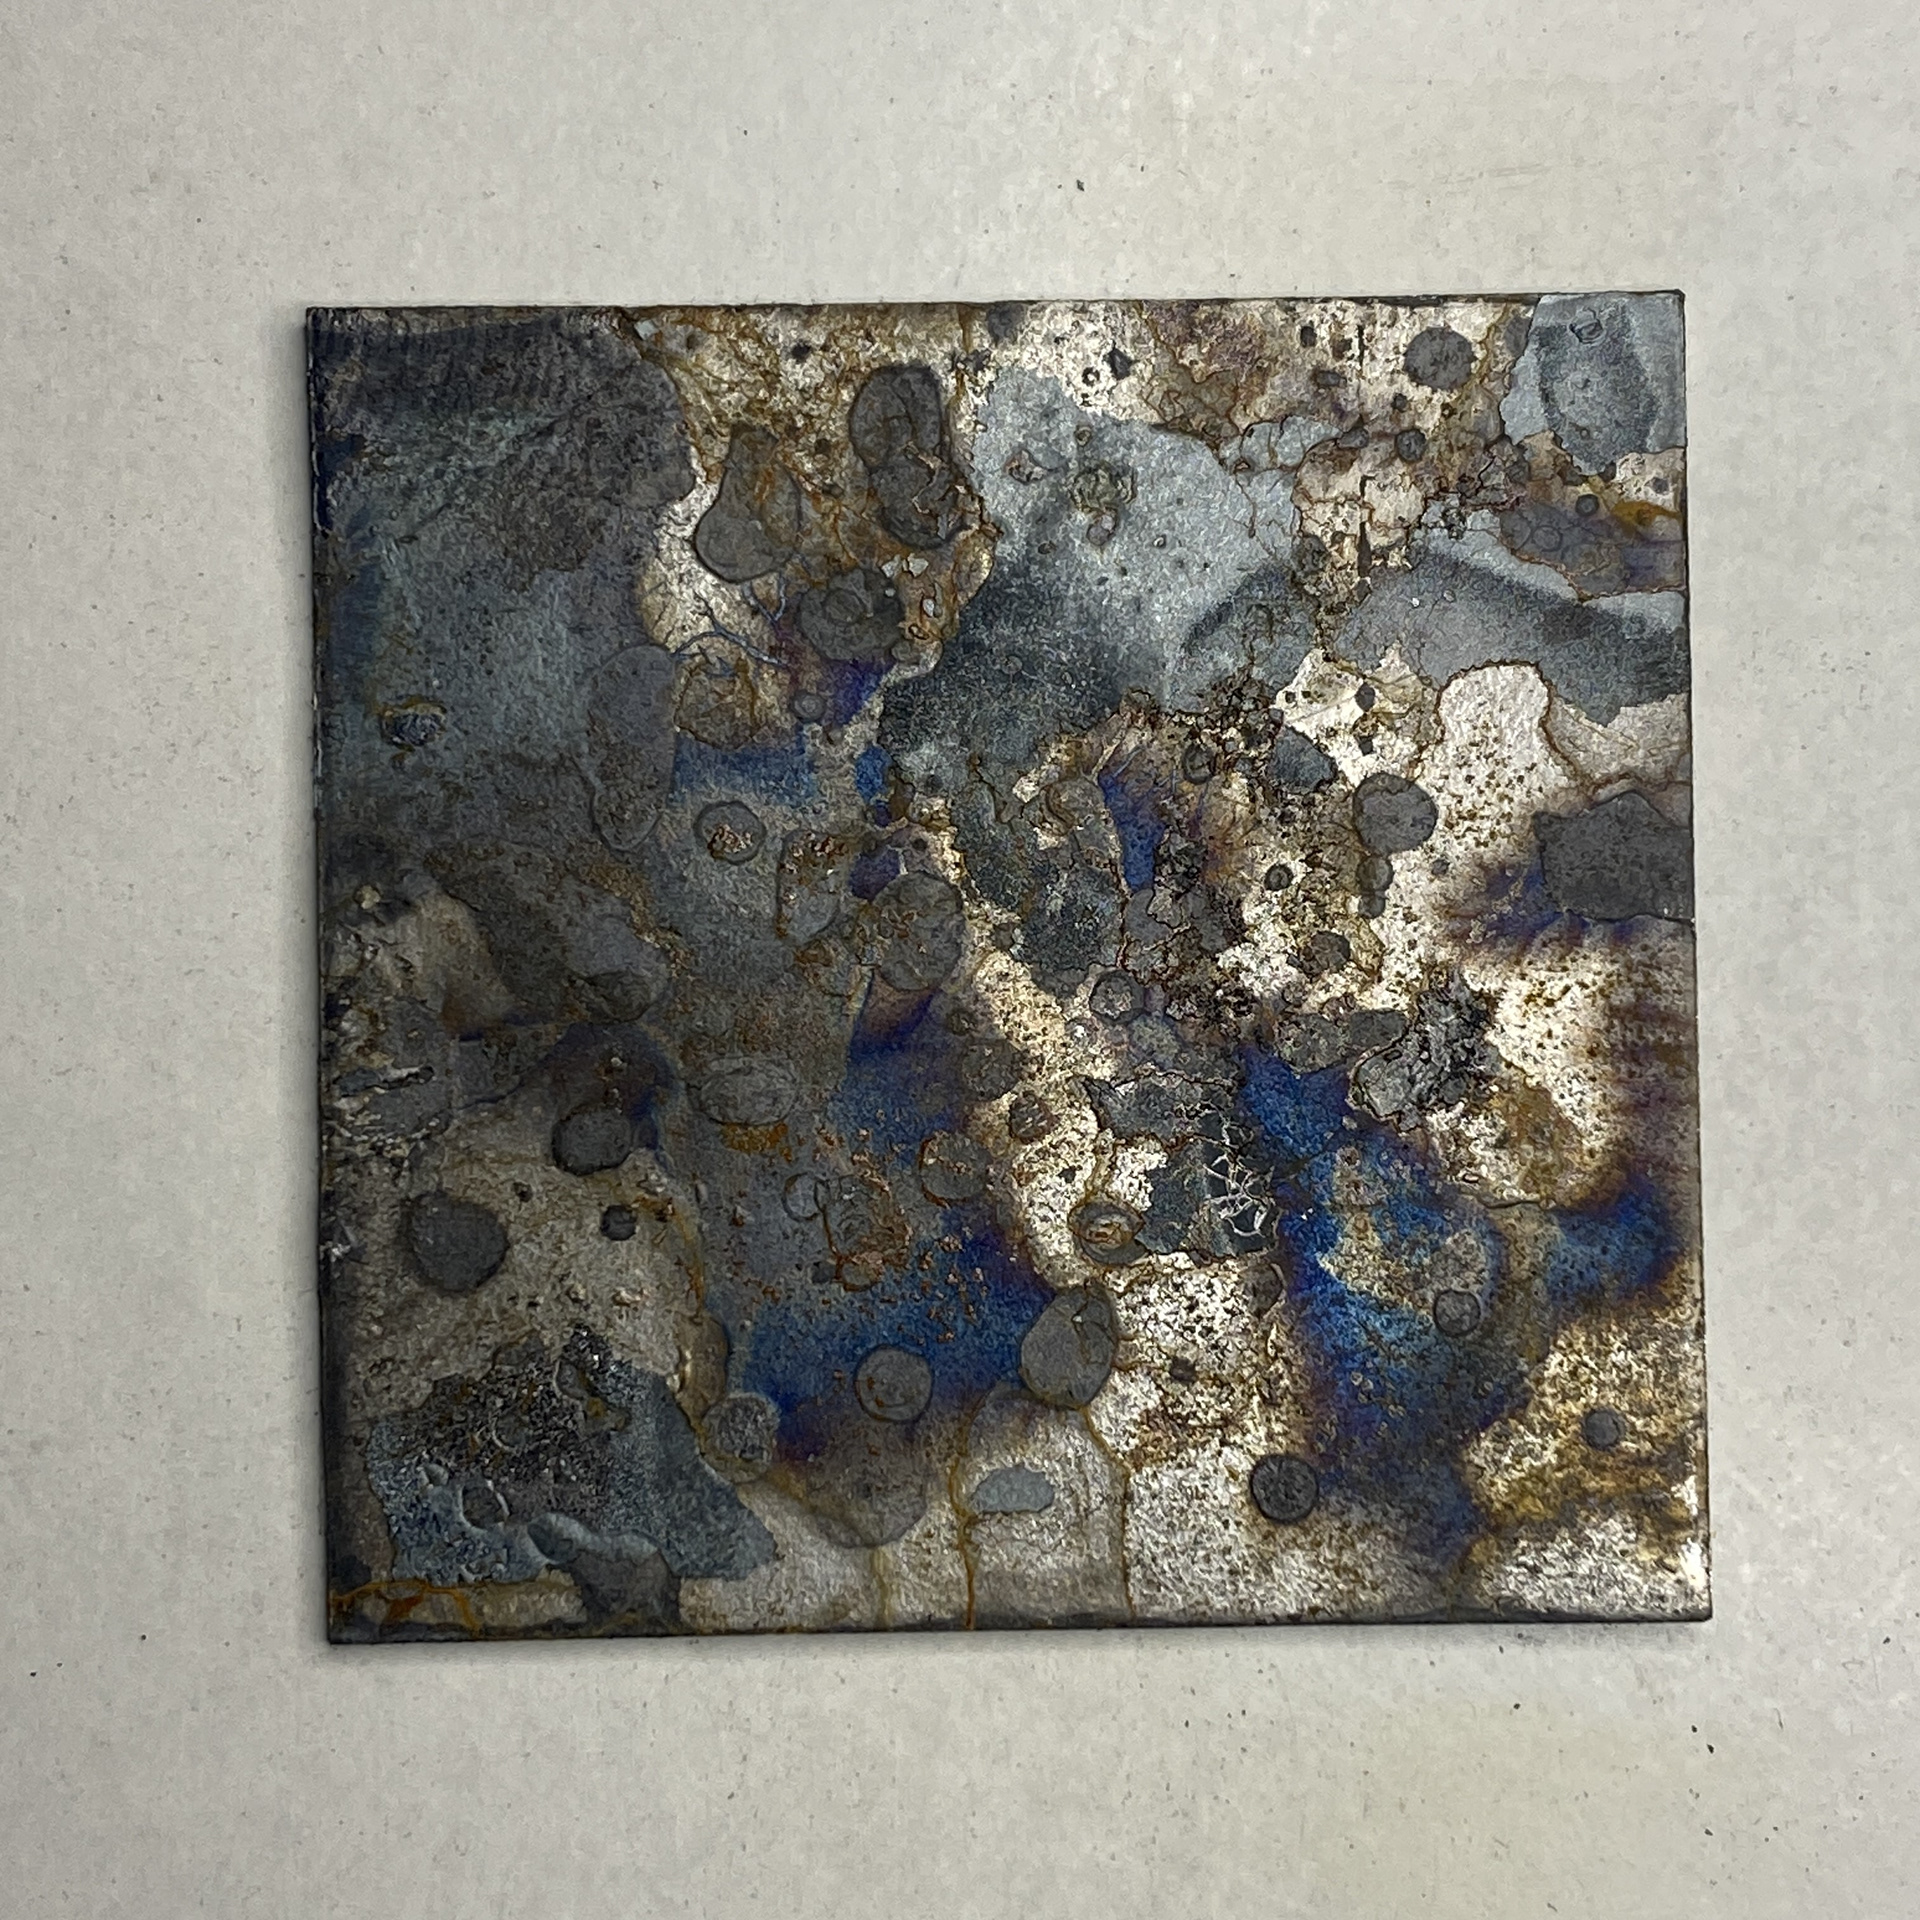
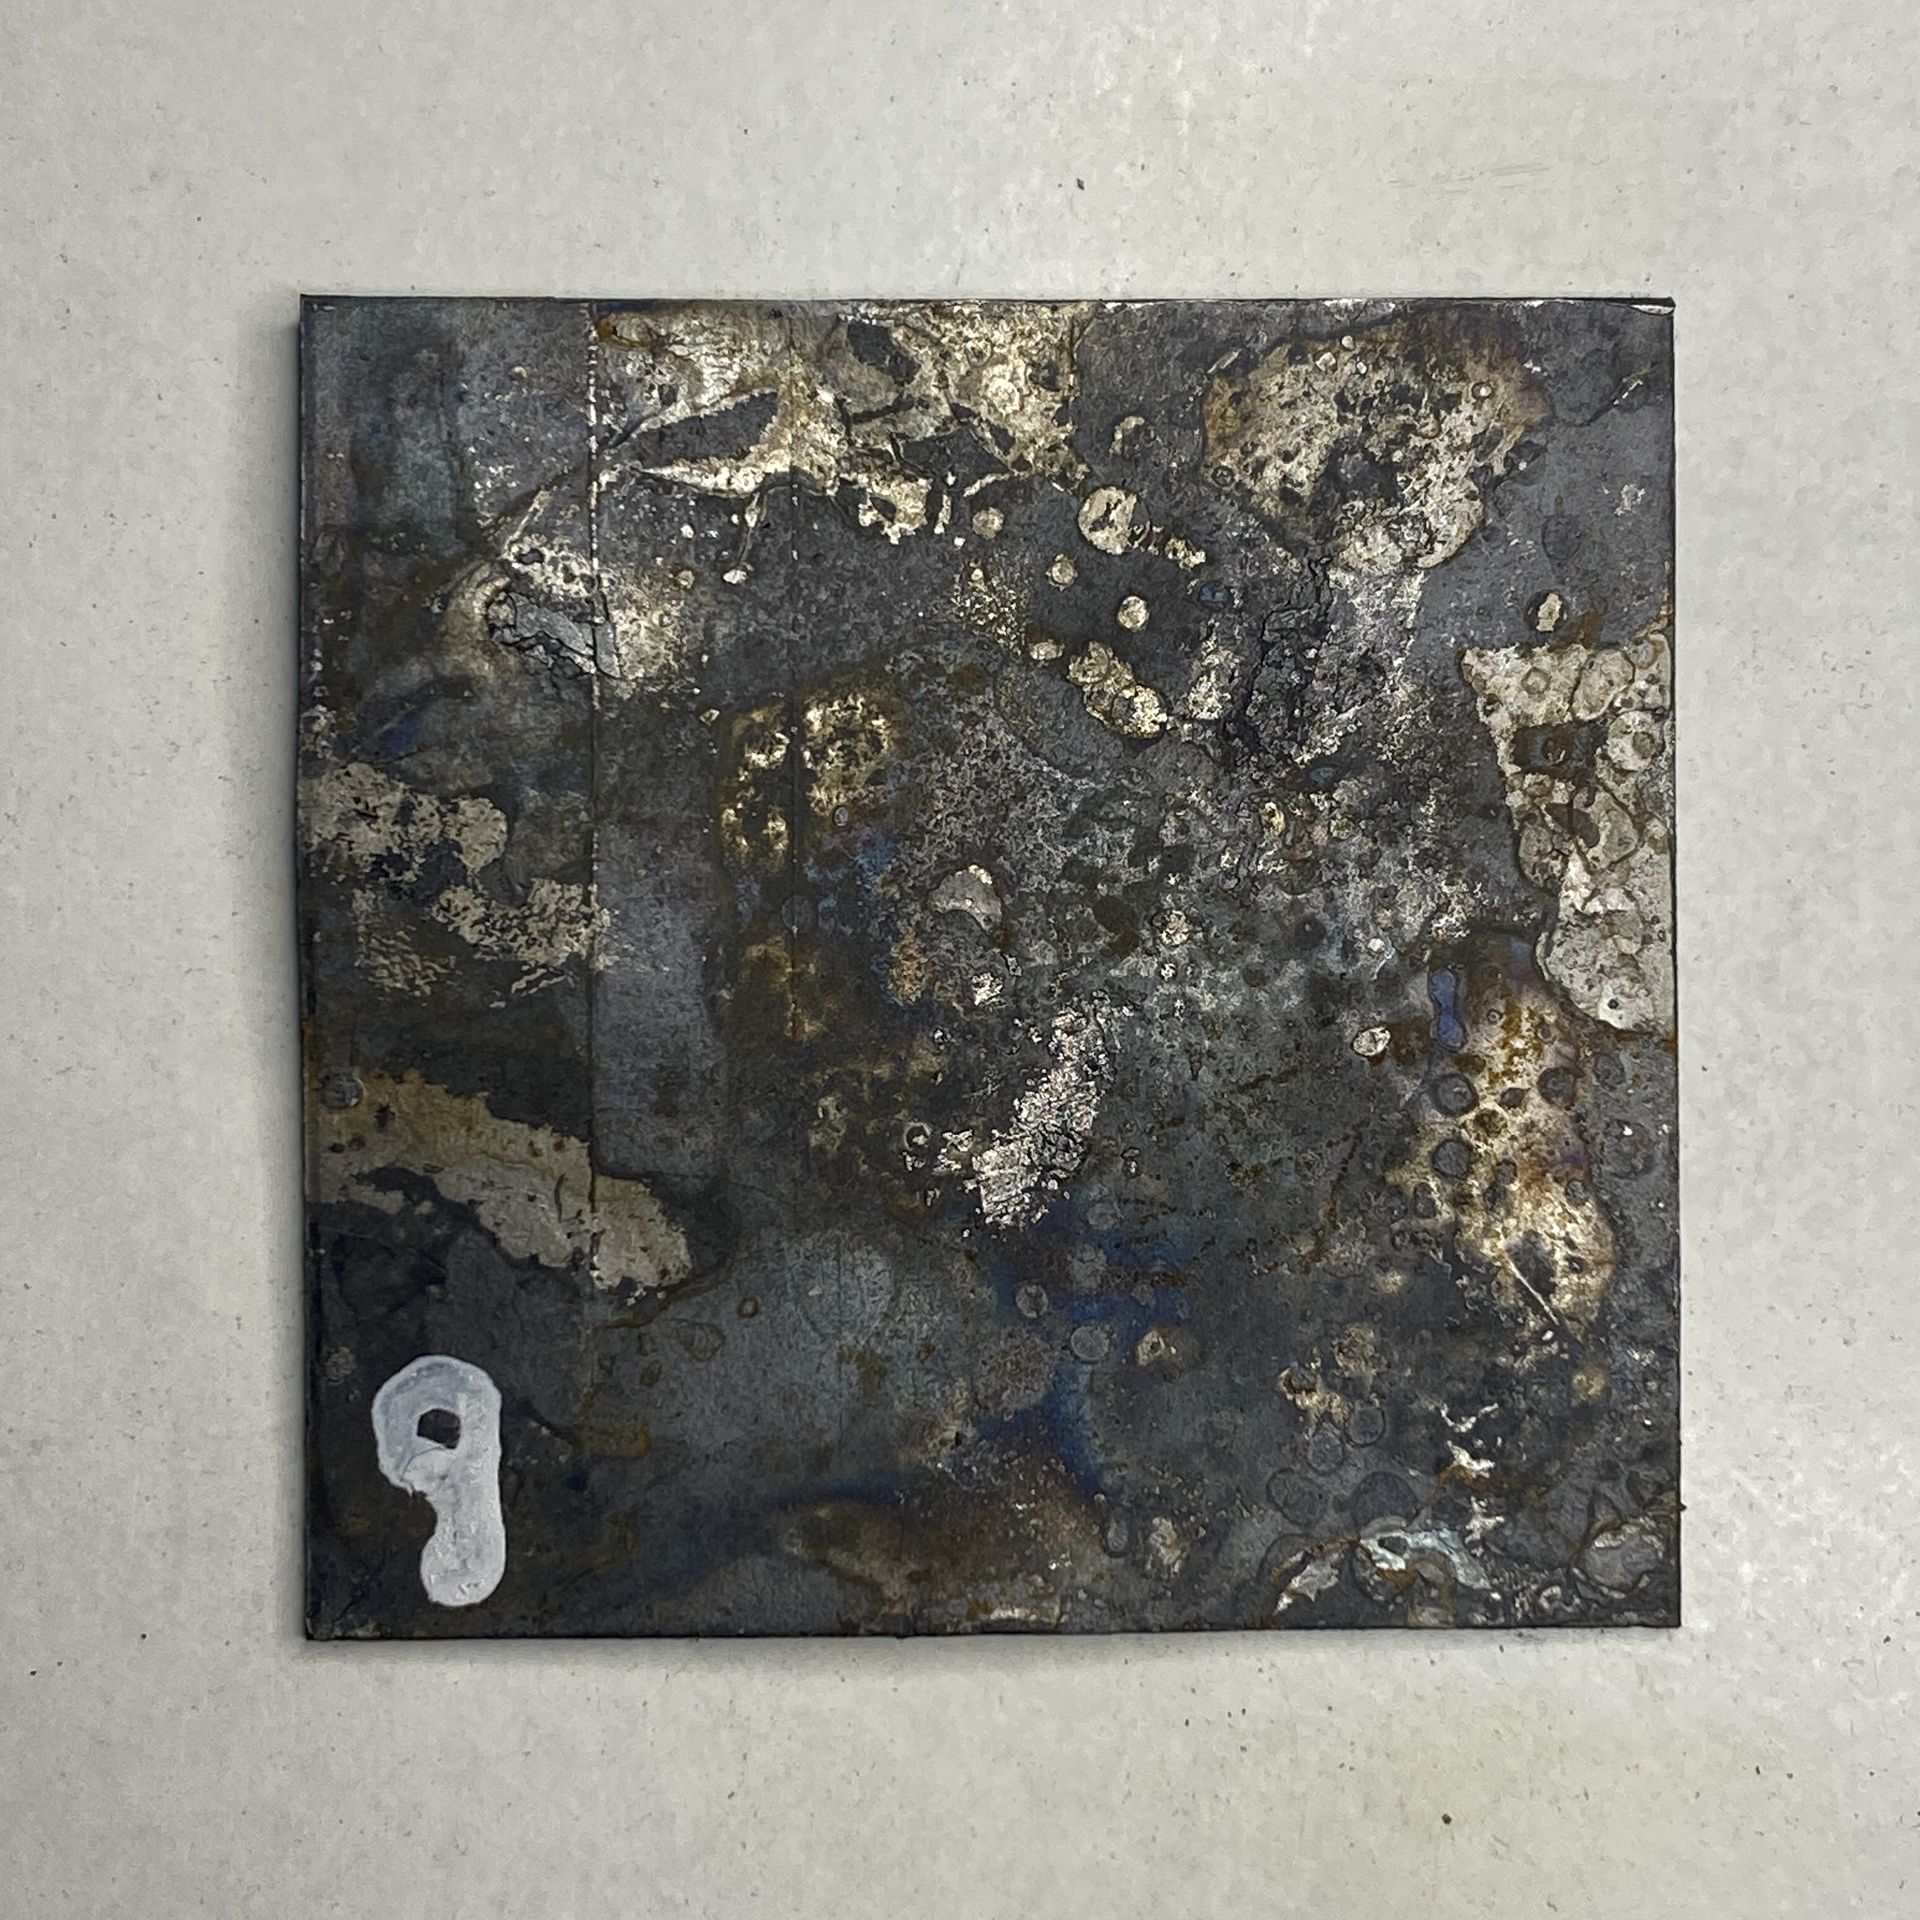
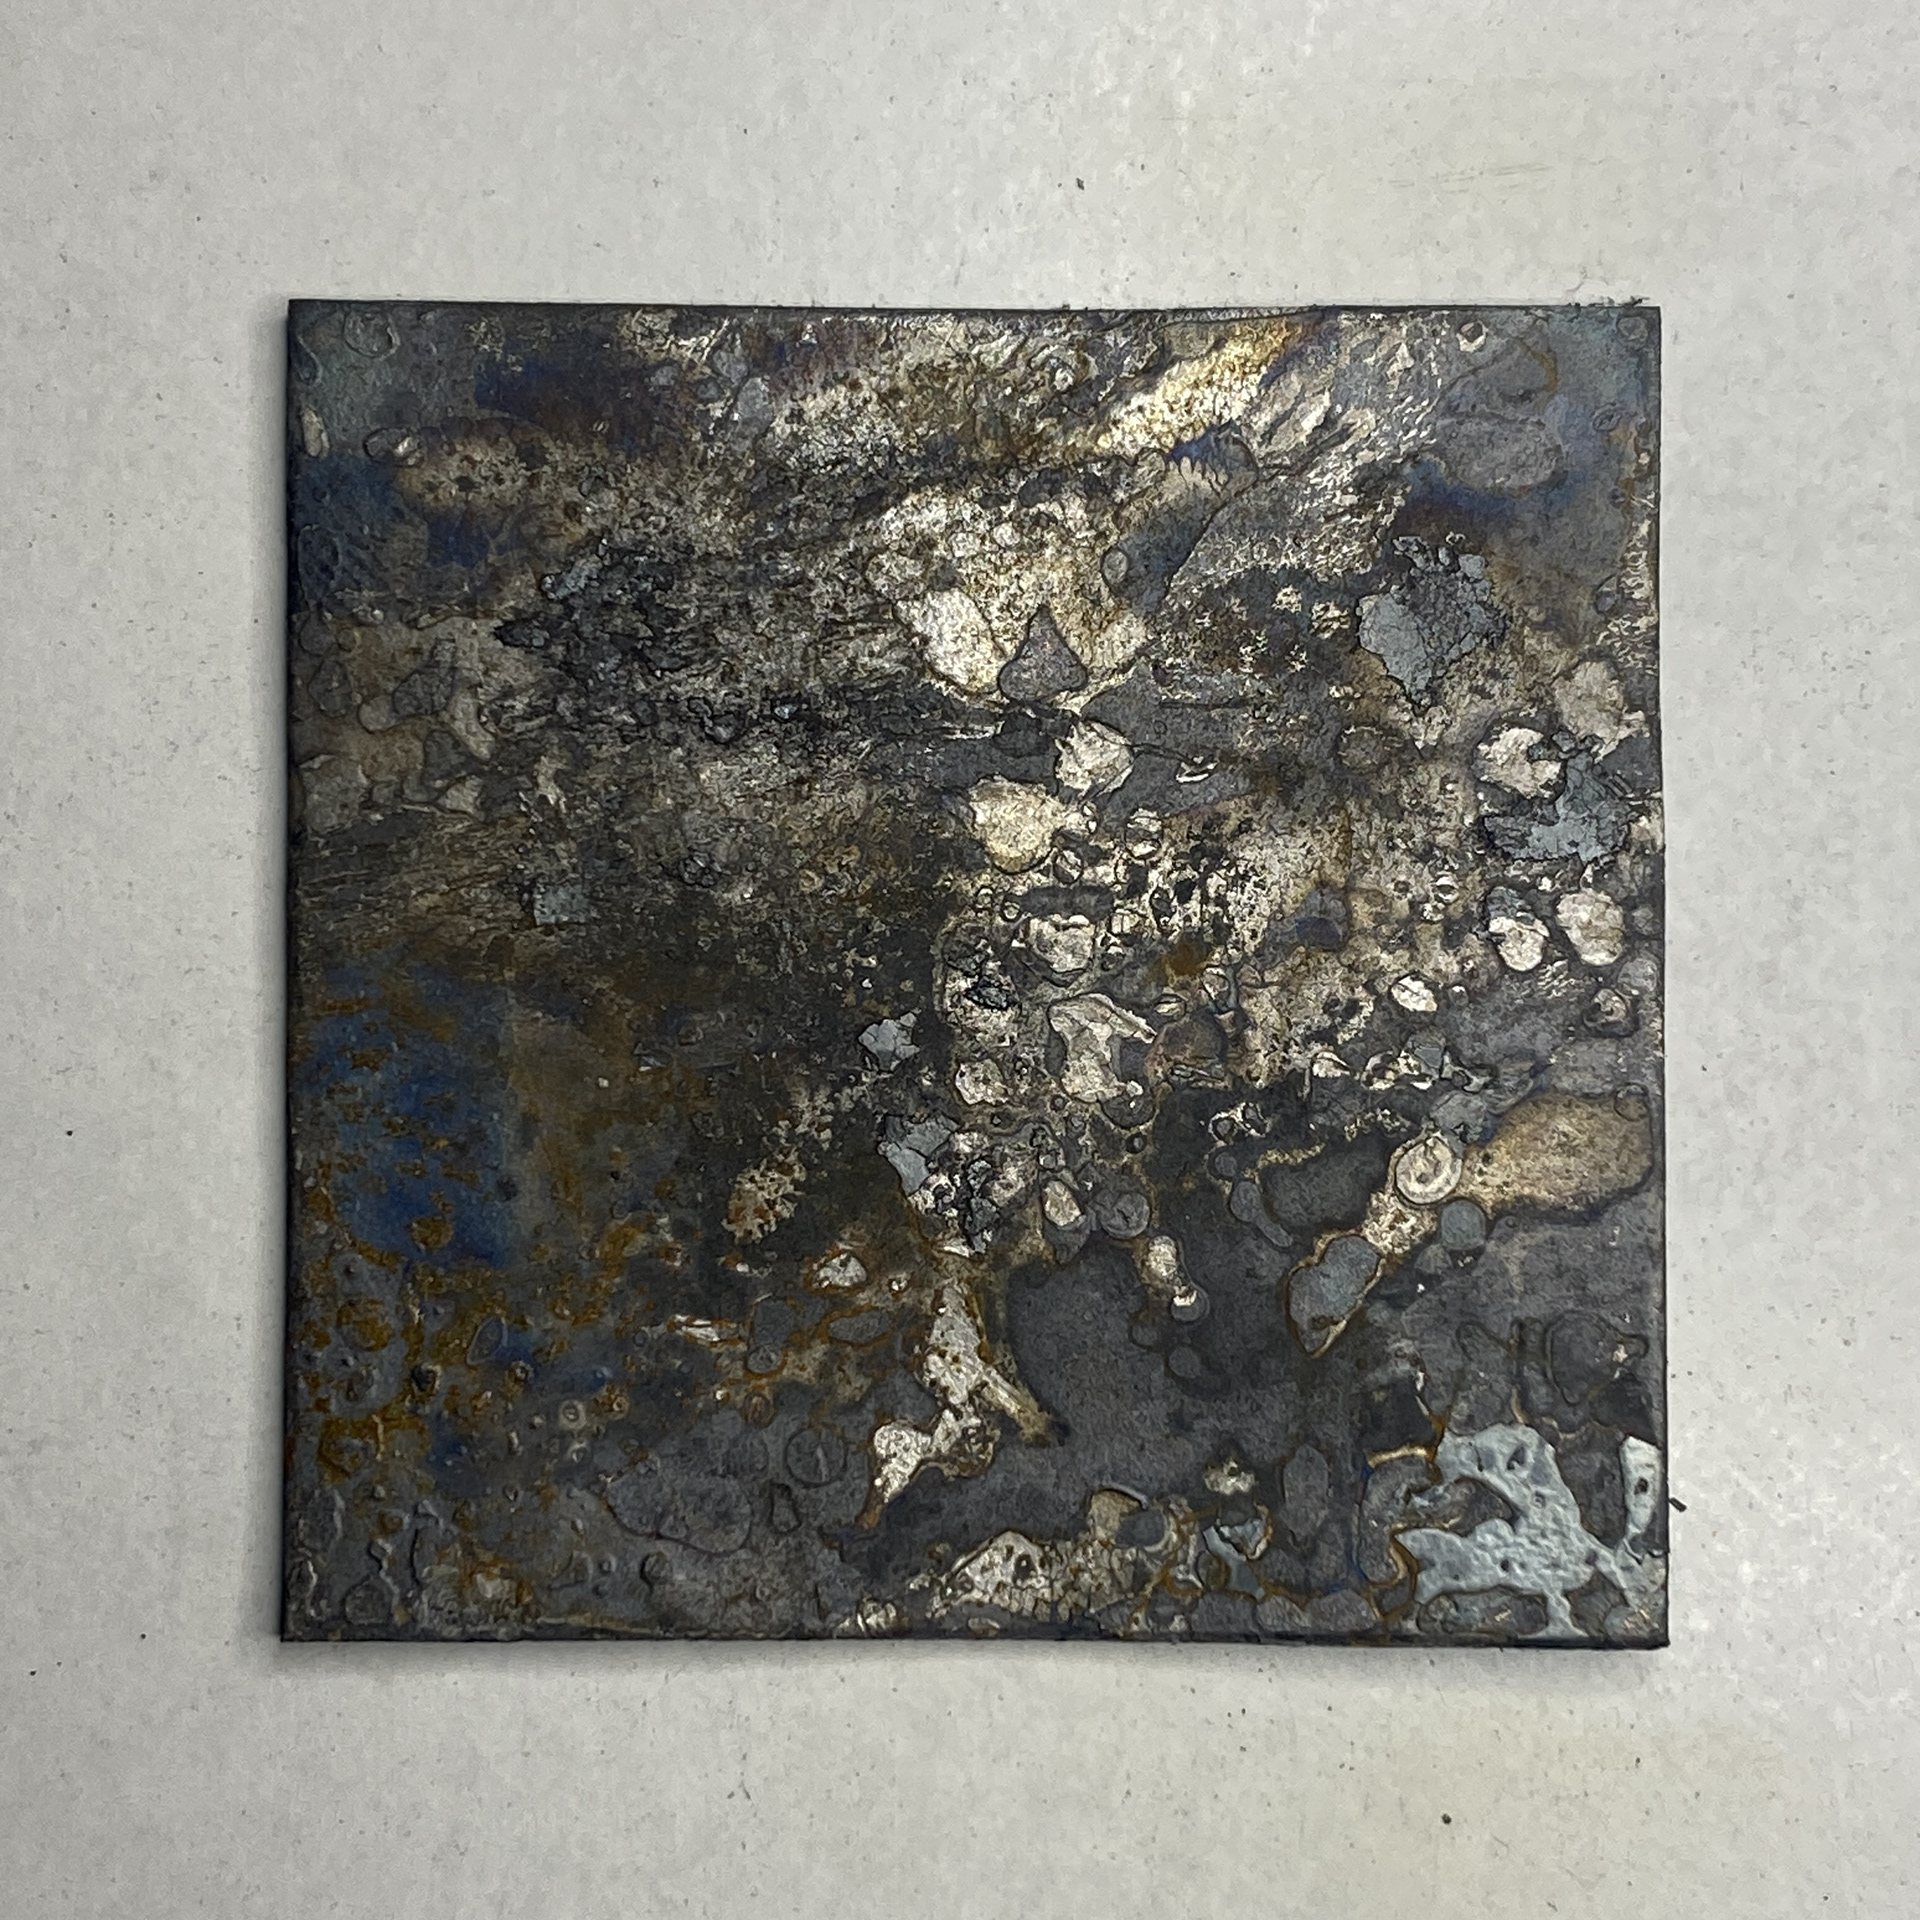
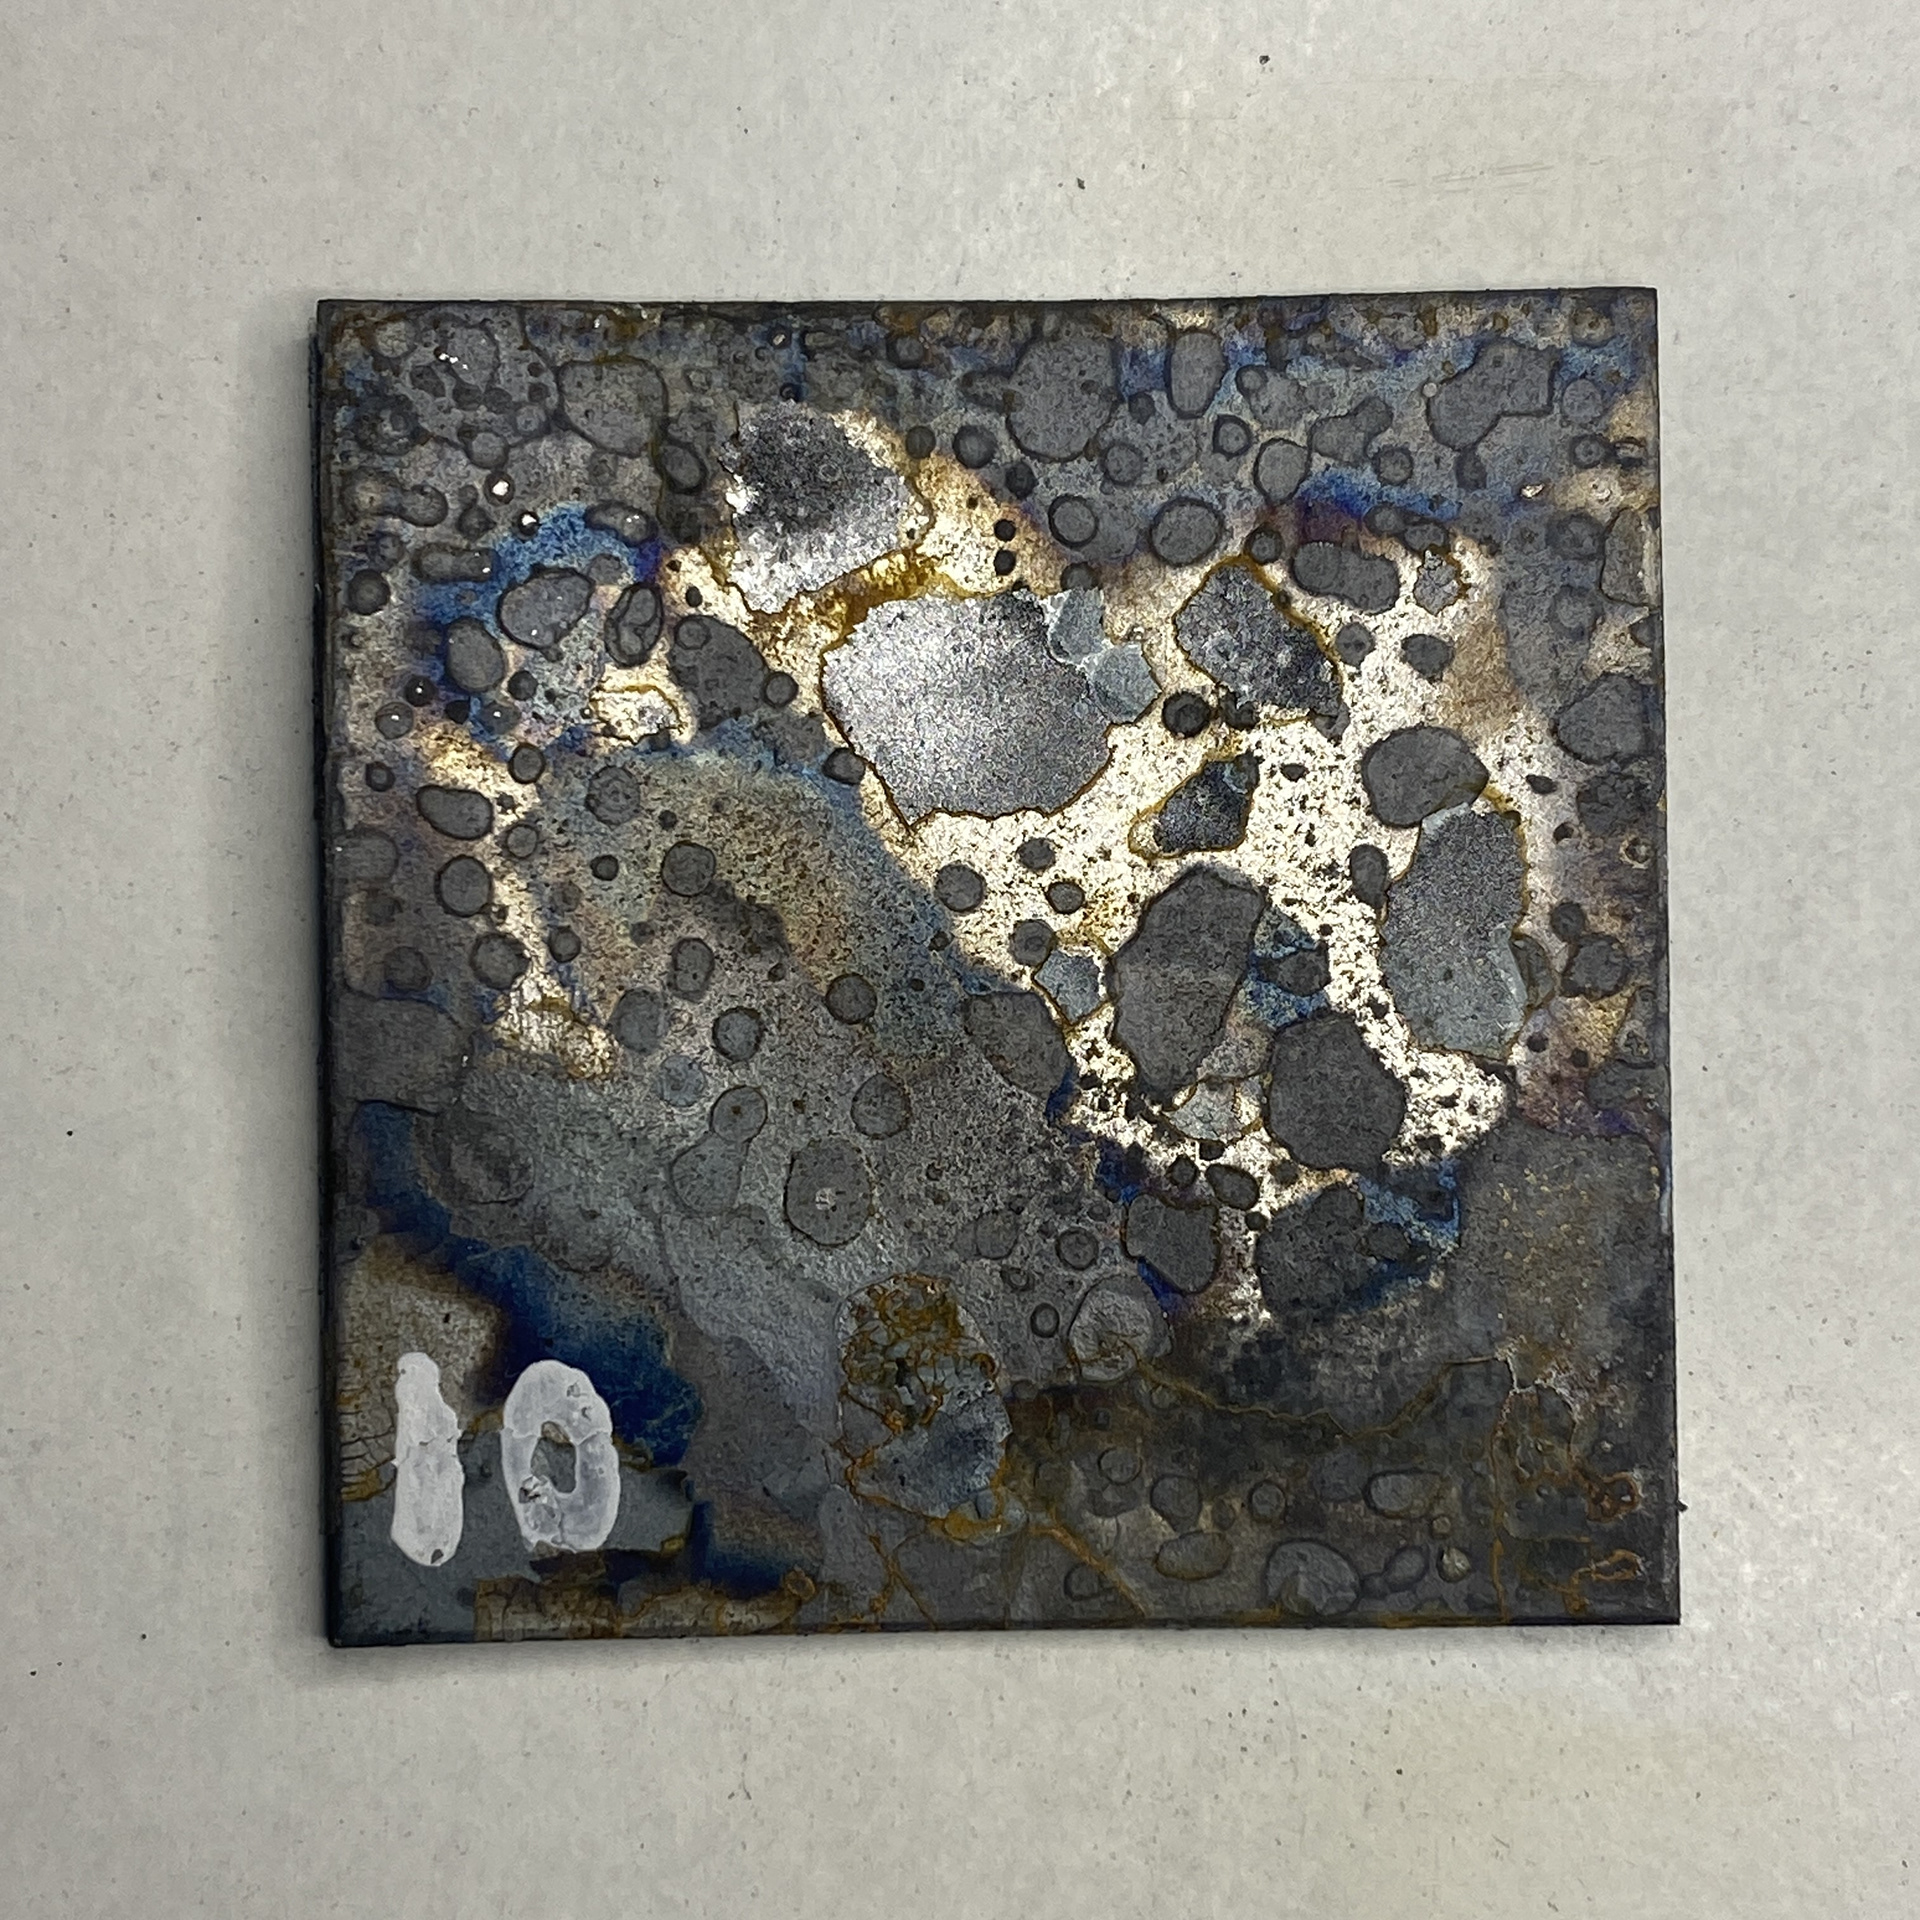
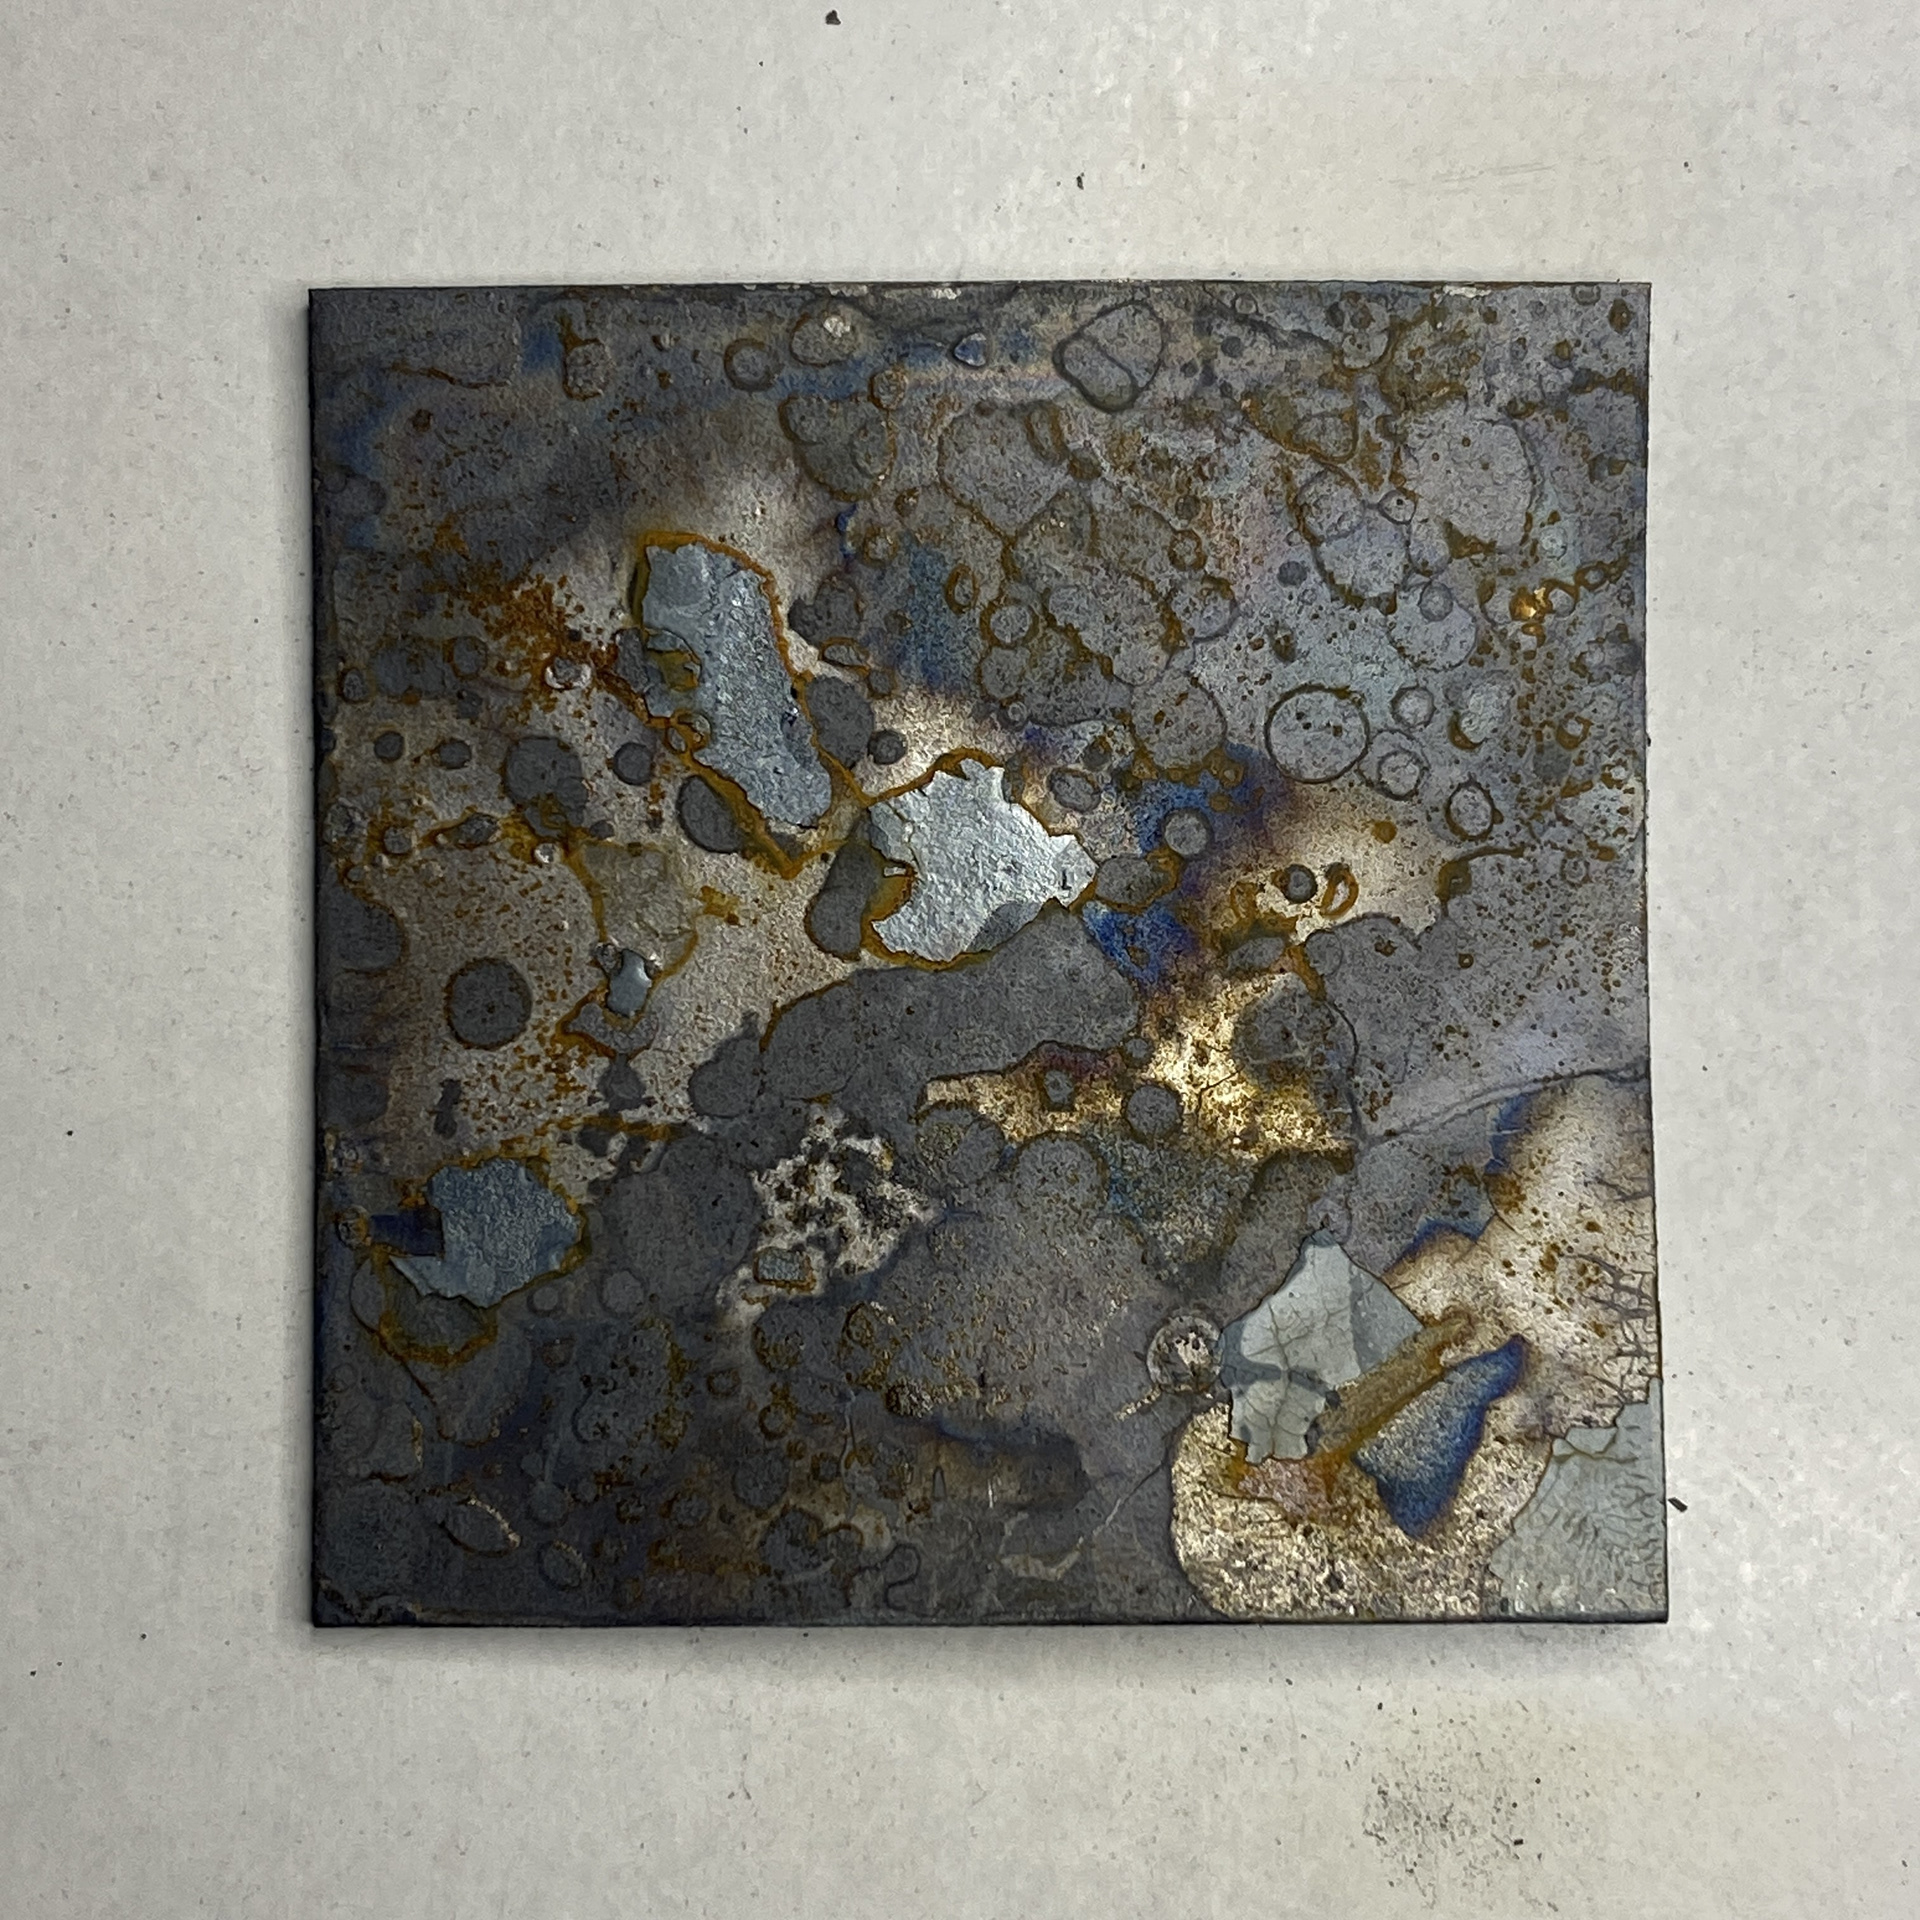
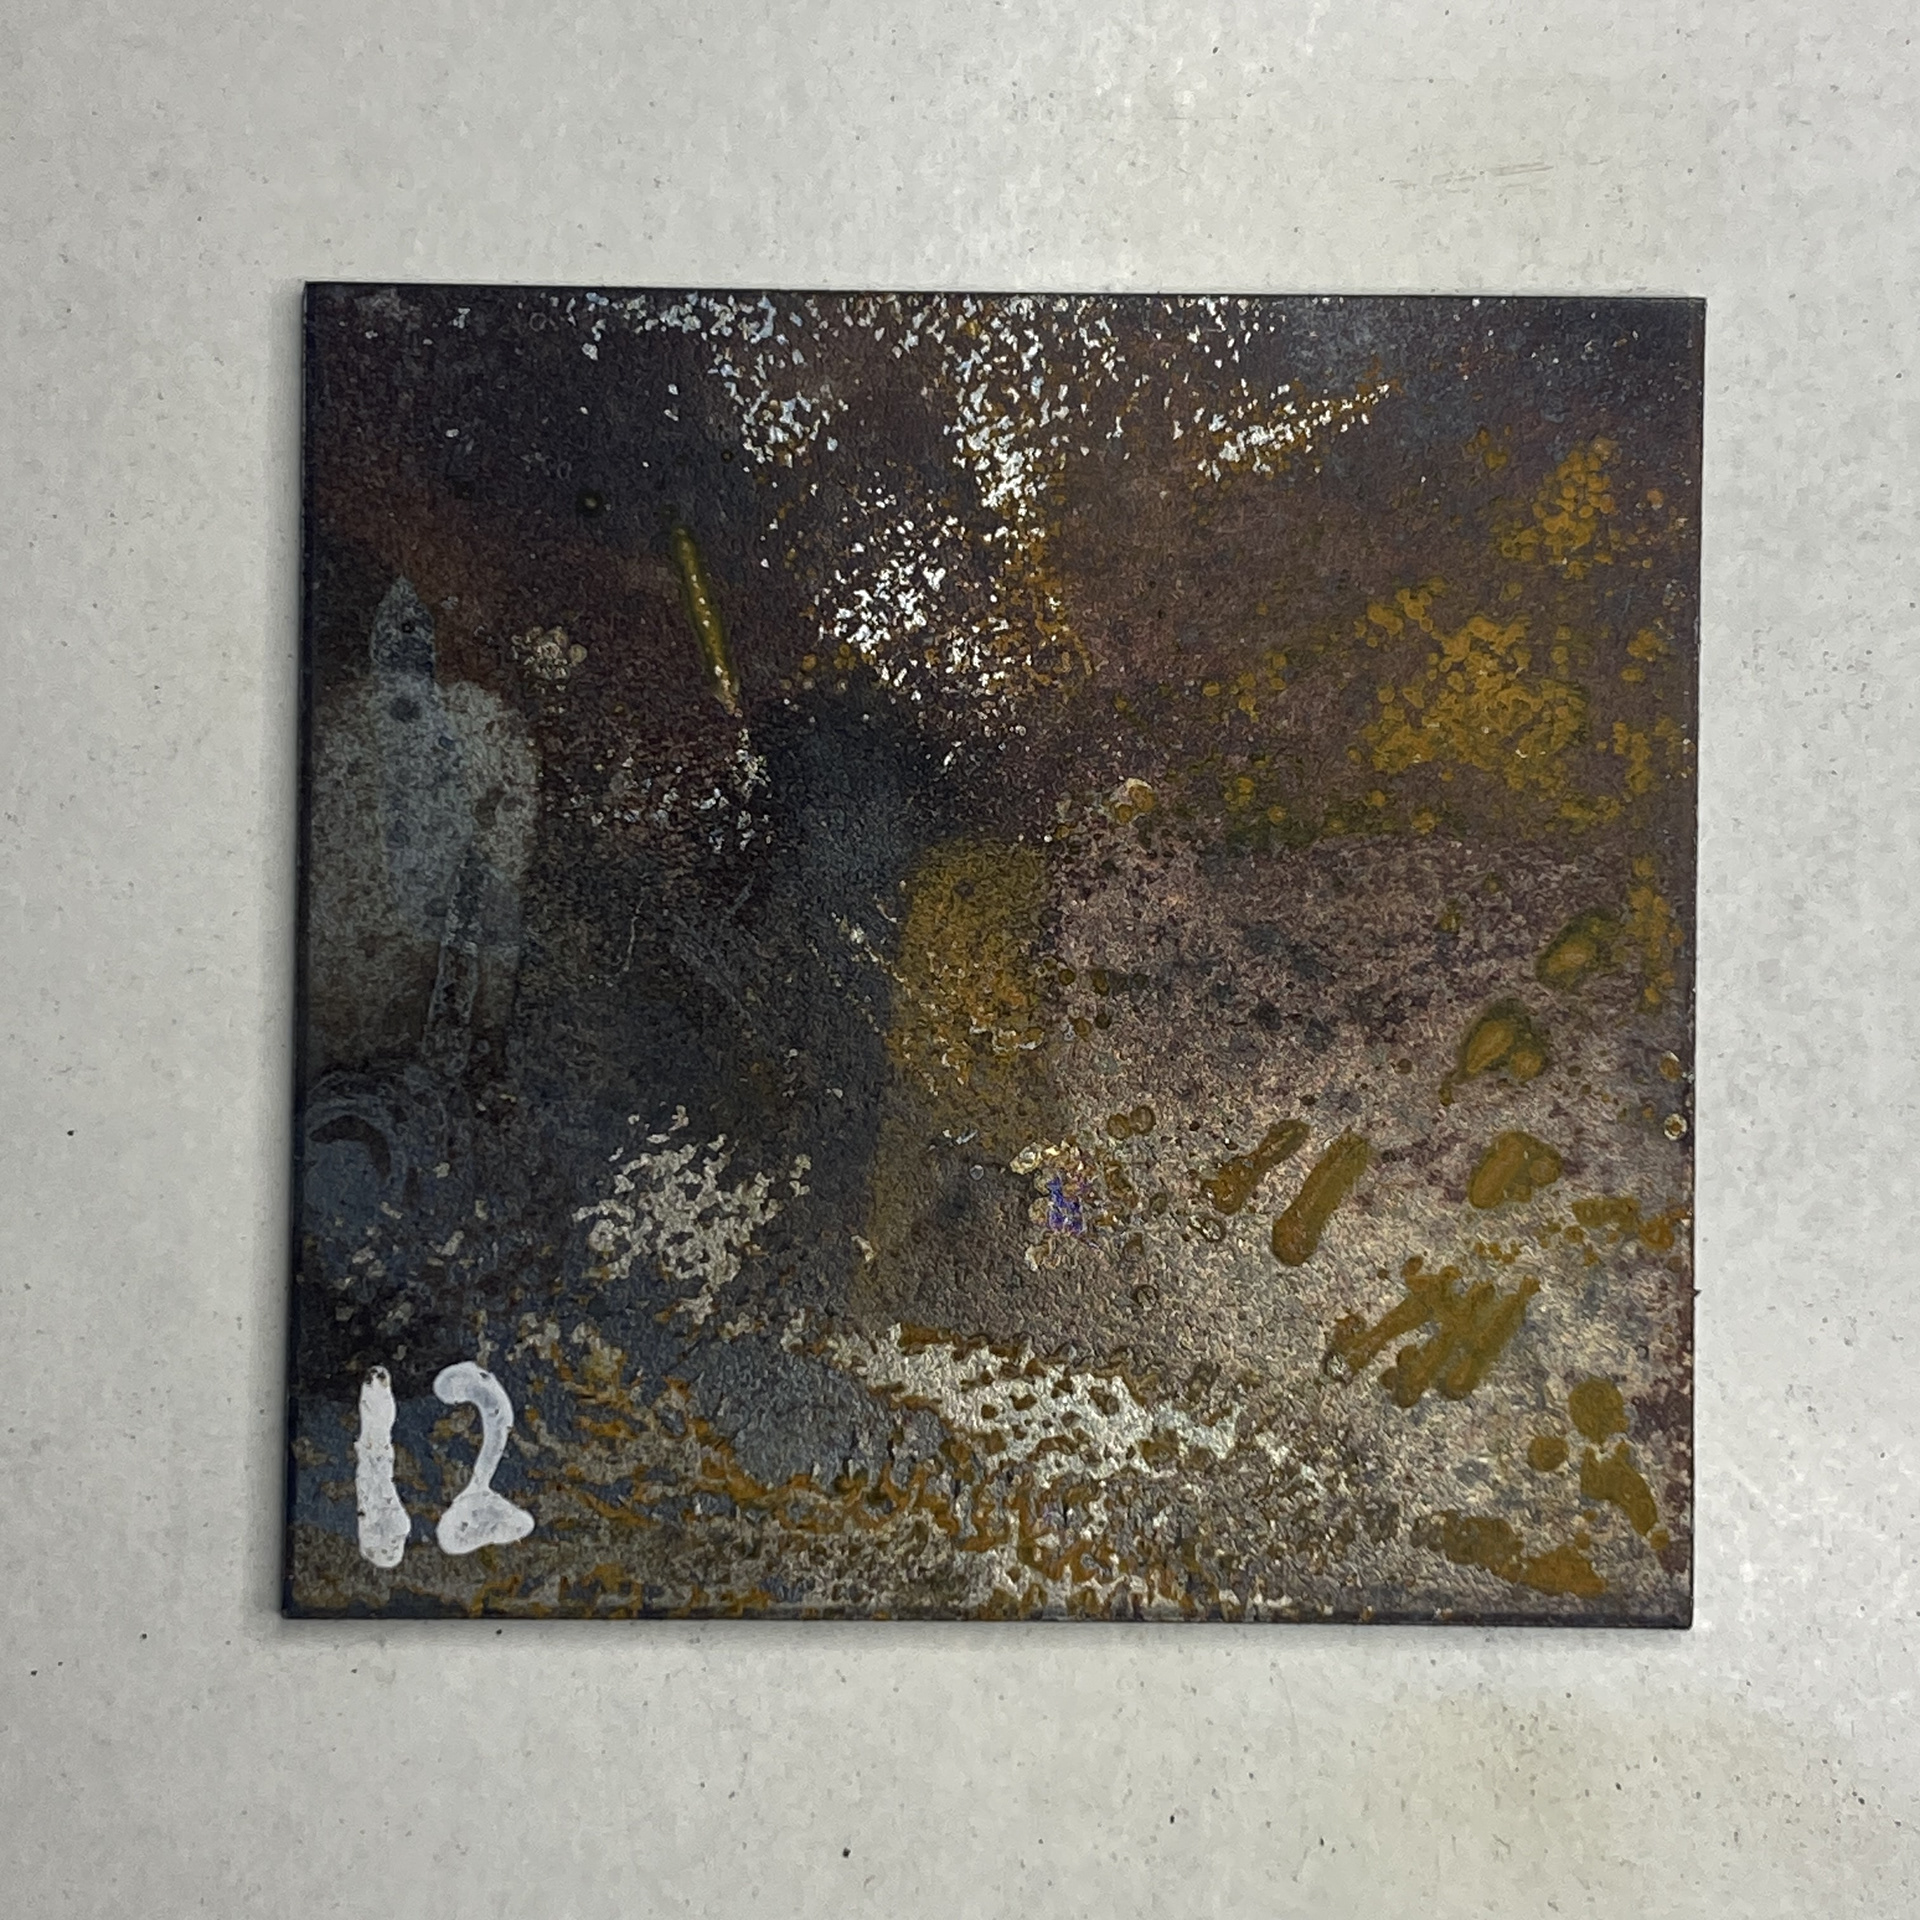
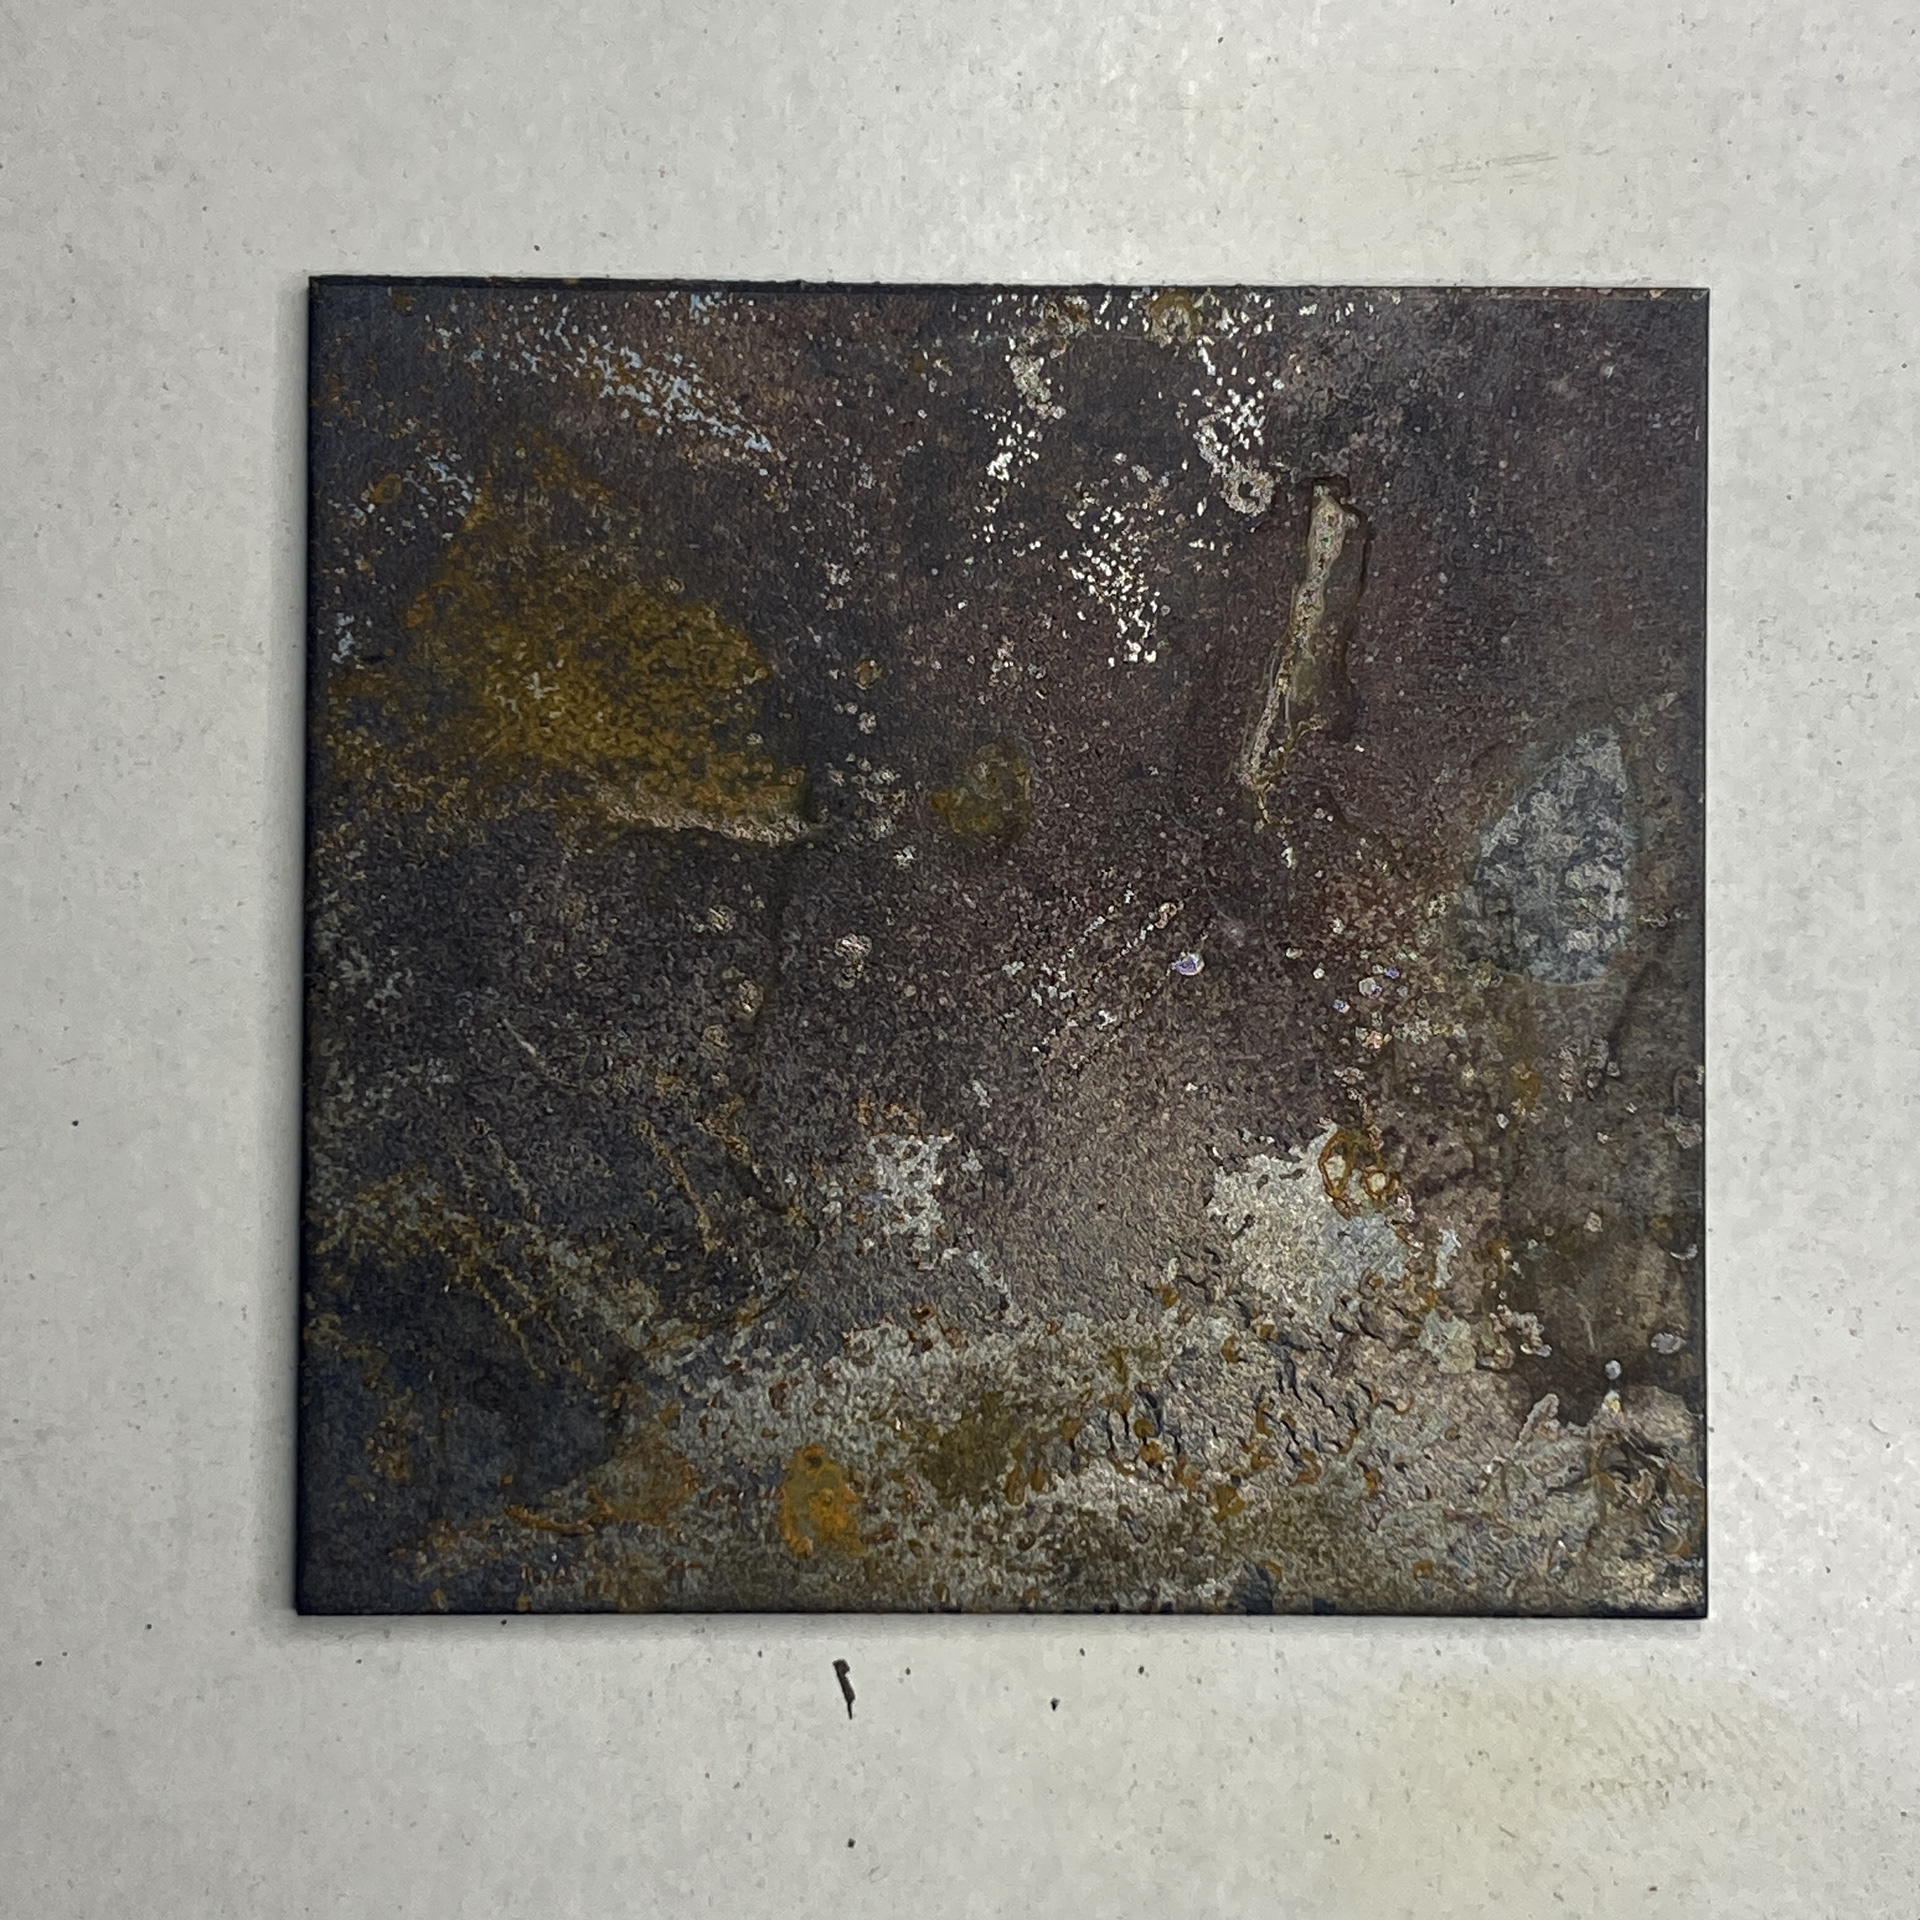
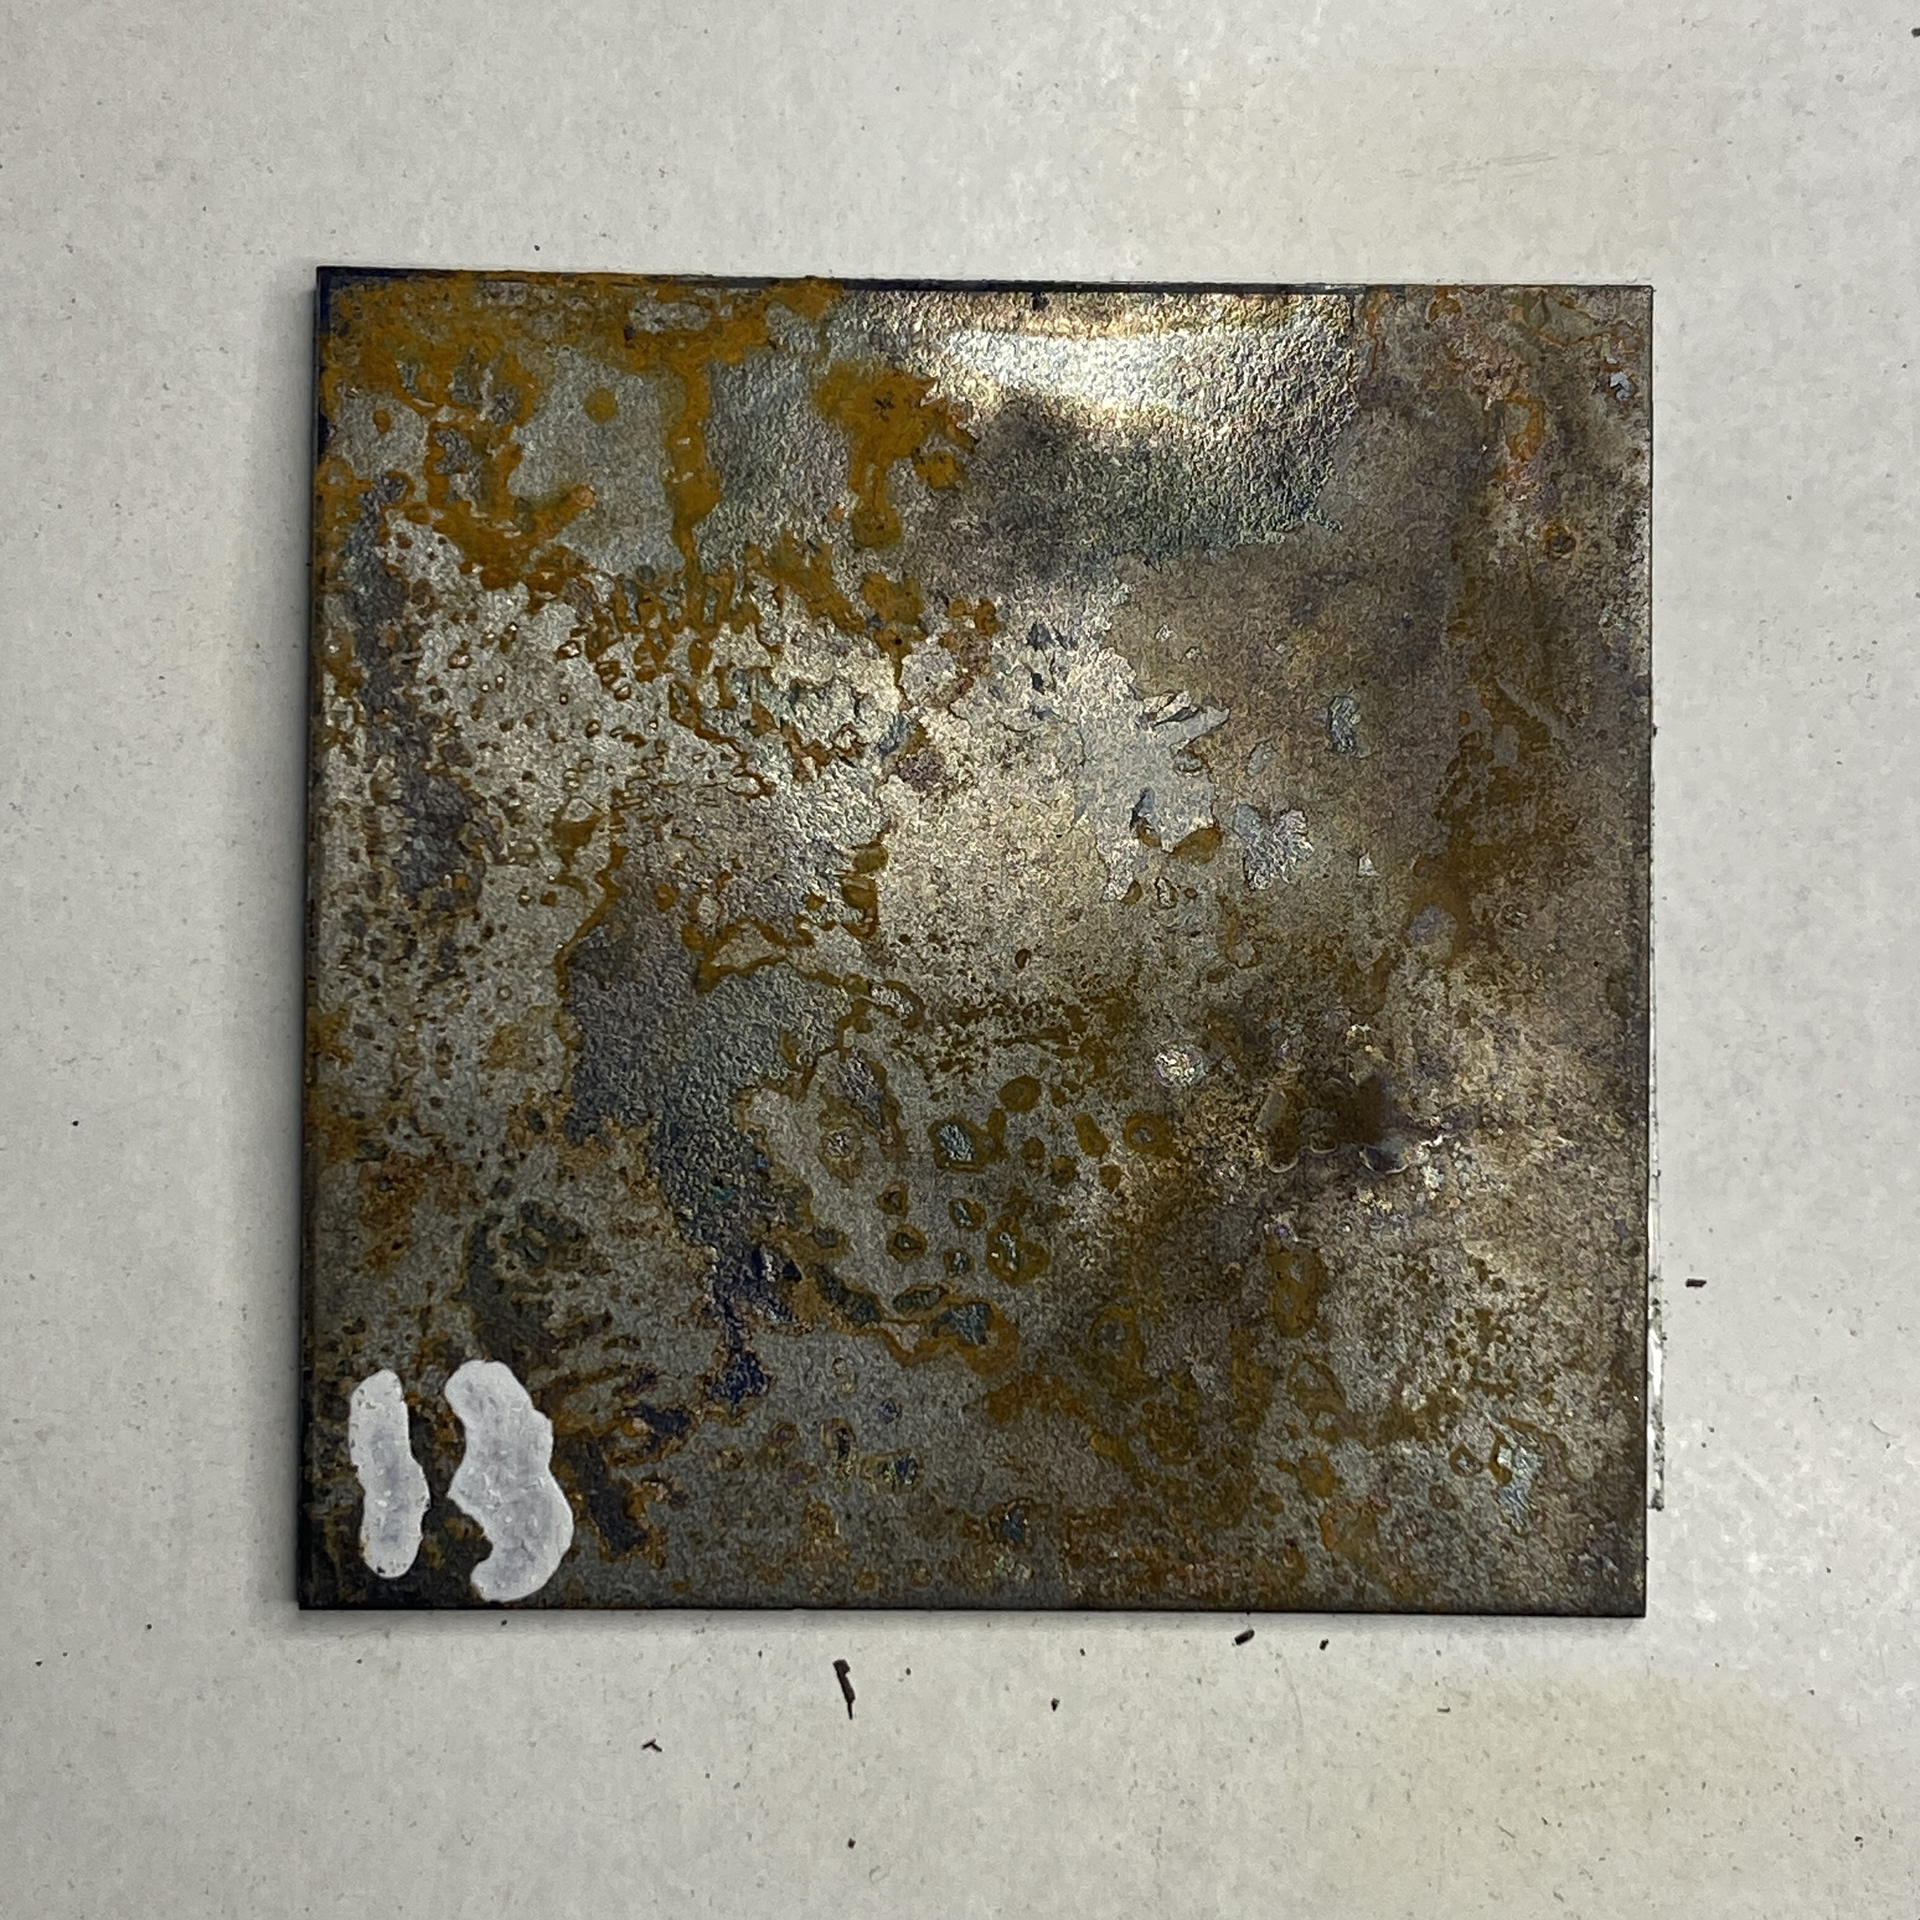
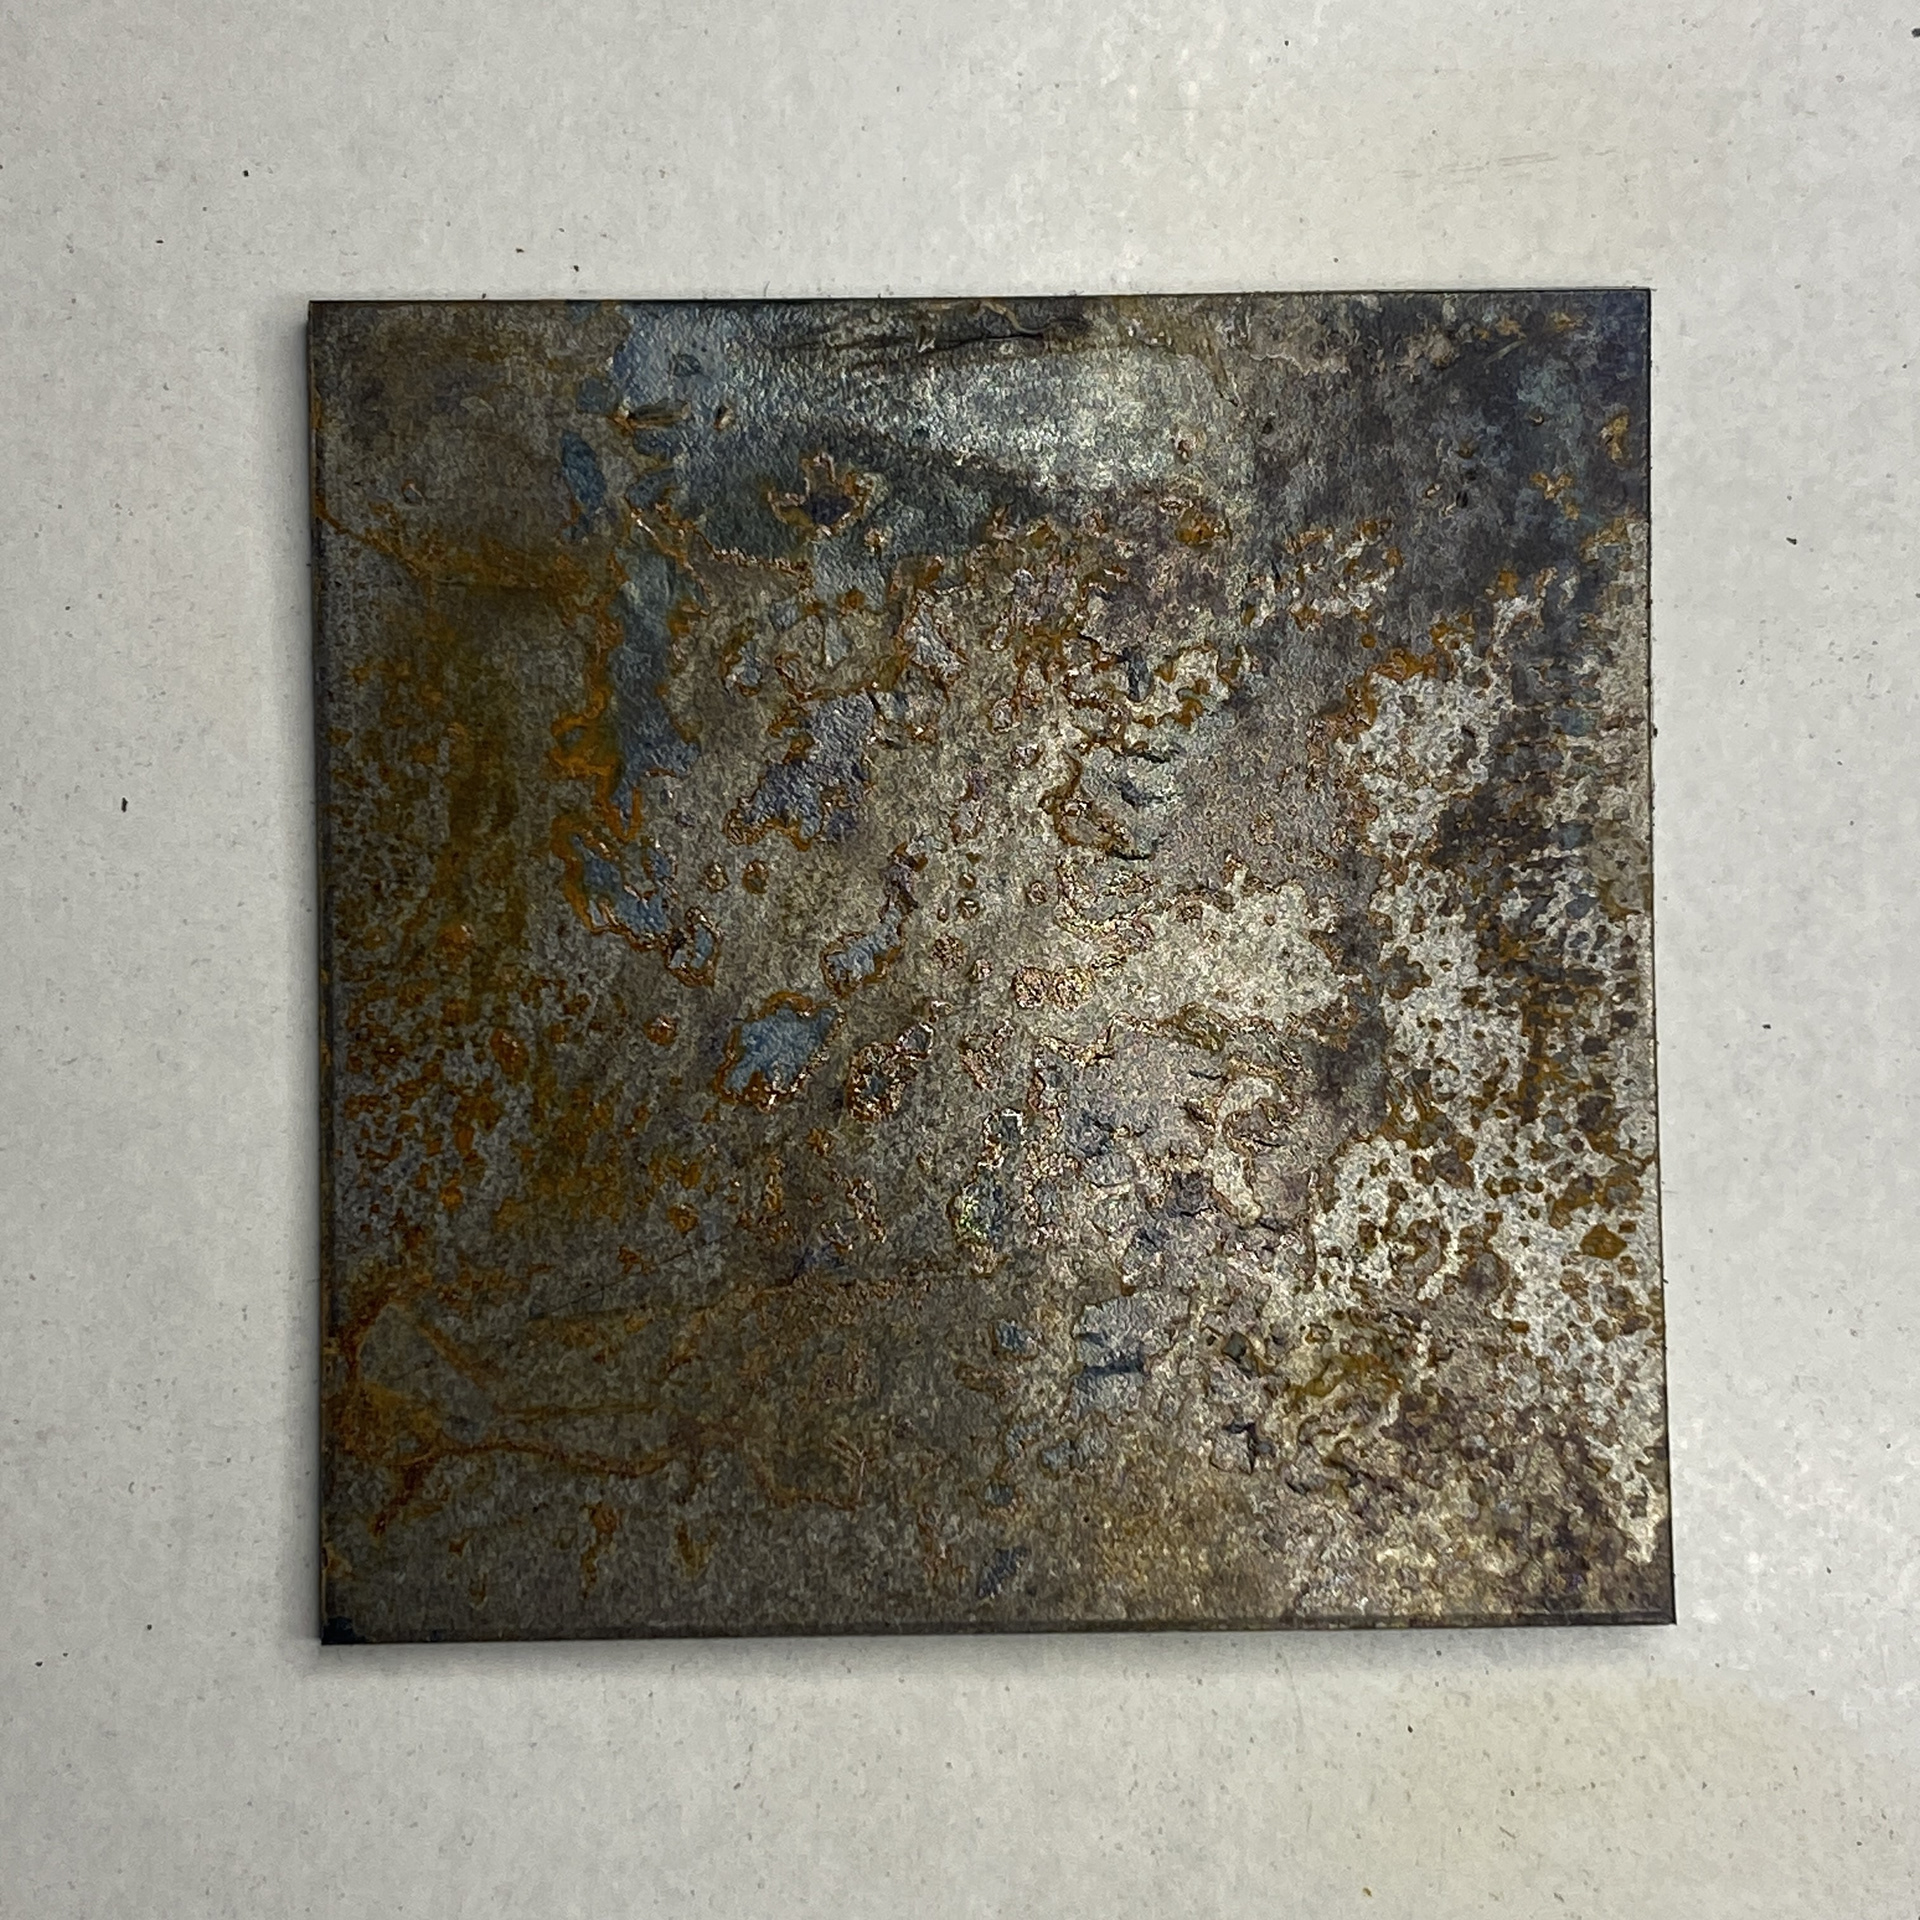
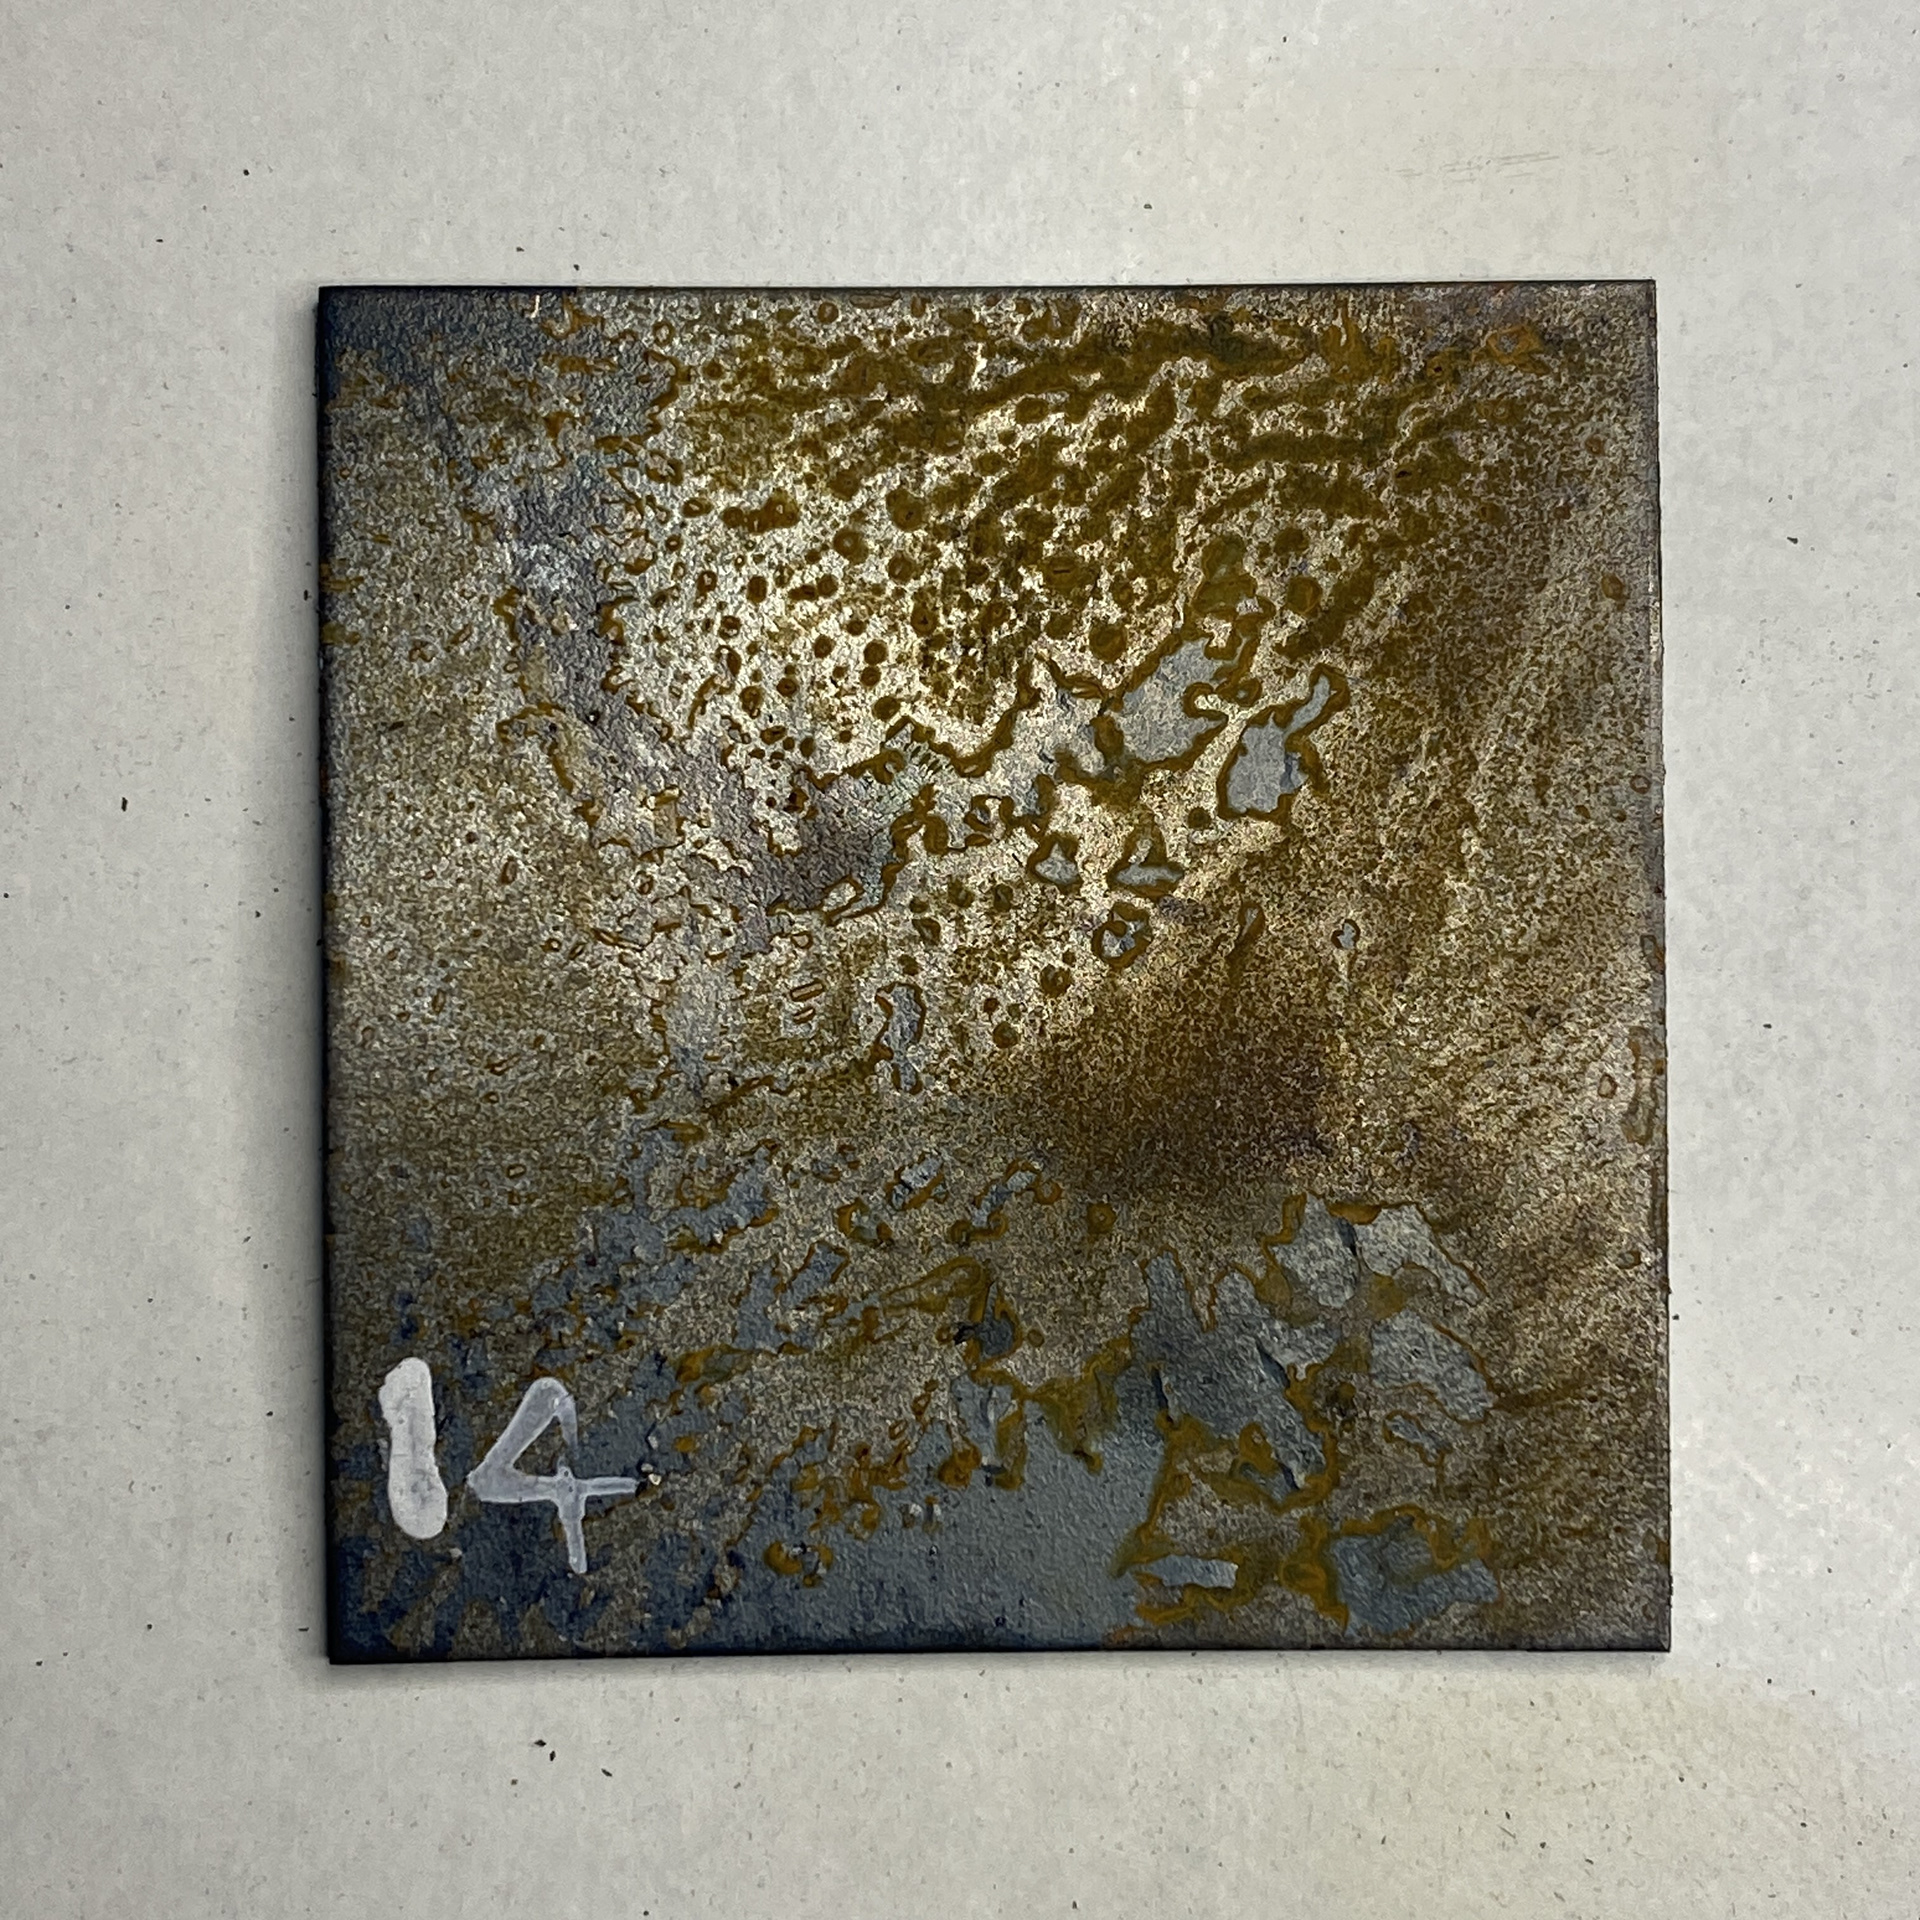
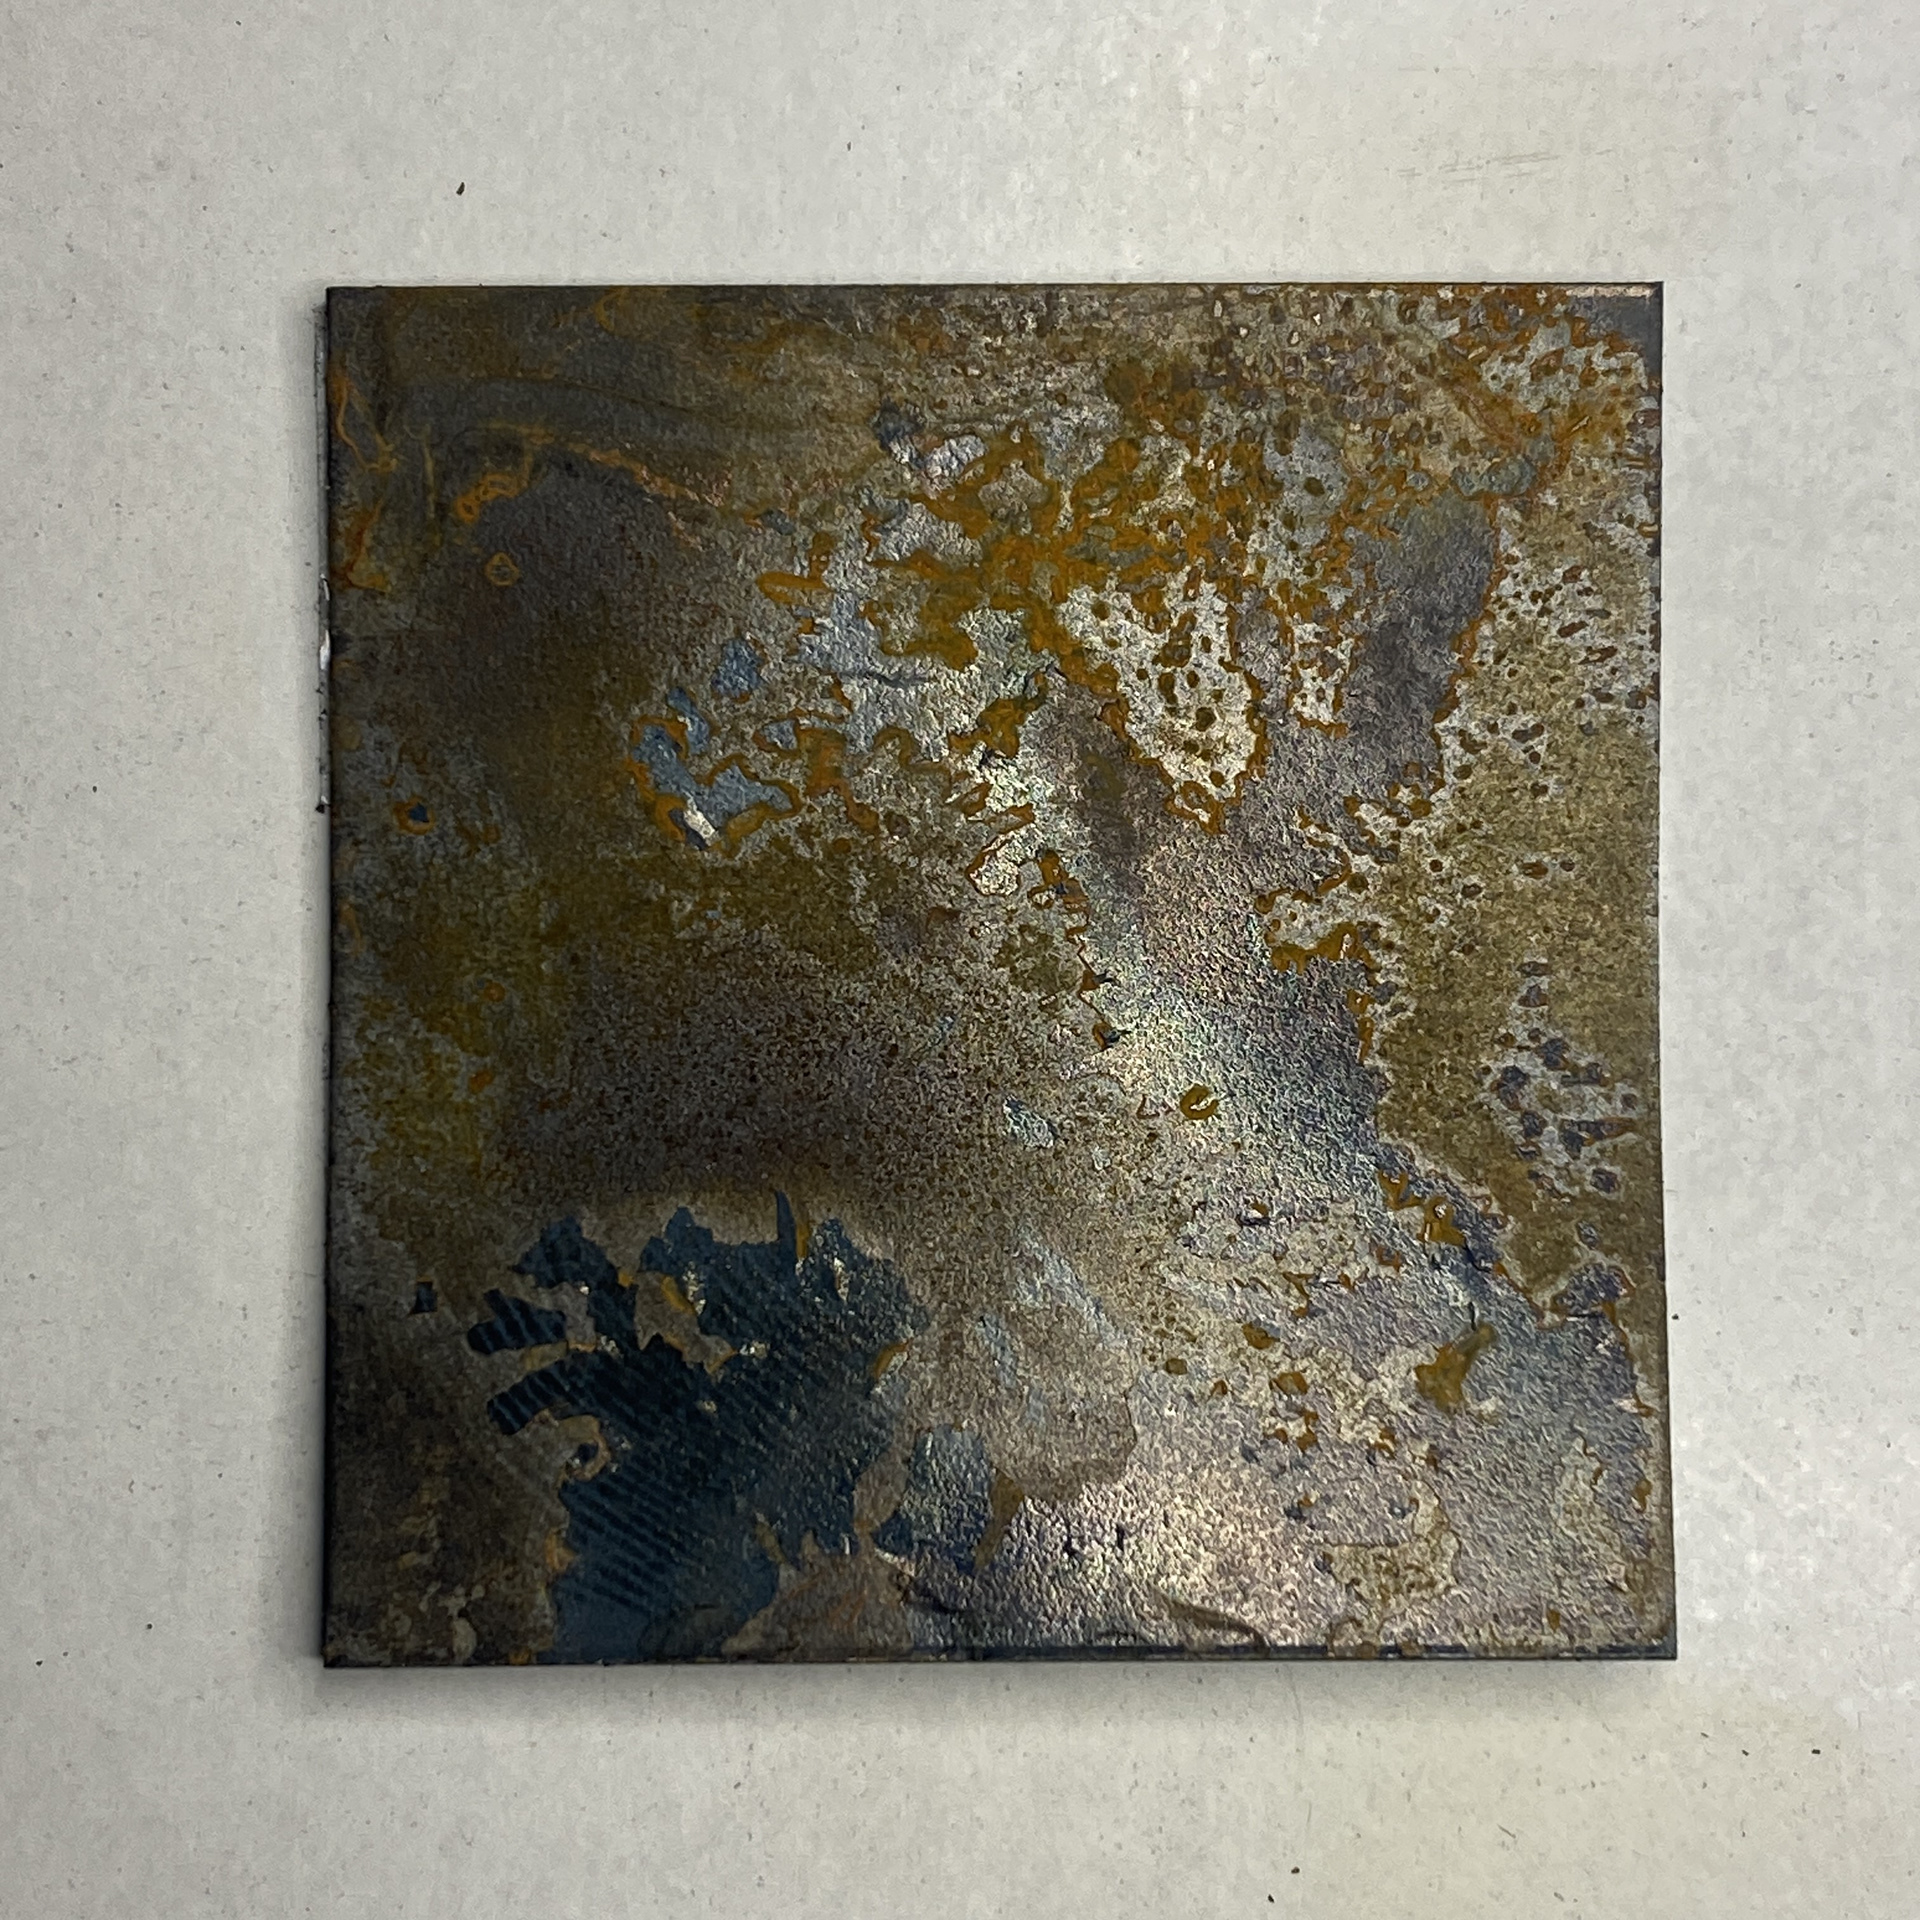
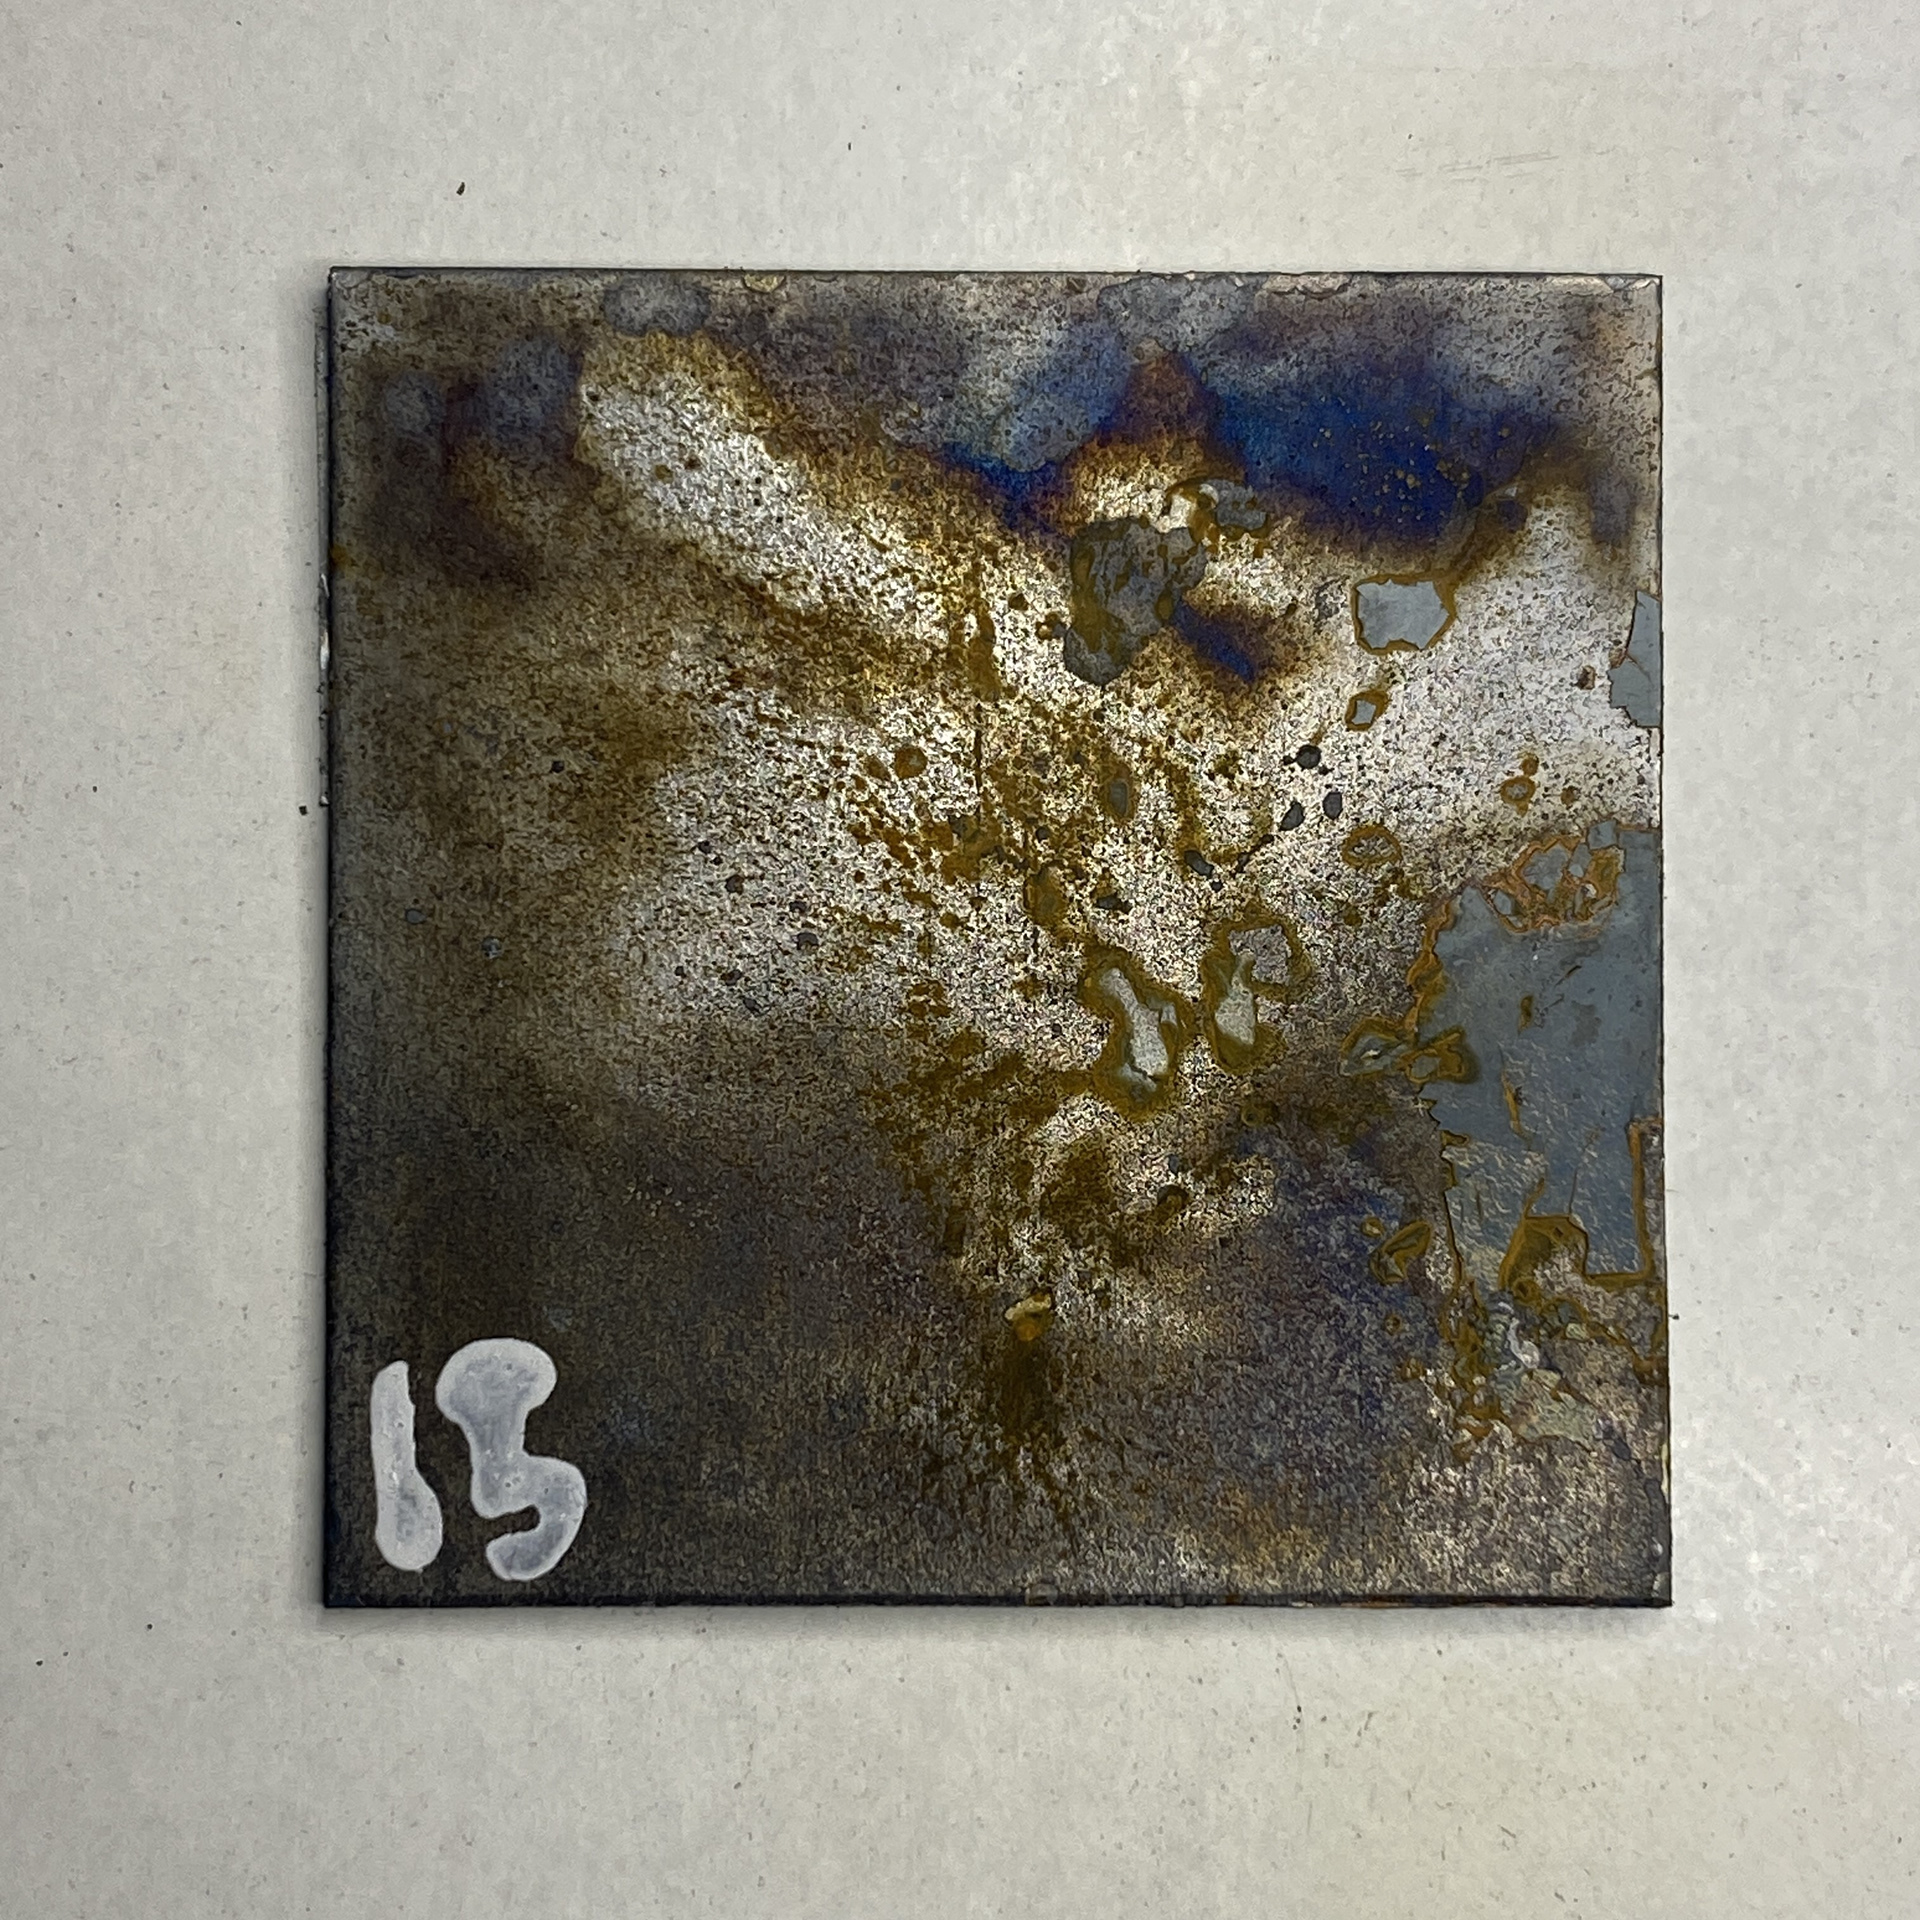
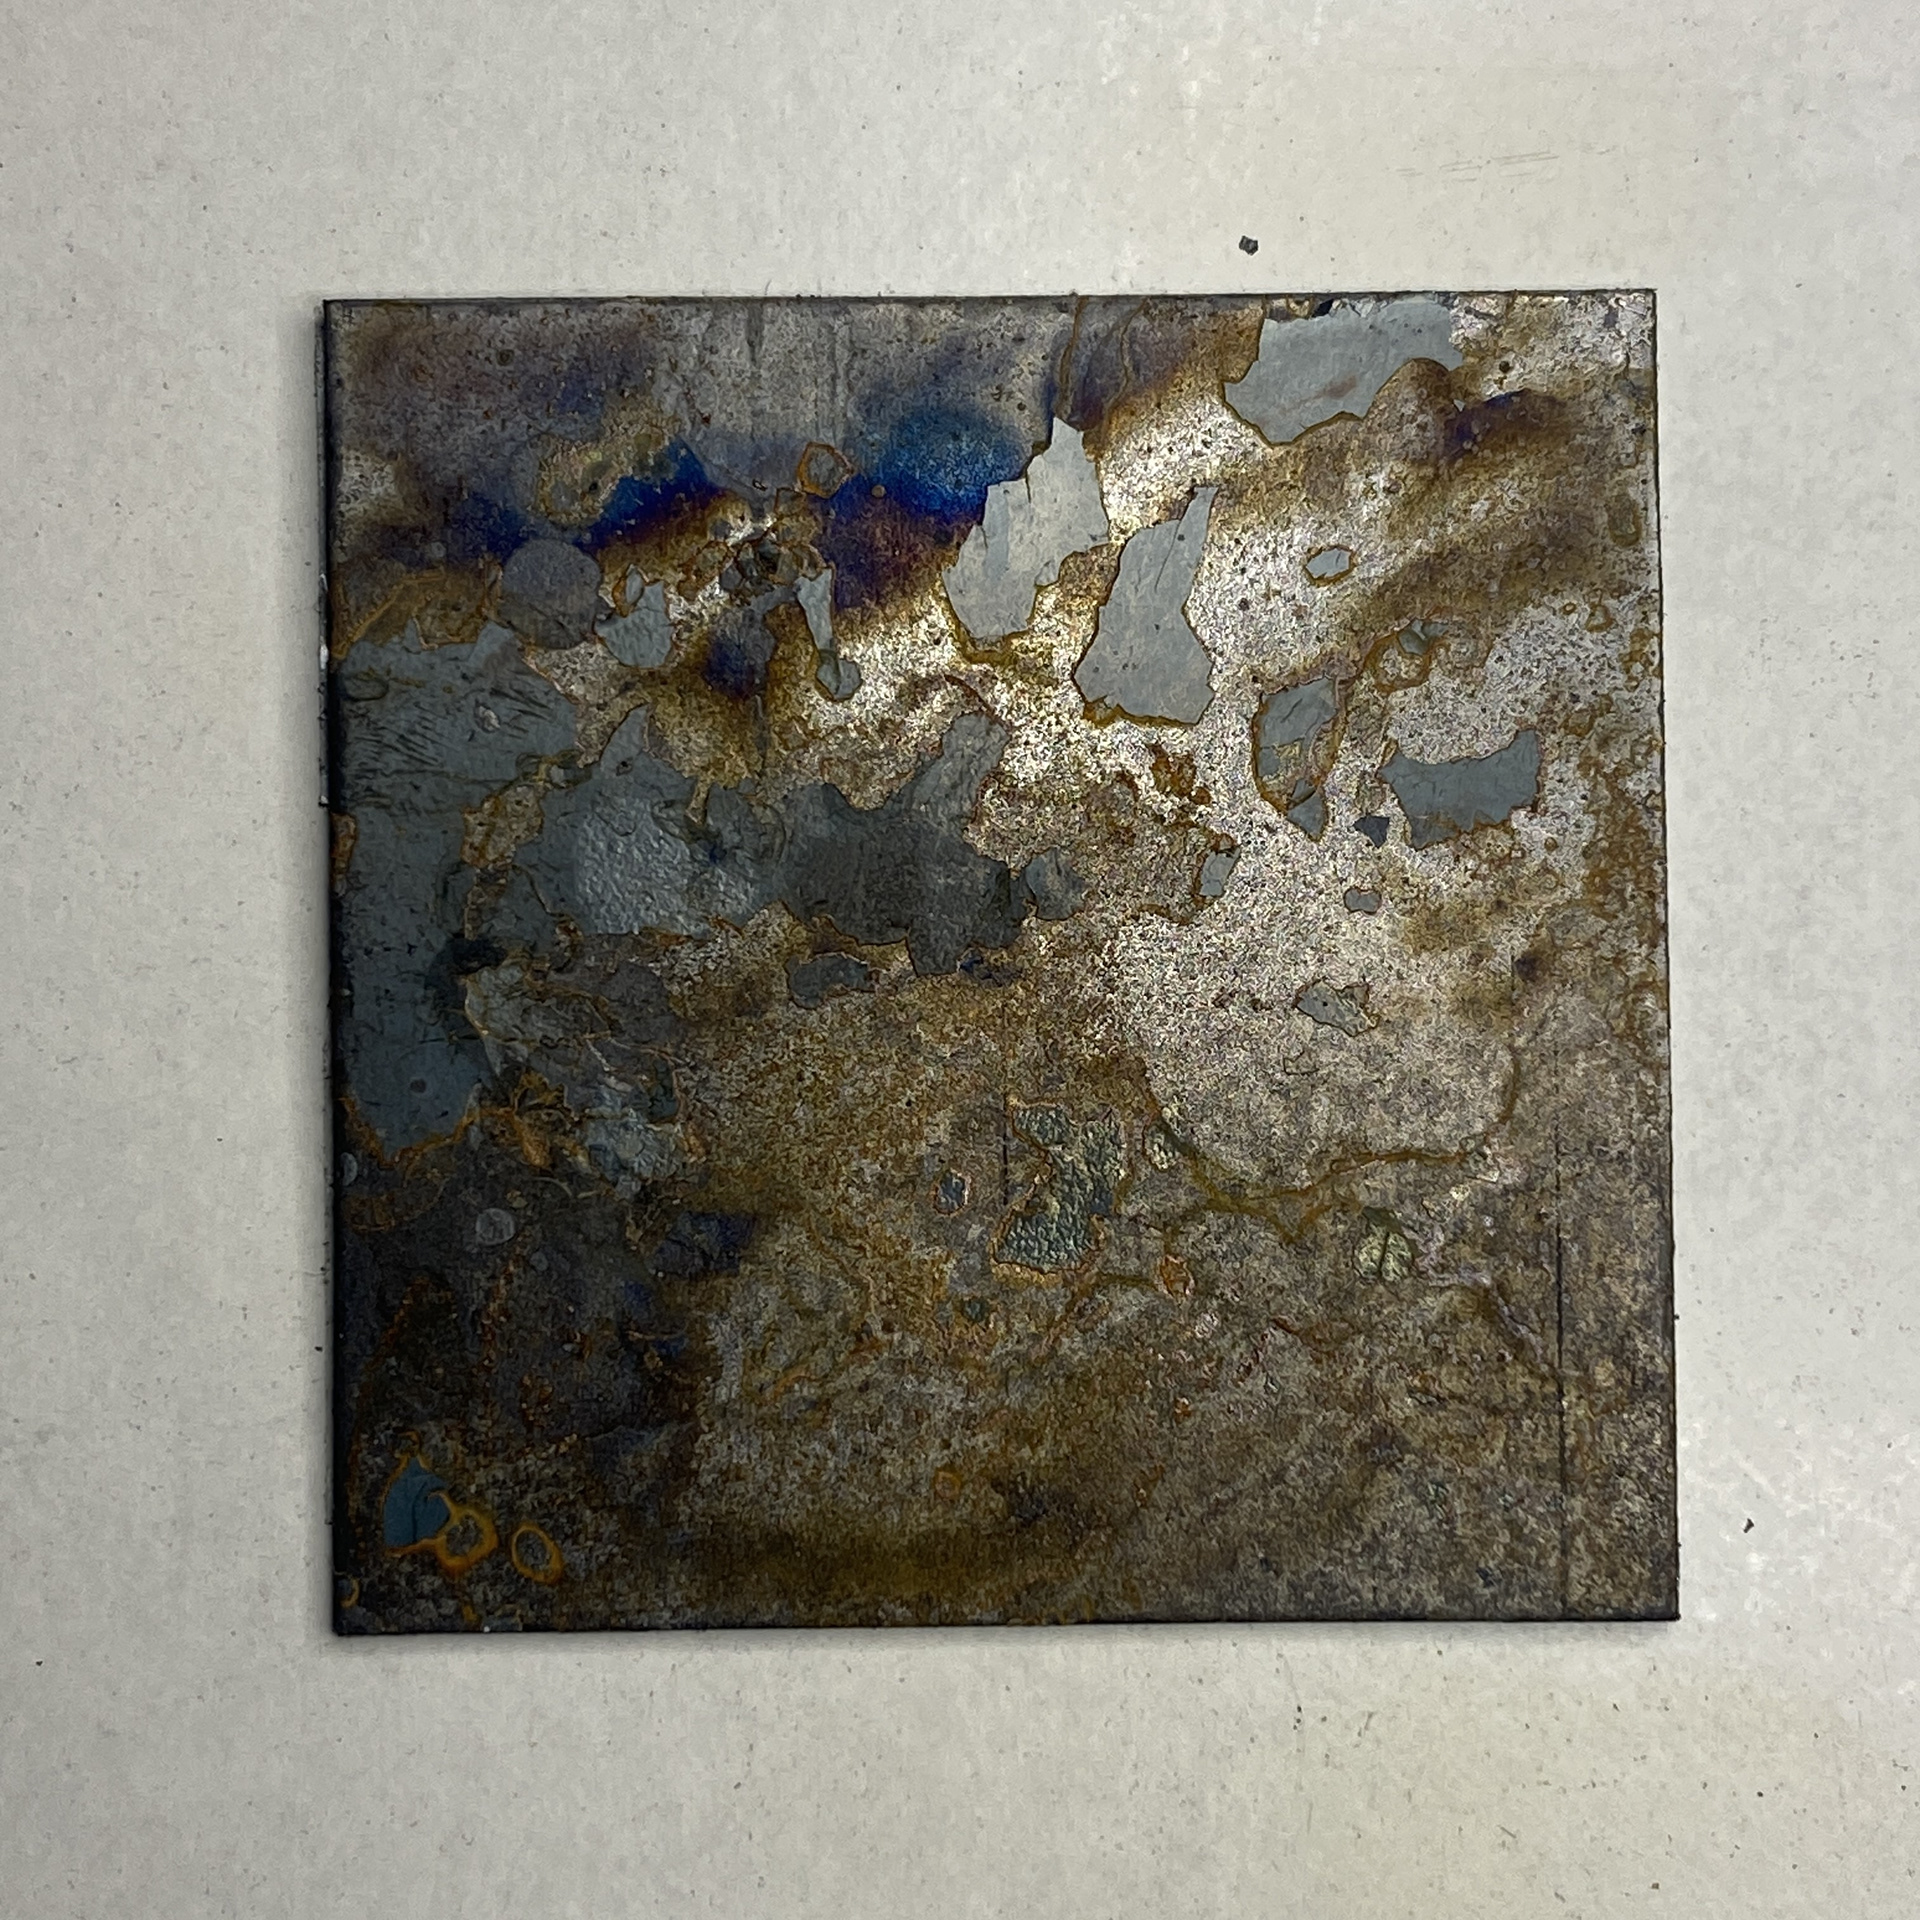
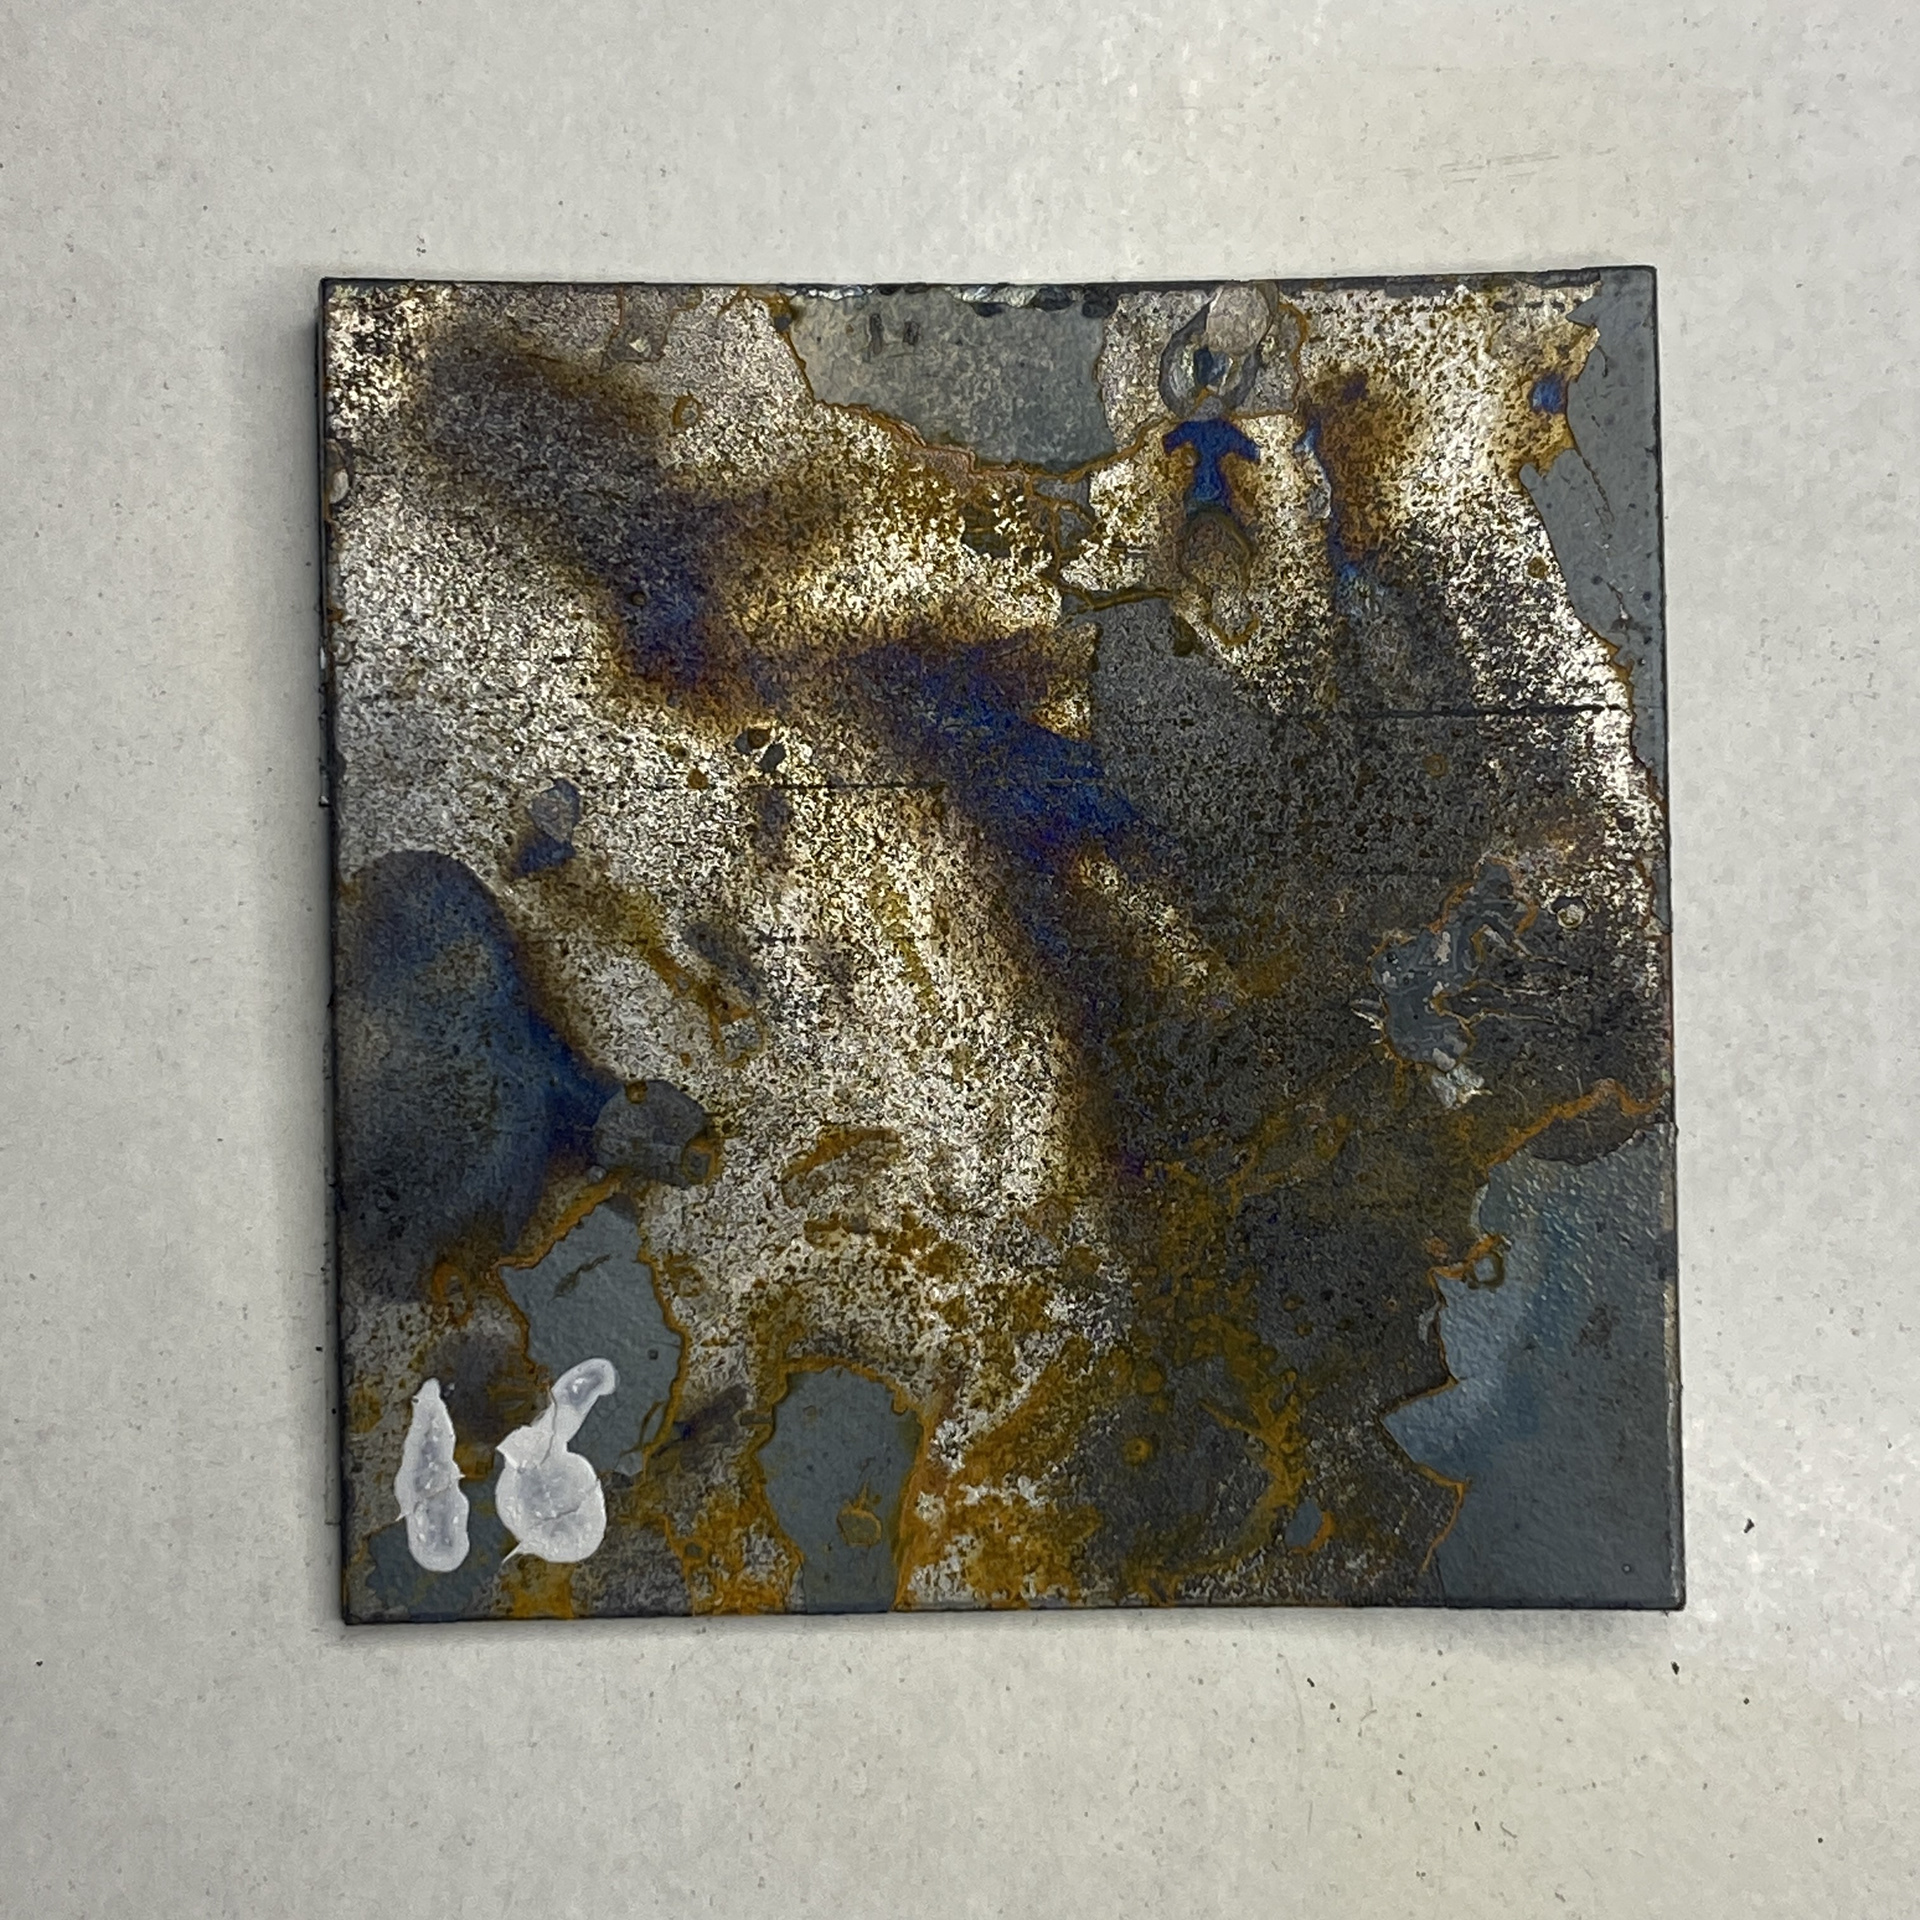
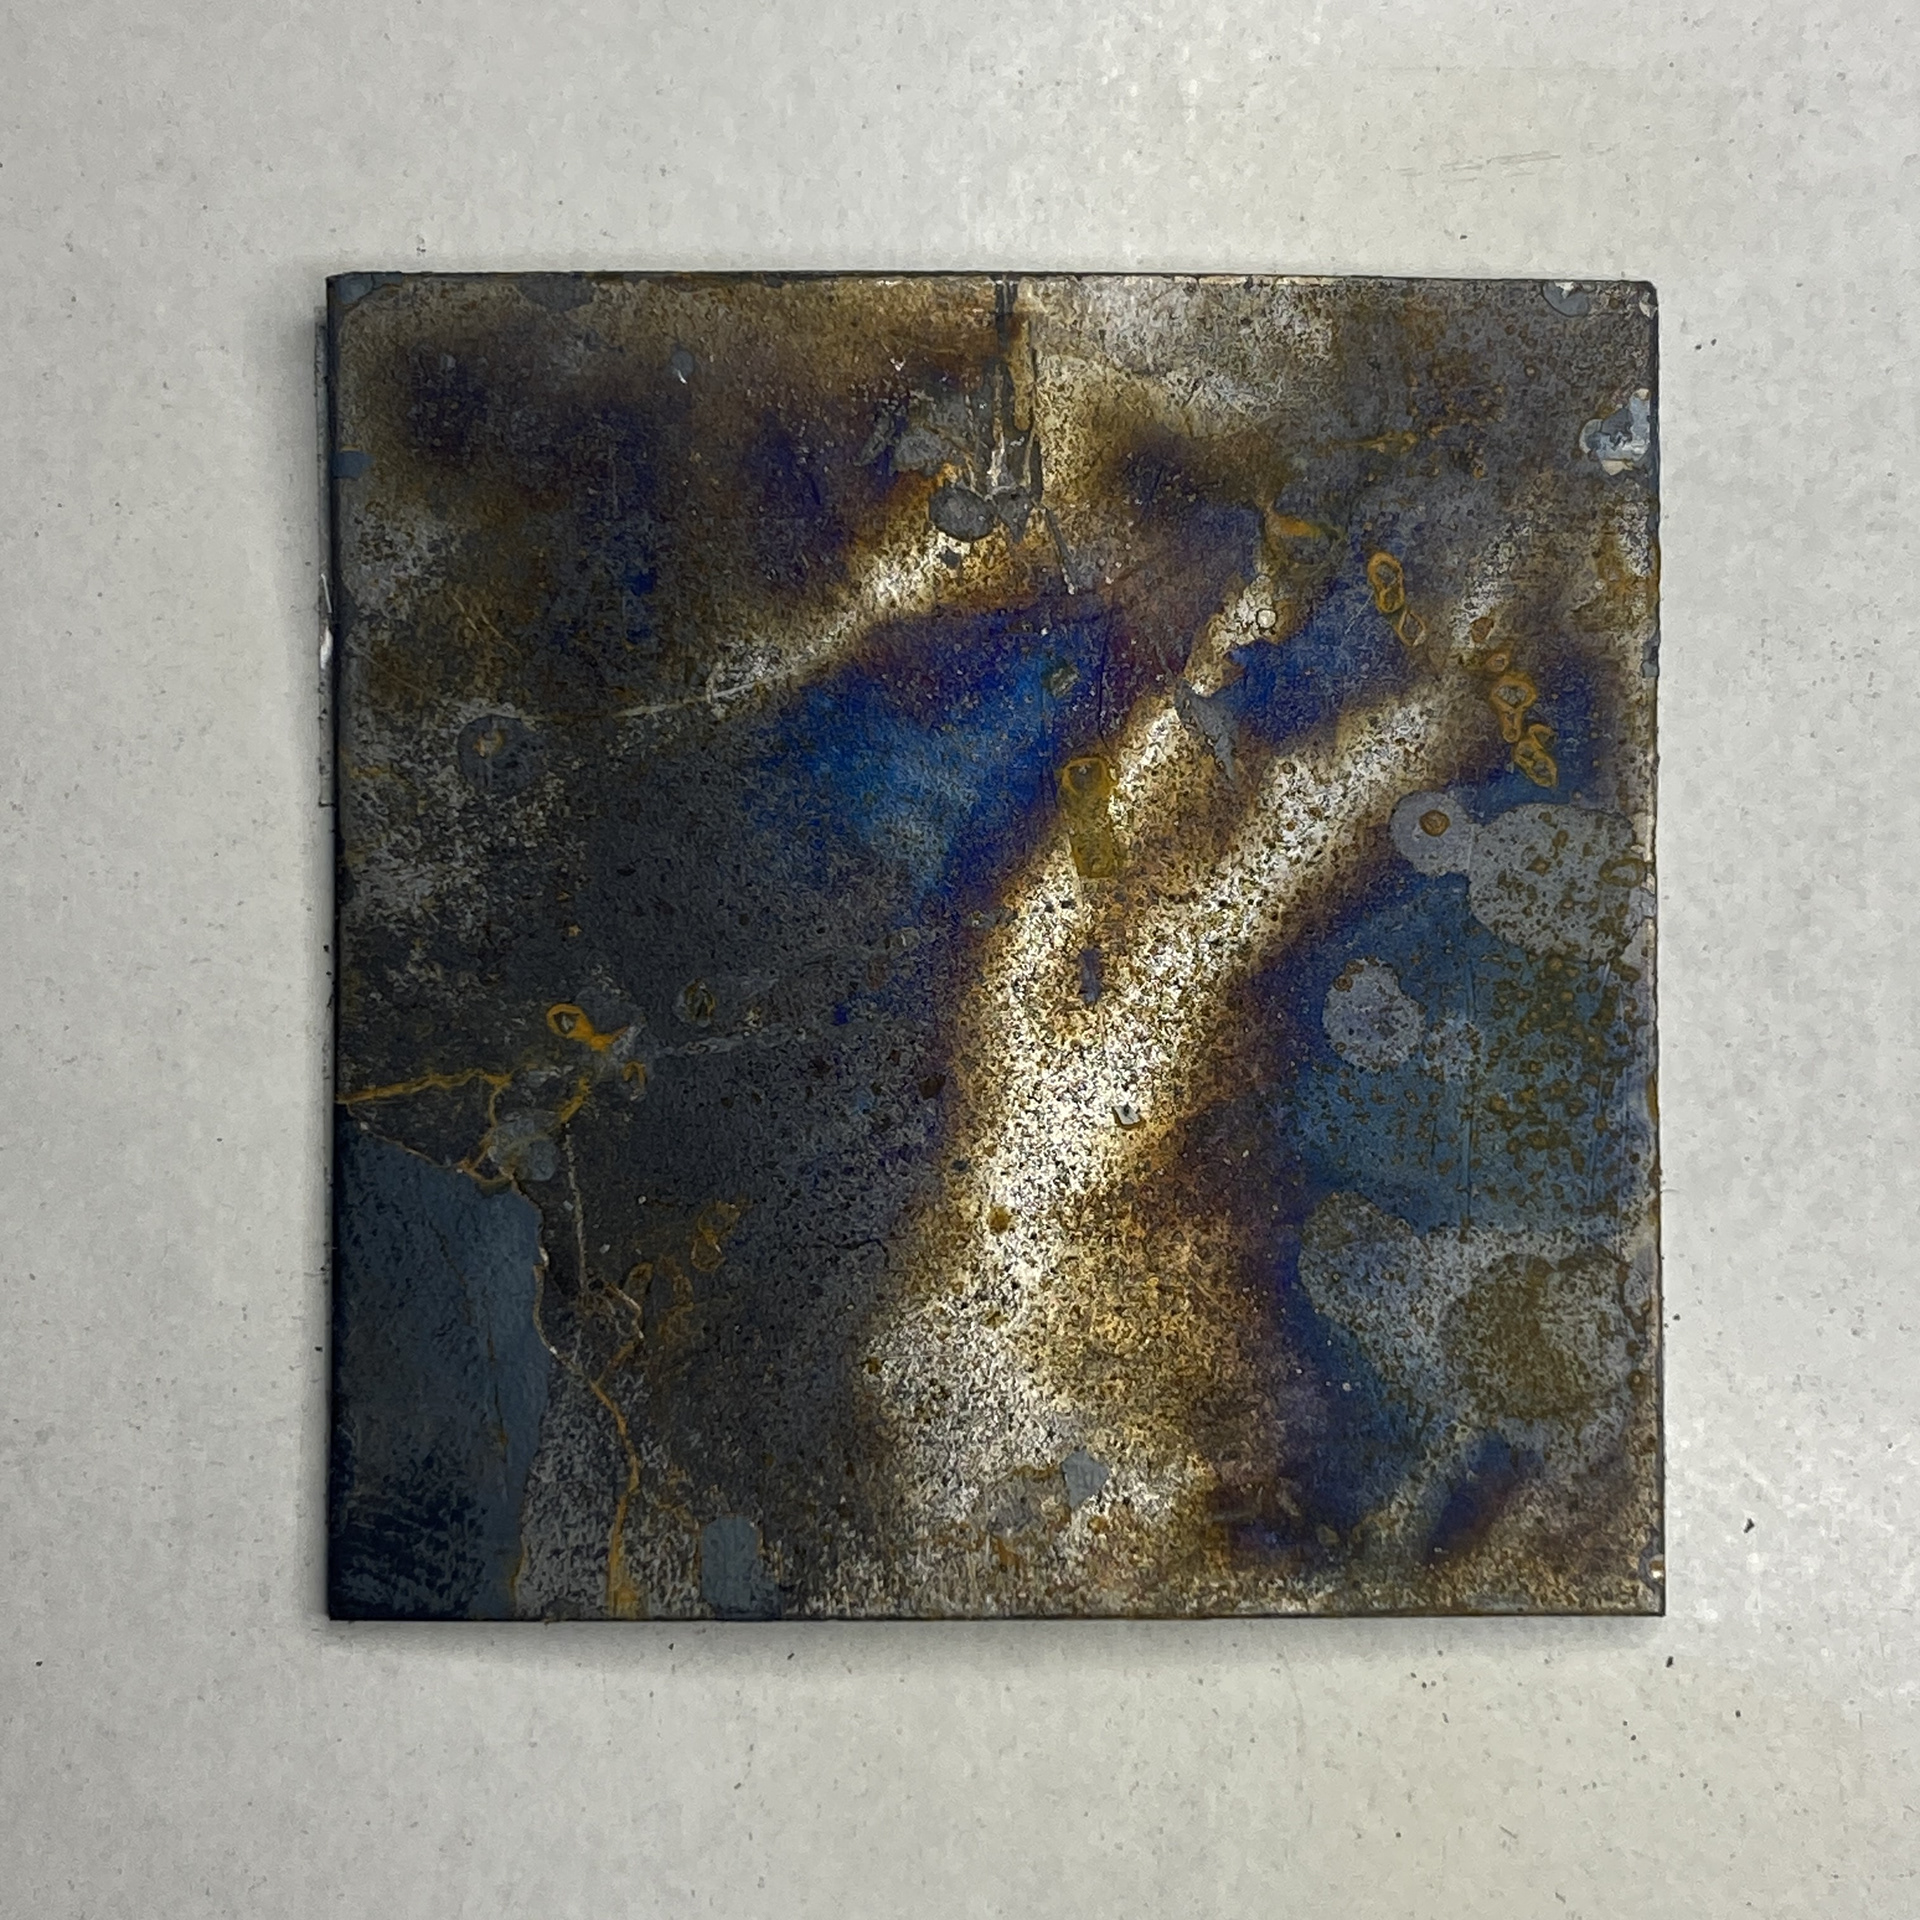
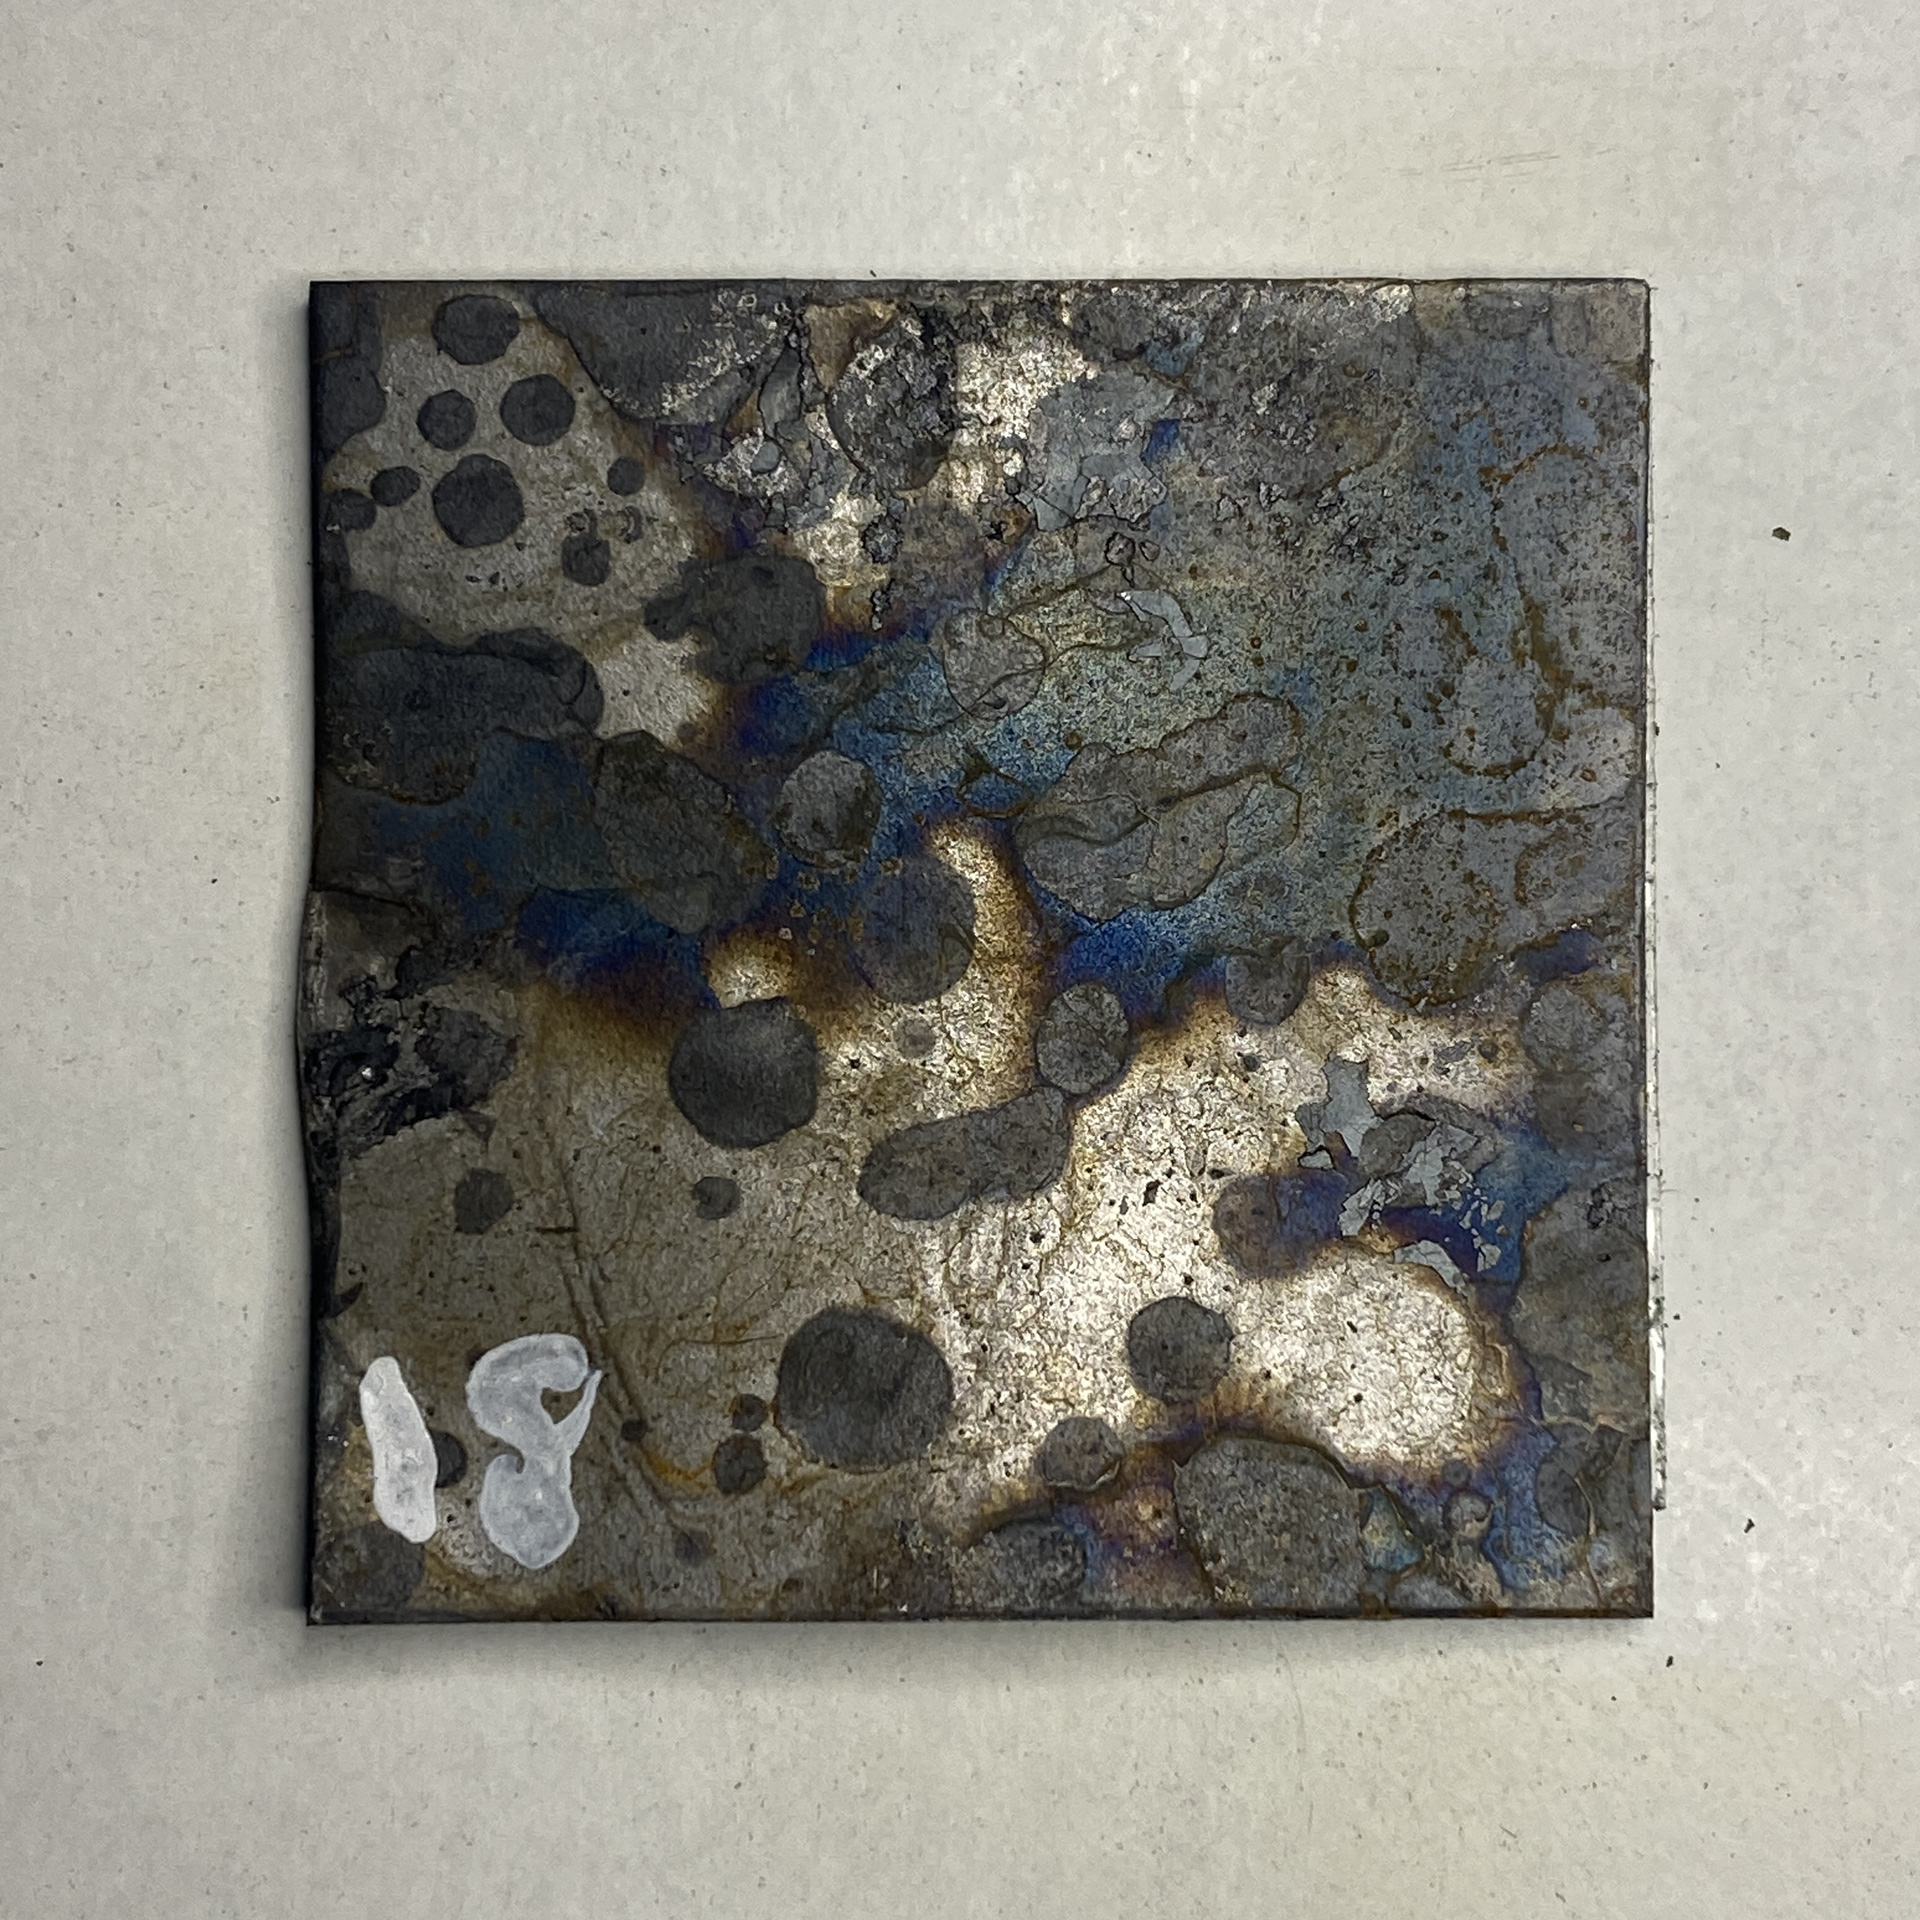
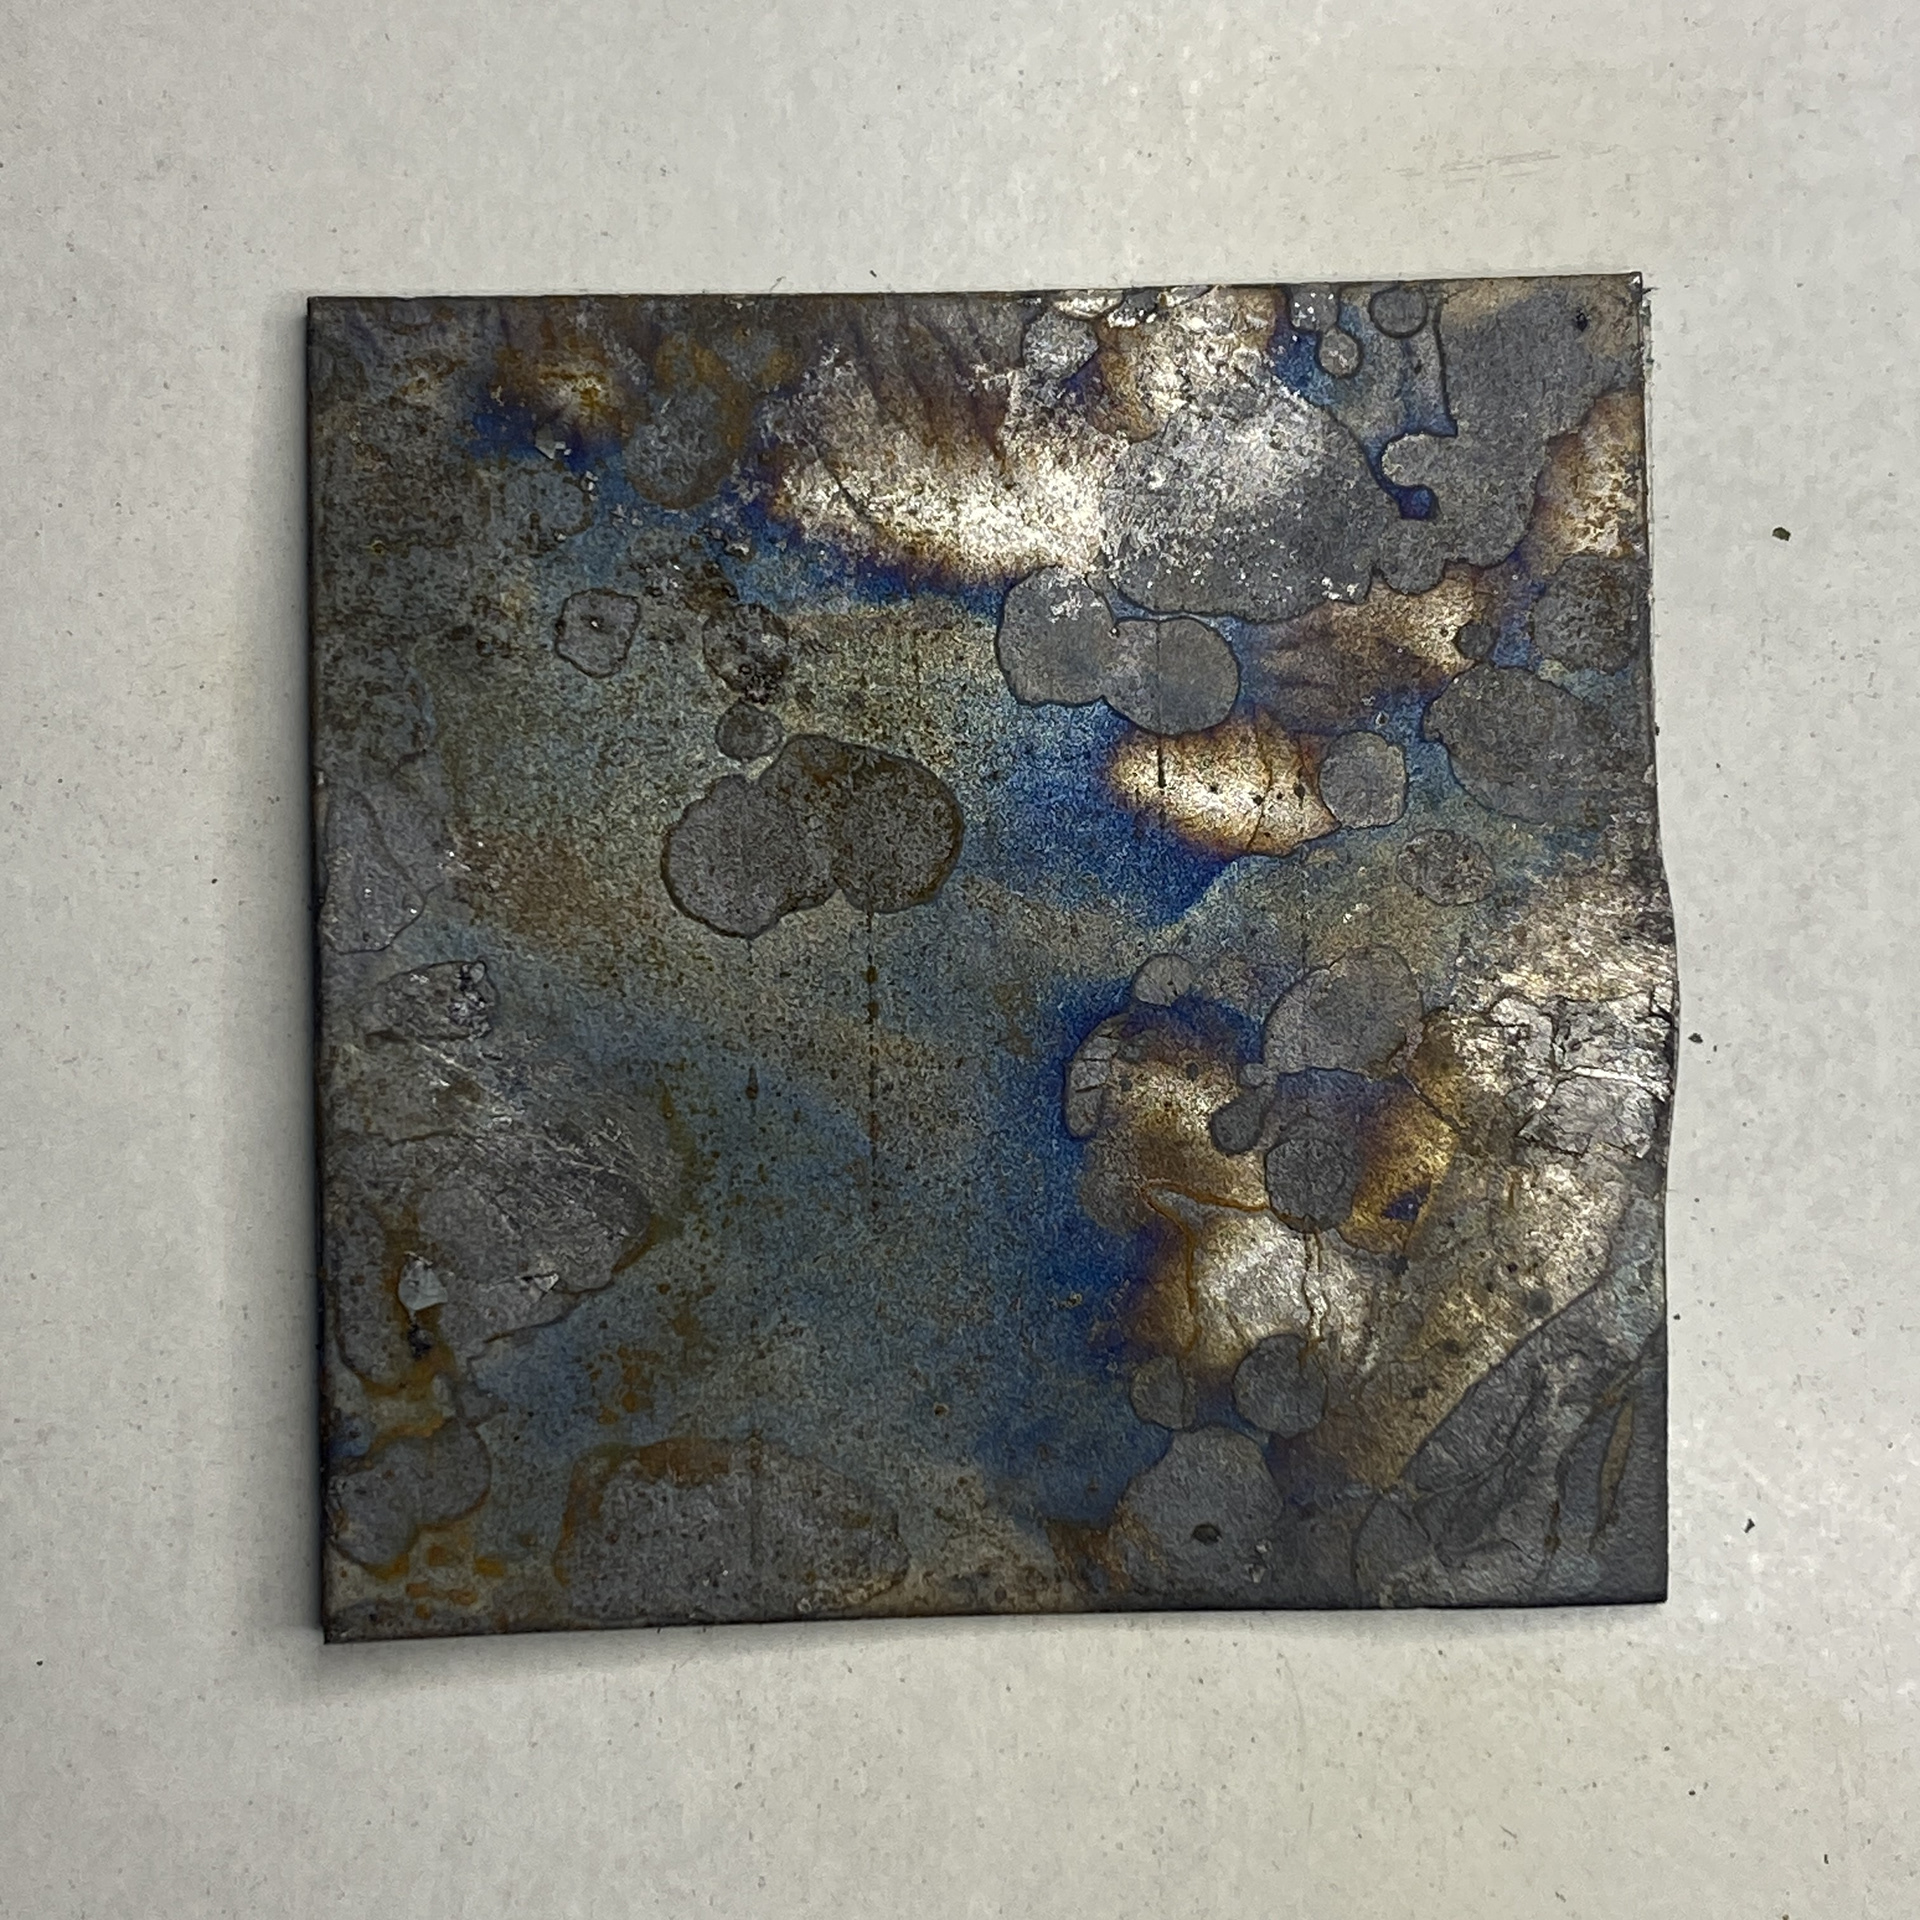
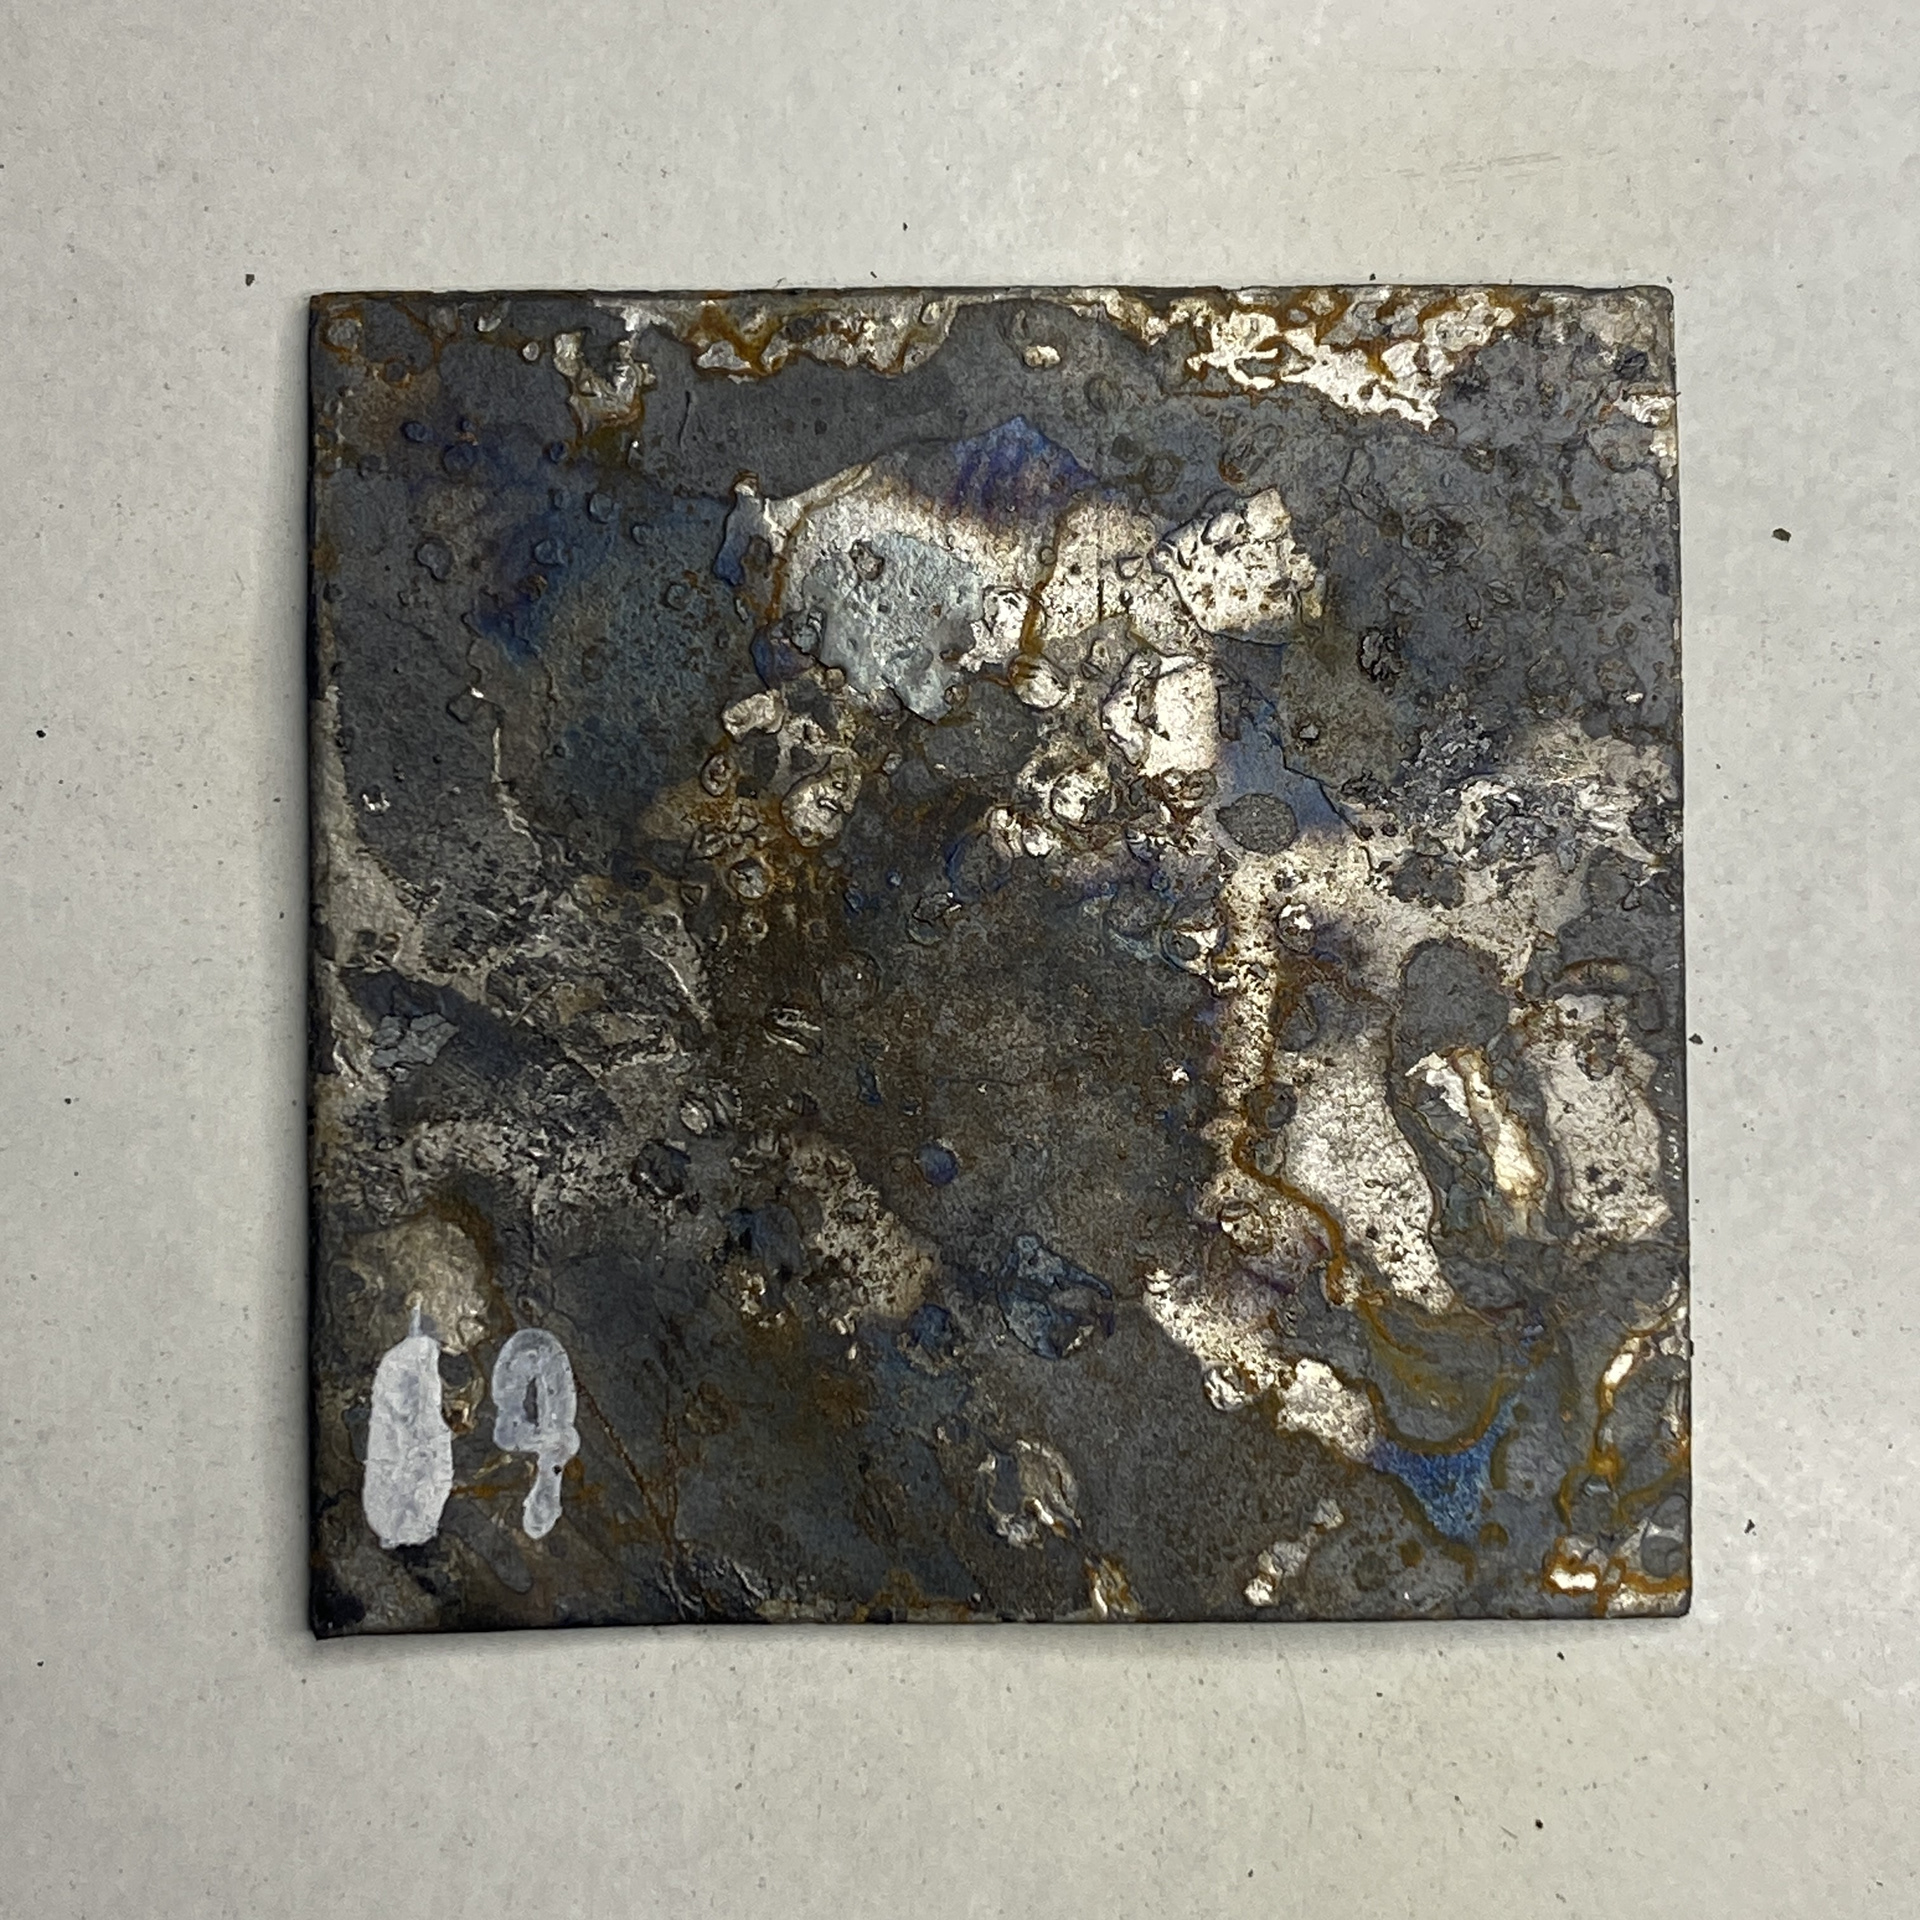
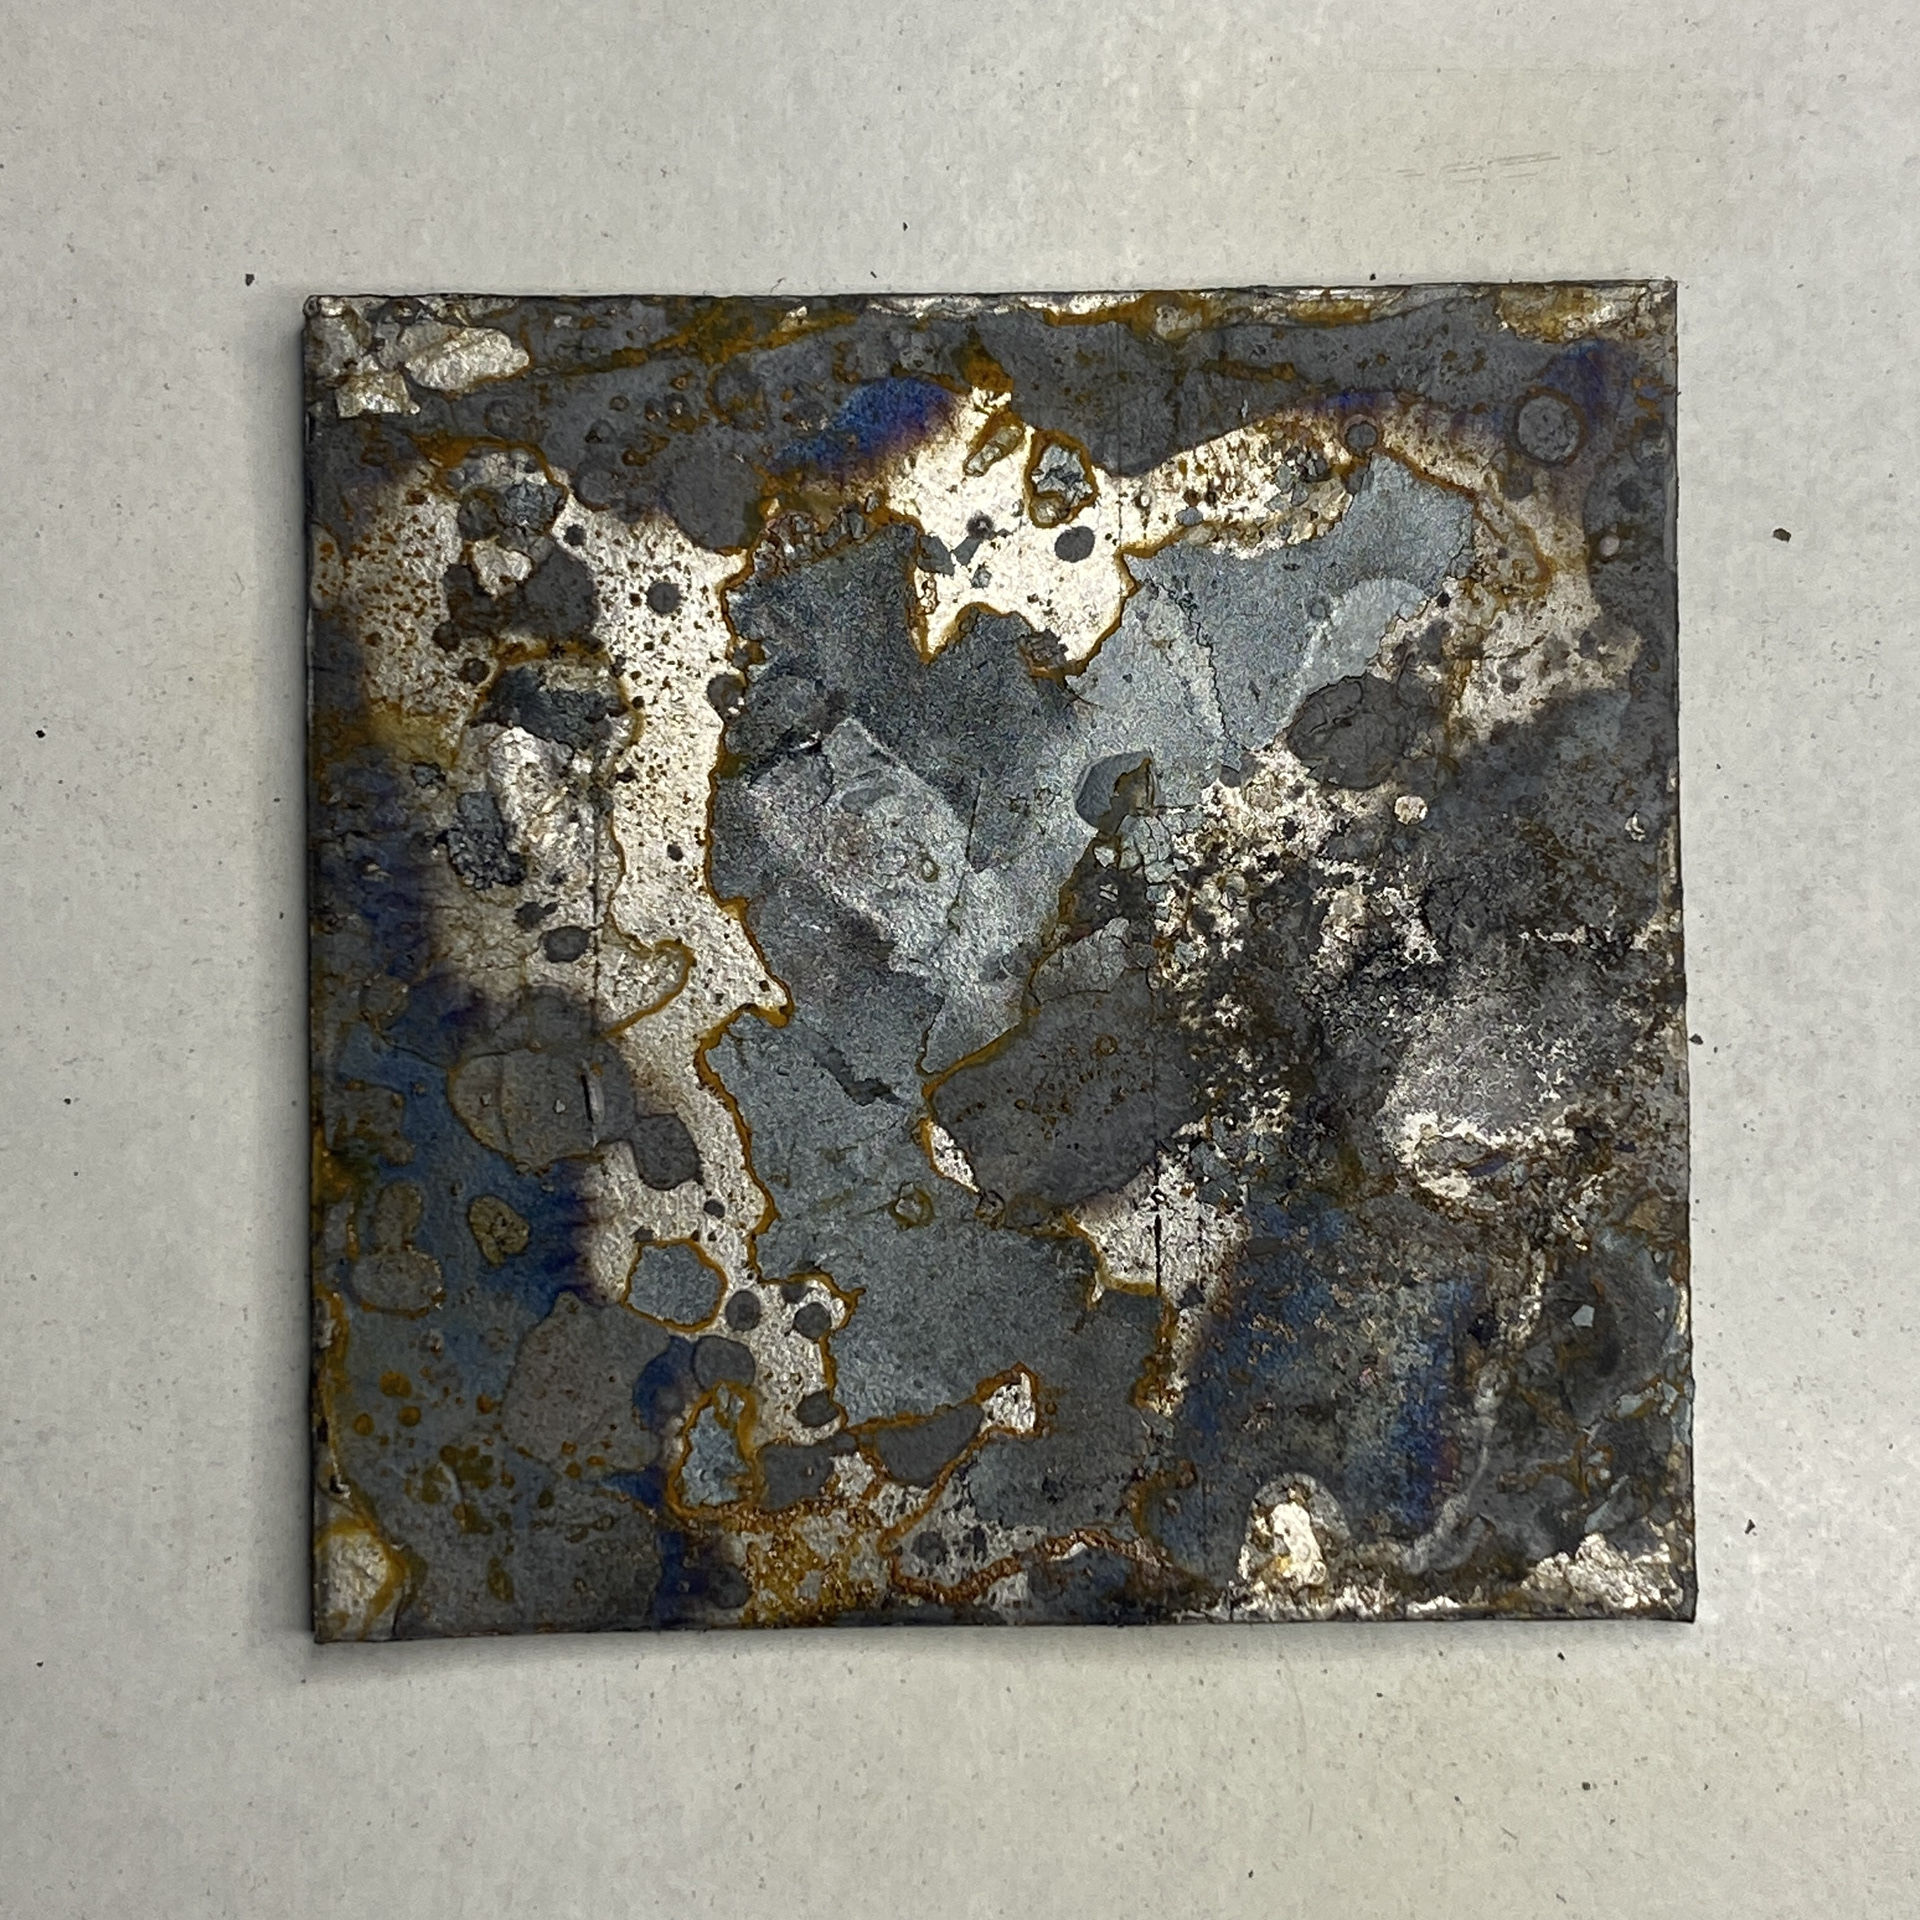

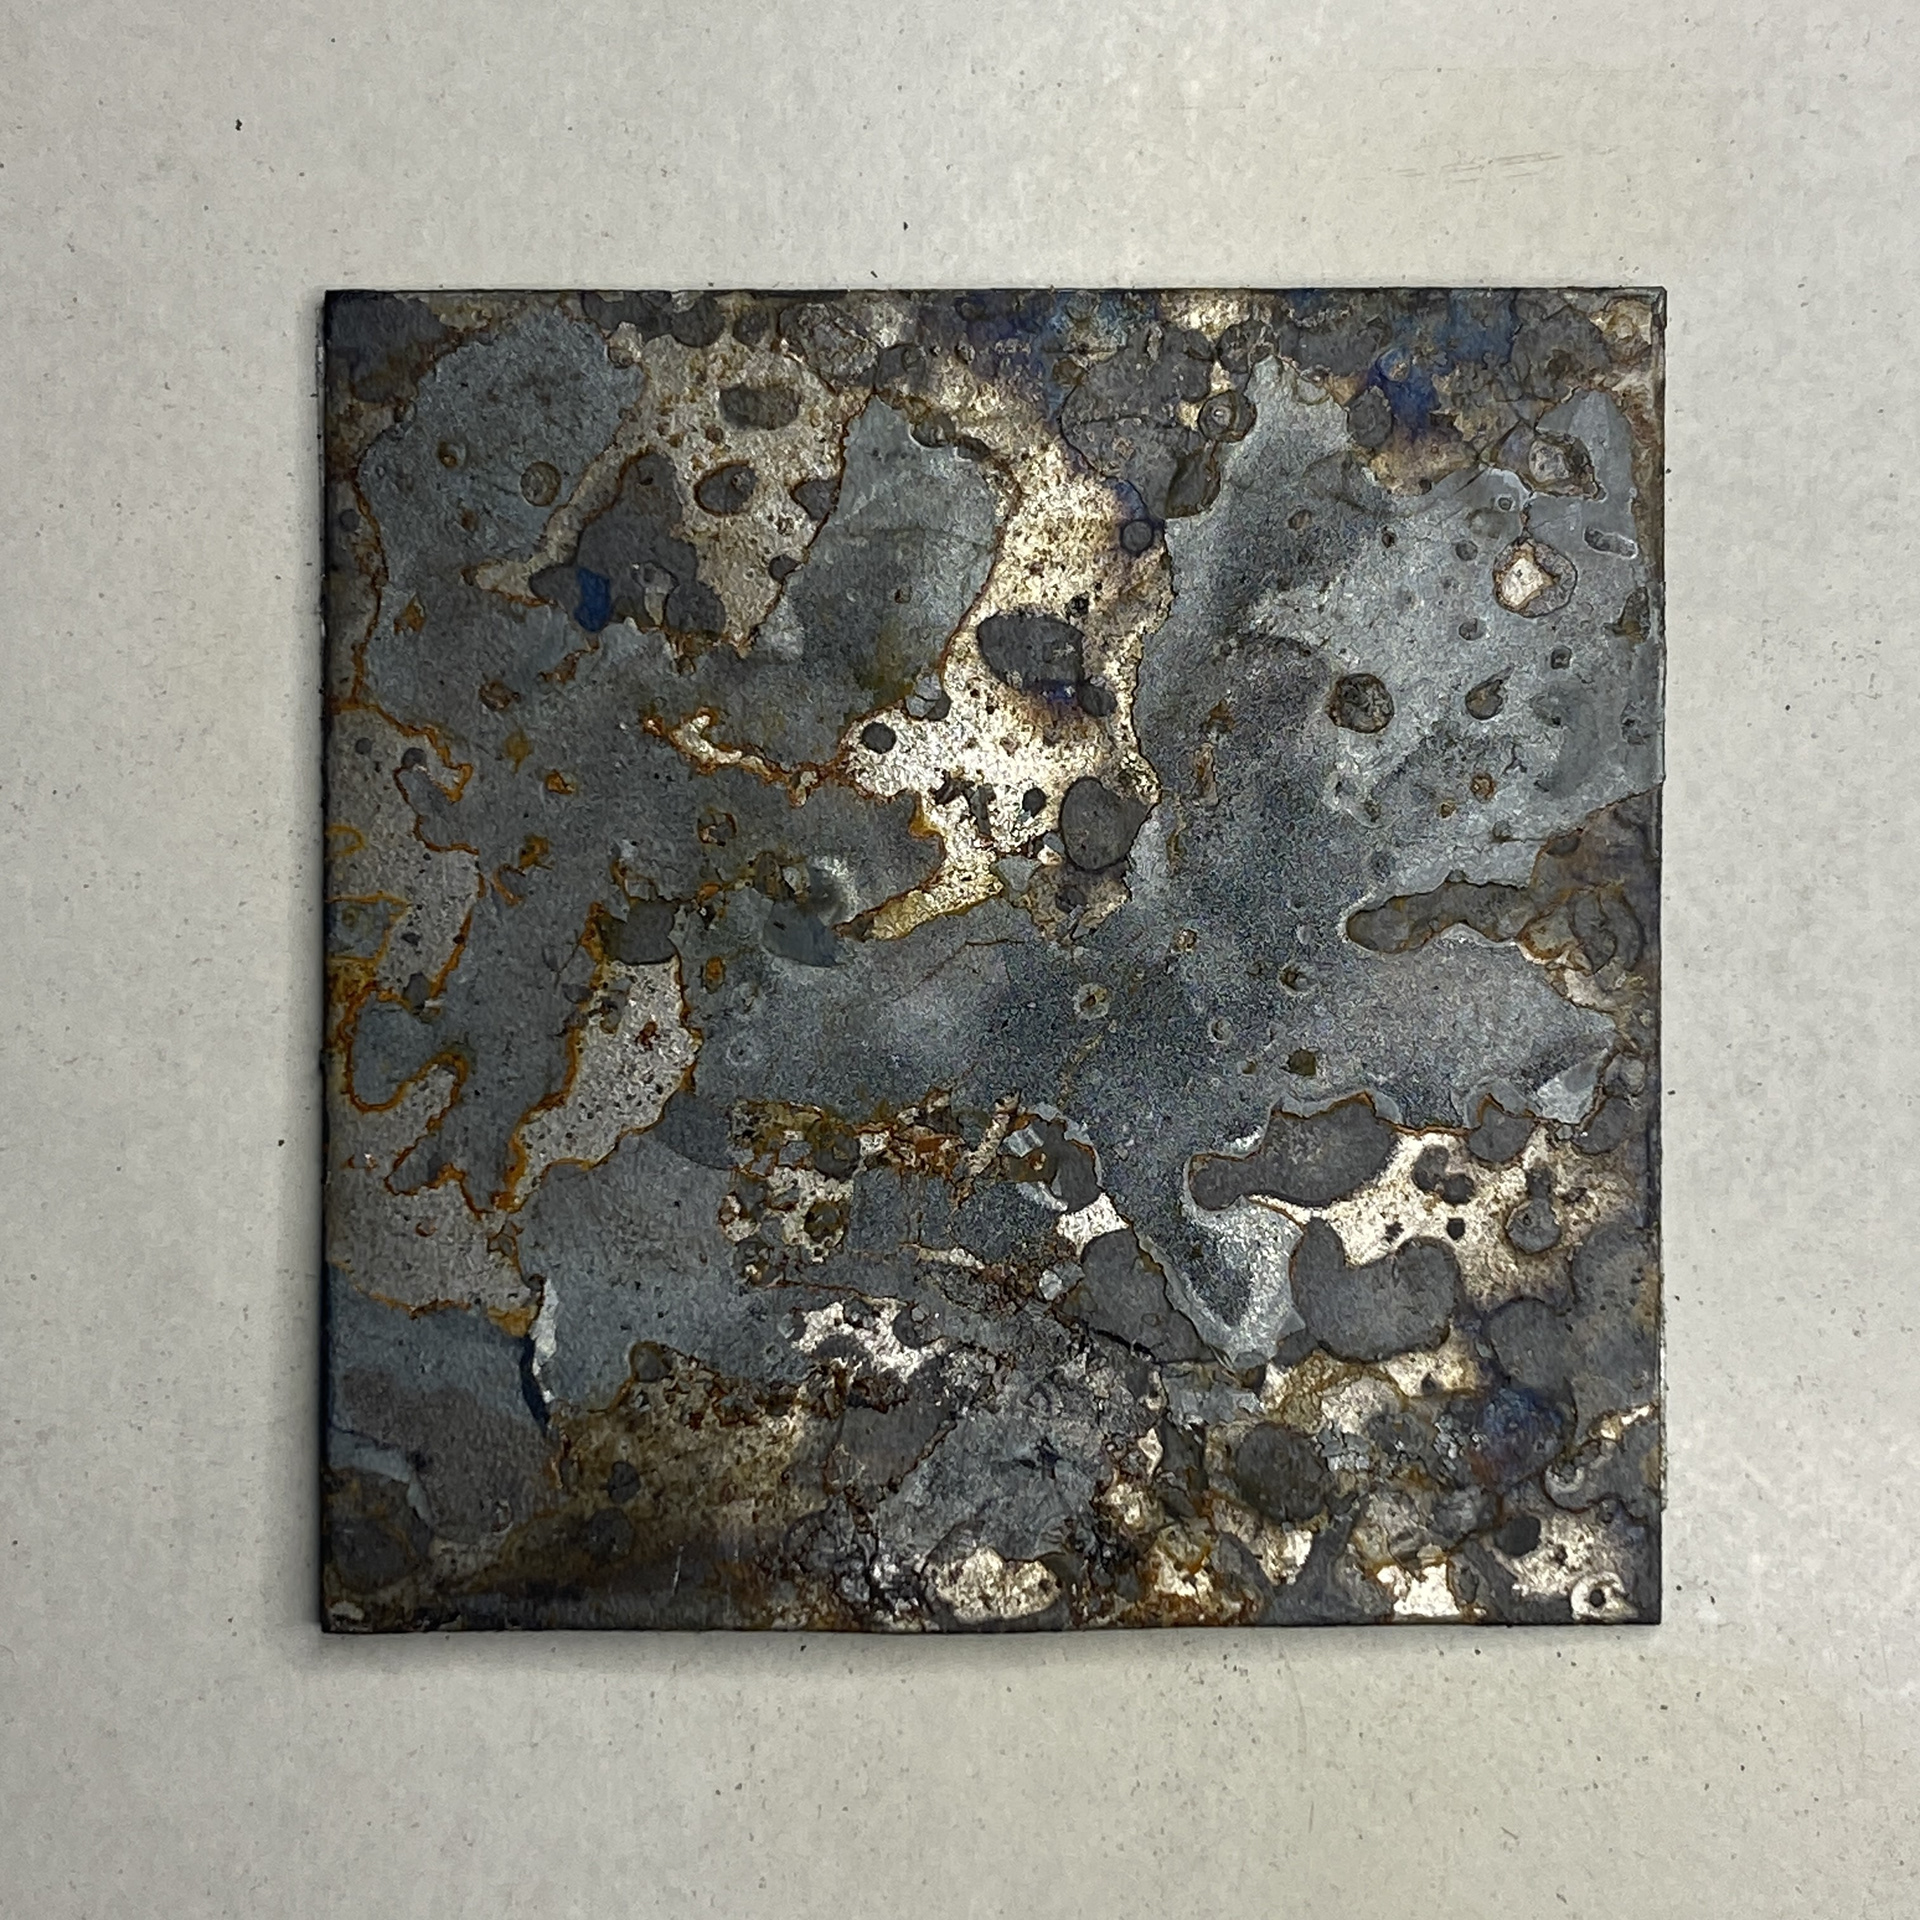
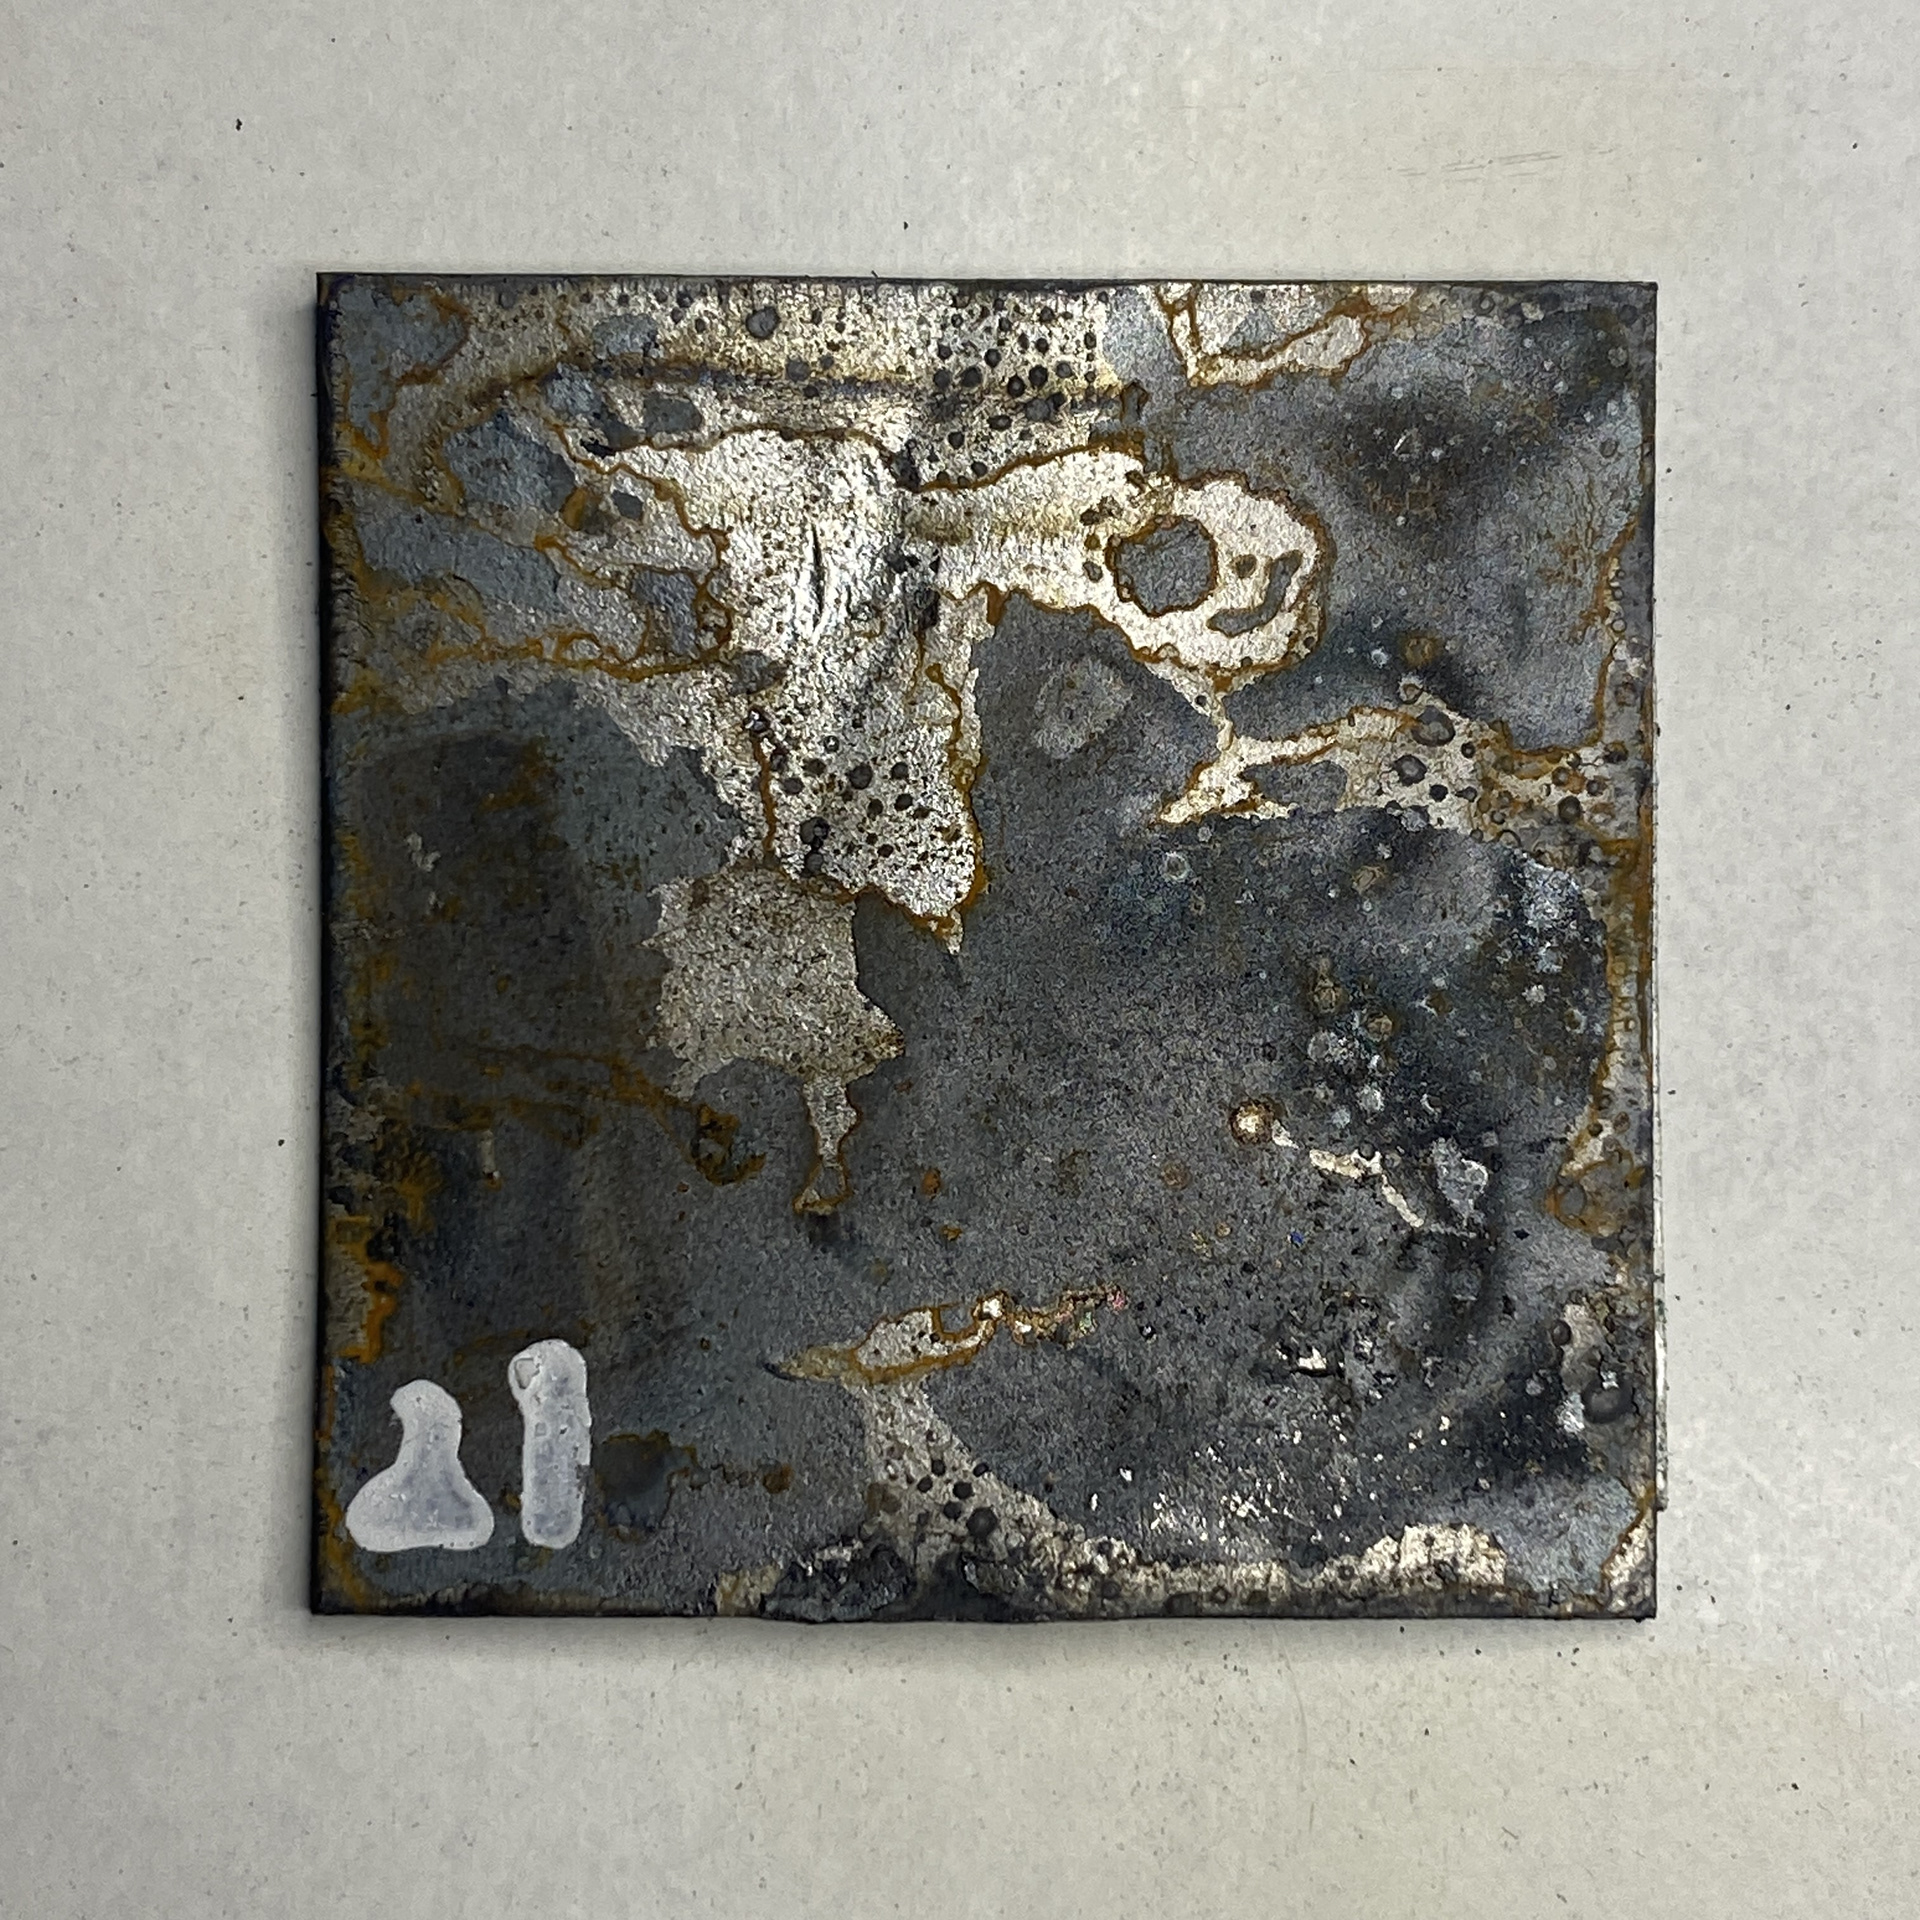
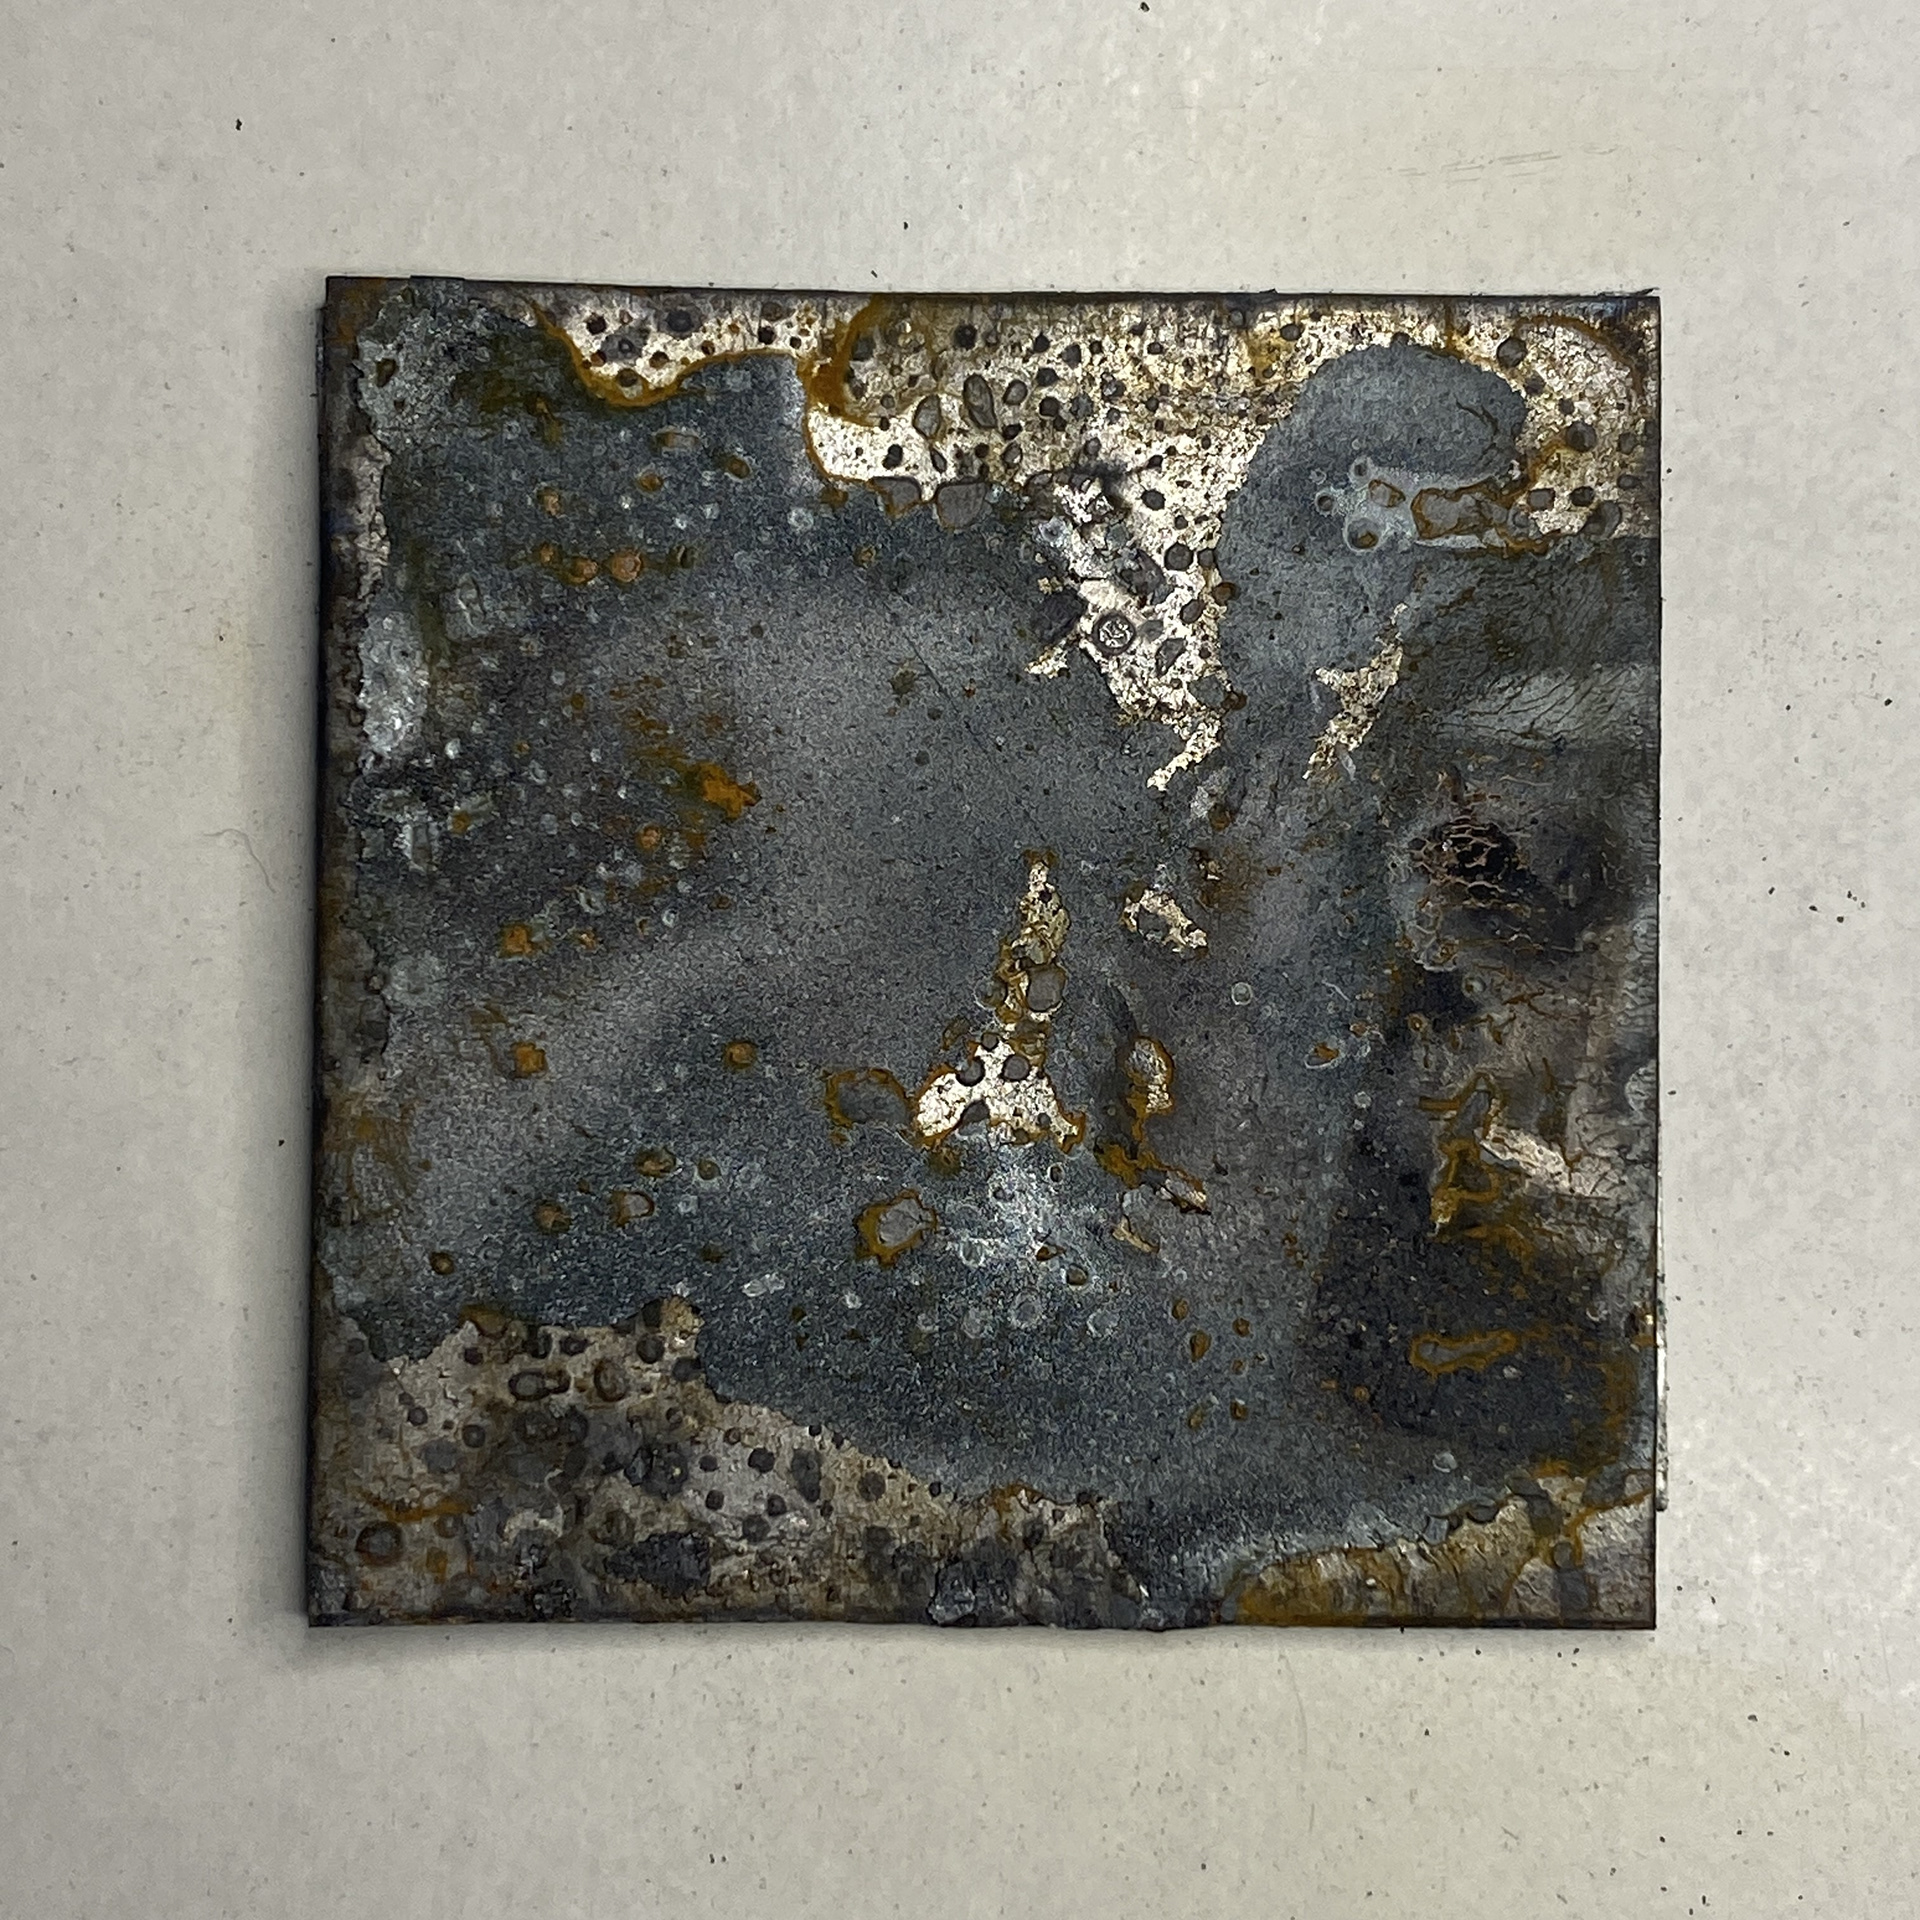
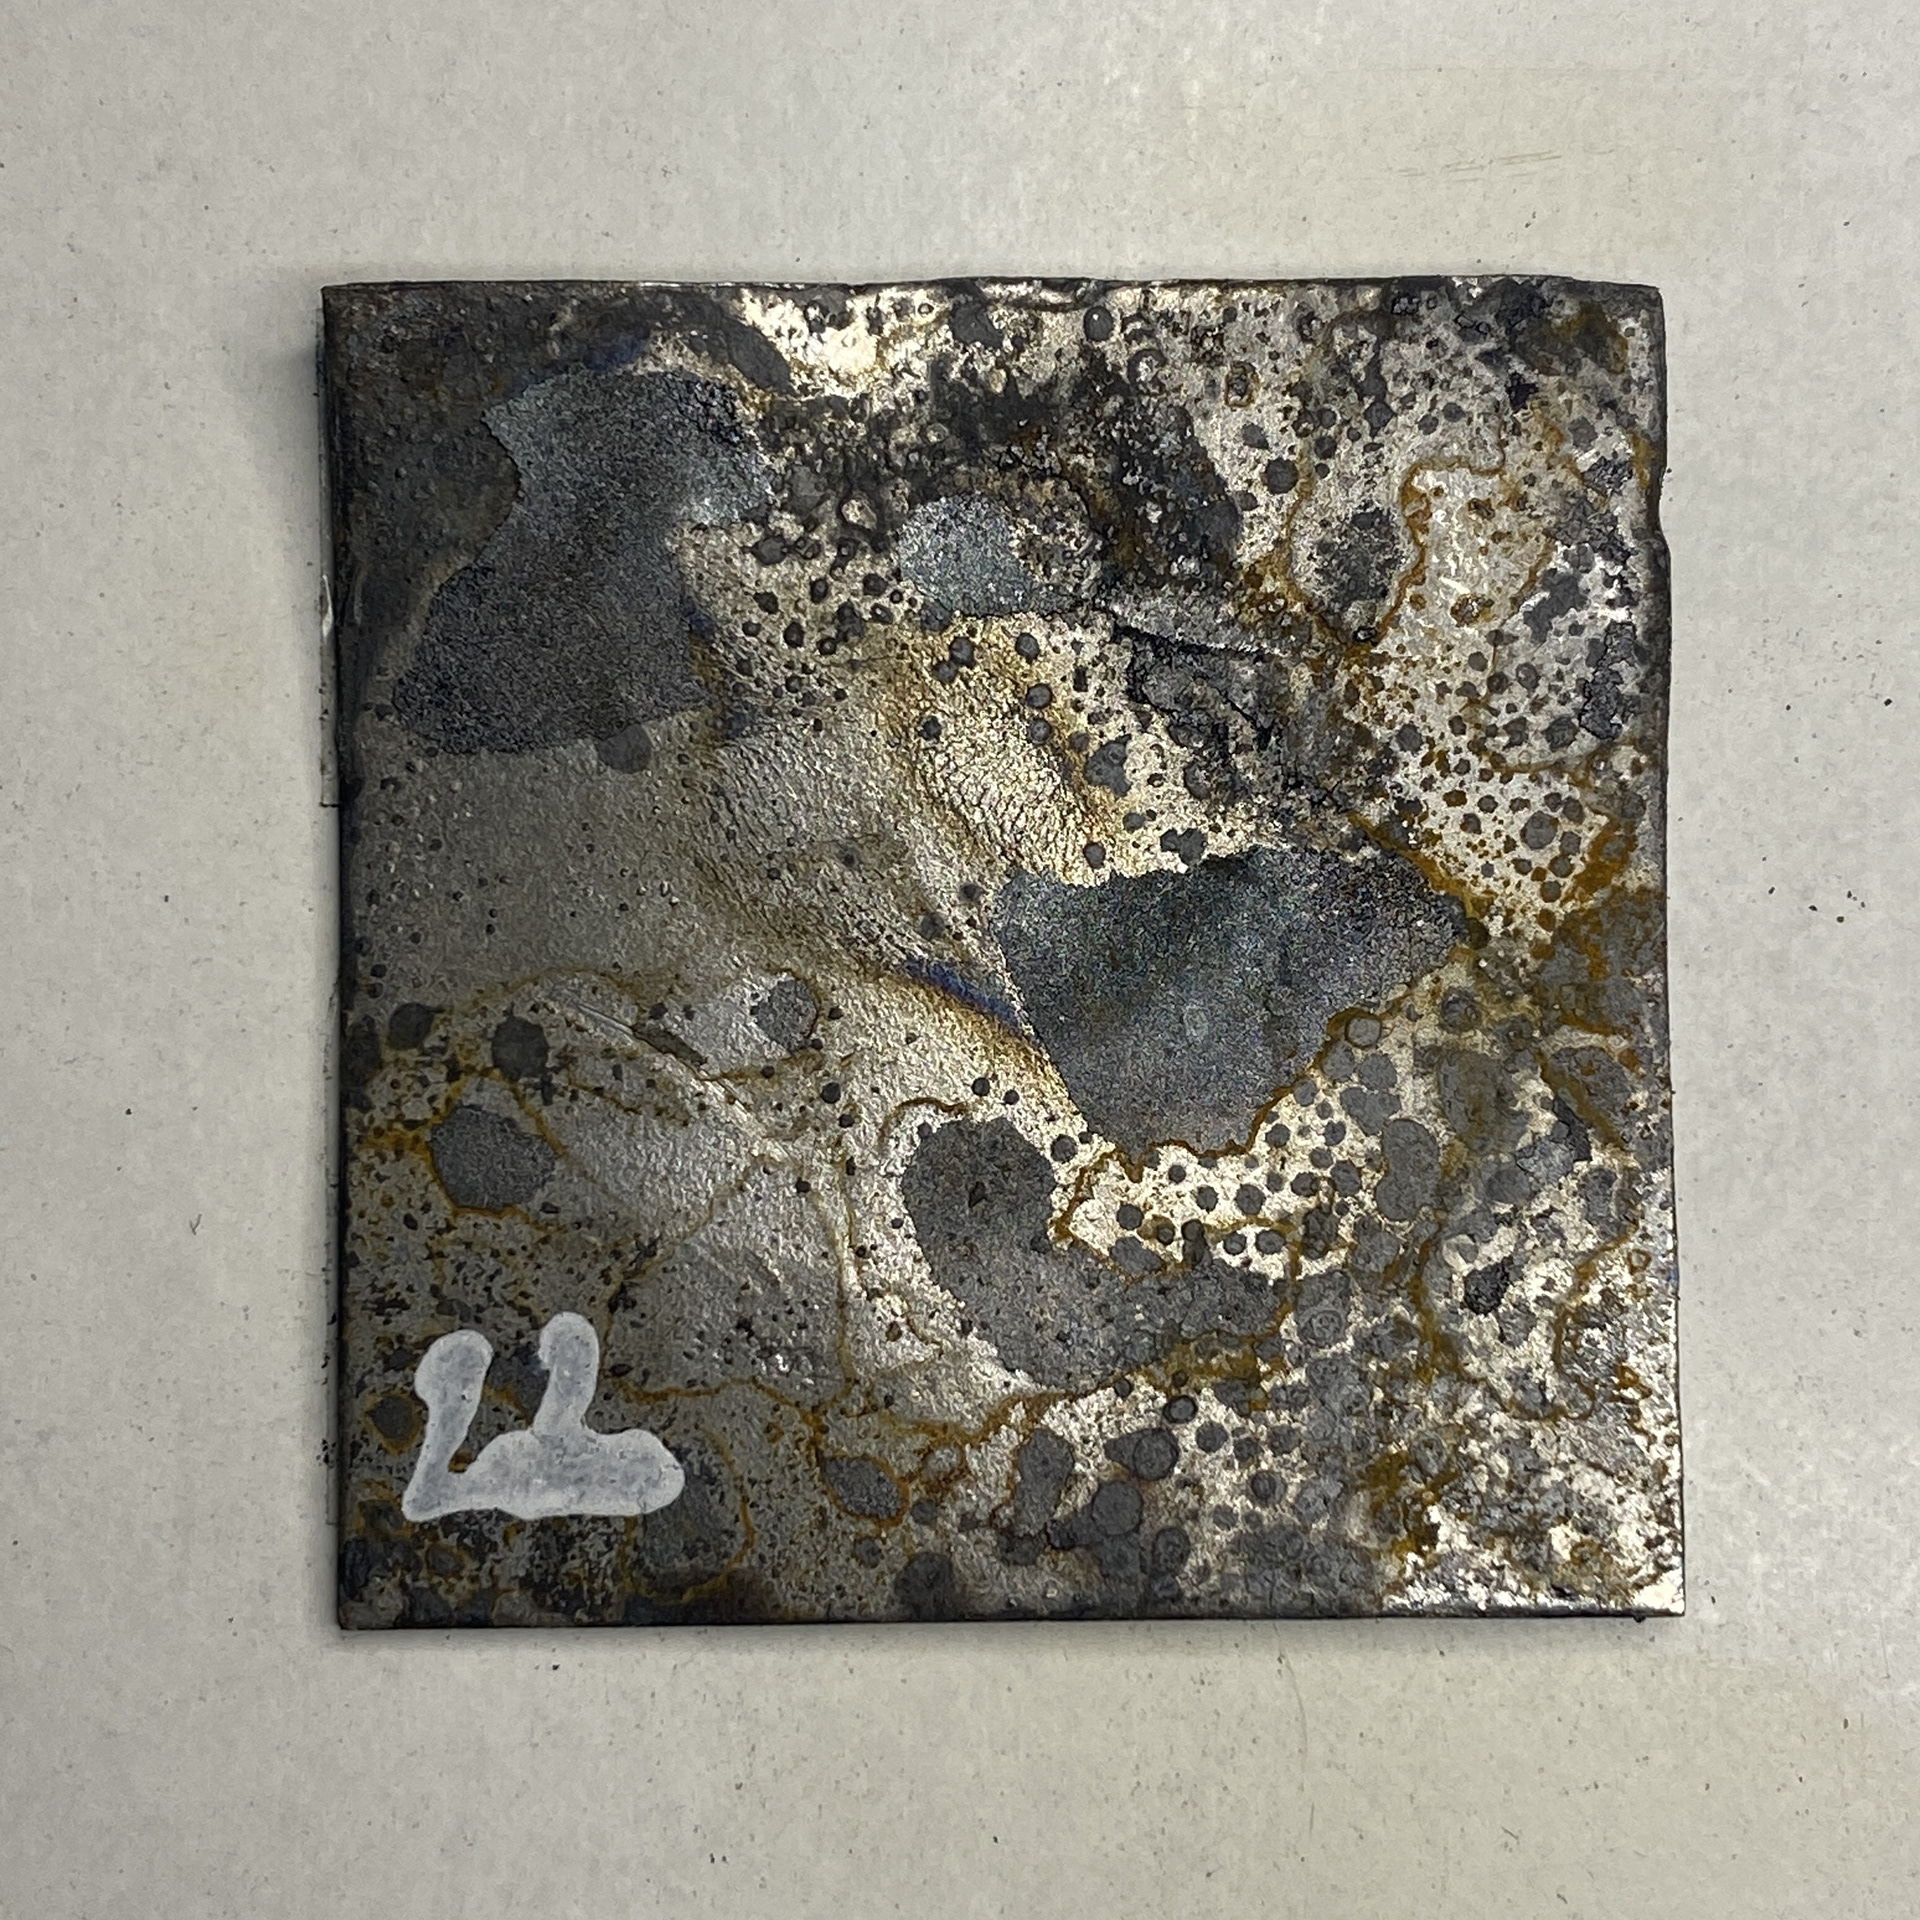
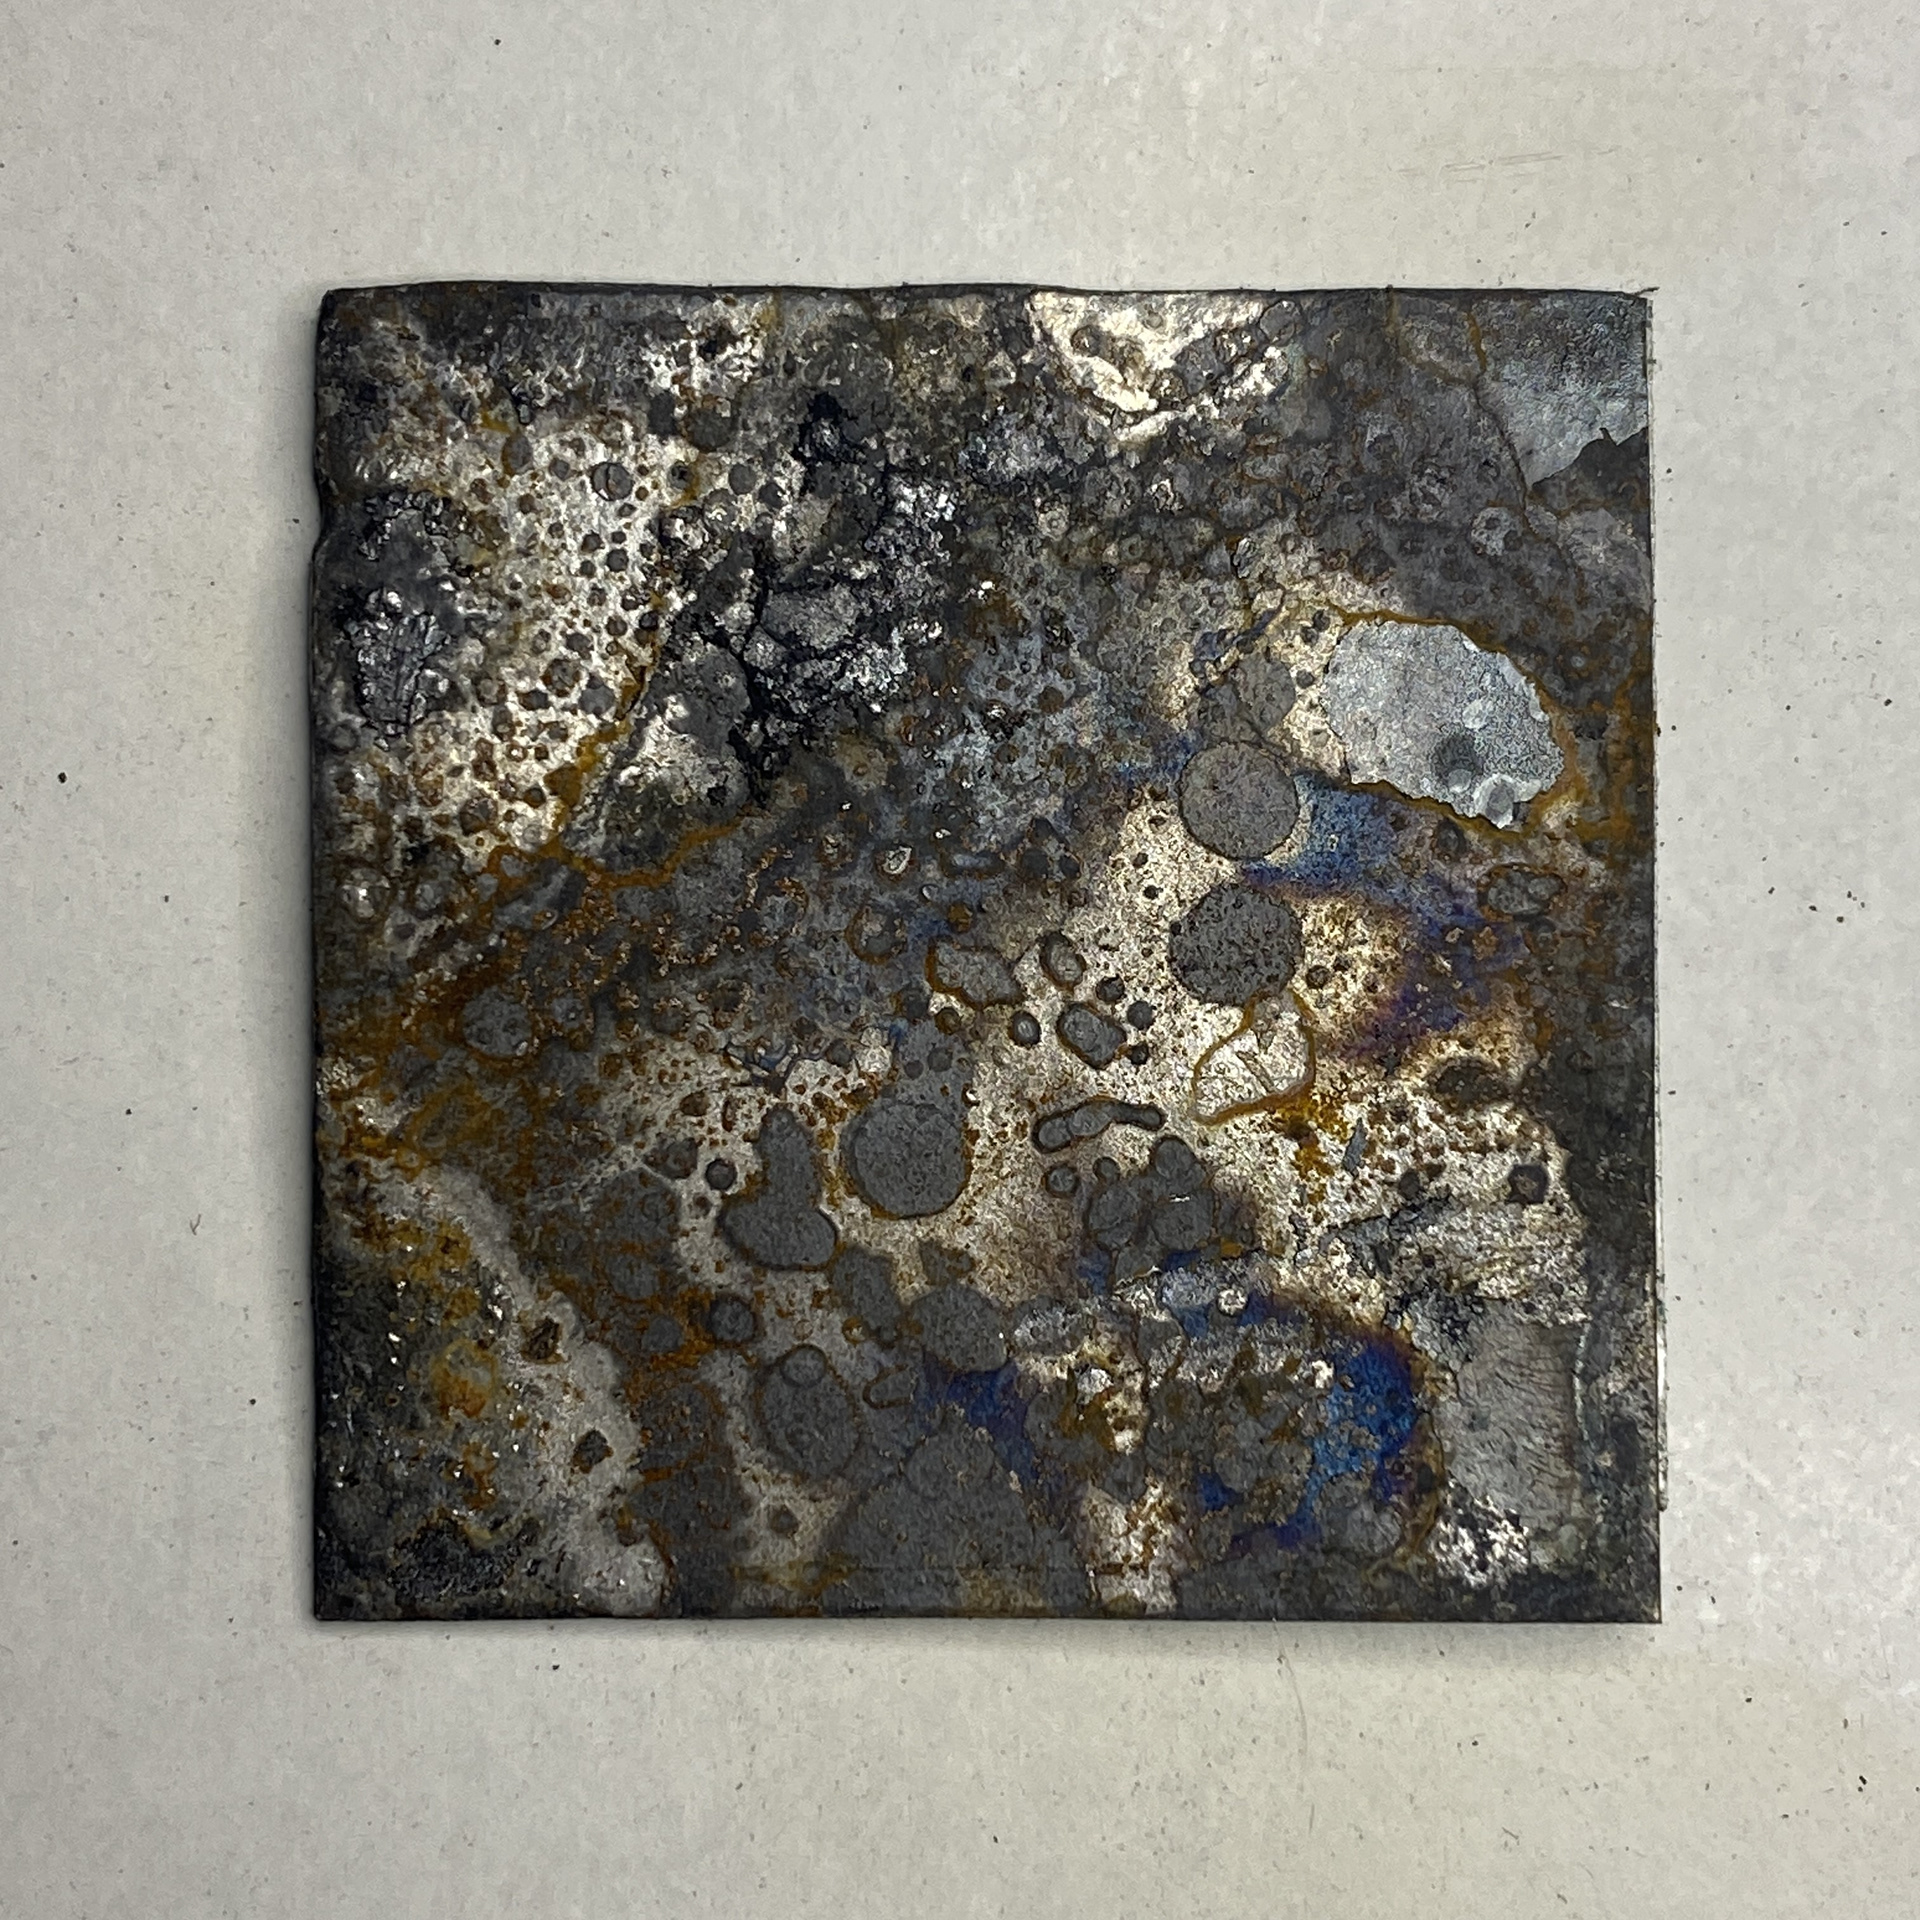
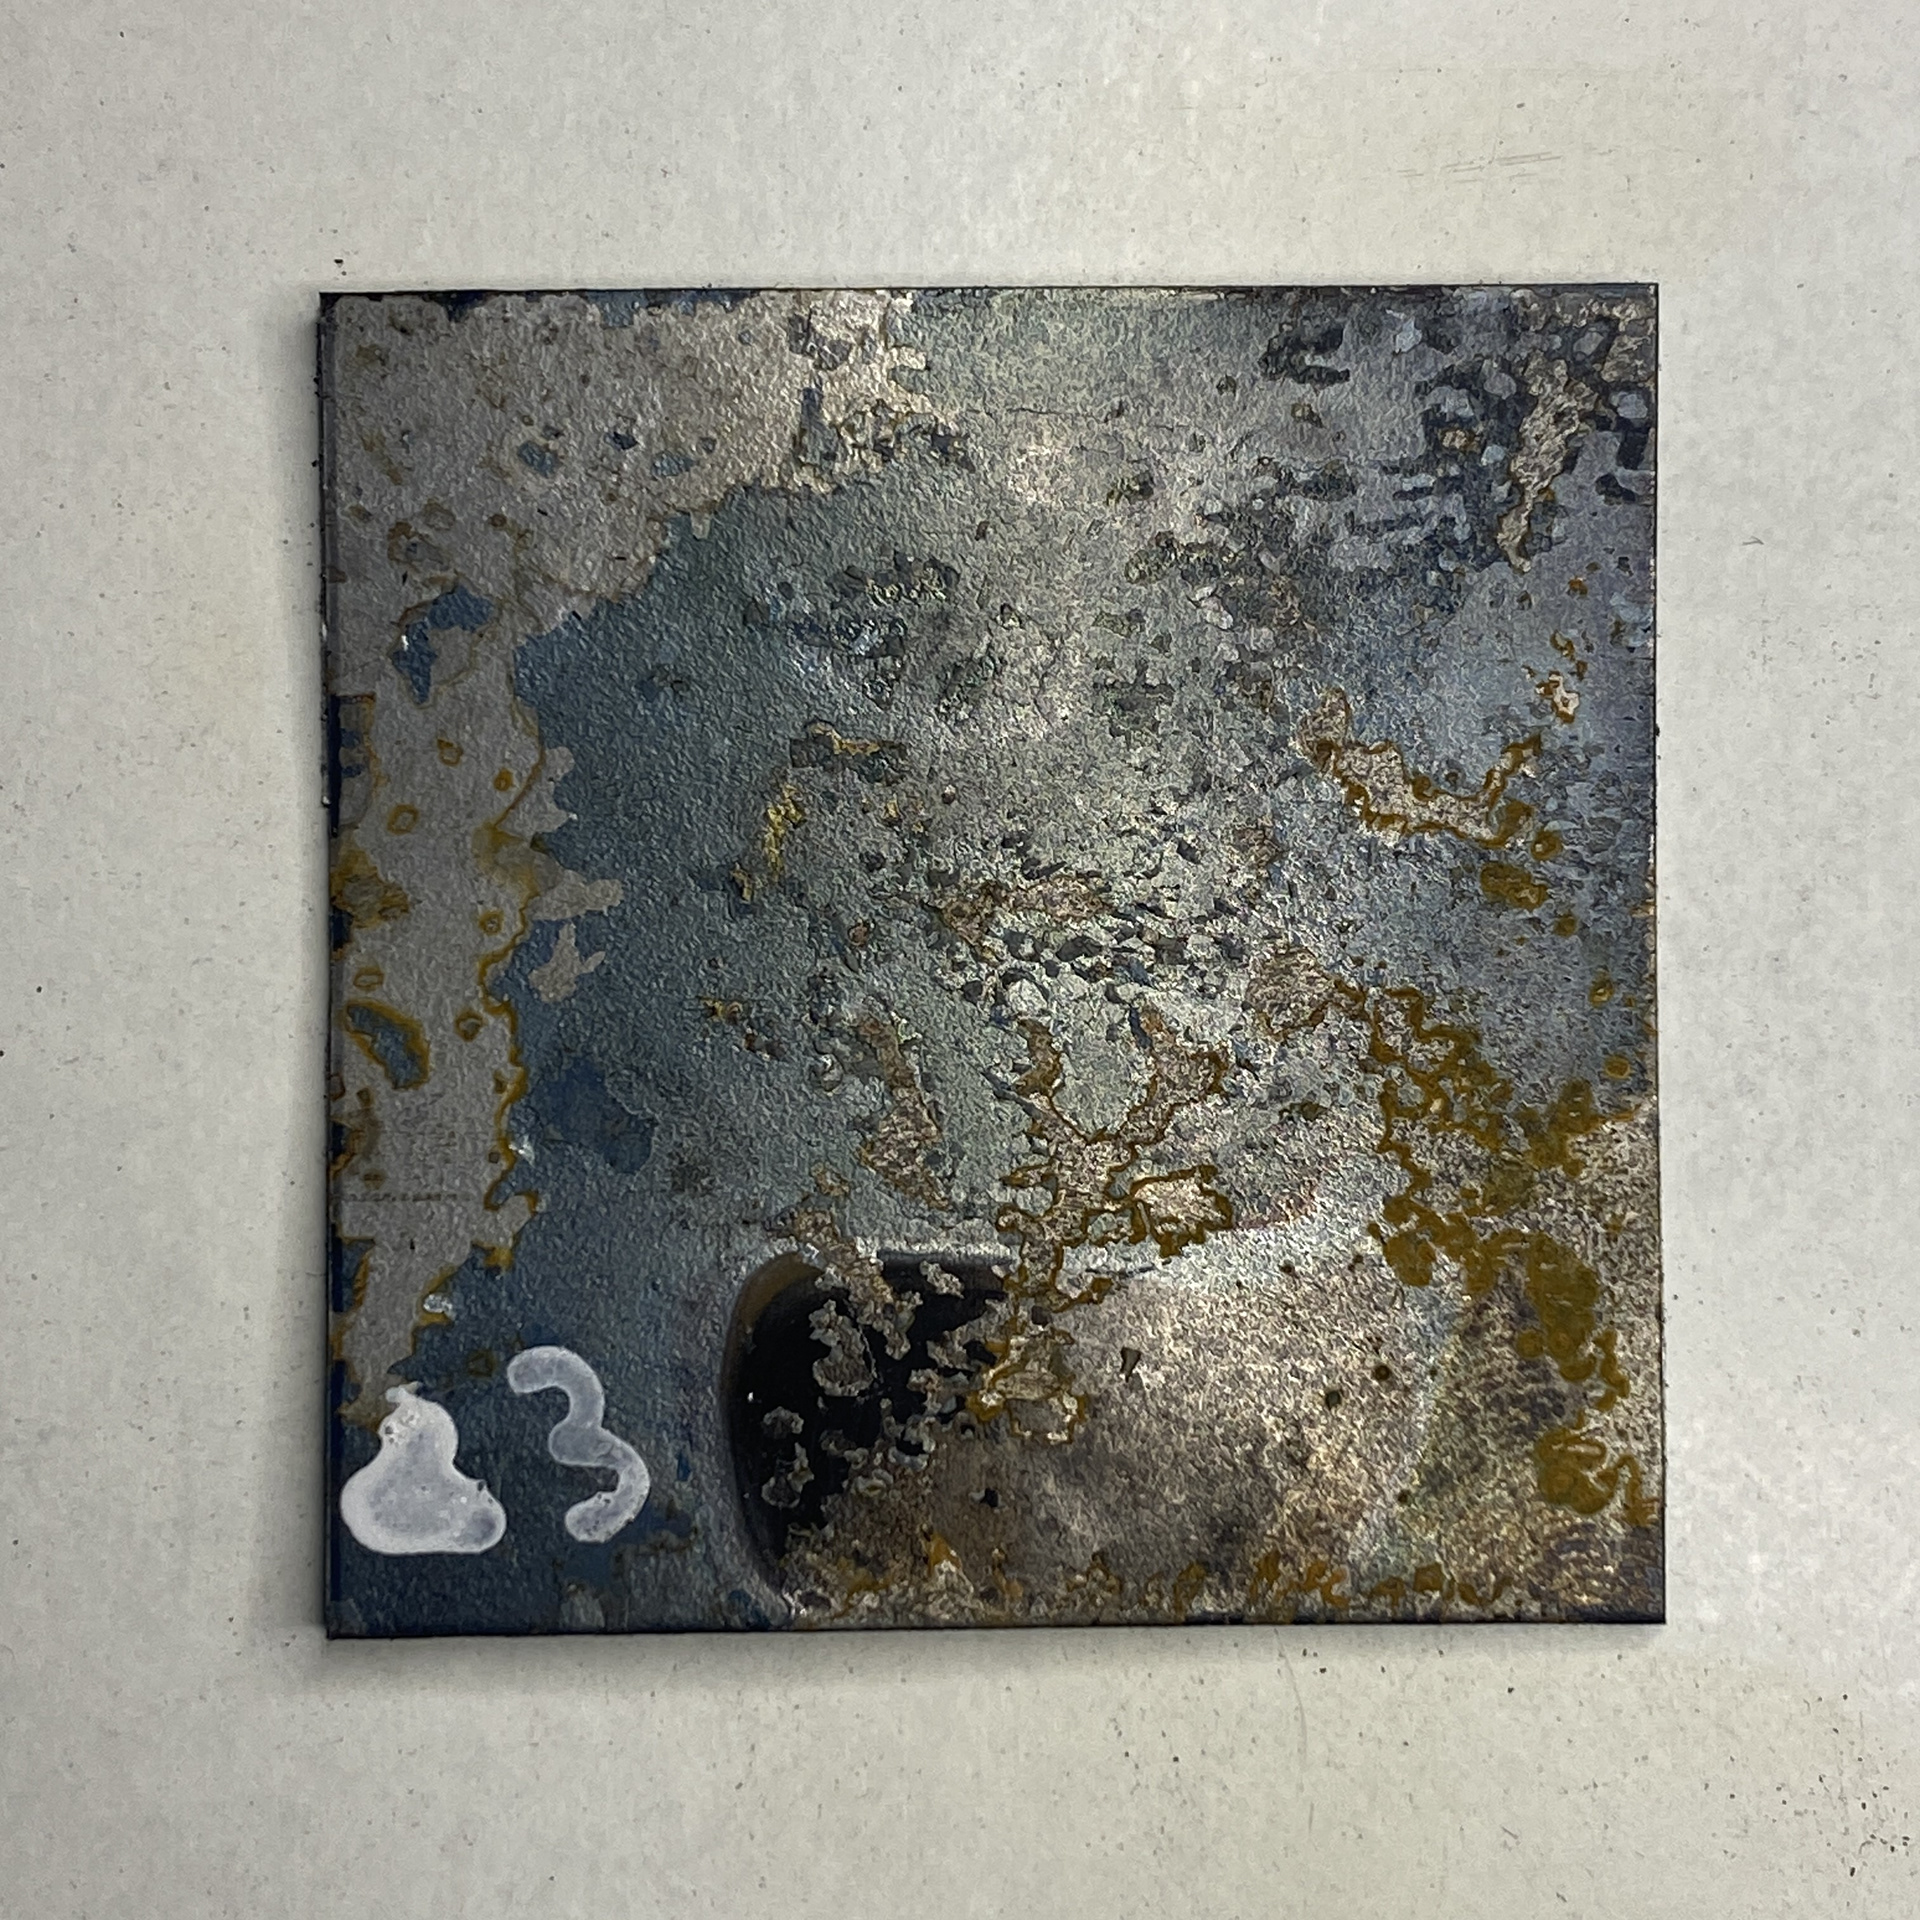
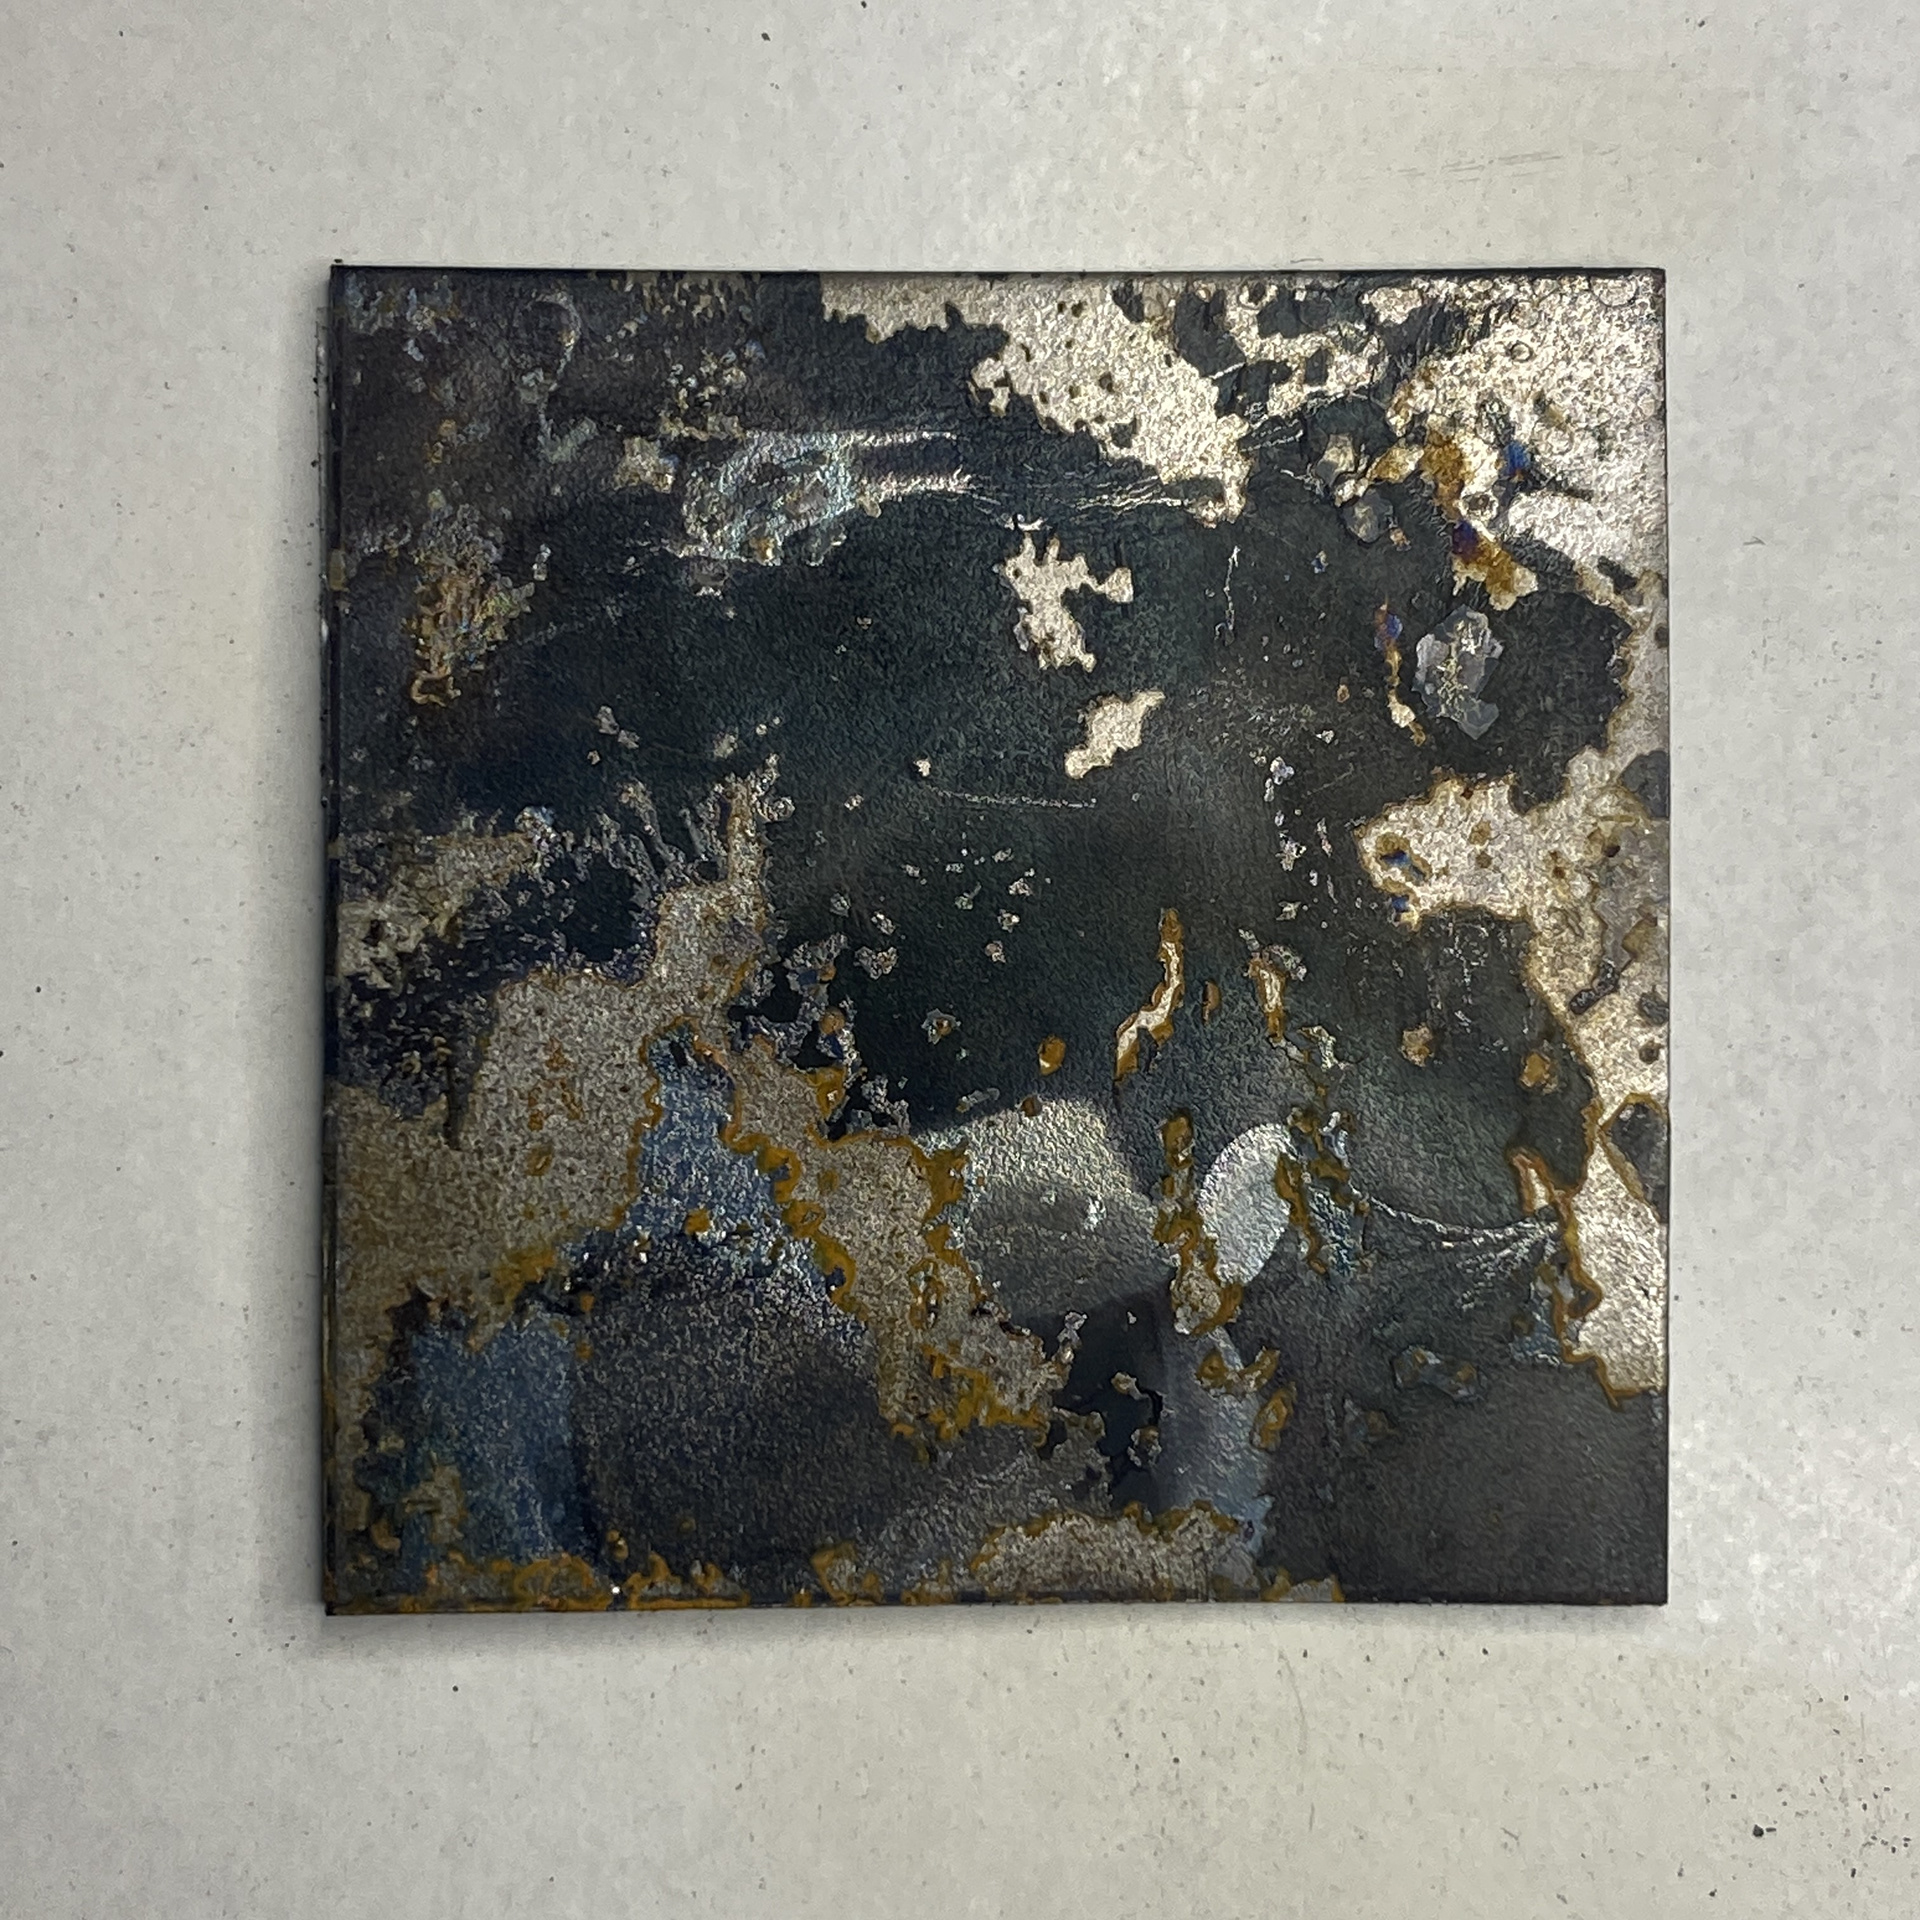
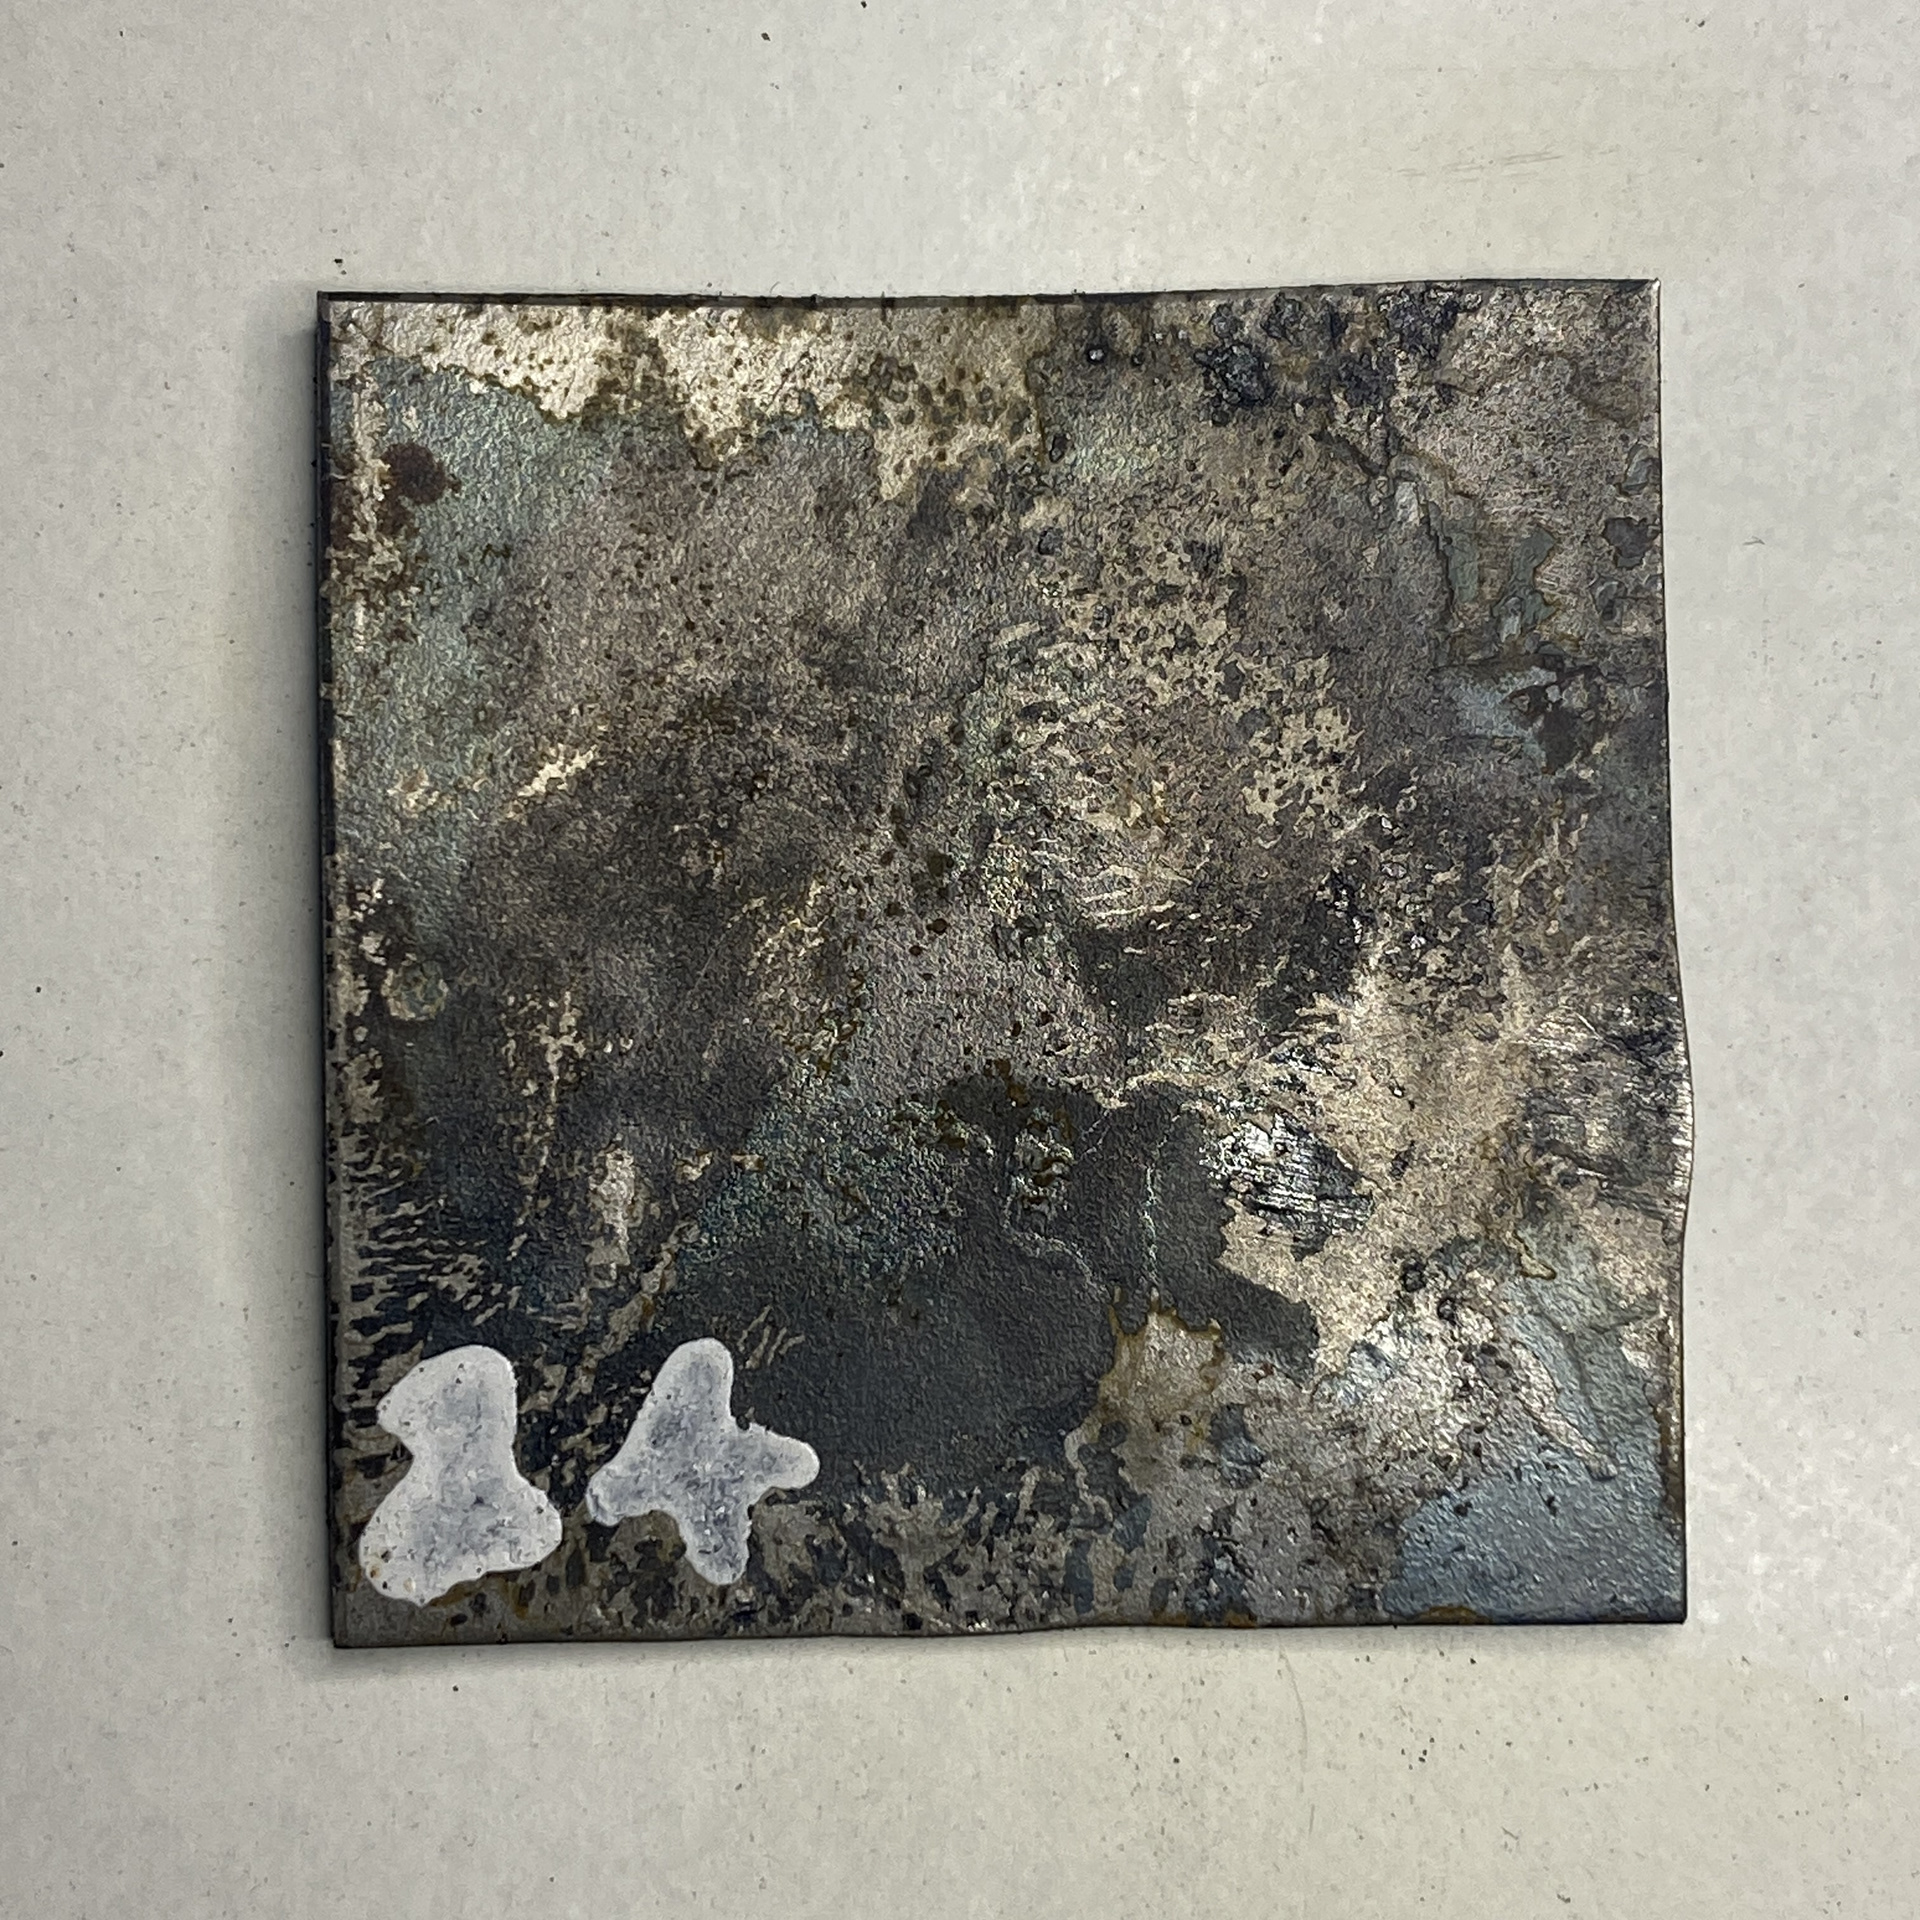
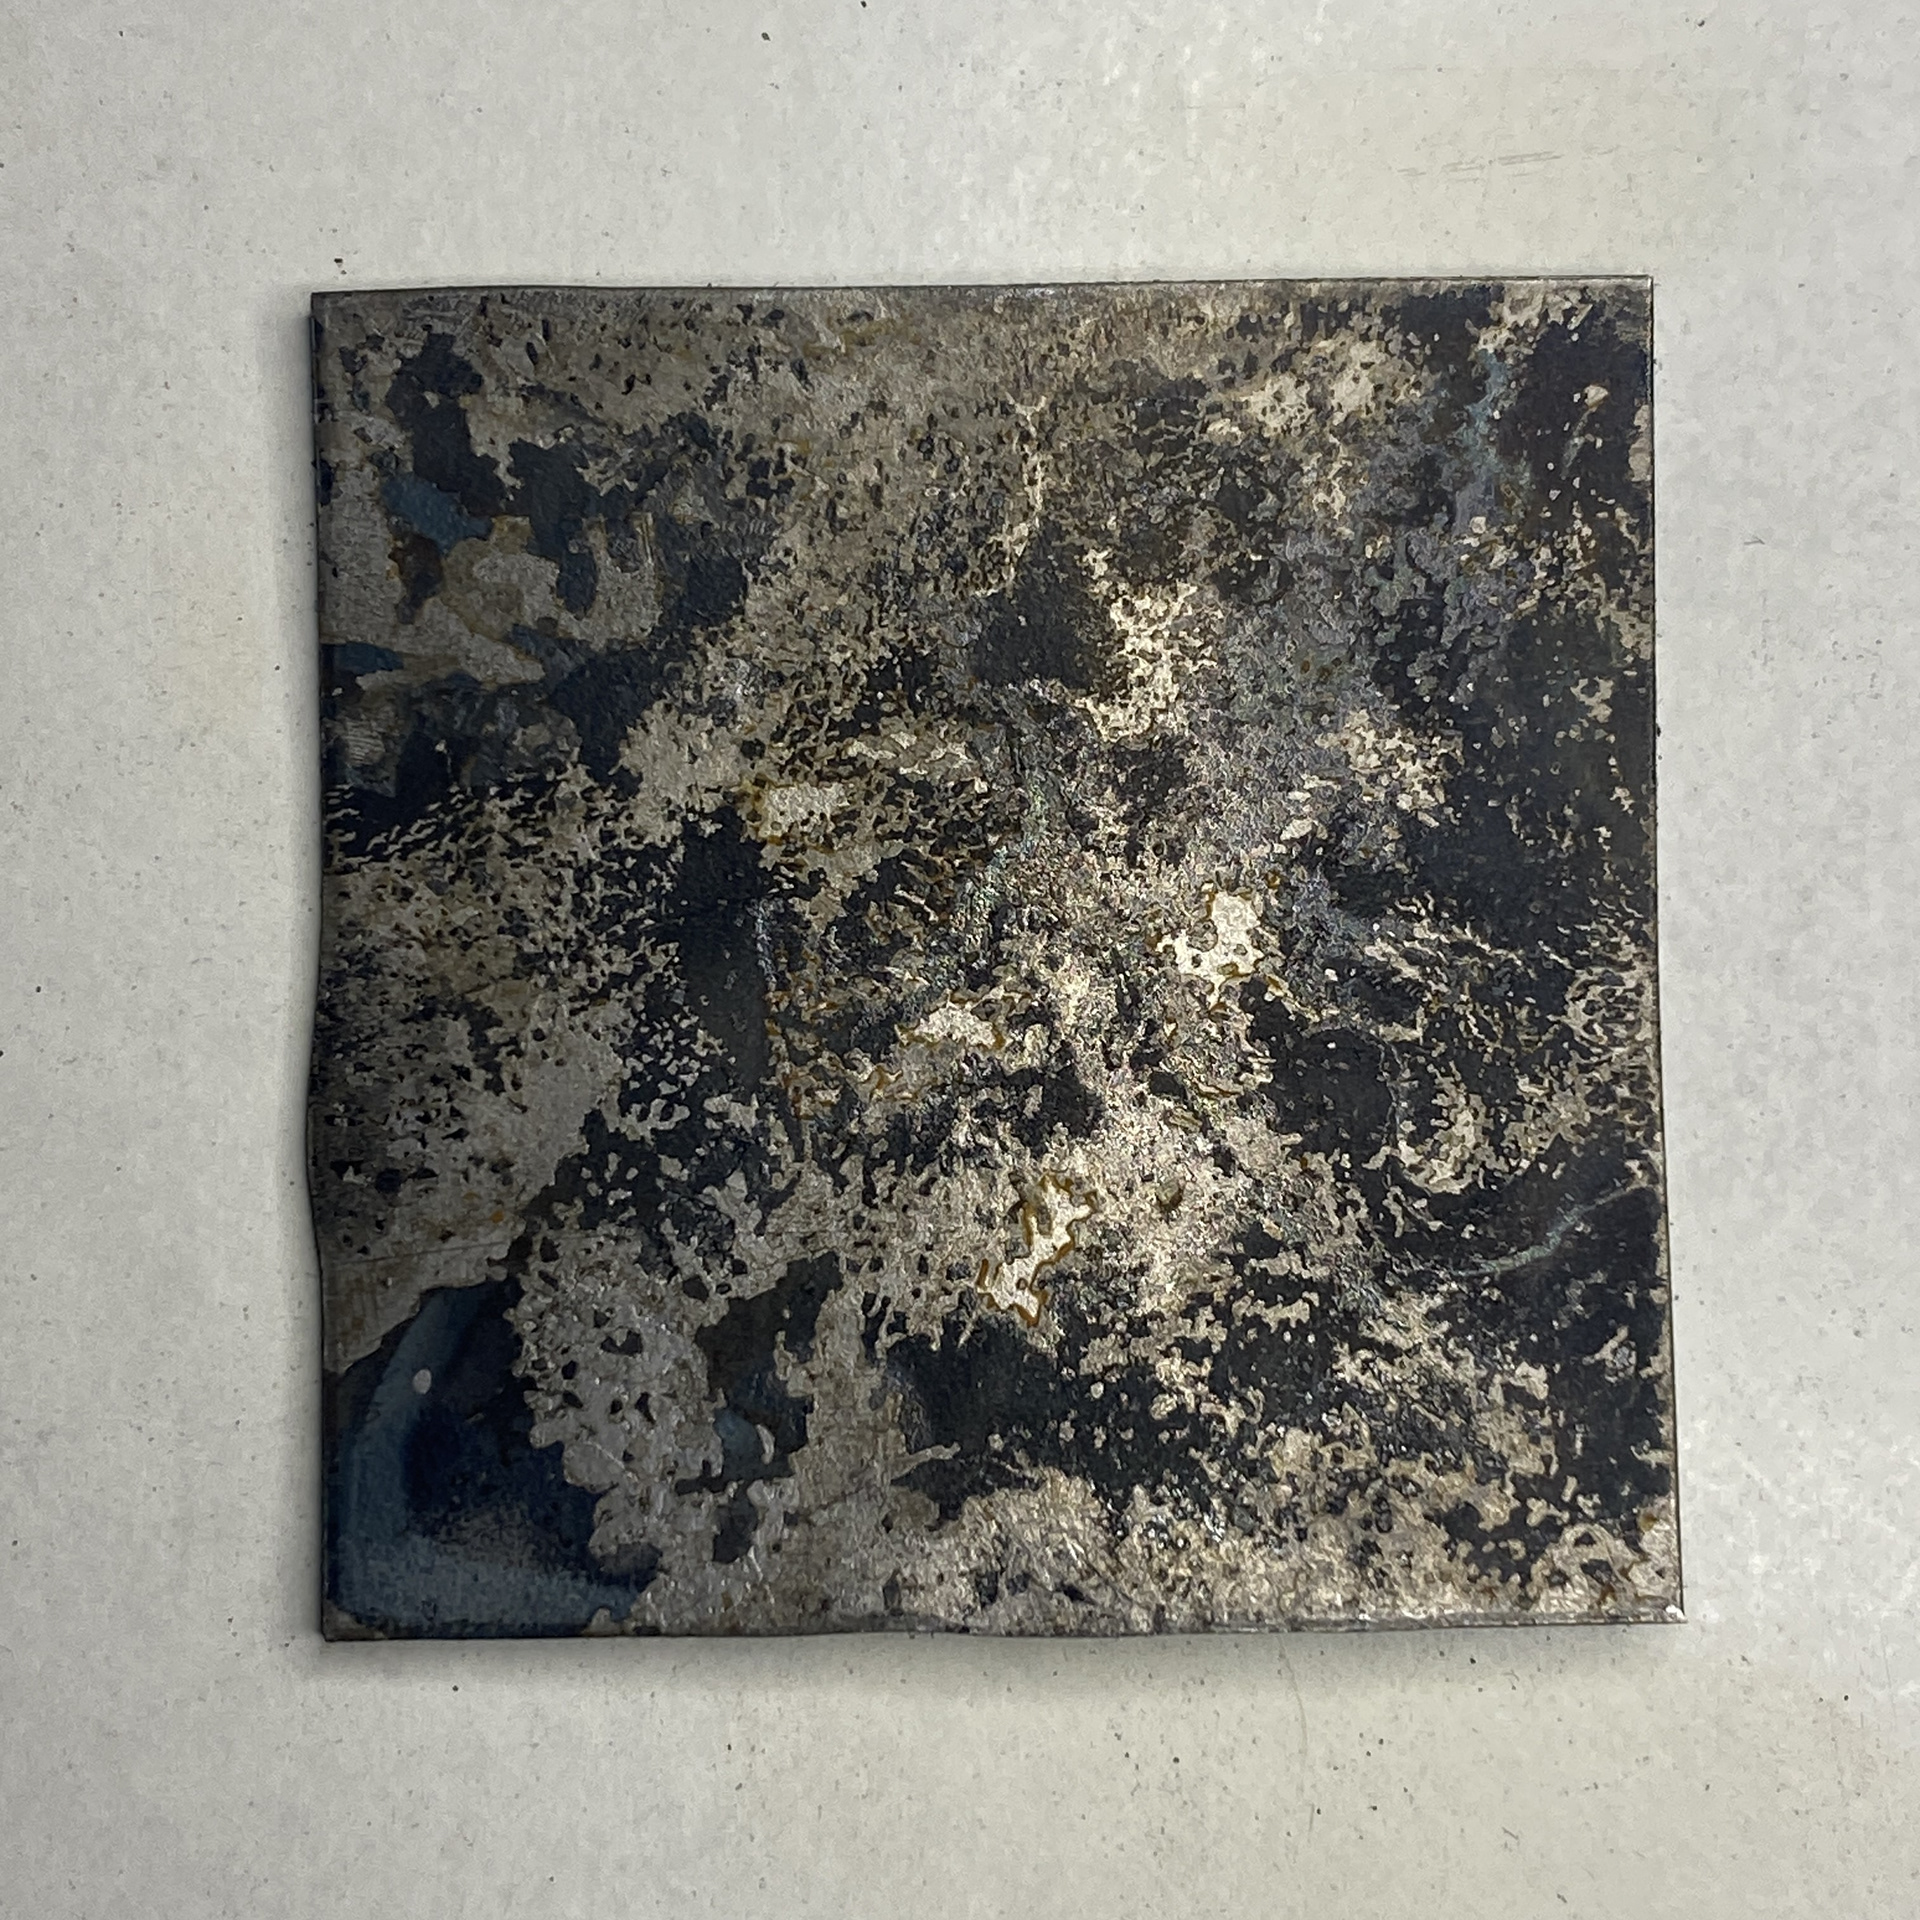
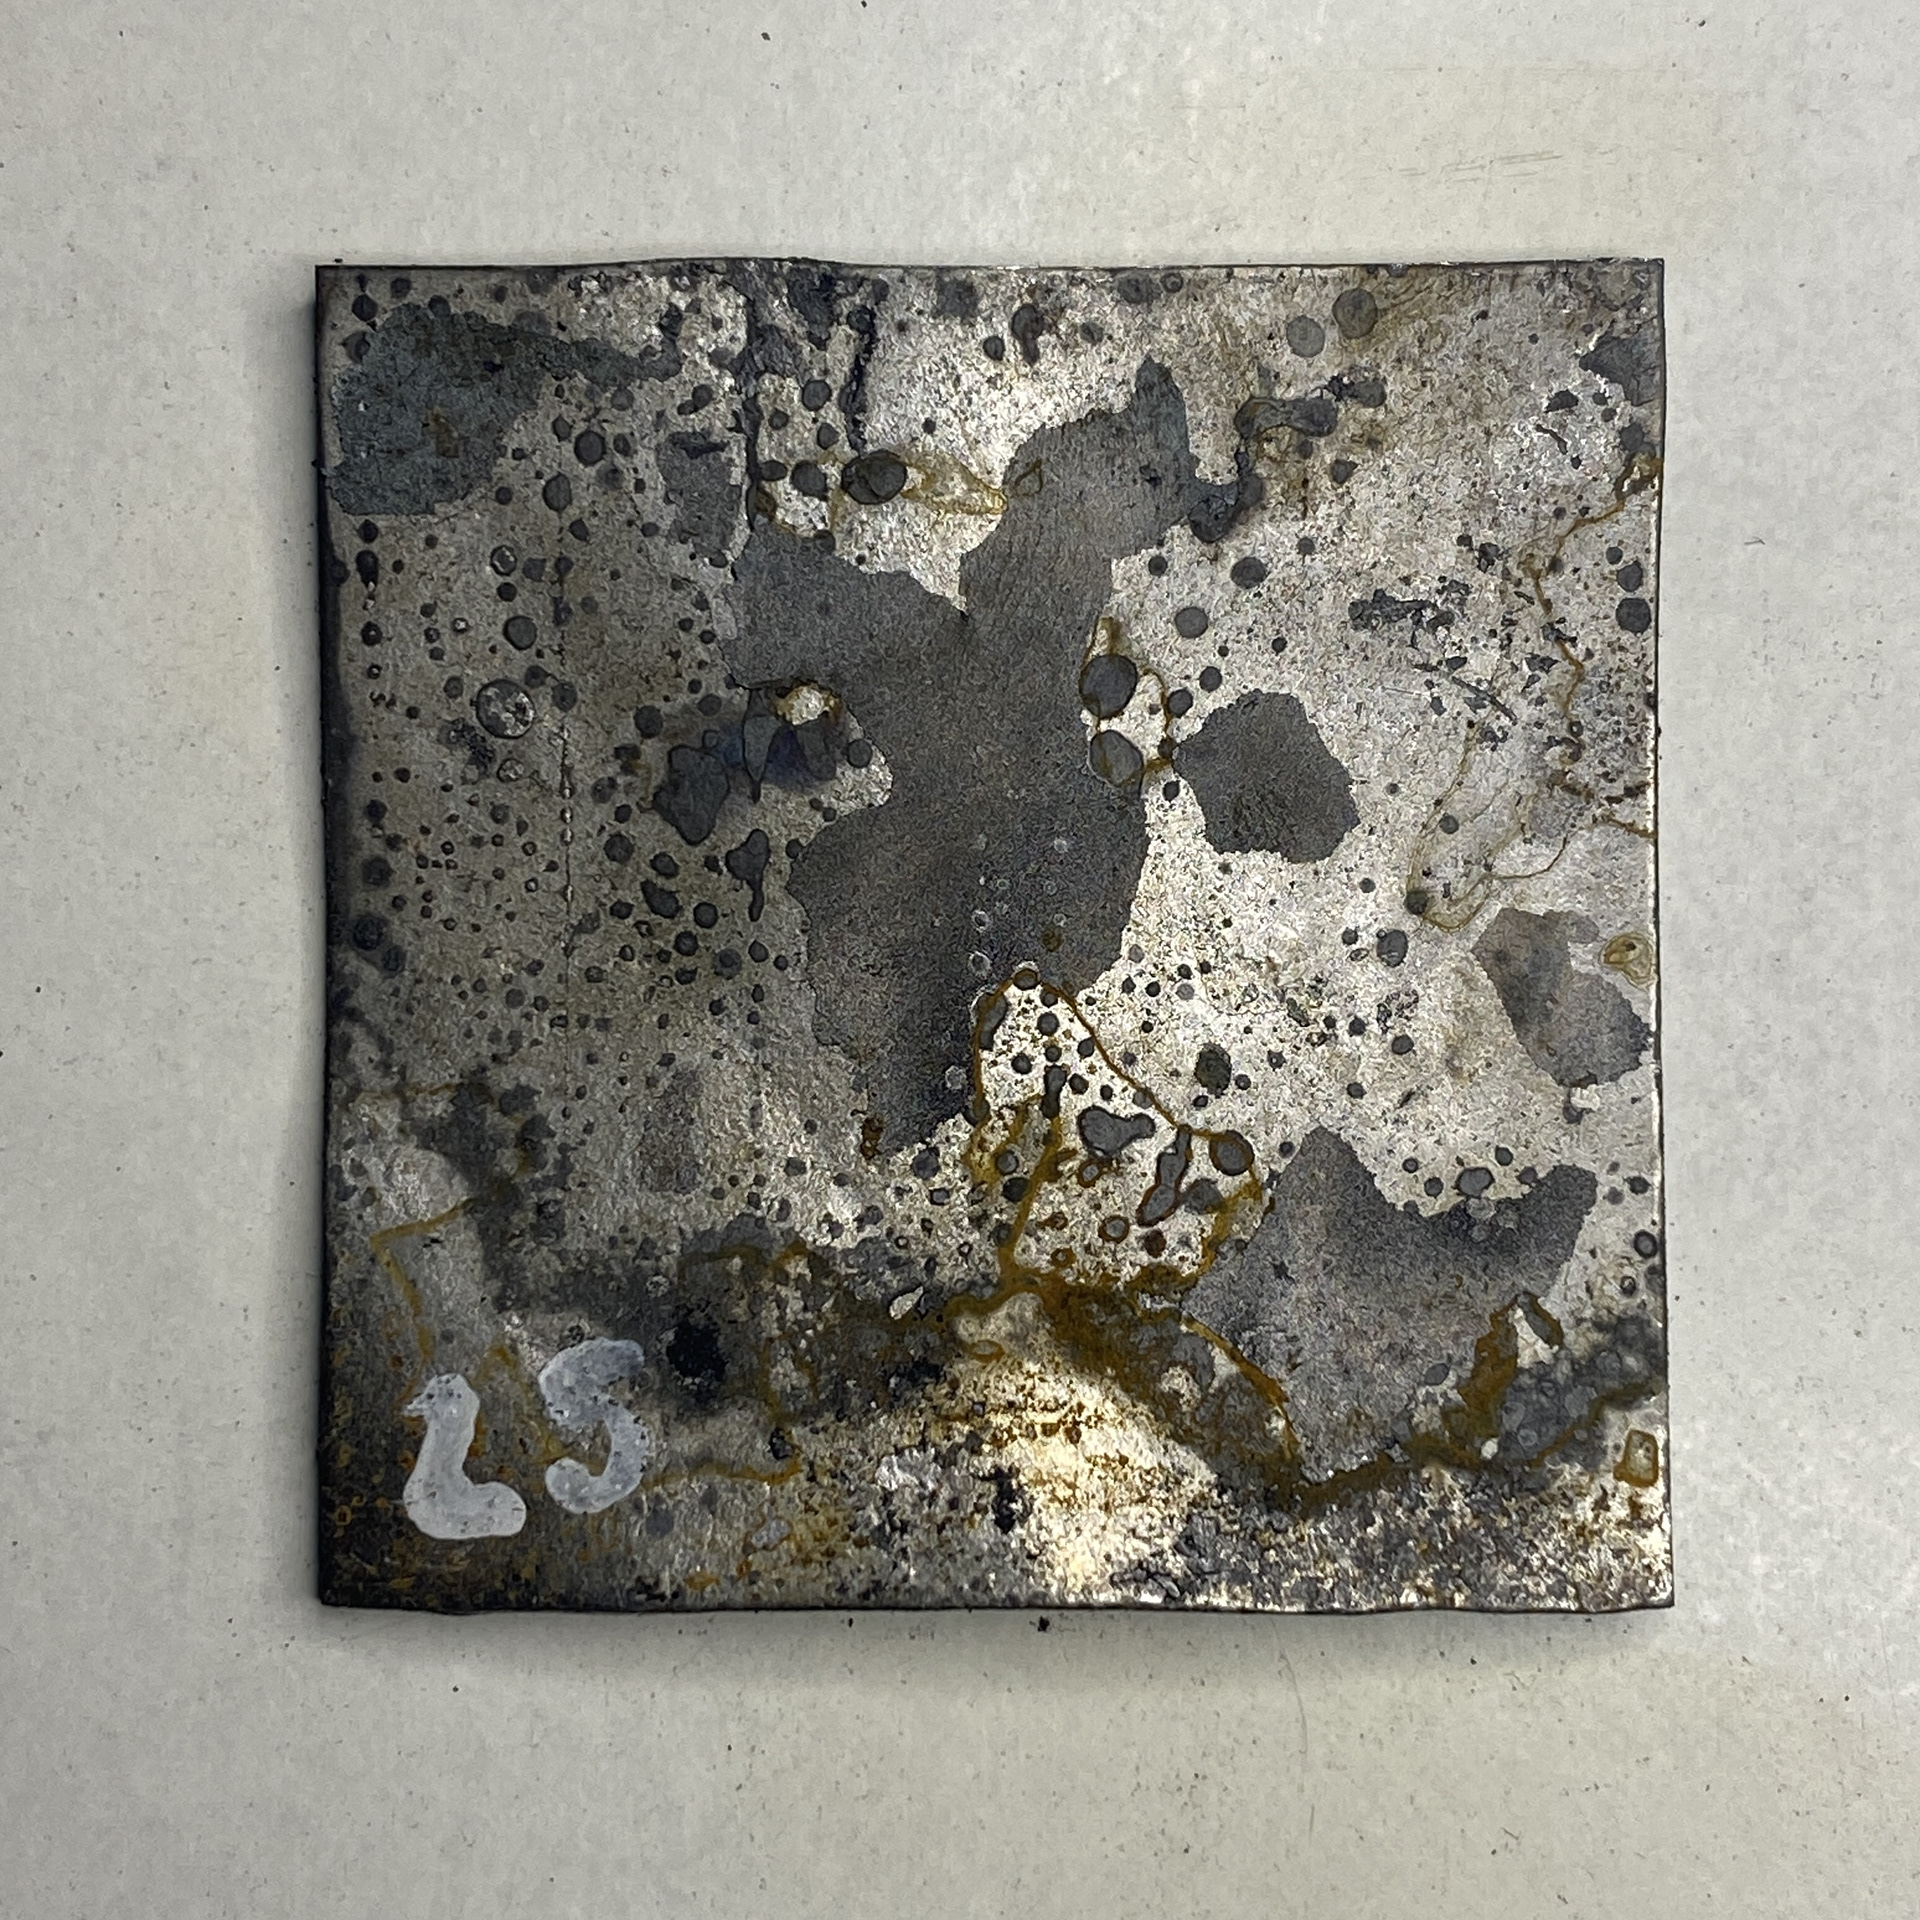
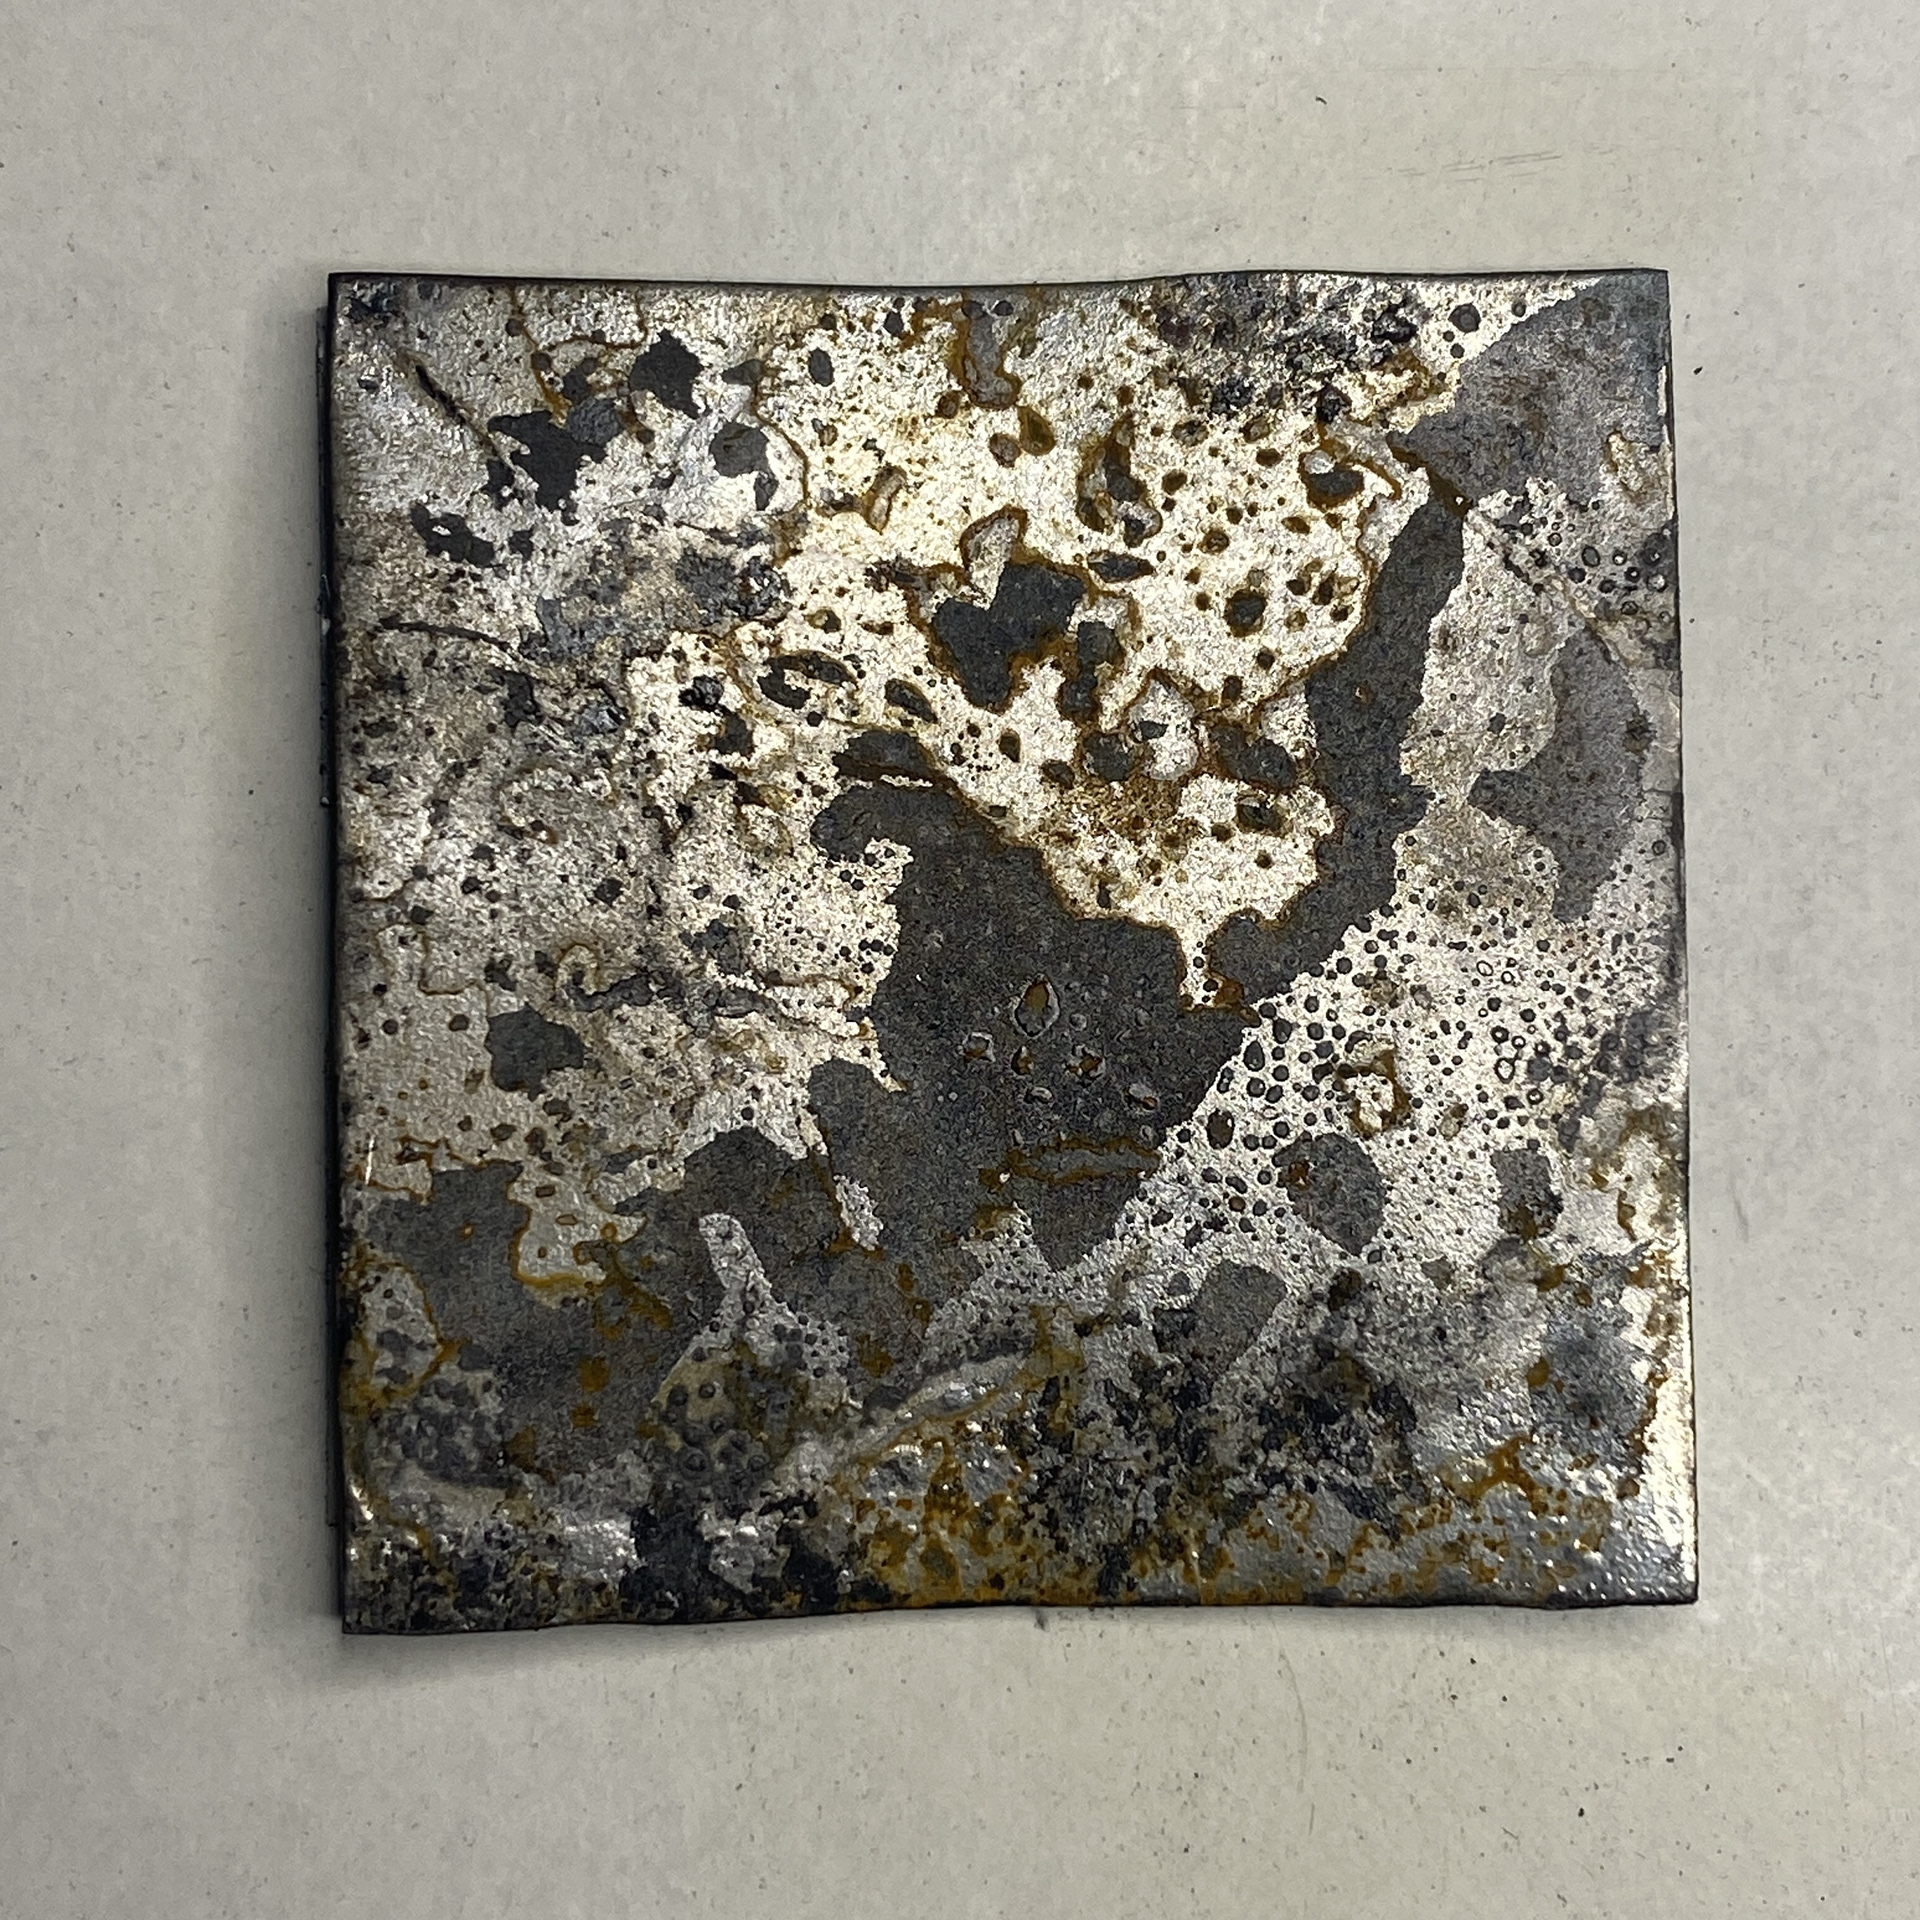
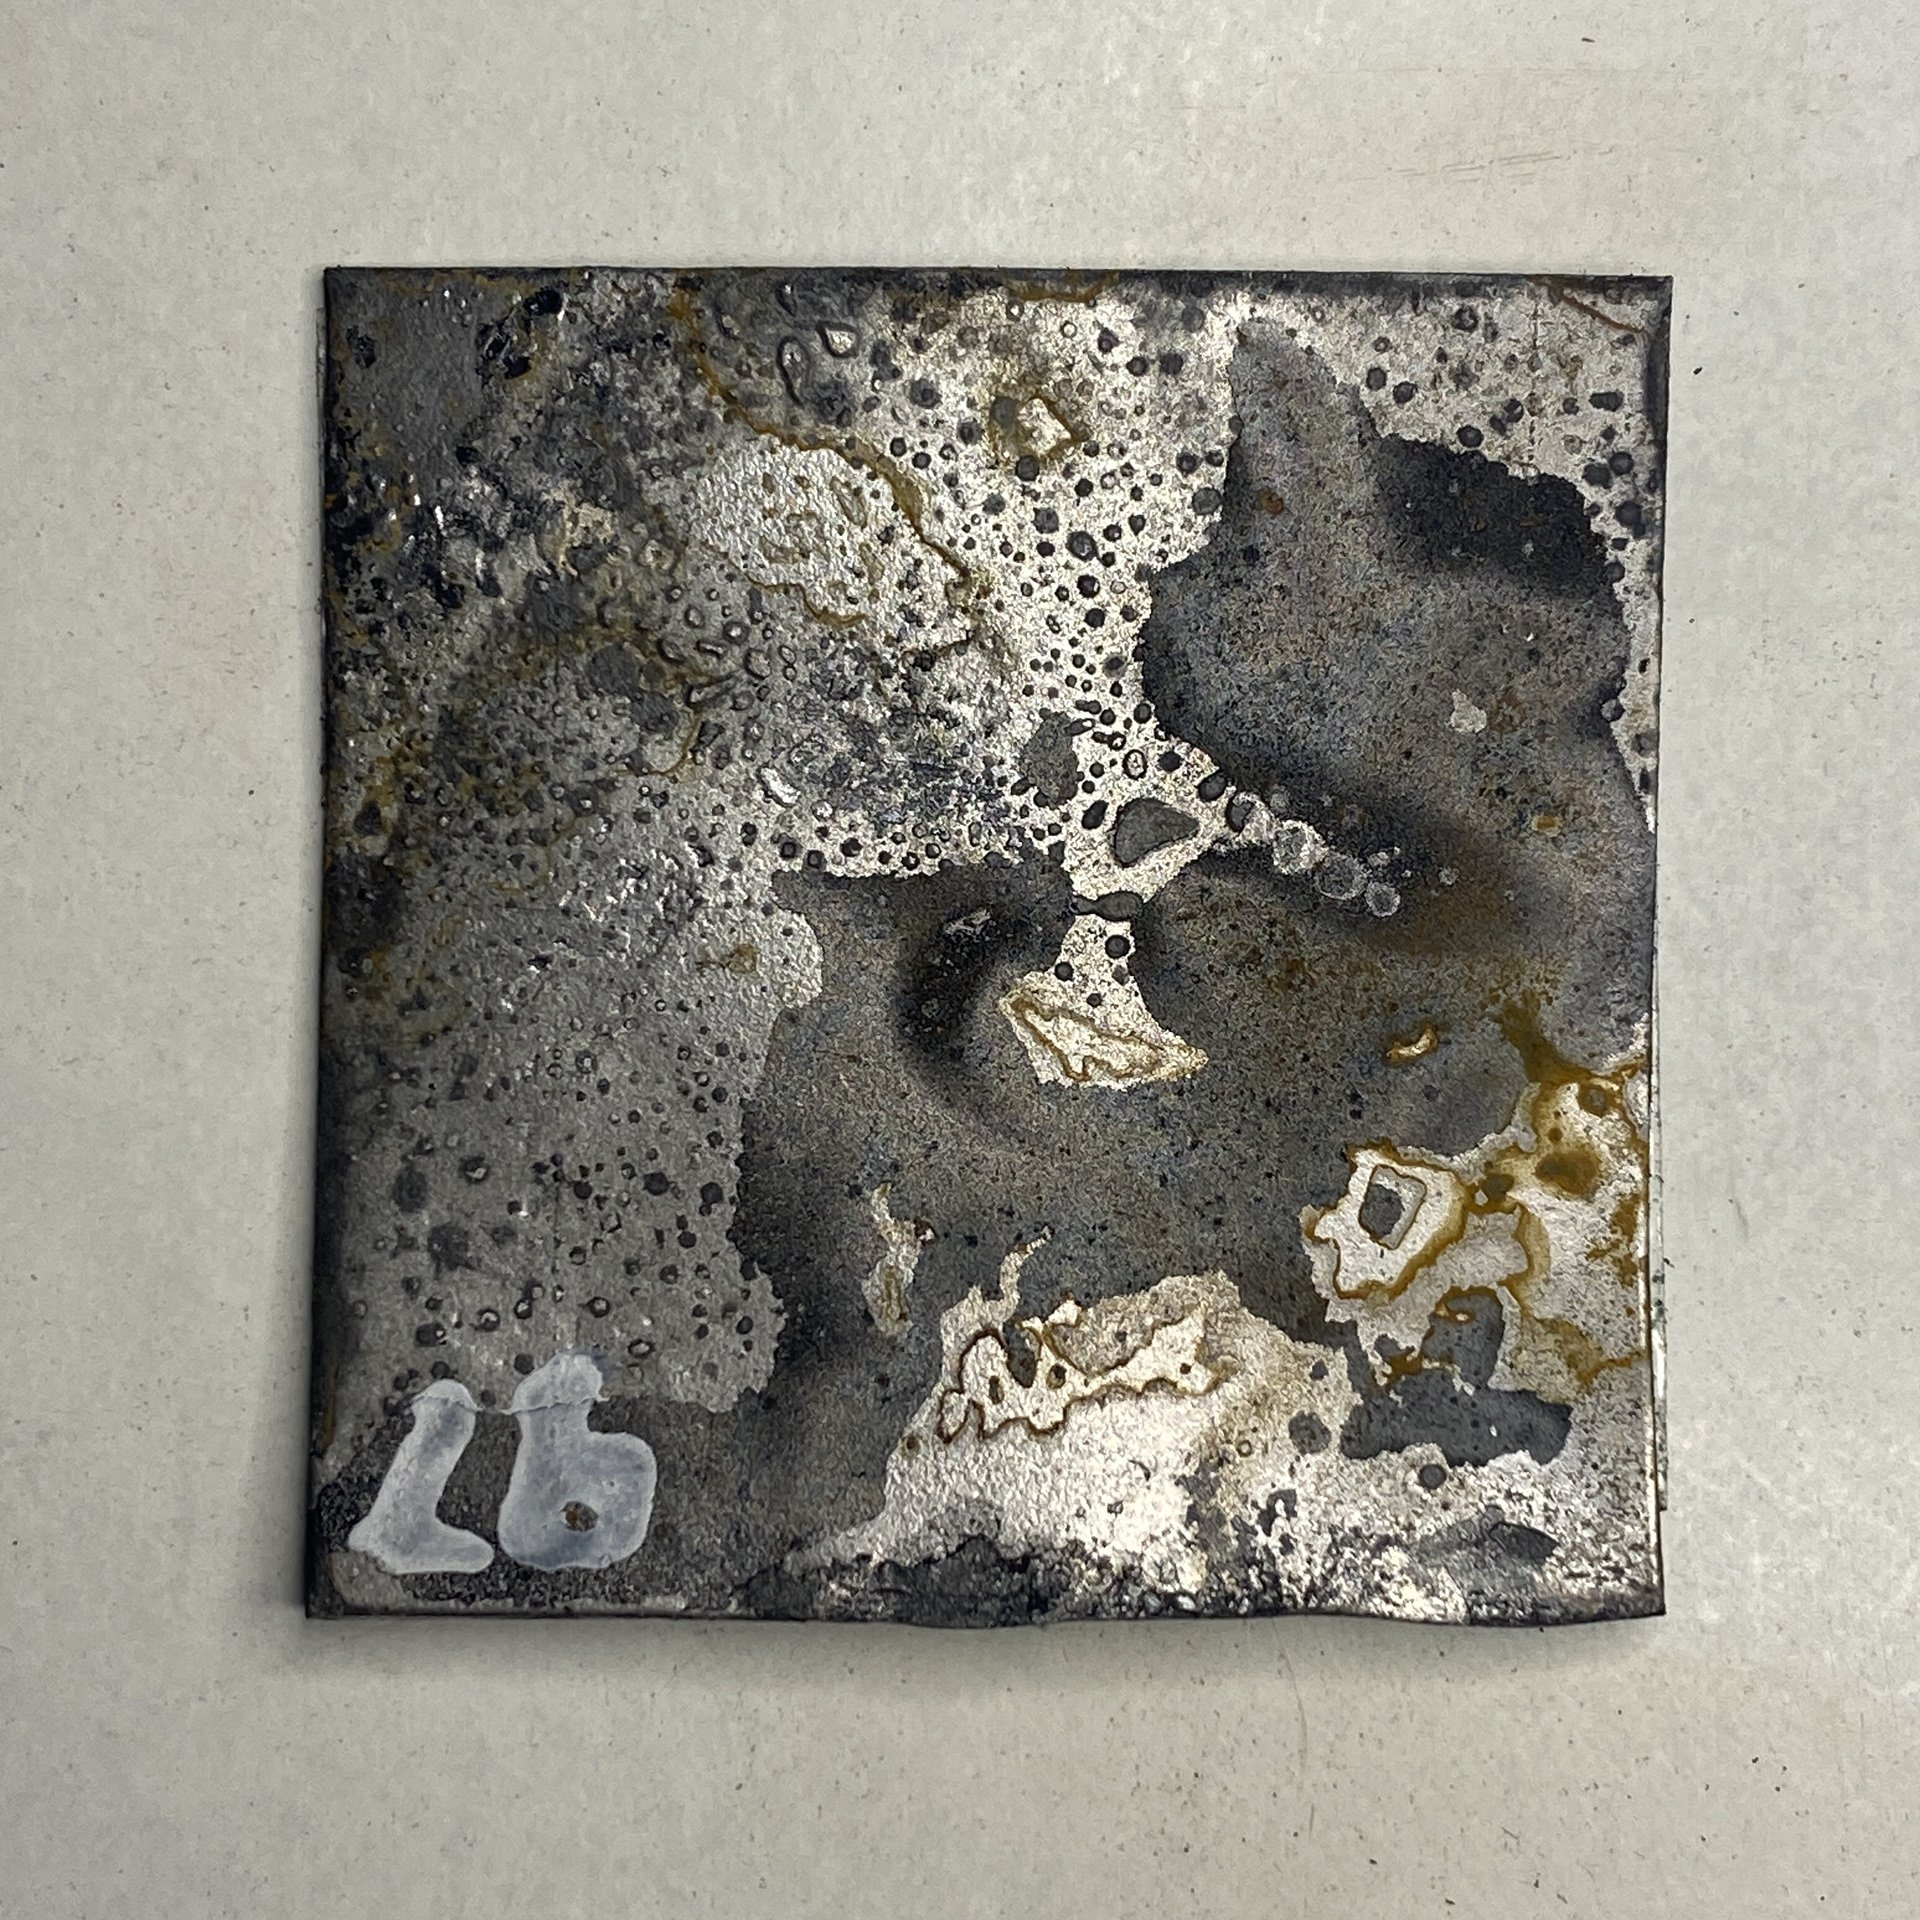
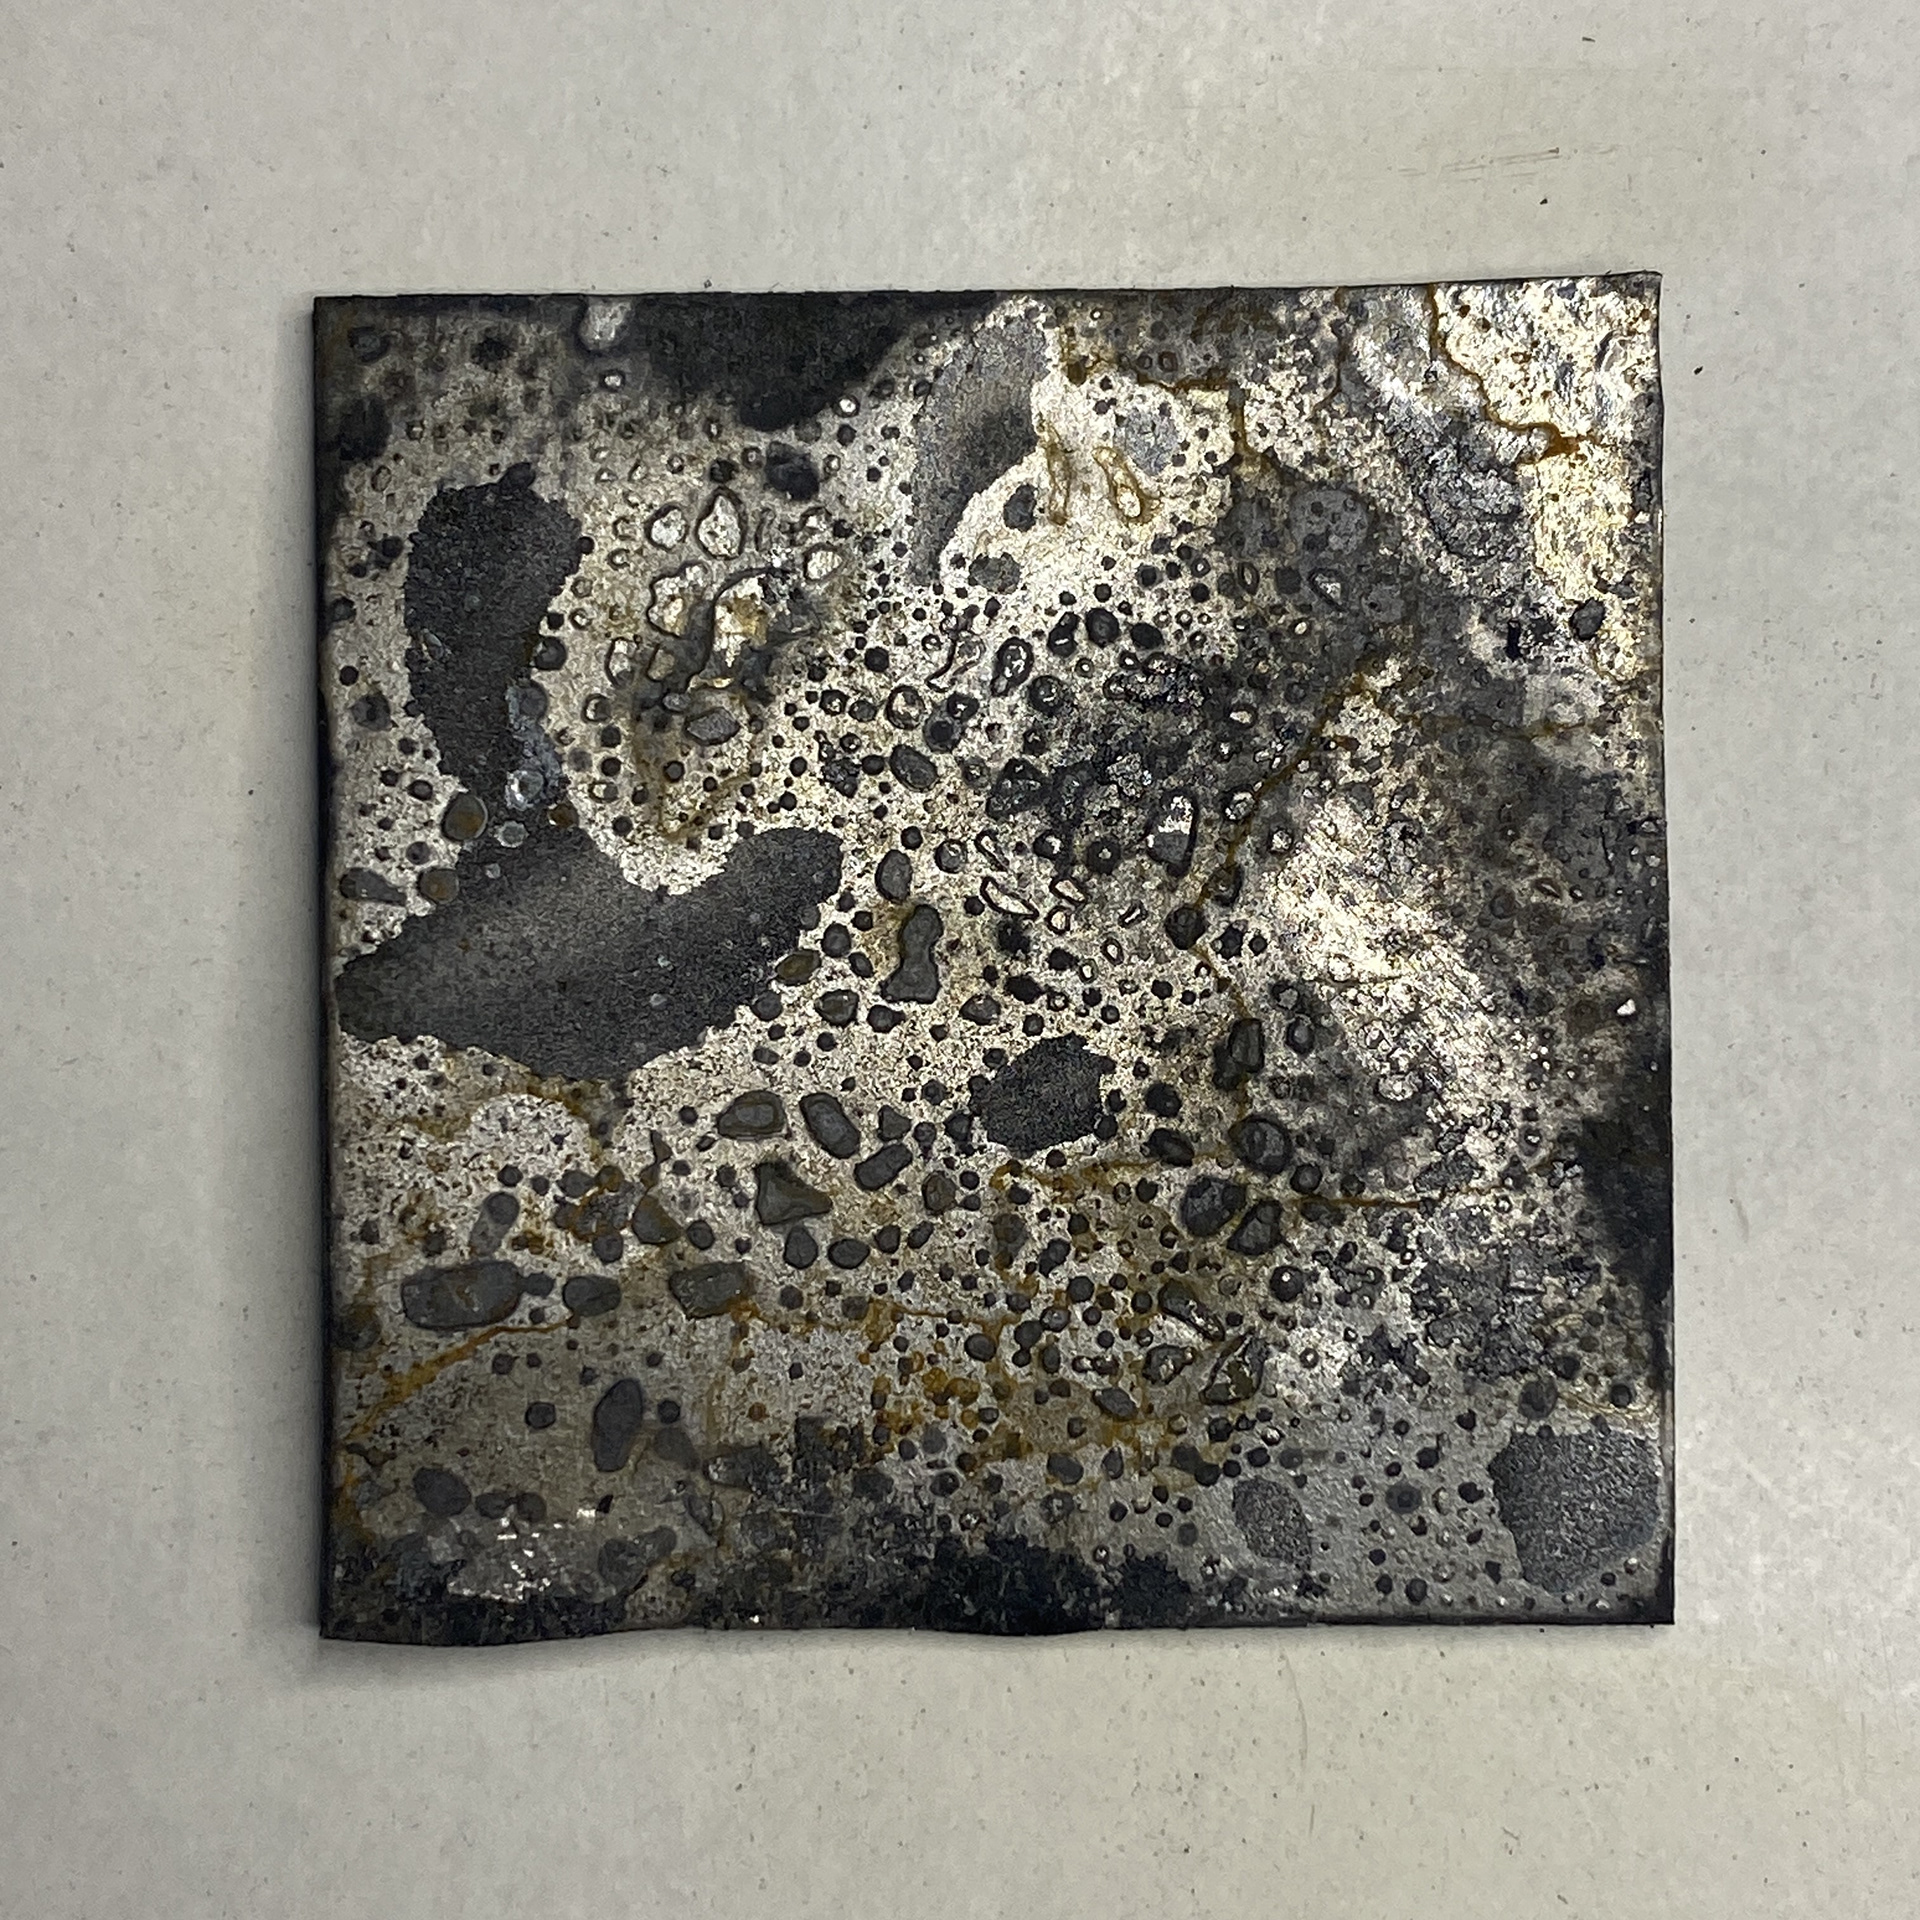
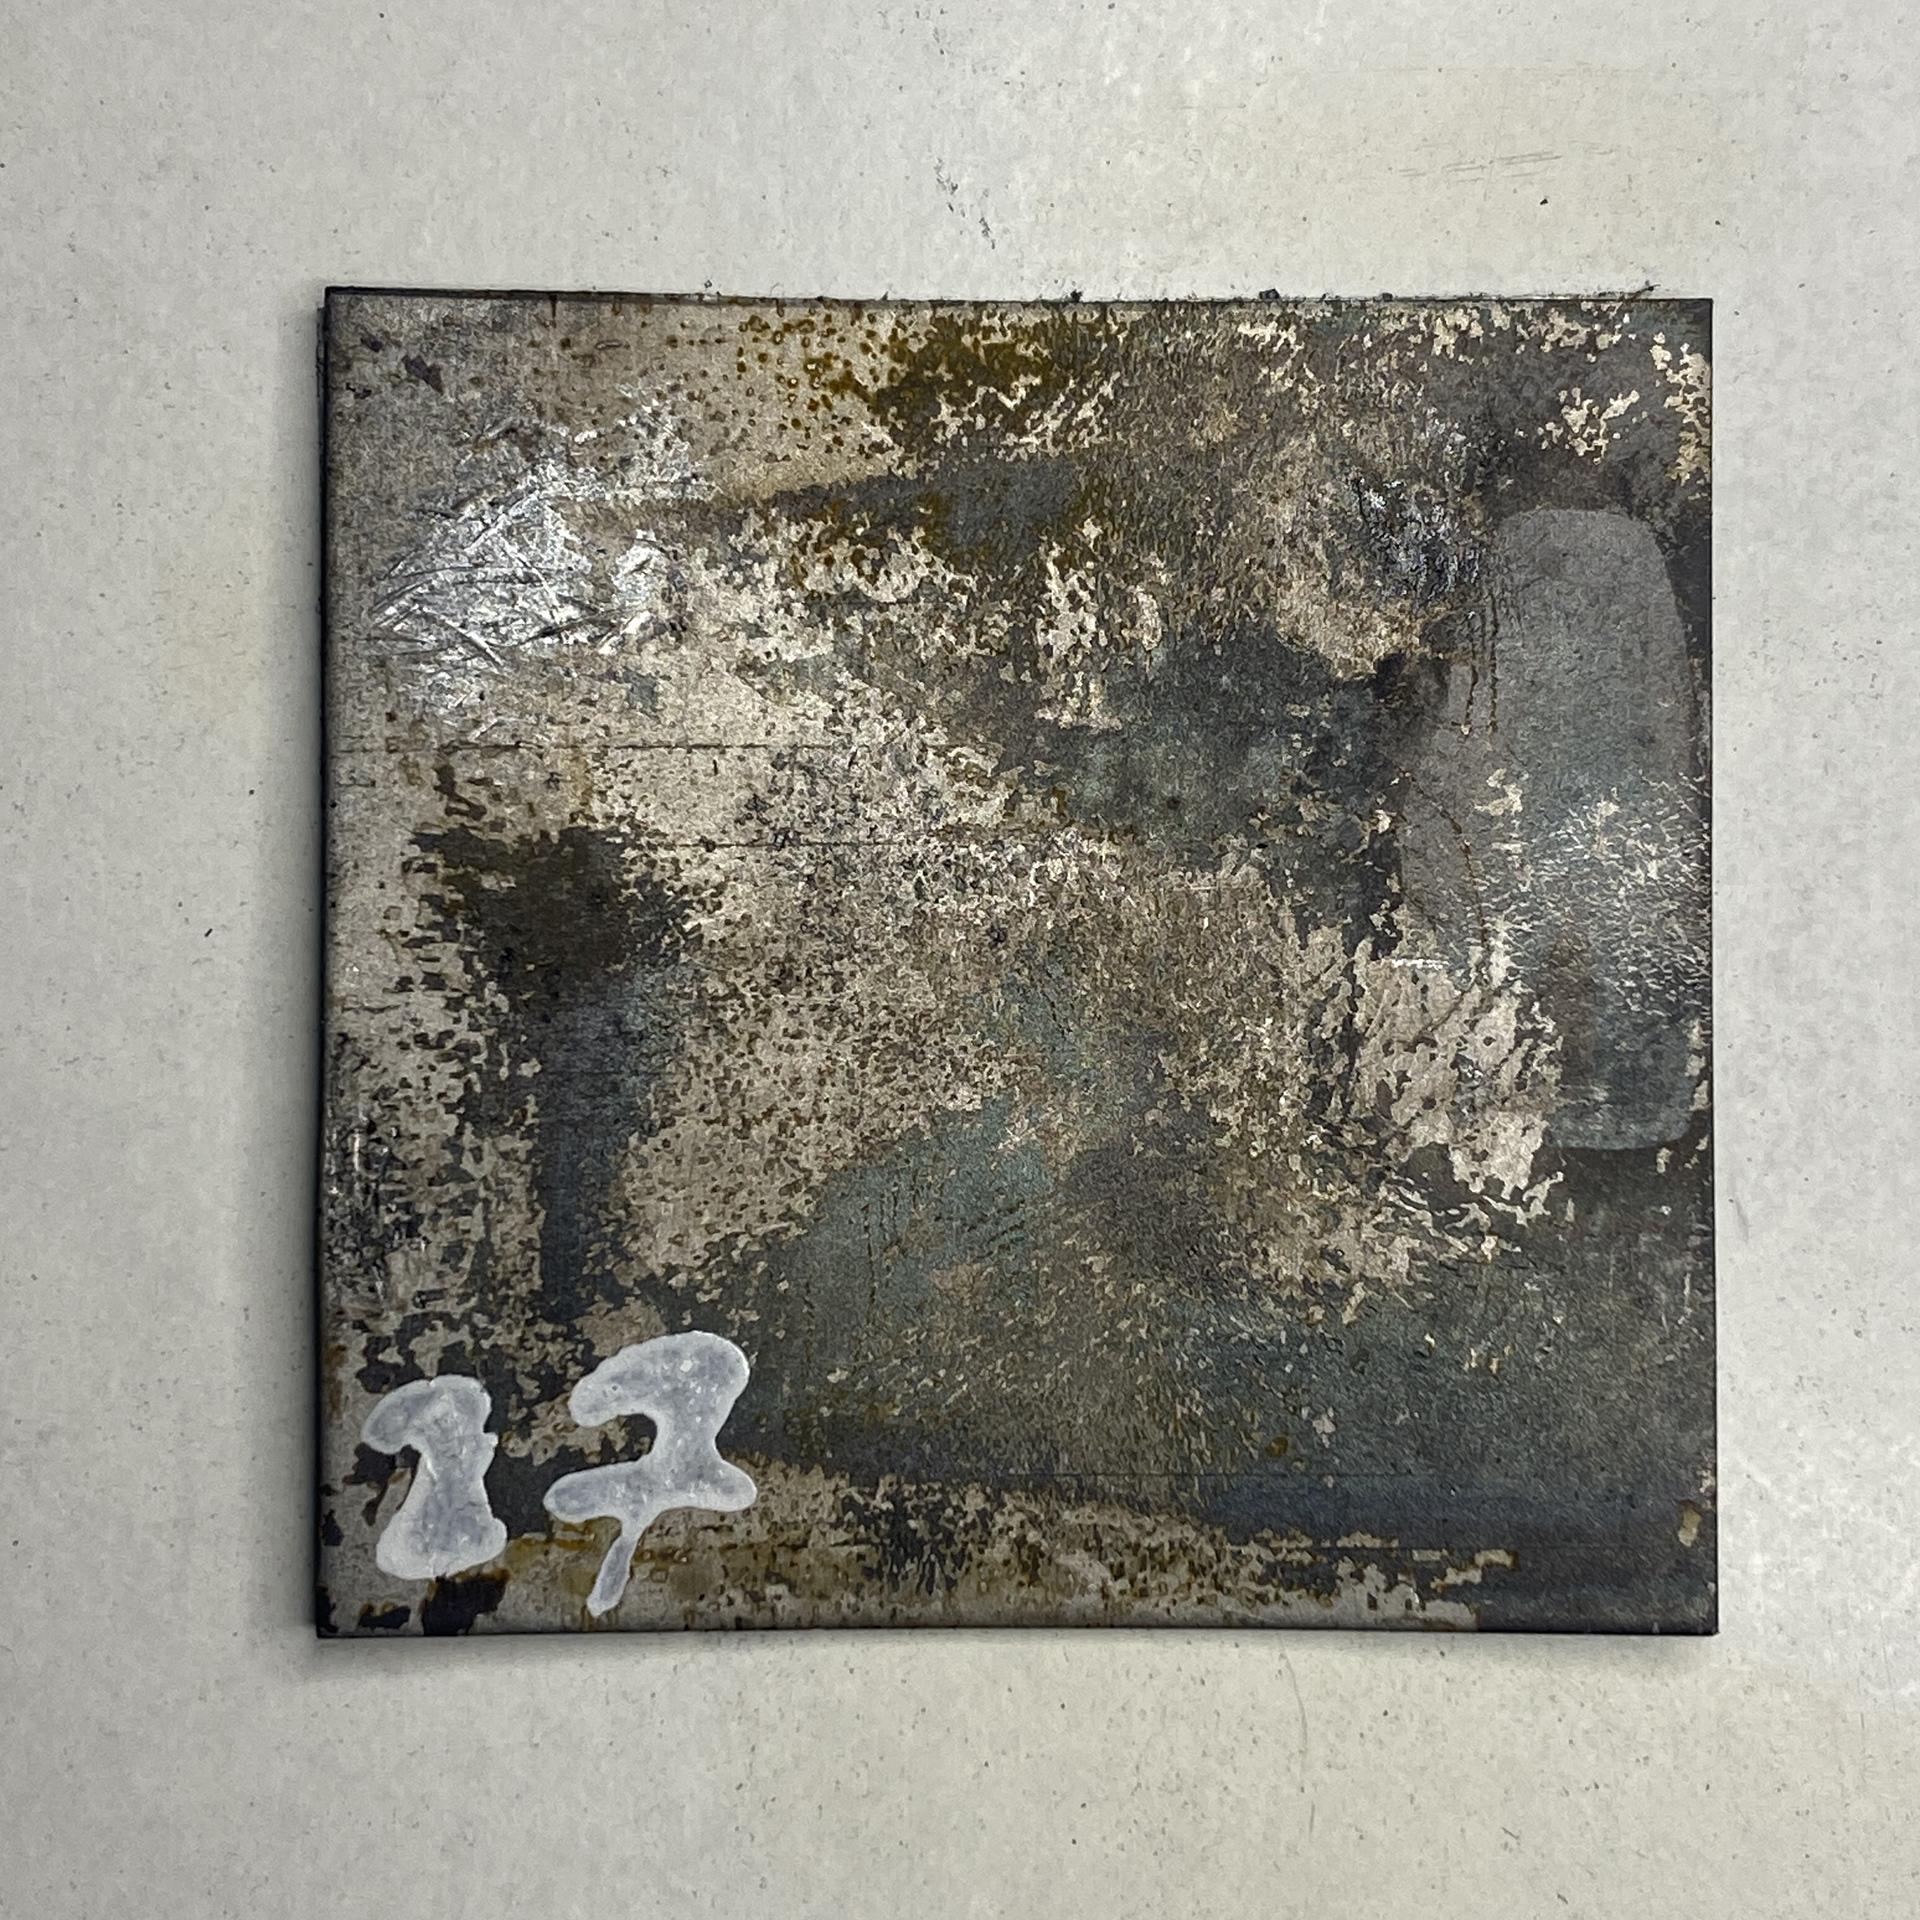
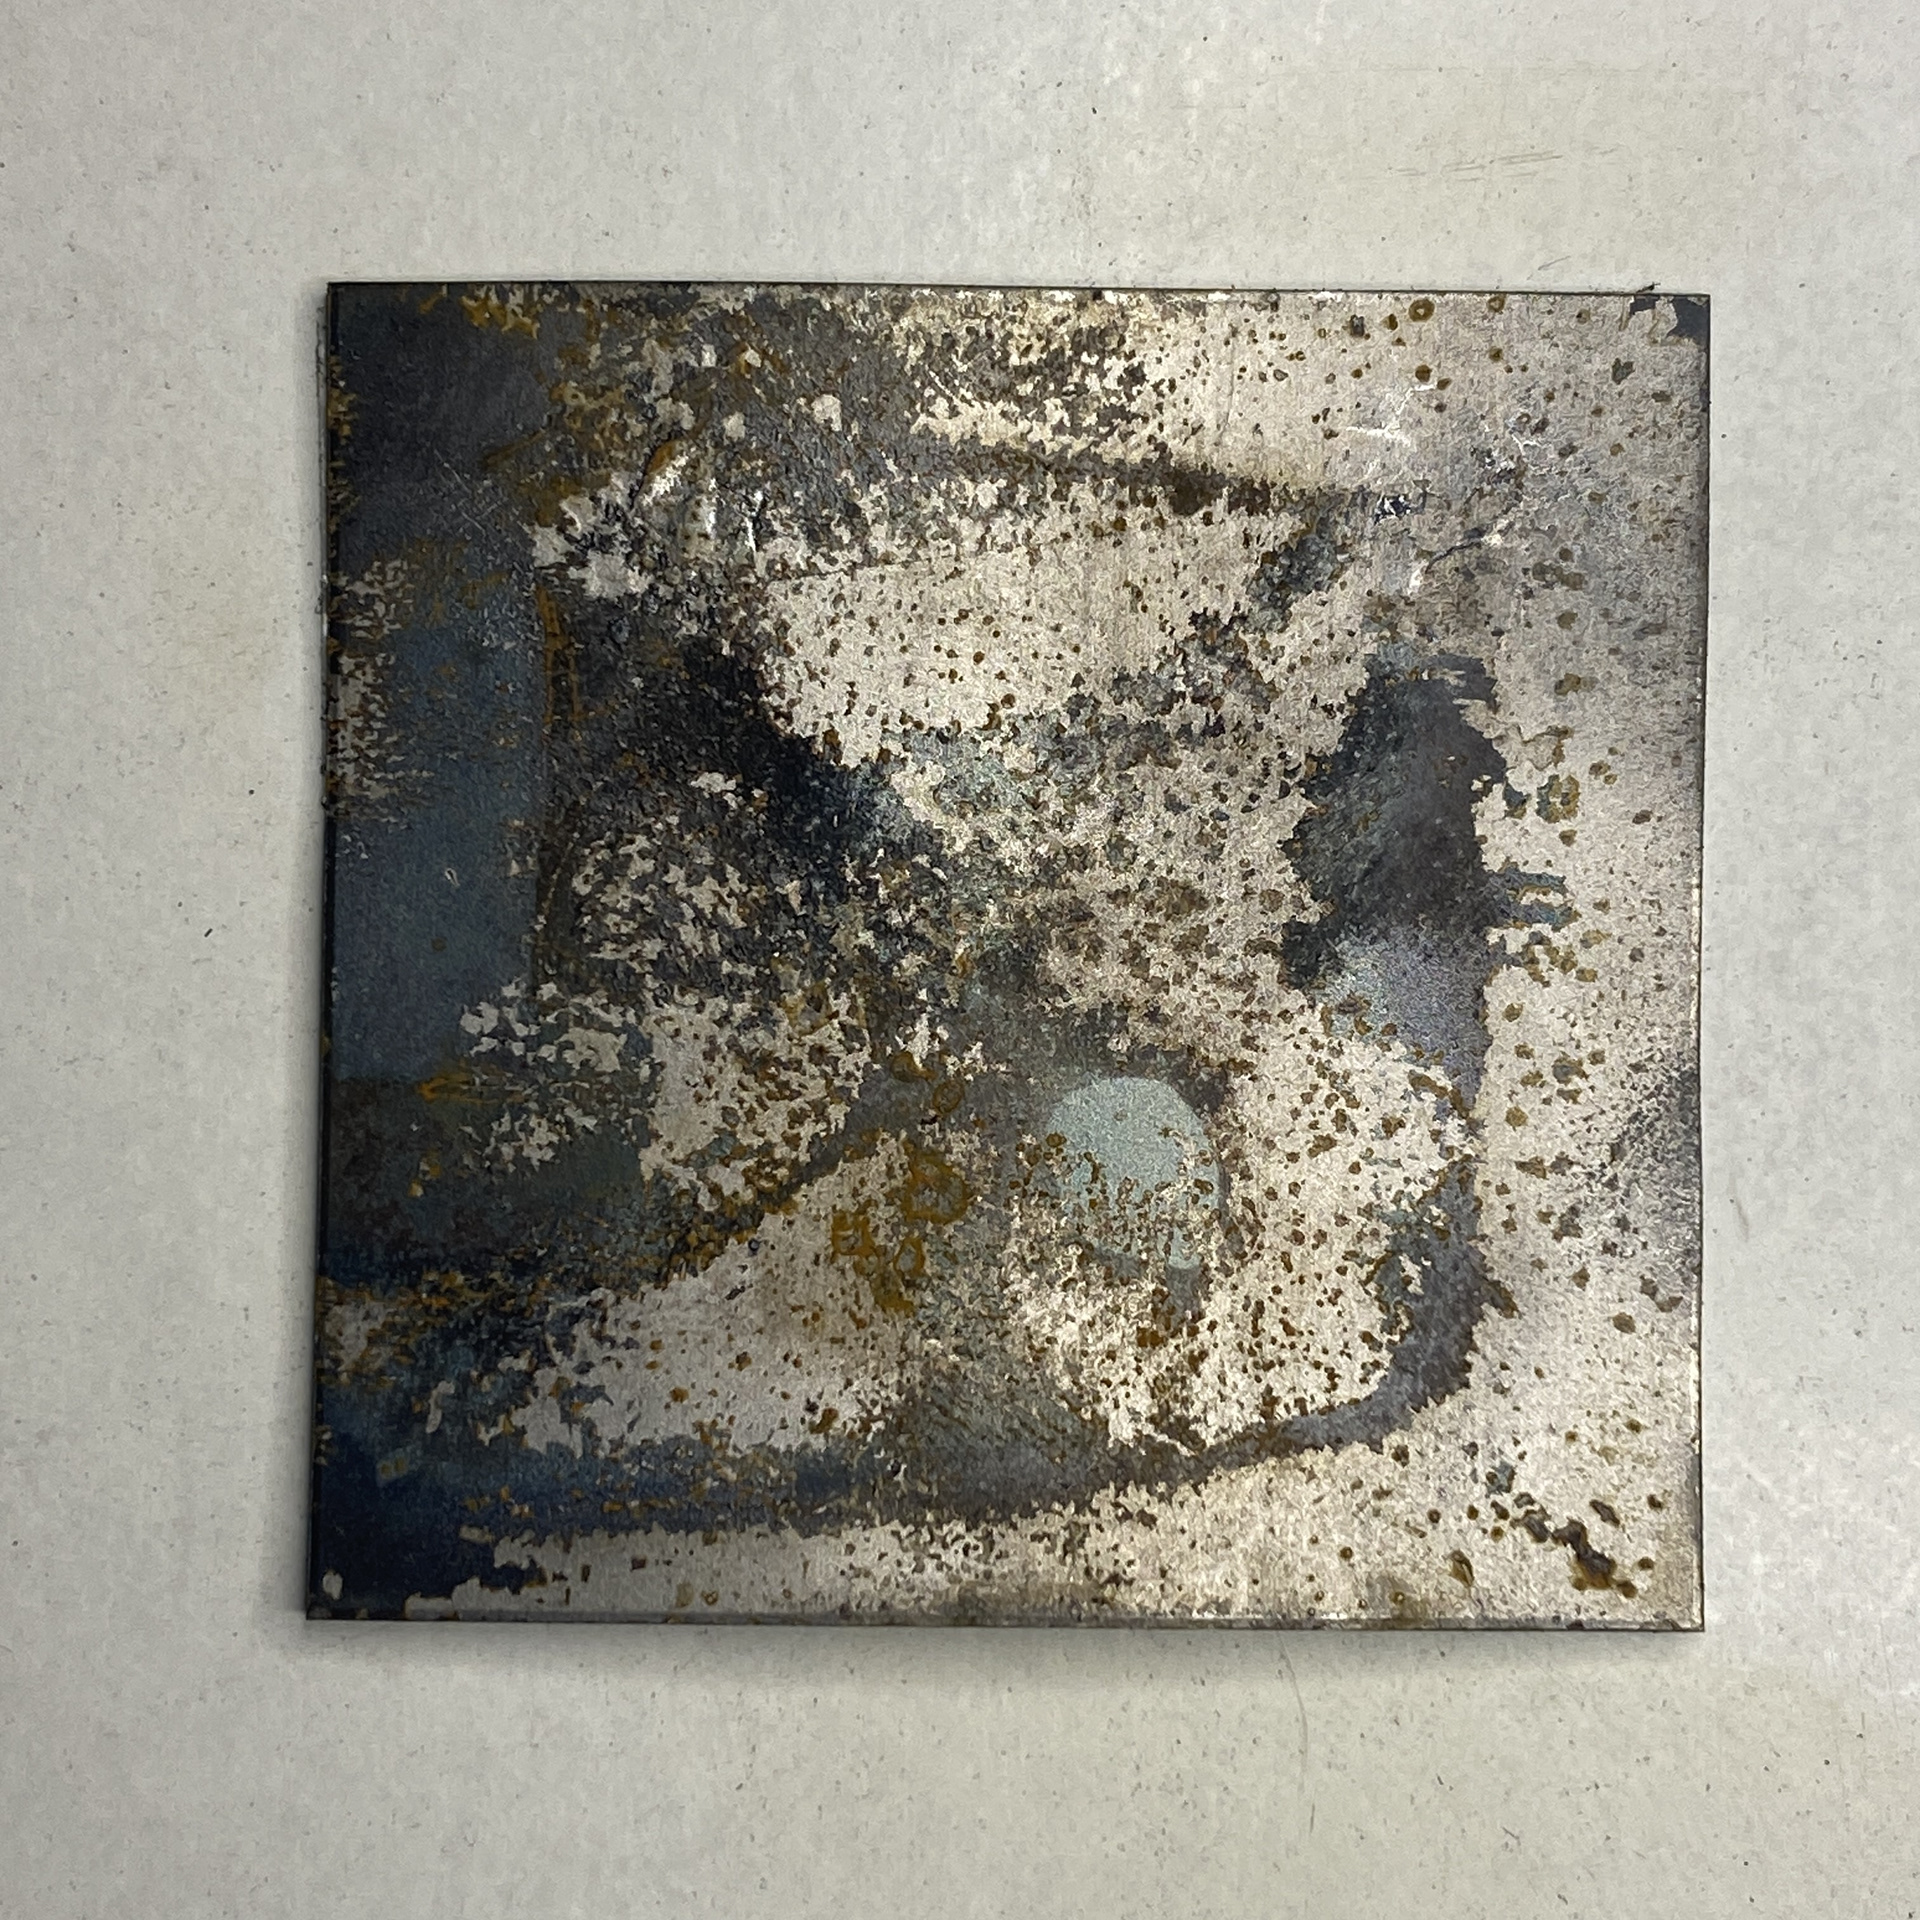
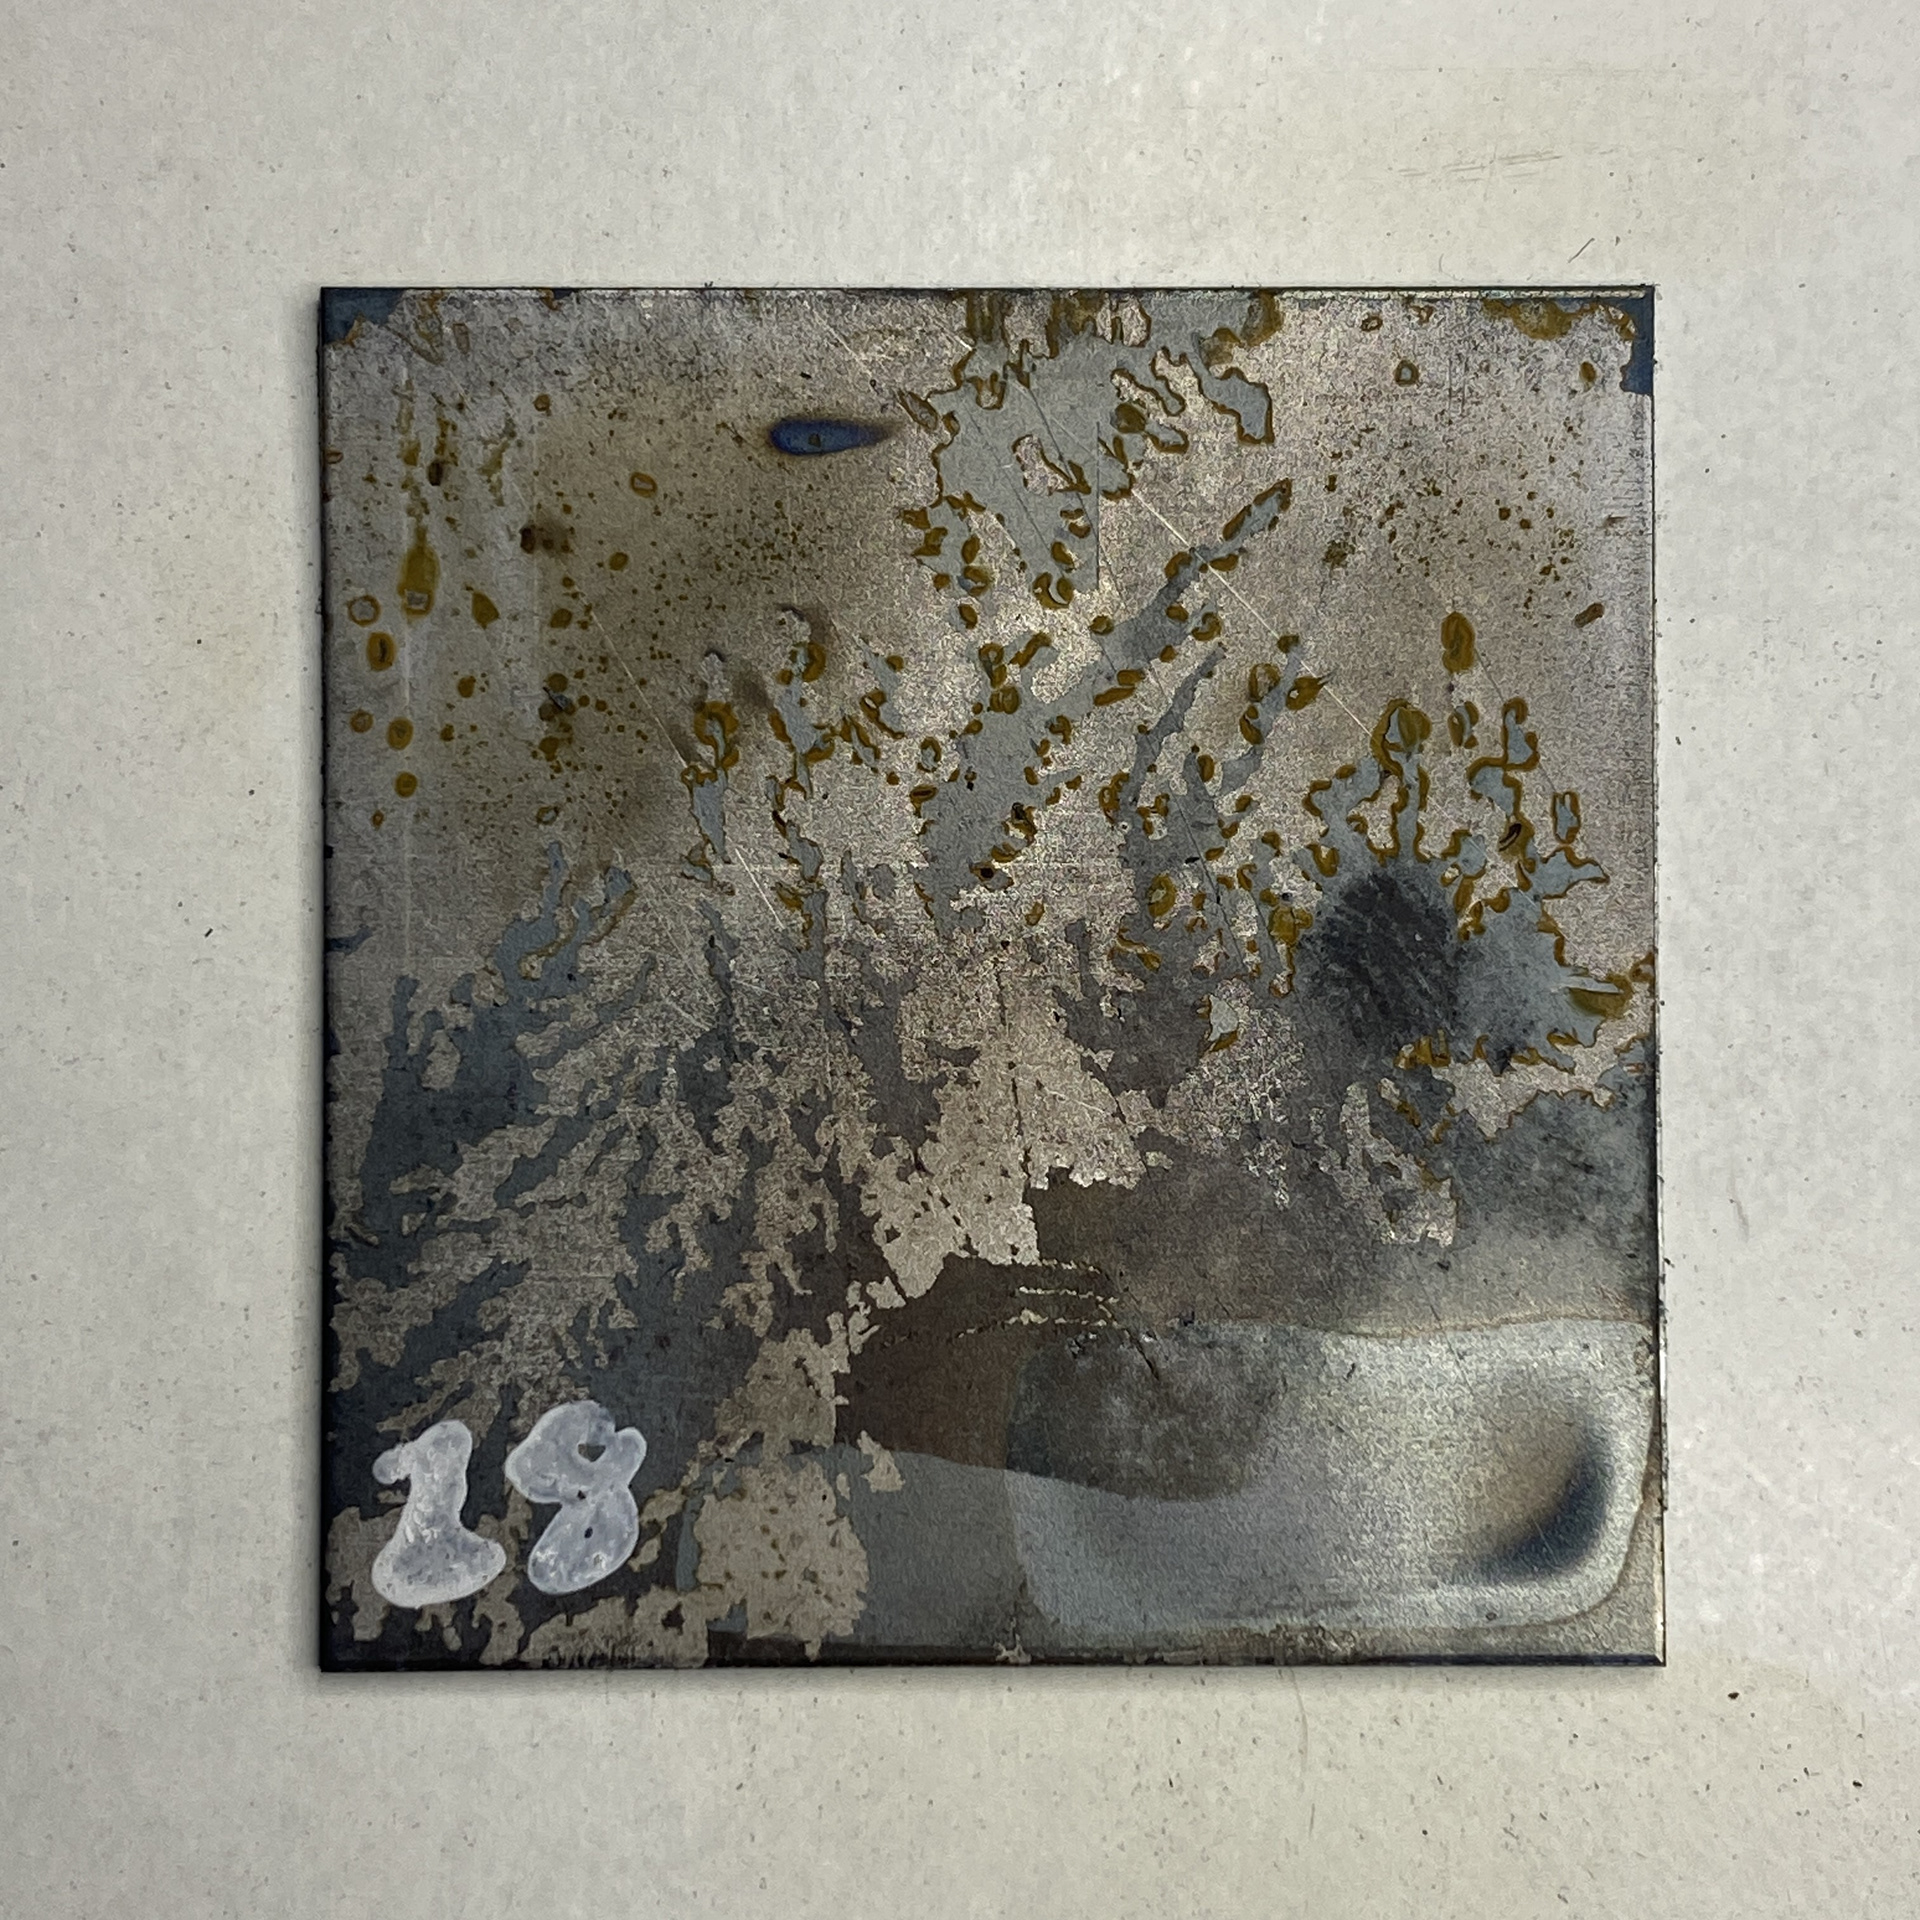
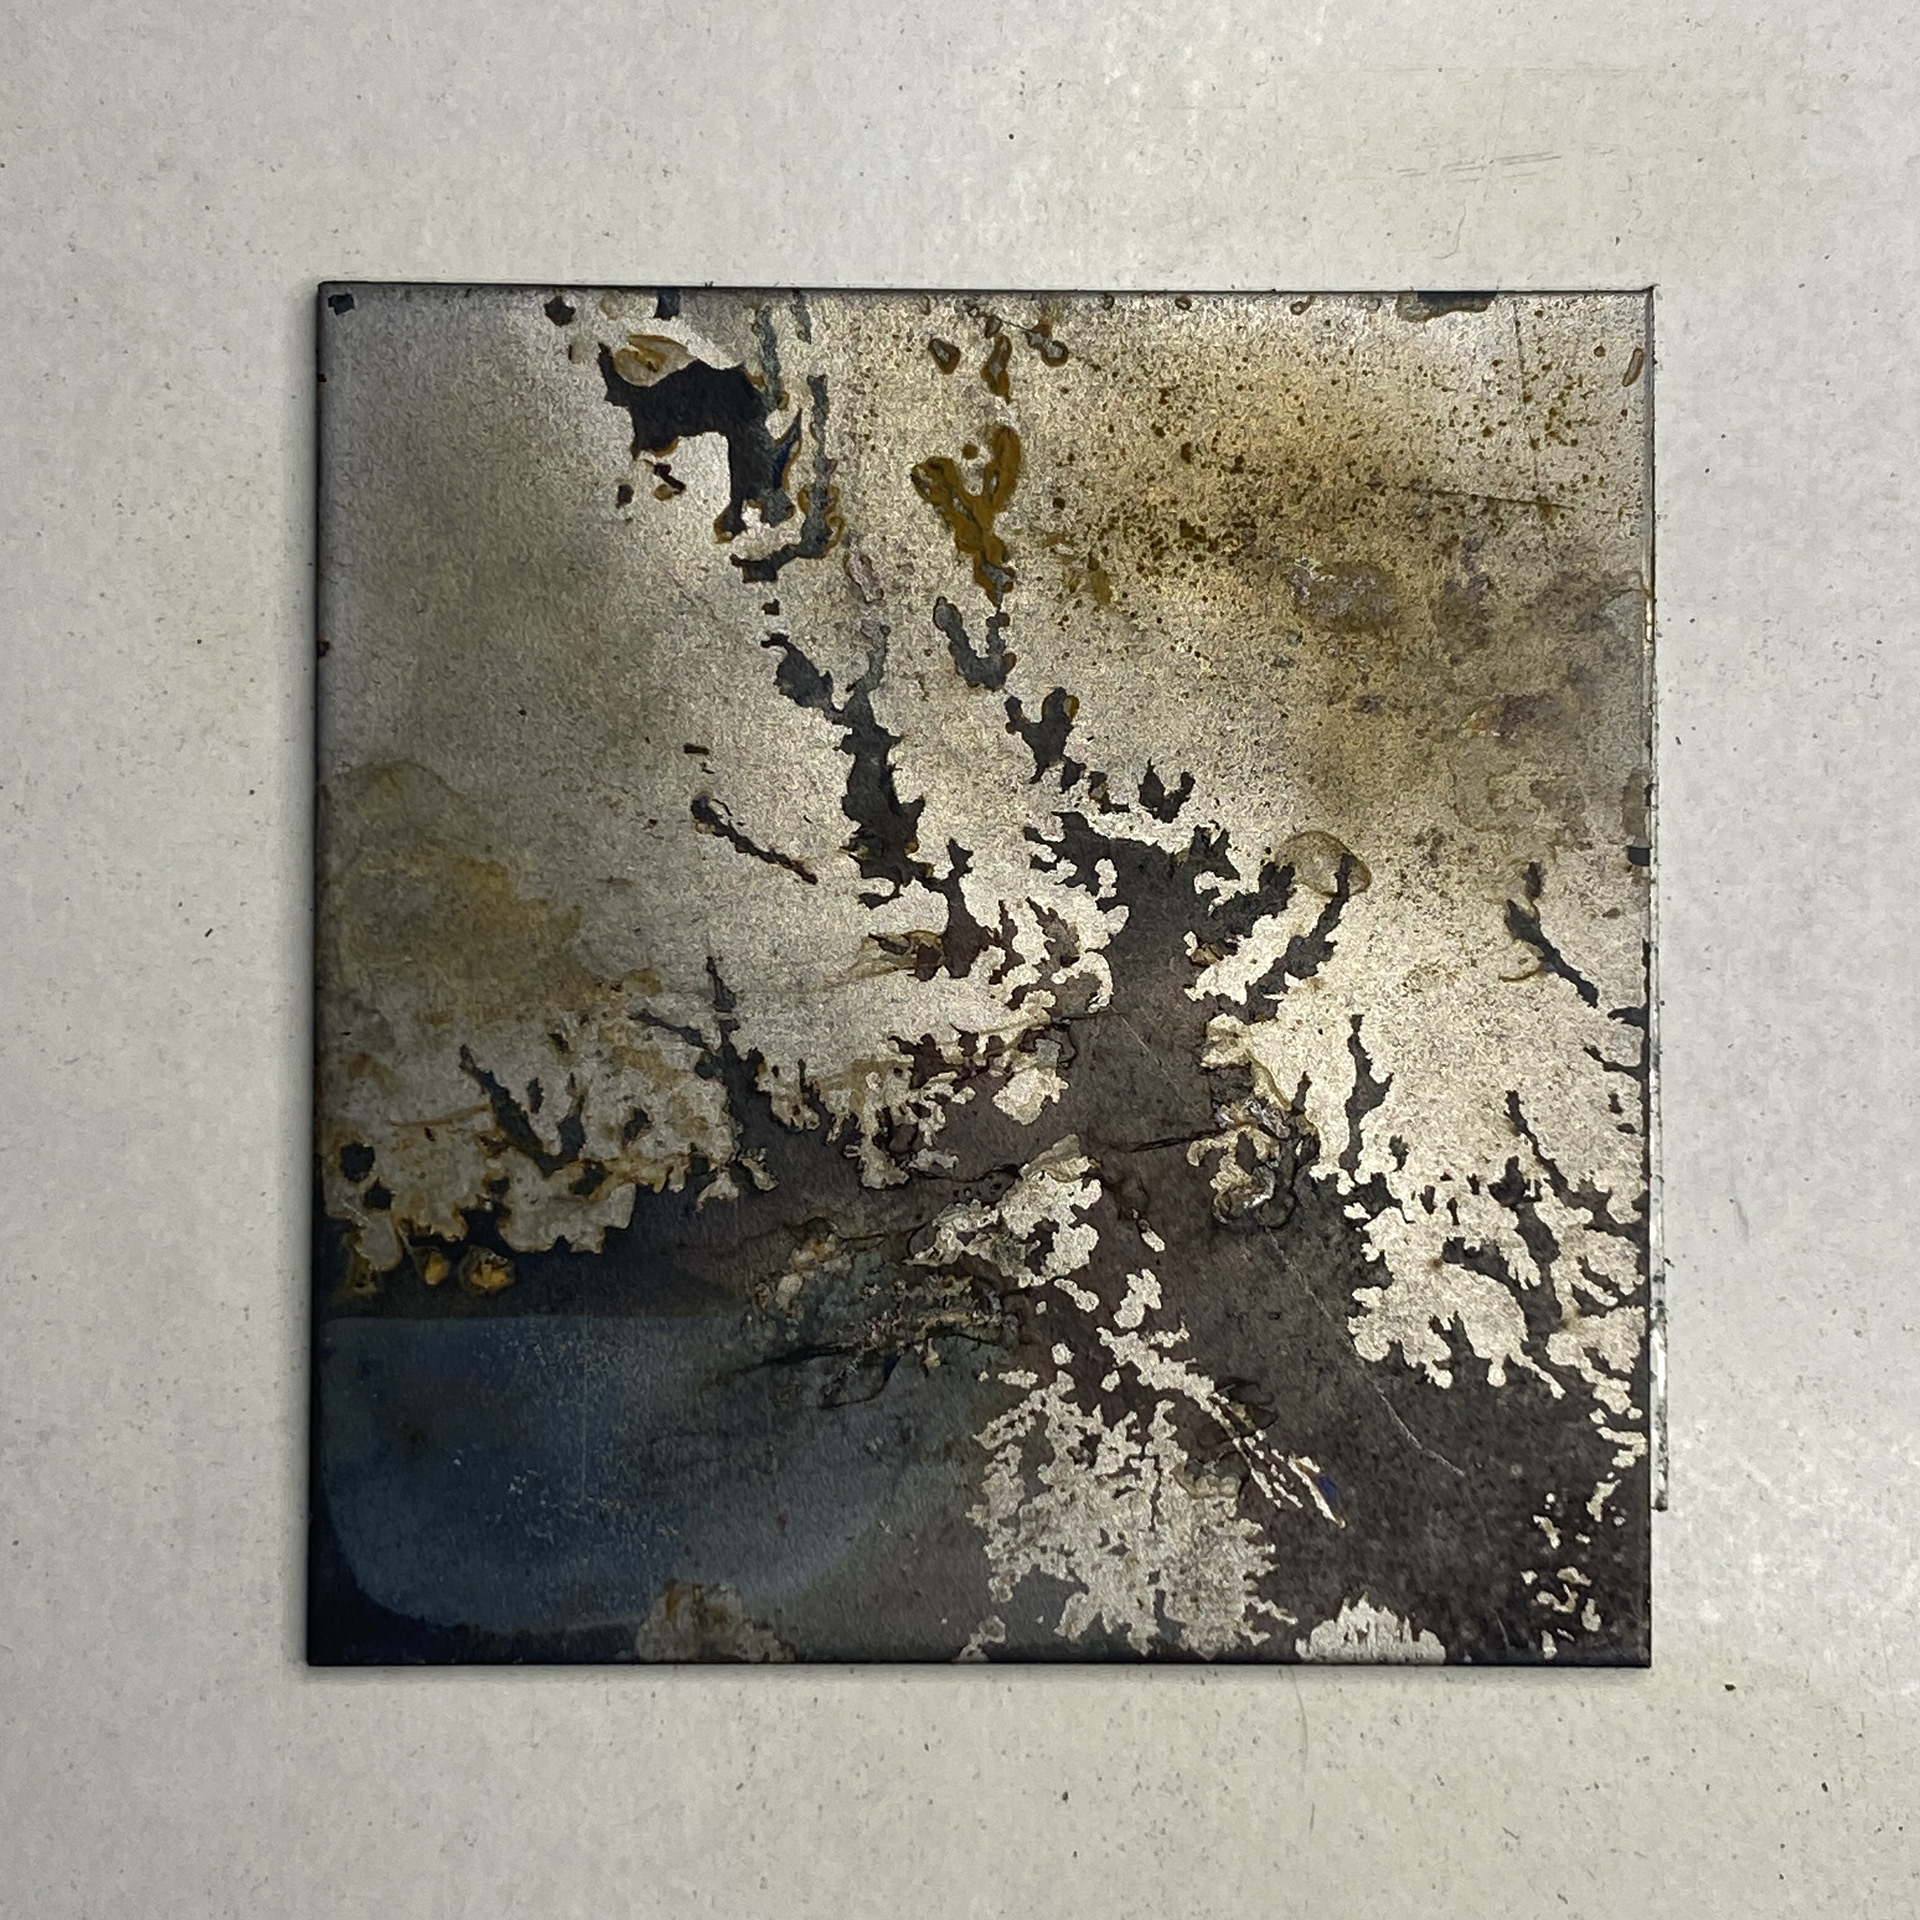

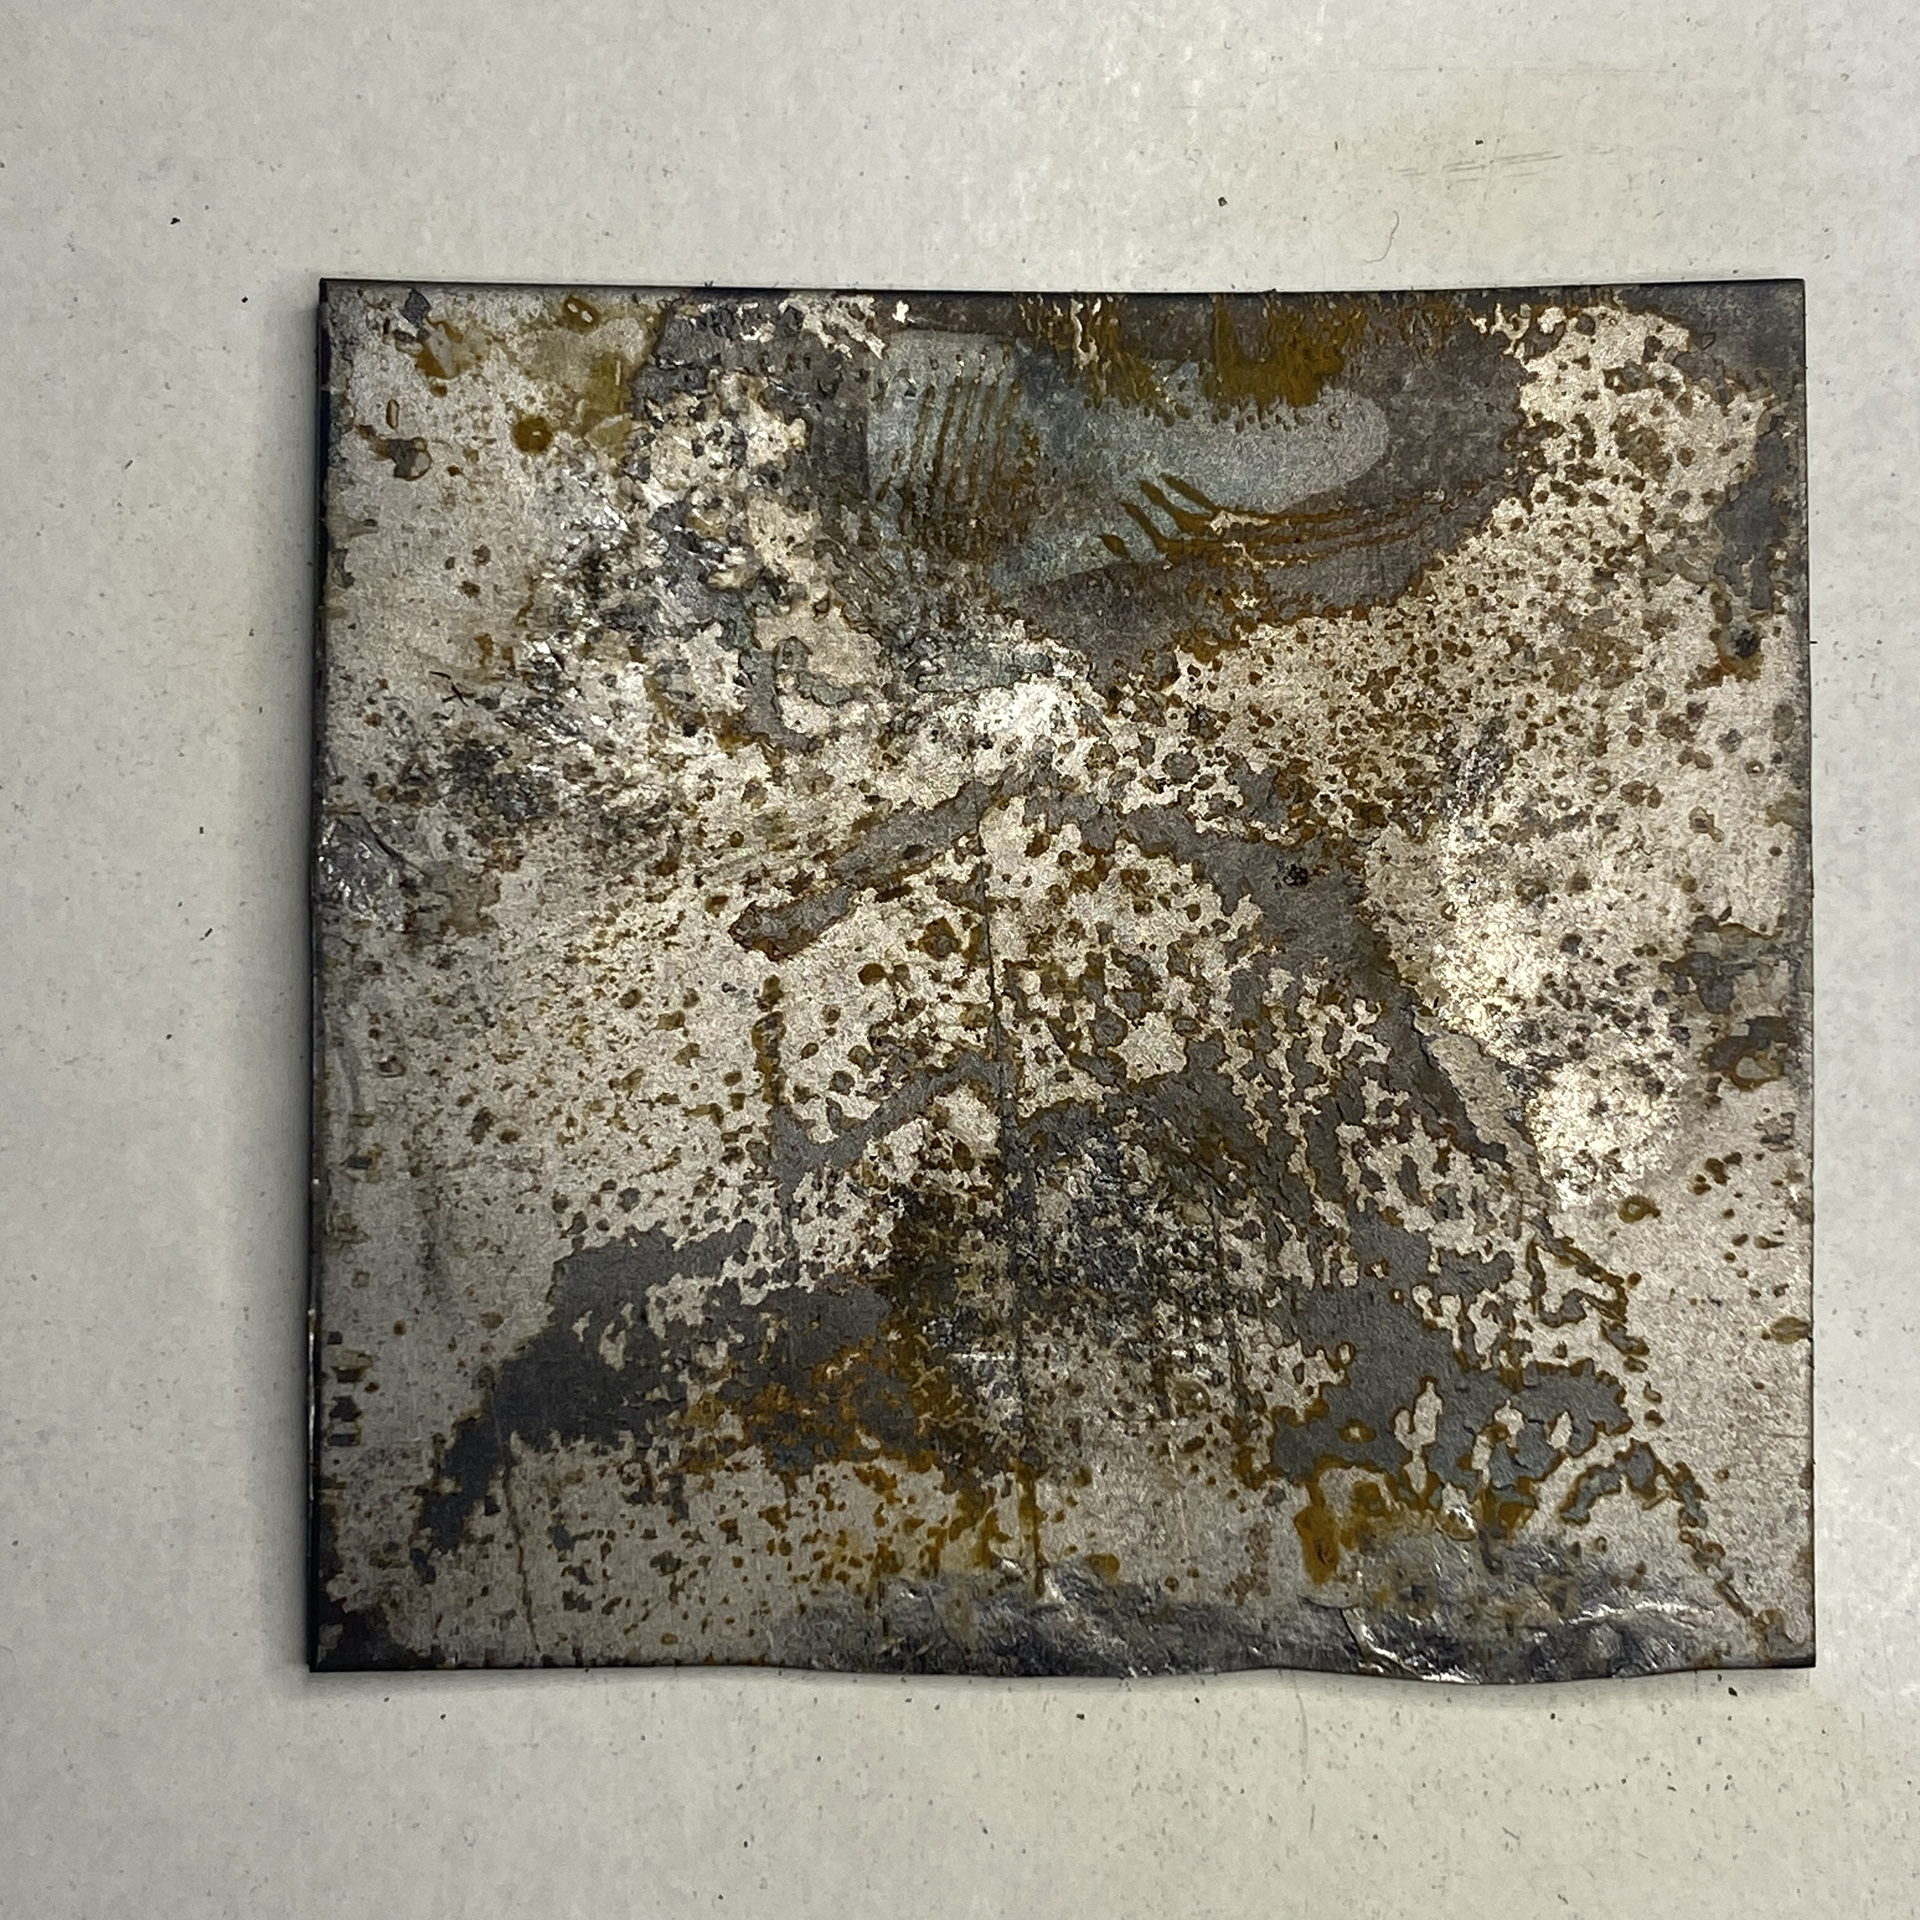
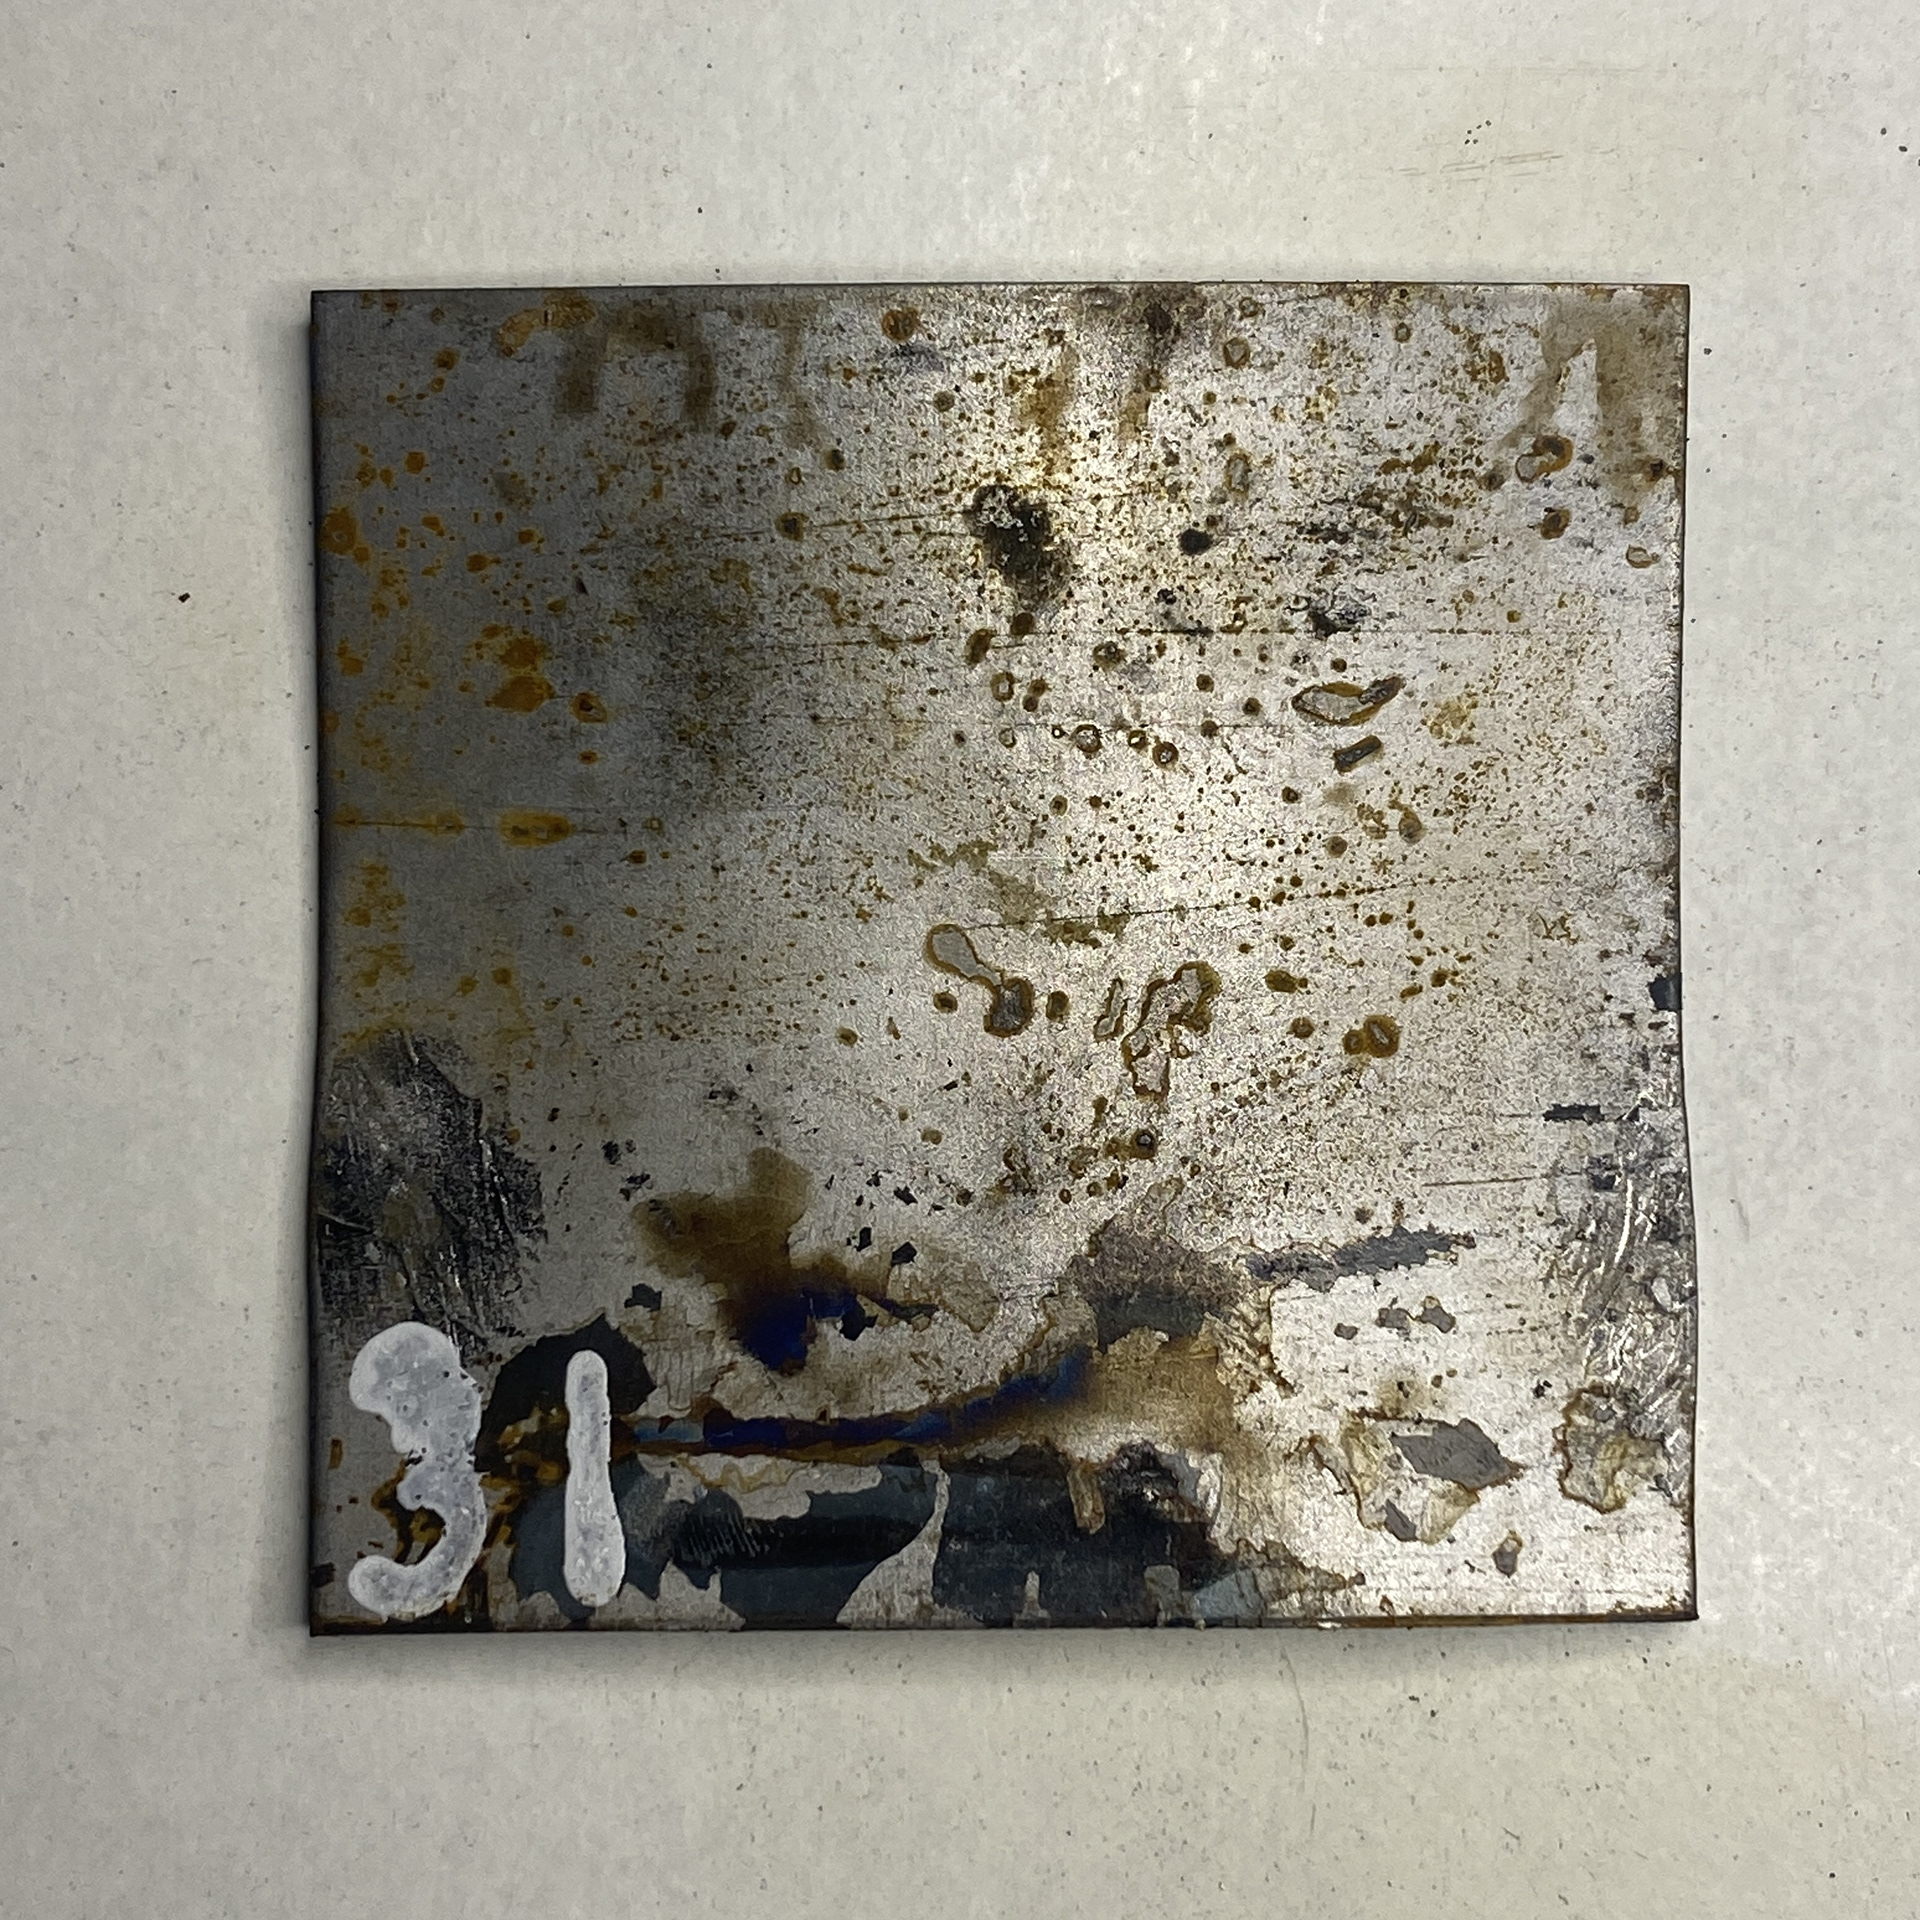
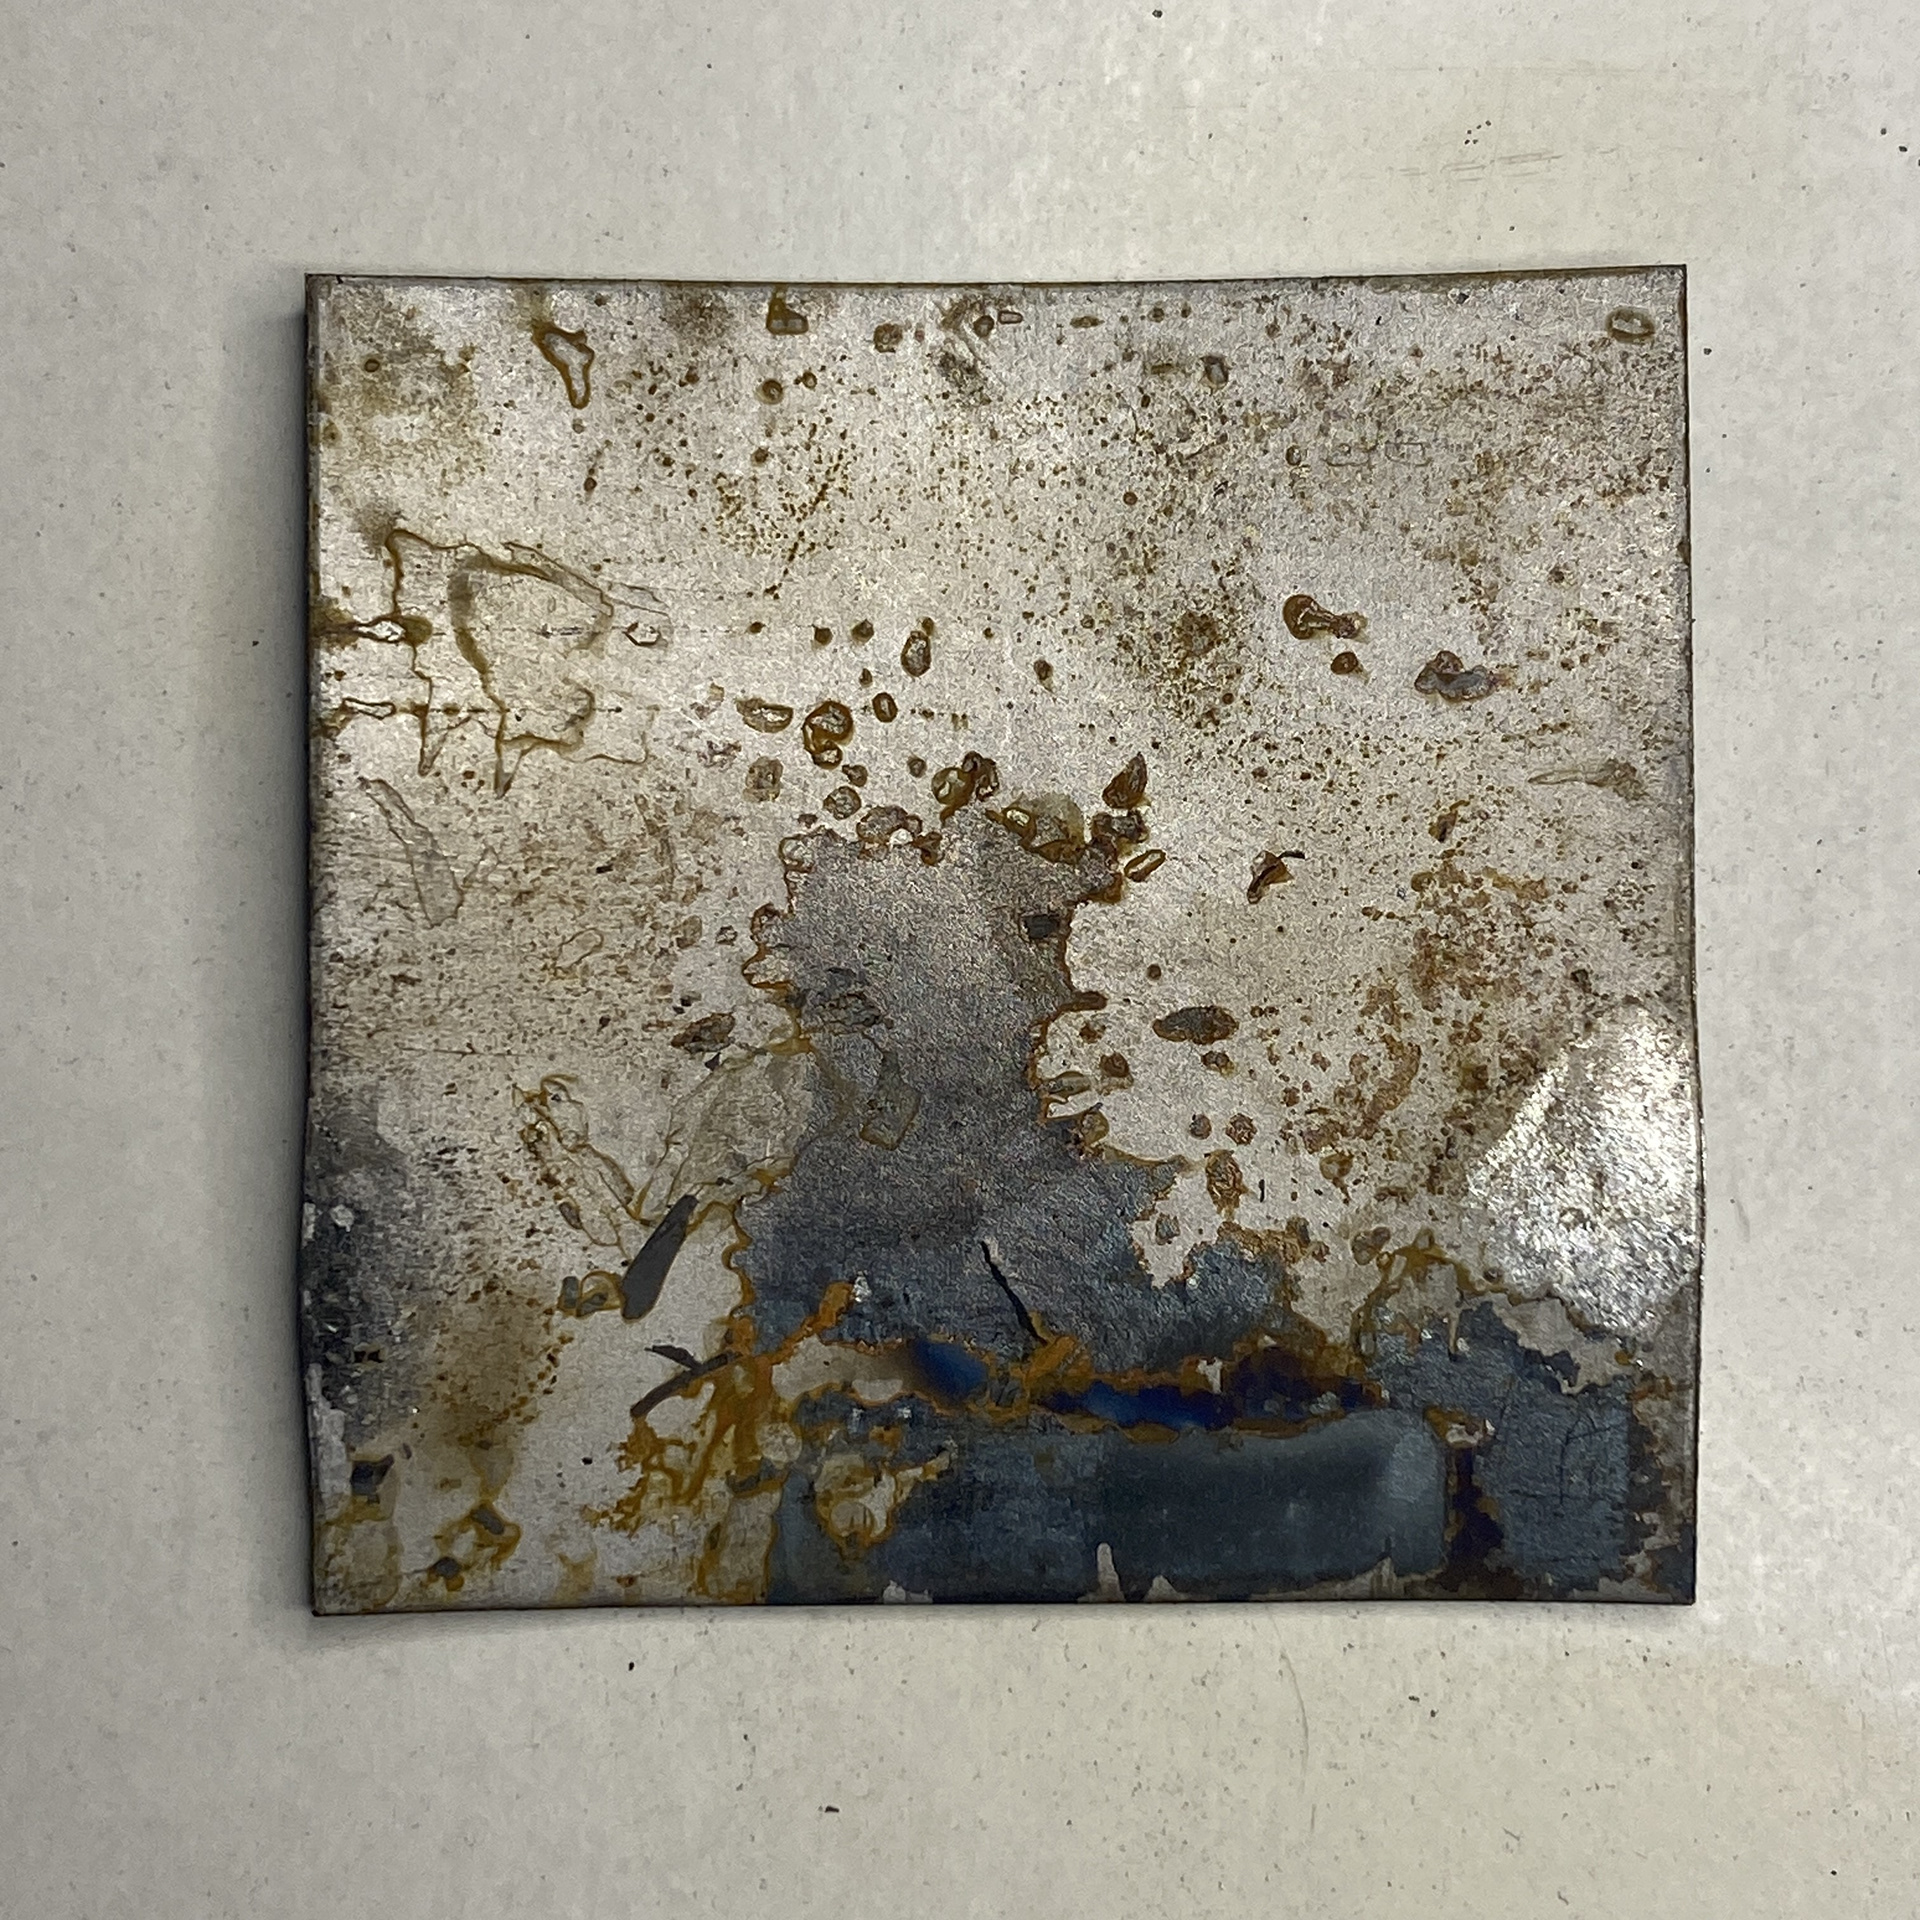
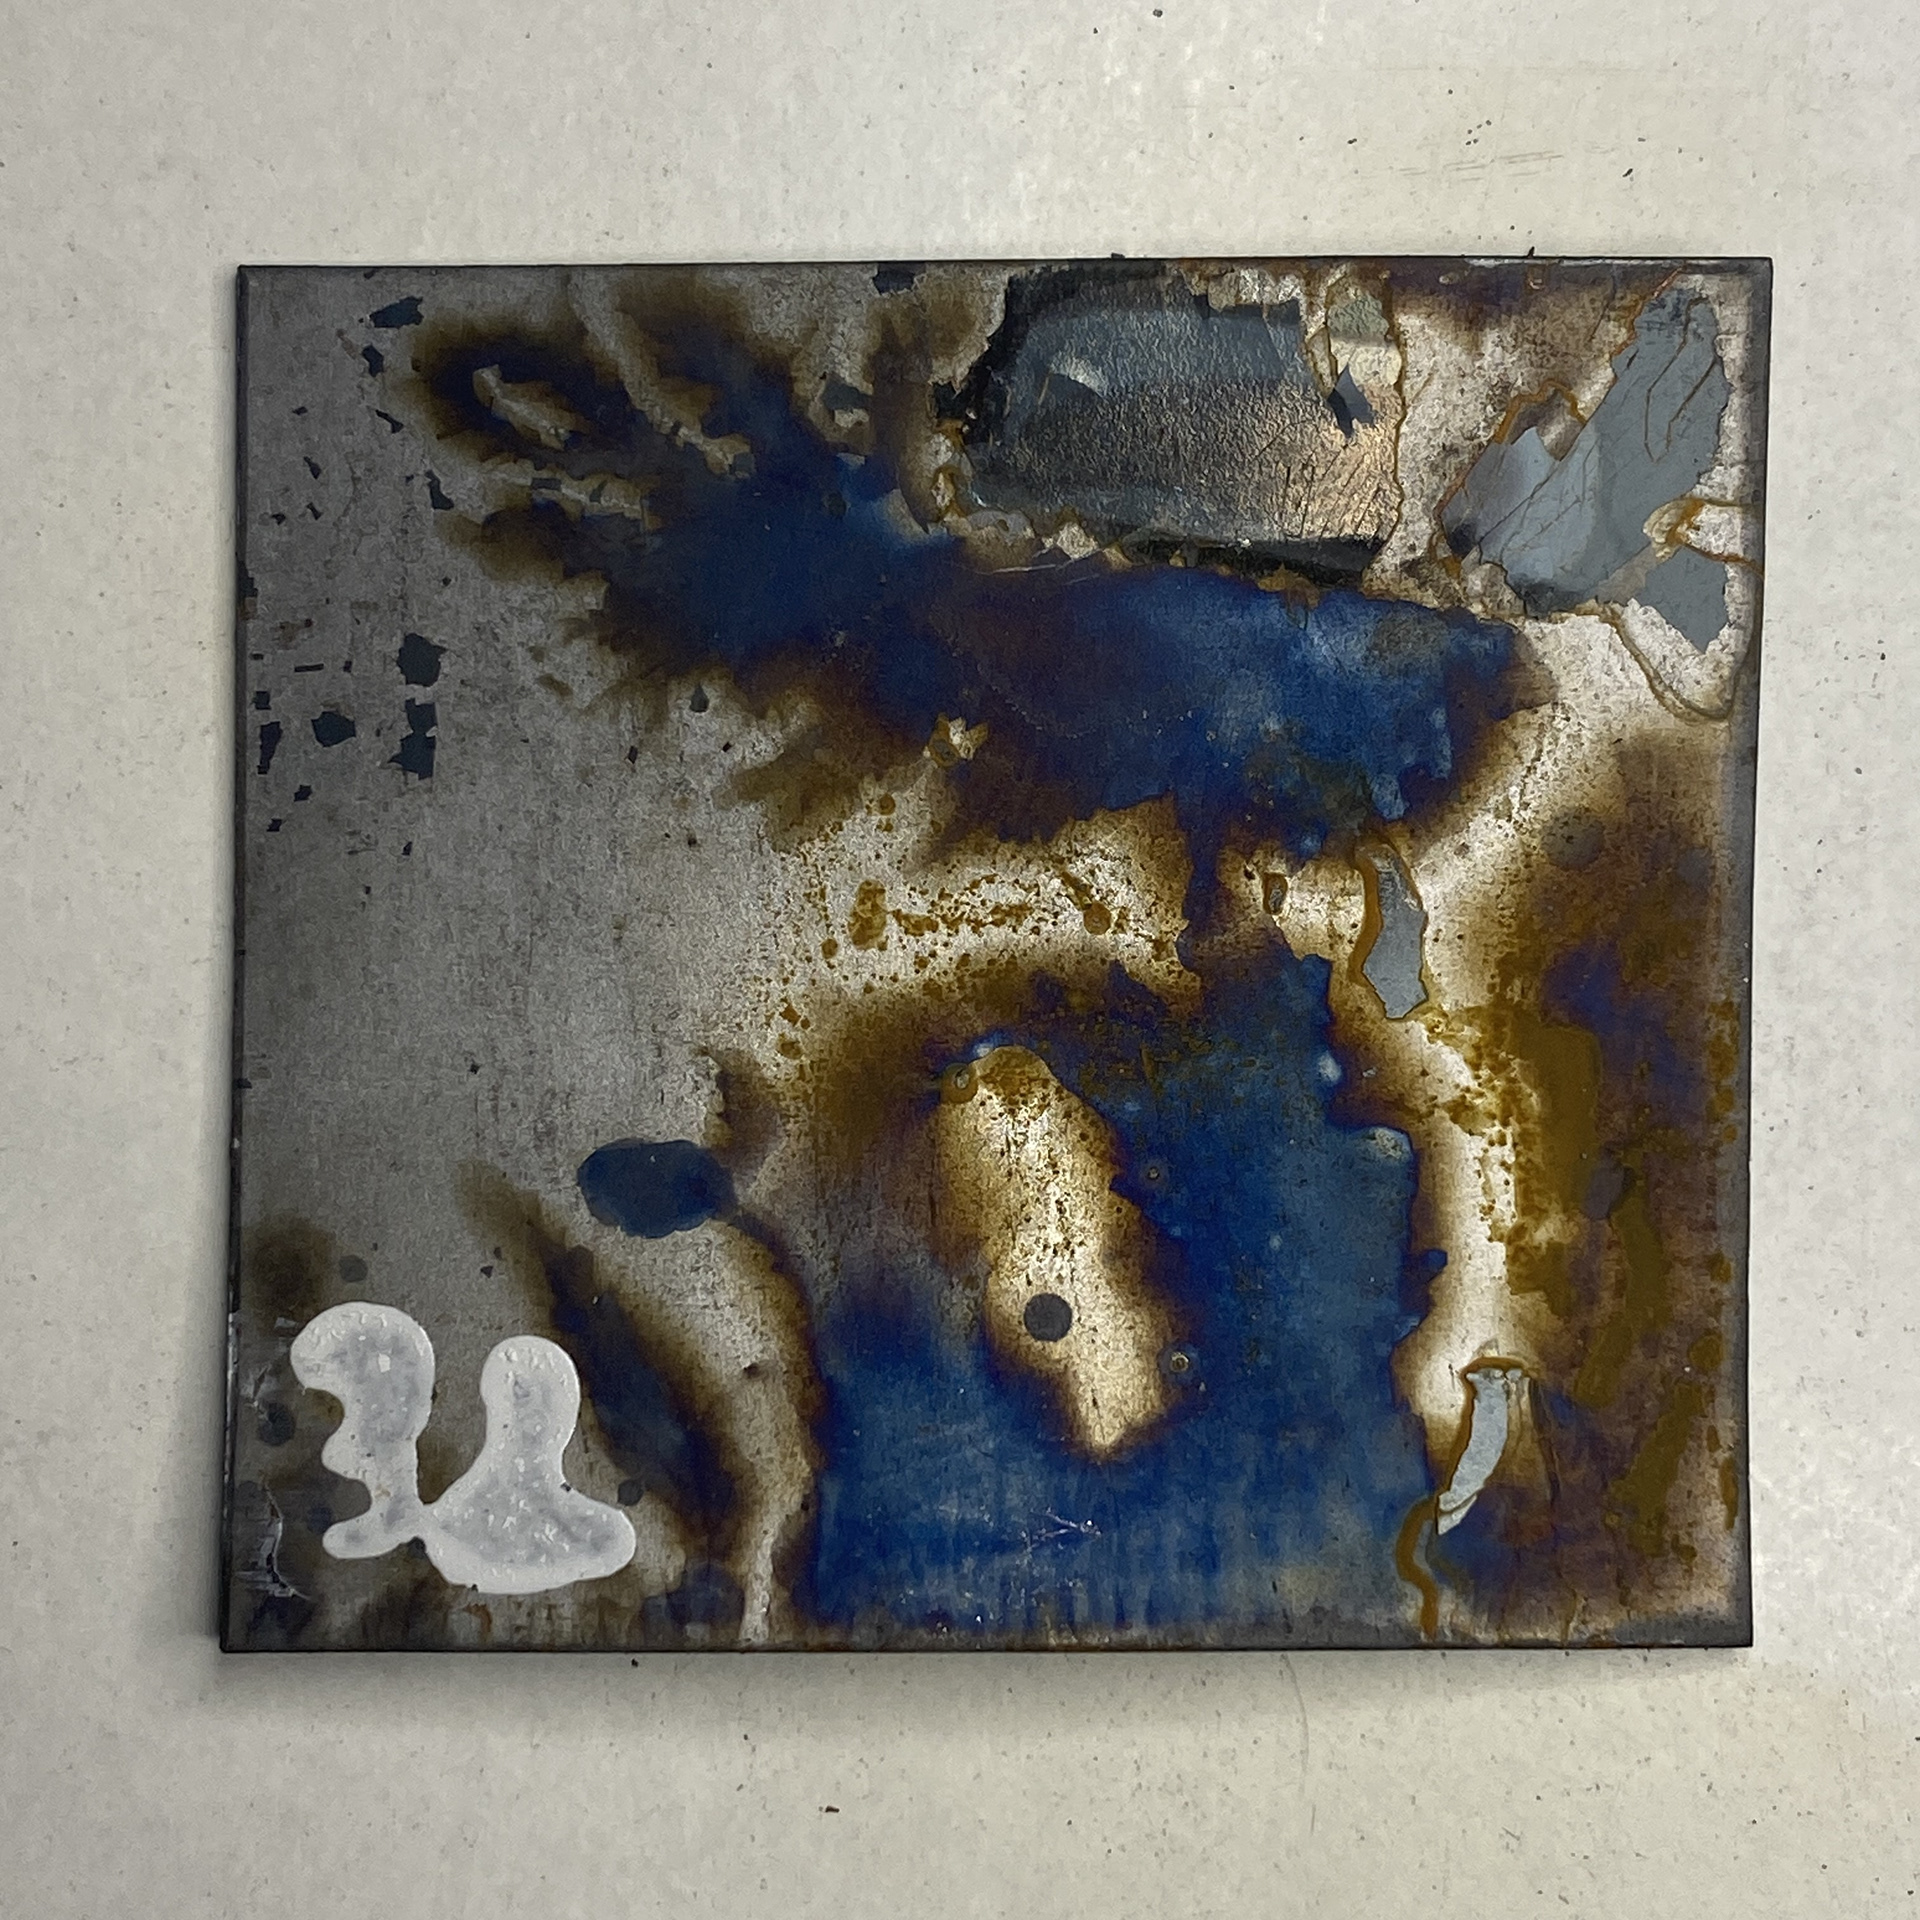
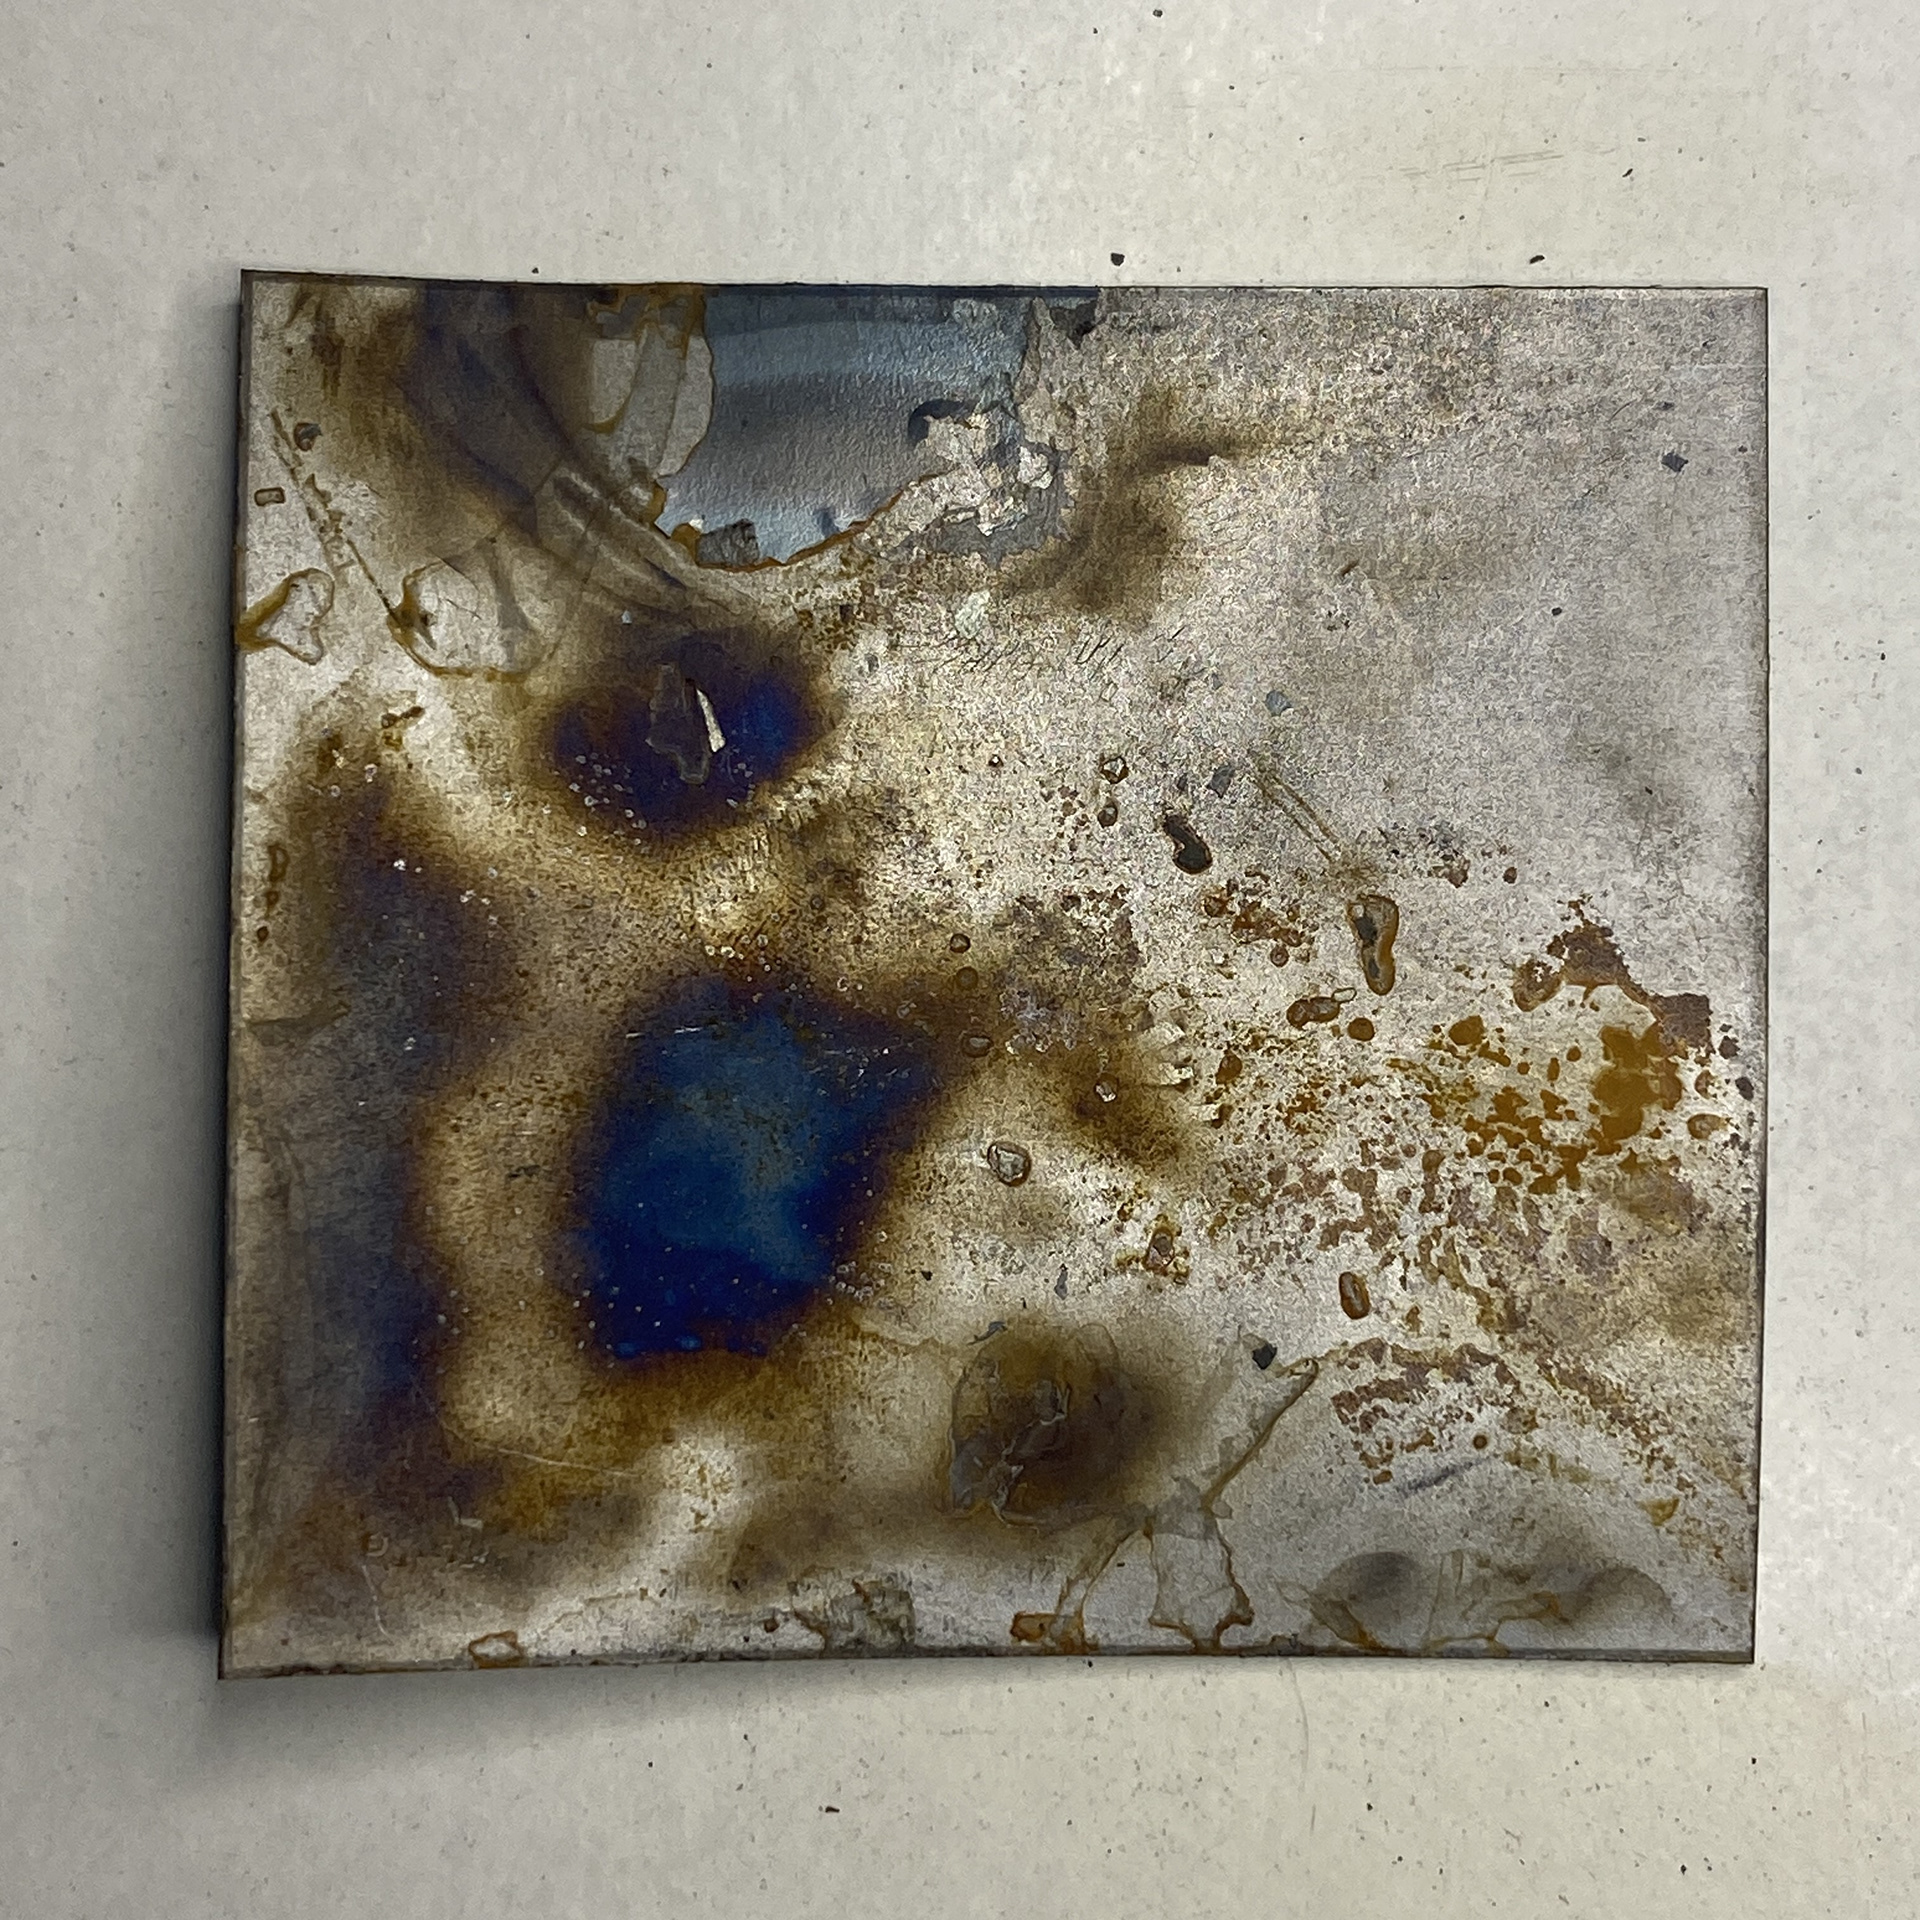
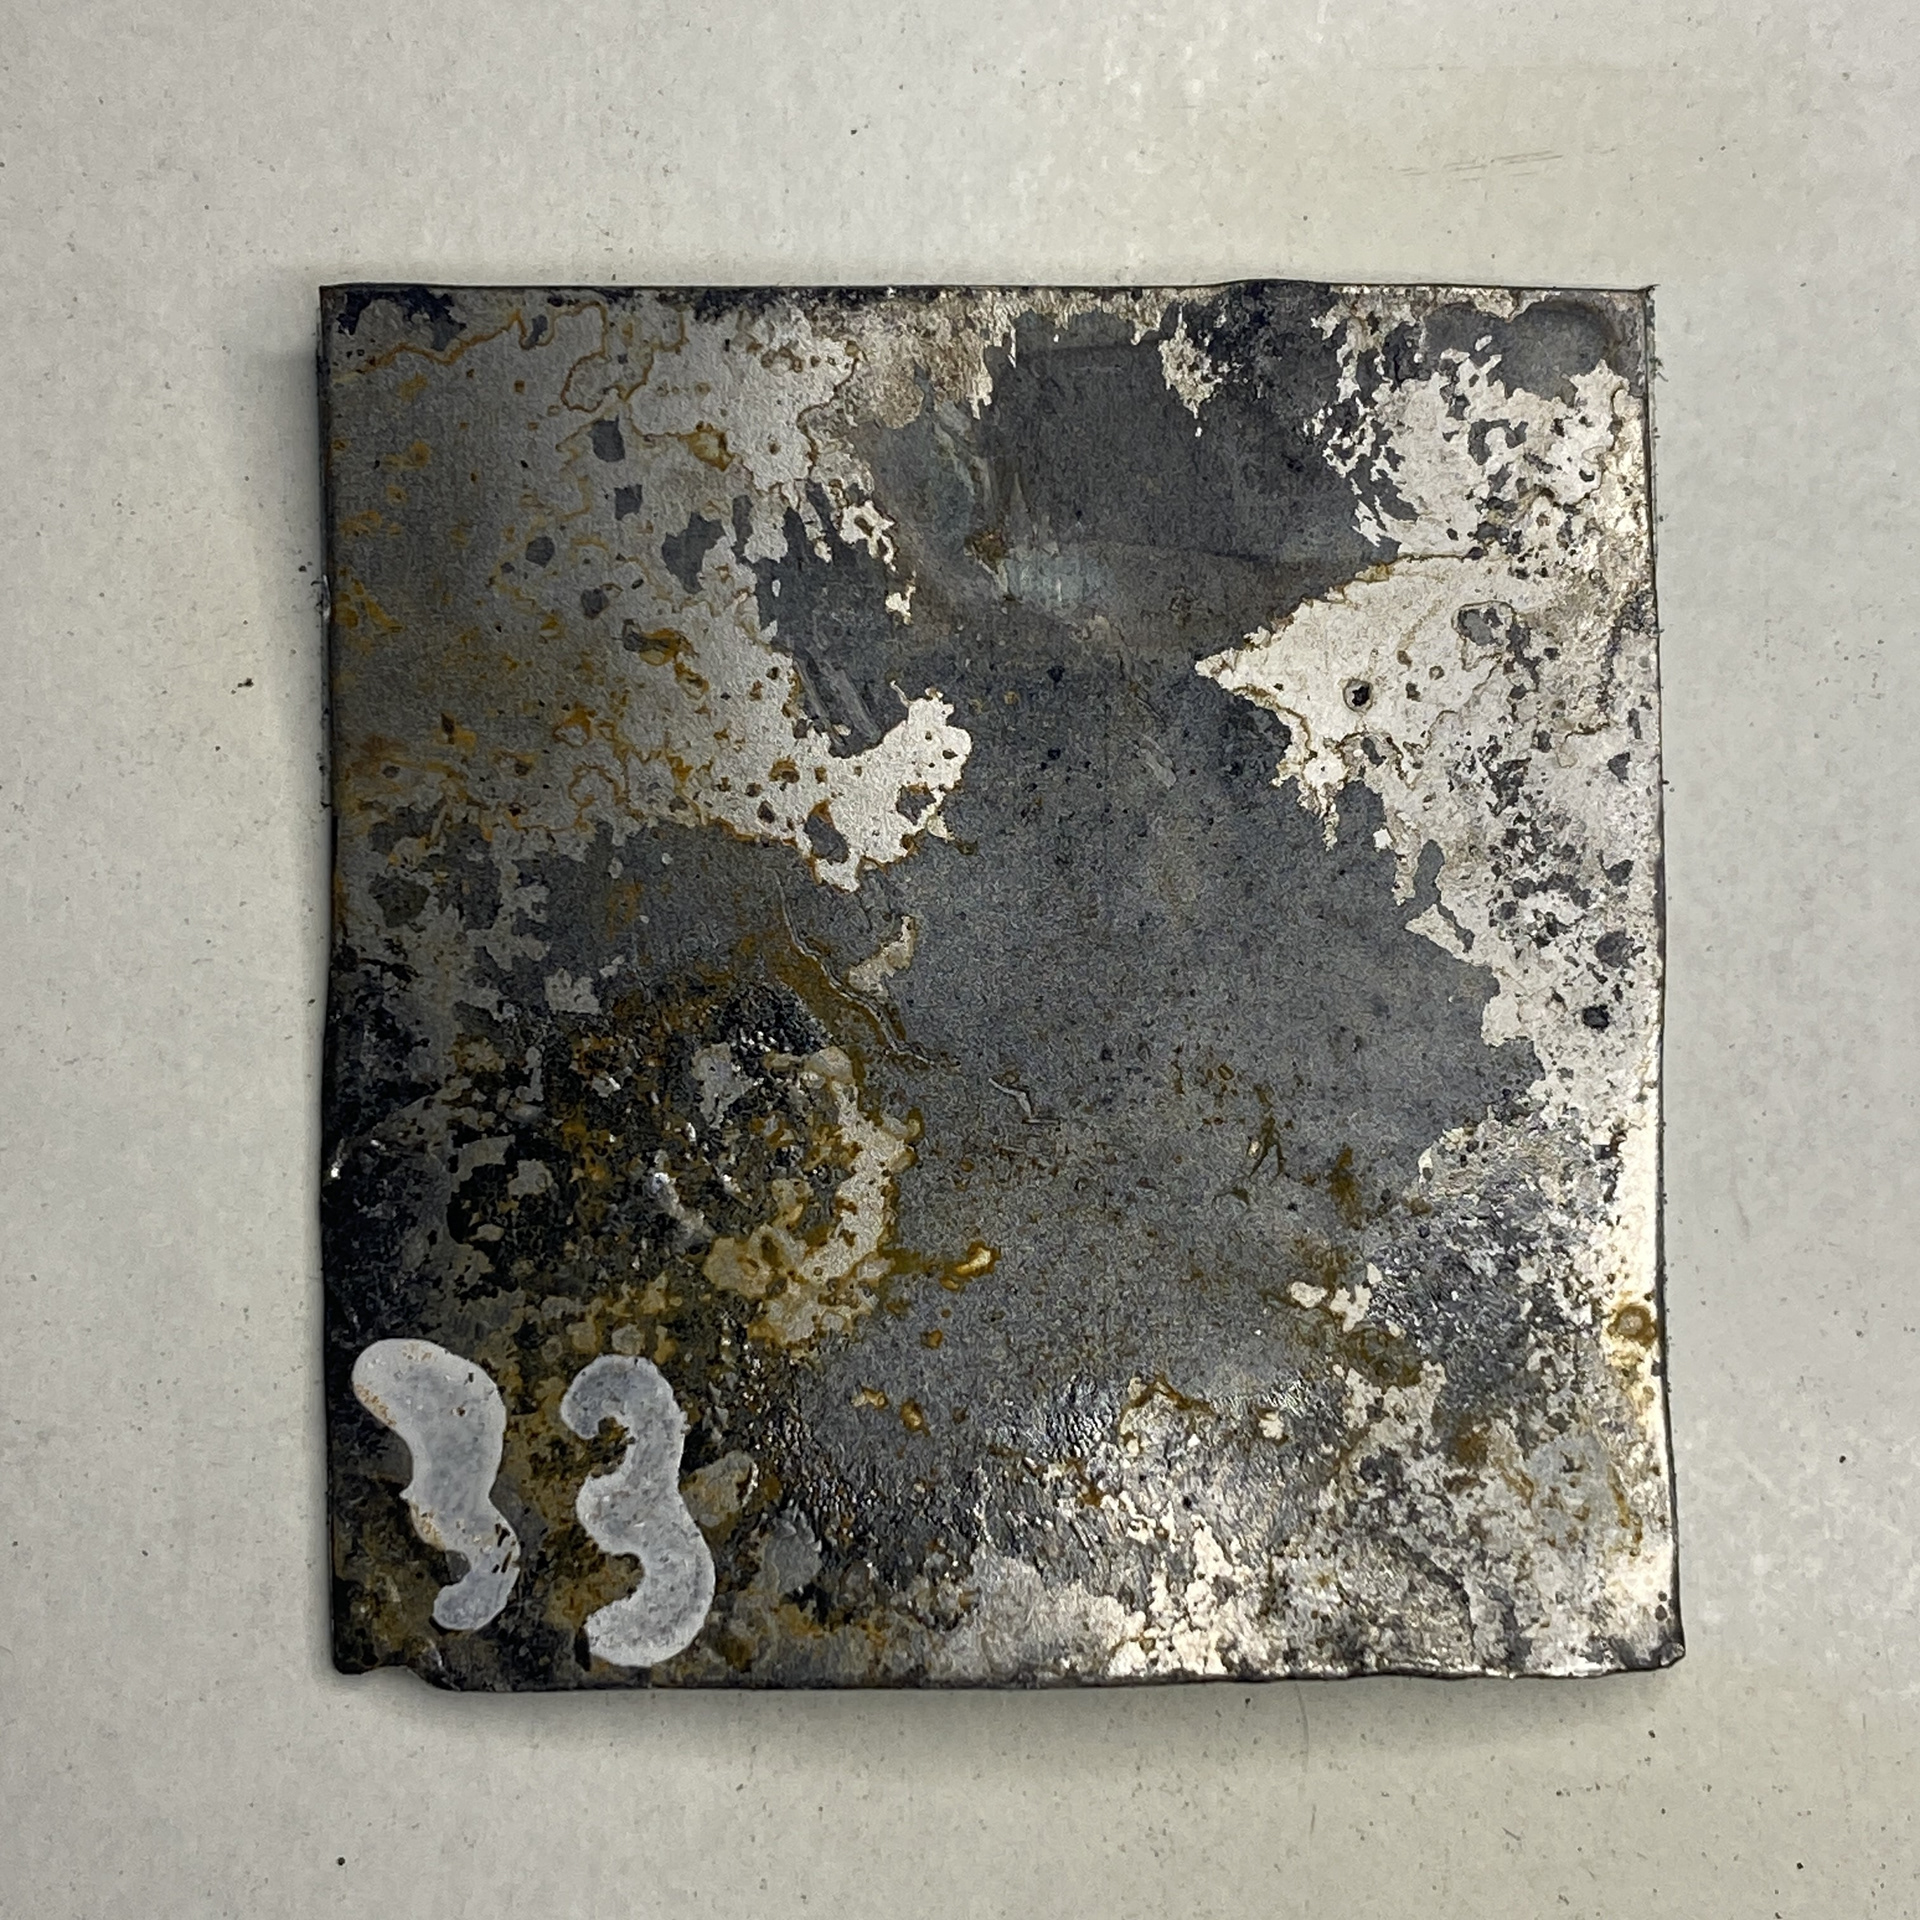
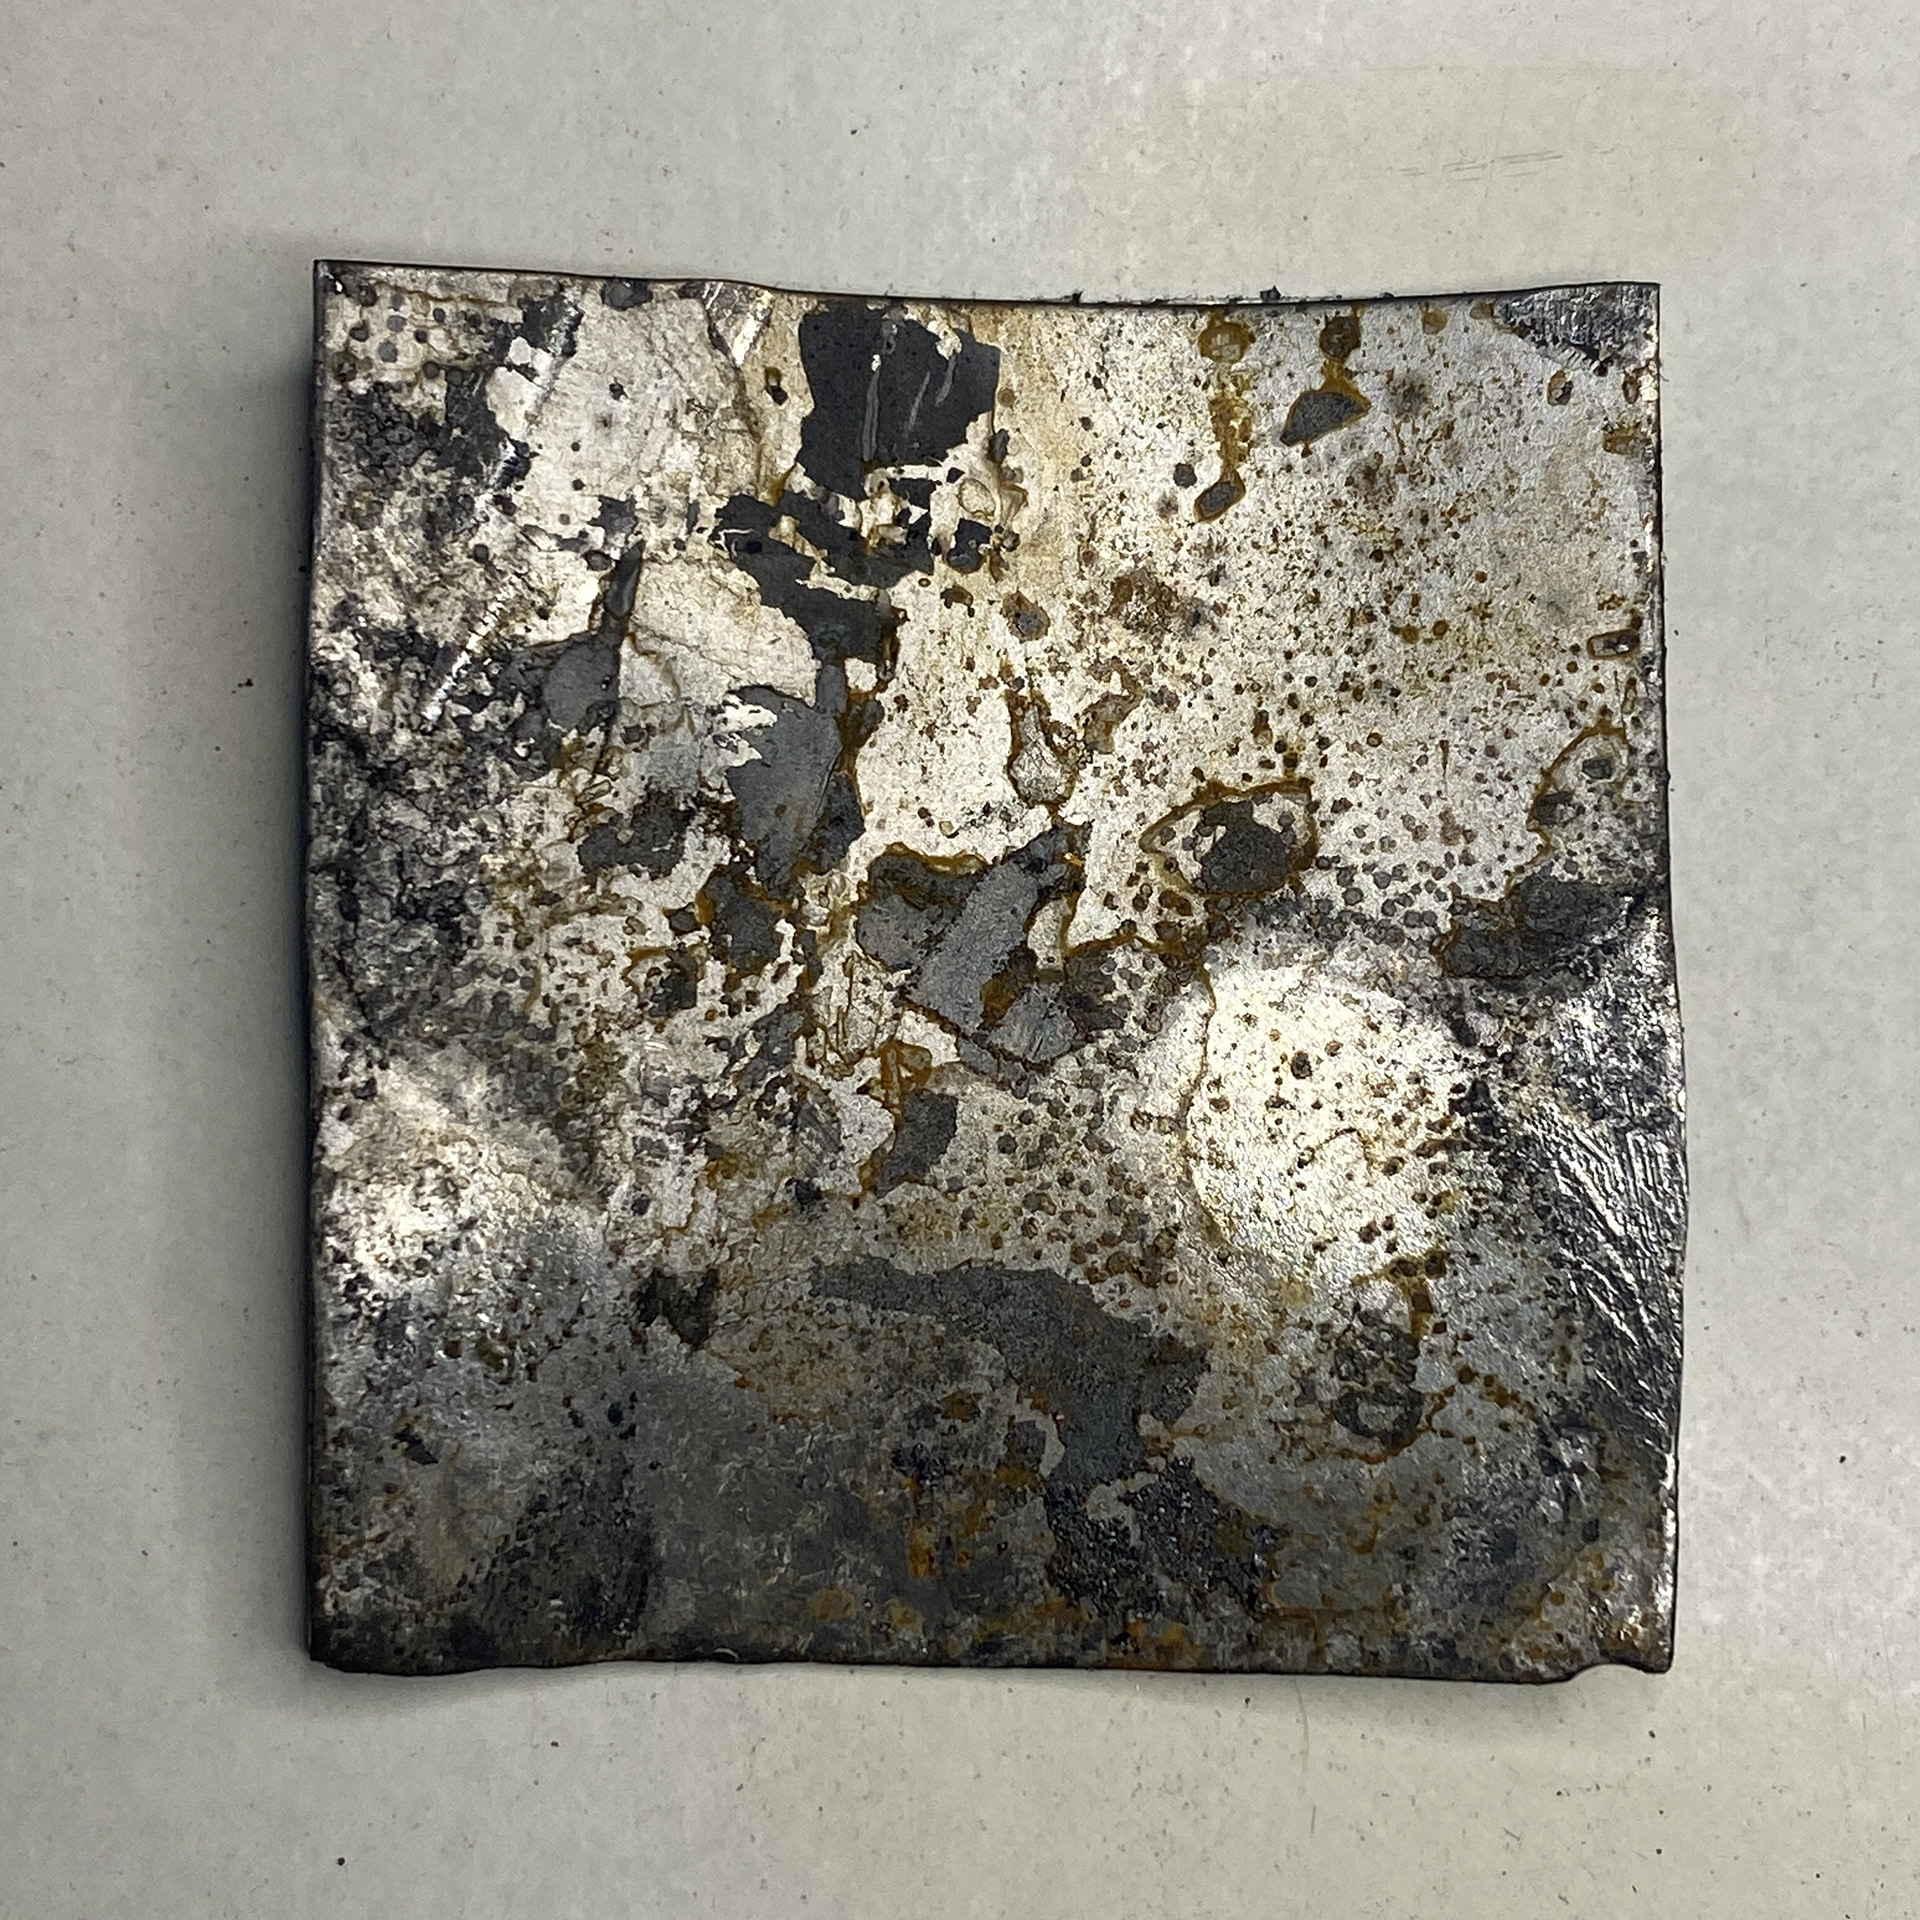

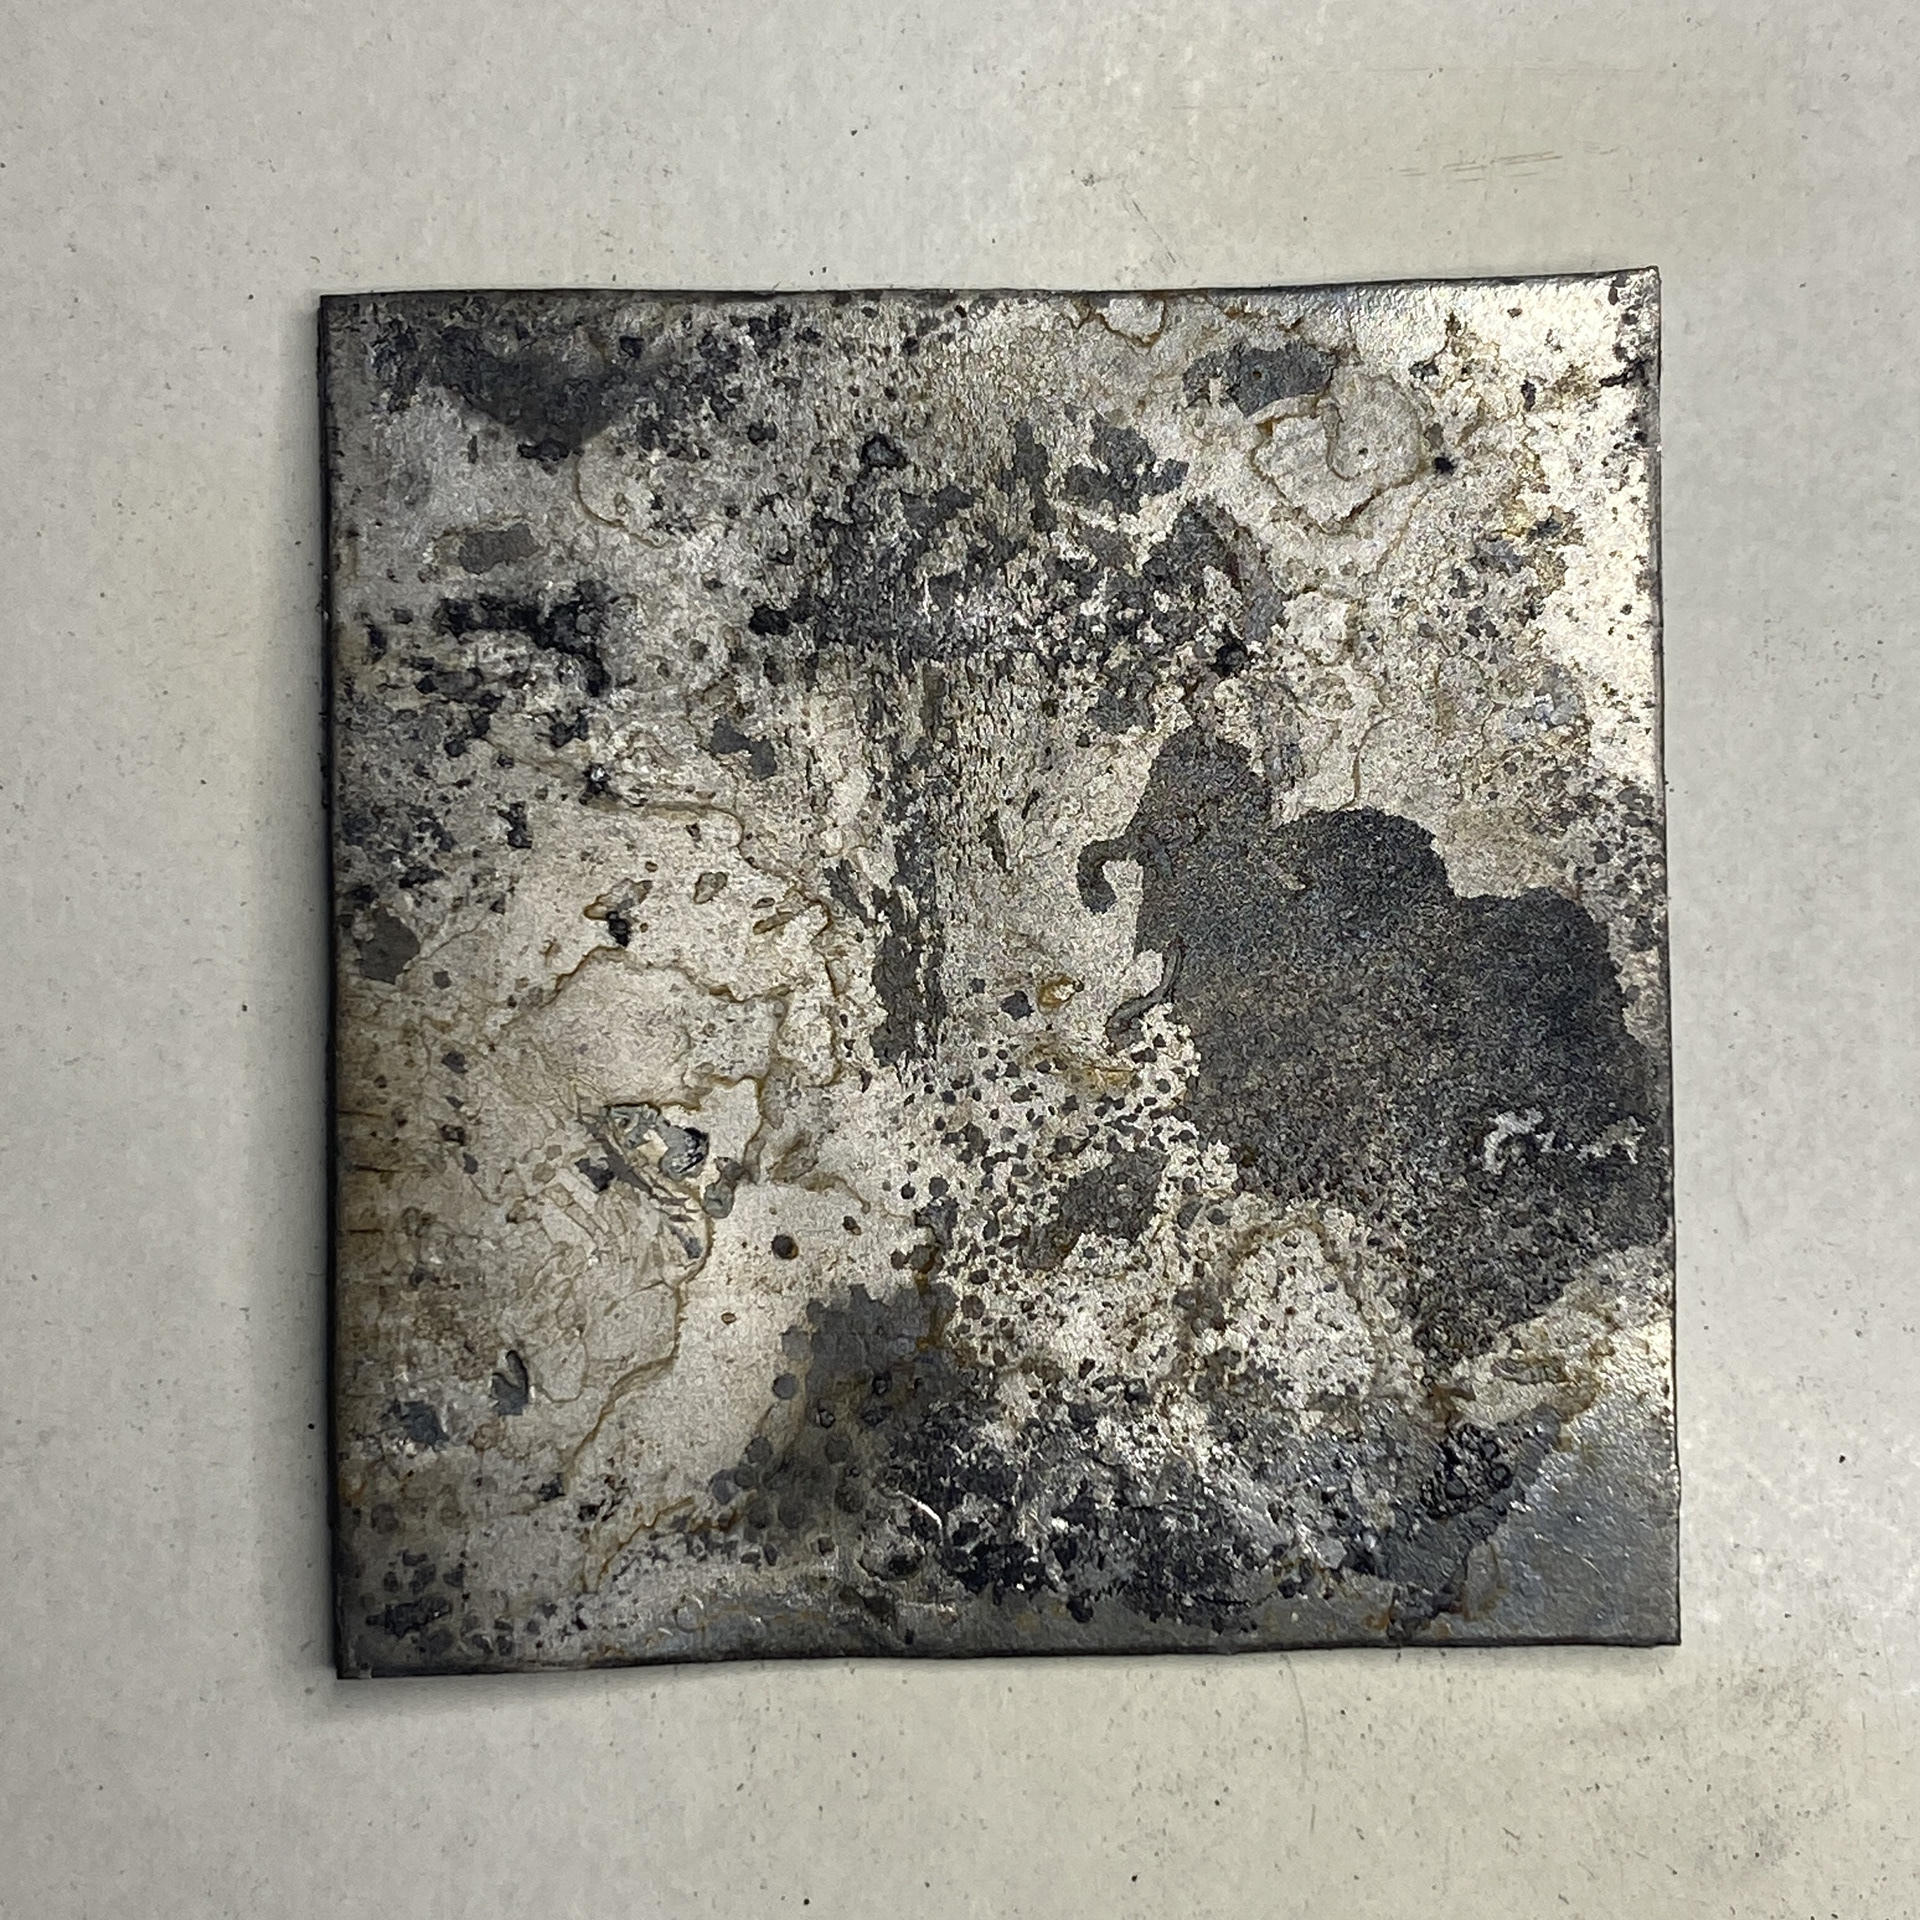
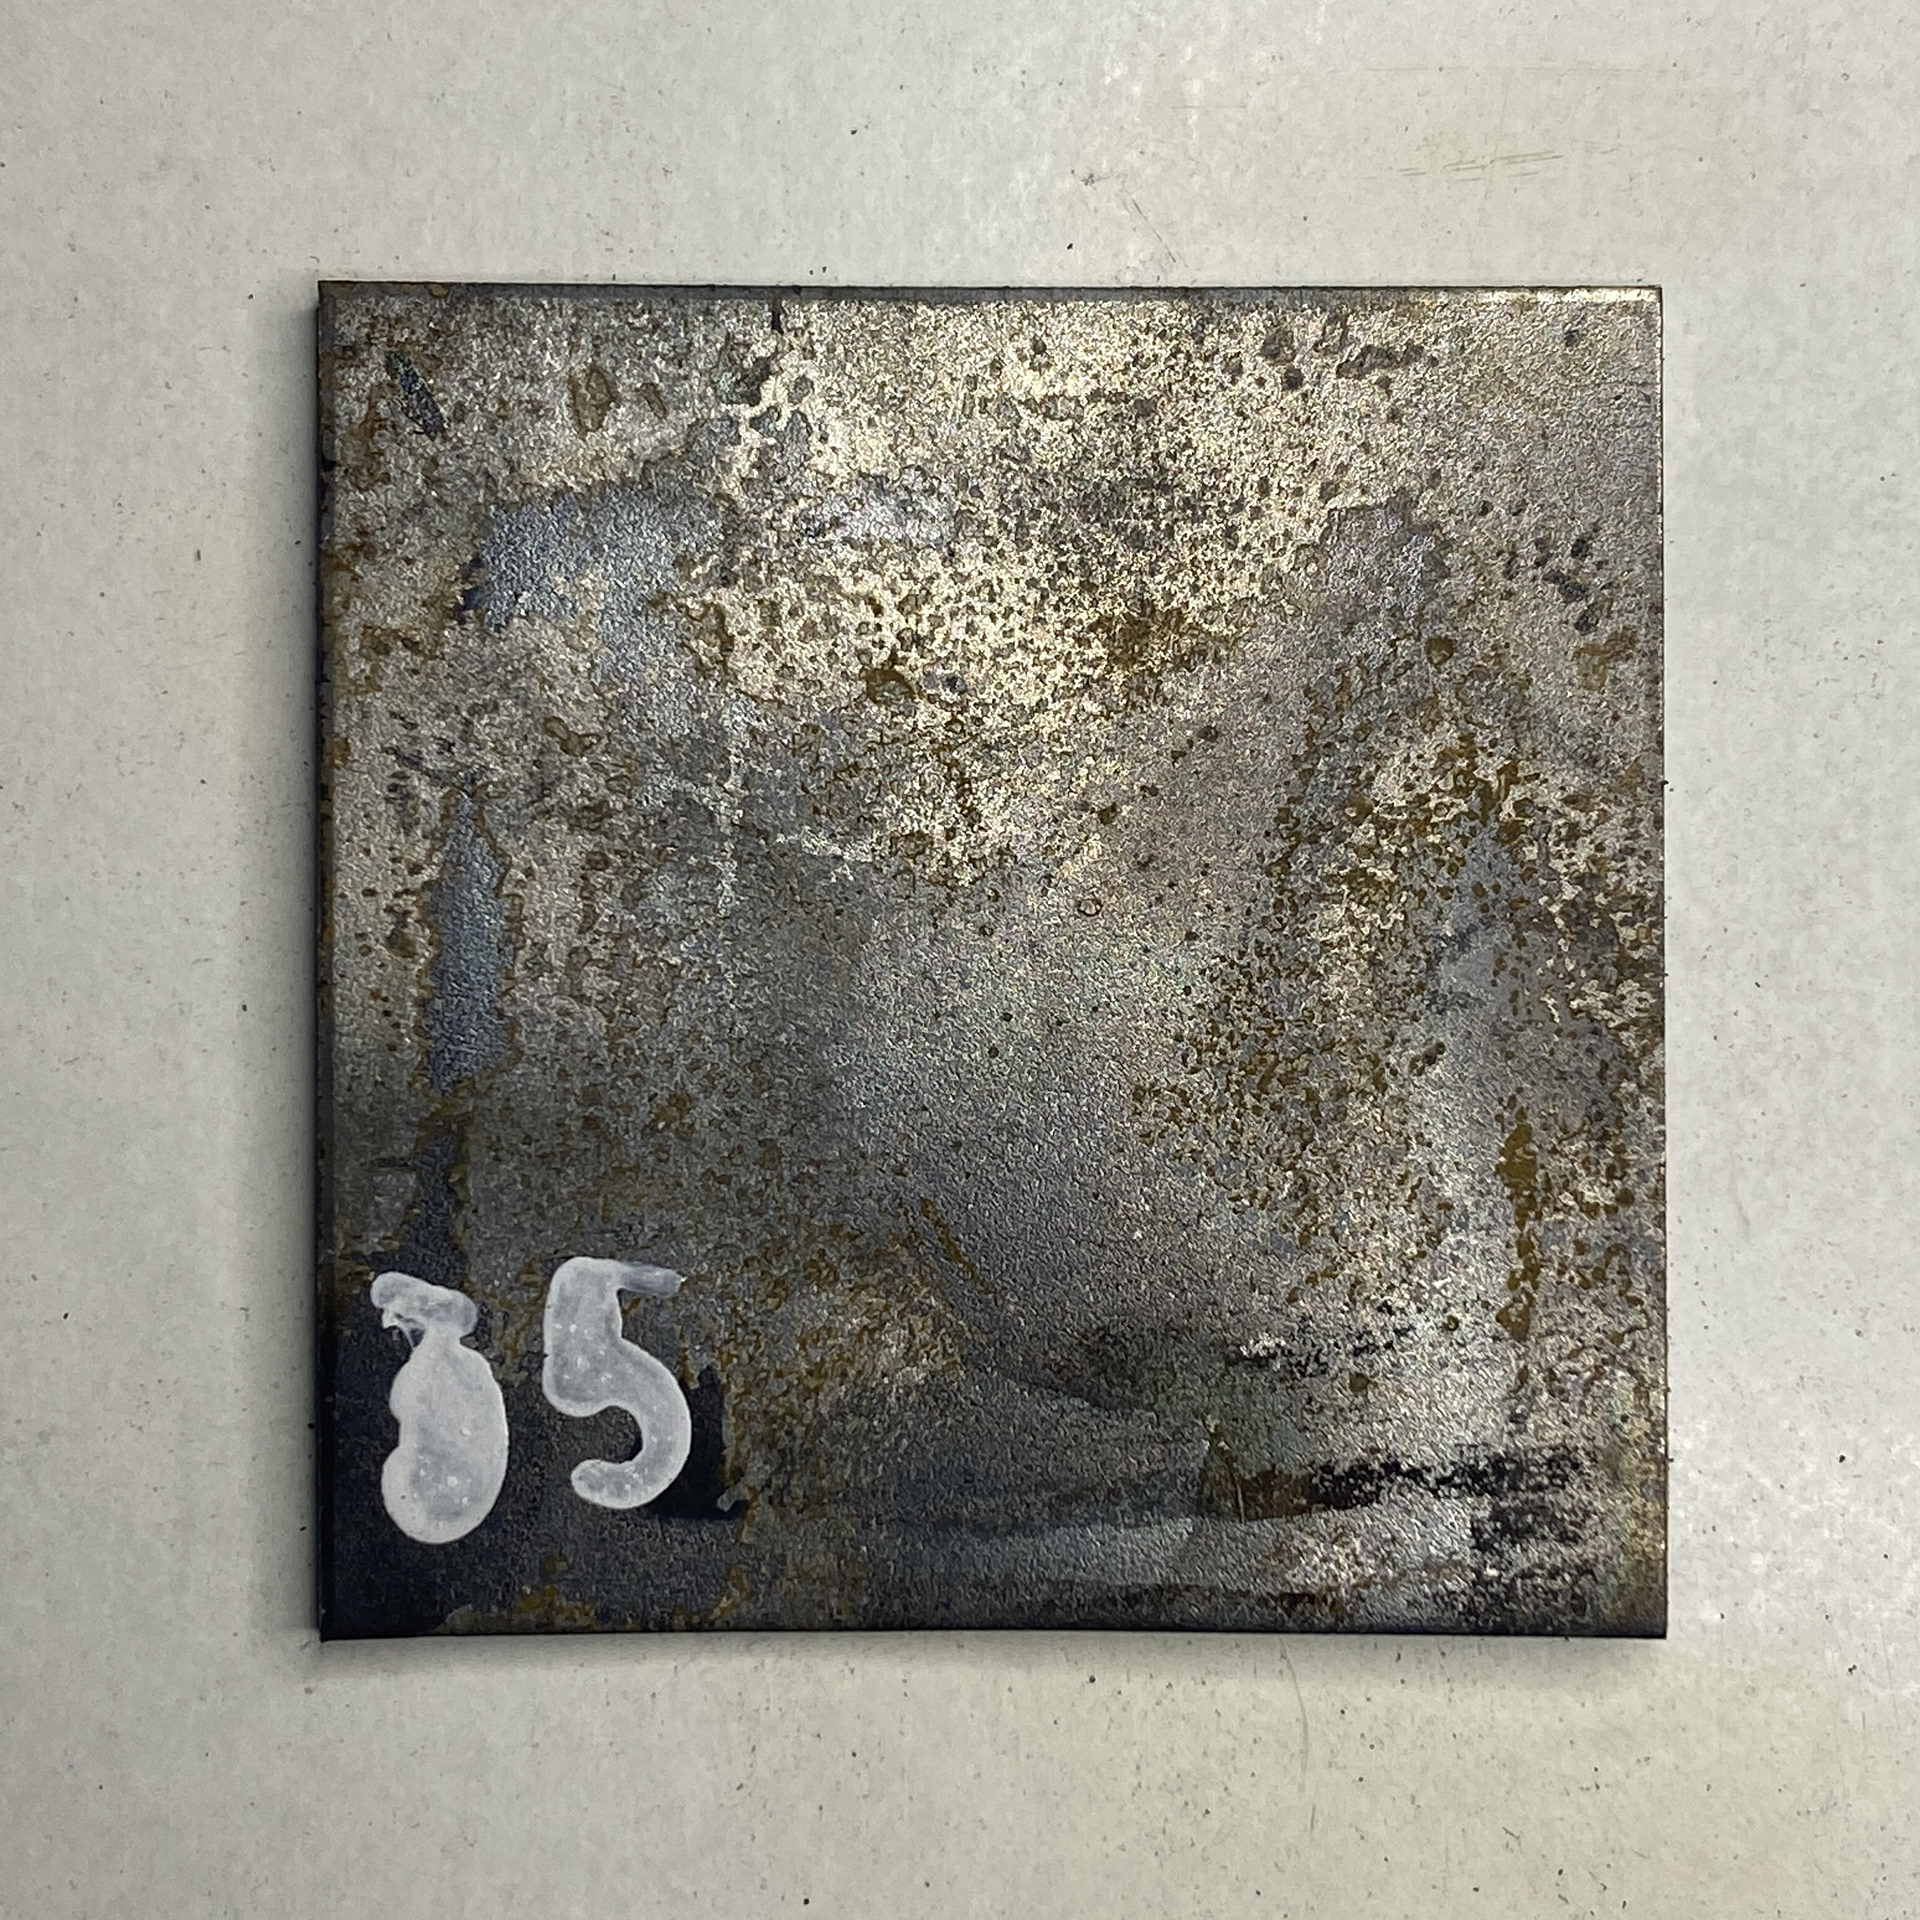
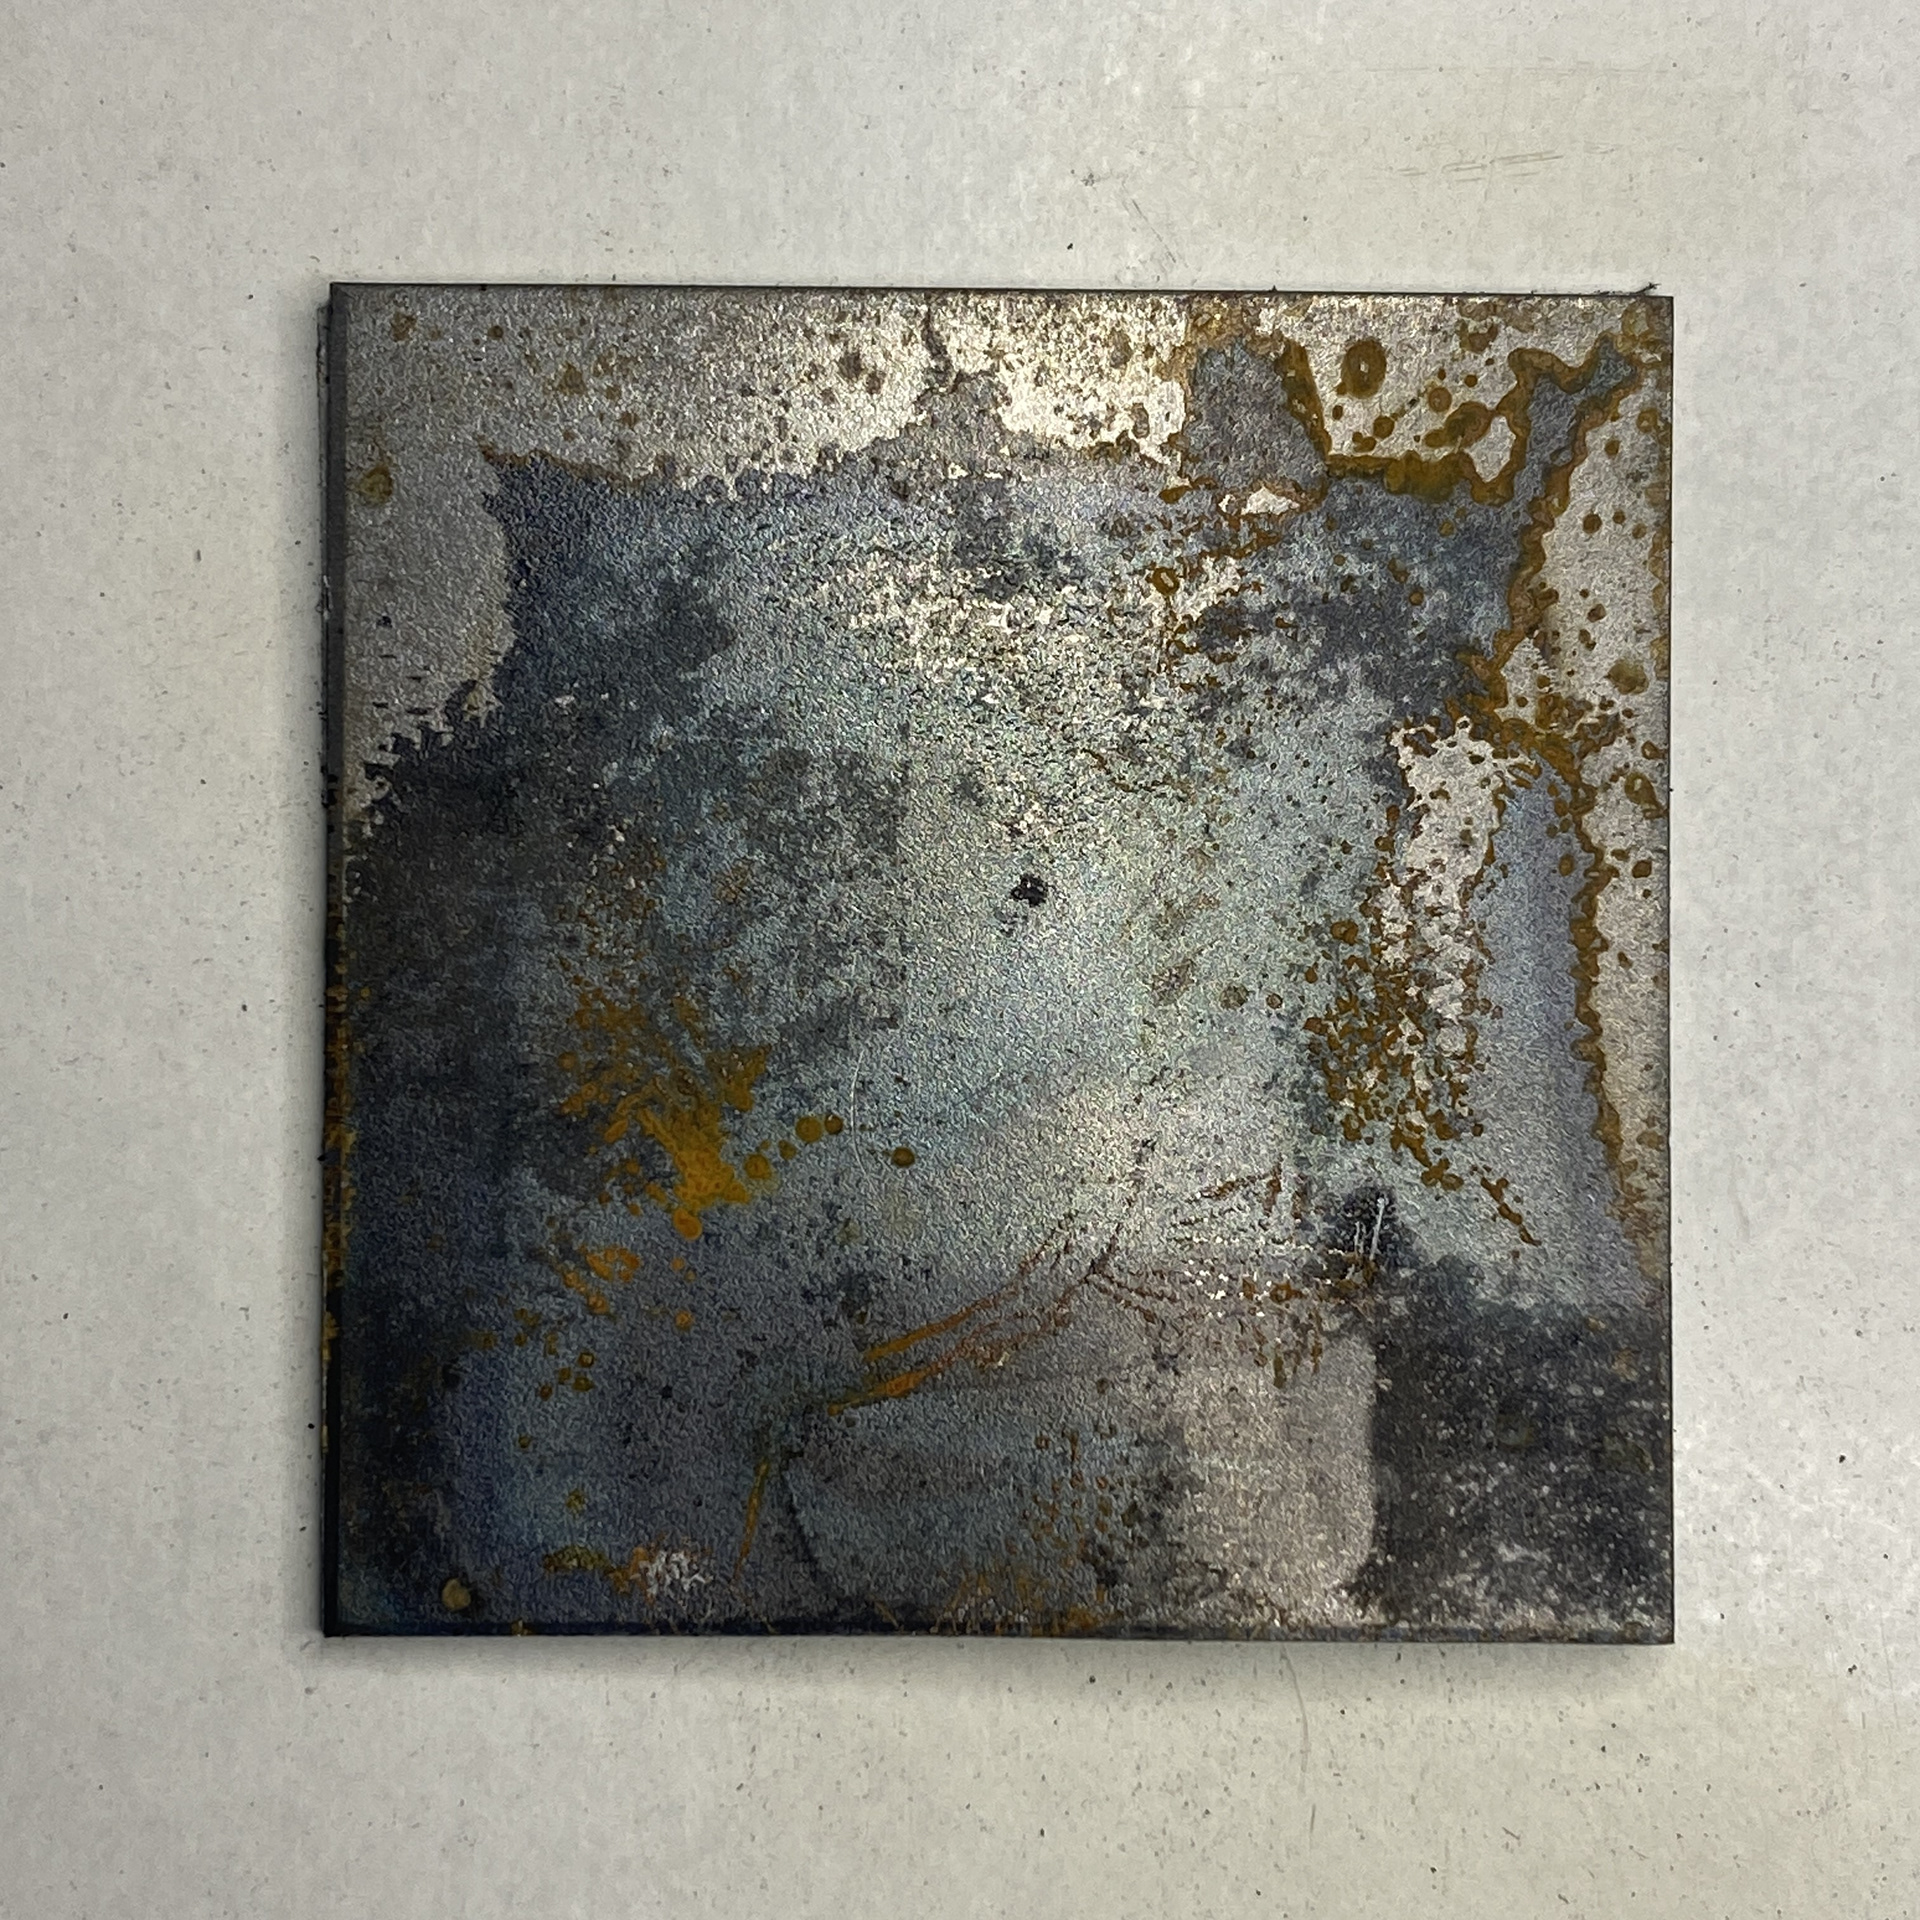
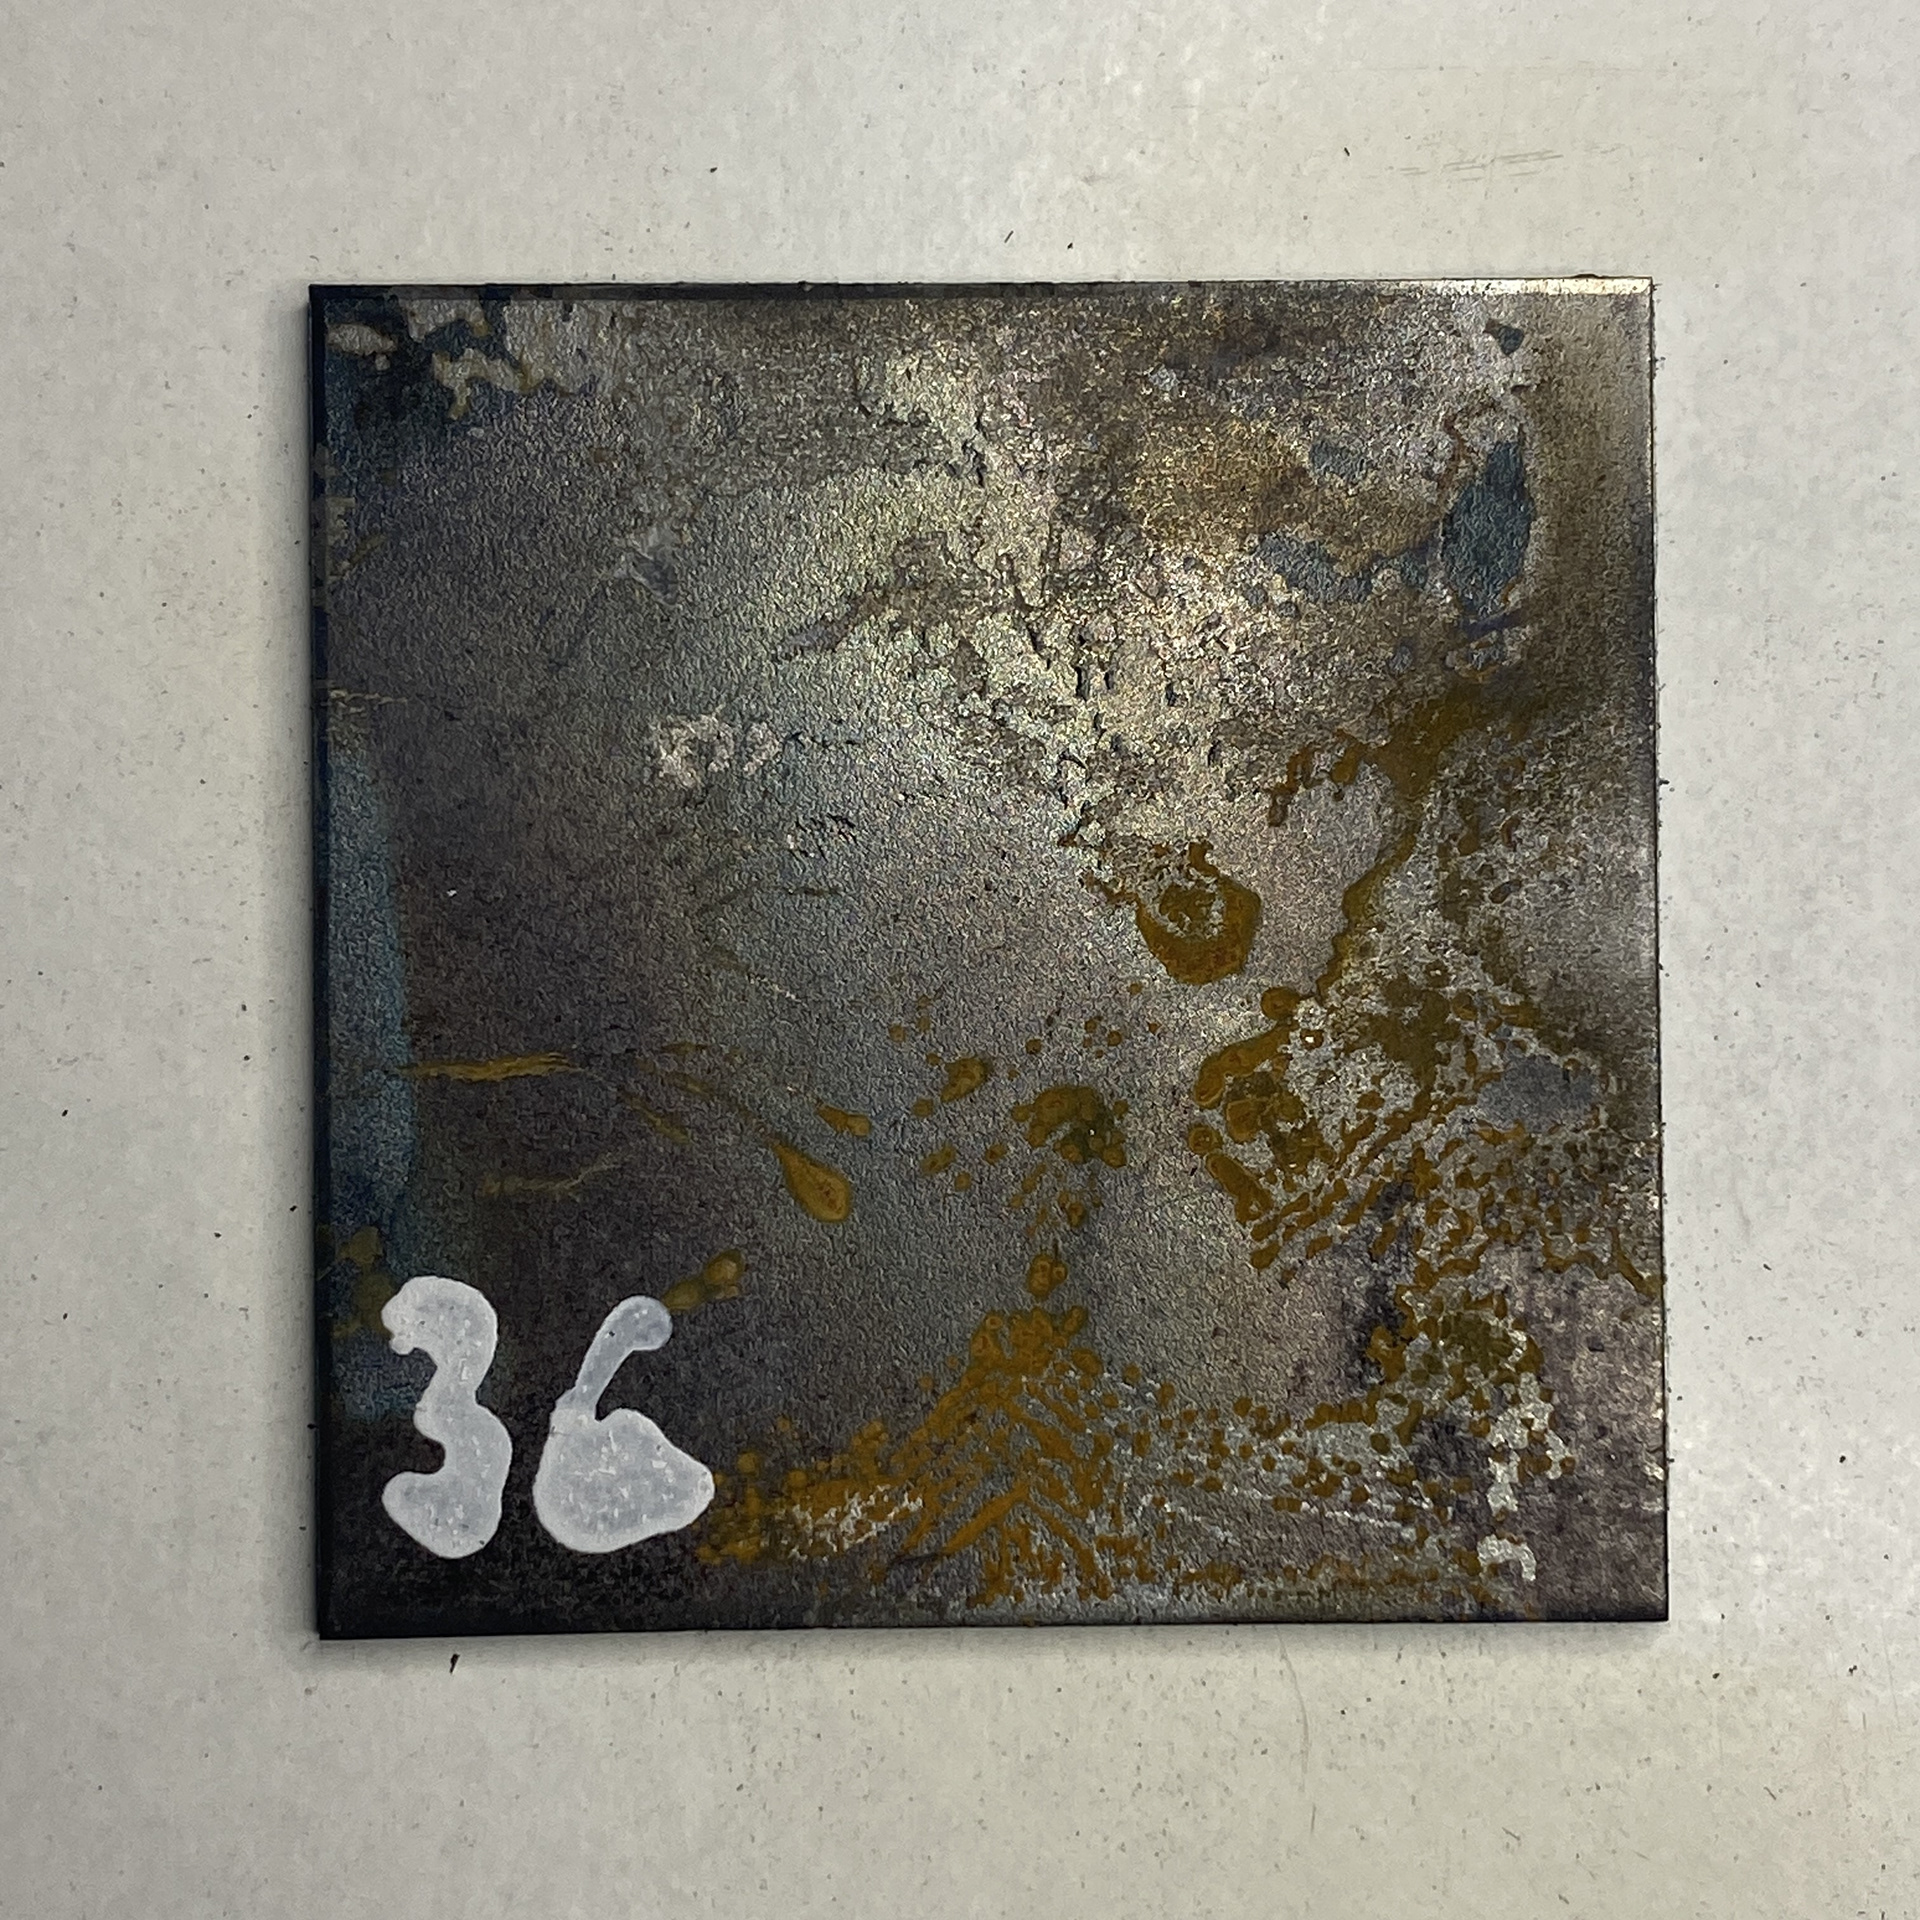
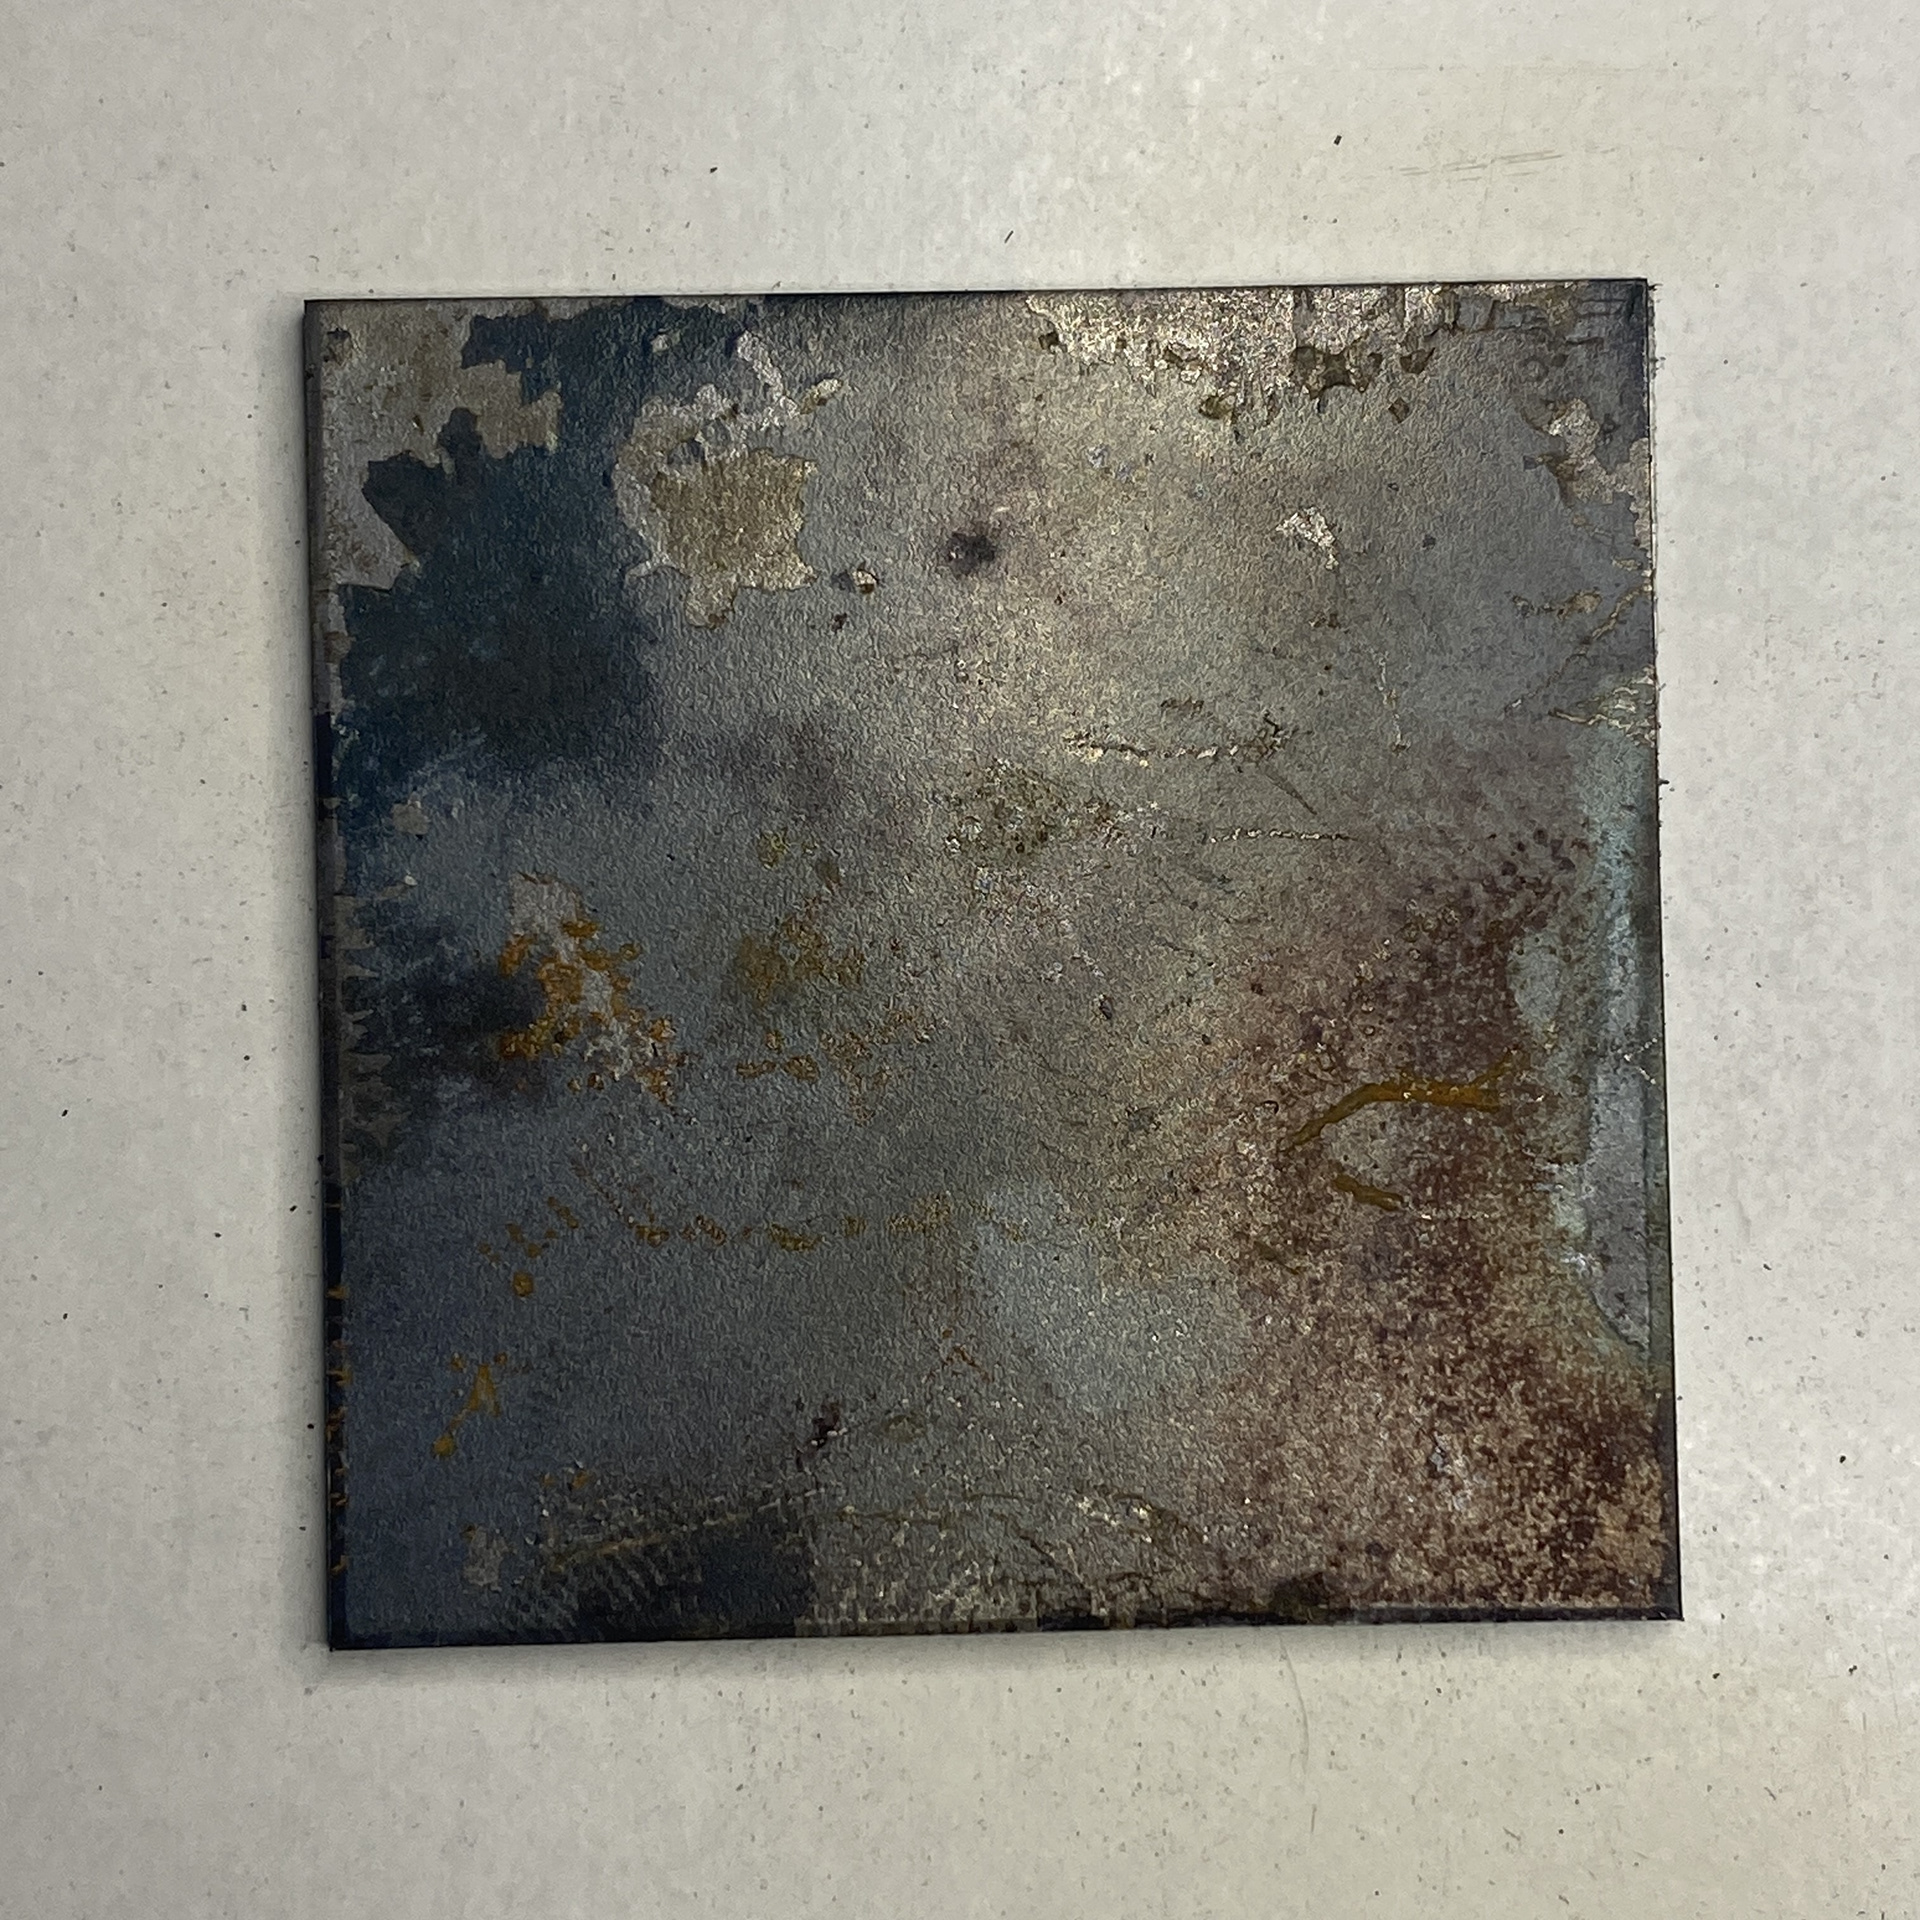
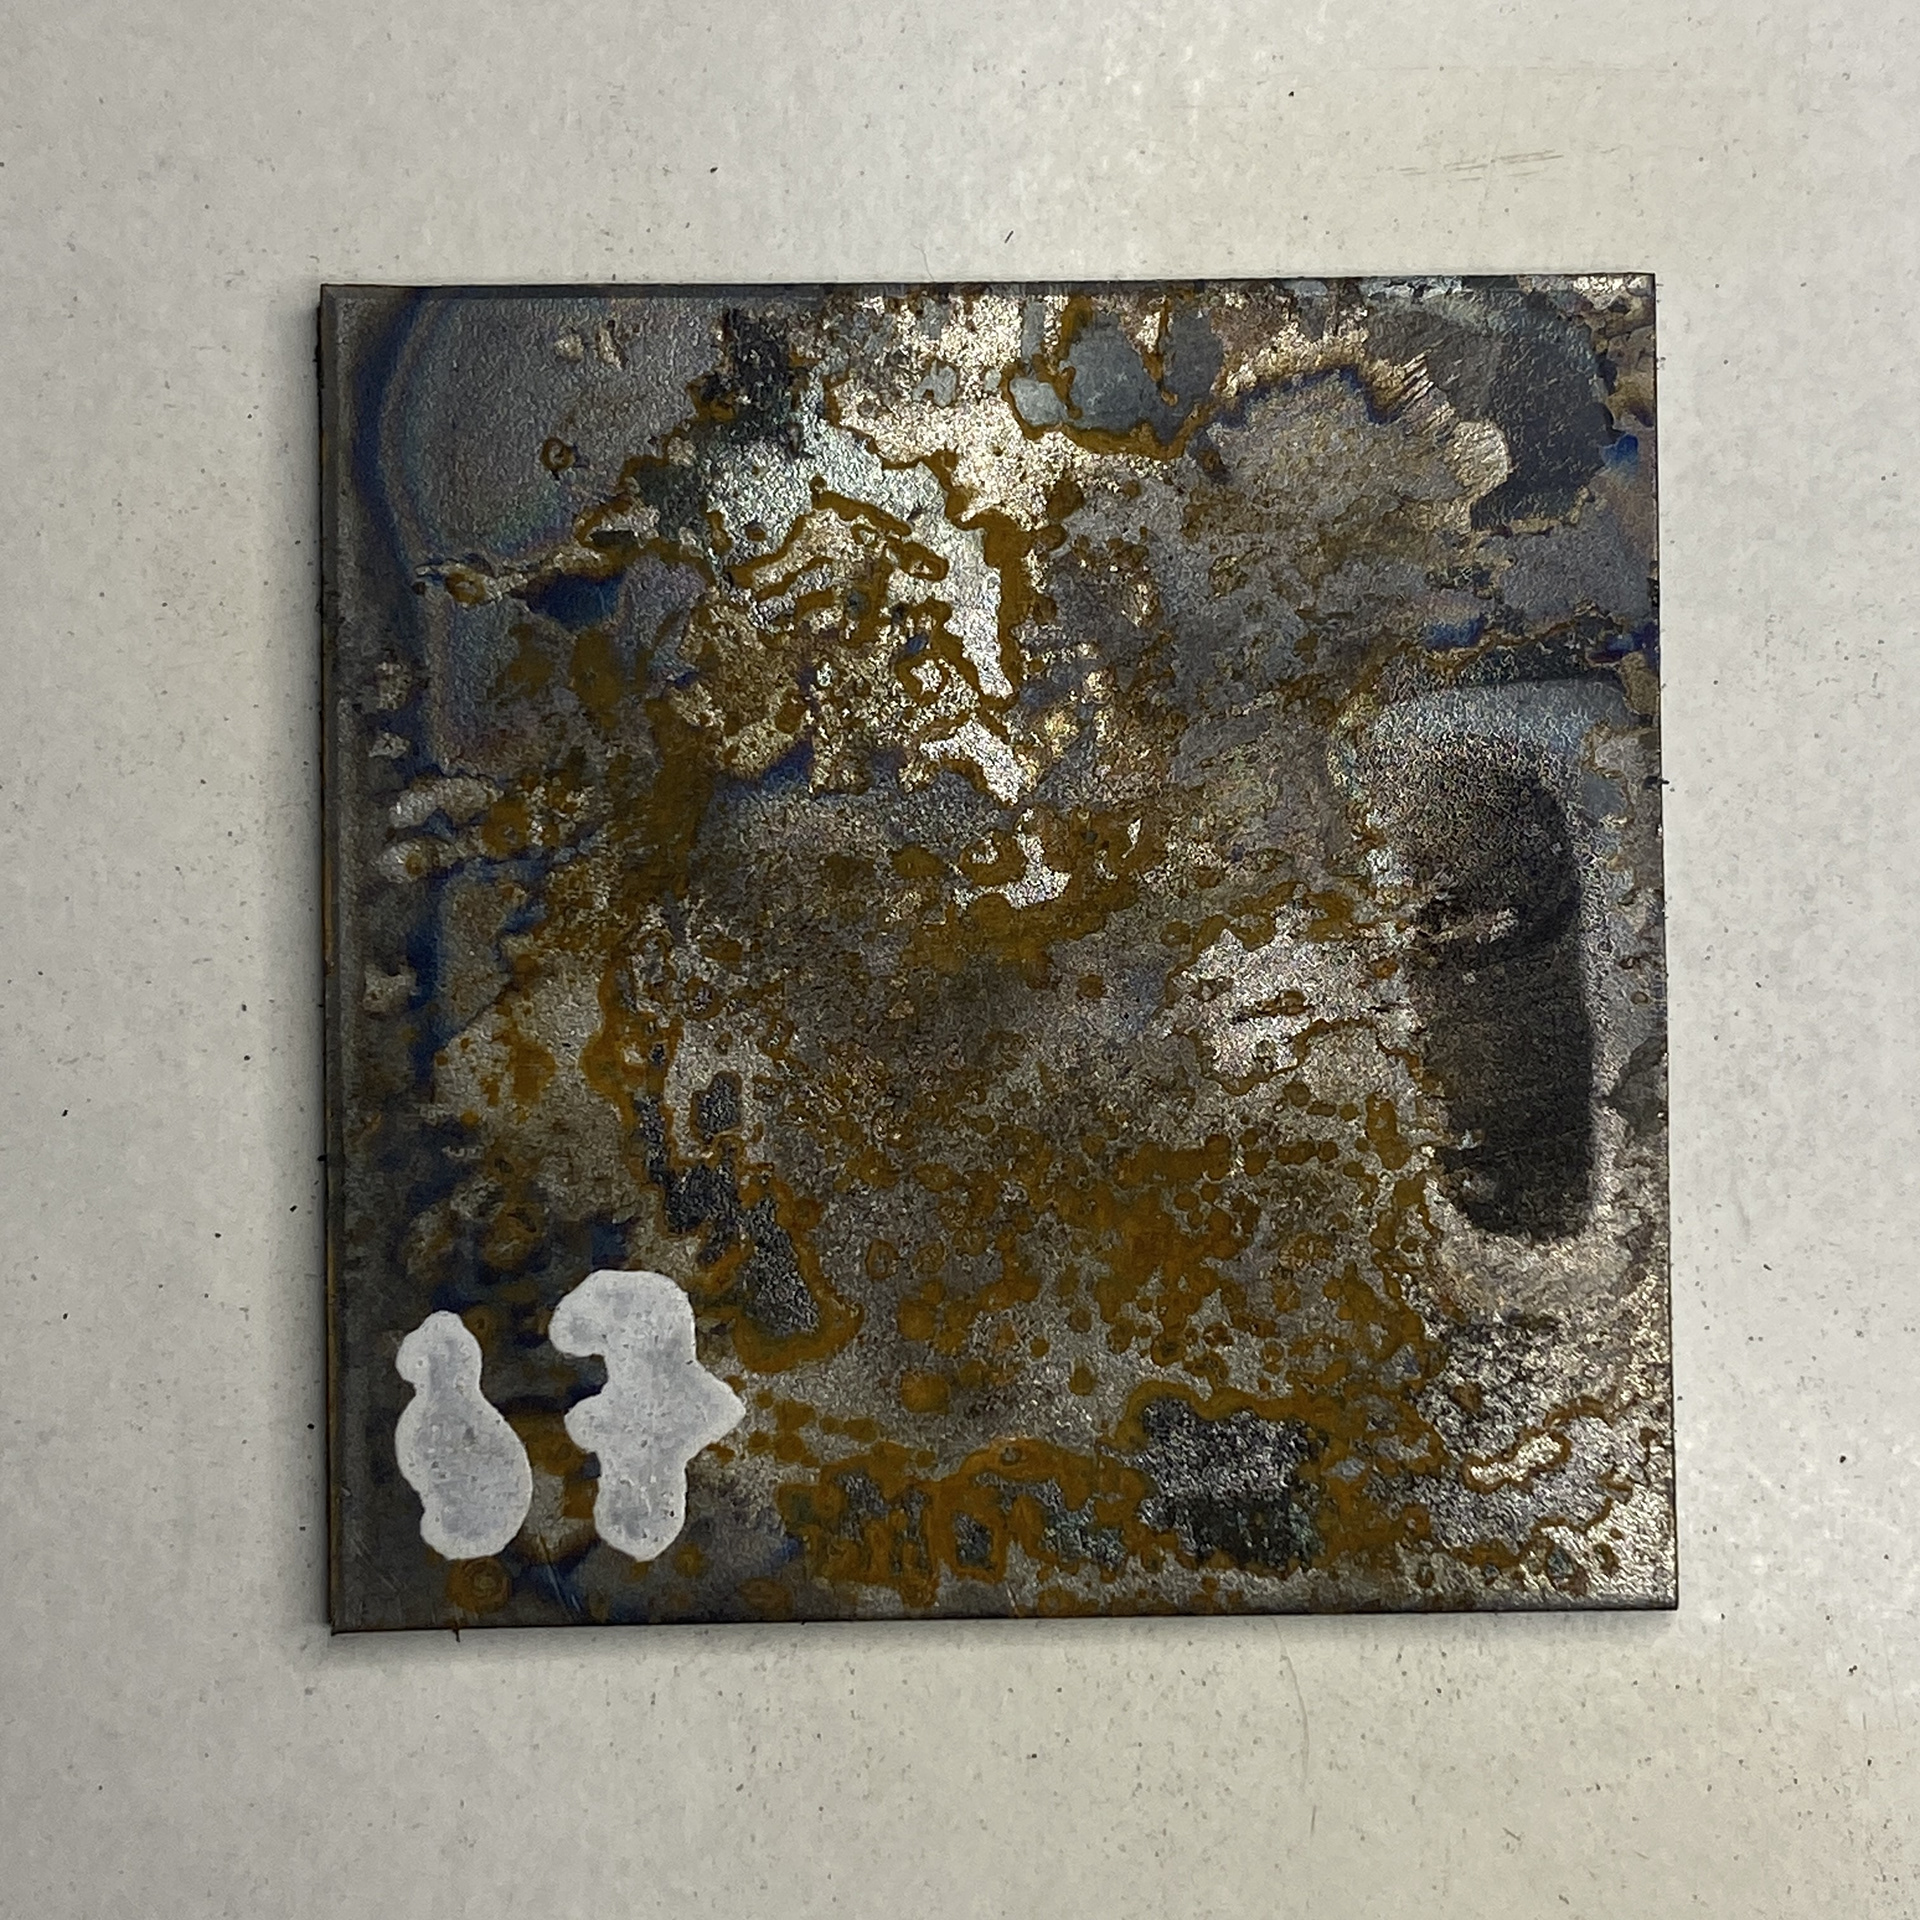
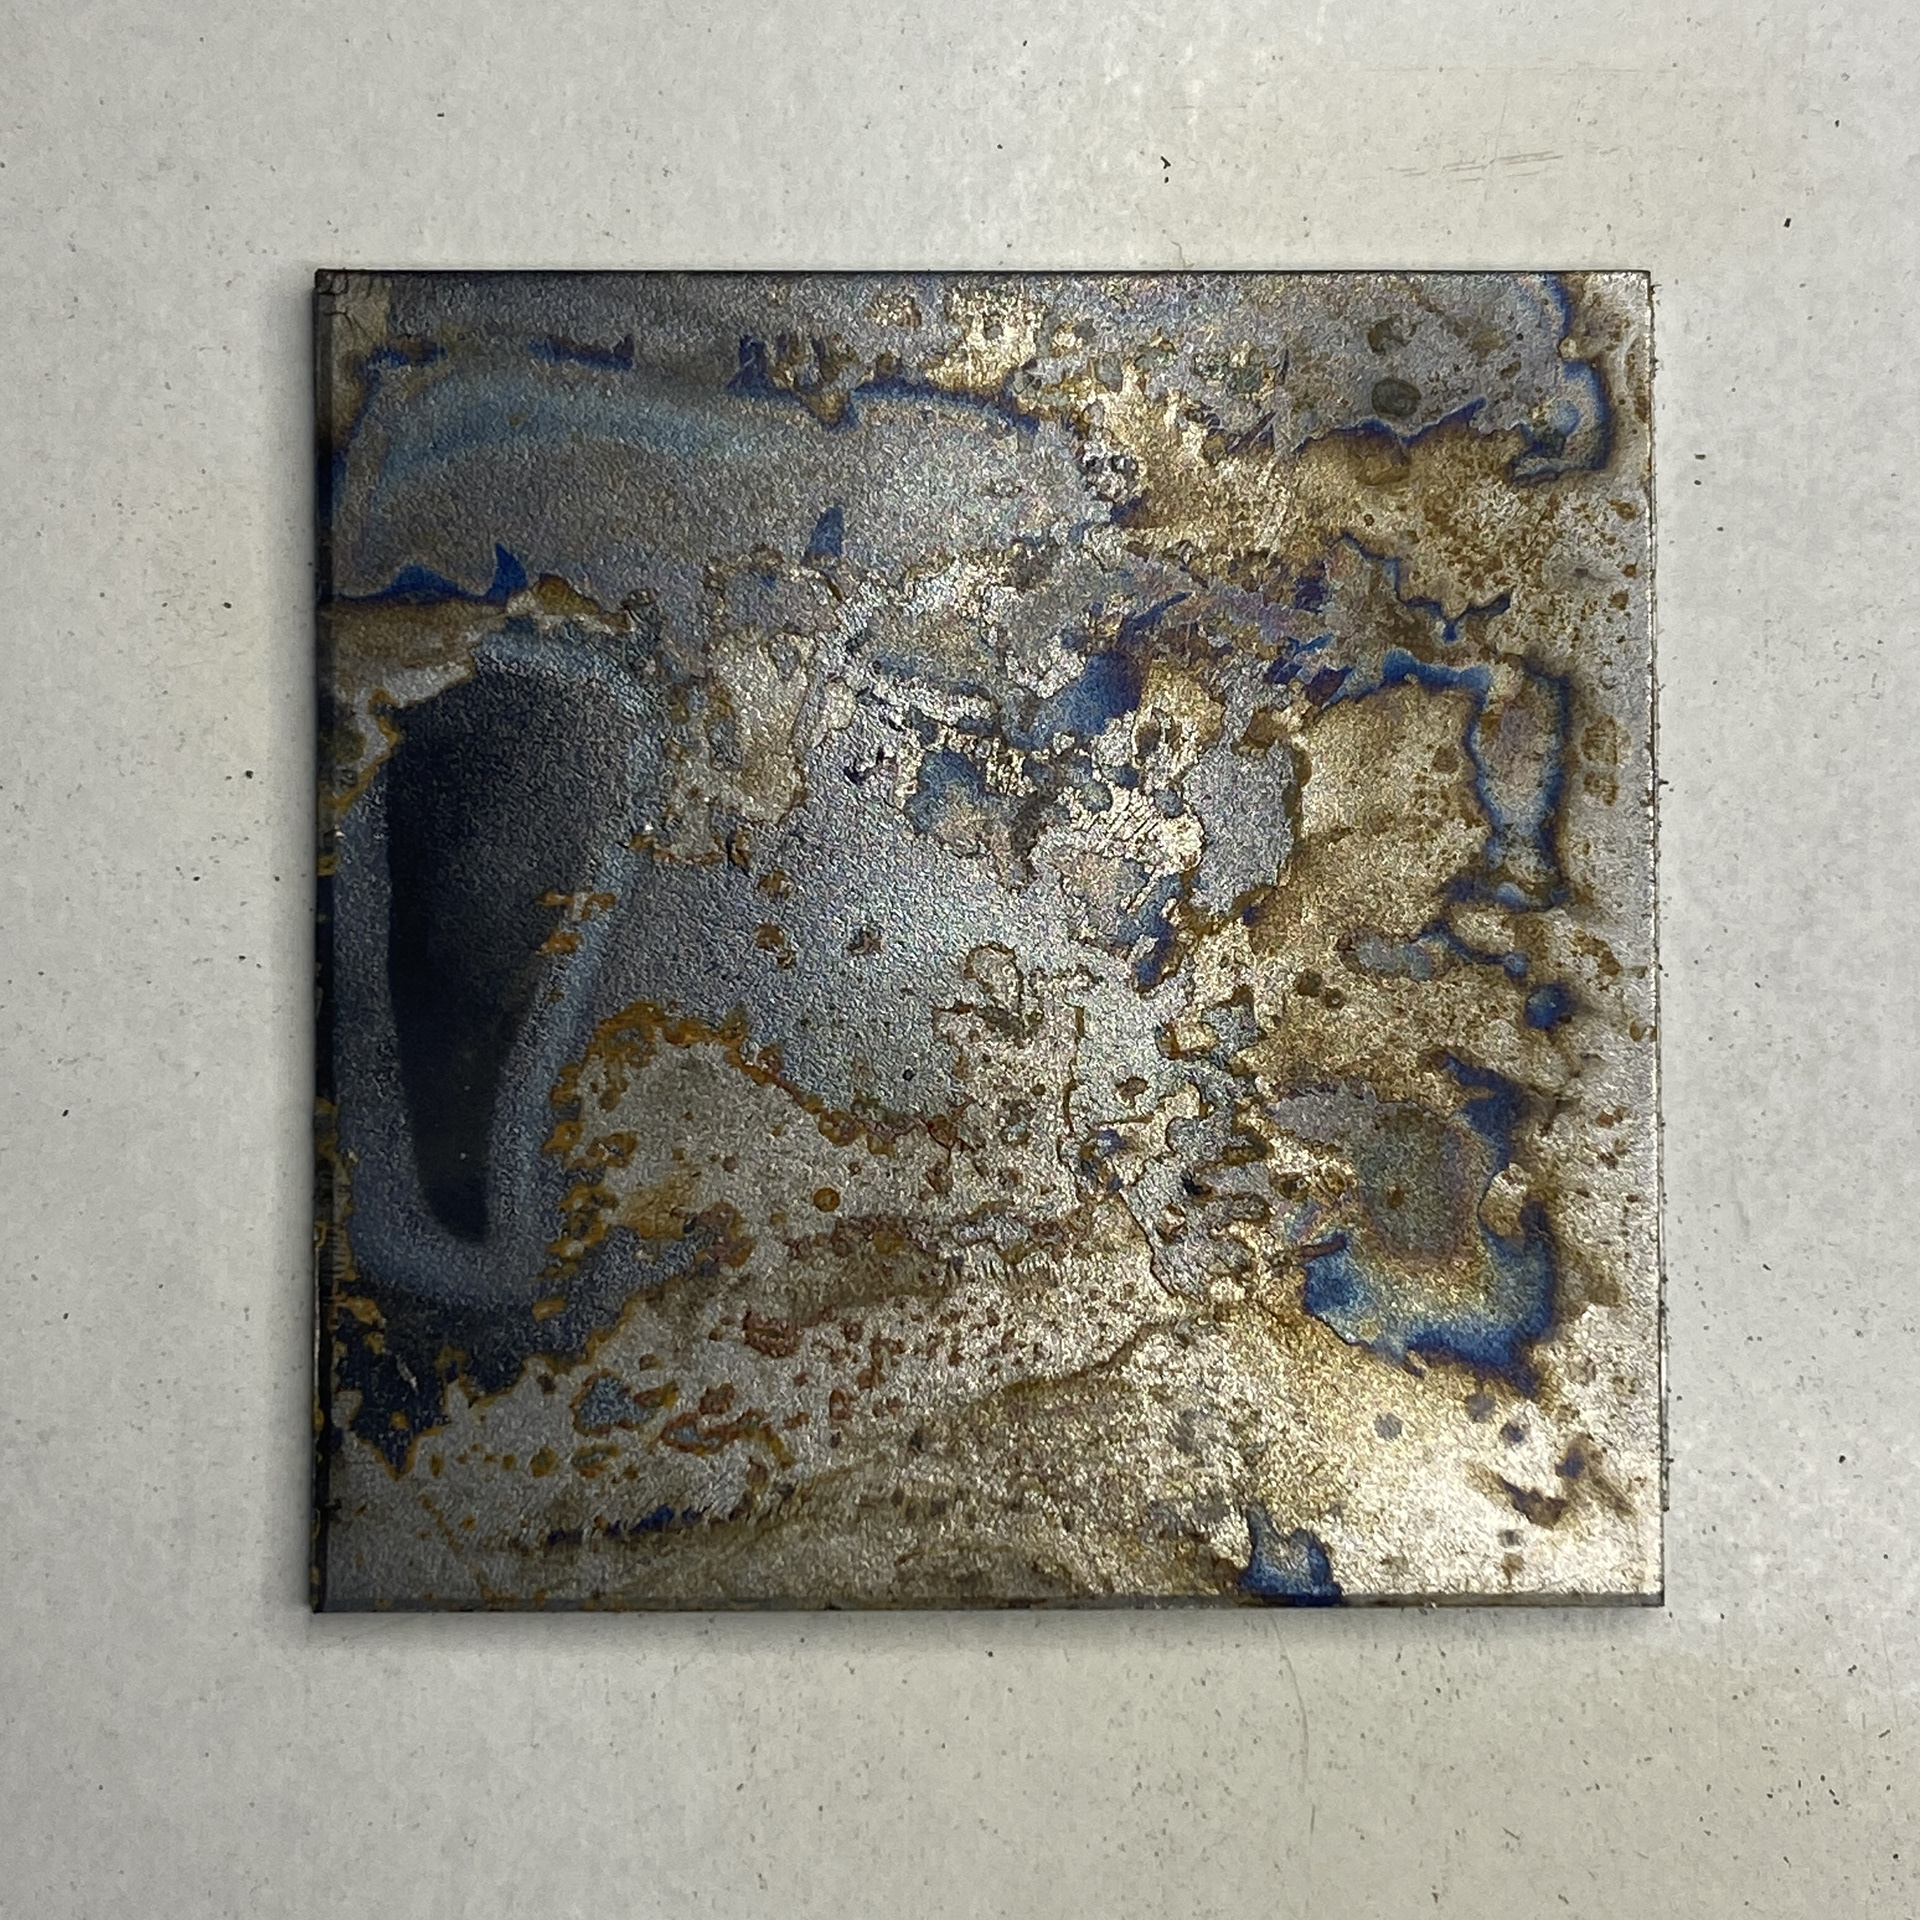
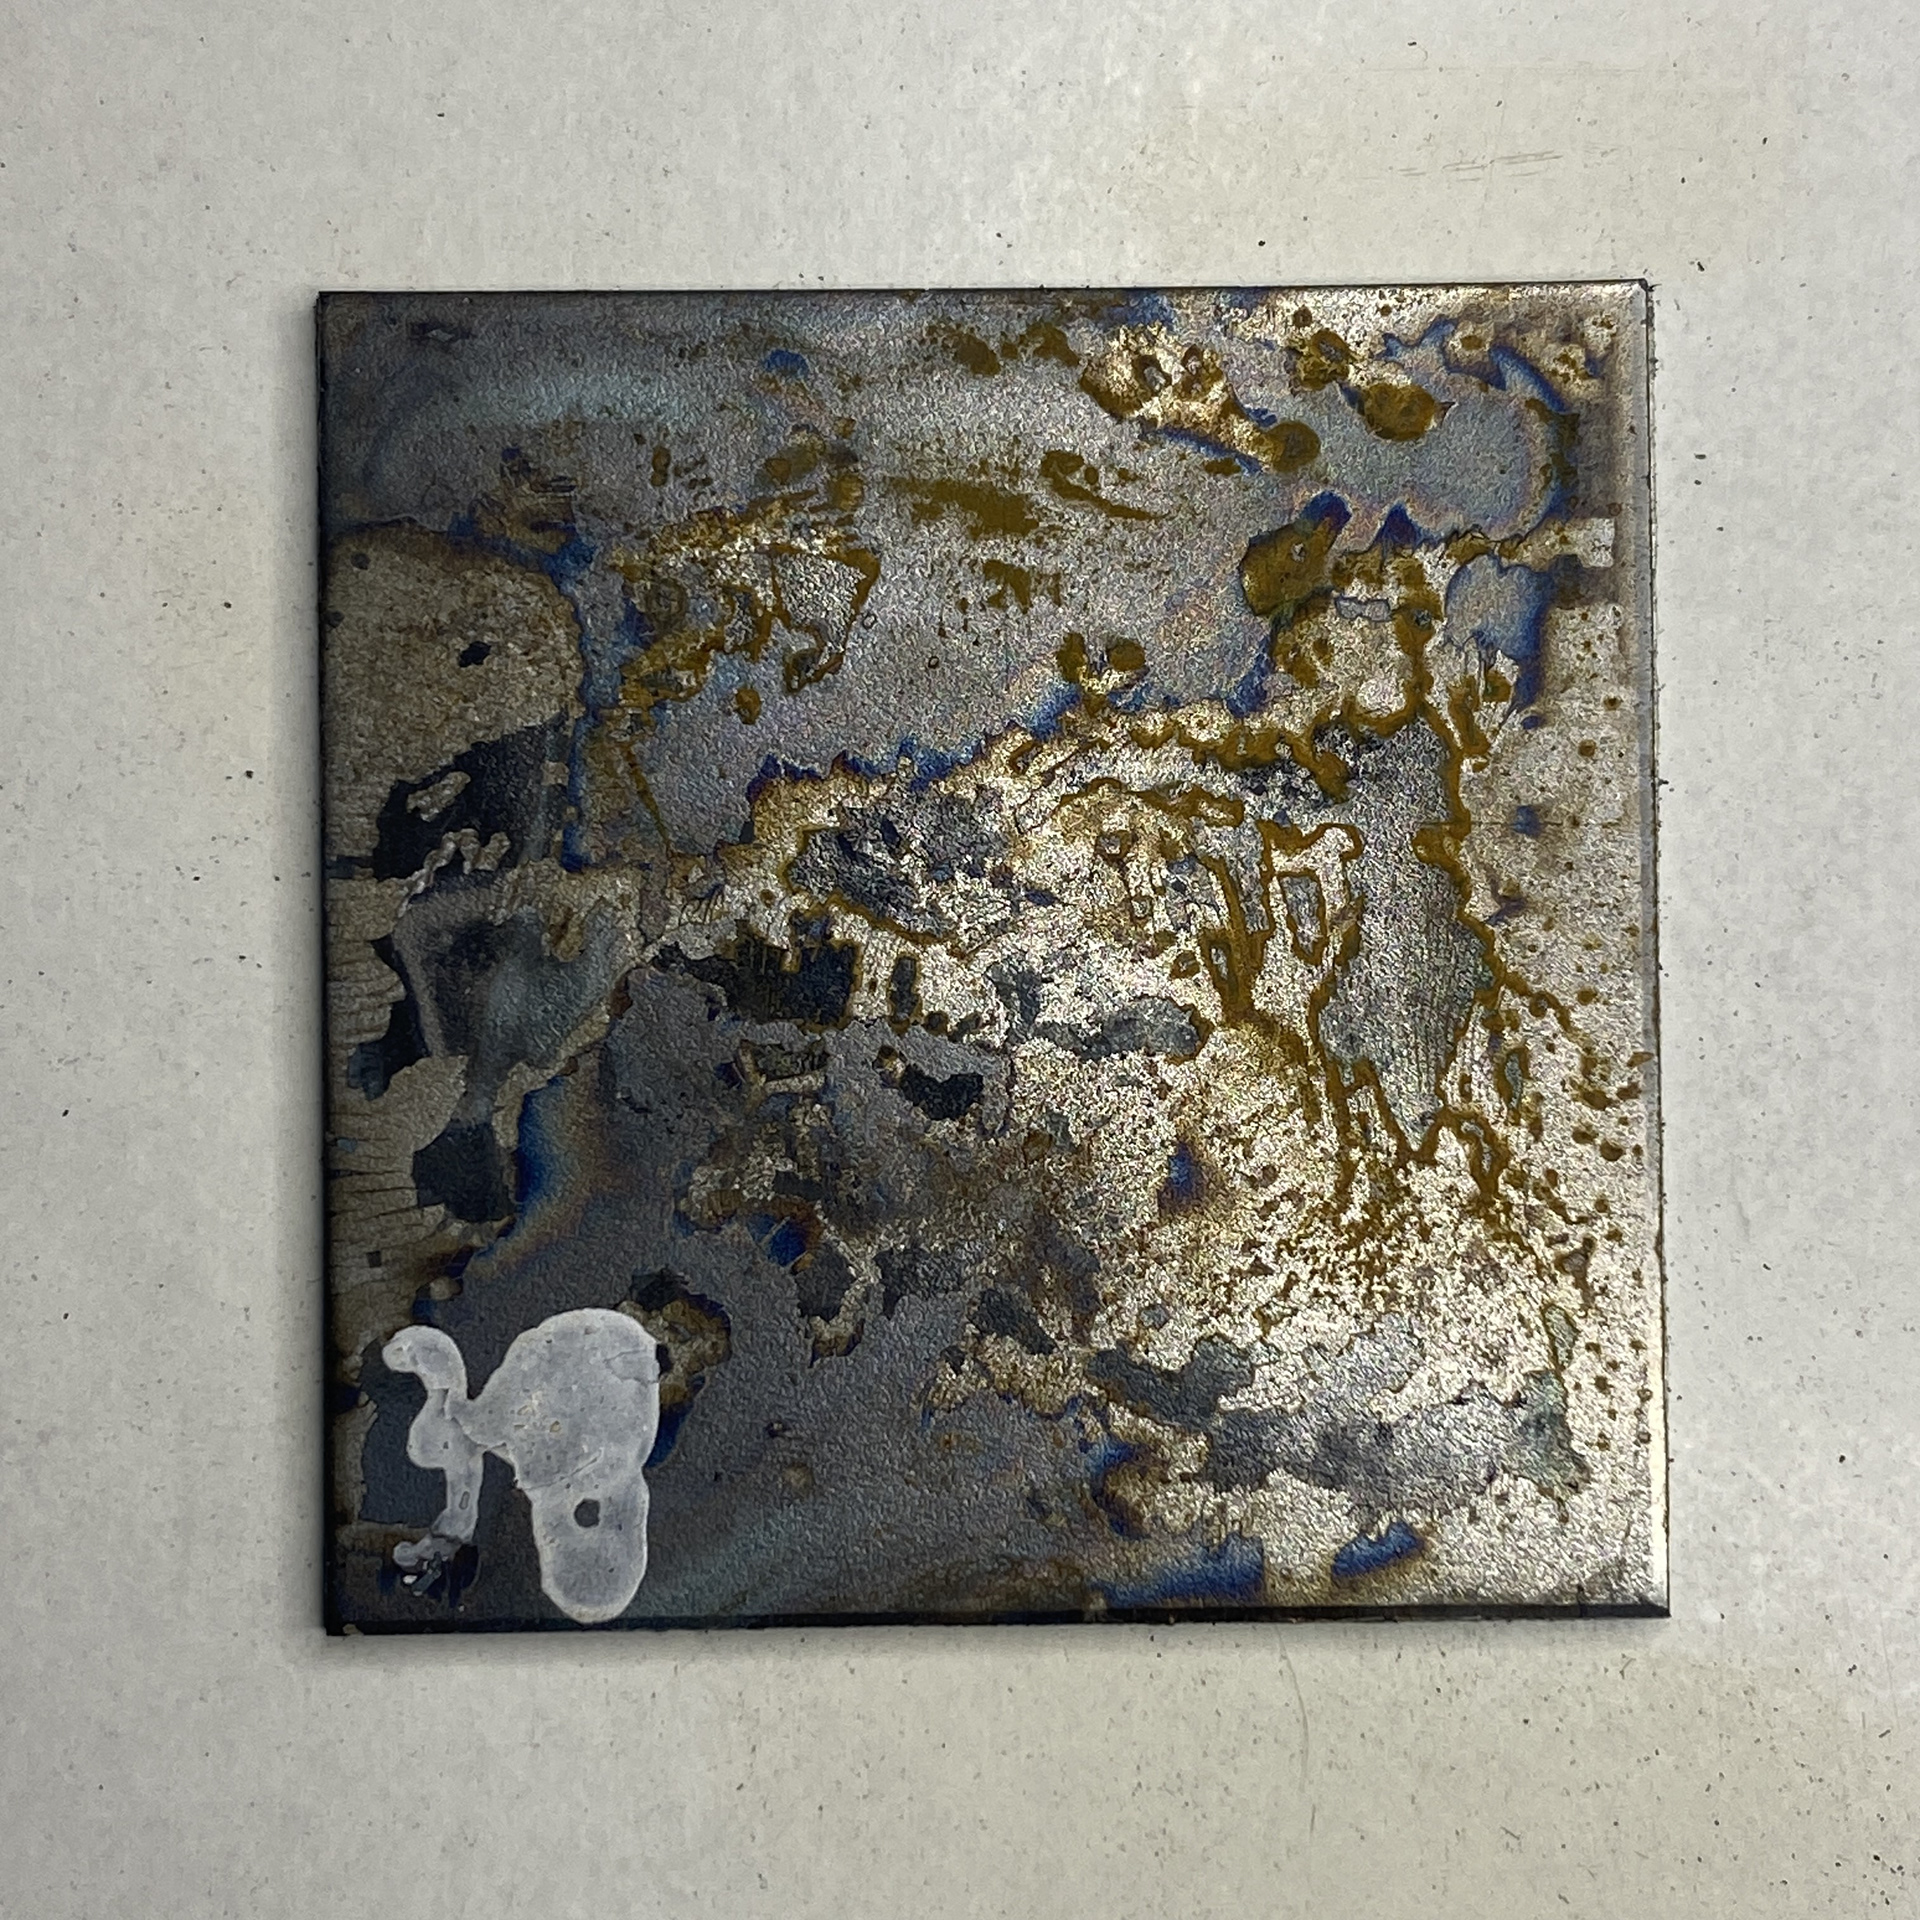
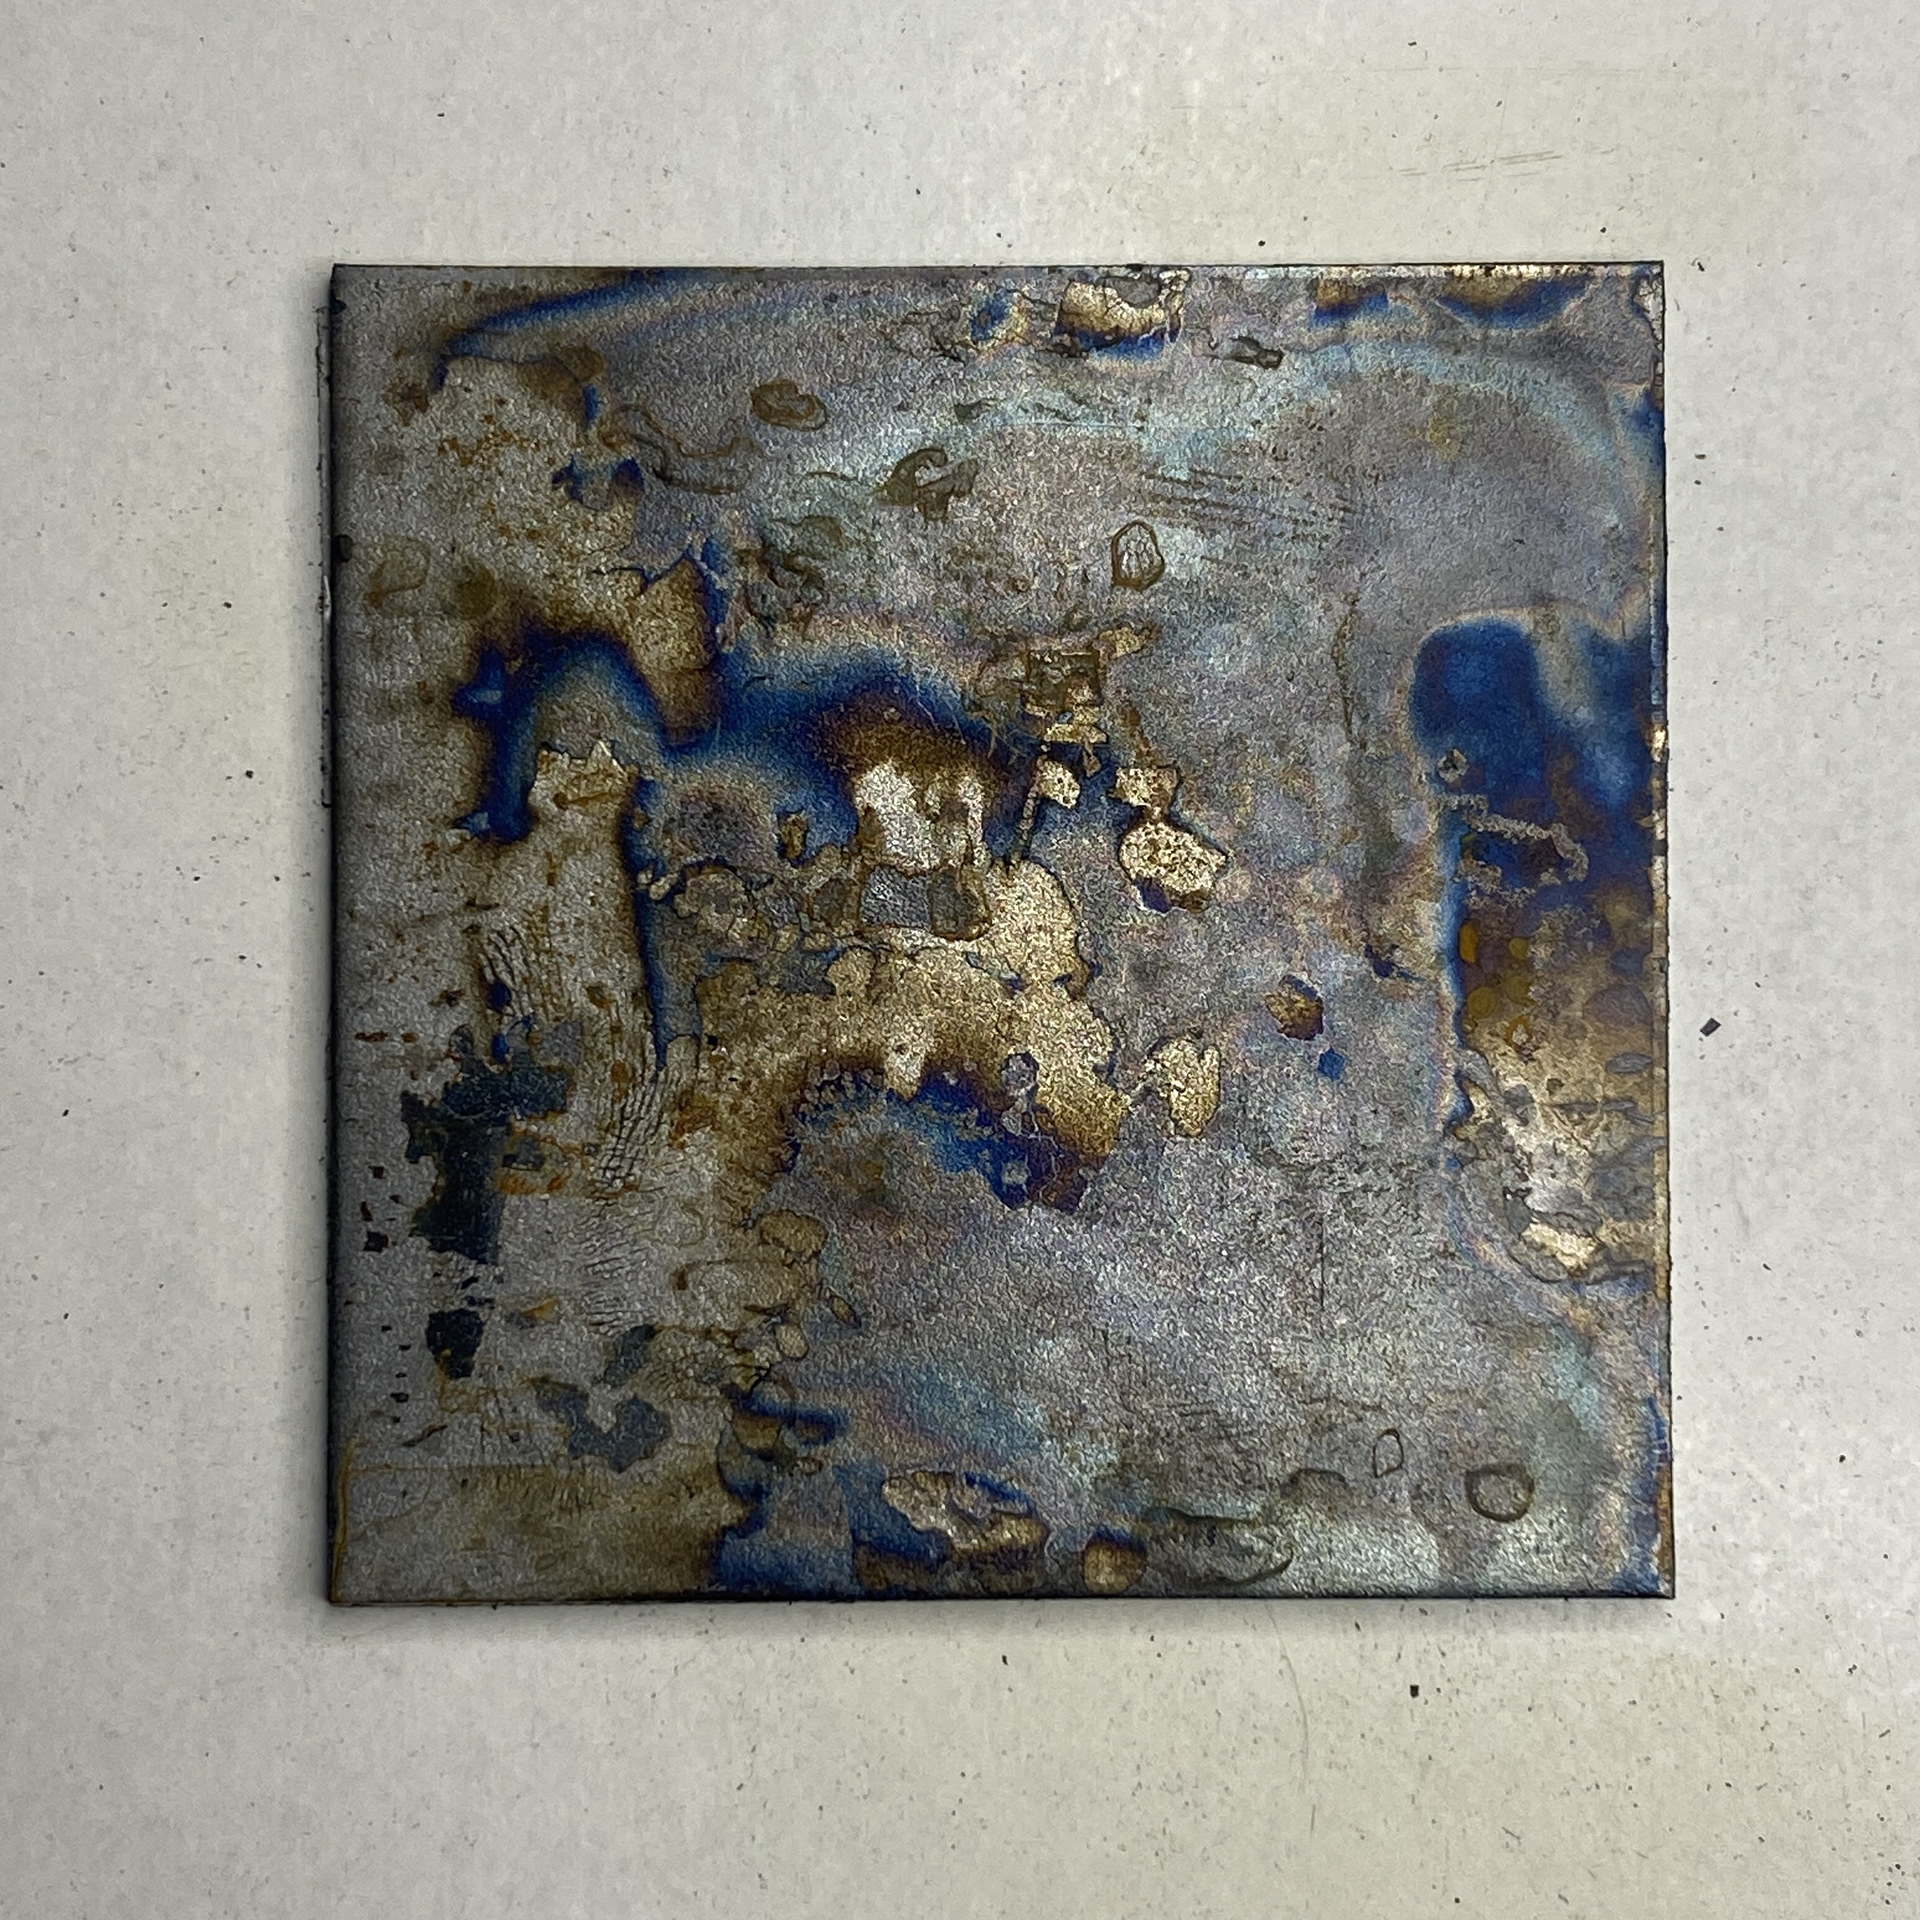

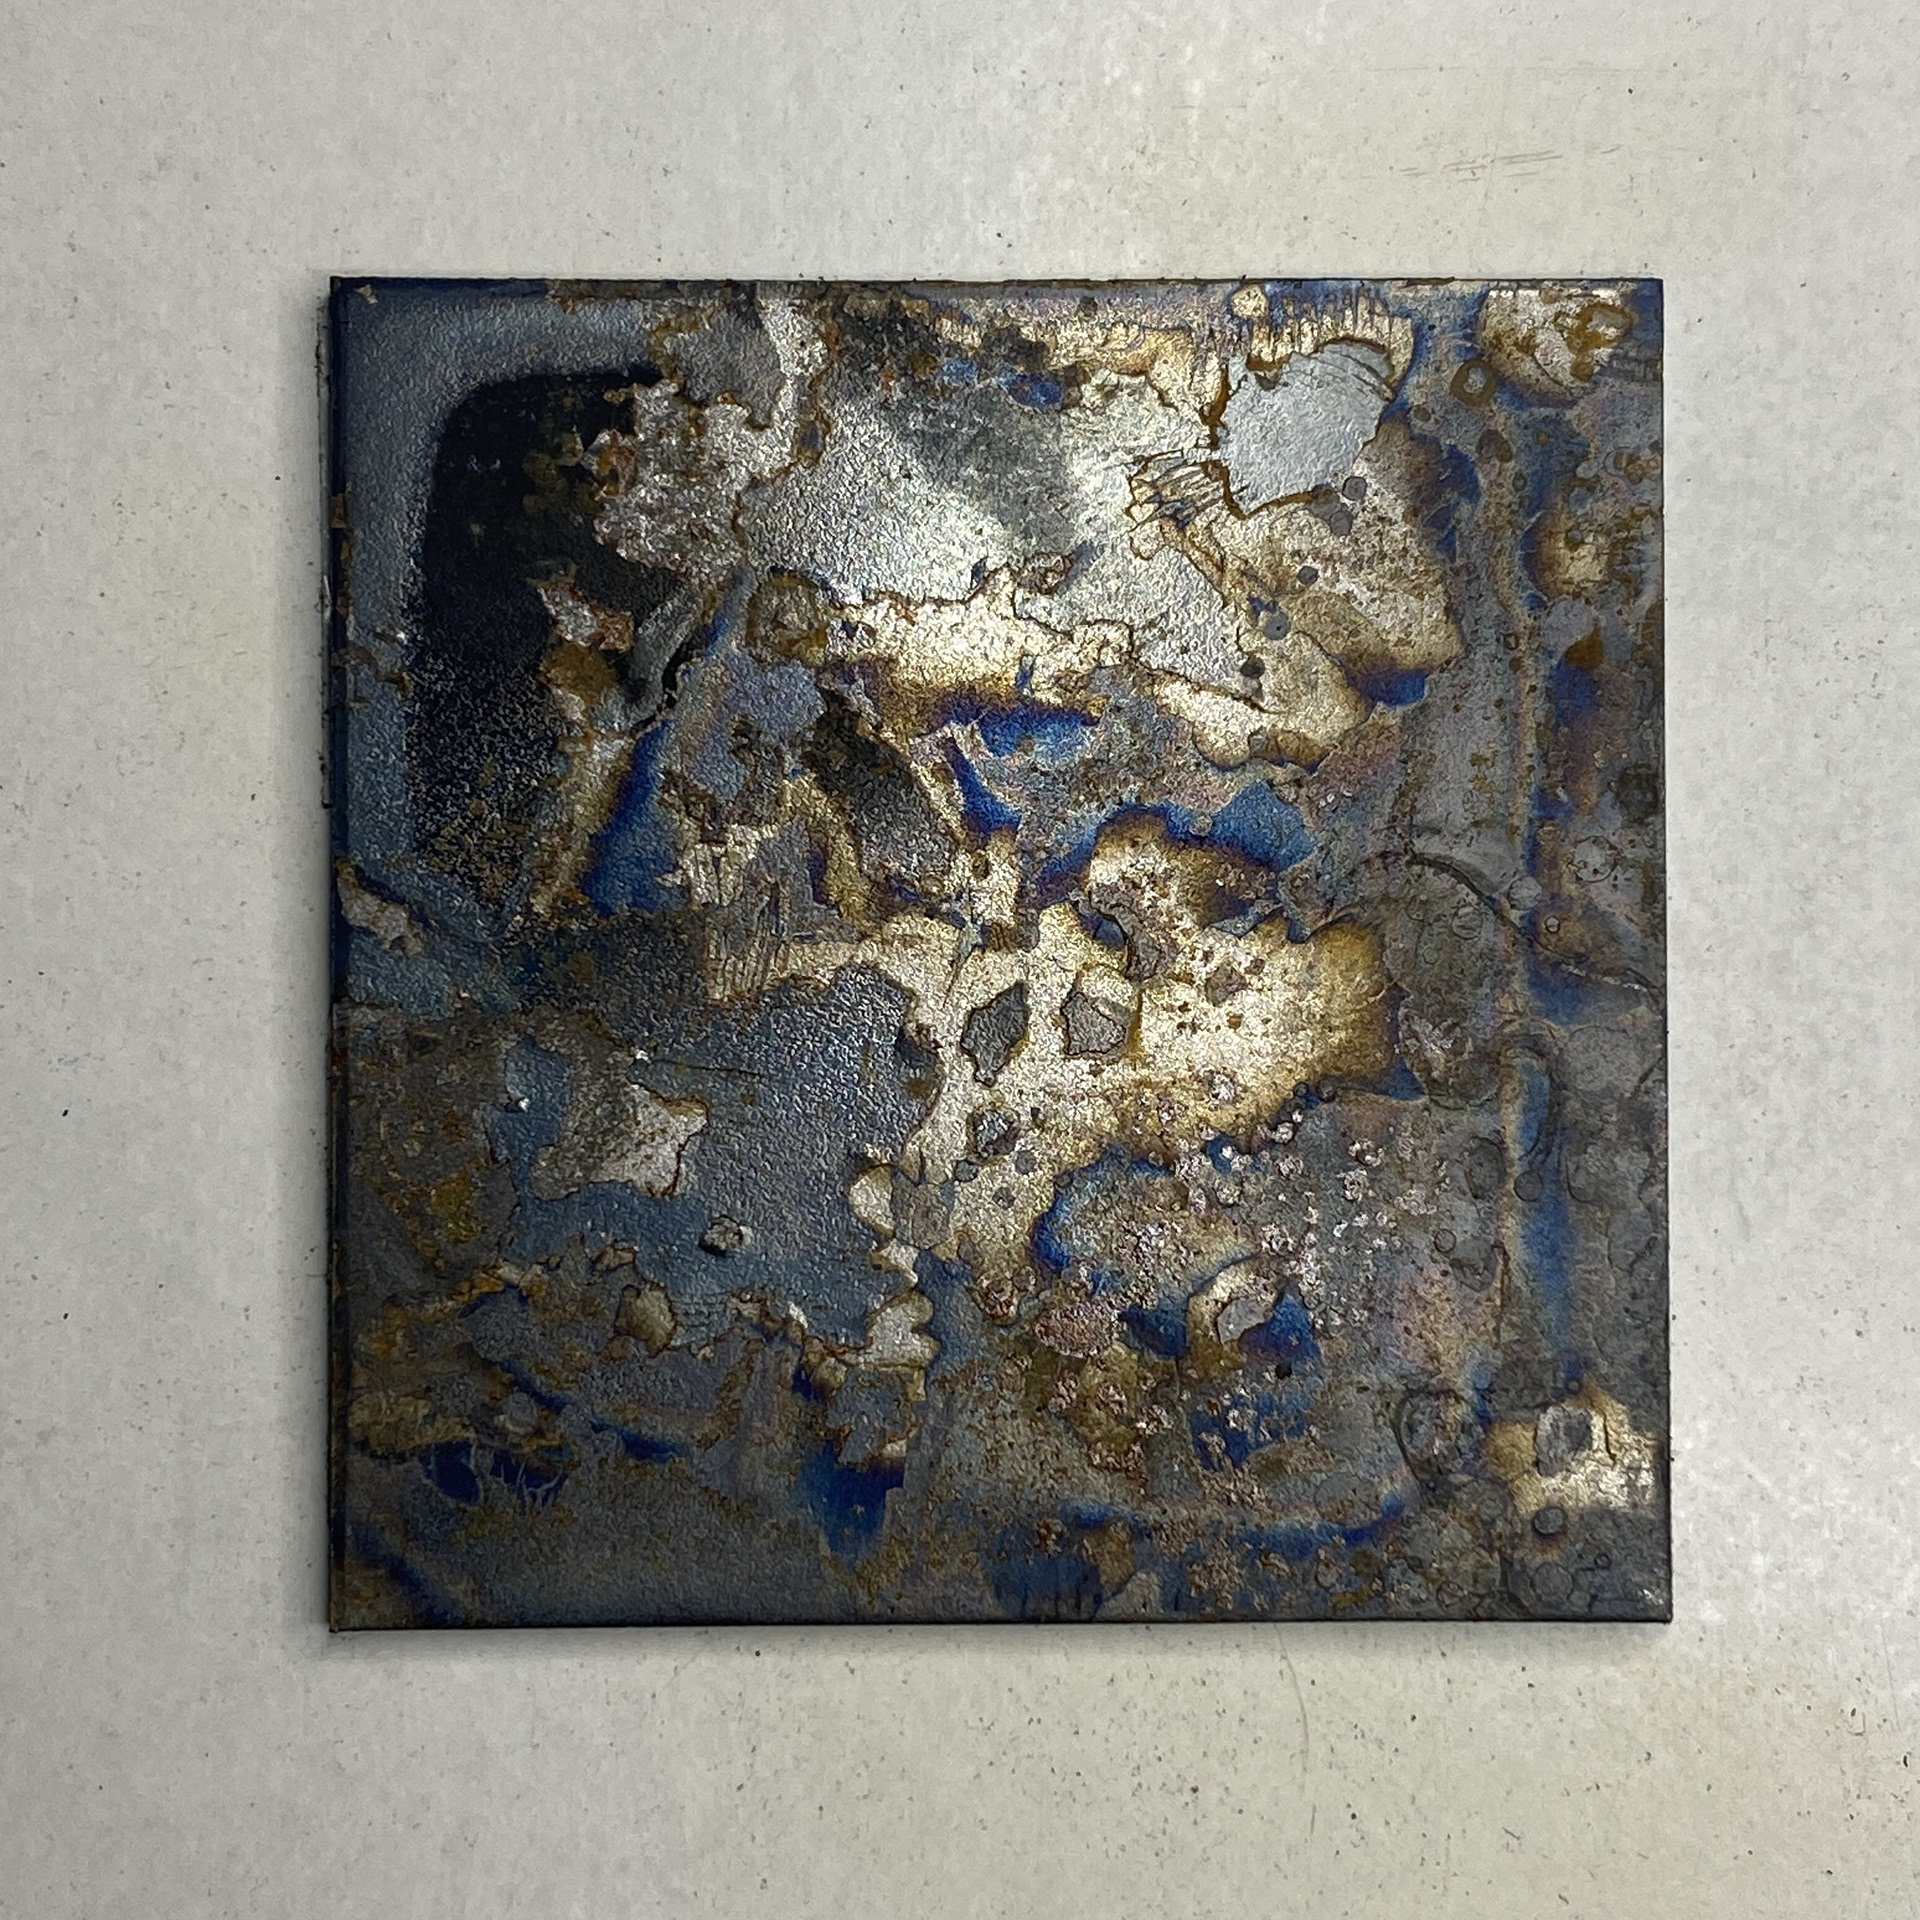
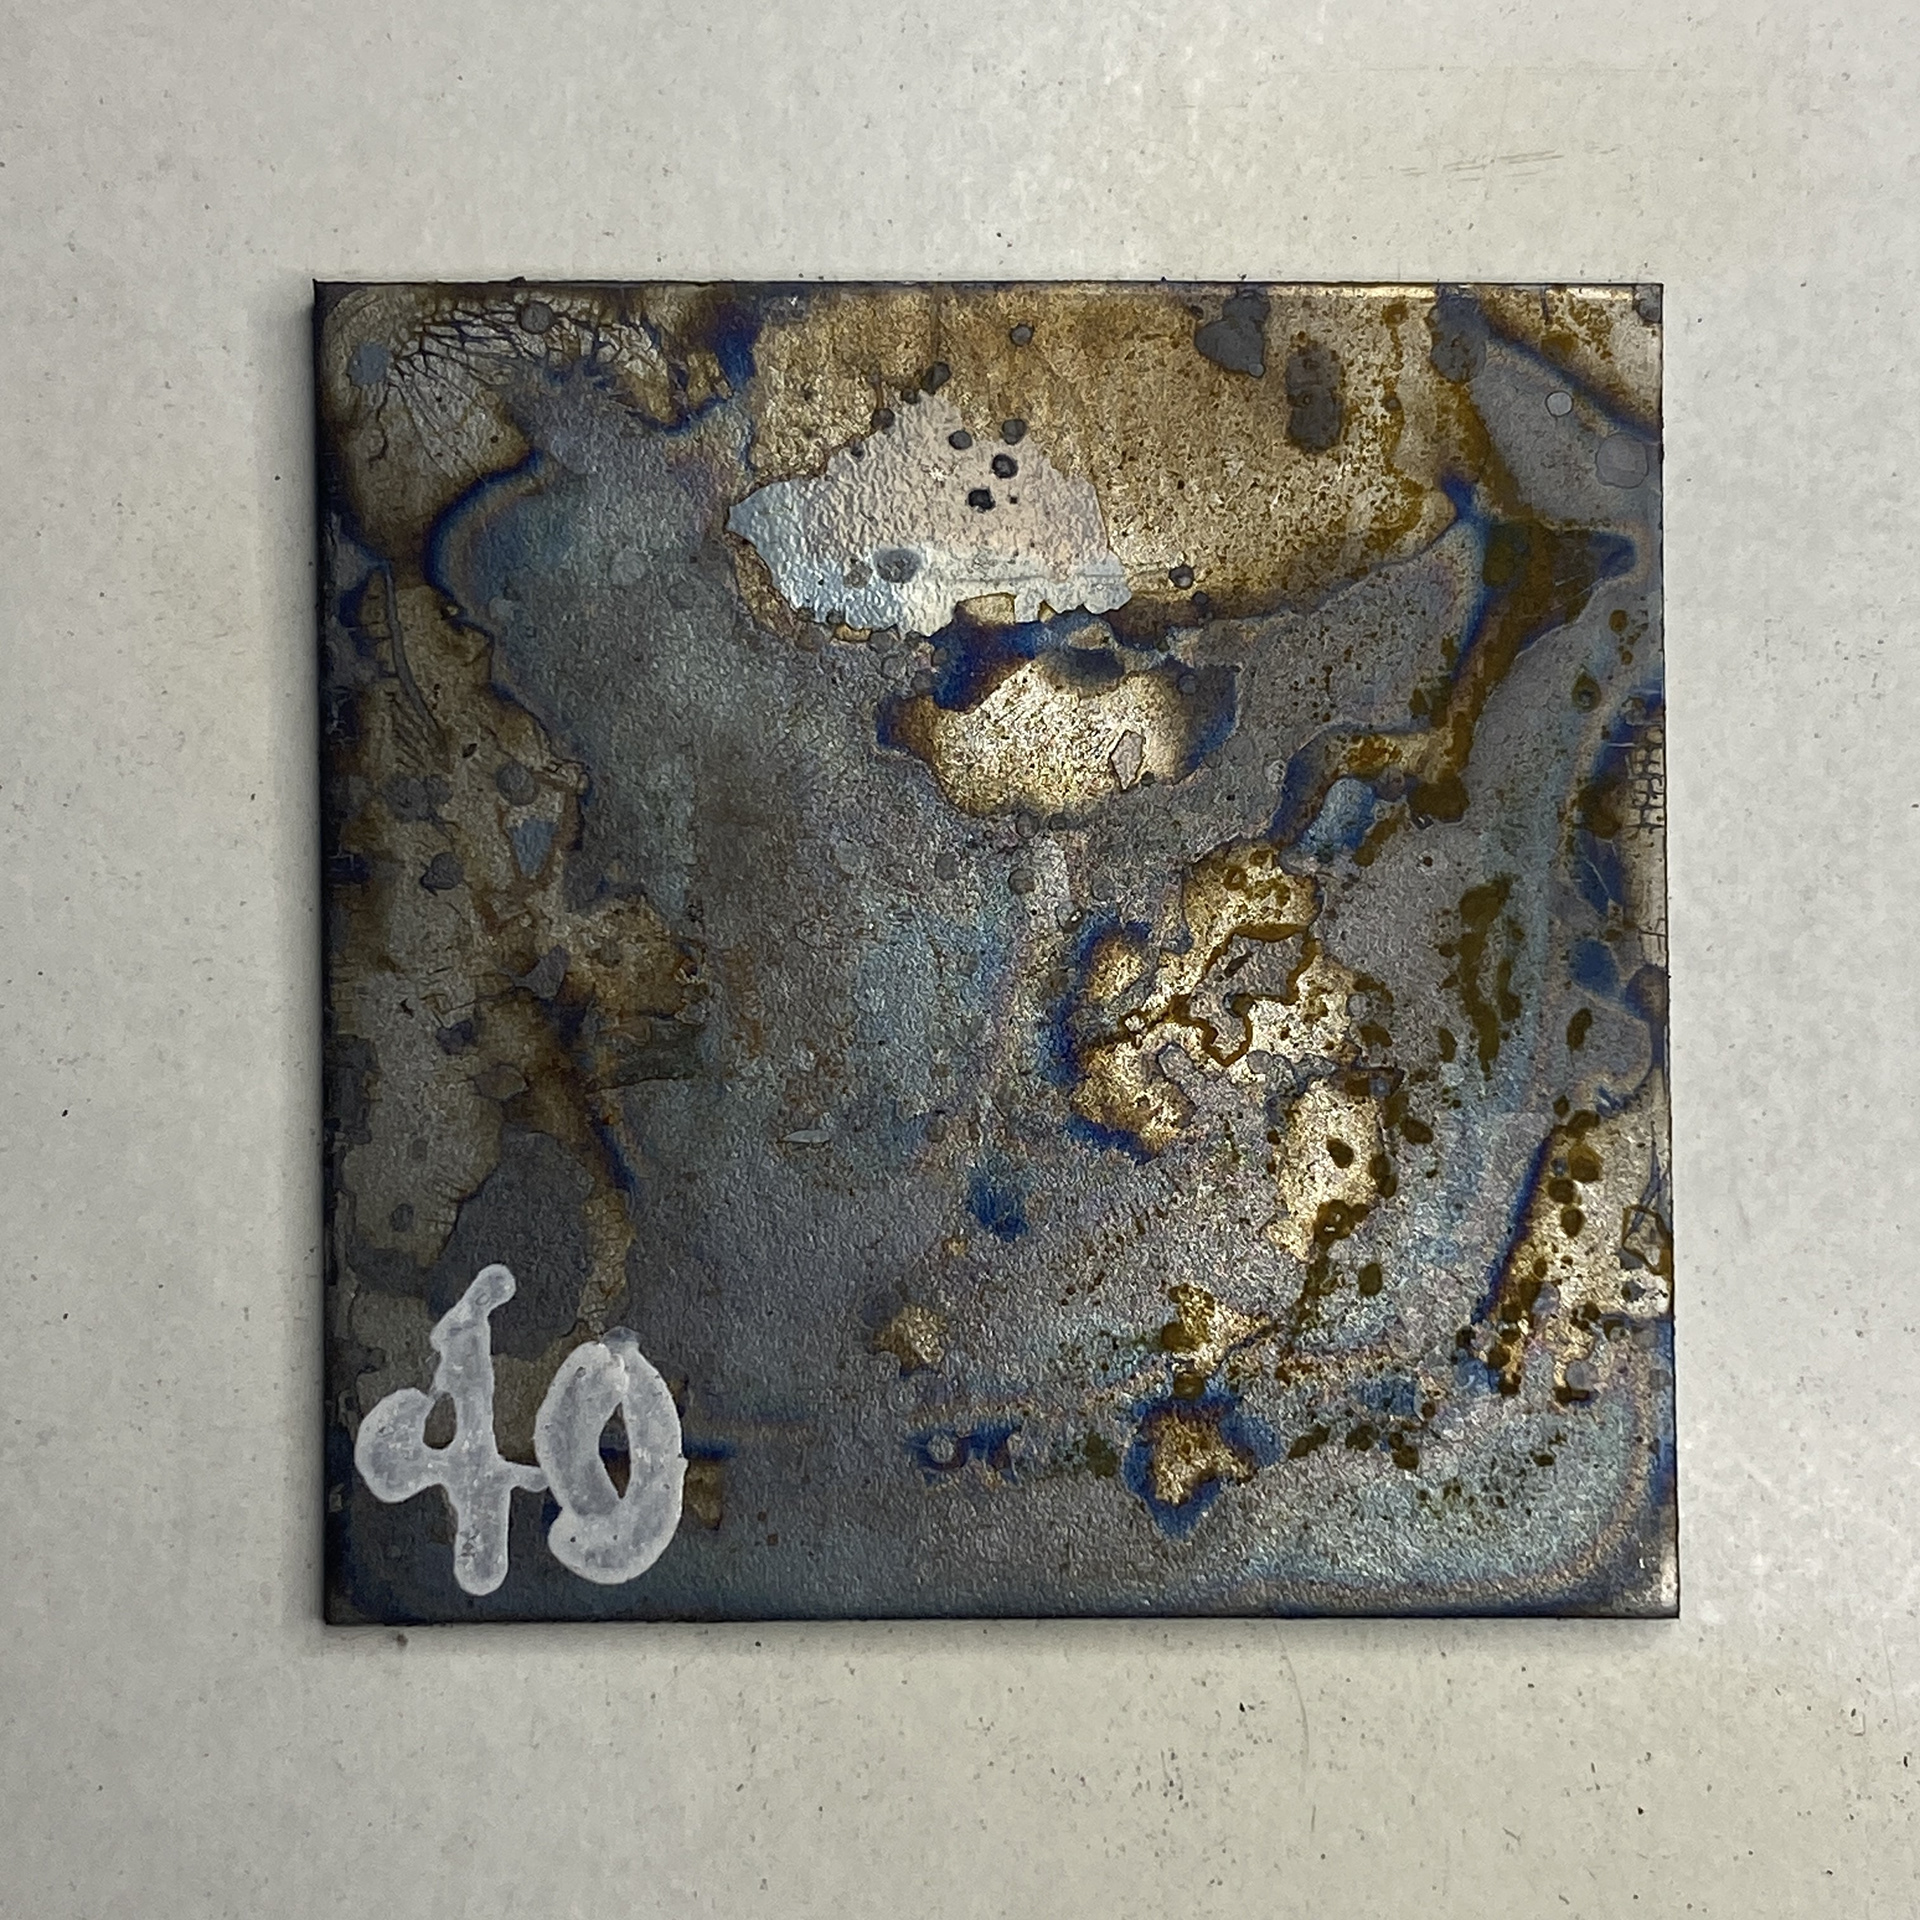
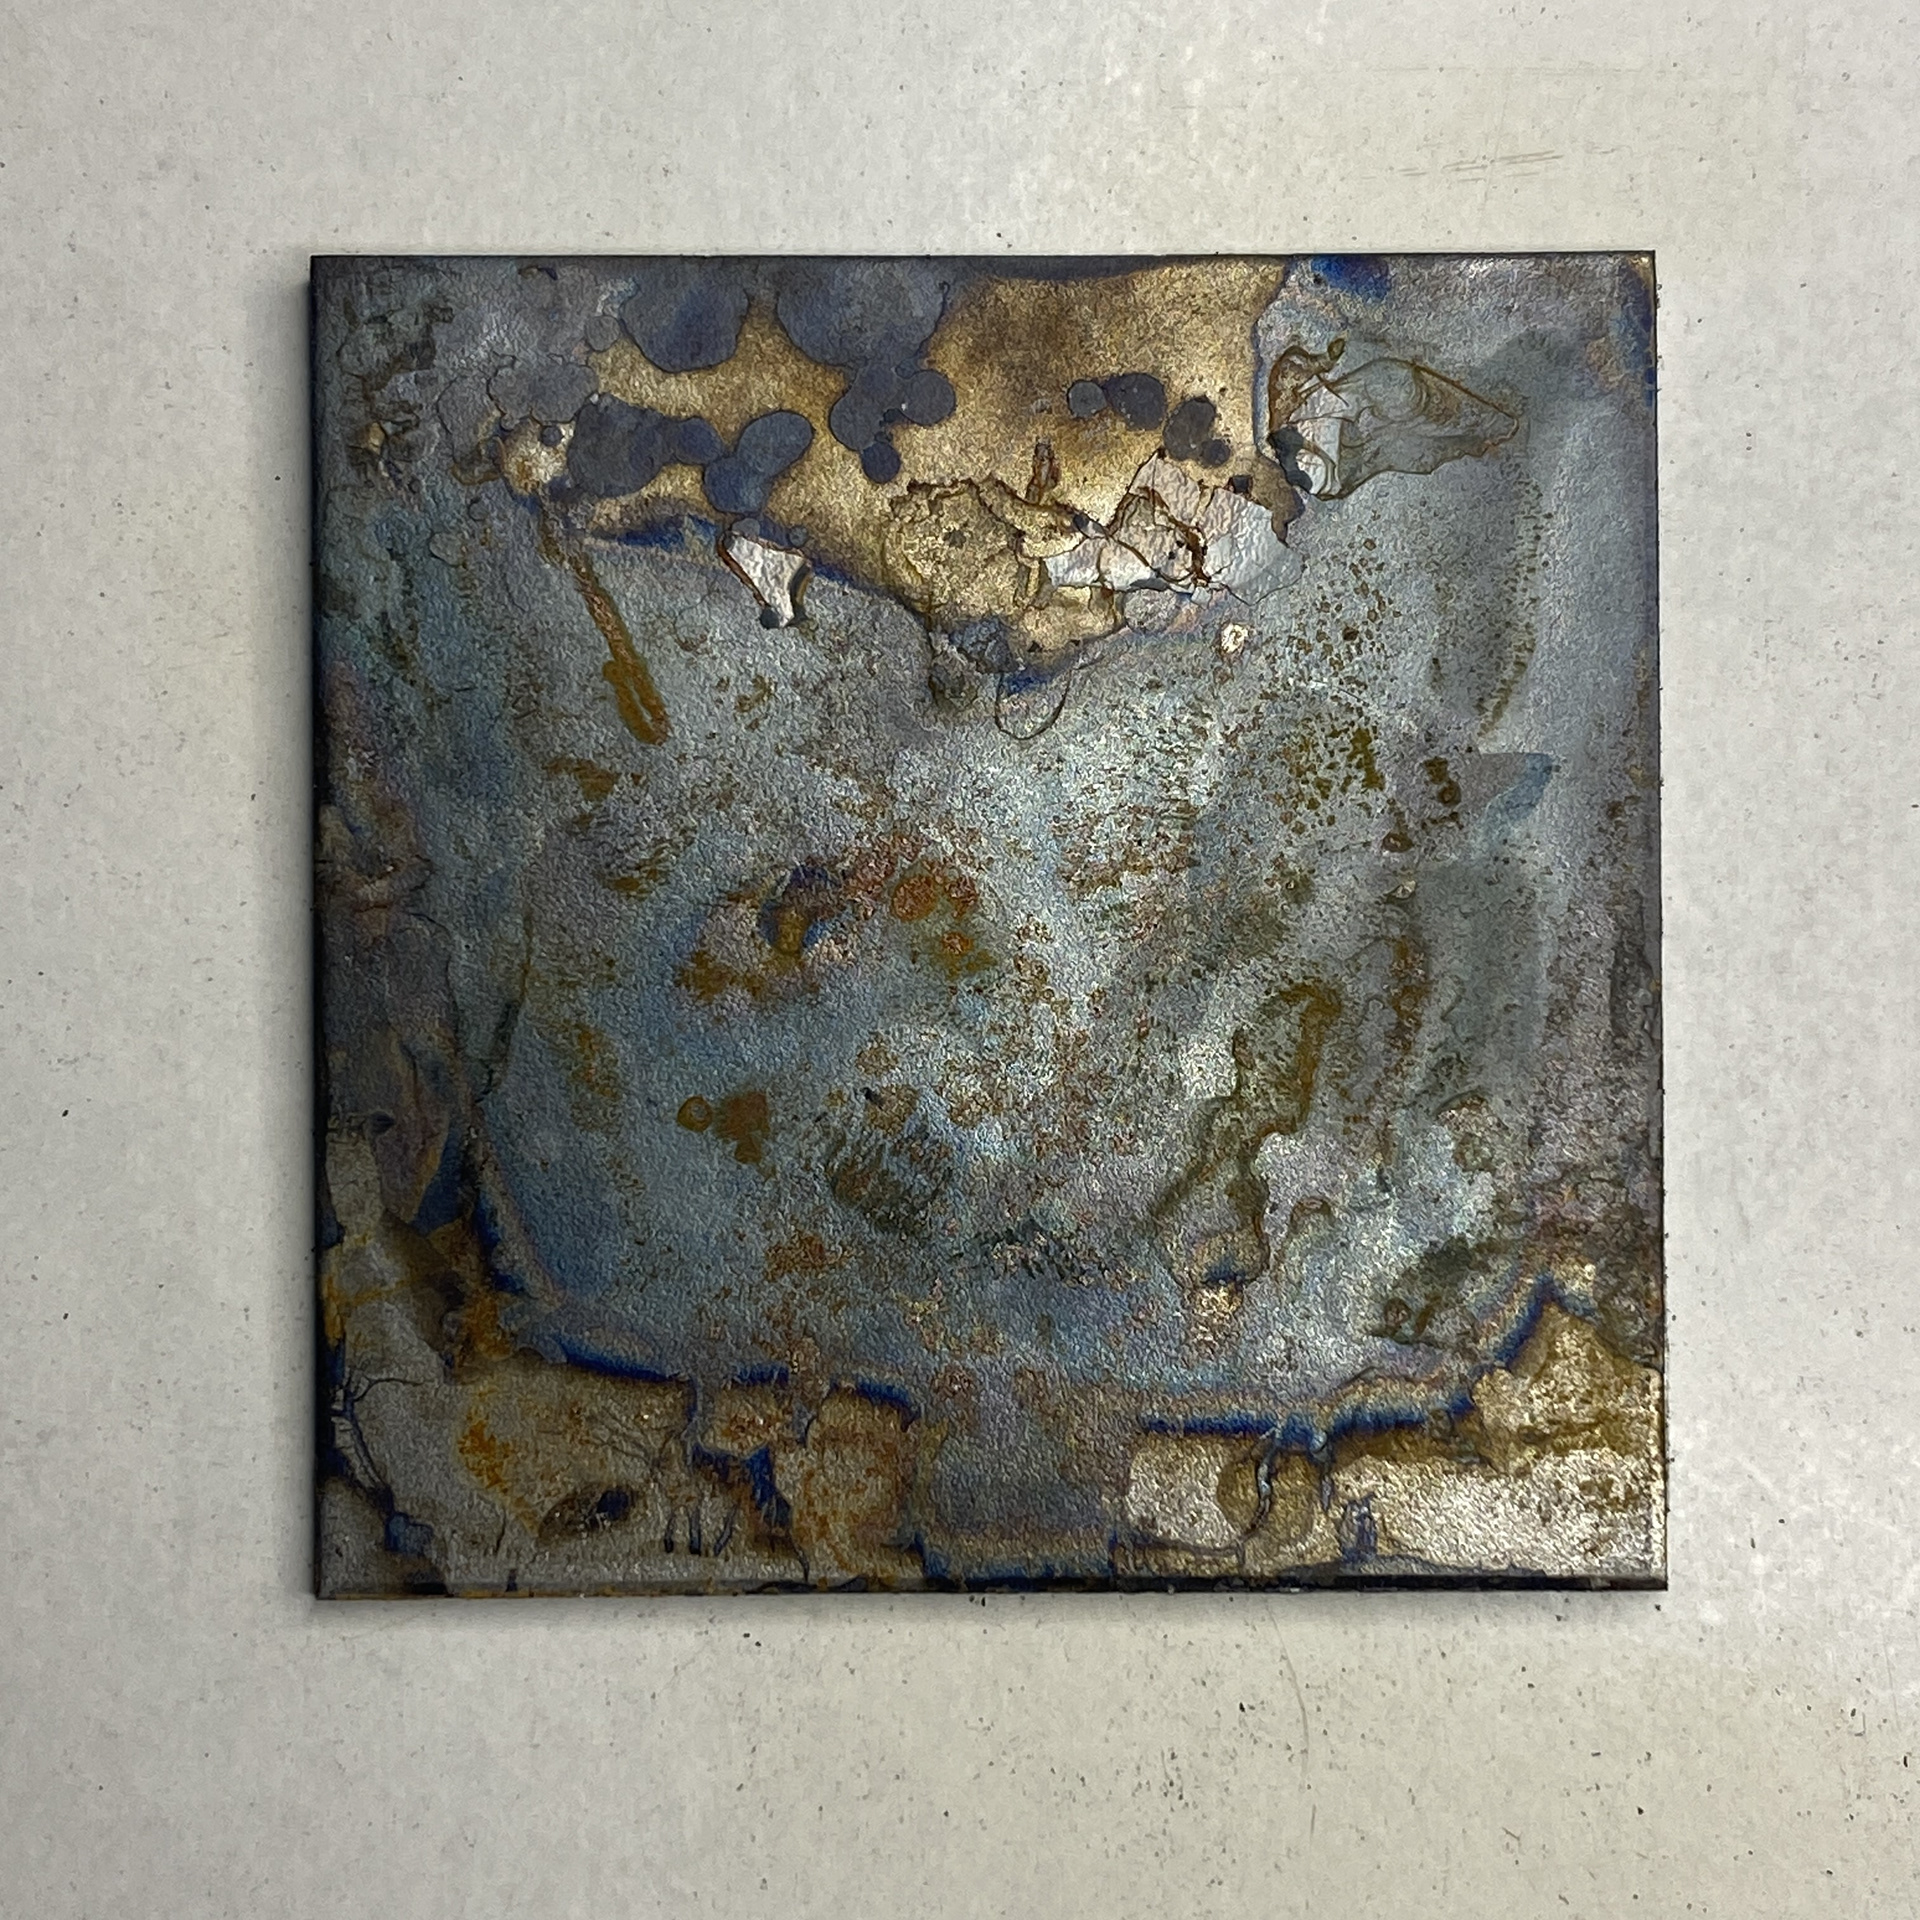
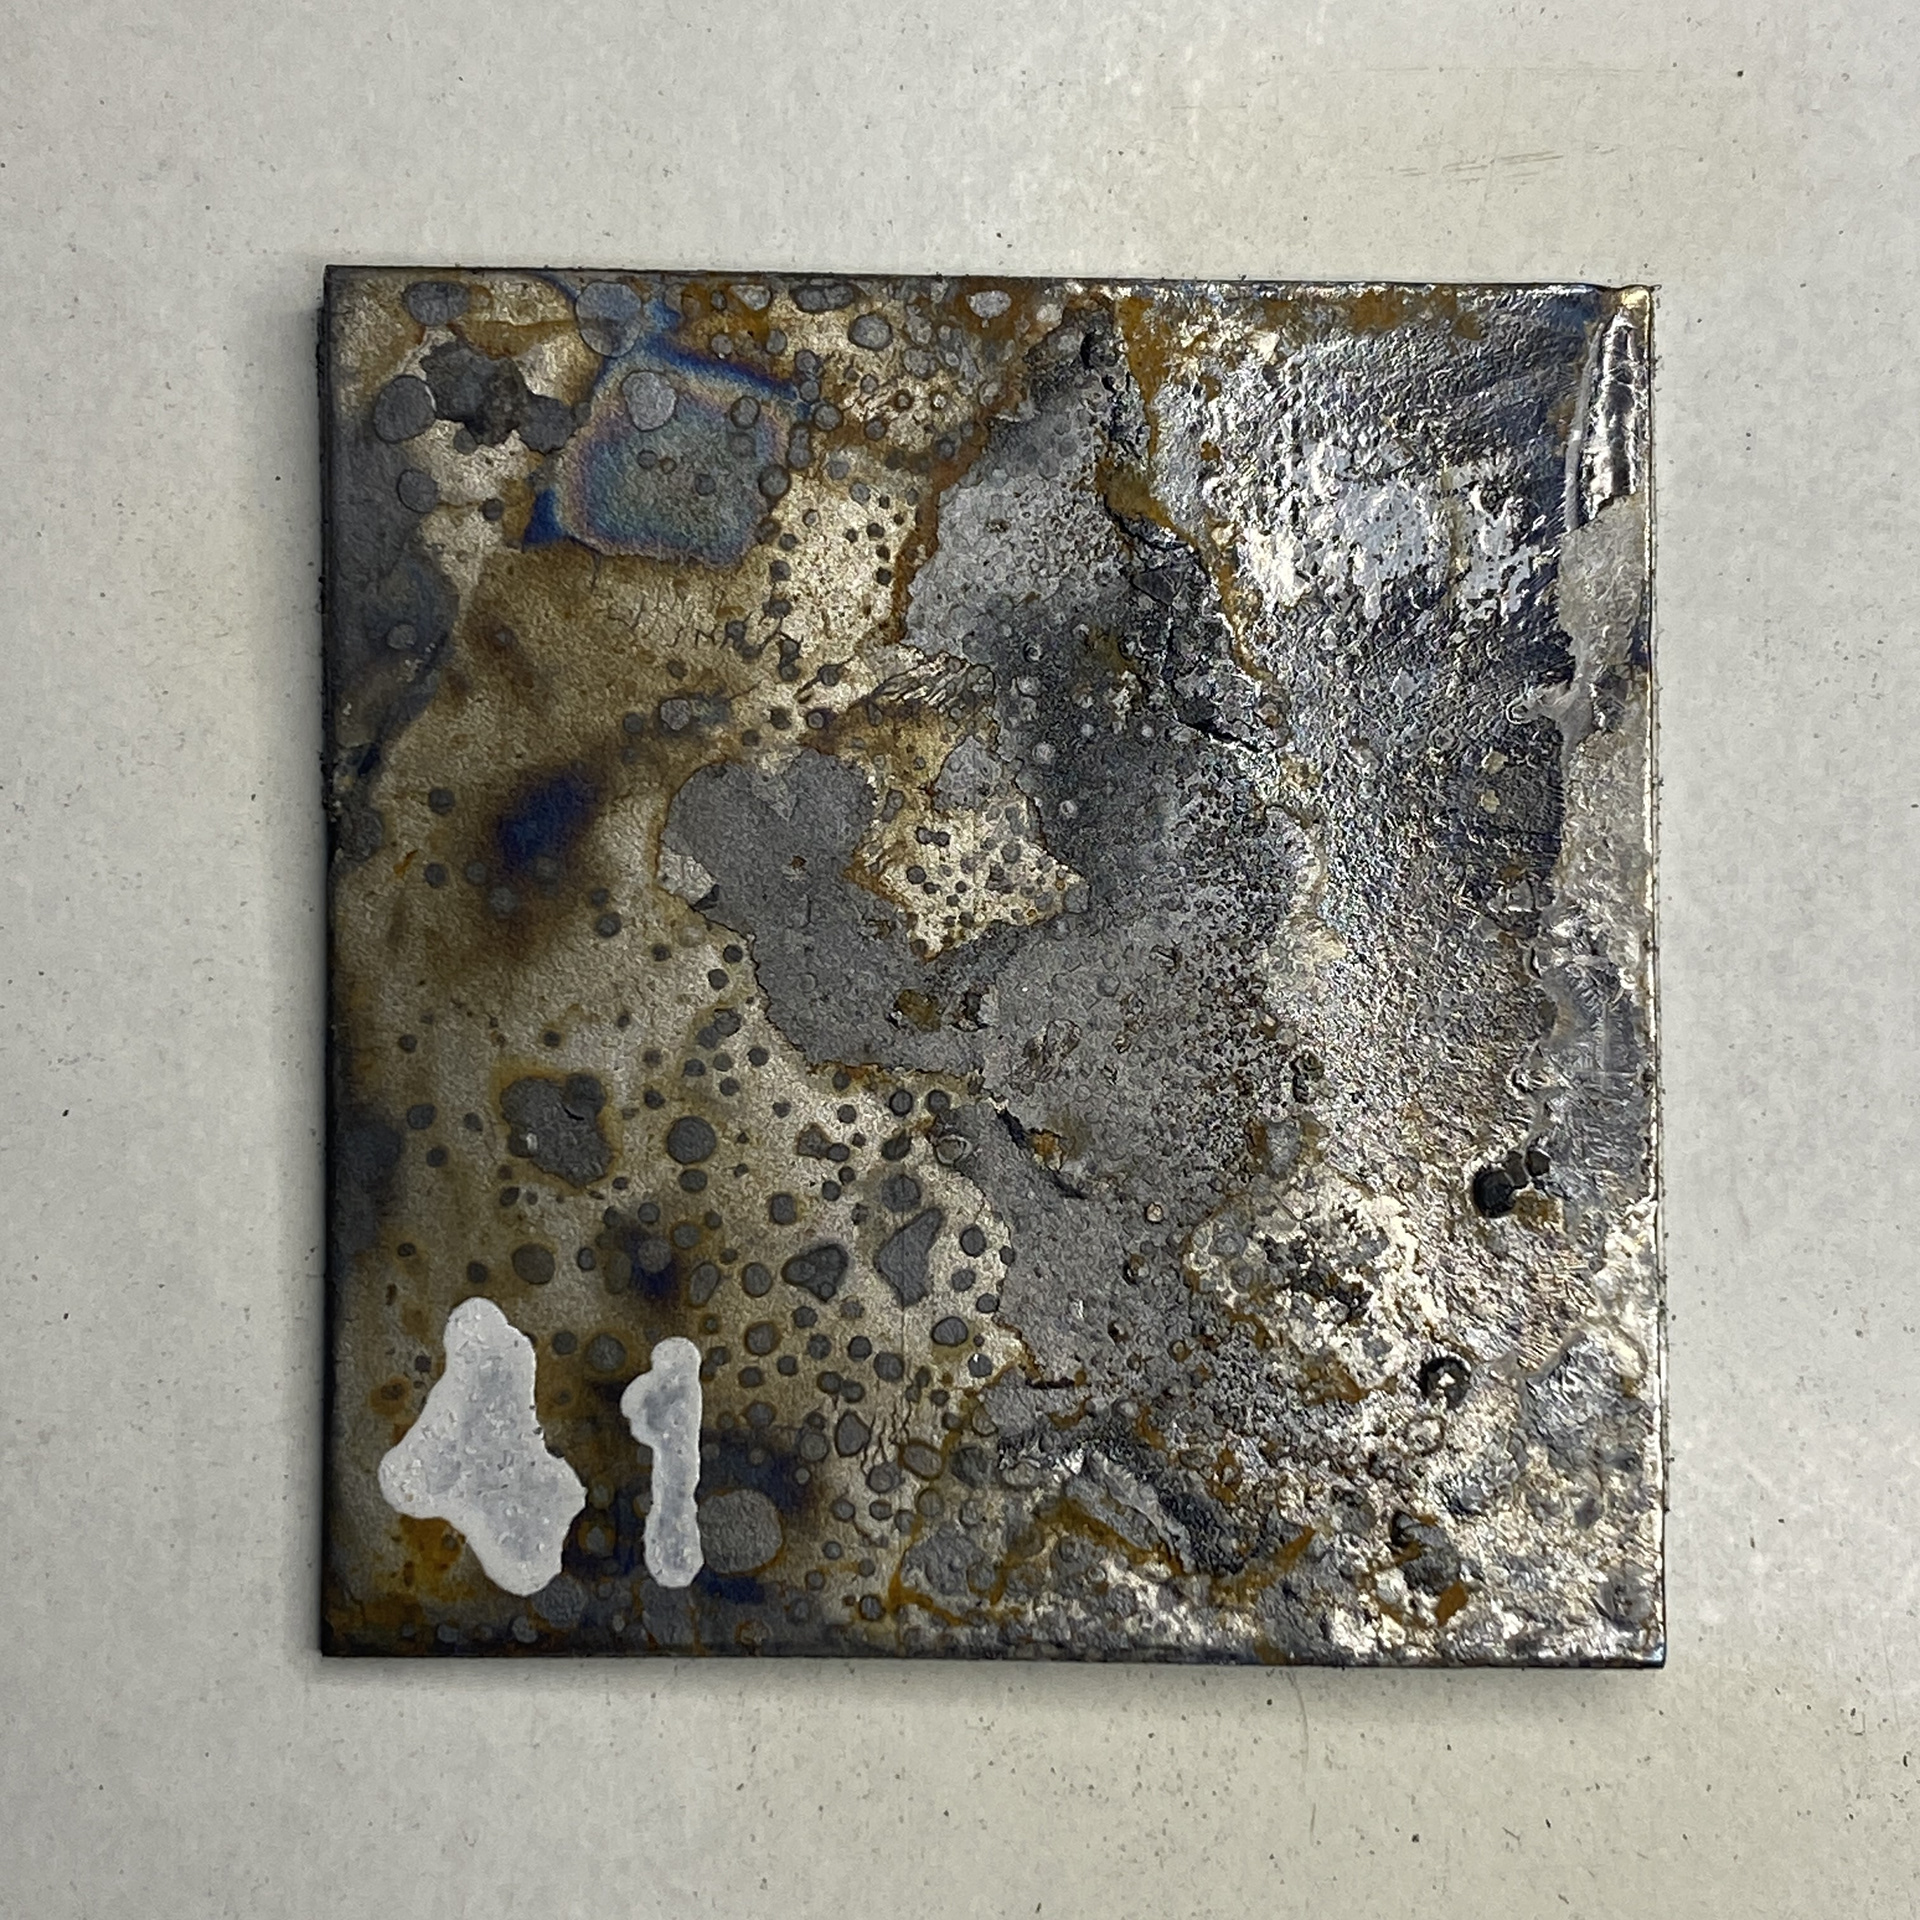
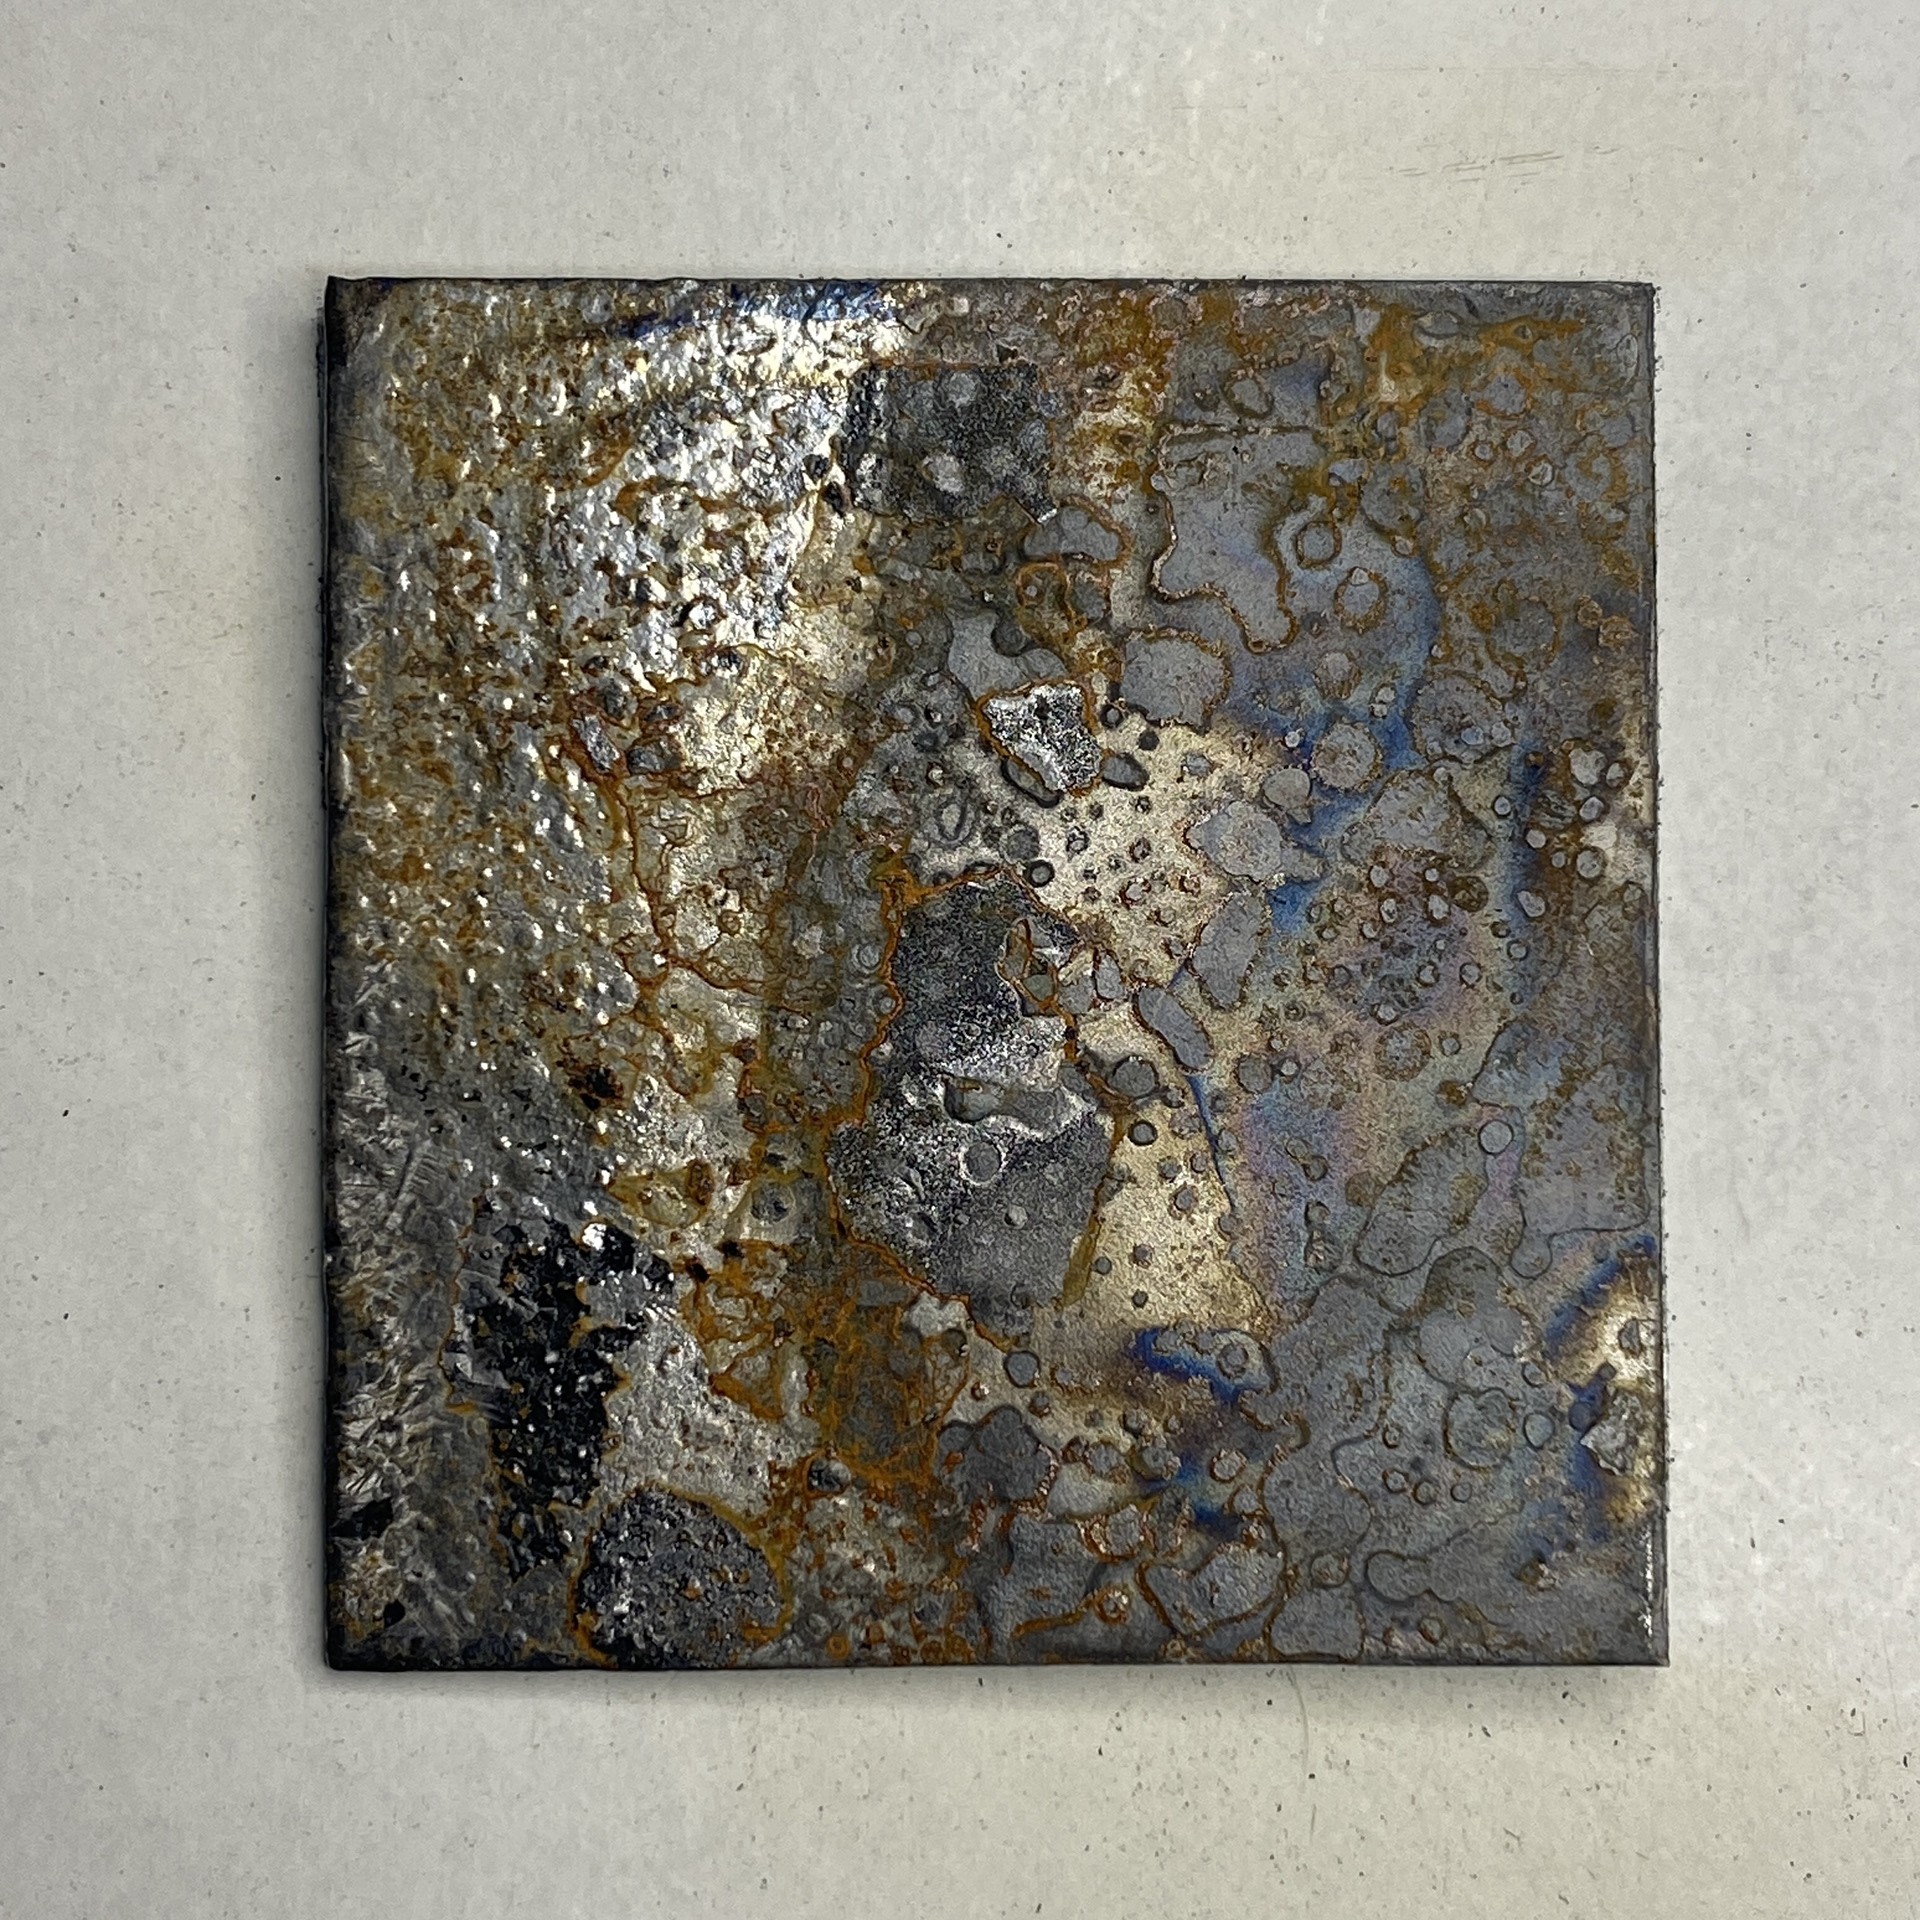

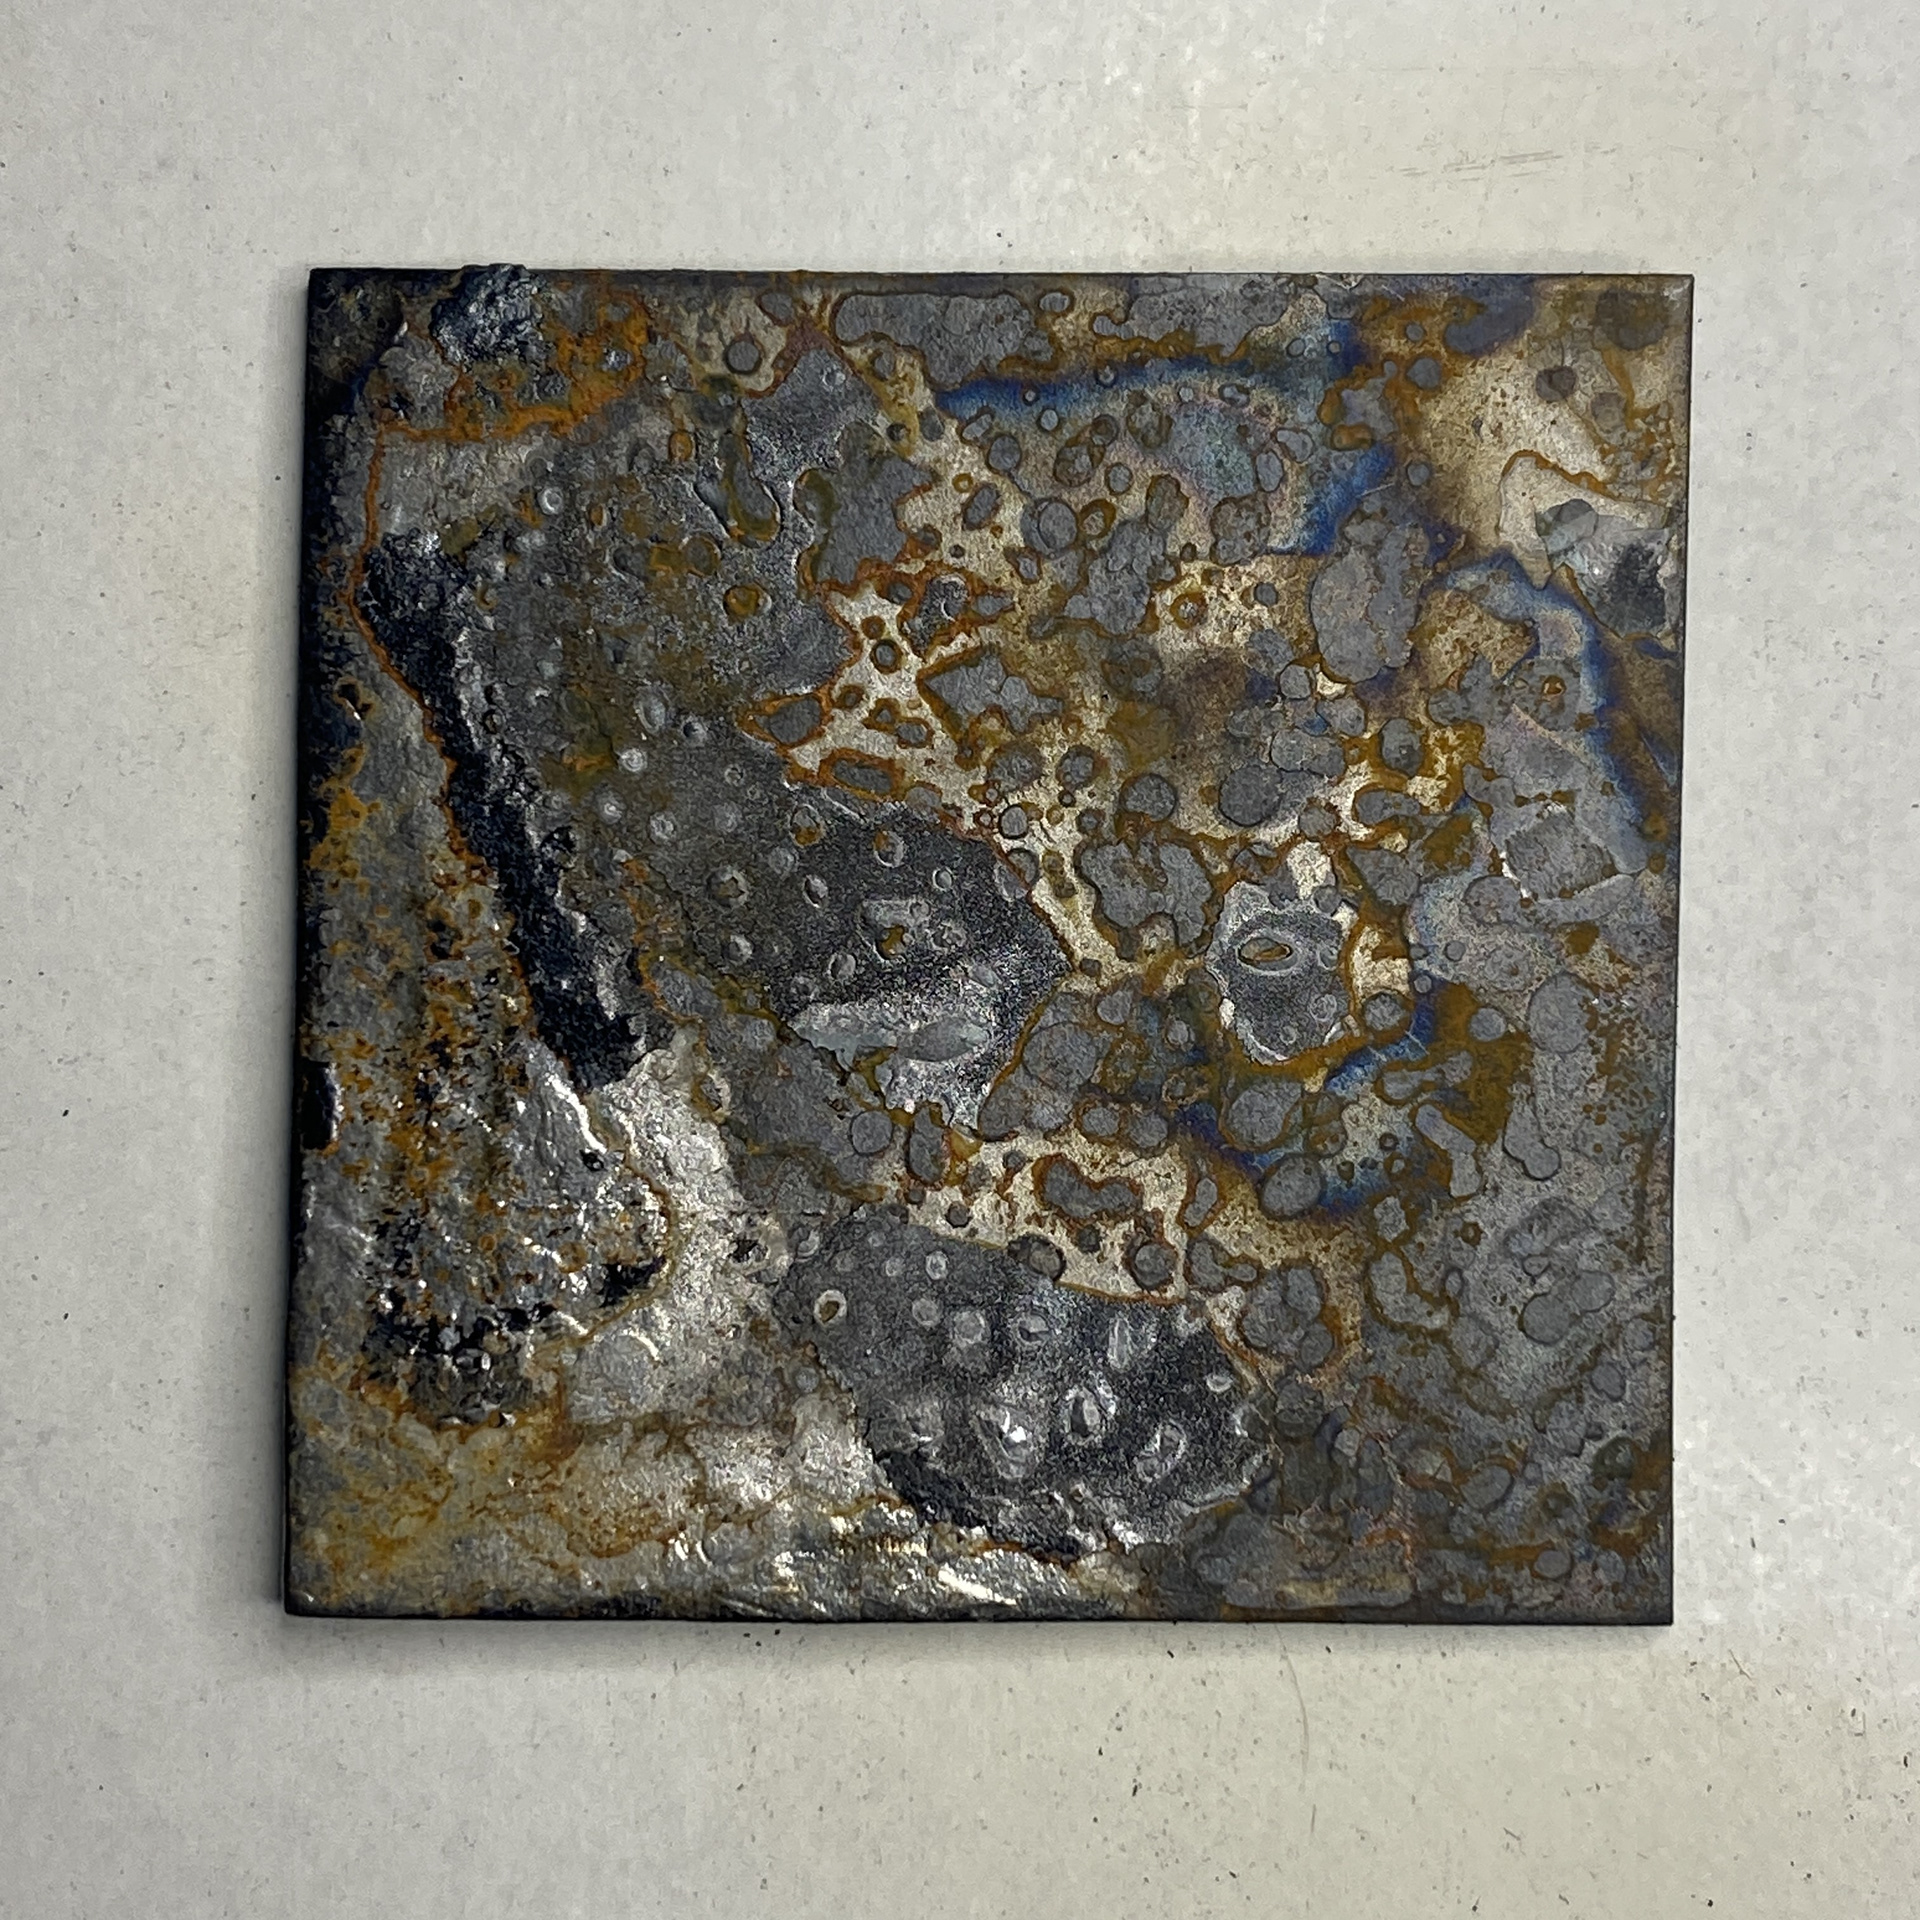
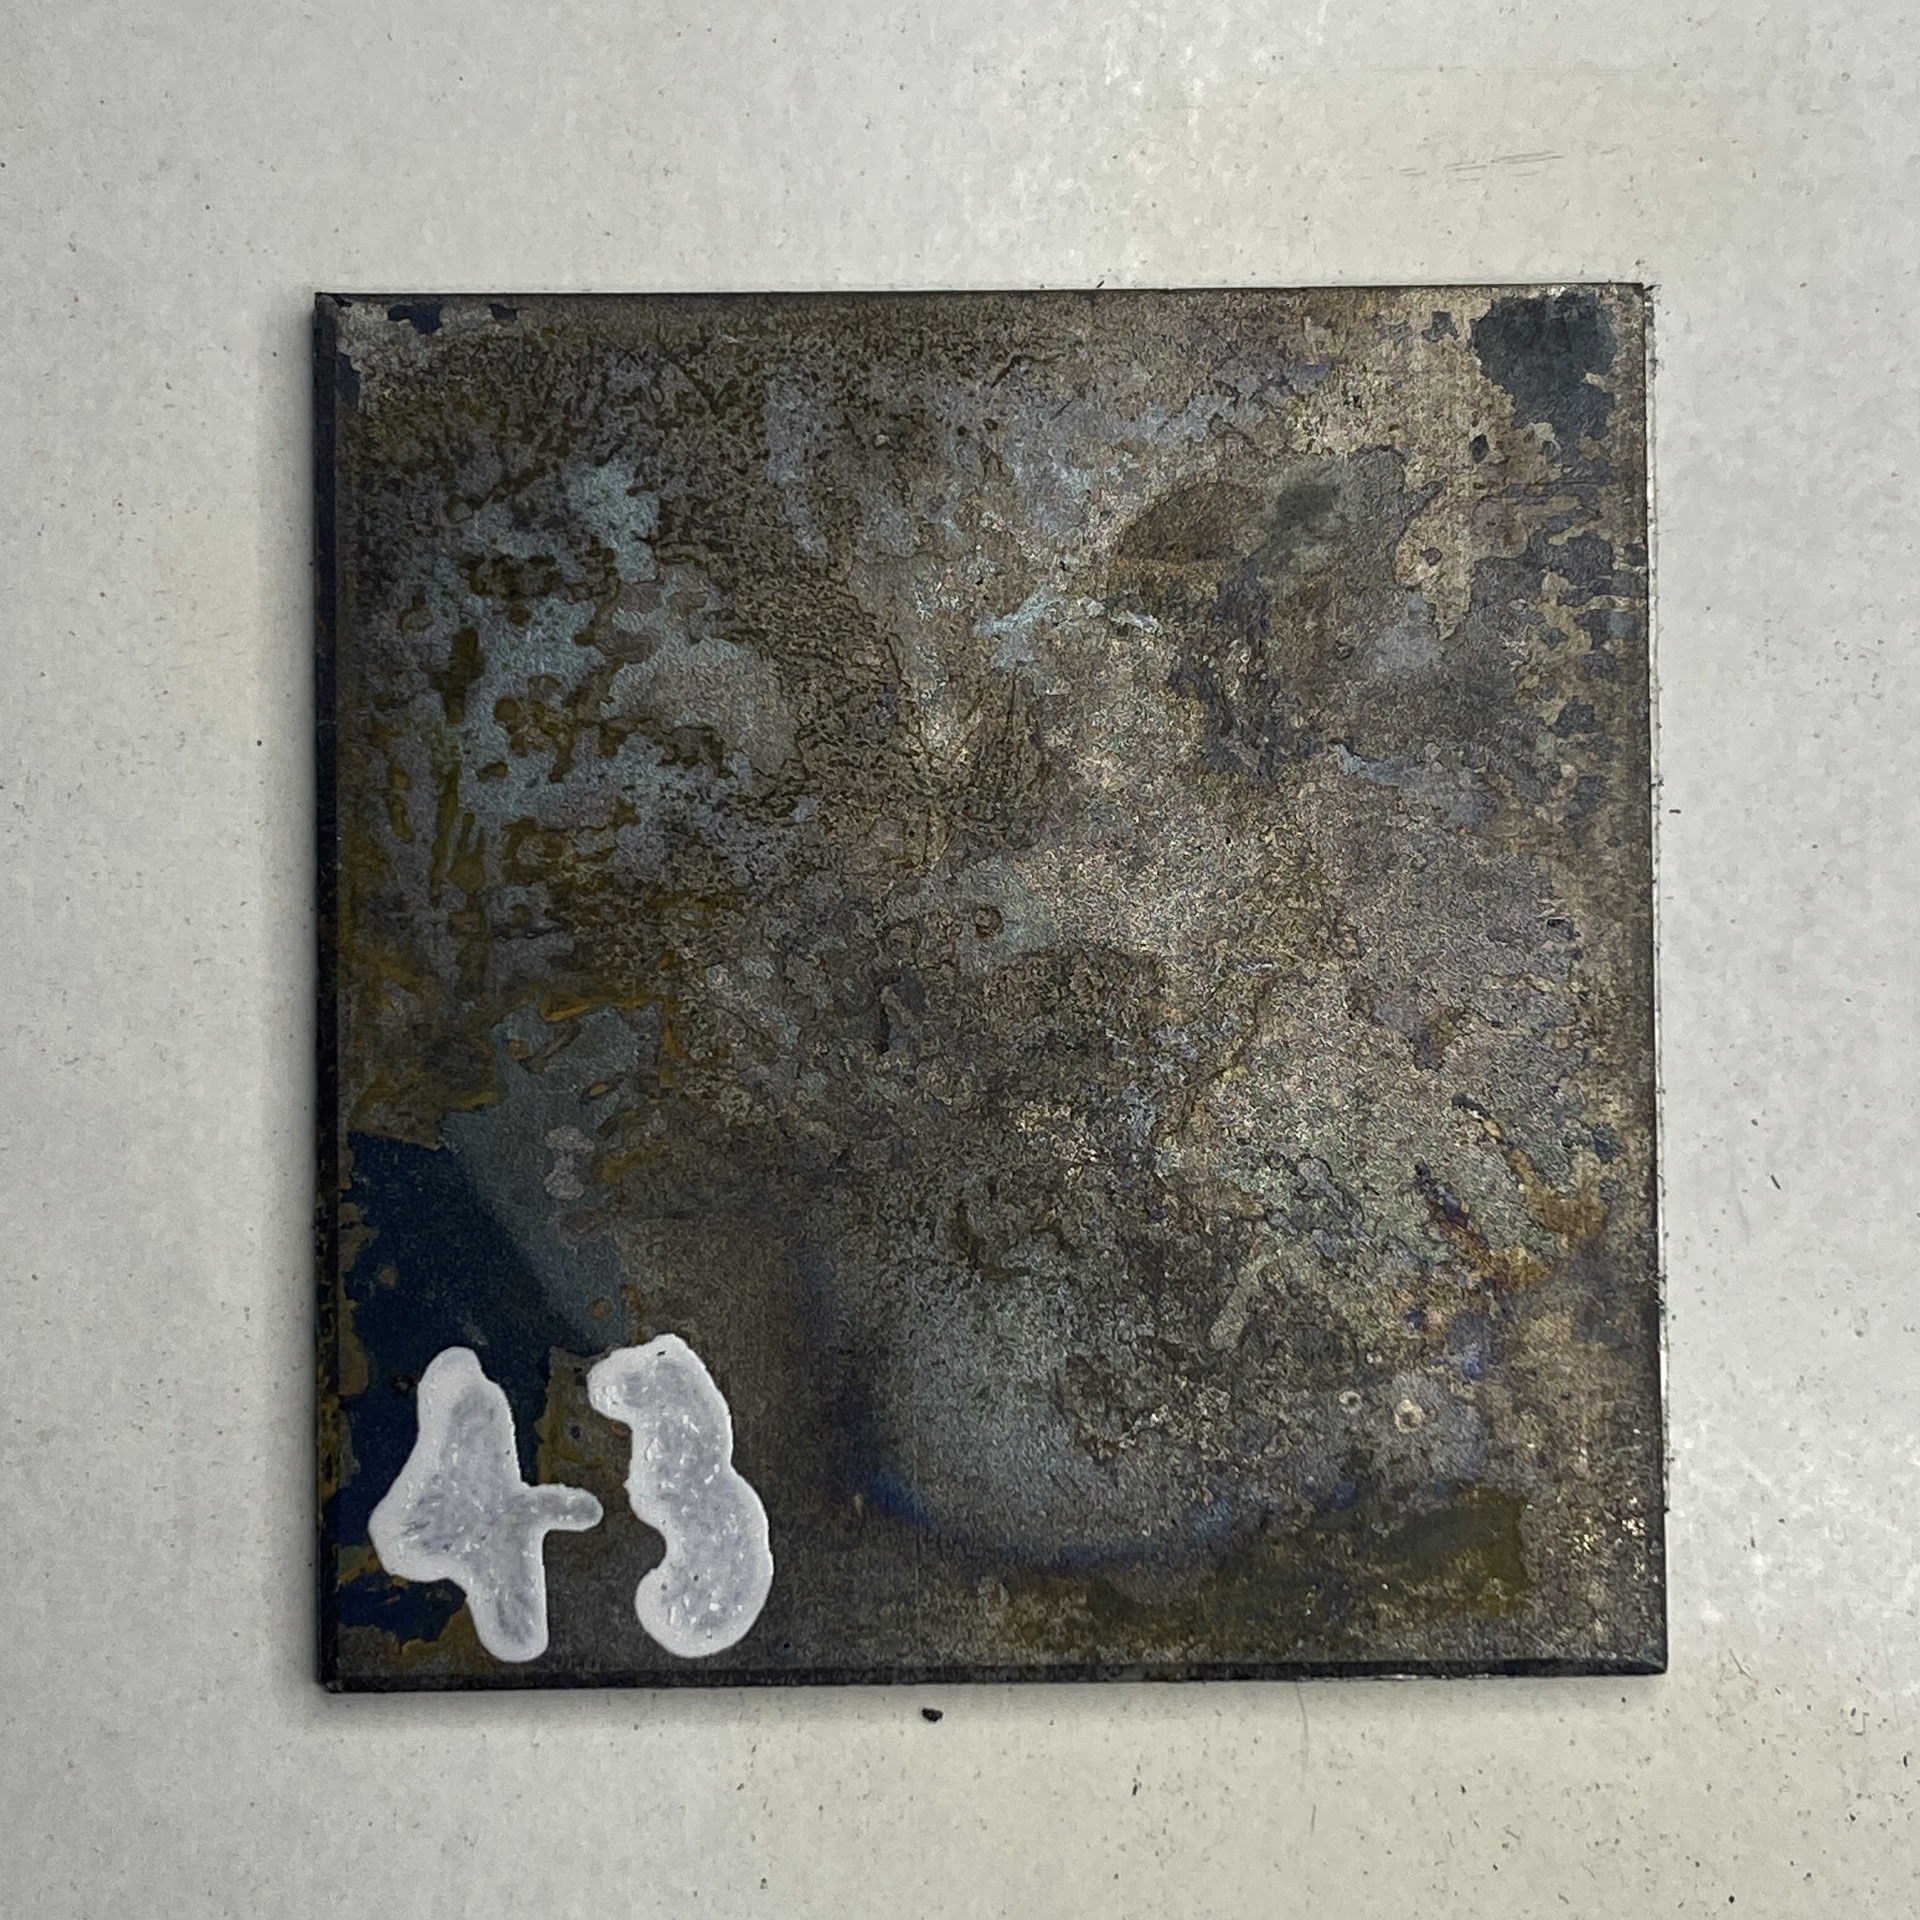
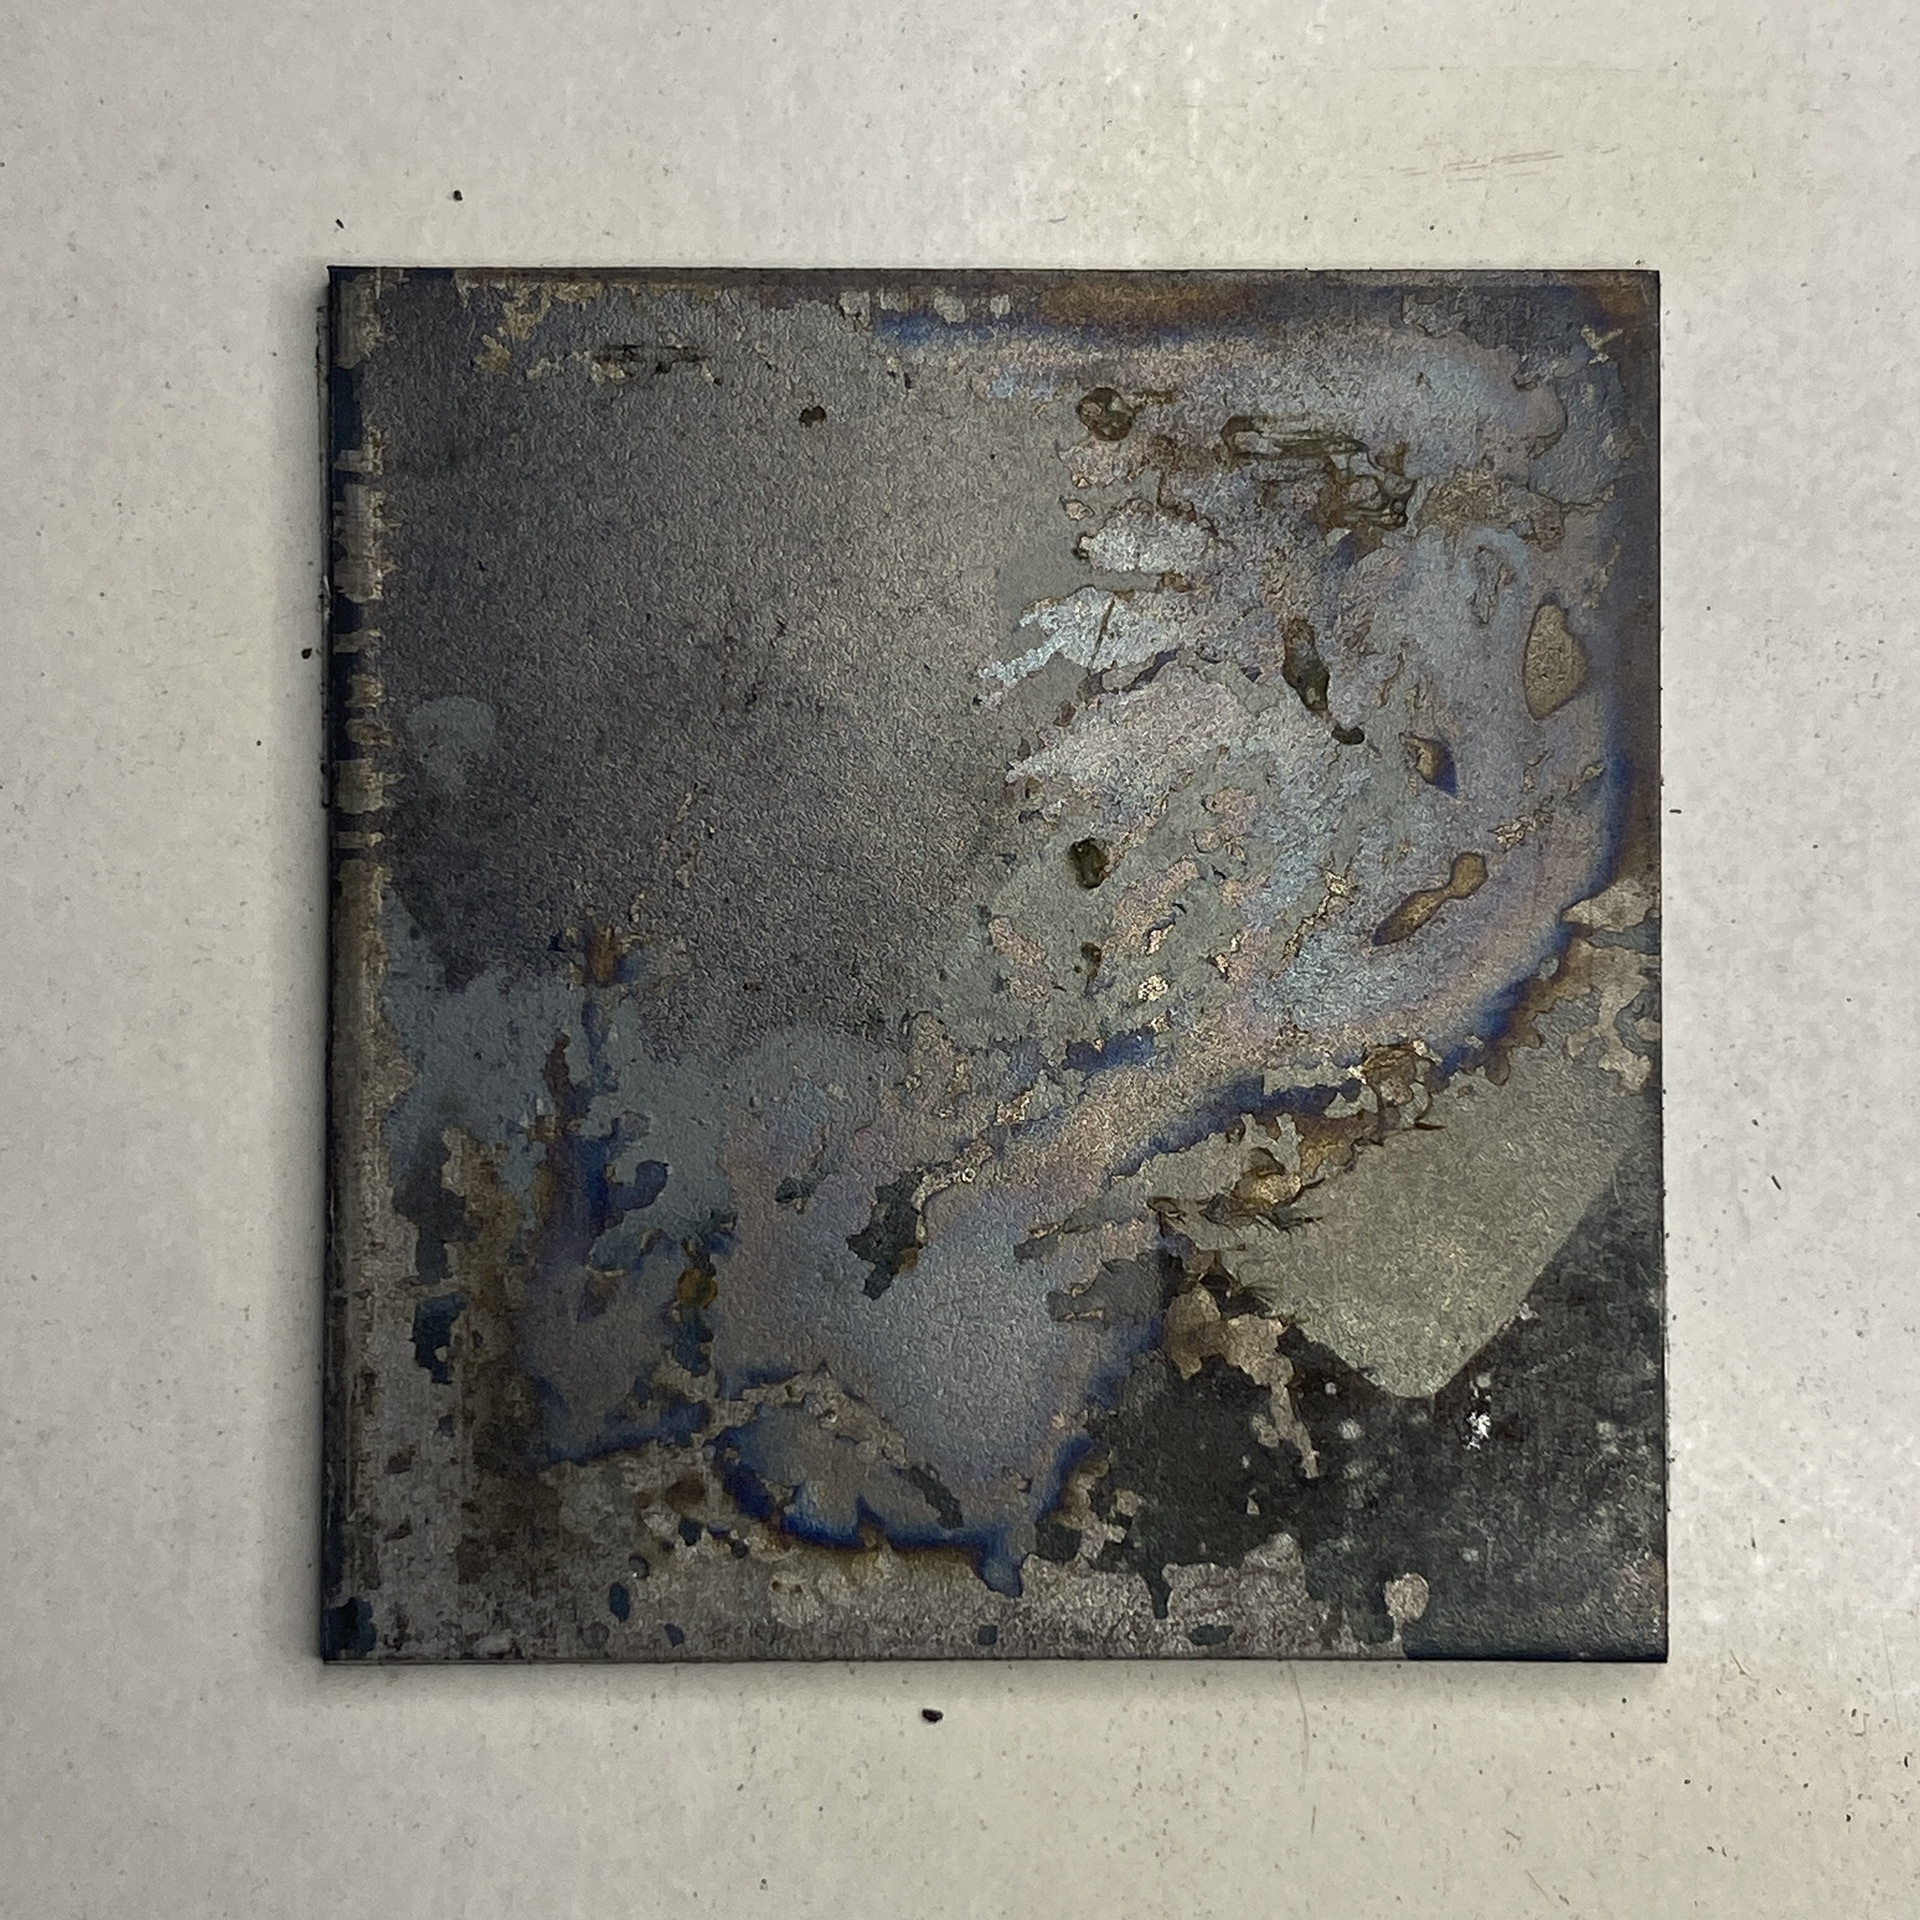
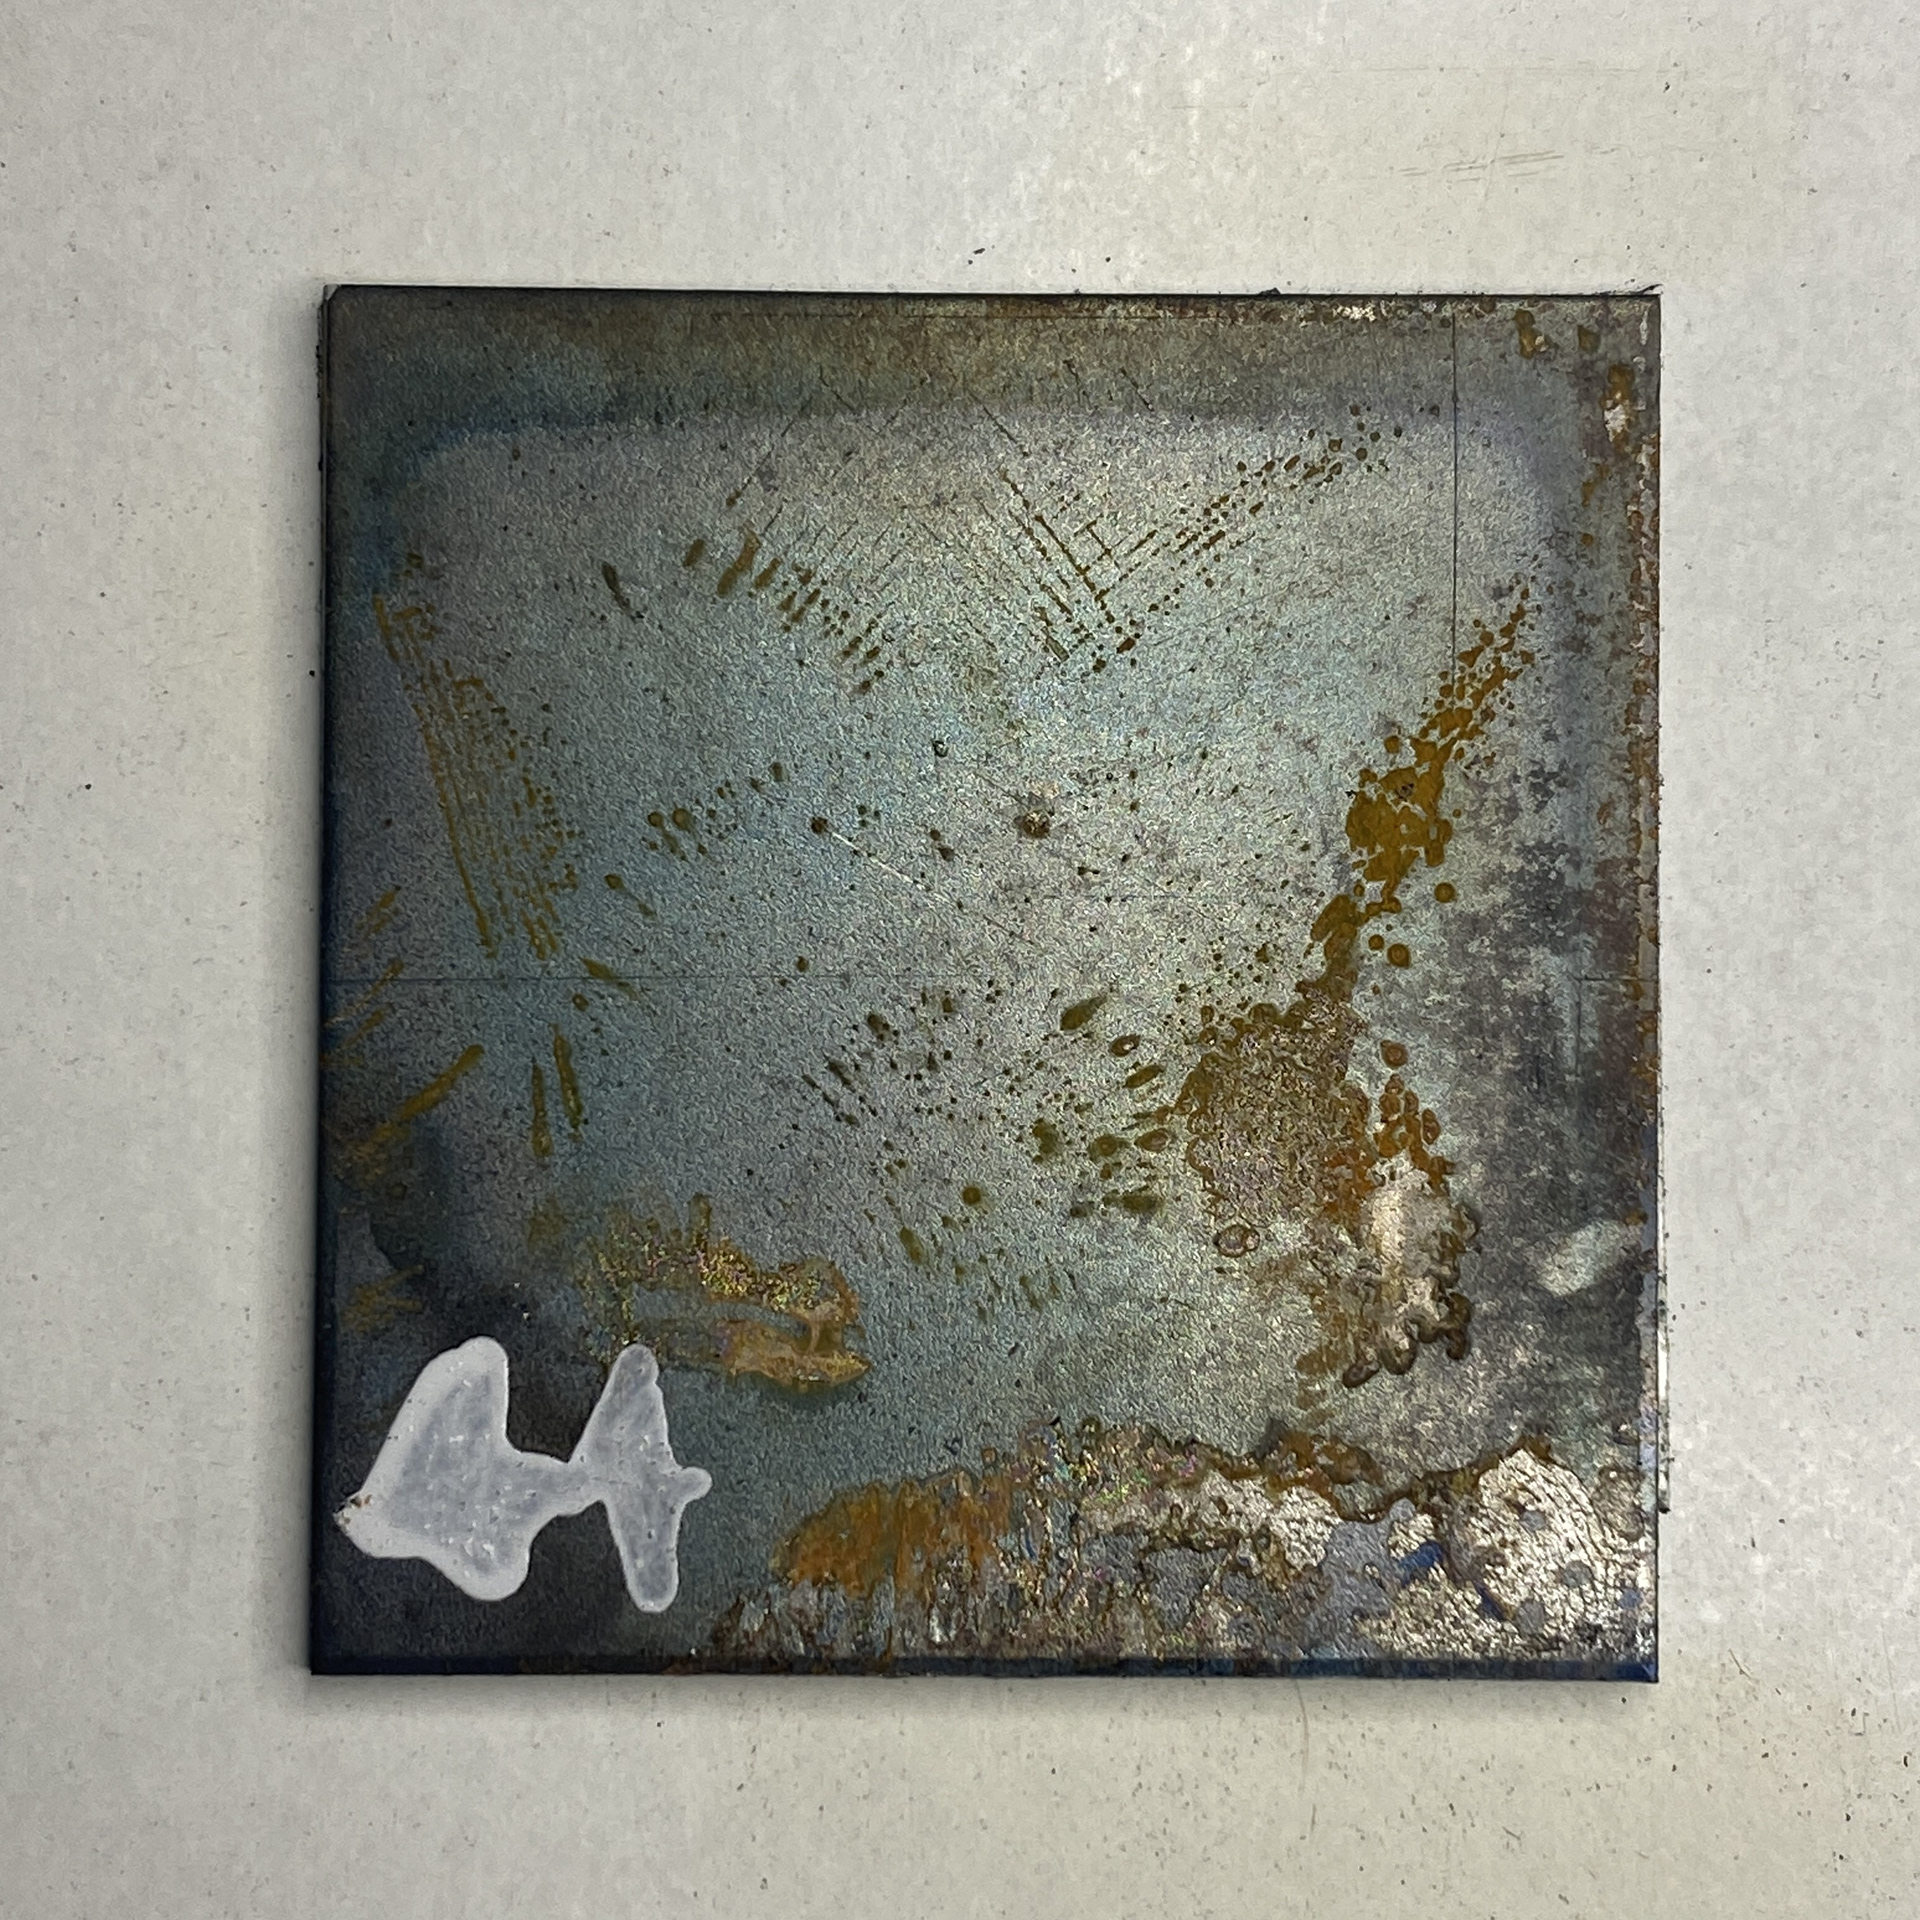
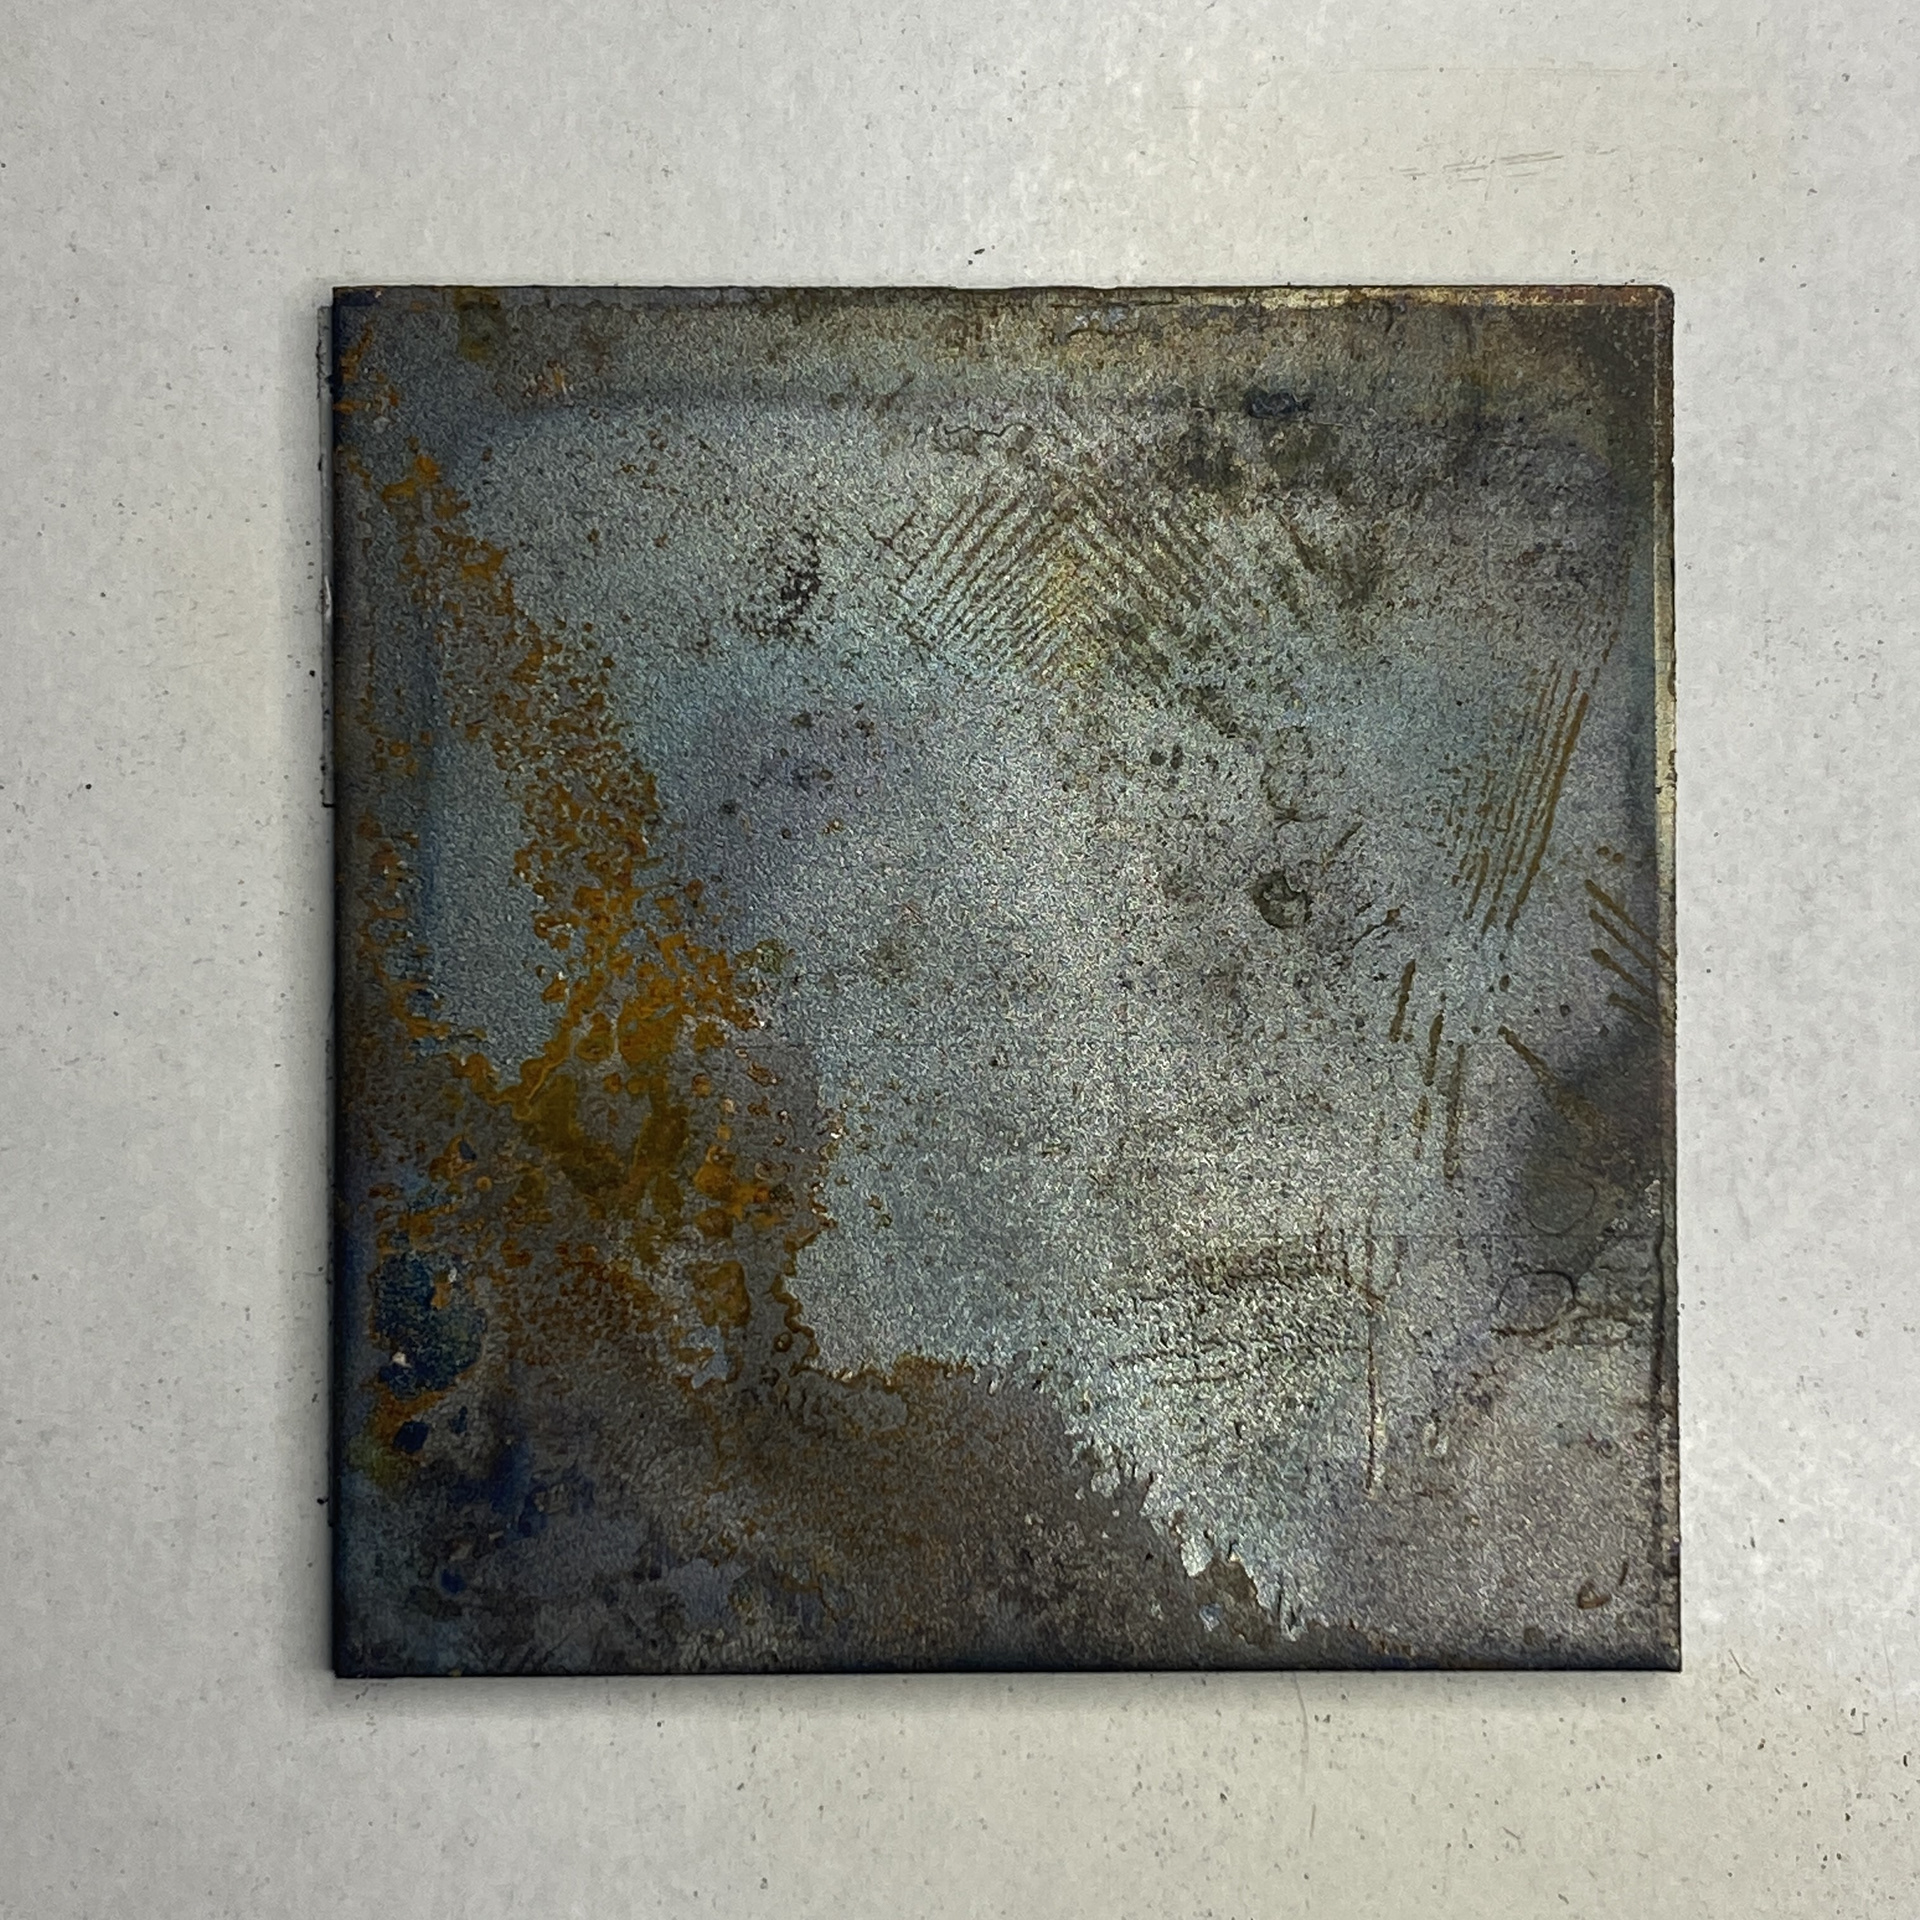
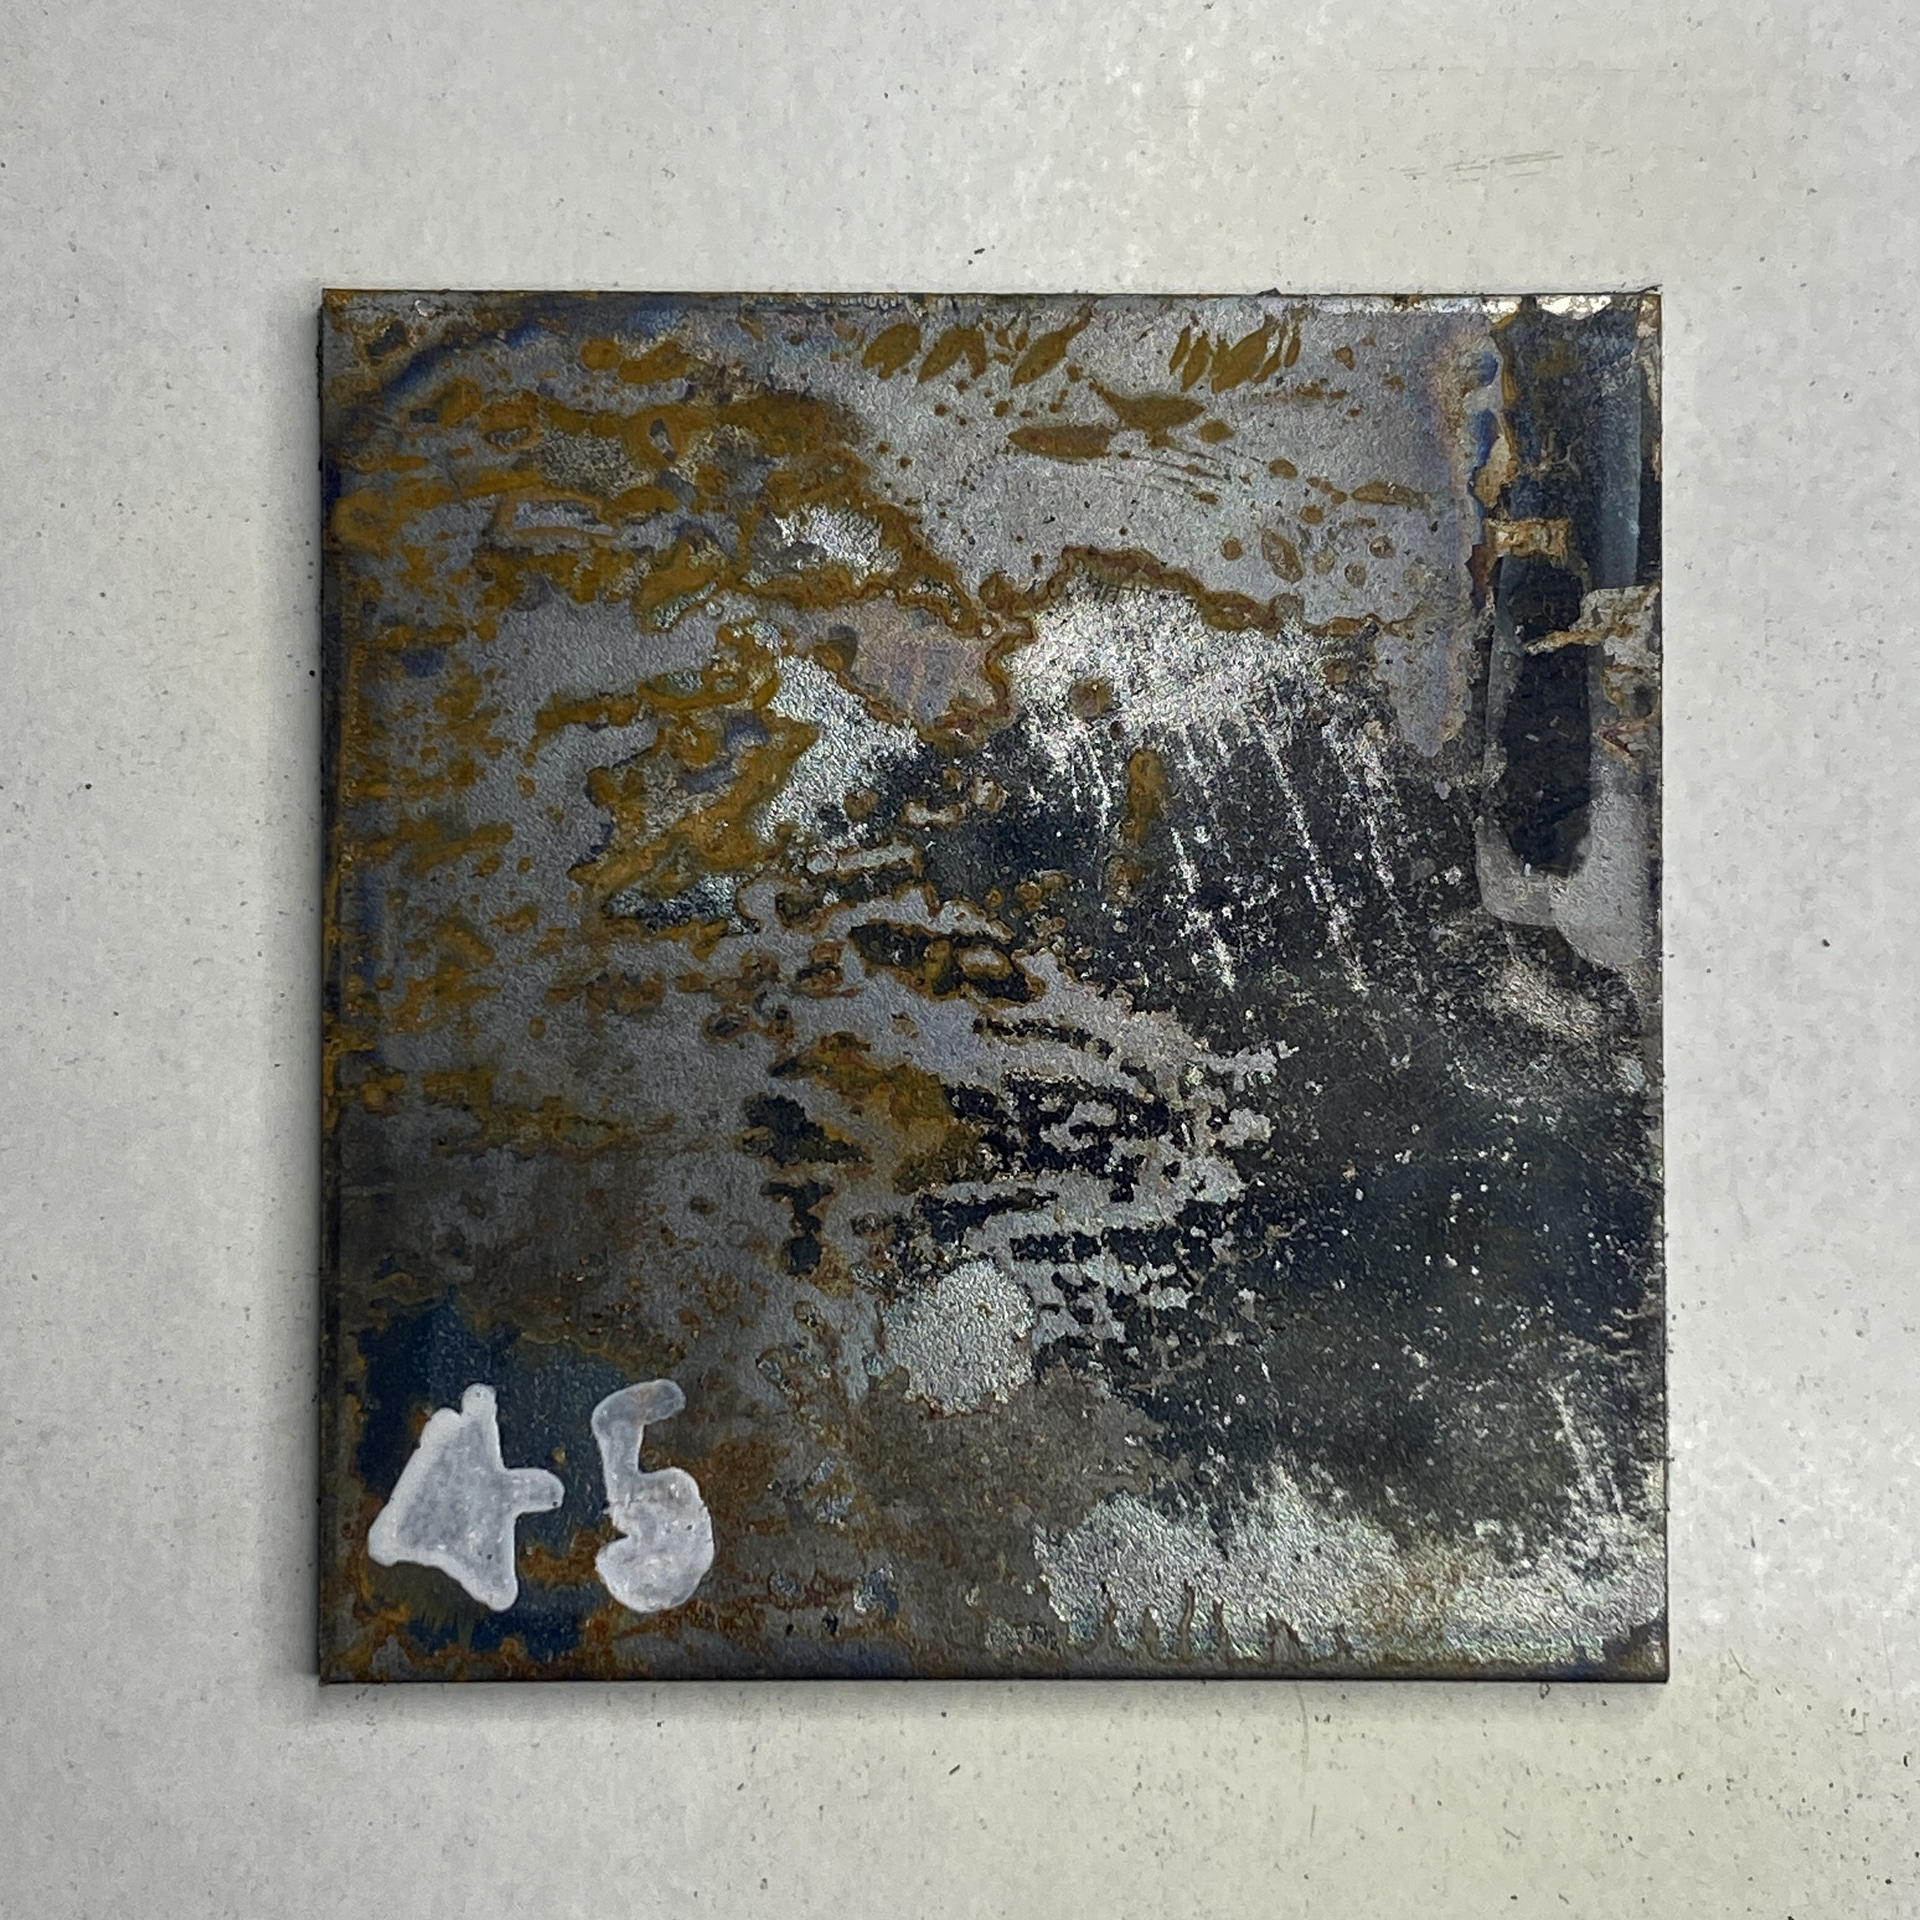
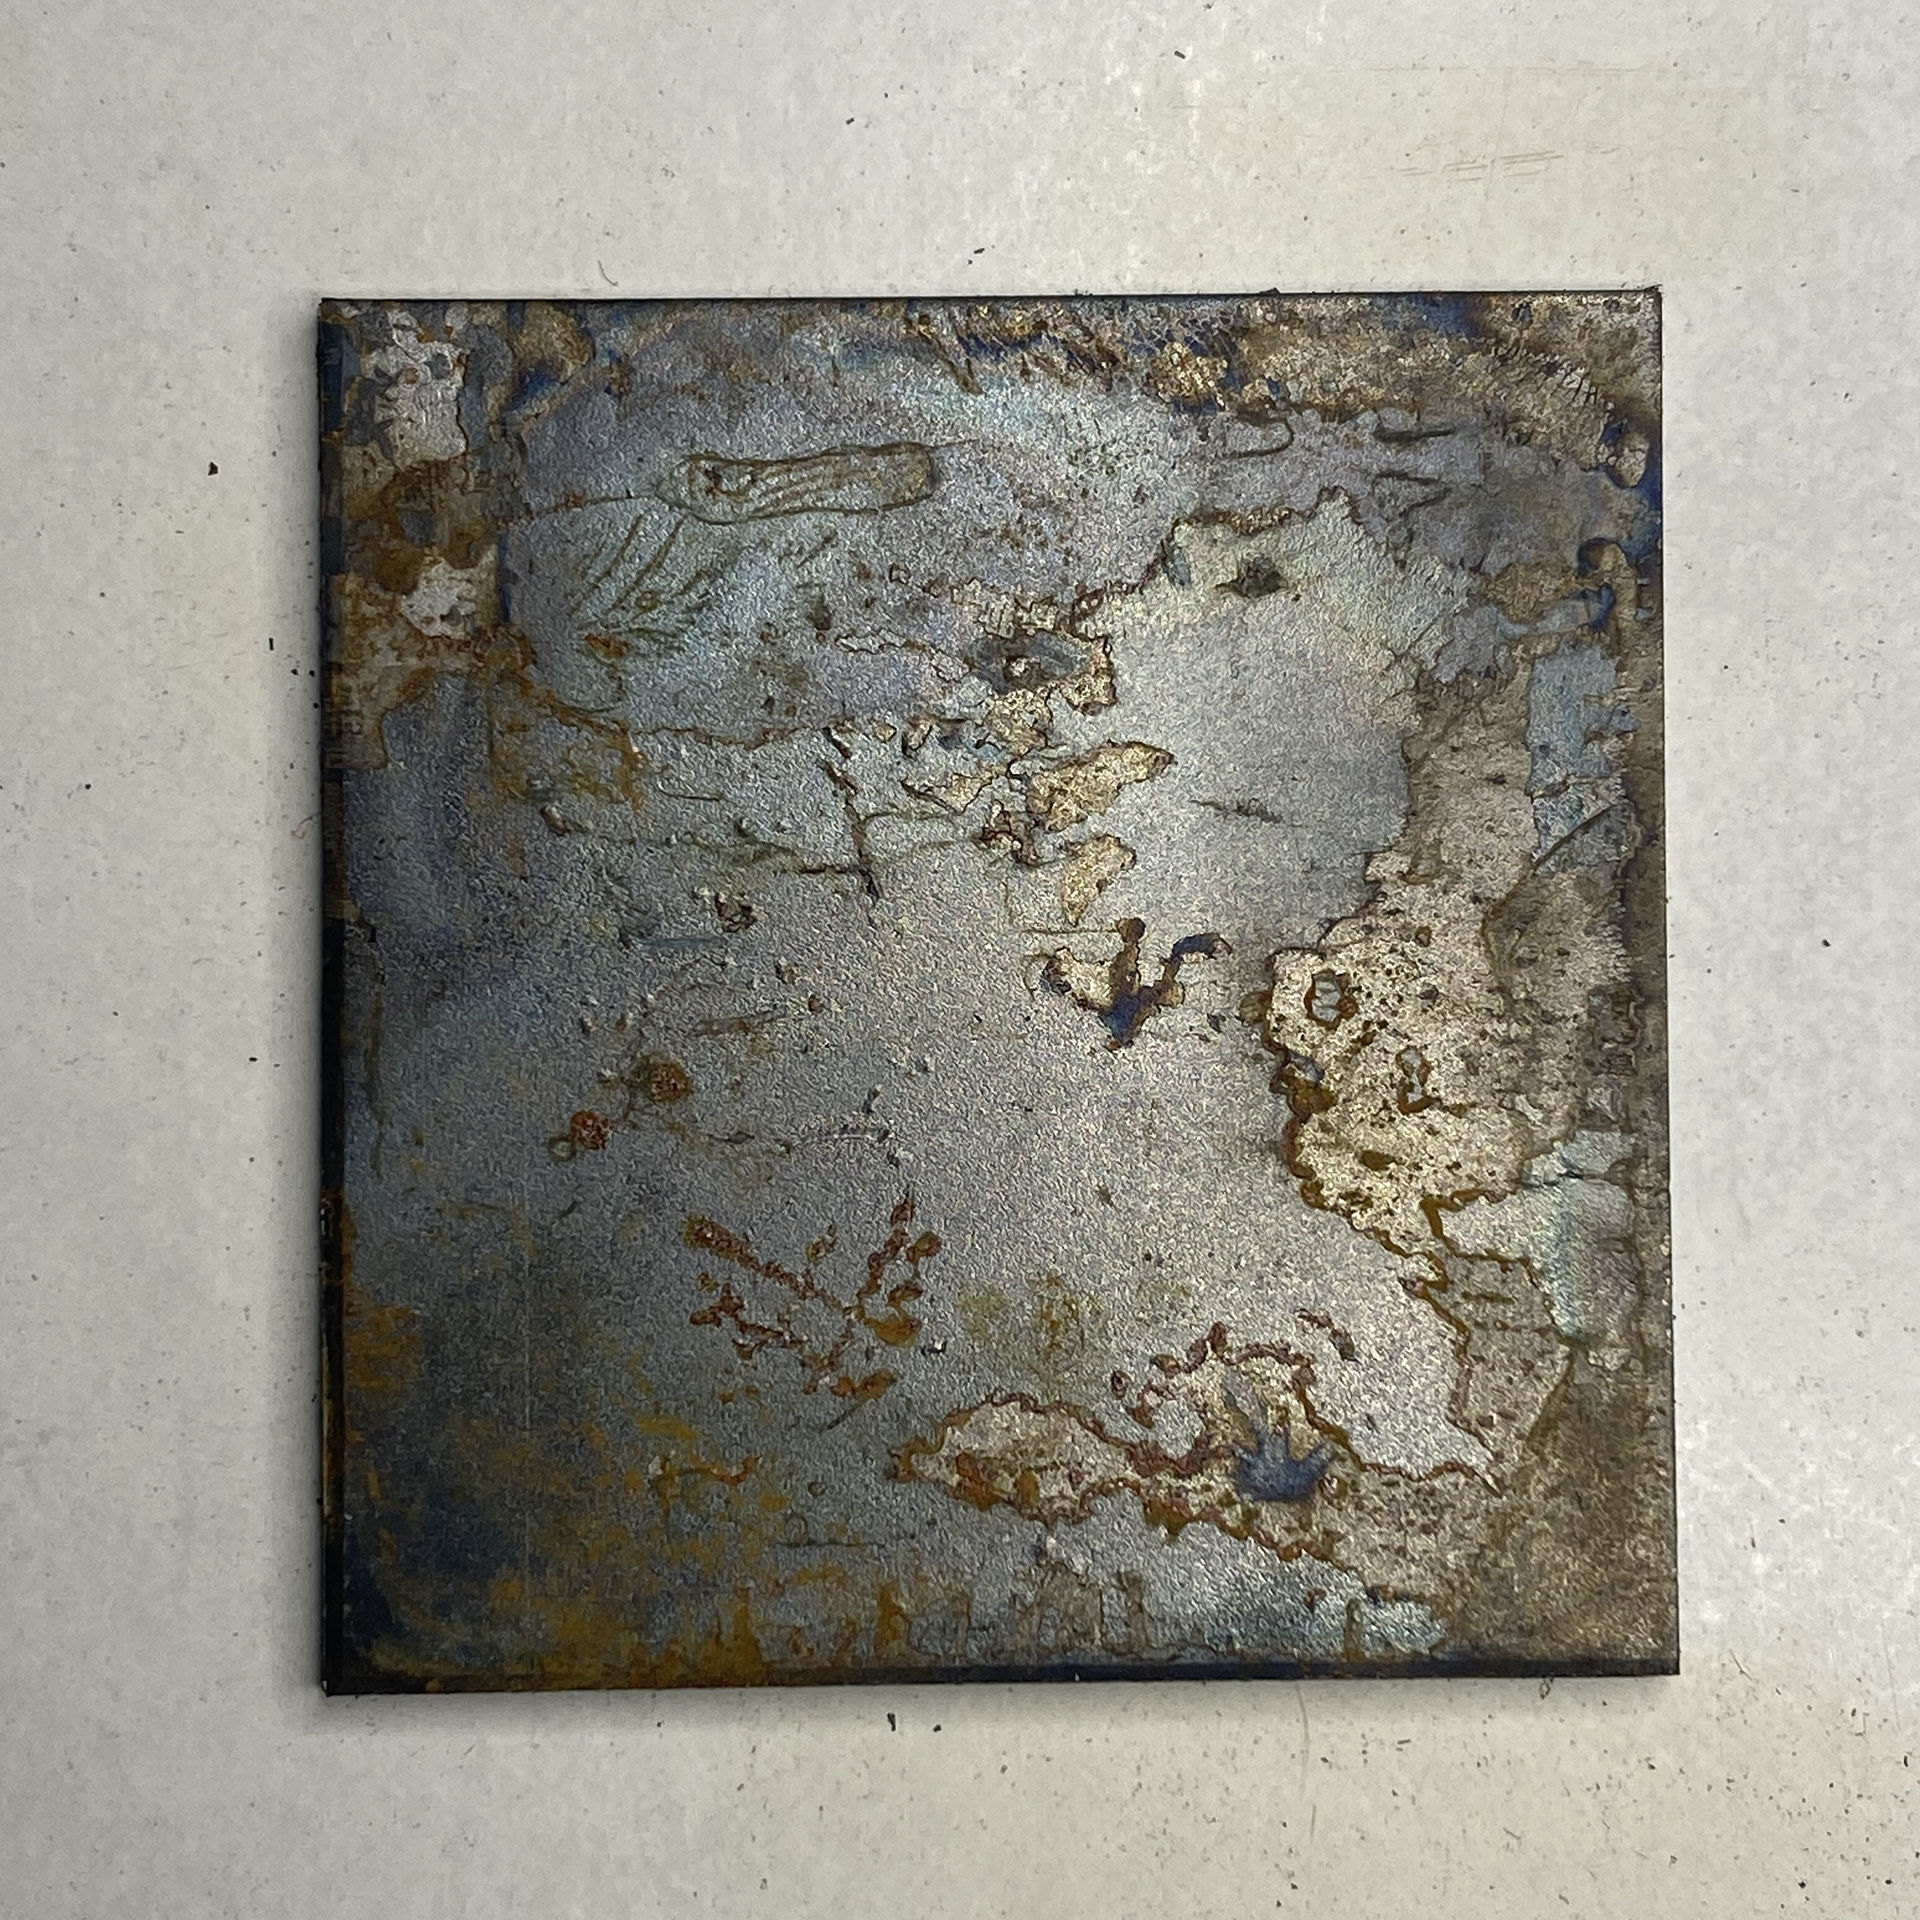
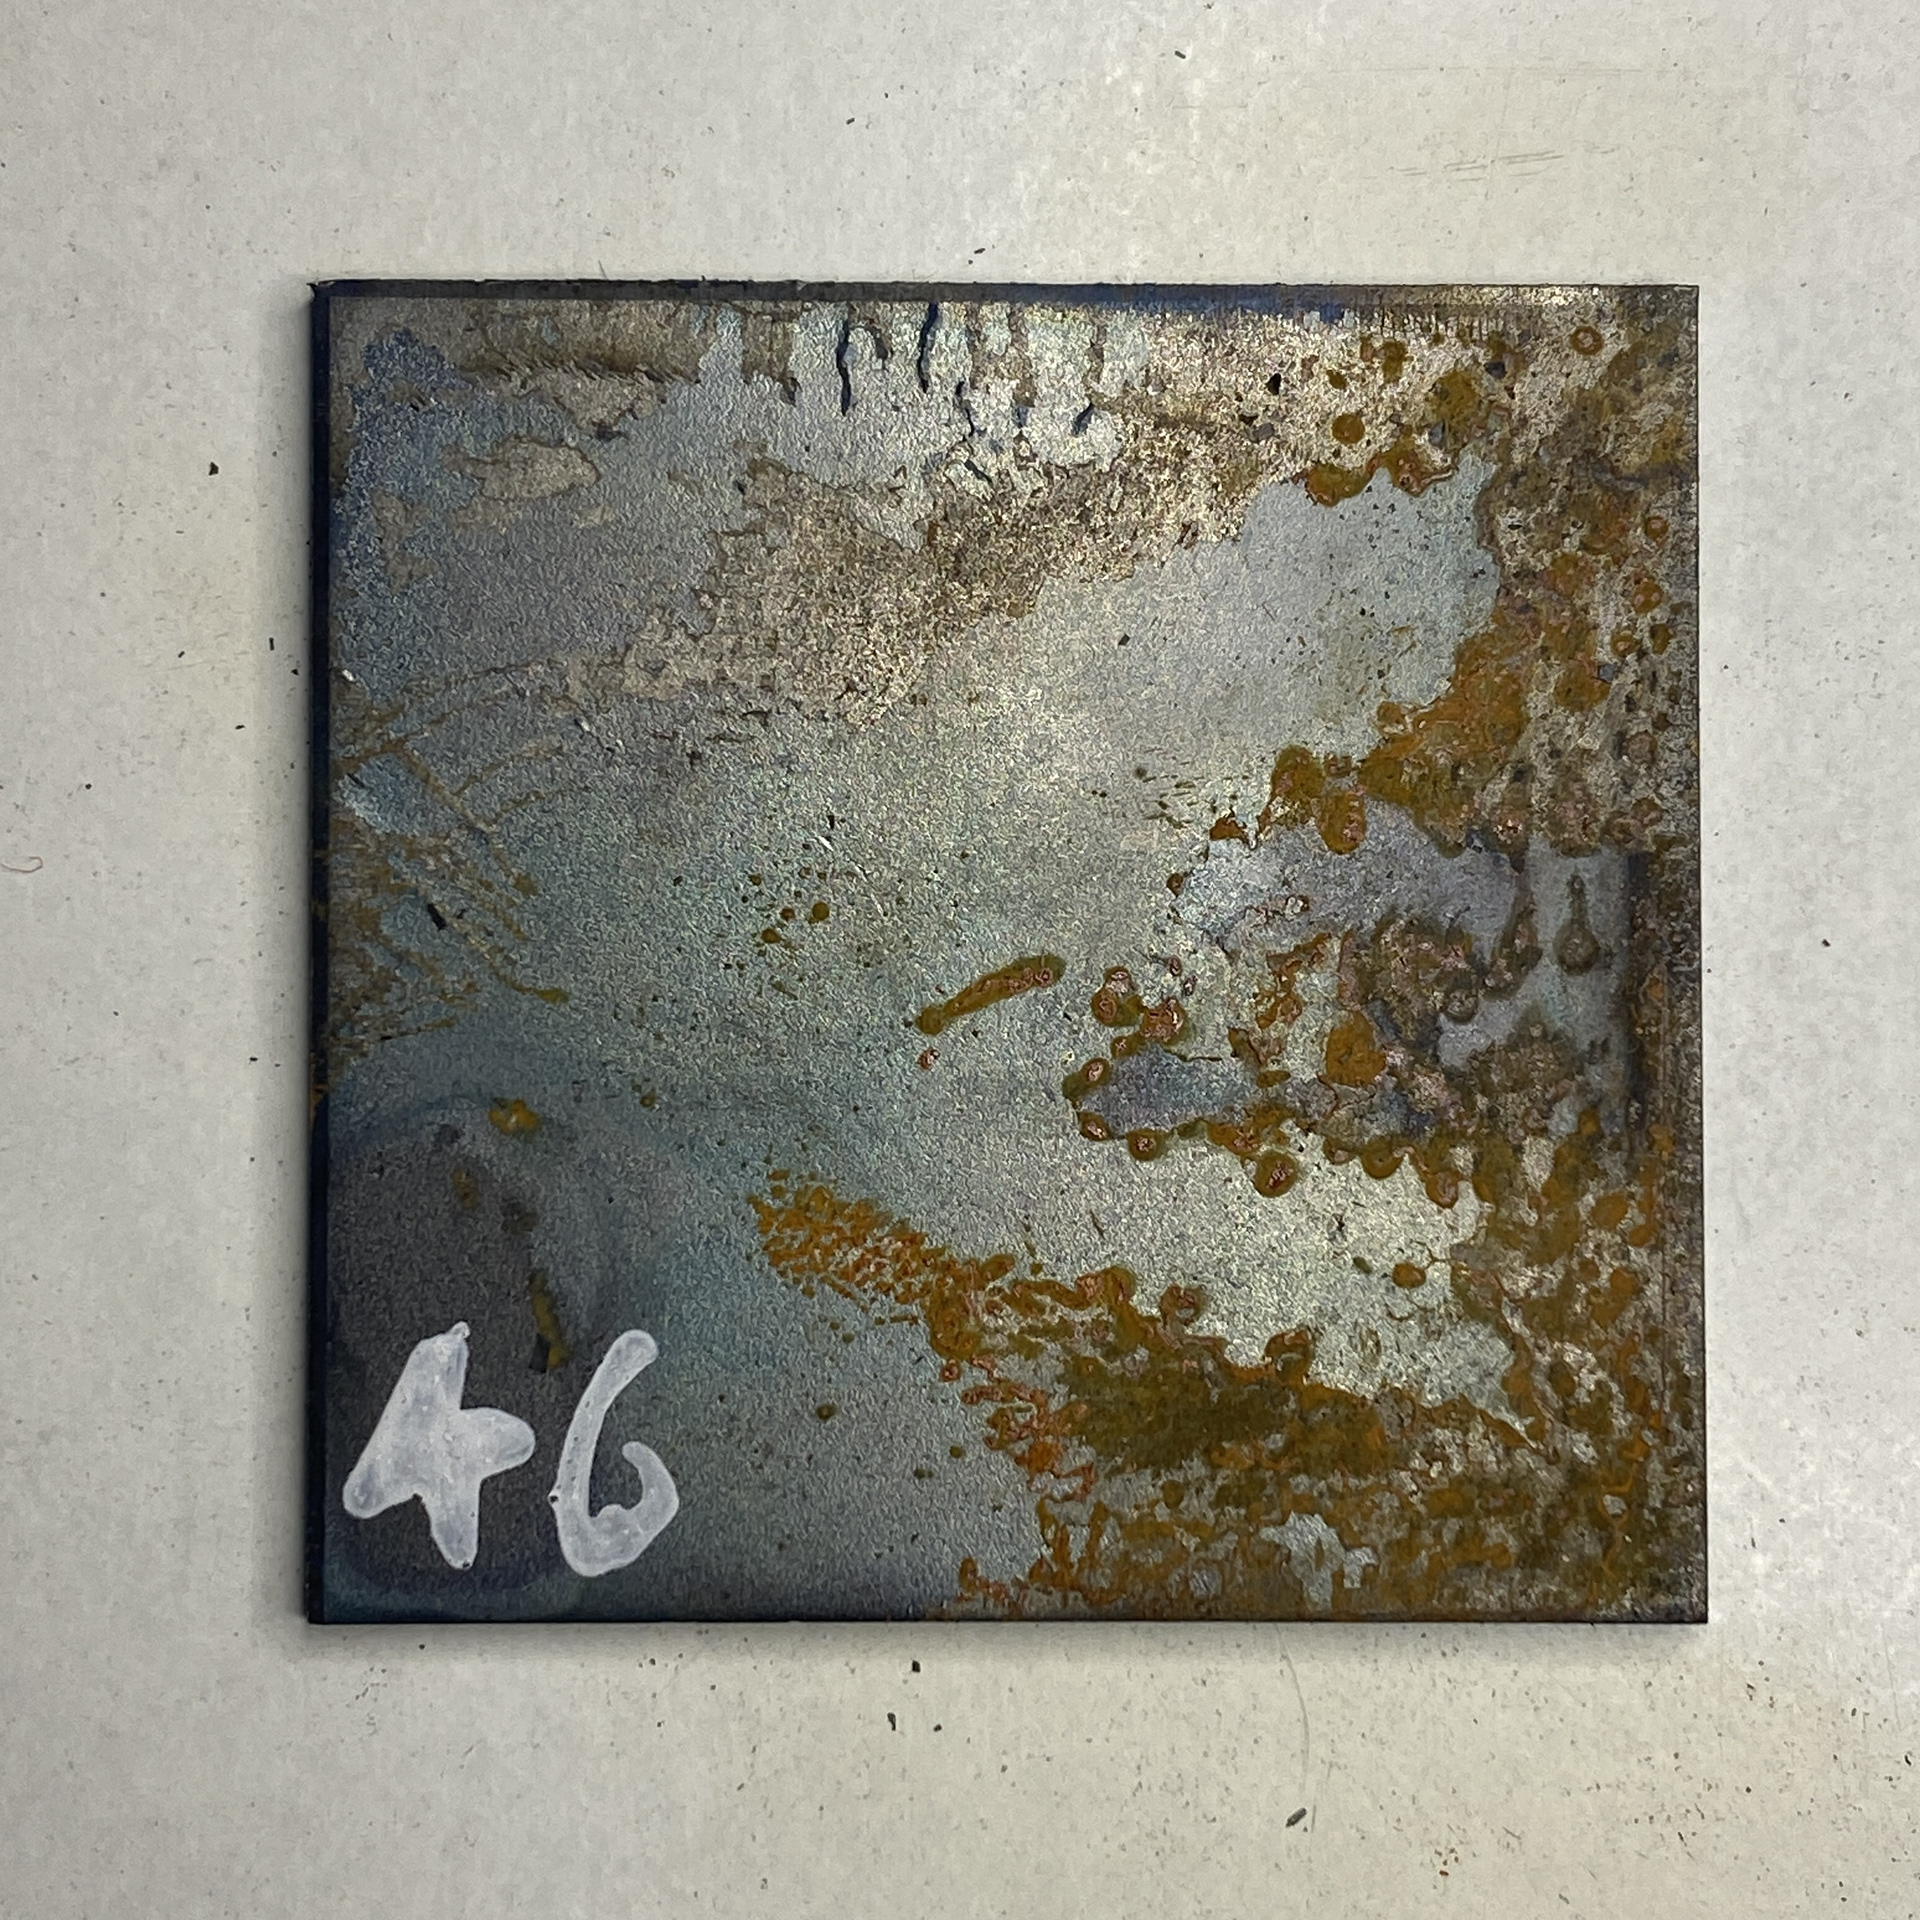
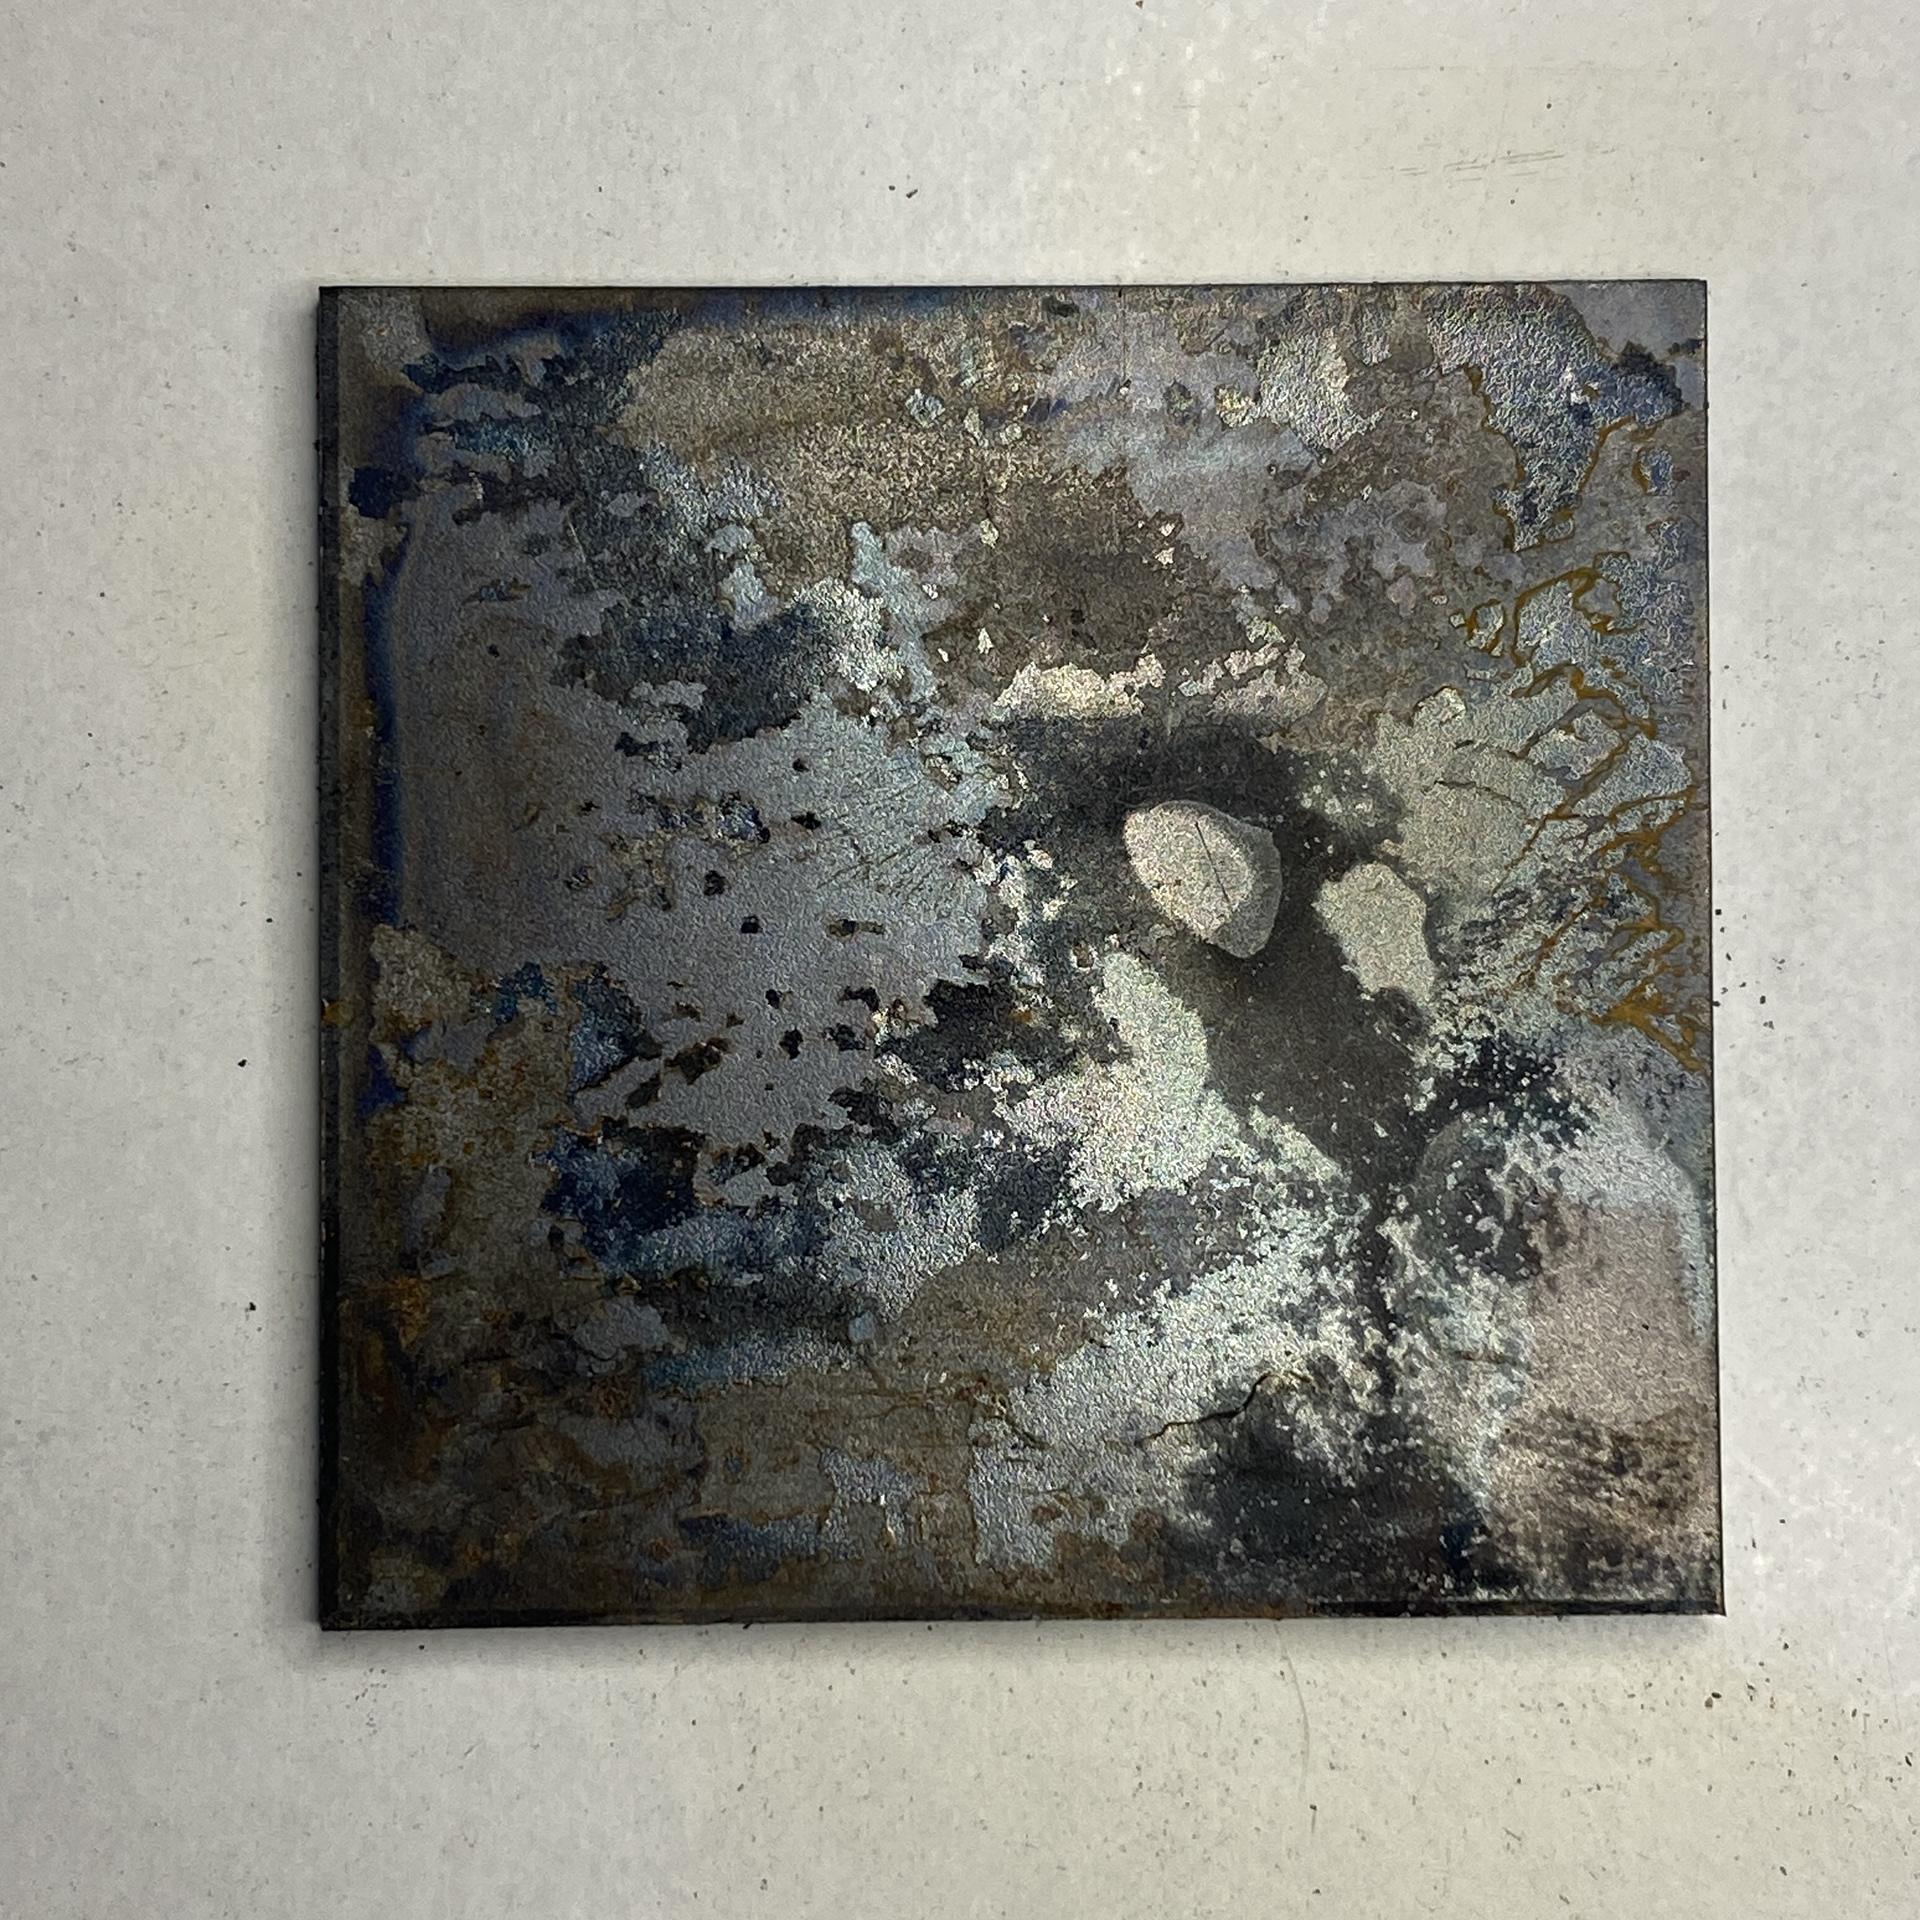
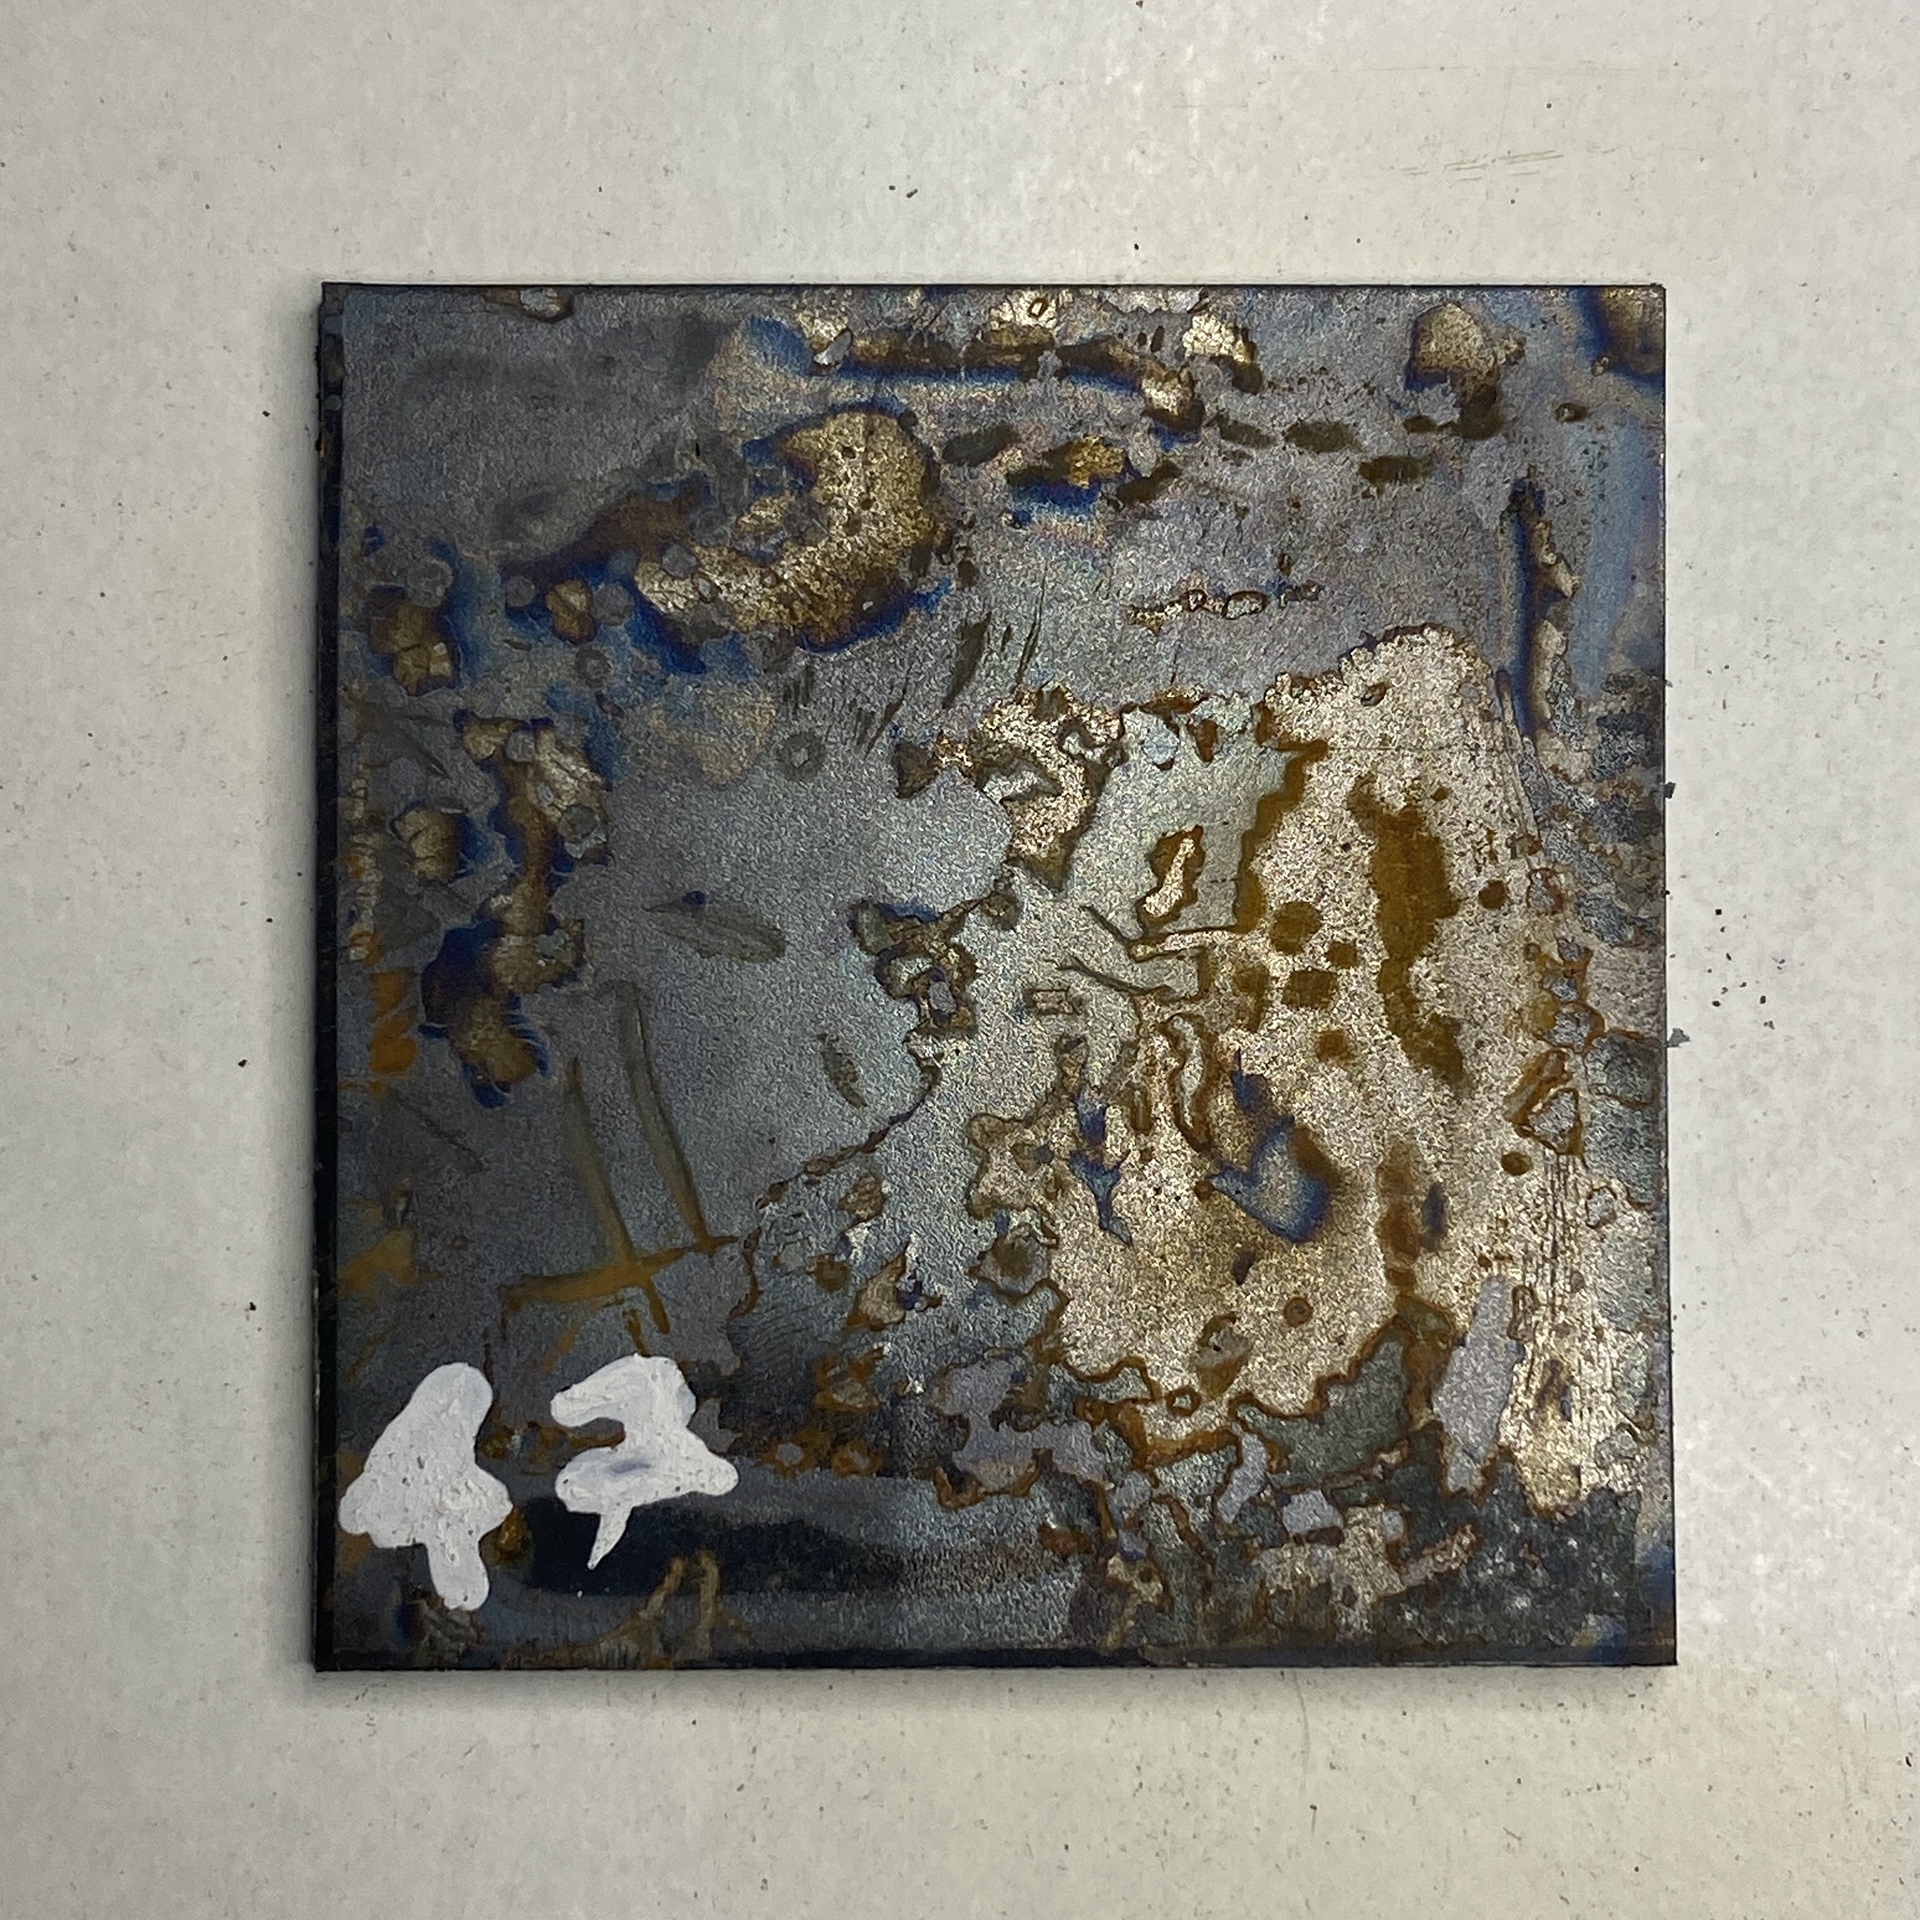

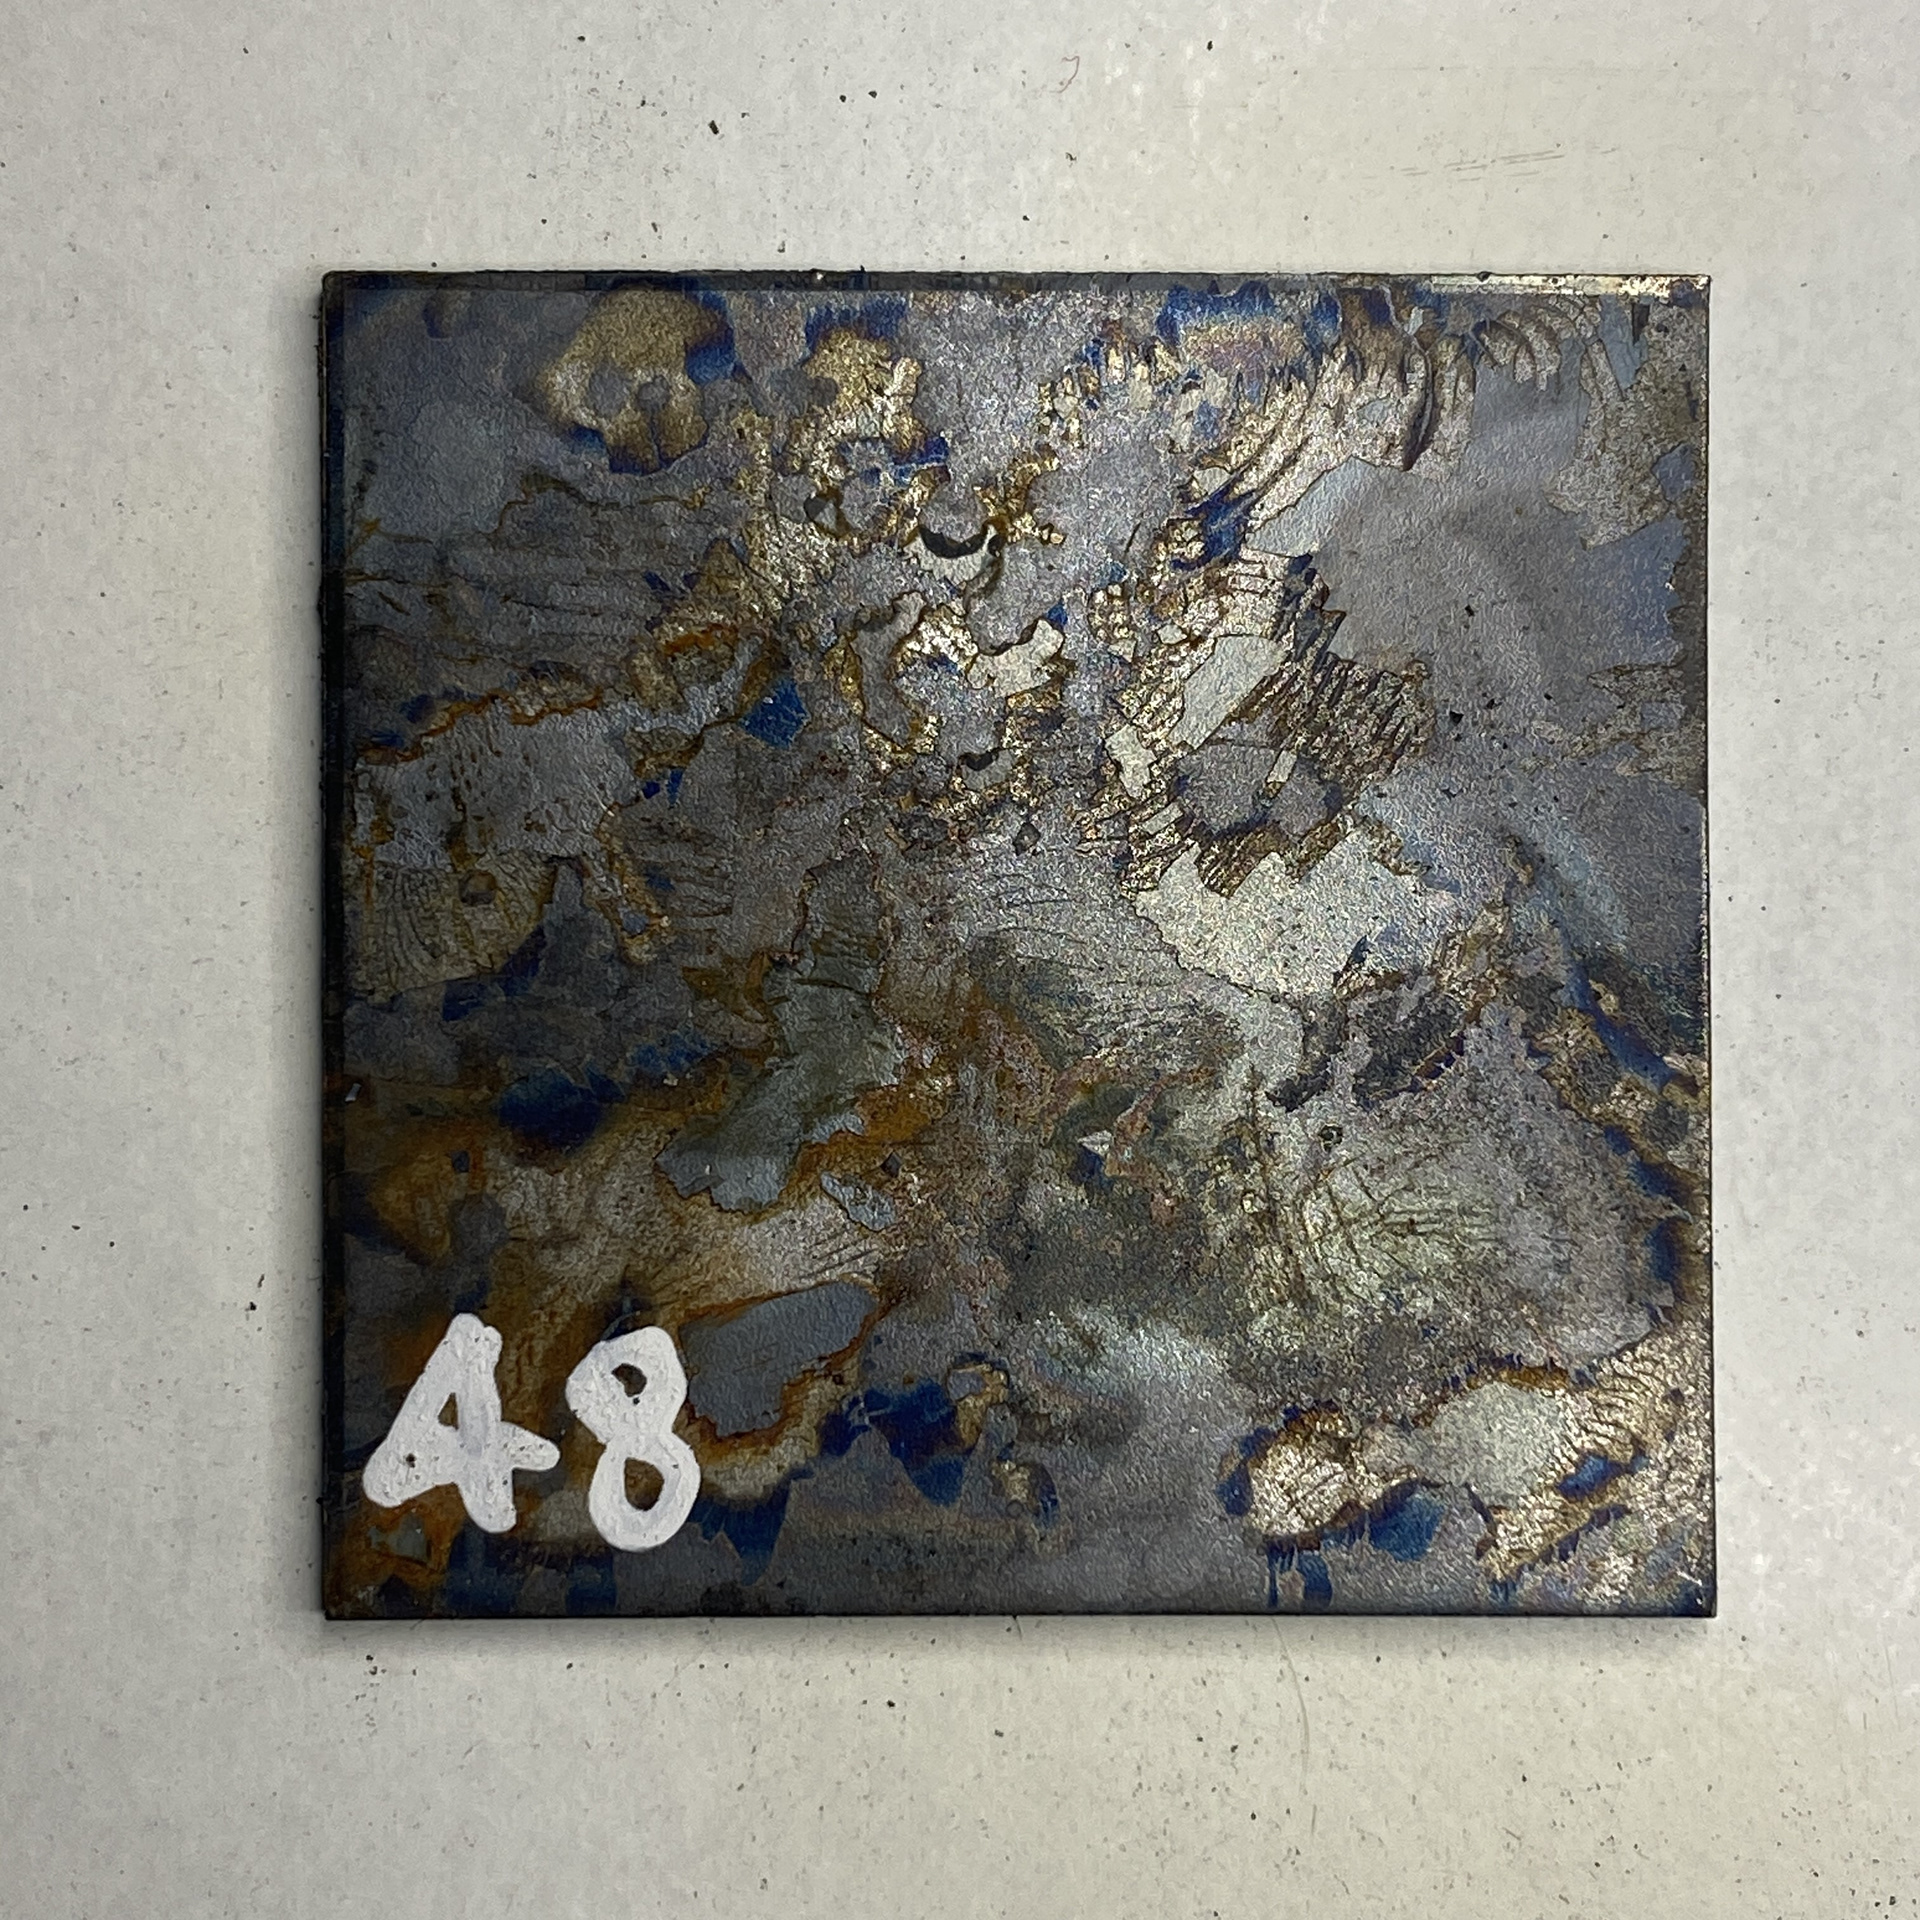
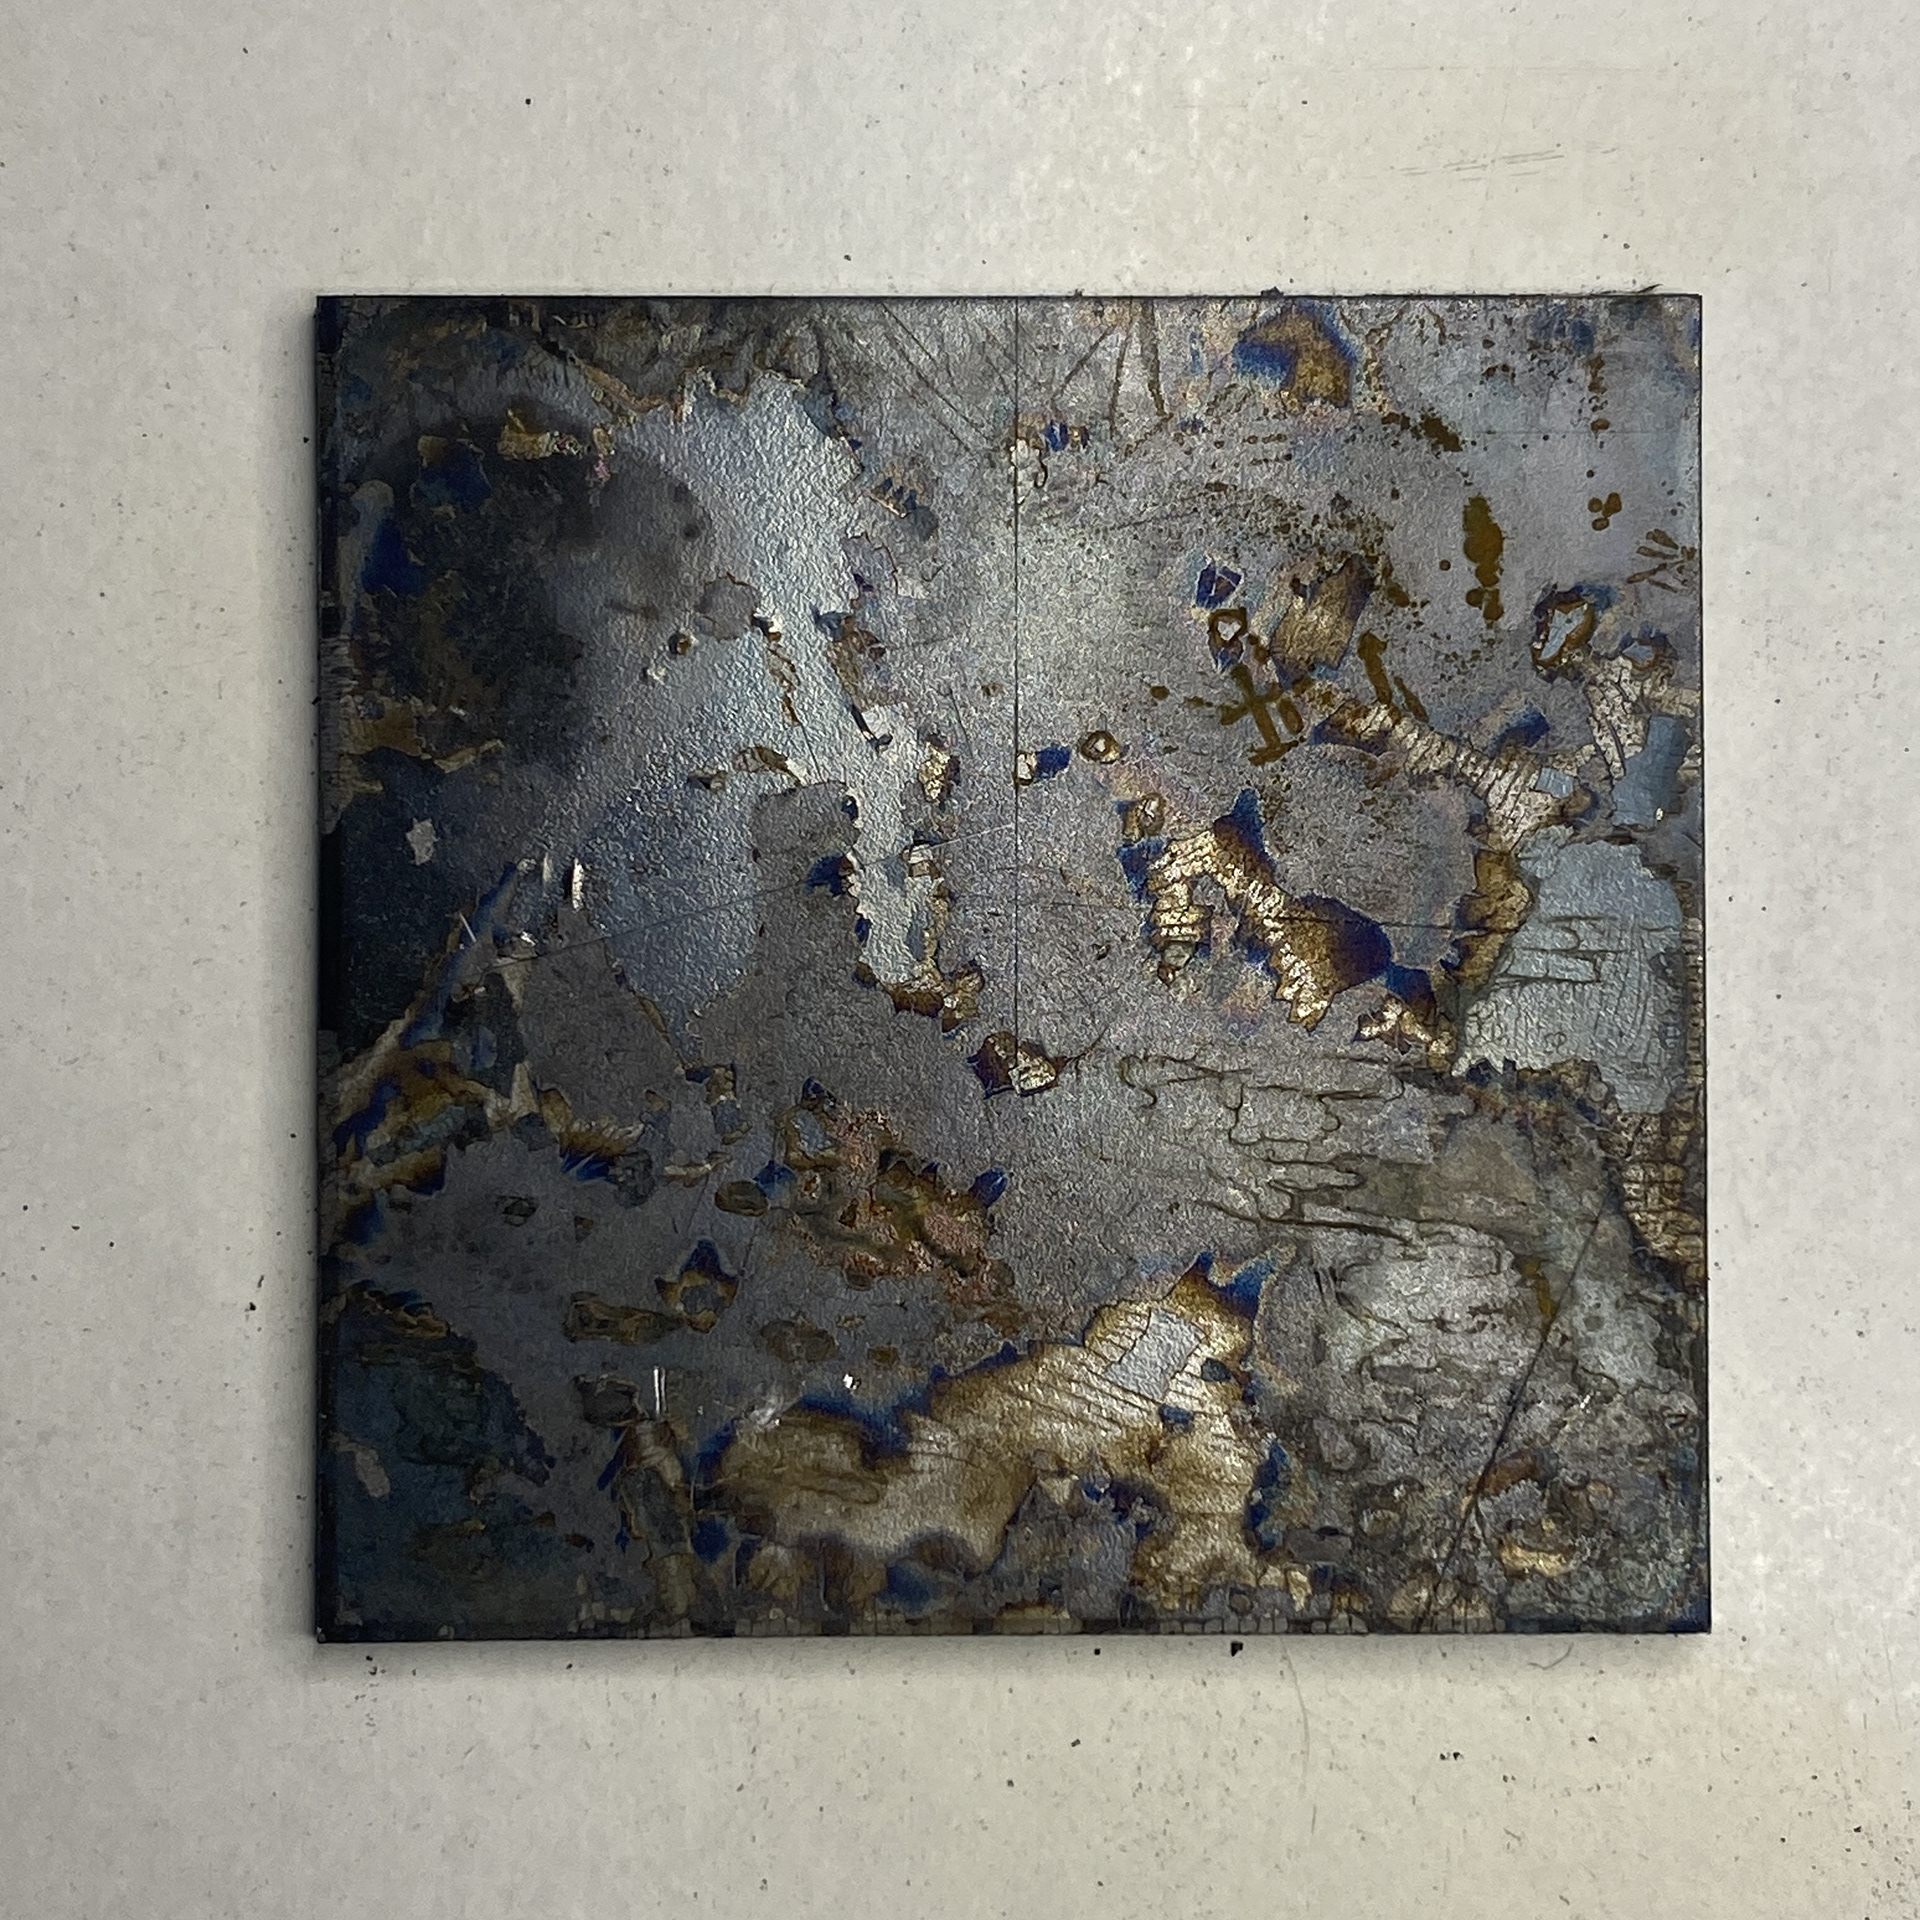
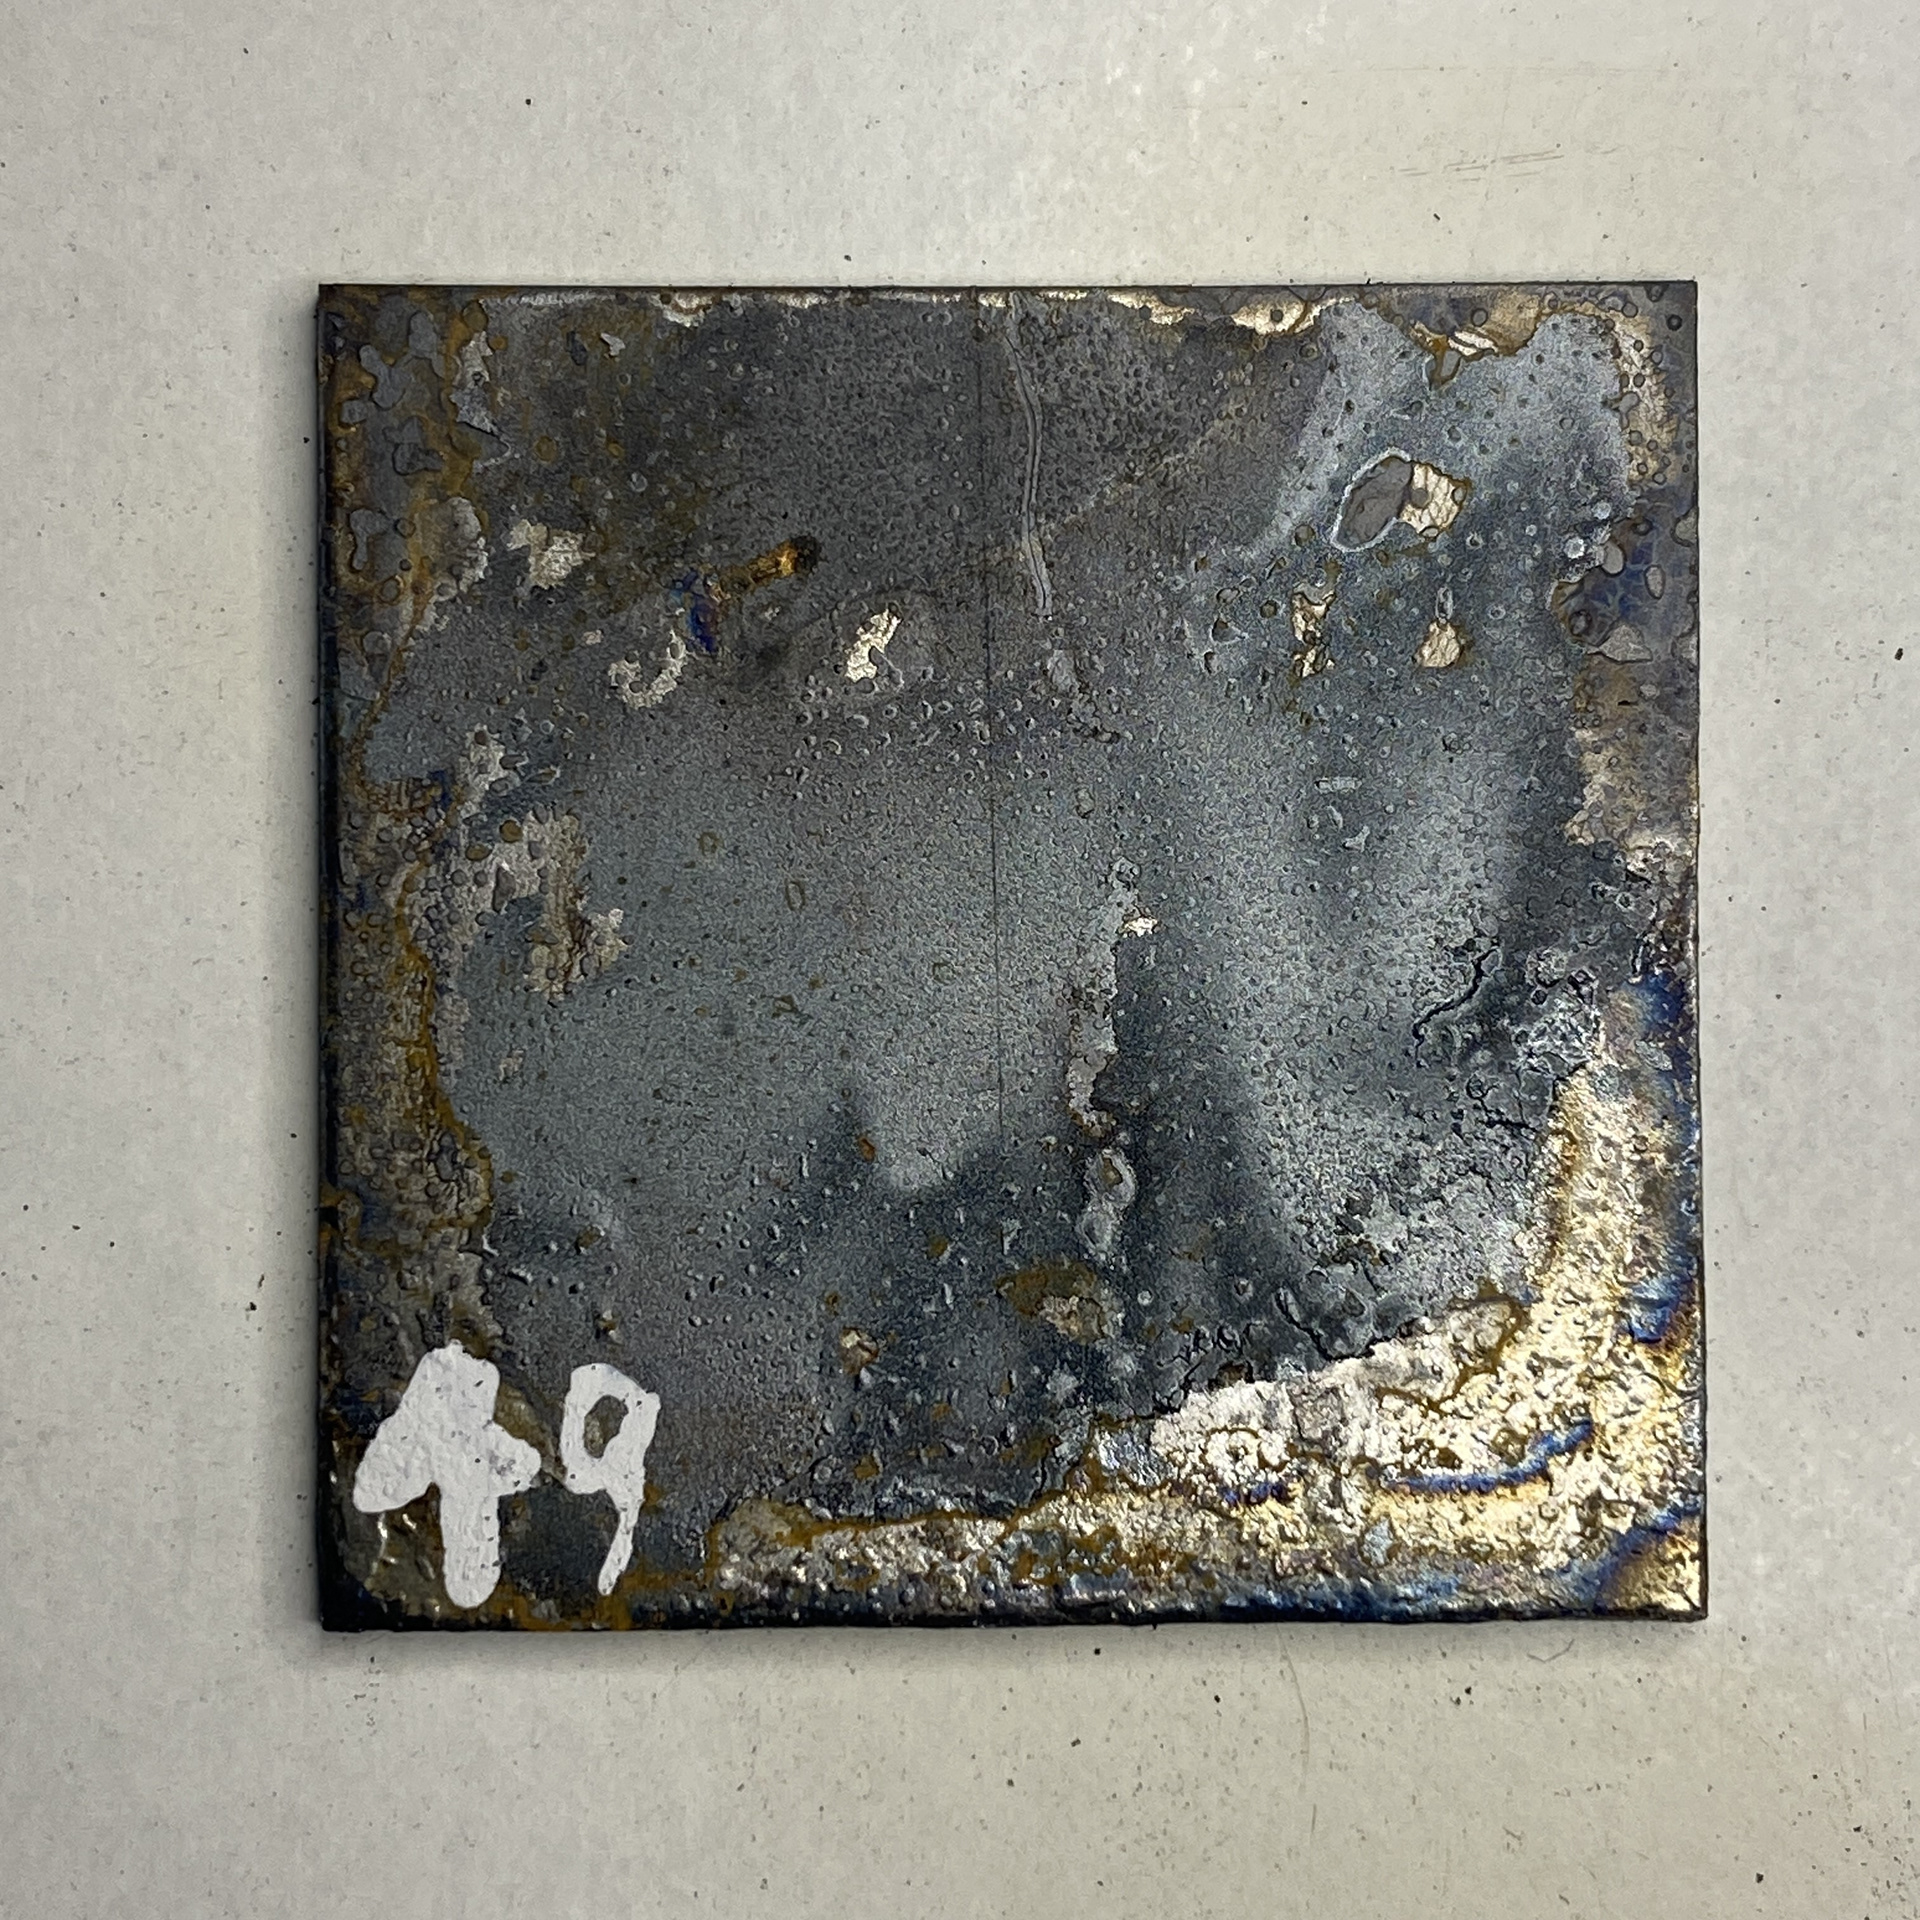
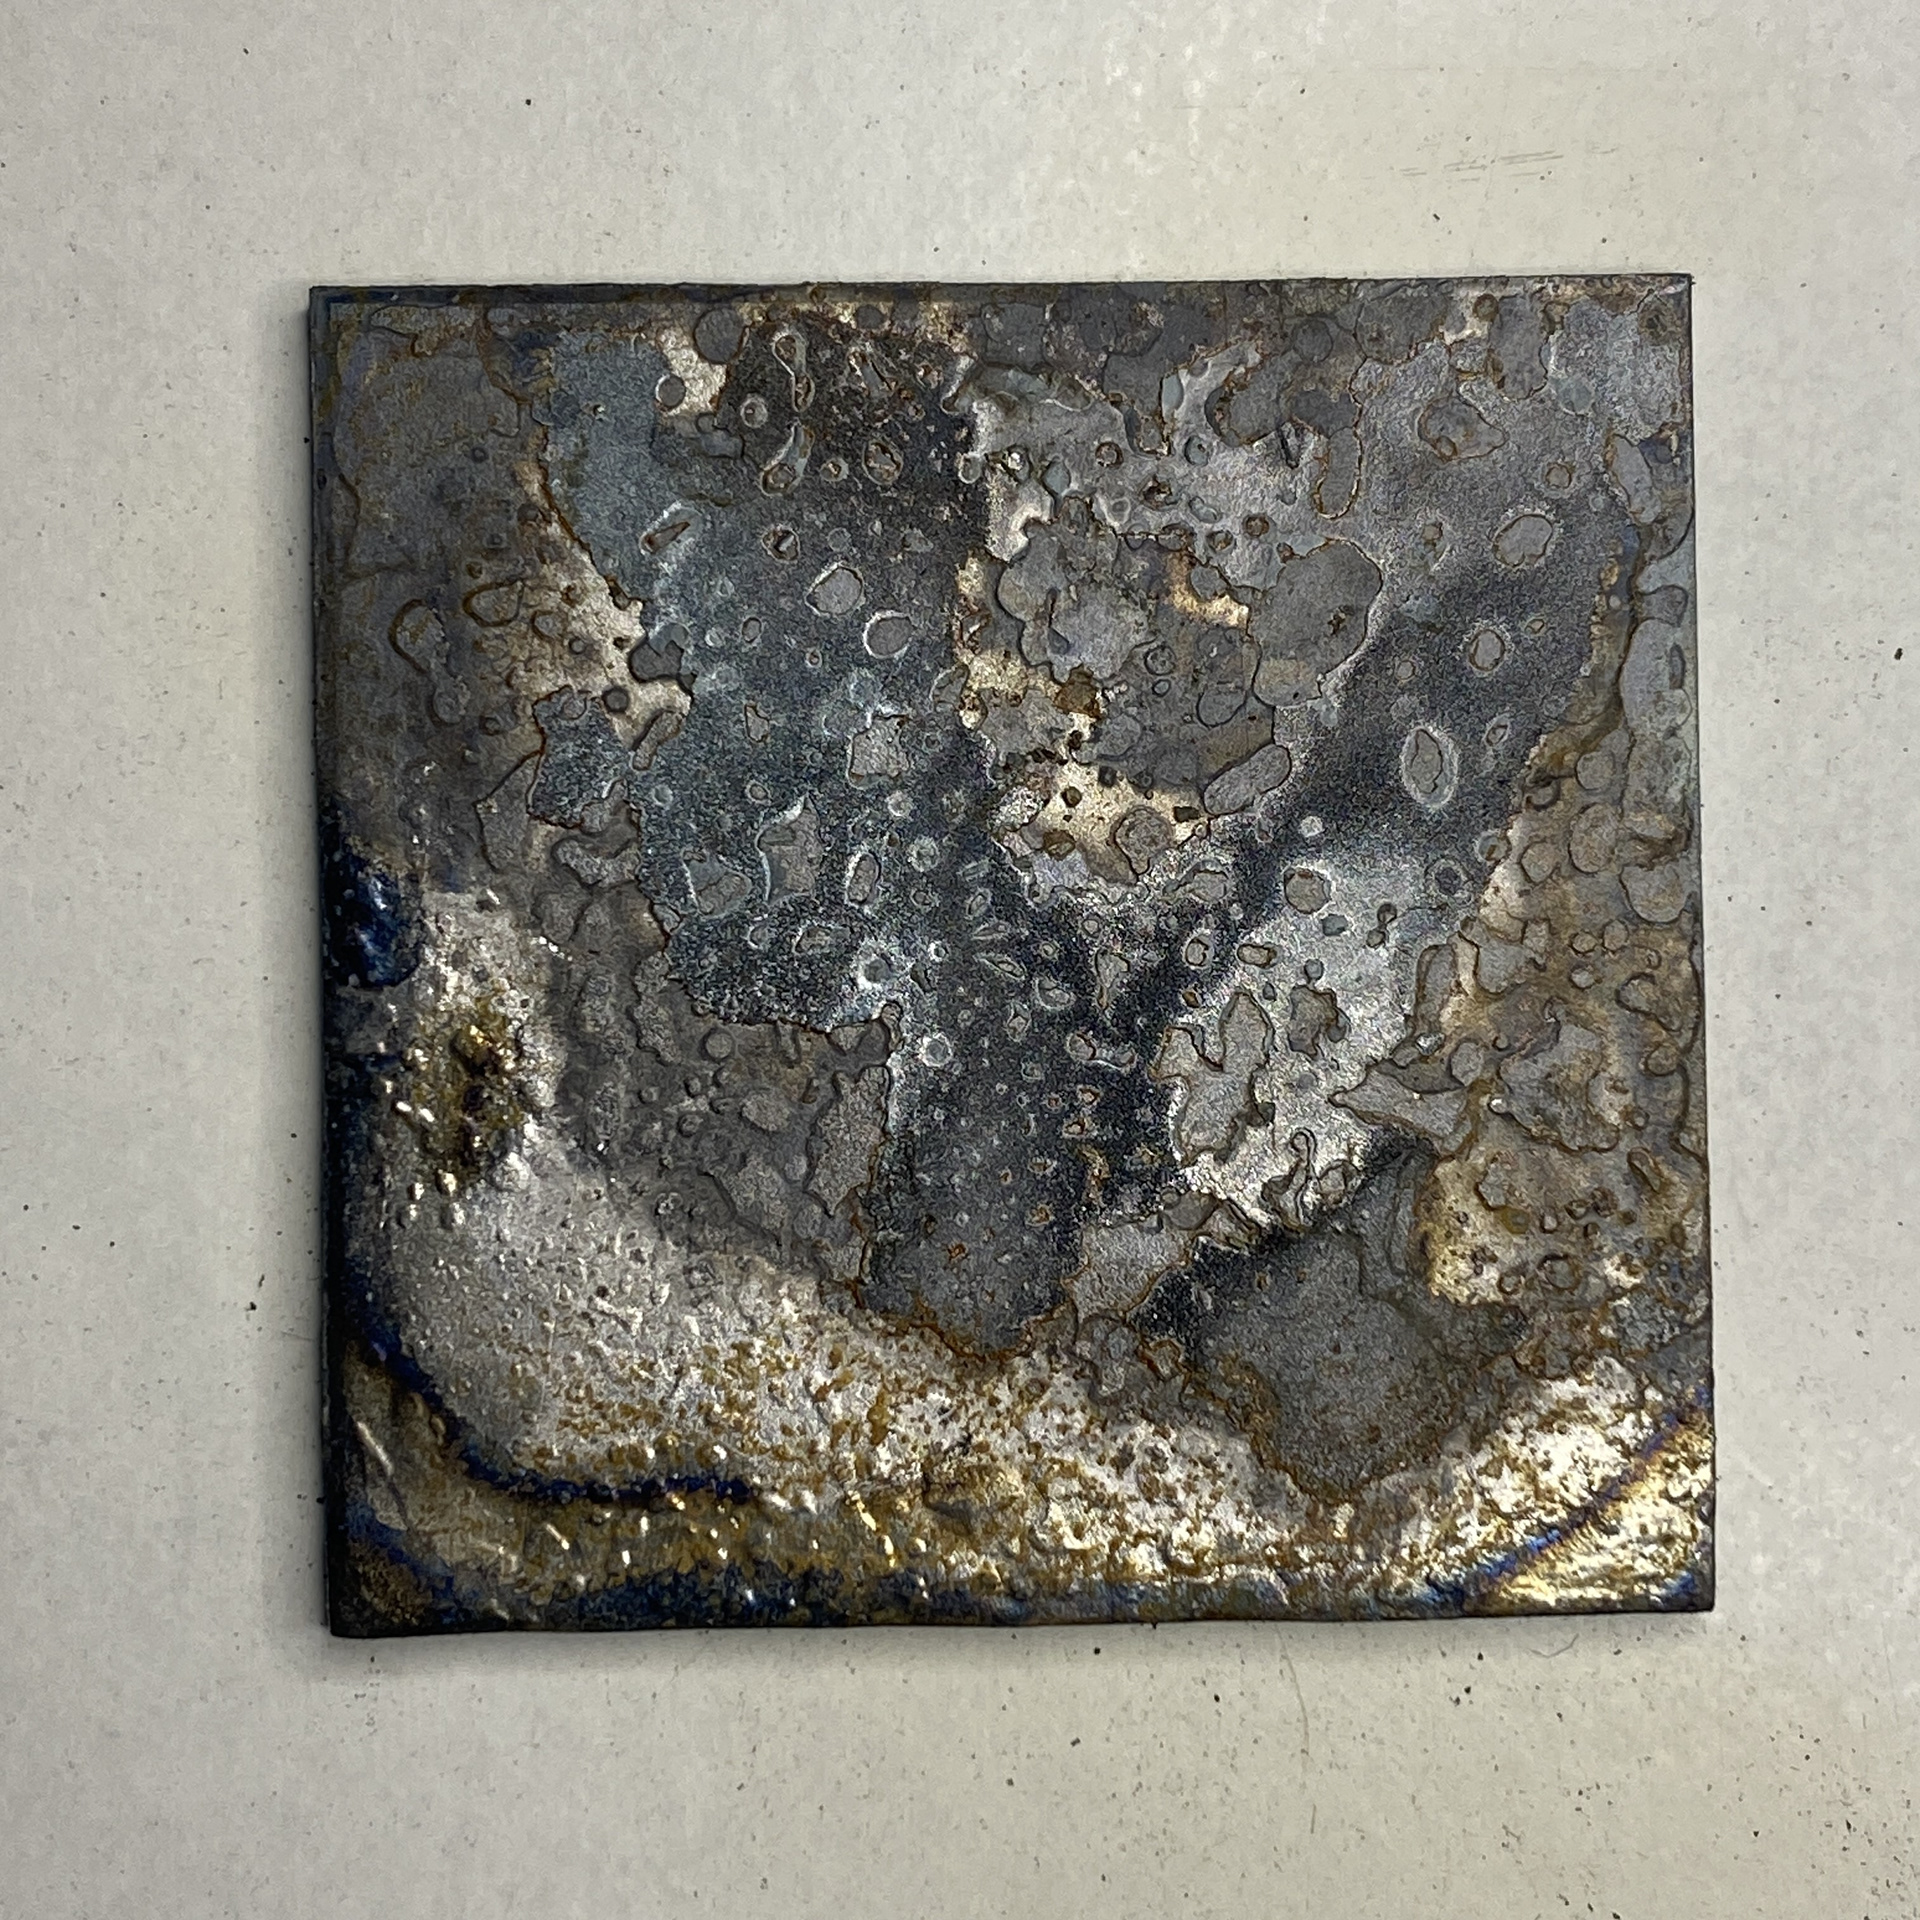
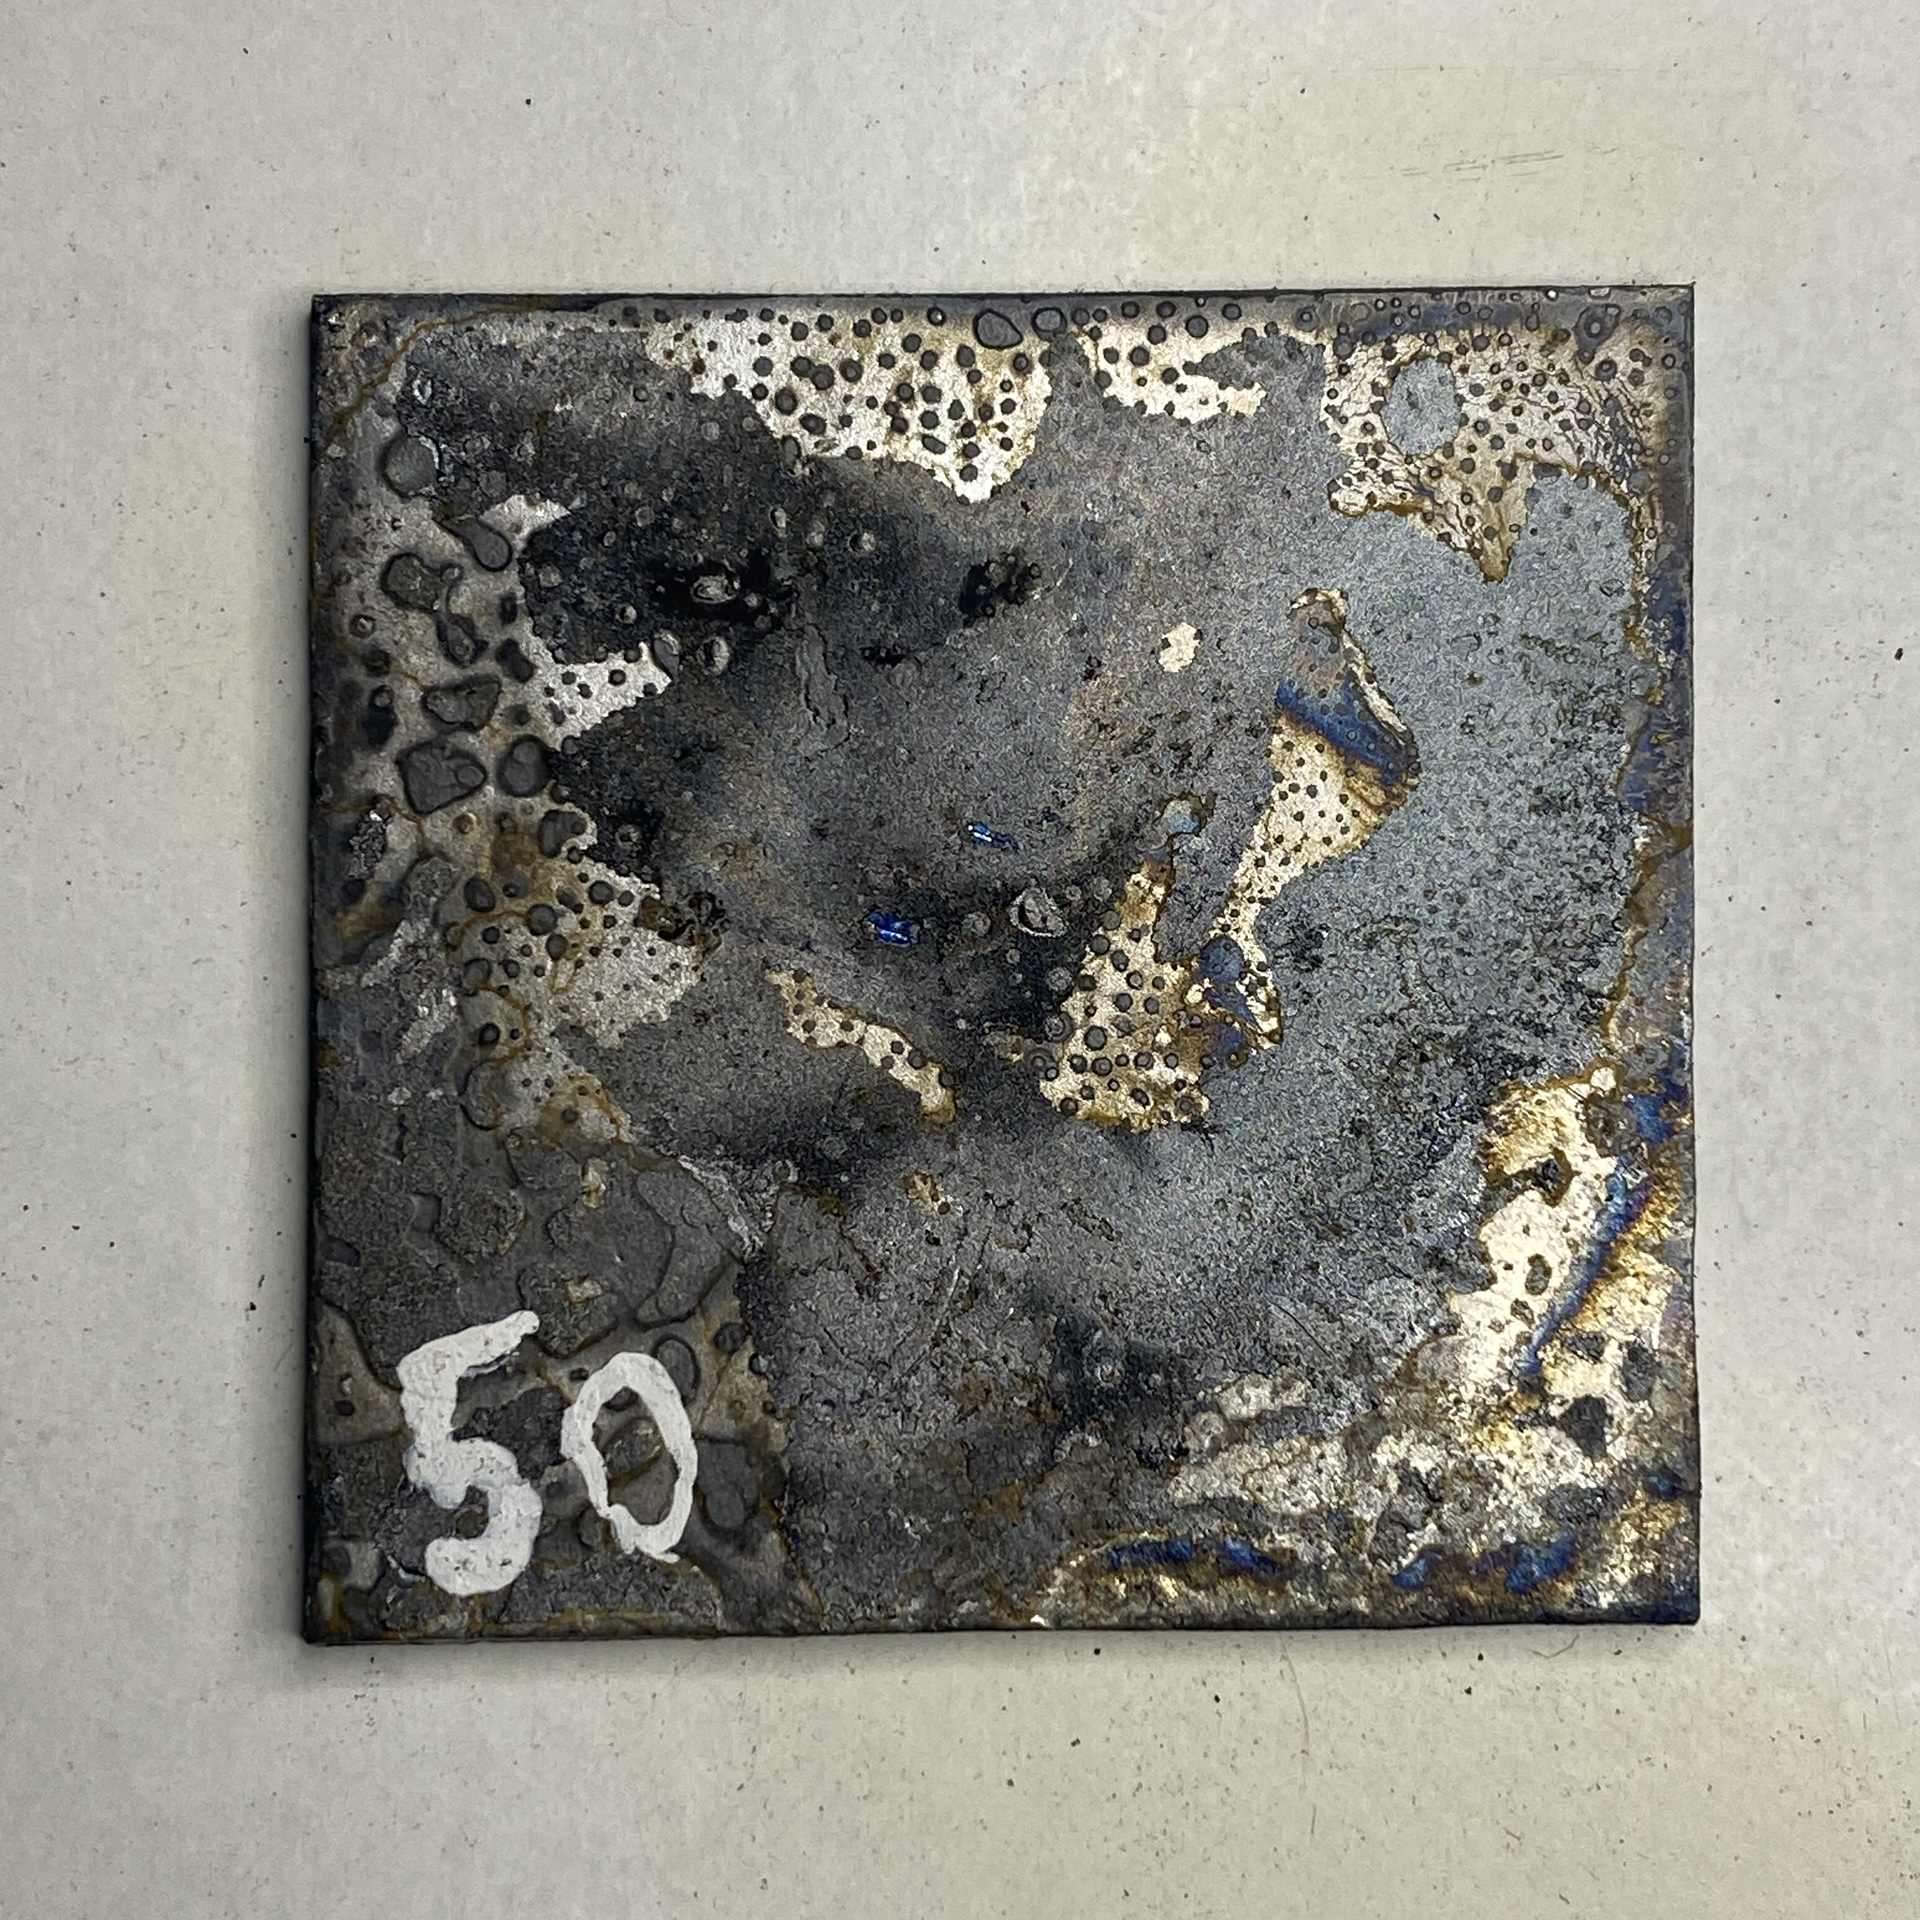
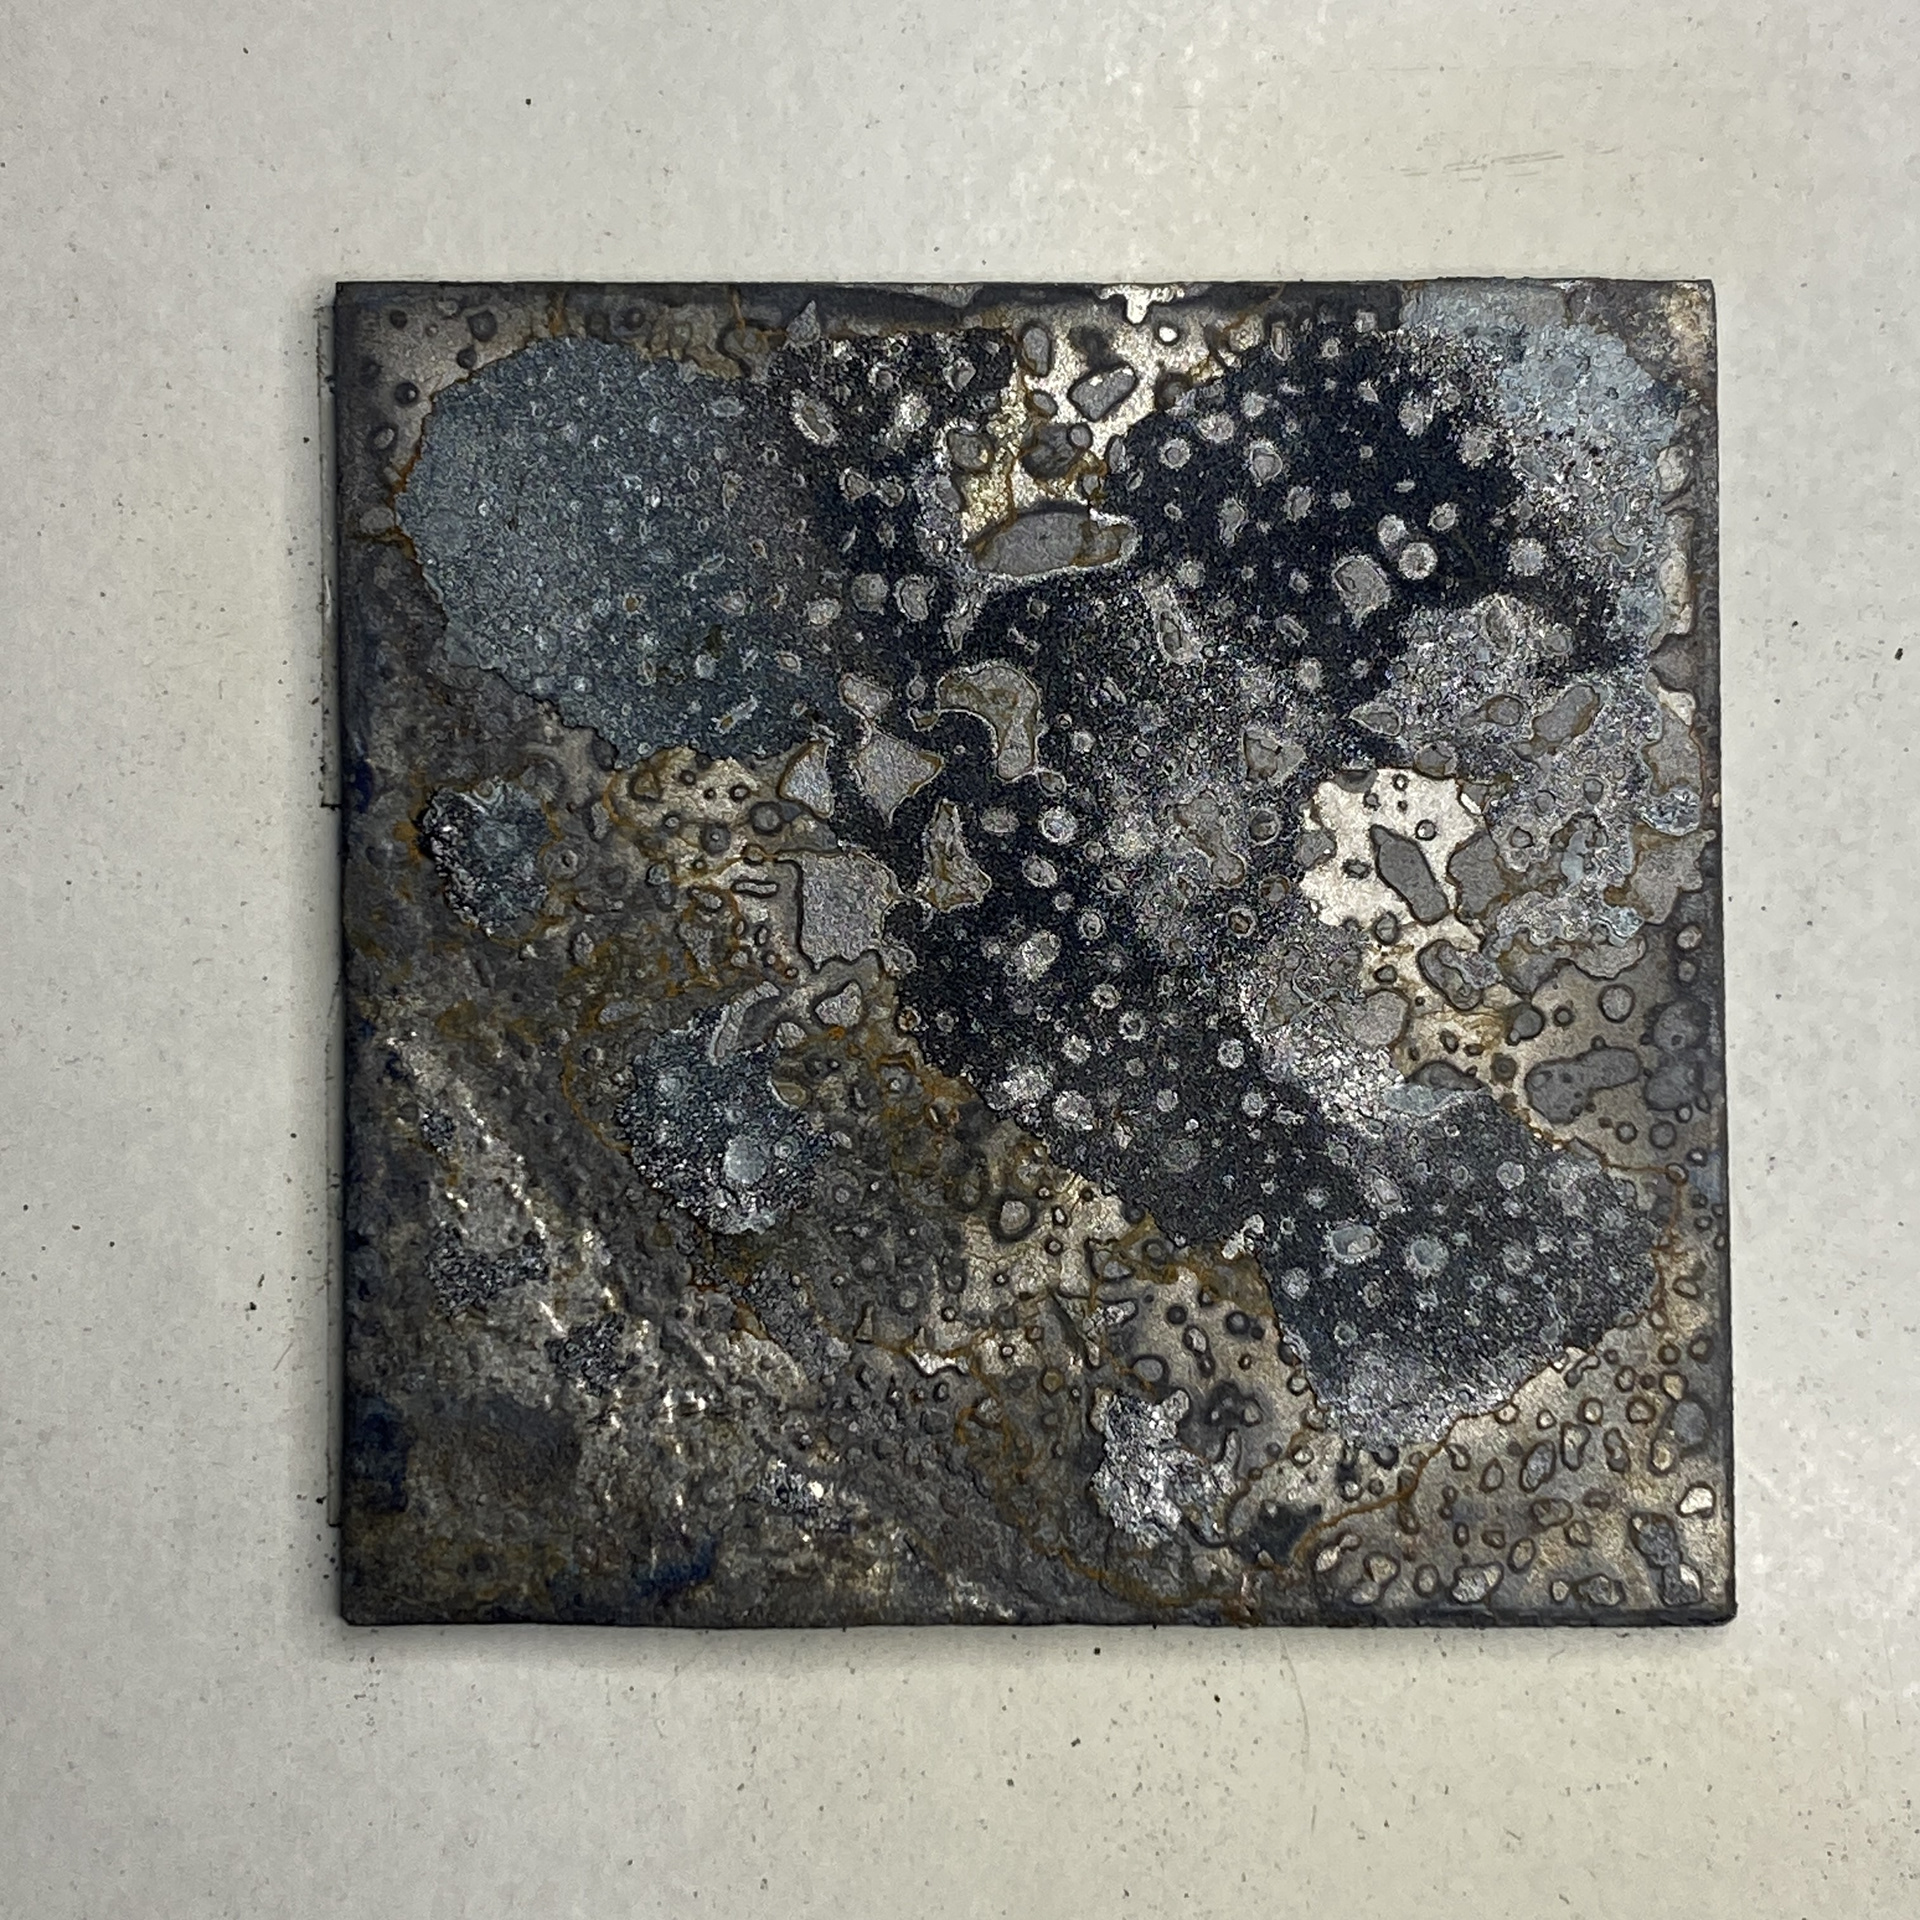
Reflecting on my circular steel structure I wanted to investigate the process of heating and quenching the sheet steel to seek a clearer understanding of what methods result in each pattern and finish. I first tested the difference of quenching the steel (using 0.9mm) by holding or mixing it around in the water. When quenching steel, it typically boils the surrounding water that touches the surface and slows the cooling process. I found that when I held the piece more of the forge scale/ oxidisation on the surface stayed giving a darker finish.
I then tested if repeating the quenching process would build or develop the scale through multiple cycles. I tested this with different temperatures and found that the initial oxidisation would burn off during the second heating process, thus repeating this process would be unnecessary.
I also tested the quenching at different temperatures recording this by the colour of that the steel changed (black, deep red, red, orange, yellow). I found that at lower temperature the finish was a more uniform dark oxidisation, whereas the higher the temperature the more the pattern would become patchy and scattered. During this experiment I didn't remember to wipe off the excess water after quenching as I had previously done. This resulted in rust forming in the exposed bare steel areas, filling in the gaps between the oxidisations.
Finally, I tested different thicknesses of steel (0.7, 0.9, 1.2, 1.6mm) to look at how the finish varied. I found that the 0.7mm was too thin and the oxidisation tended to fall off completely when quenched. The 1.2mm and 1.6mm lacked variation of finishes often giving the same dull grey. Therefore, moving forwards I feel that working with the 0.9mm steel will give me the greatest variety and control to direct the aesthetics and narrative of the piece.
Although this test gives me greater control over the finish there is still a large element of unpredictability. Also, as I don’t have the equipment to exactly repeat the process each piece will be unique. I believe this is one of the ways I can showcase the connection between object, process and maker.
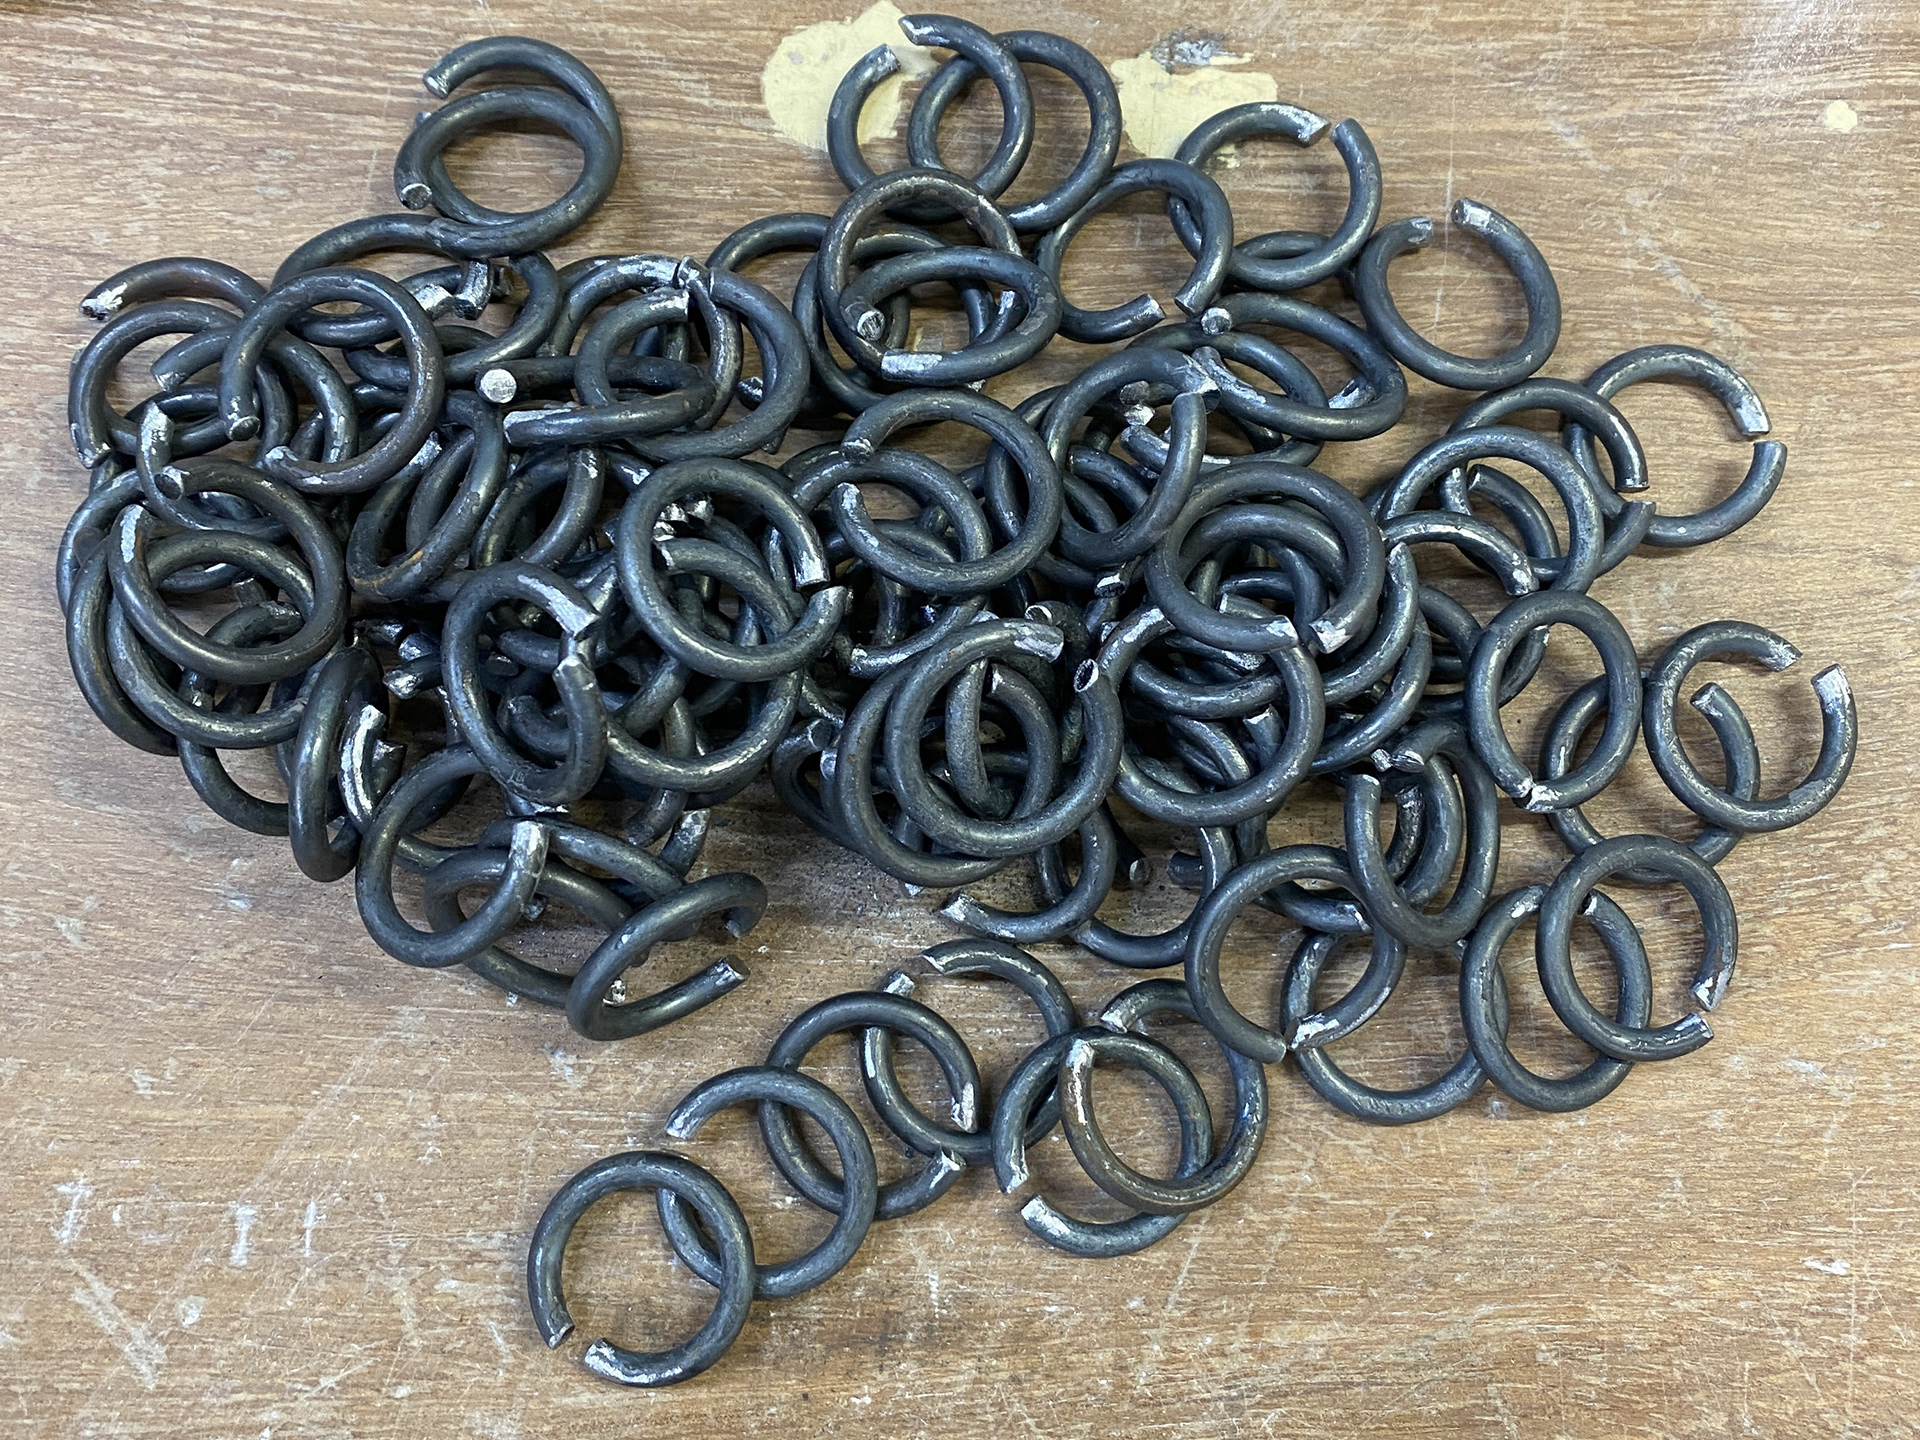
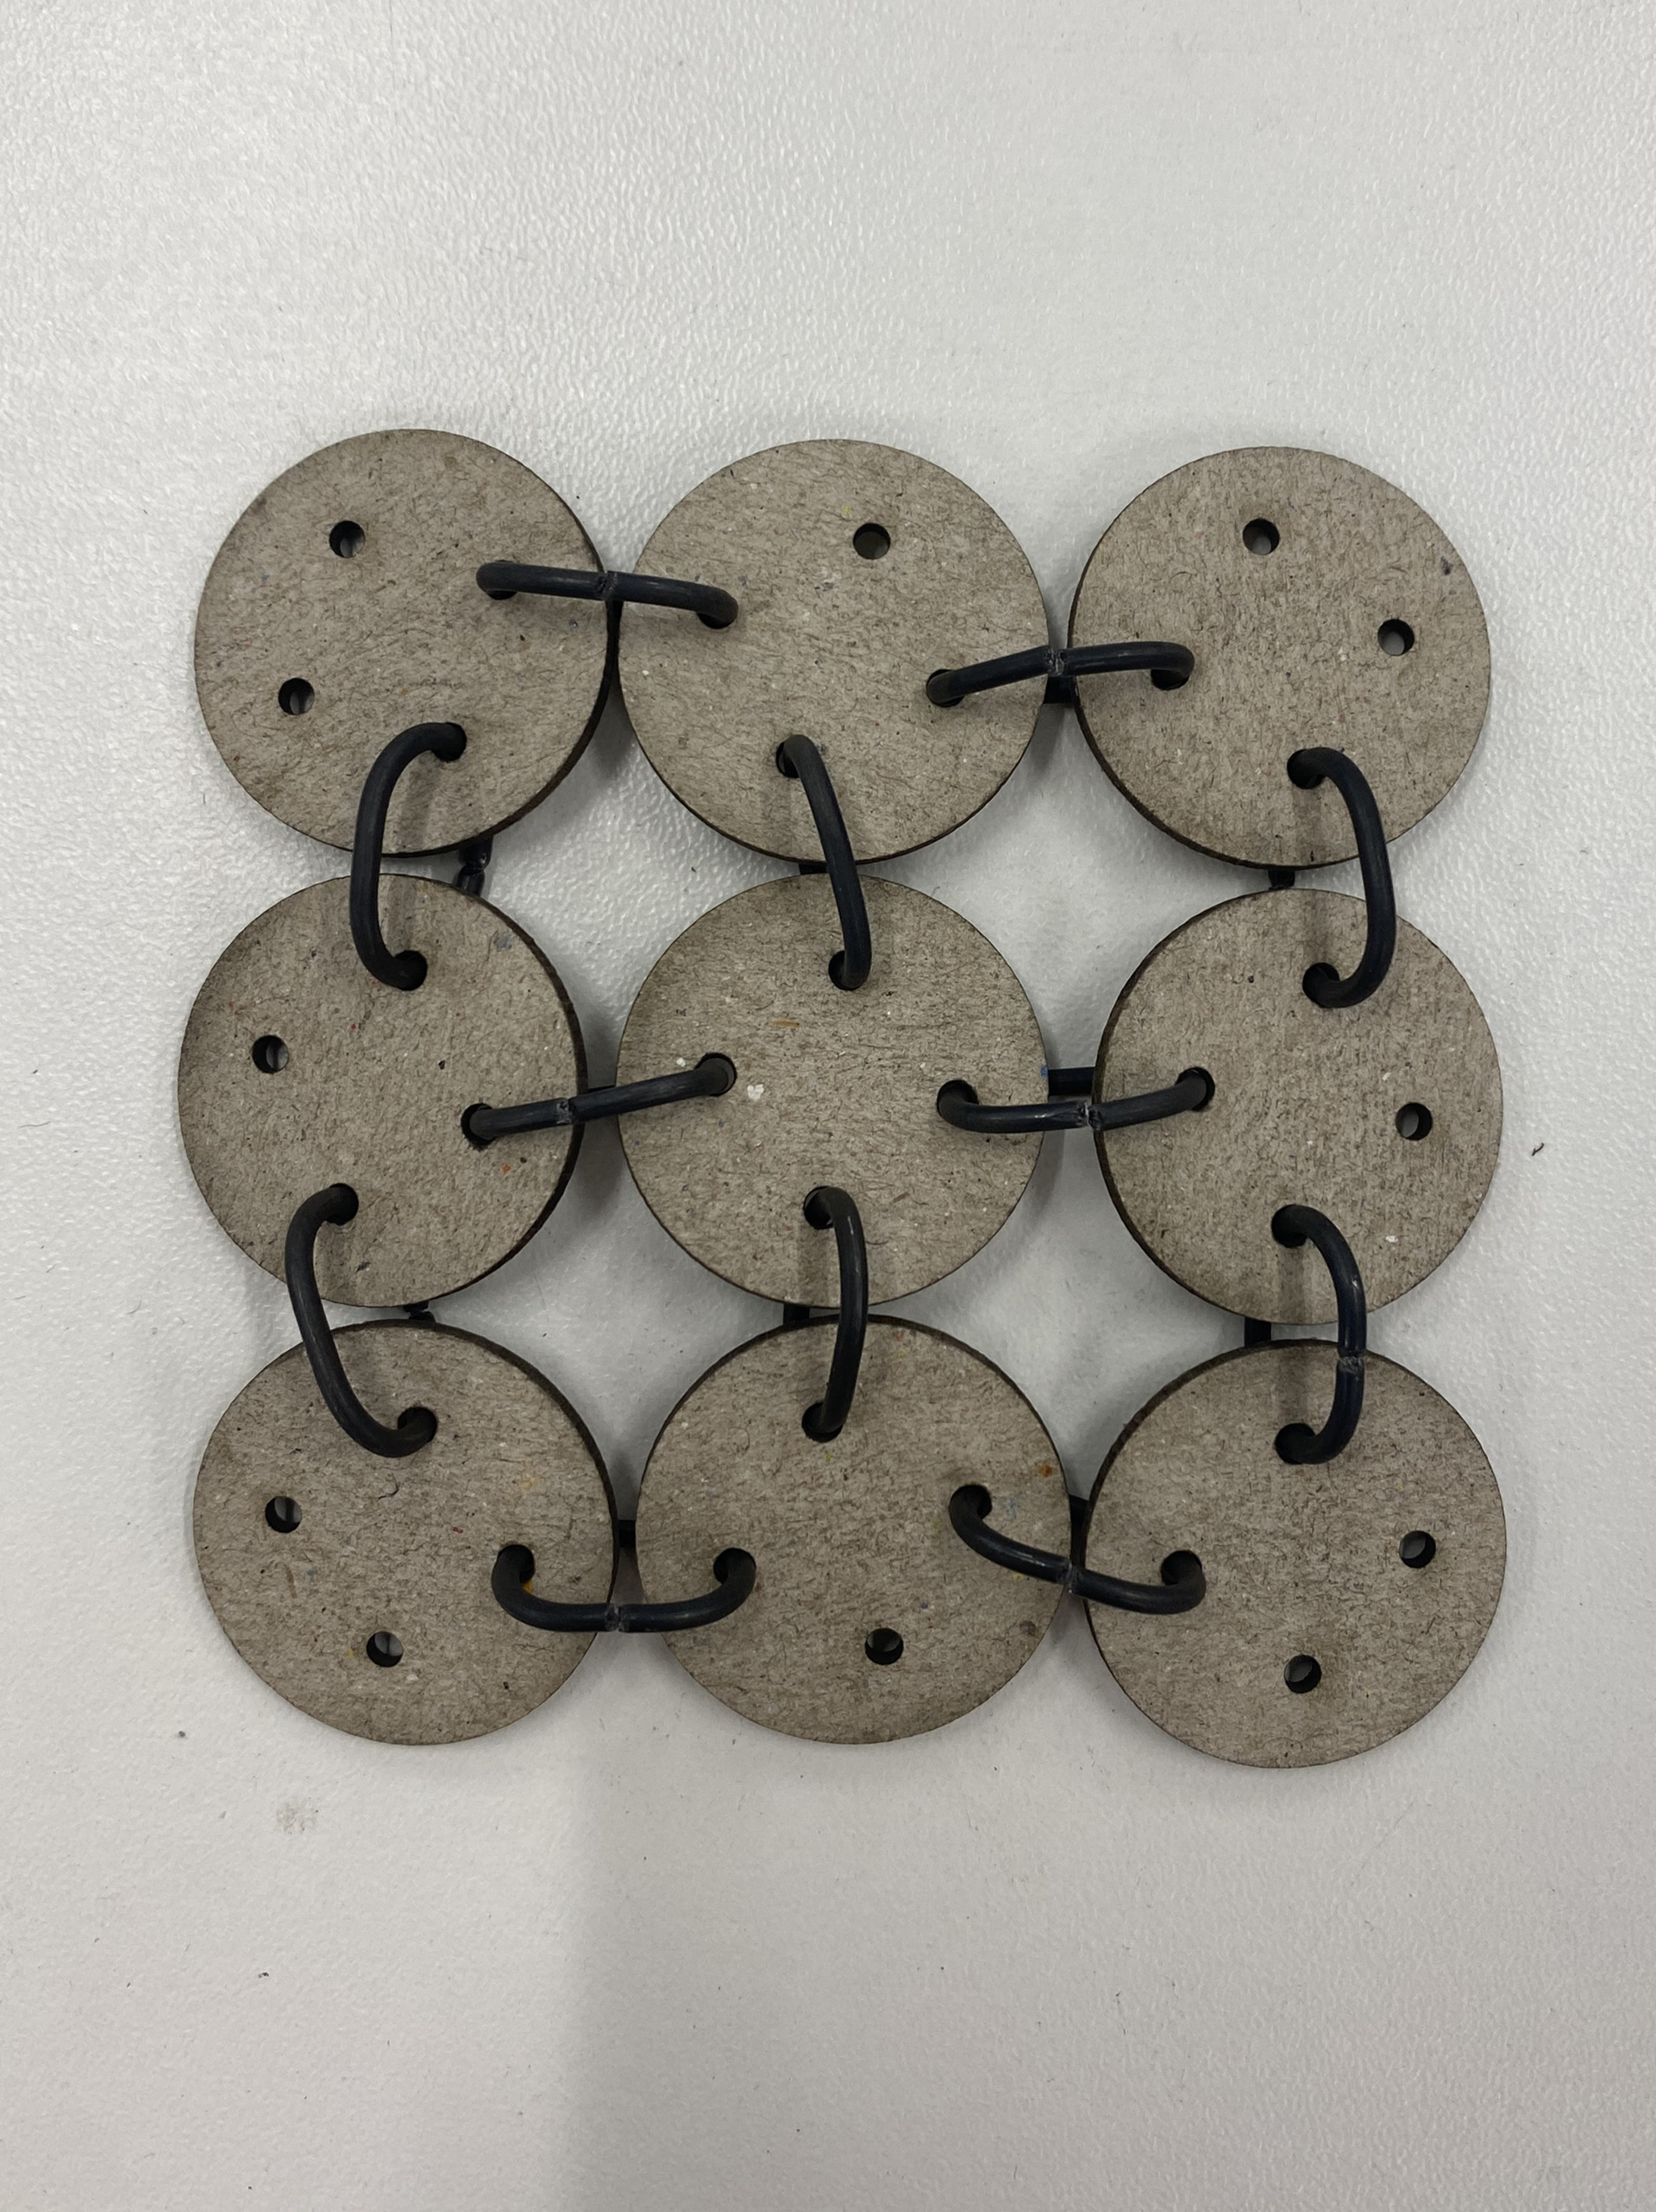
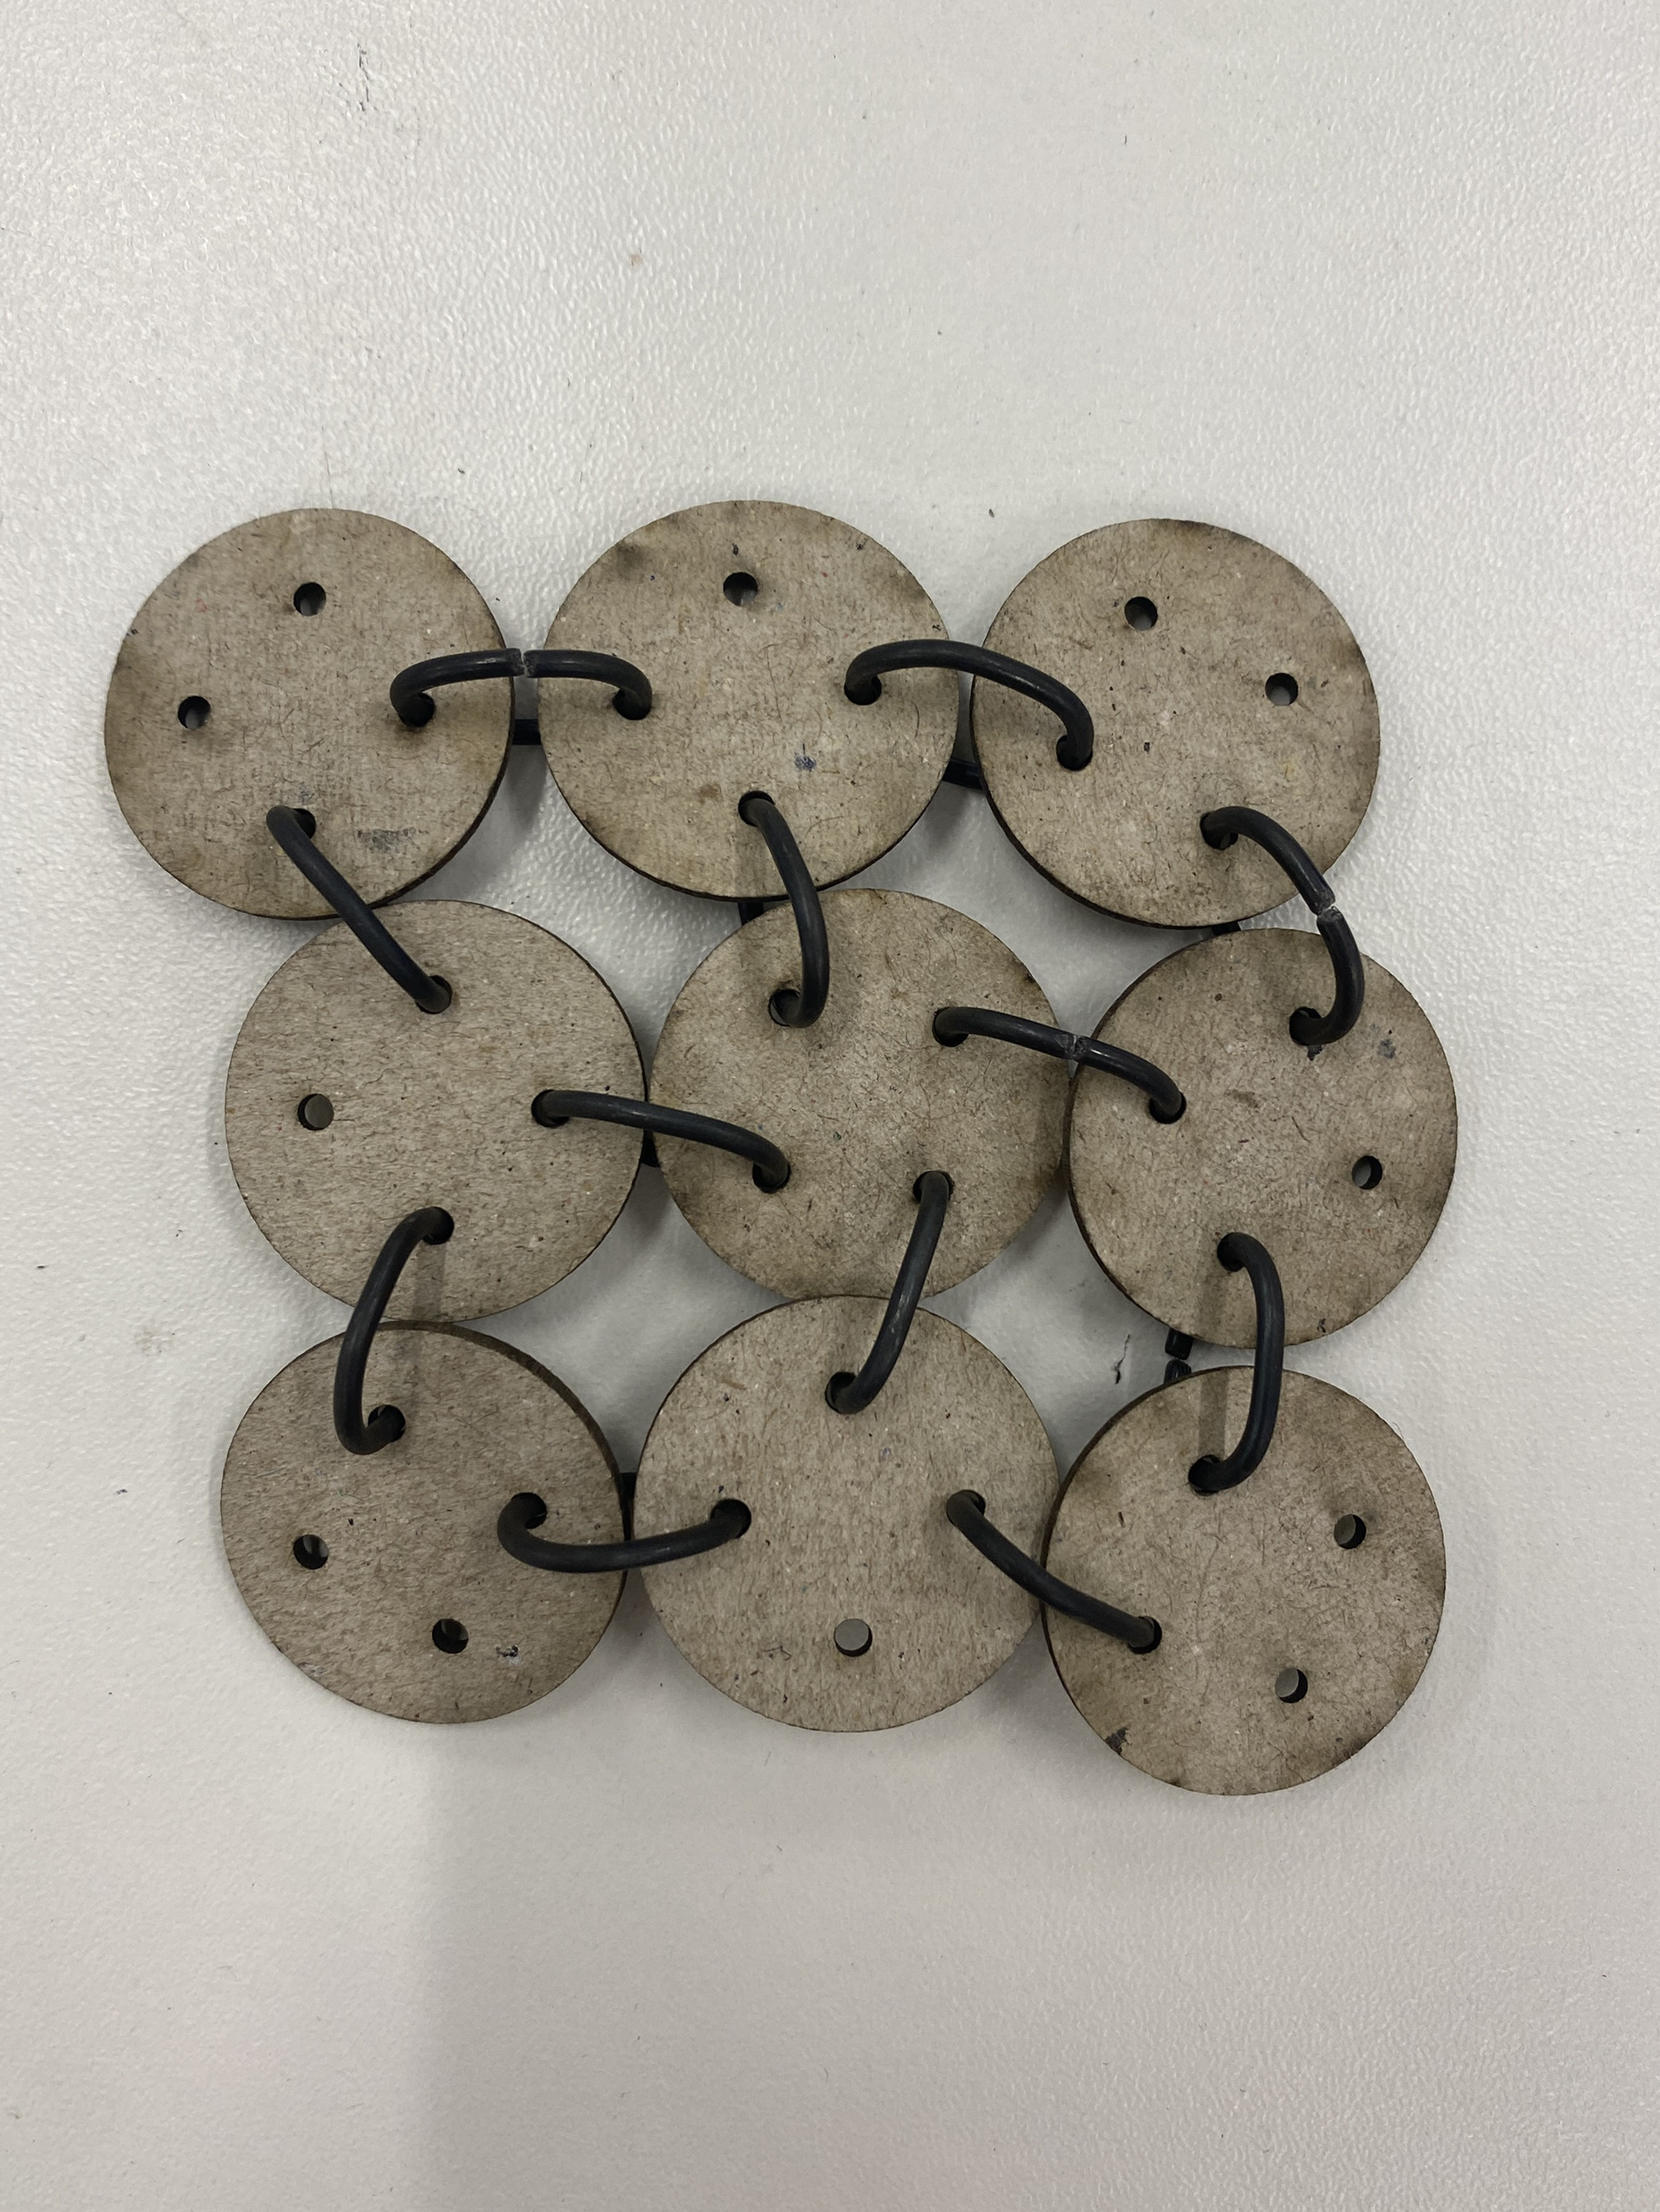
Testing oval jump rings

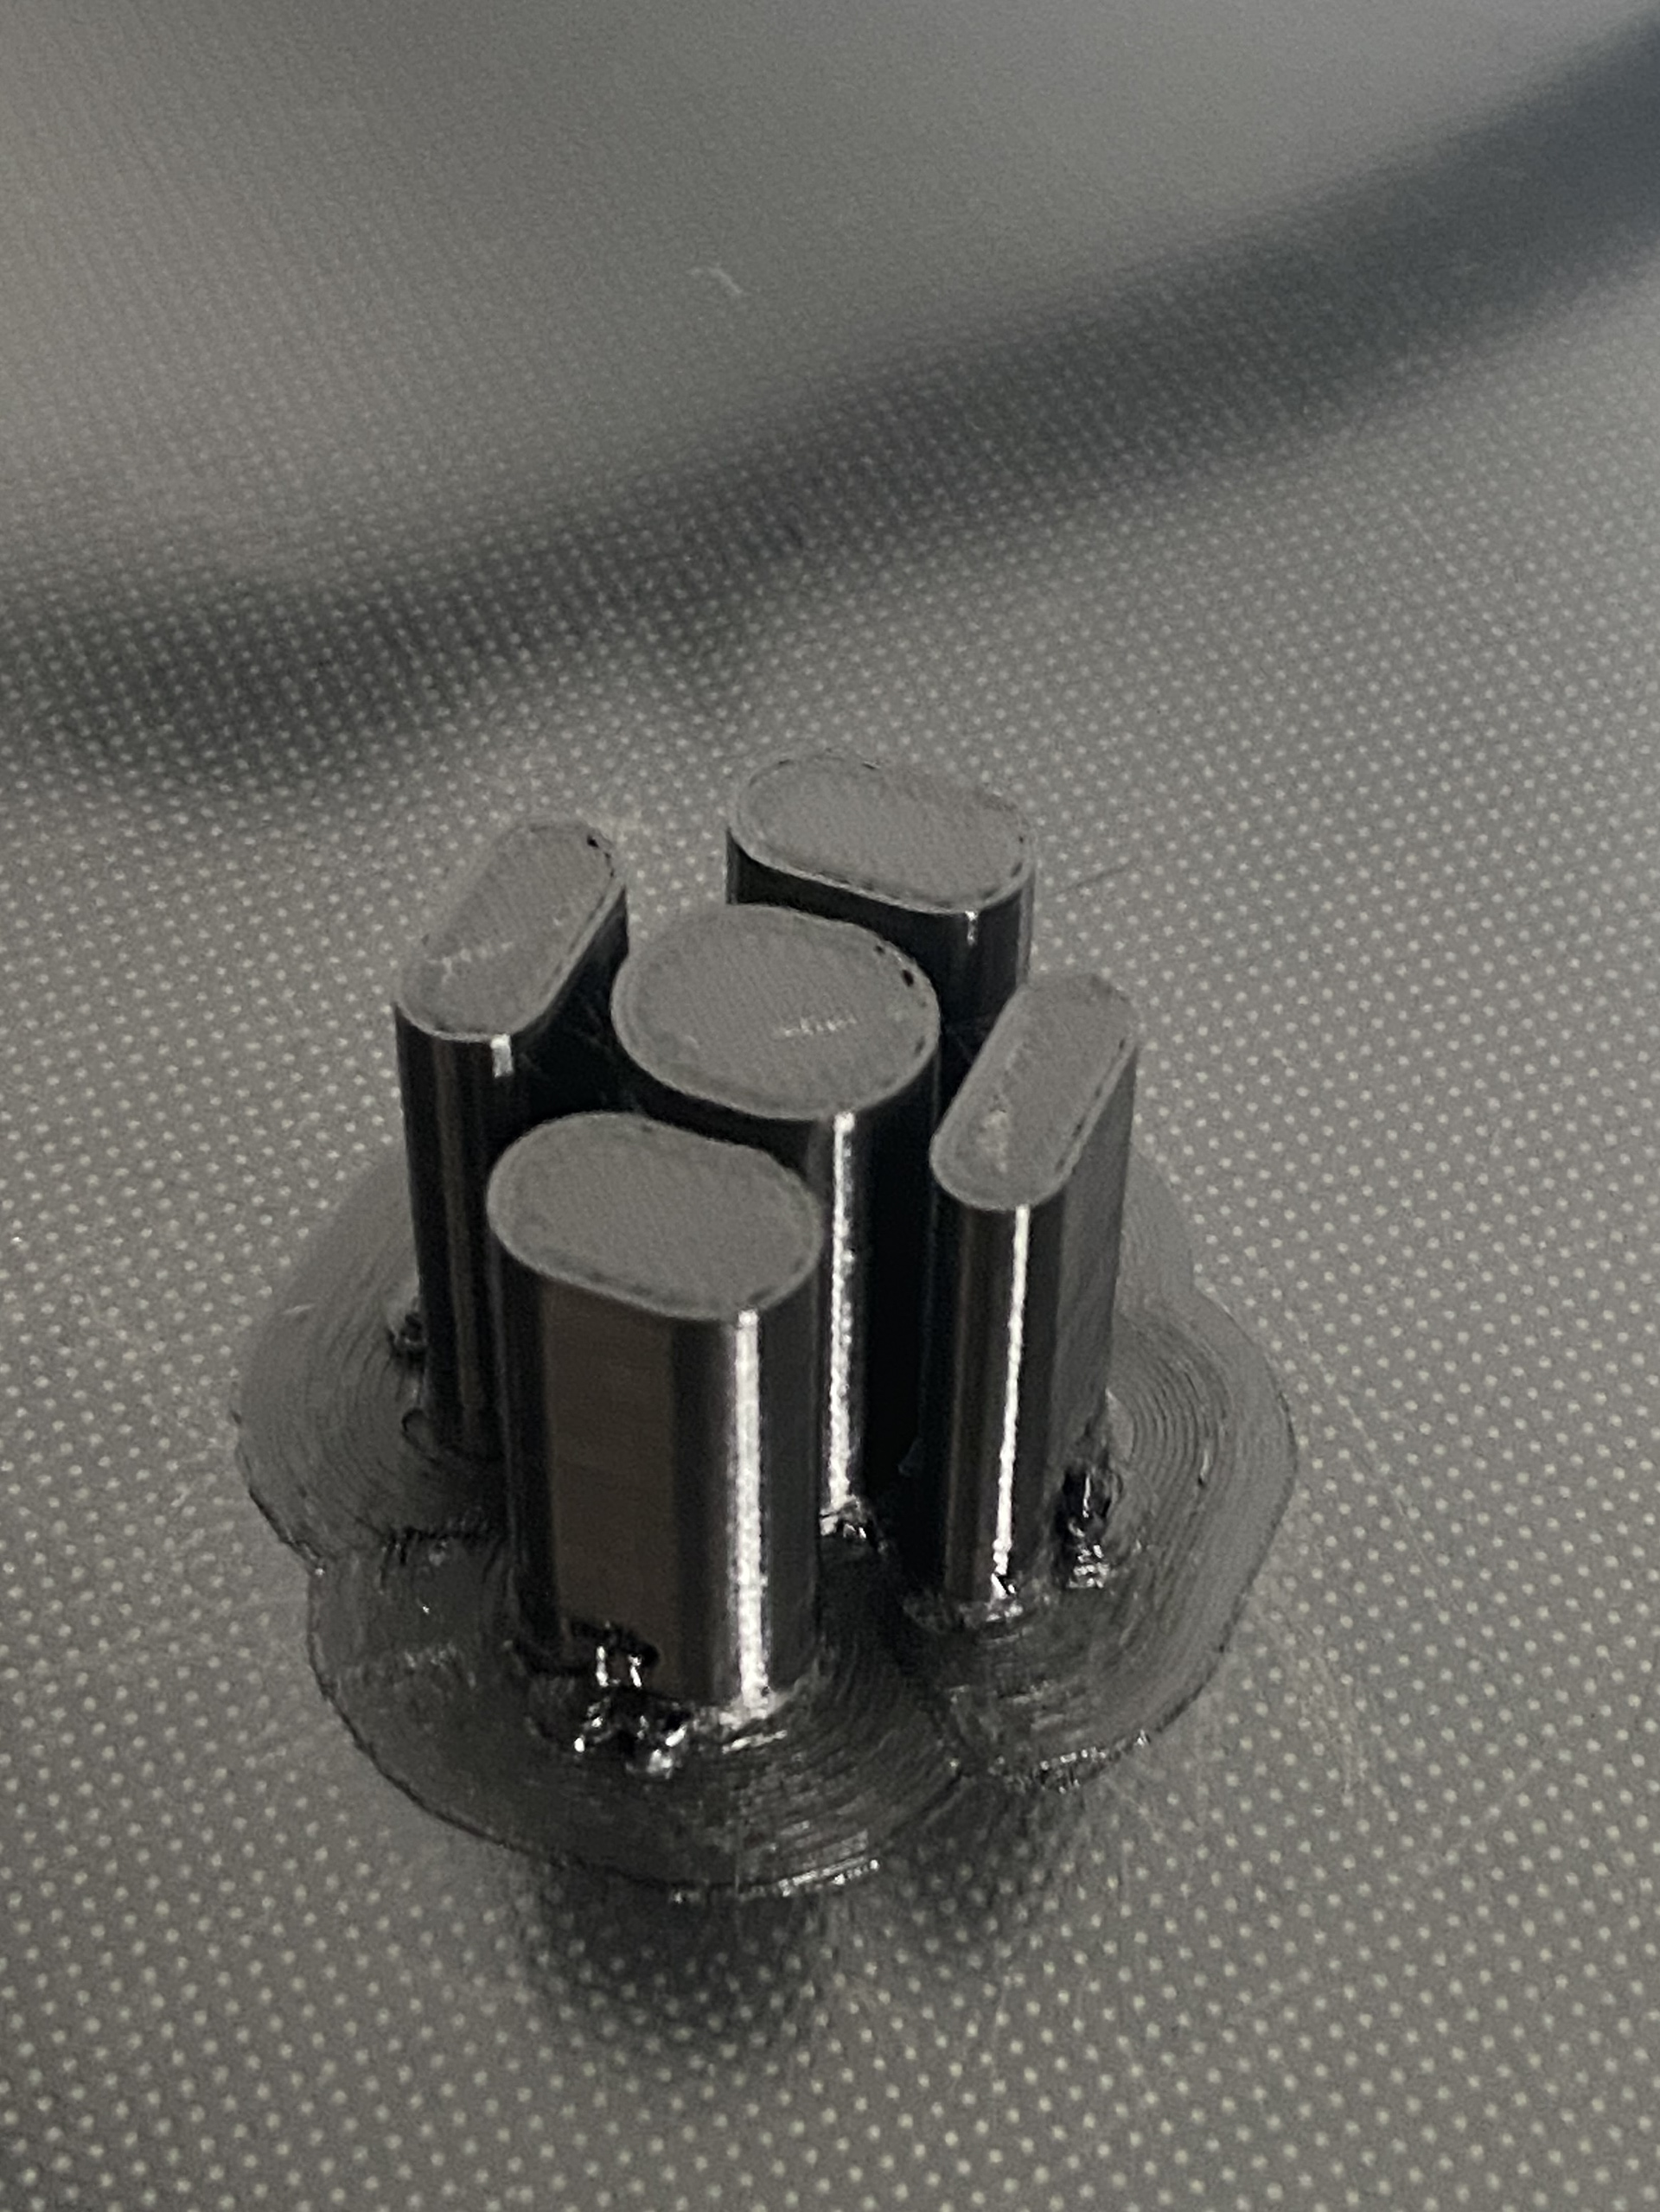

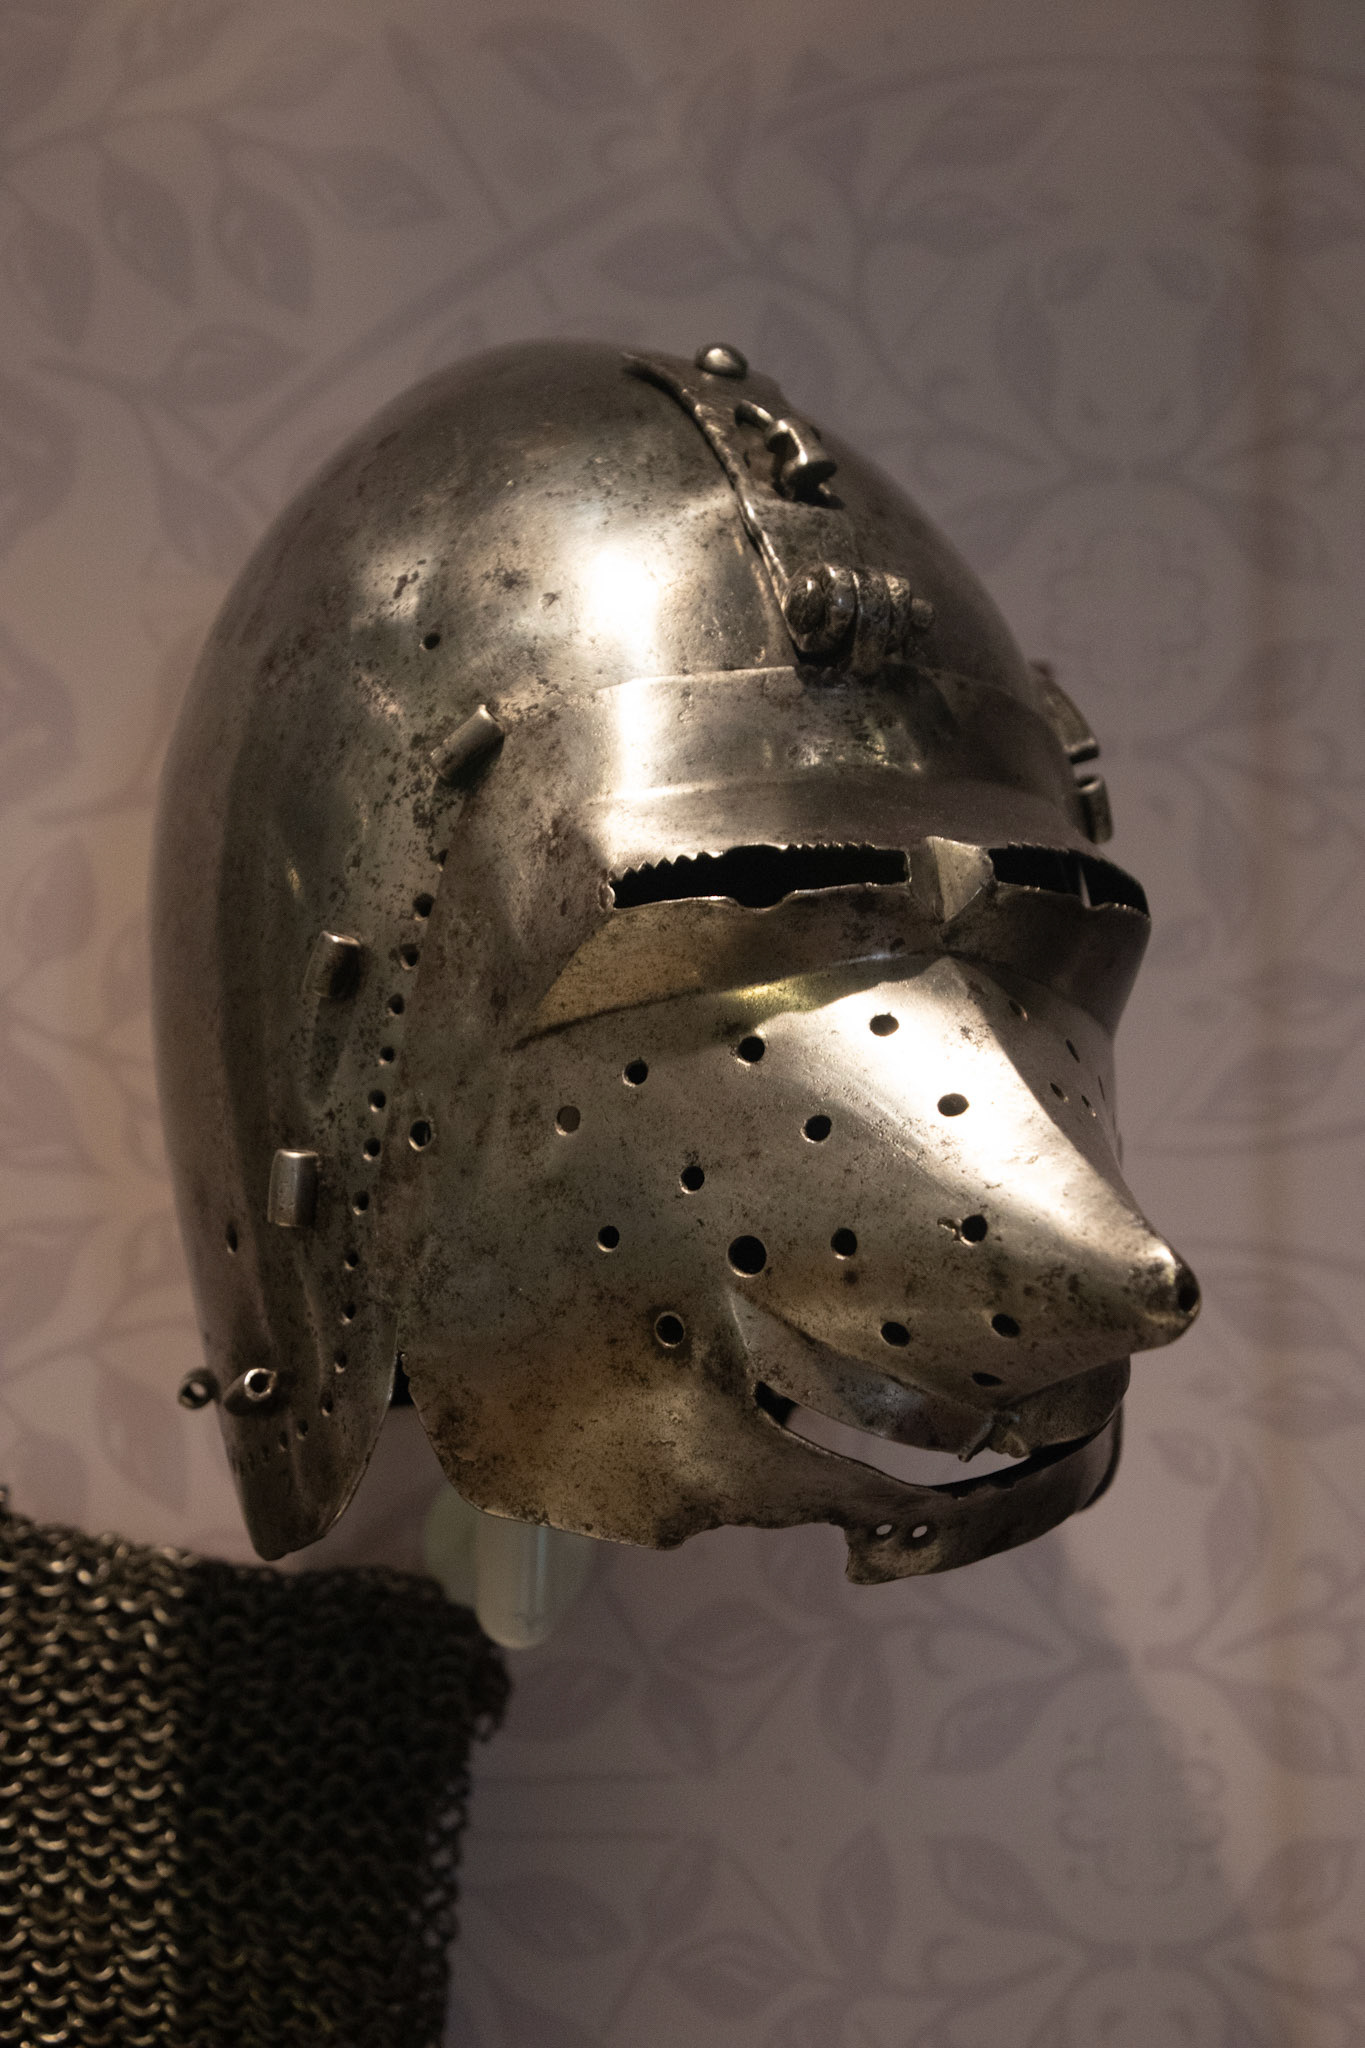
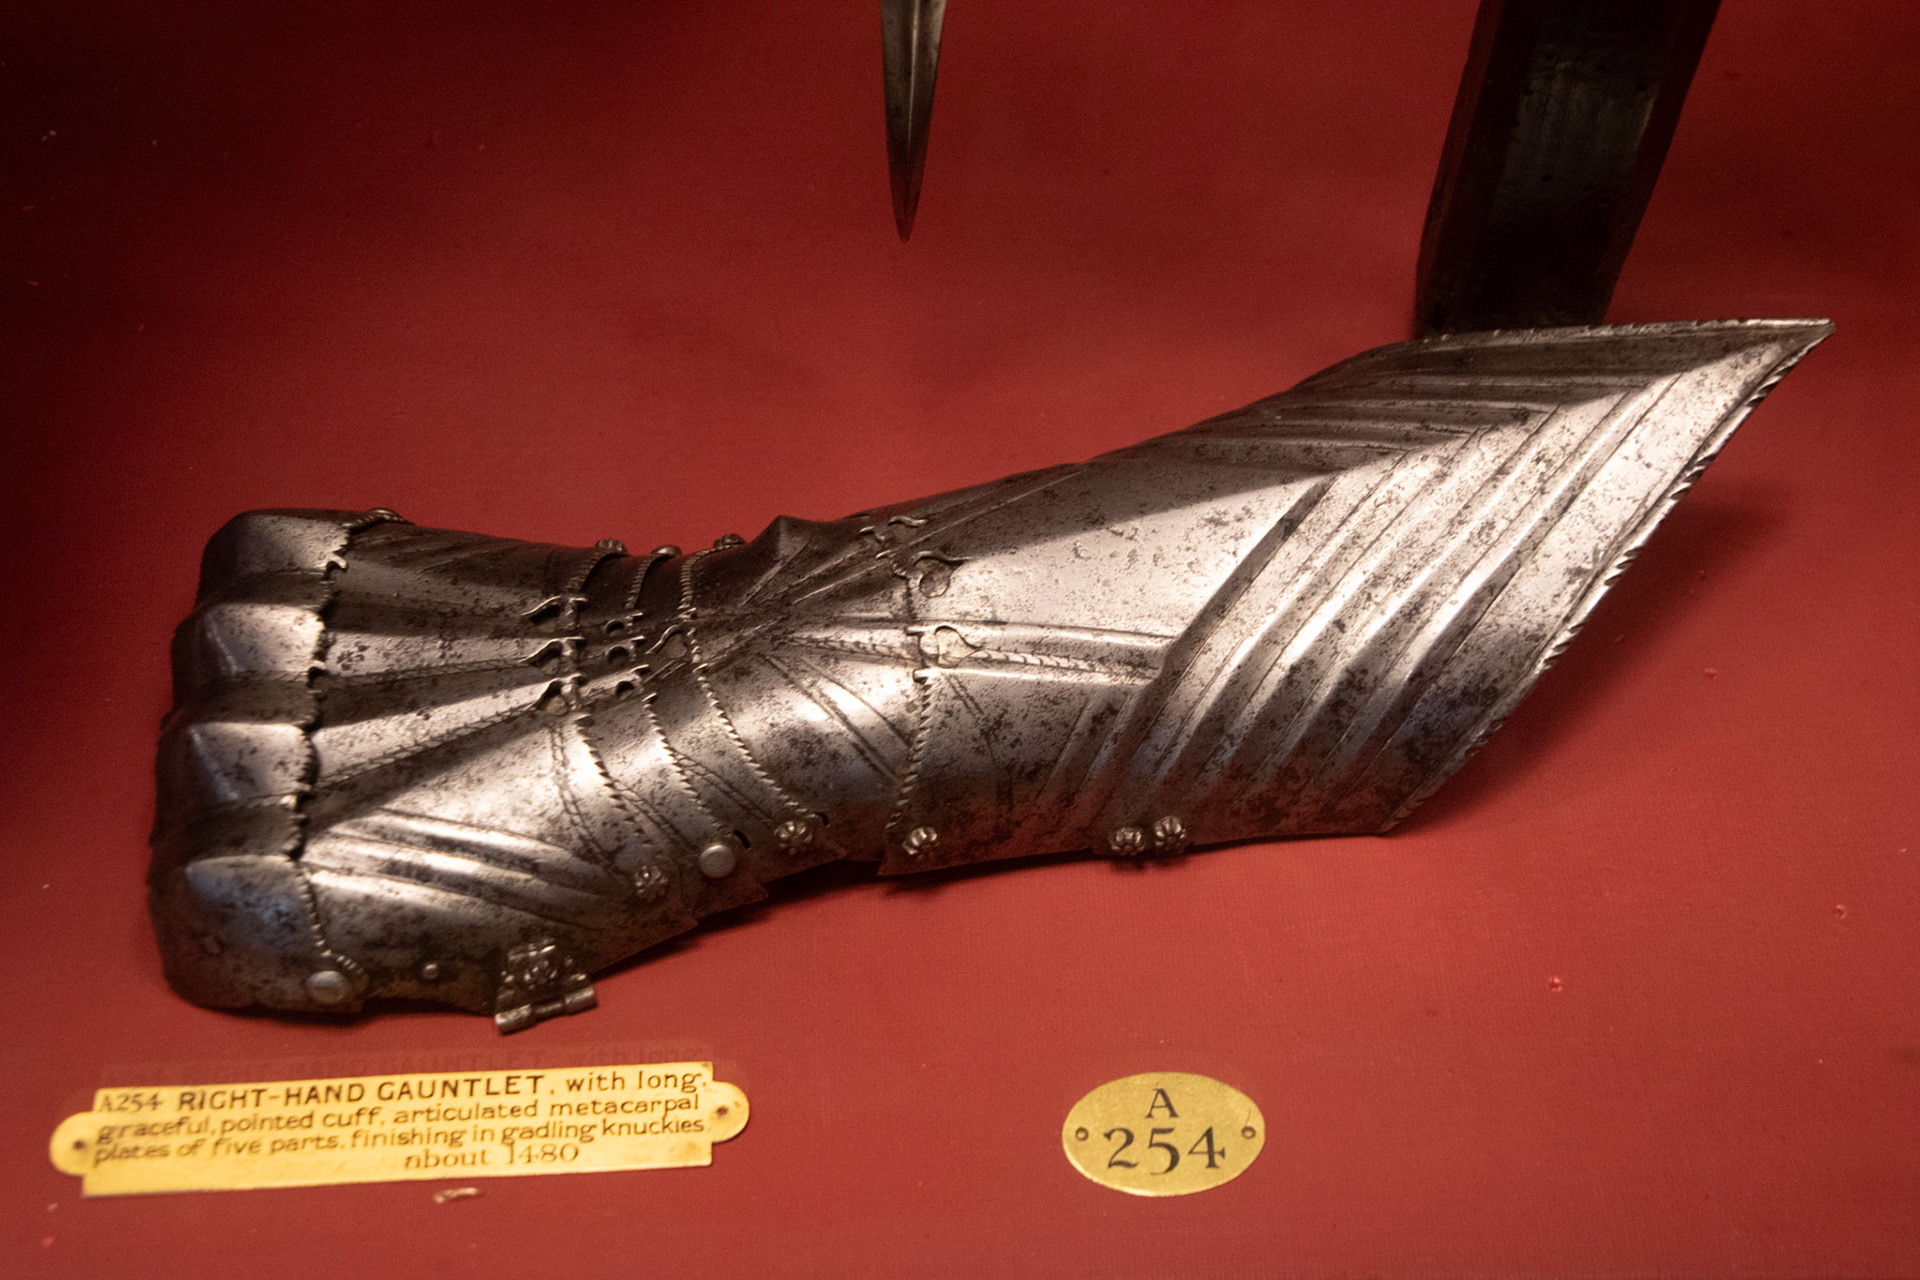
During my previous tests linking together the disks I found that the circular jump rings would overpower the structure and draw lots of attention. Therefore, I 3D printed some oval mandrels with a range of widths (5,6,8,10mm) to test how a lower profile link would work inside the structure.
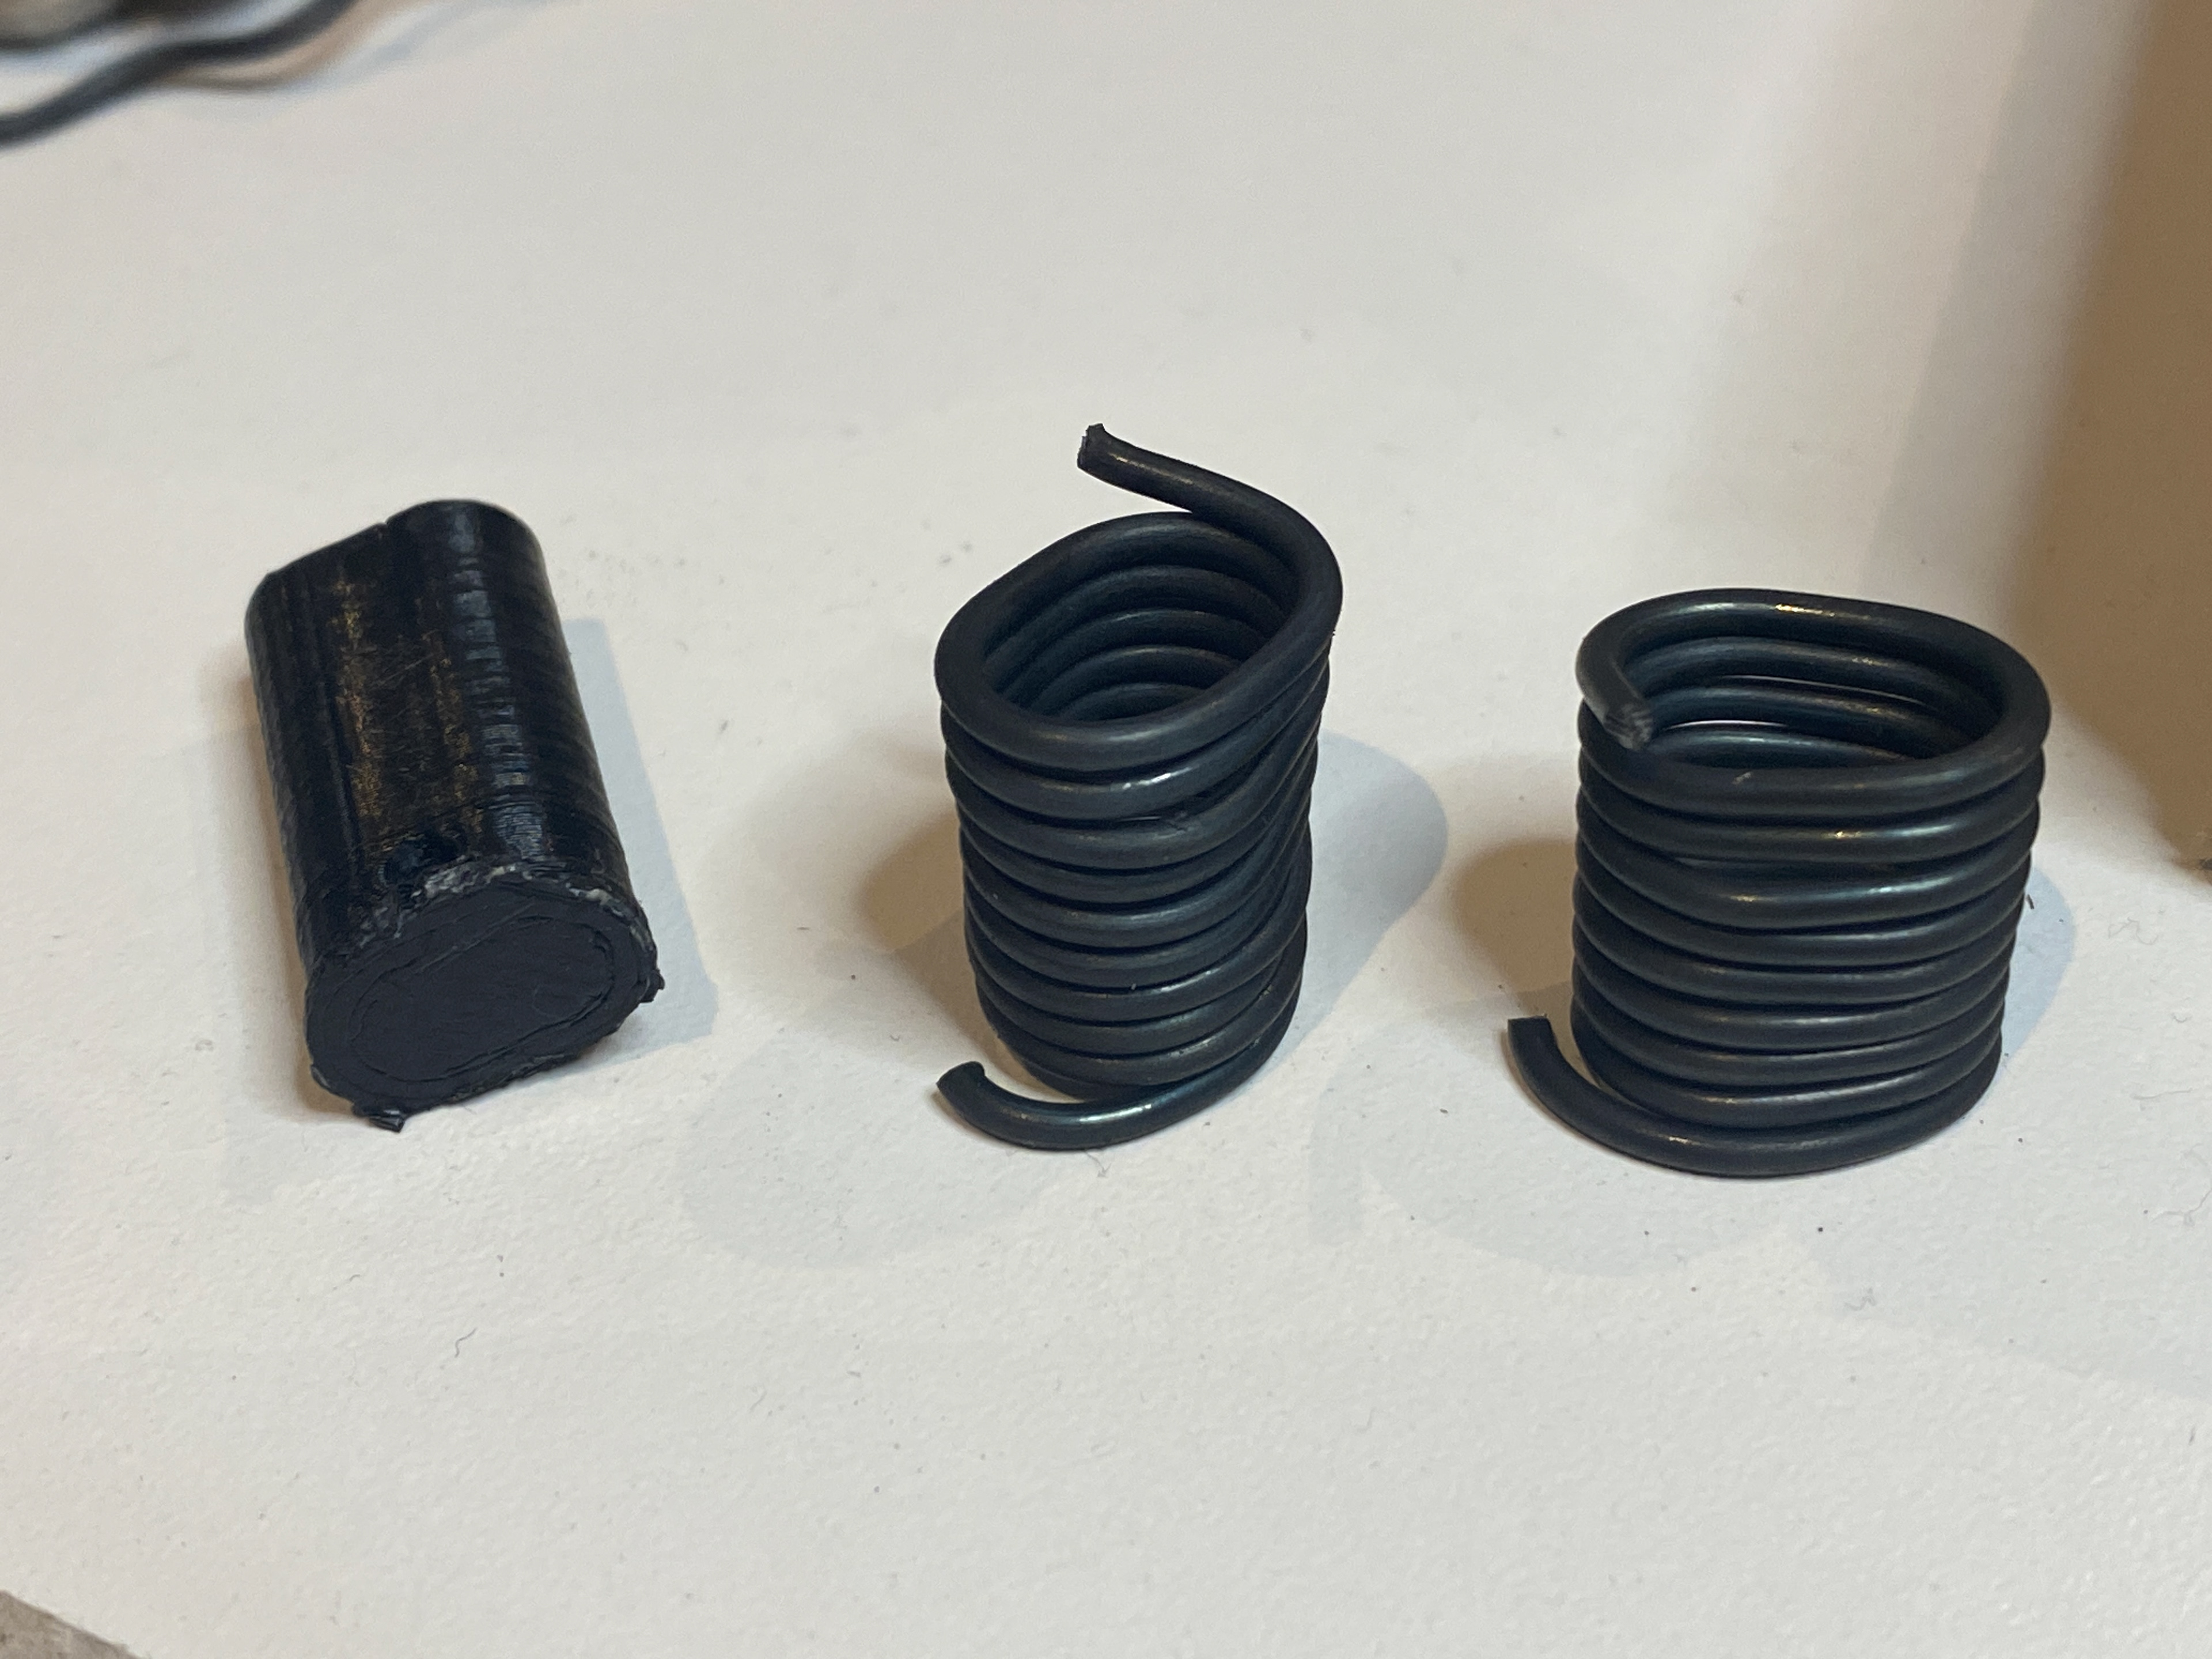
5mm width
6mm width
8mm width
10mm width
Unfortunately, all these tests didn't result in the intended outcomes. The smaller width links did provide a lower profile and were less dominant overall. However, the oval links would rotate in the holes, changing the distance between each disk and tended to lock up. This took what was a very fluid and flexible structure to a piece that became unpredictable and clunky. There is the potential to explore how using oval links to lock up and restrict movement in this structure. Although, this may overcomplicate and distract from the piece.
I believe sticking to the round jump rings will be the best moving forwards. Additionally, looking to refine the finish of them by using a piercing saw to cut them rather than snips may give a higher quality.
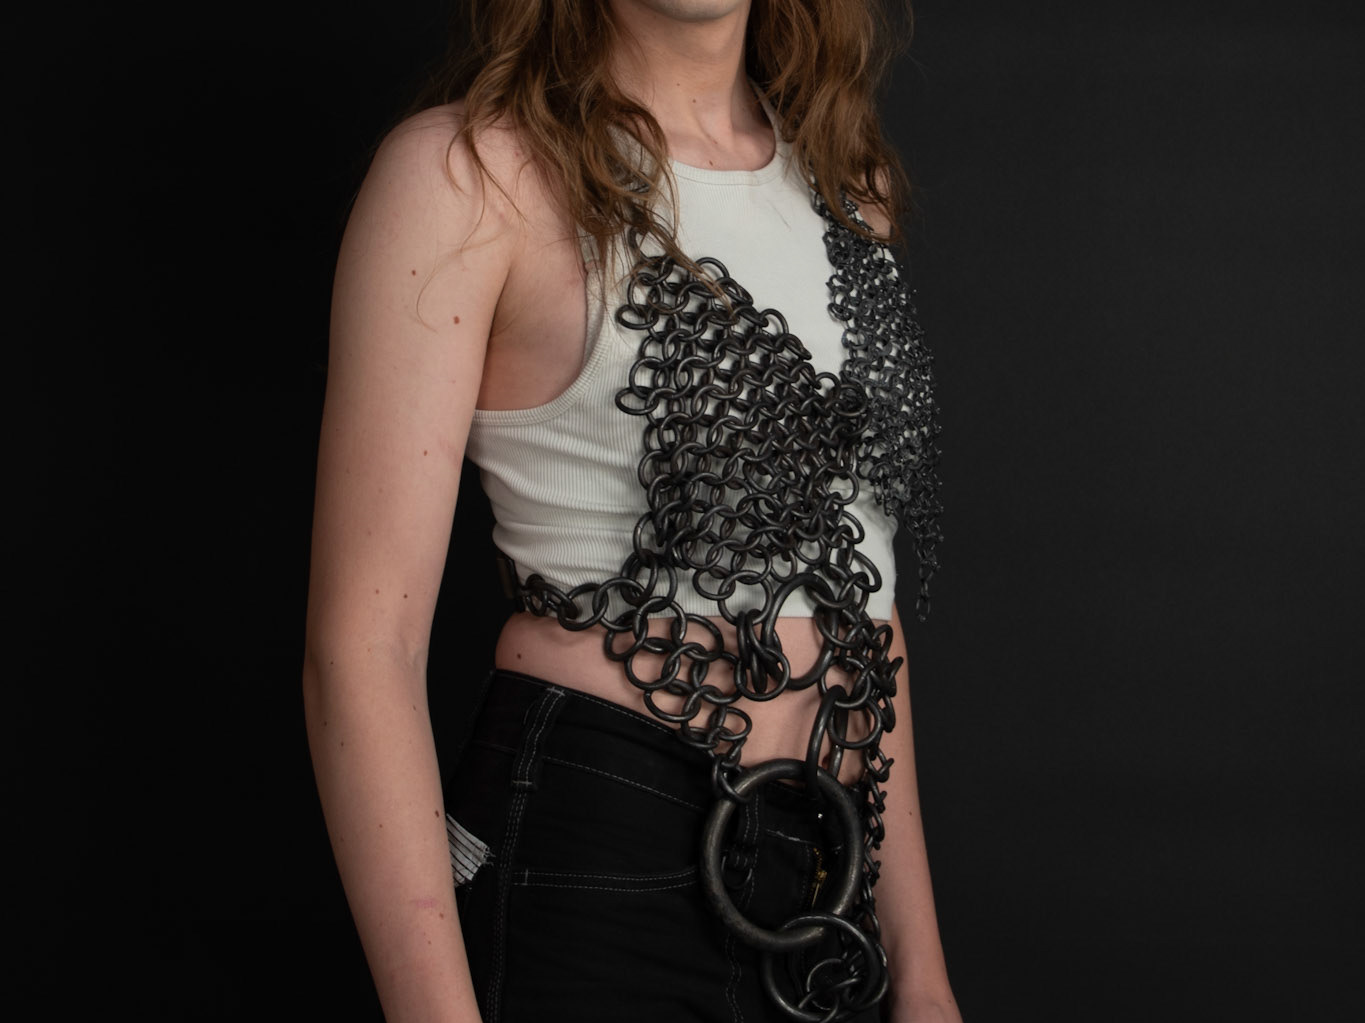
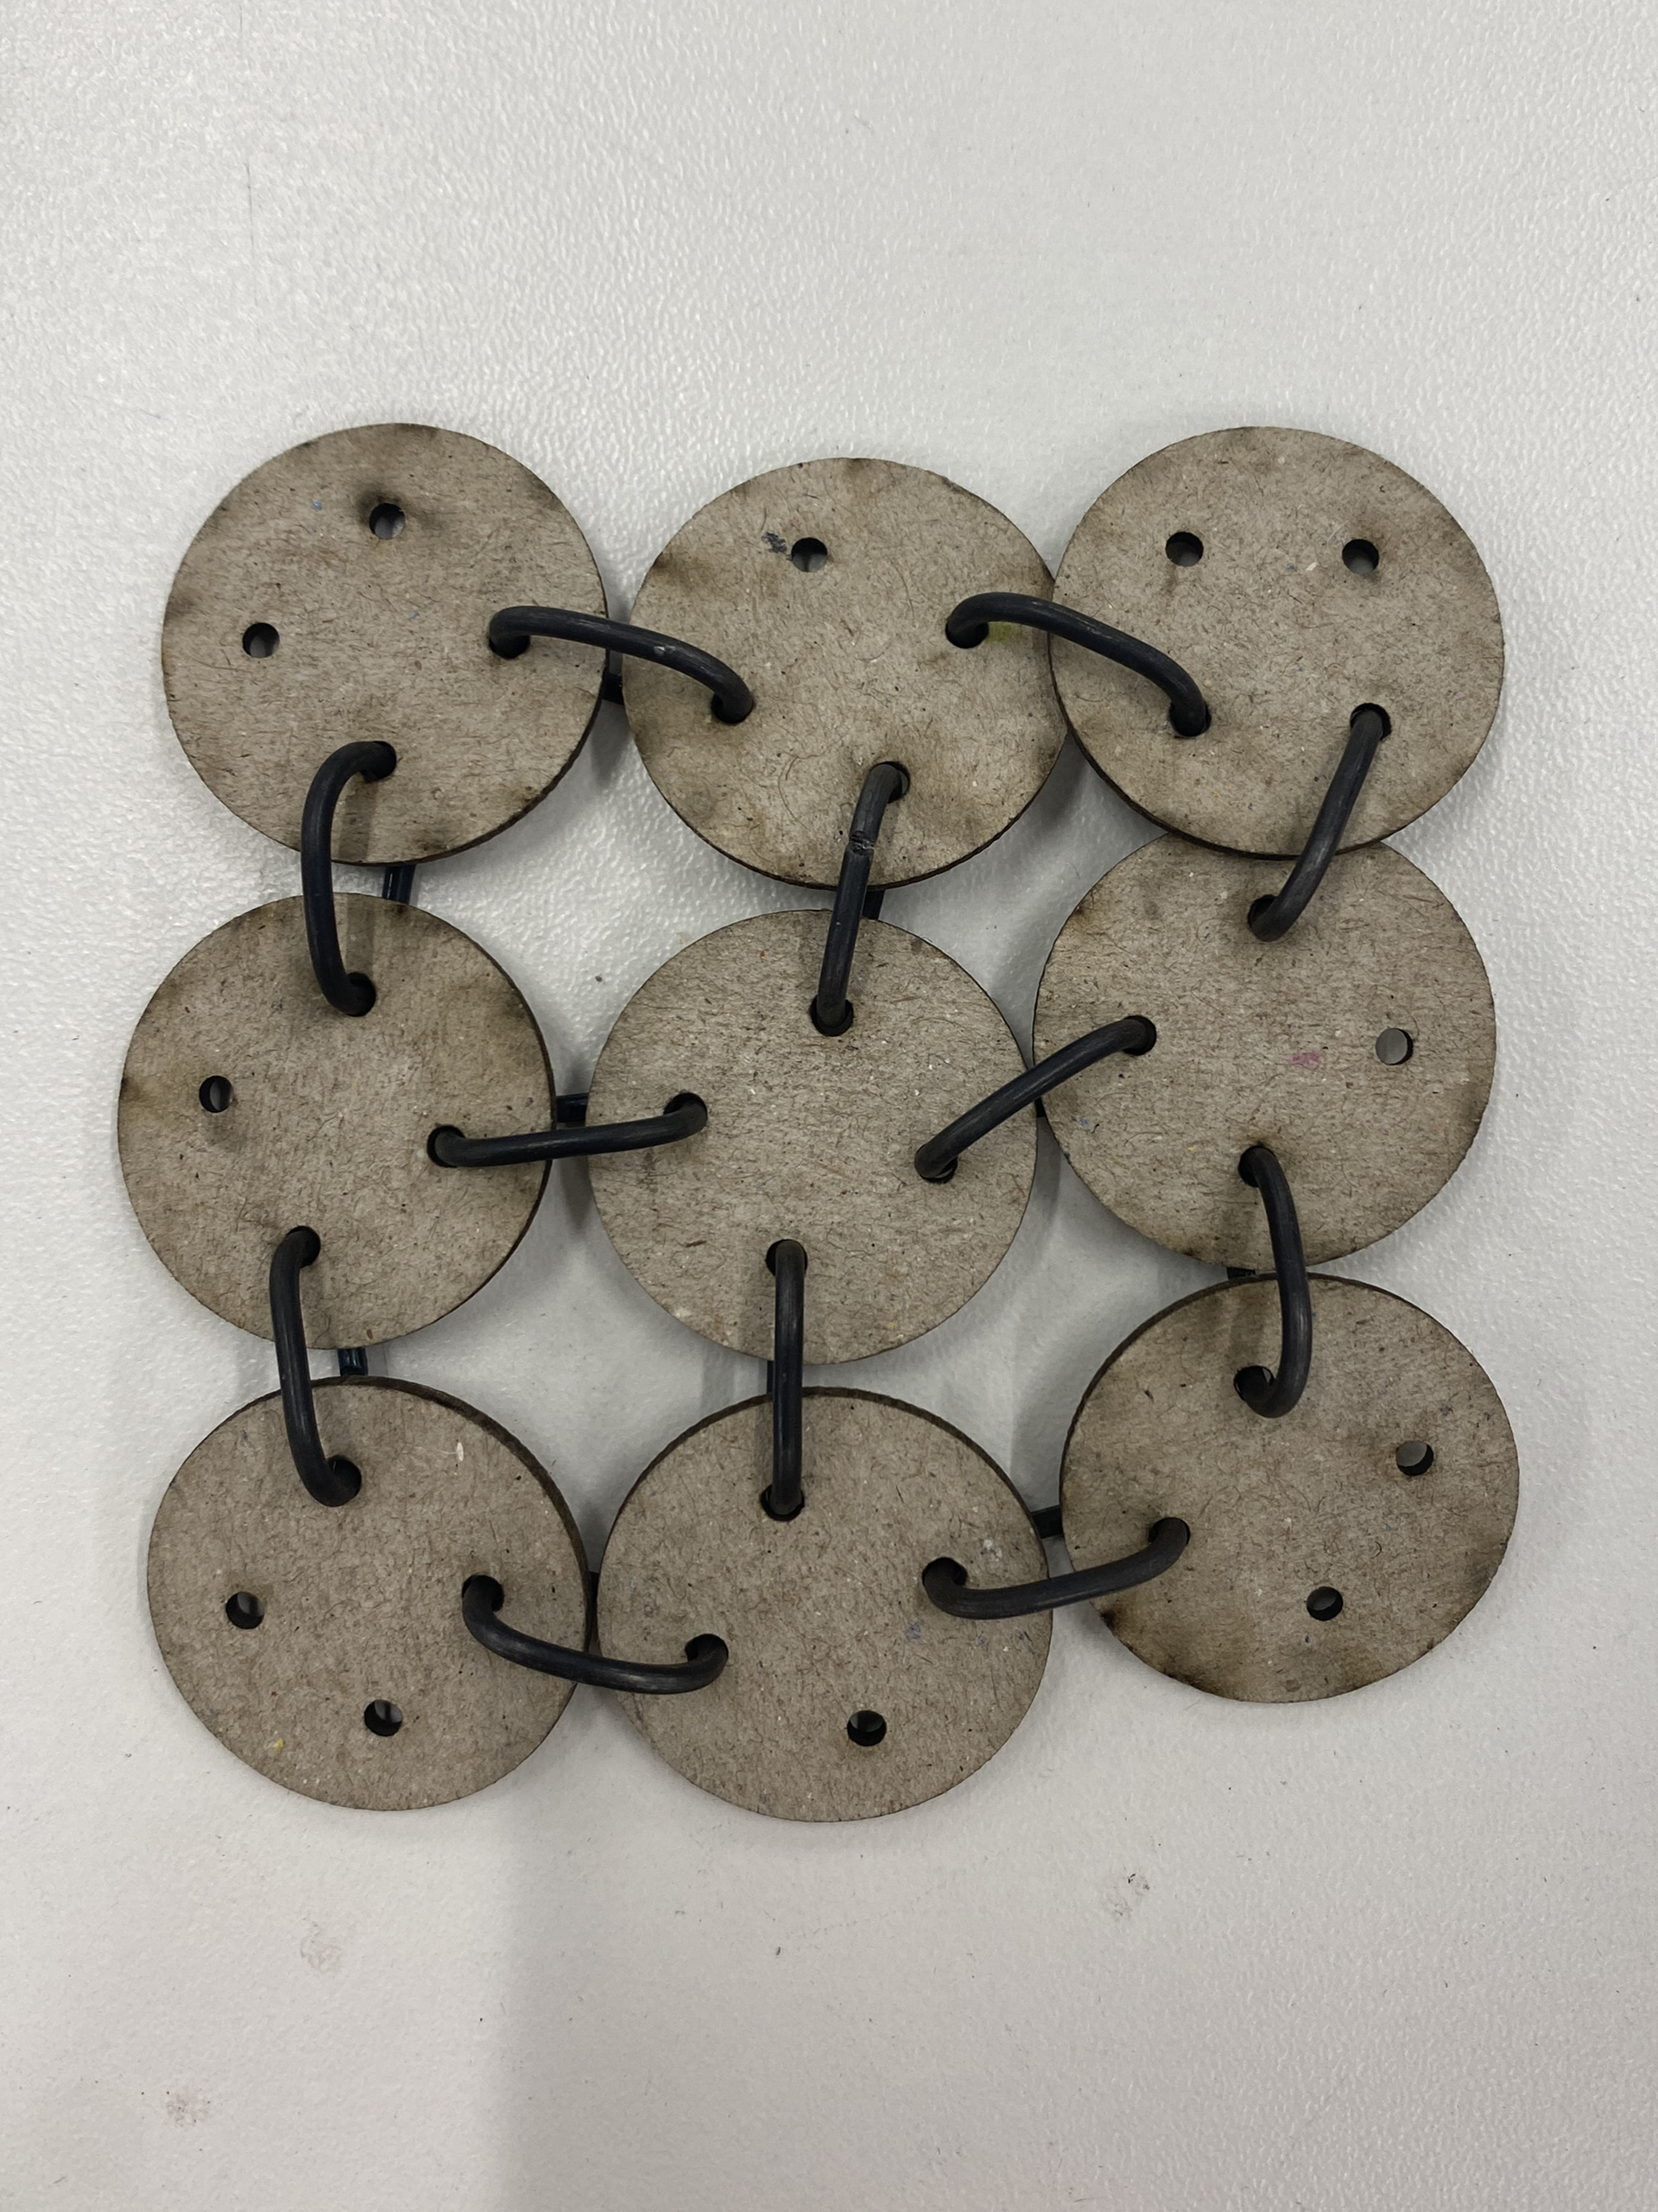
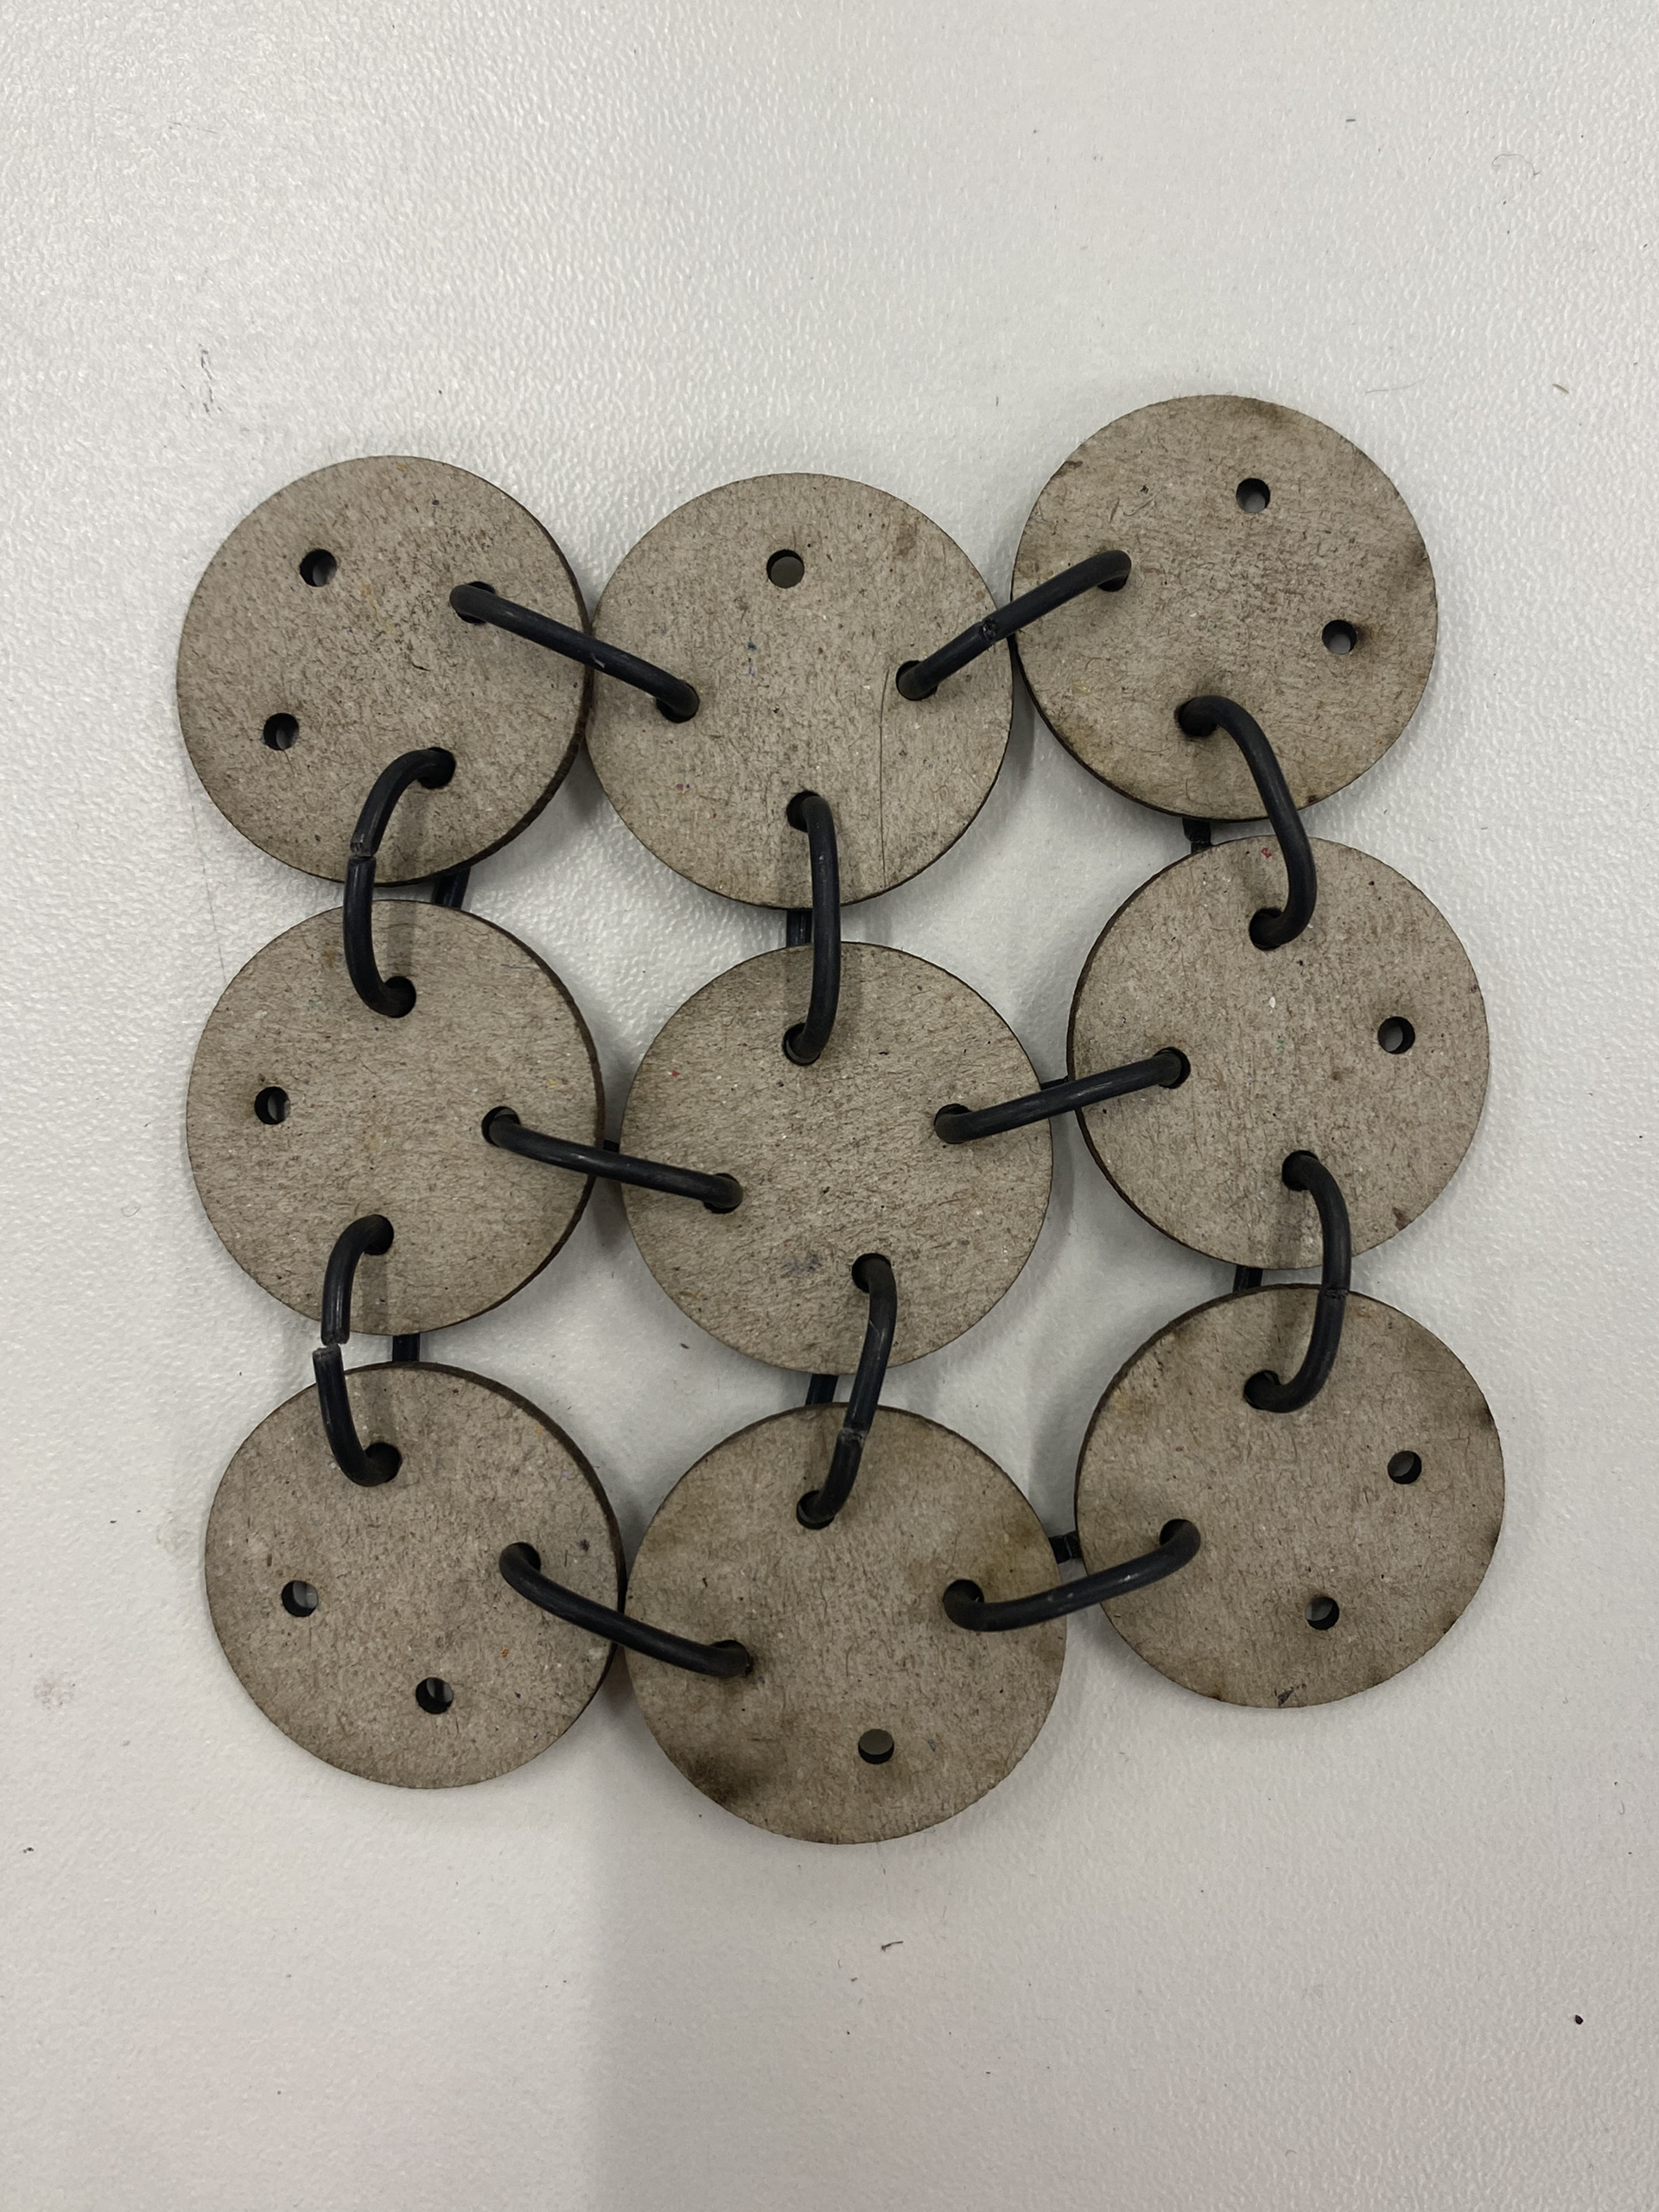
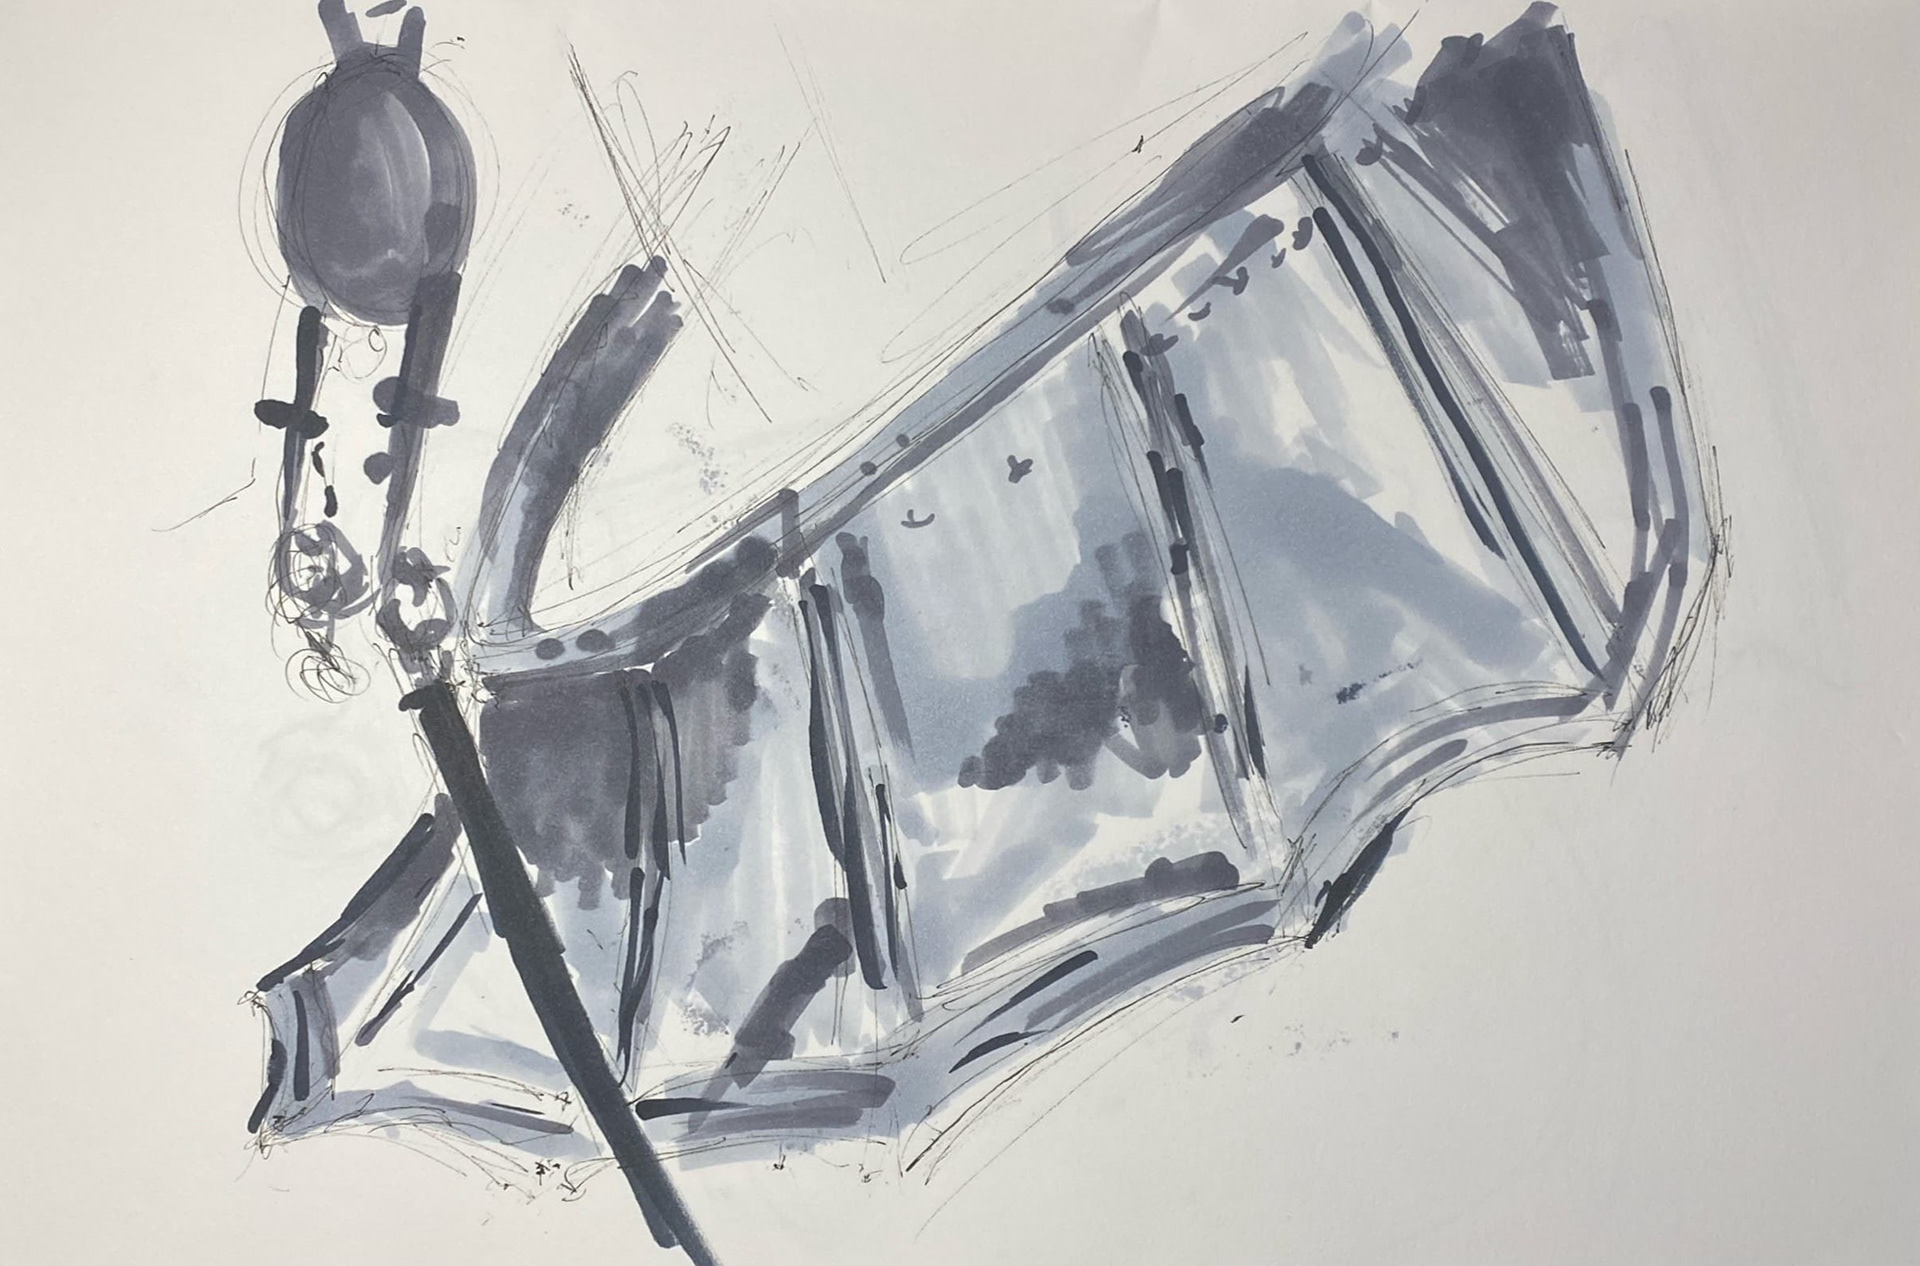
Testing transition from chain to plate
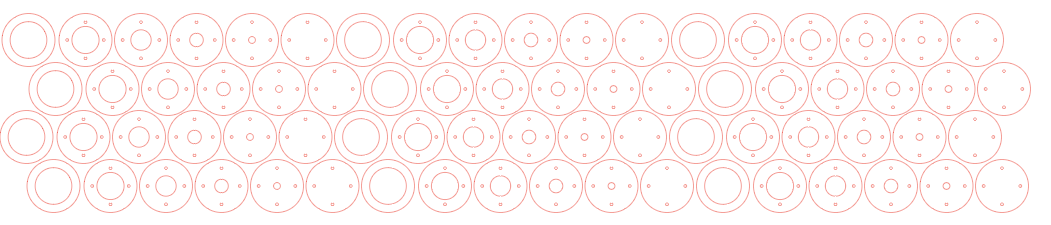
One of the areas that I needed to address from my previous tests was the transition from chain to disk and then solid plate. As altering the sizes of the disks didn't result in a successful outcome, I looked to slowly transition from a torus (chain link) to a flat disk by decreasing the hole in the centre. I reduced this by 5mm increments.
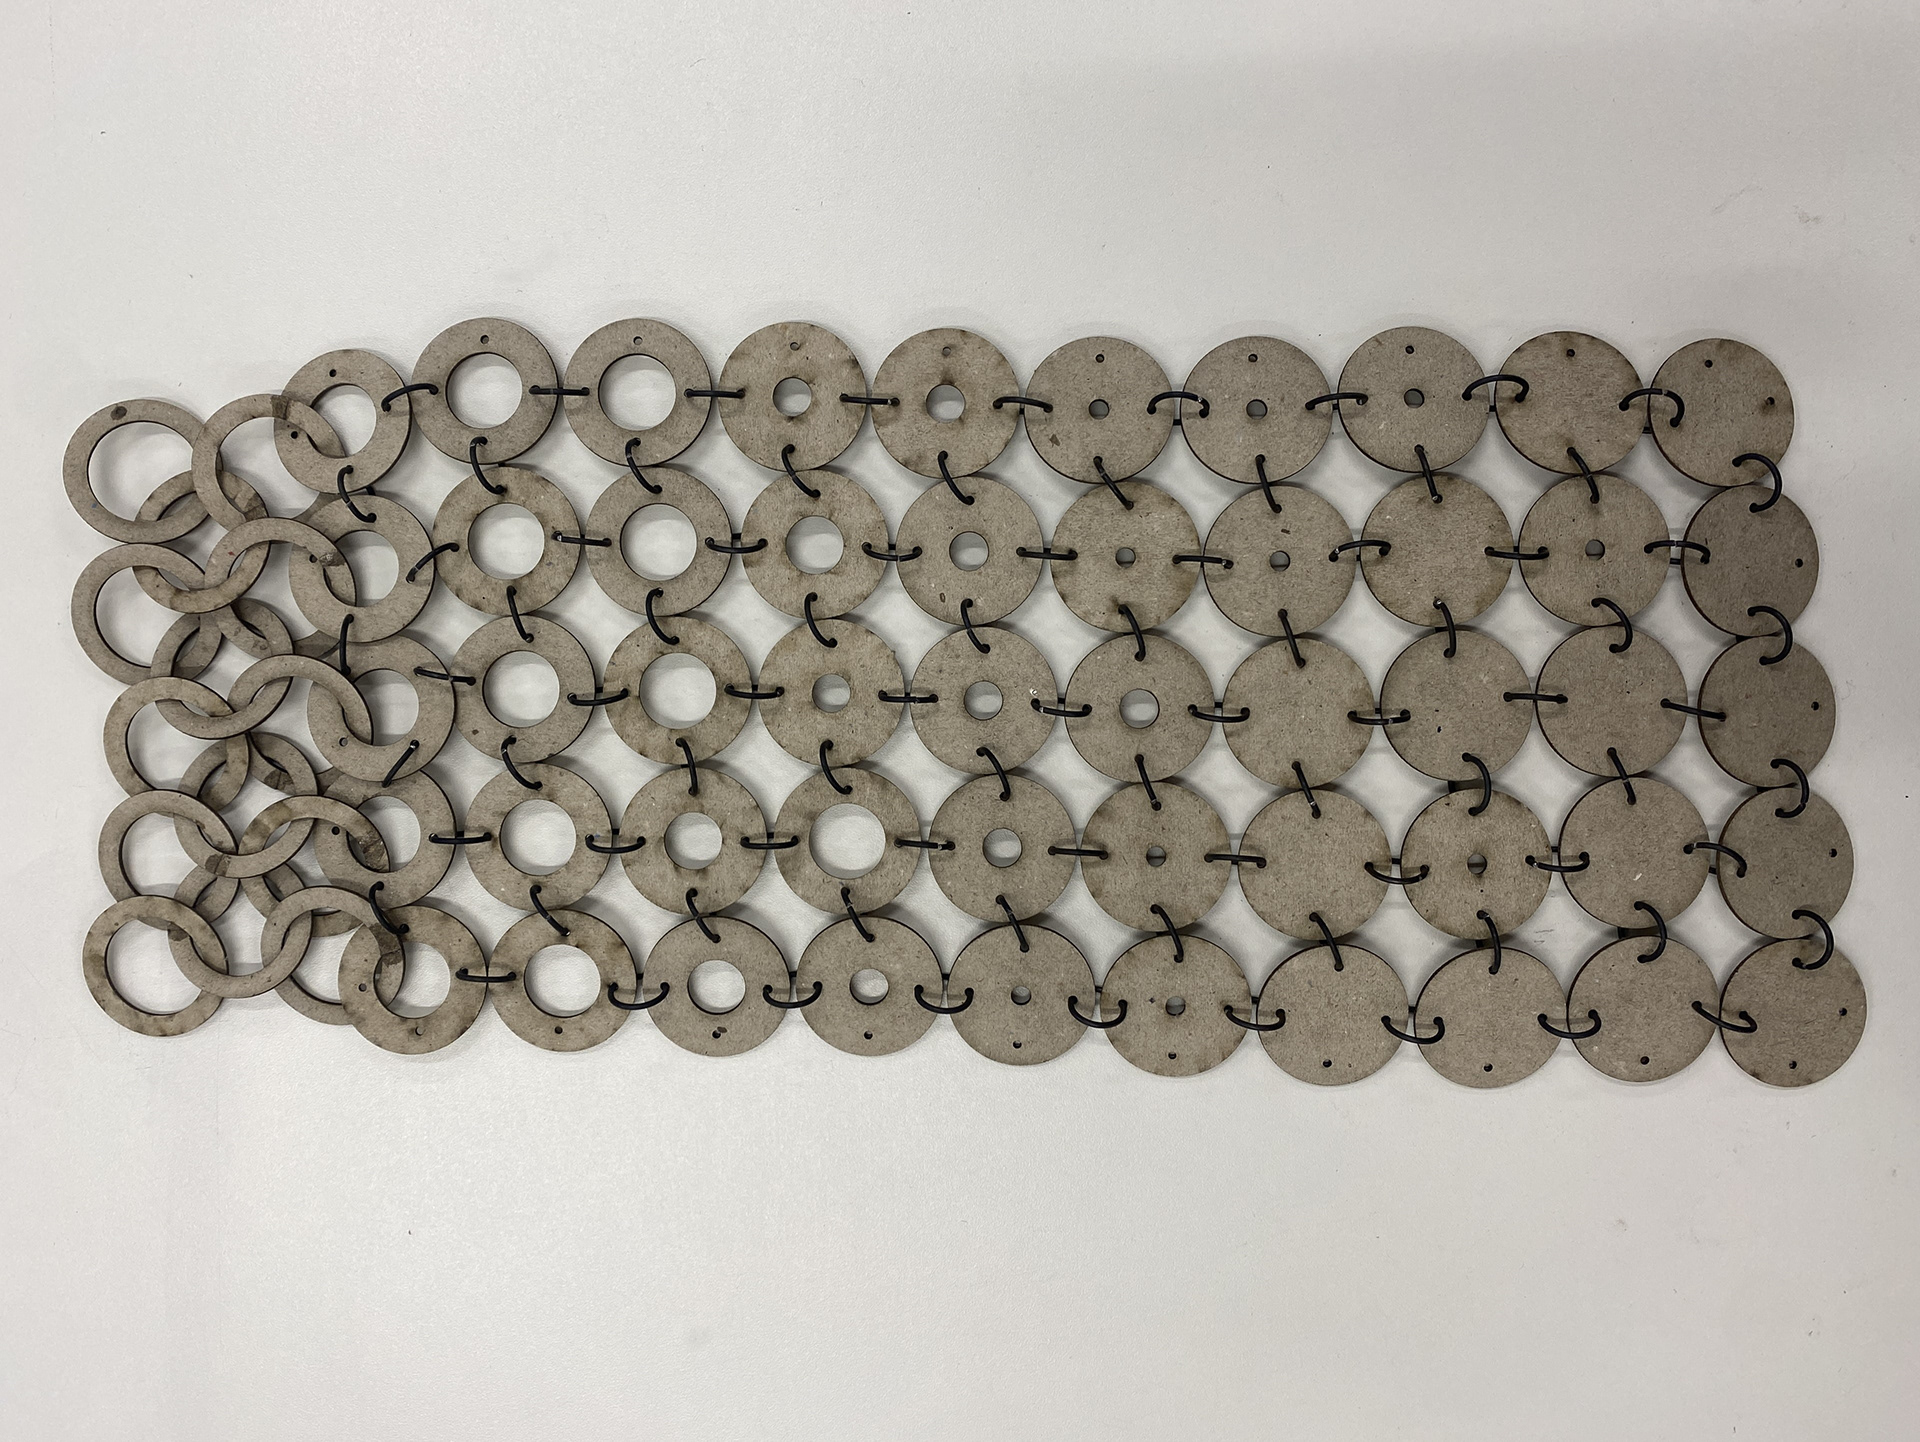
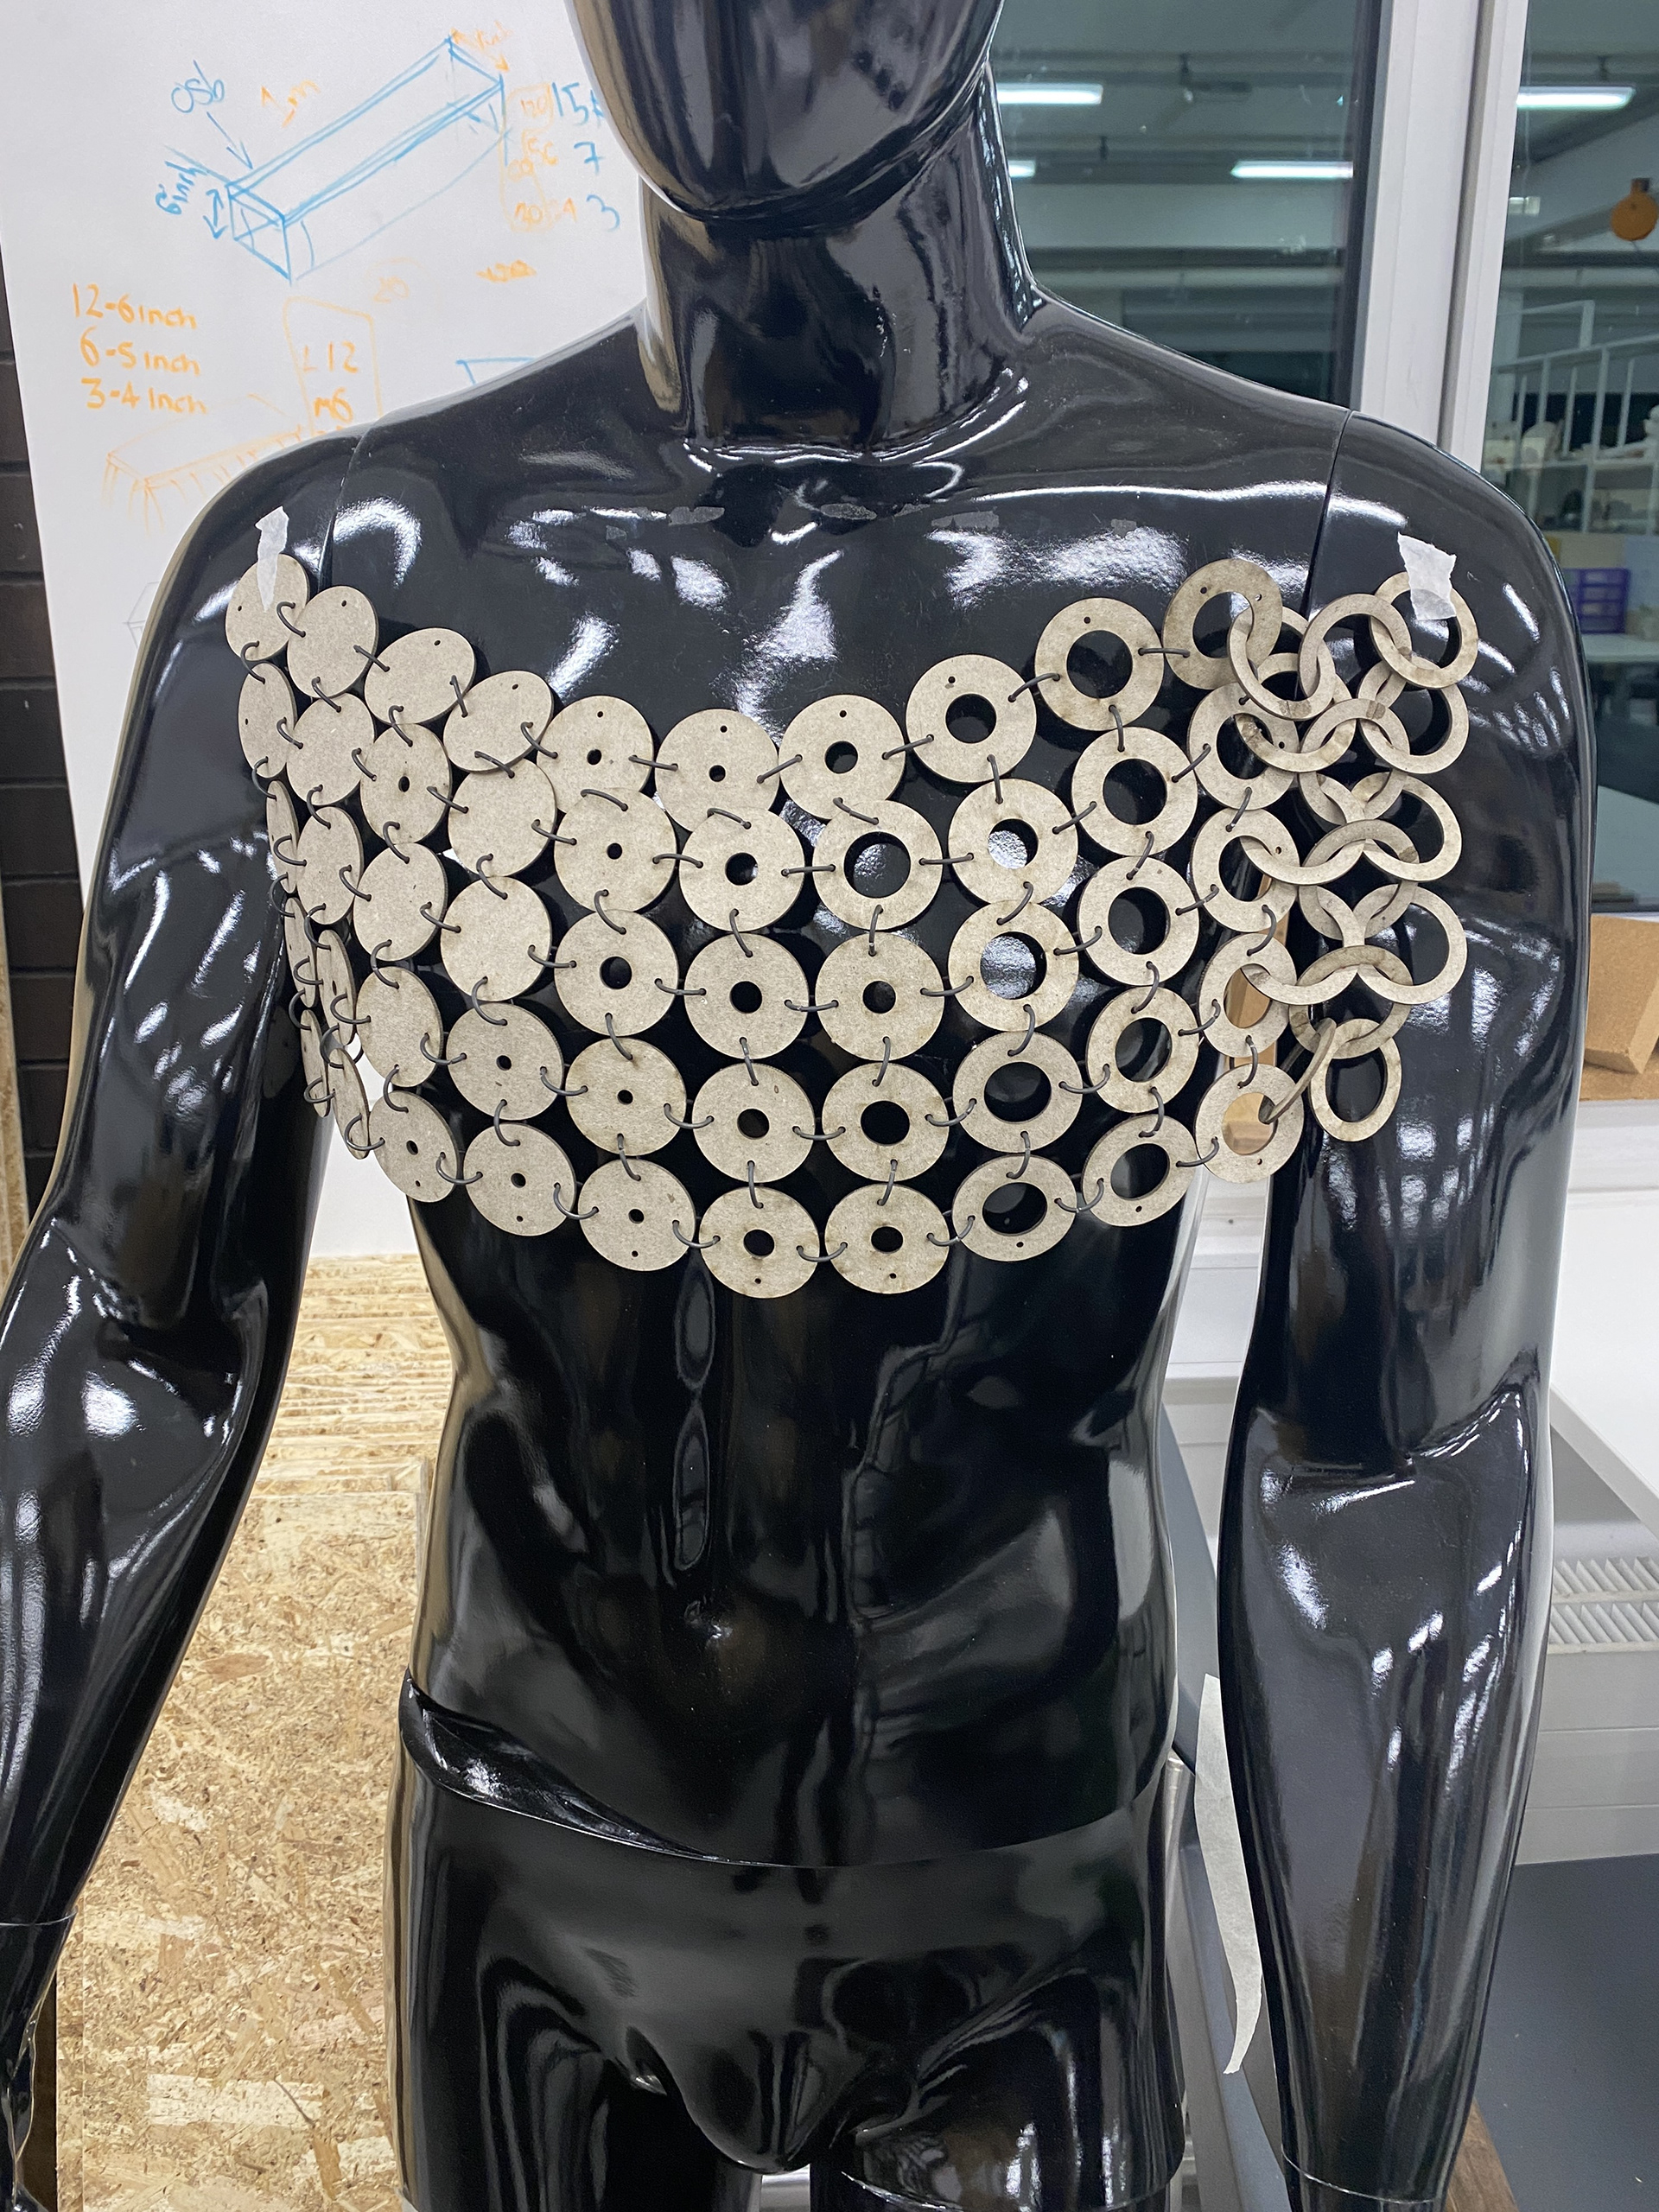
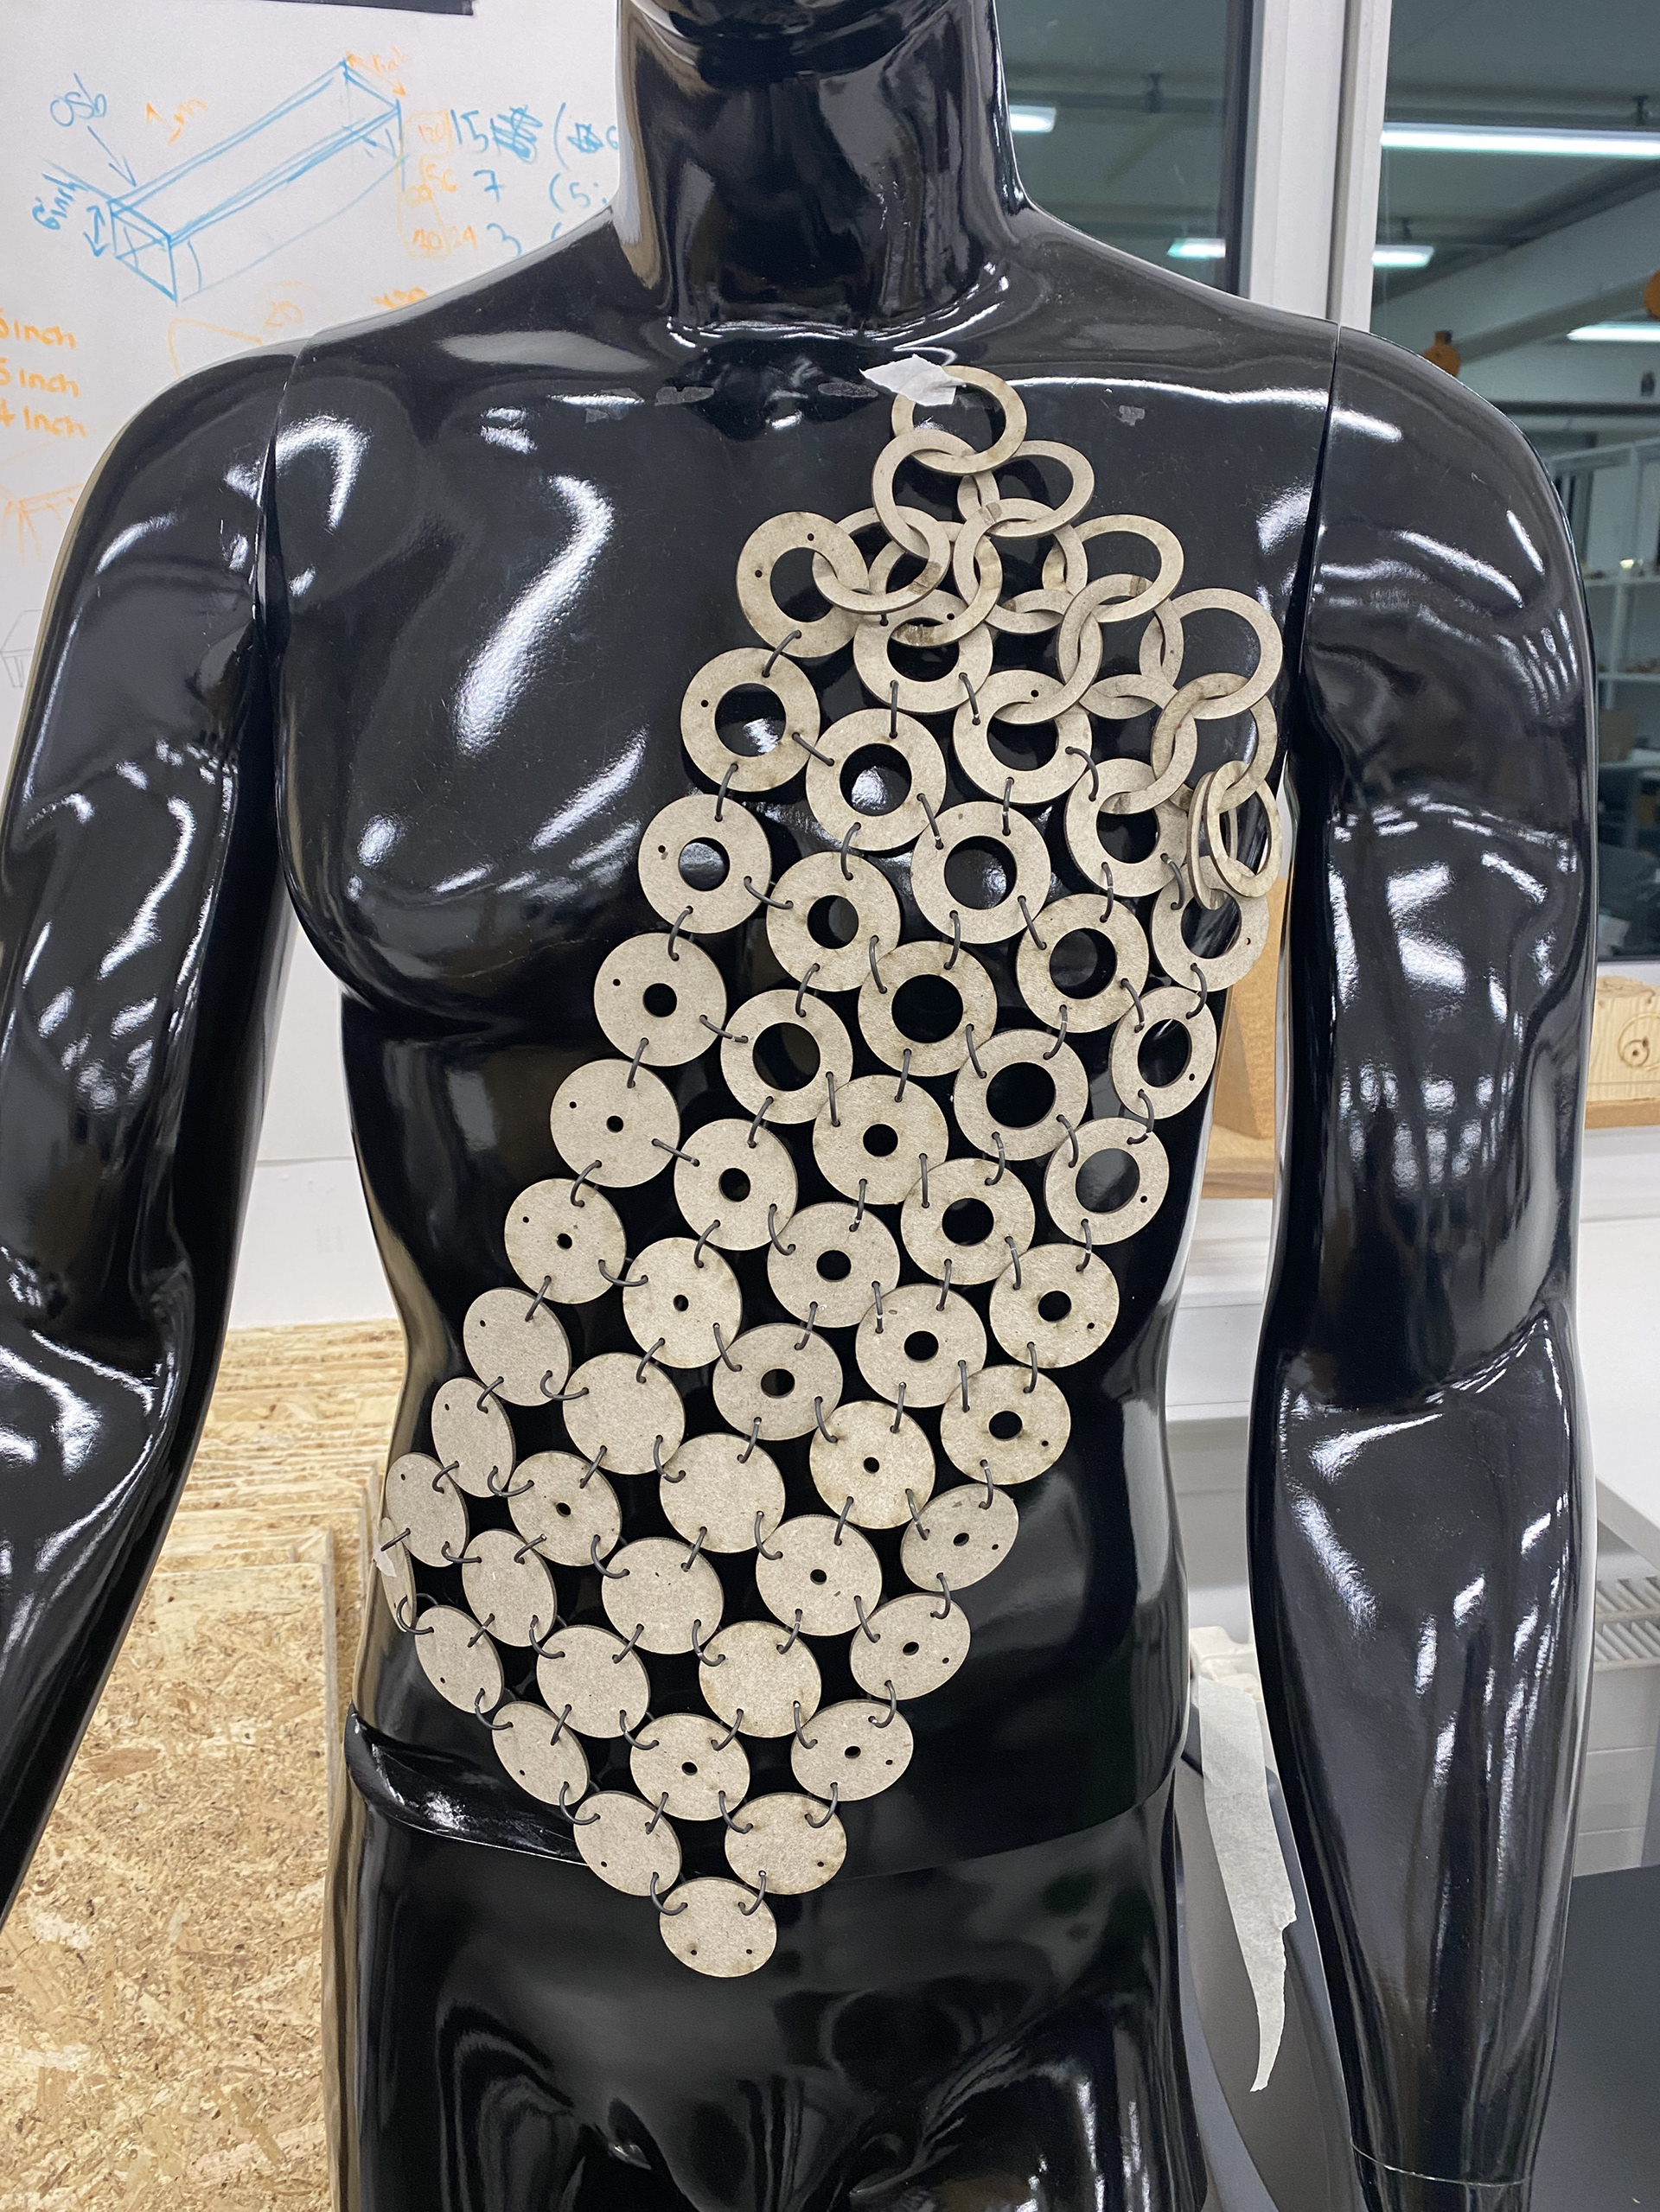
I focused on creating a smooth and gradual gradient from the chain to solid disk. I believe there is potential from this test as it creates a simple flexible structure that allows me to purely focus on the coverage over the body. I feel that there is still work to test the transition from torus to the first disk, potentially staggering this transition along the rows as well as columns of the weave. Additionally, I feel that exploring different patterns, rather than a simple rectangle will enhance the impact of which area of the body is covered/ protected.
I also believe that in a larger test the circular jump rings aren’t as dominant as my previous smaller tests.
Sketching plate over laser cut mail
After creating many different structures and sample, I was lacking the aesthetics and creative direction to further develop them. Therefore, I created a series of sketches to explore how these would fit onto the body and help drive the narrative.
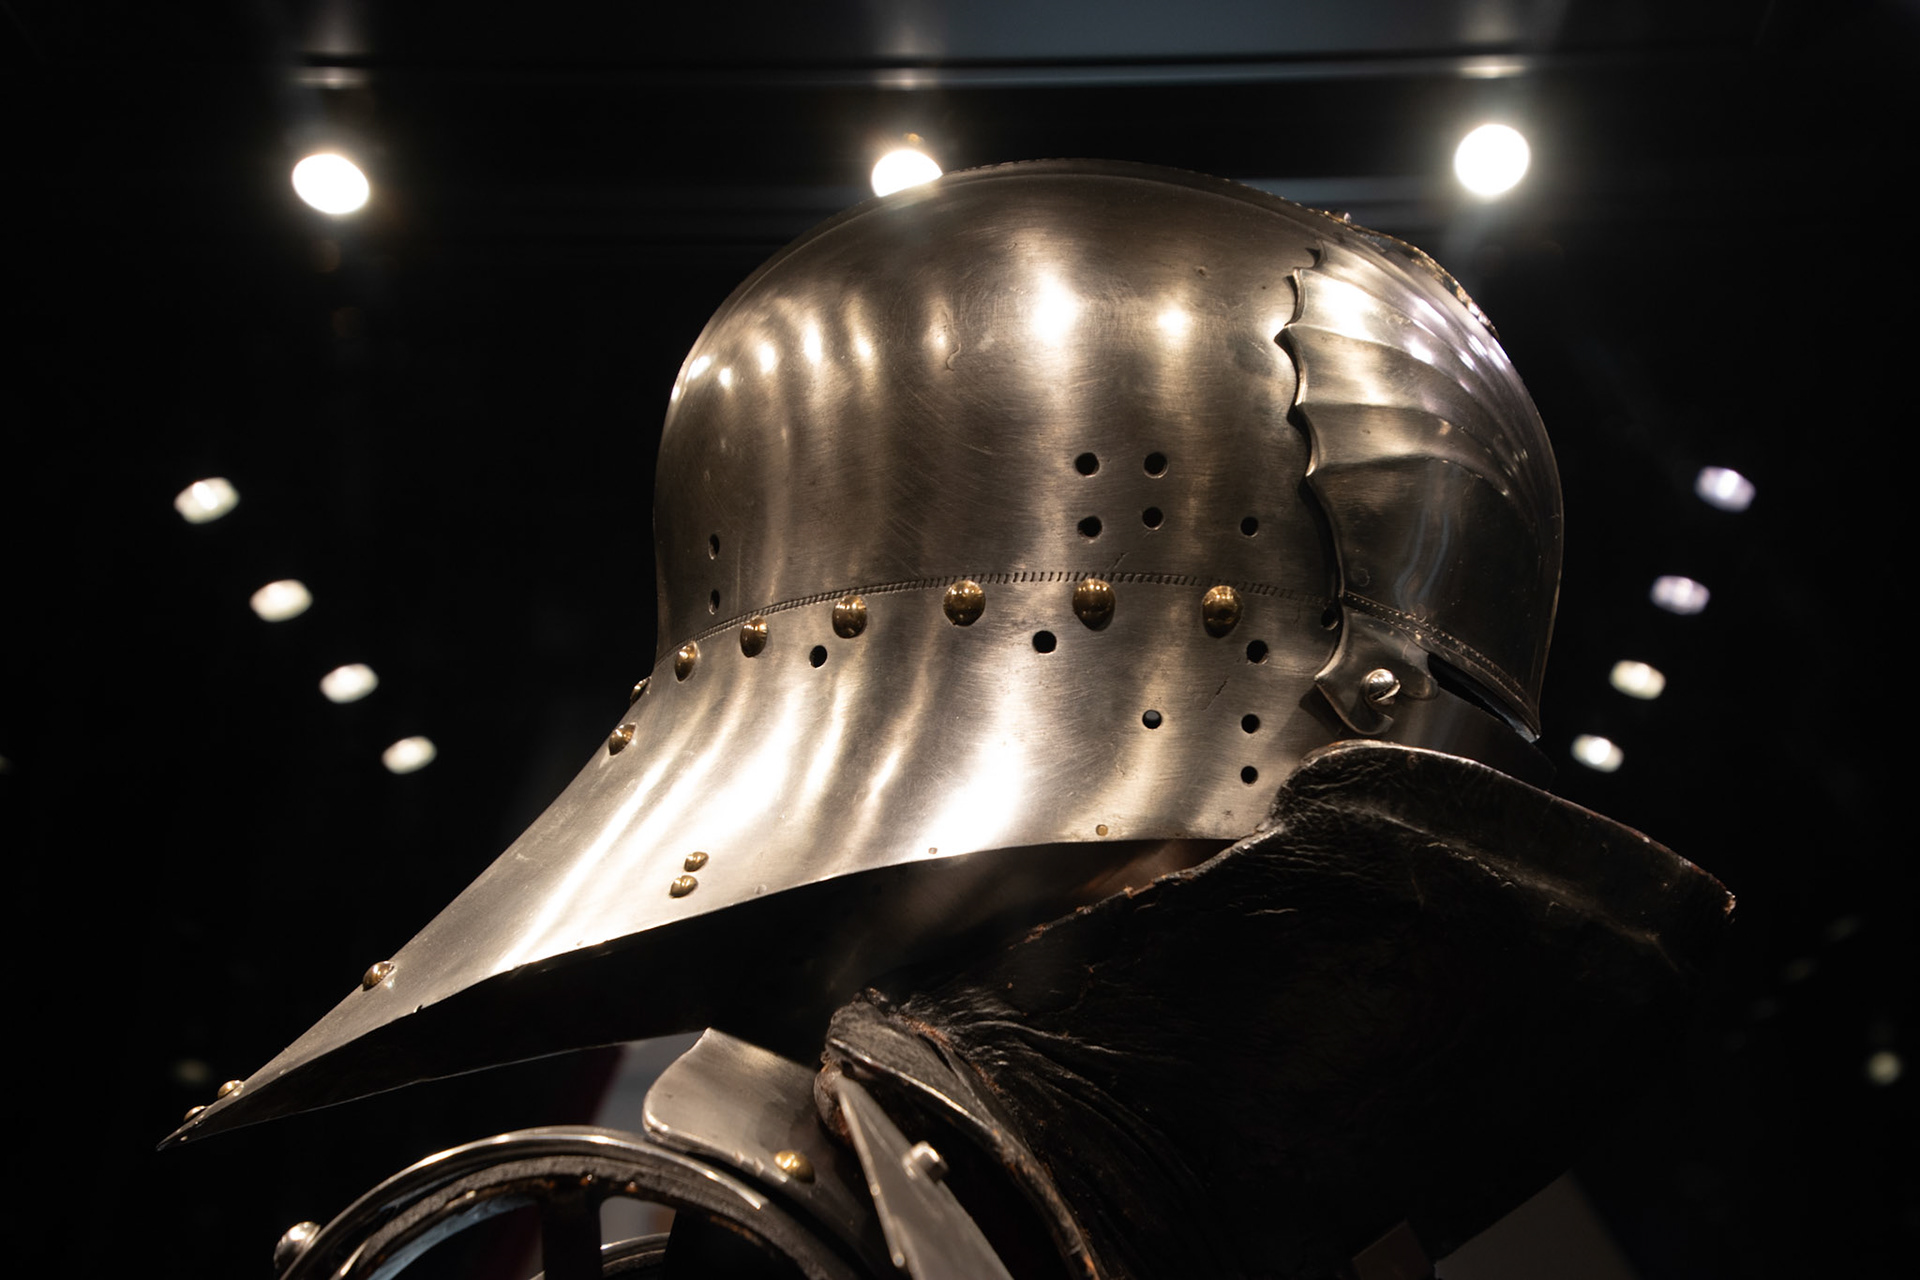
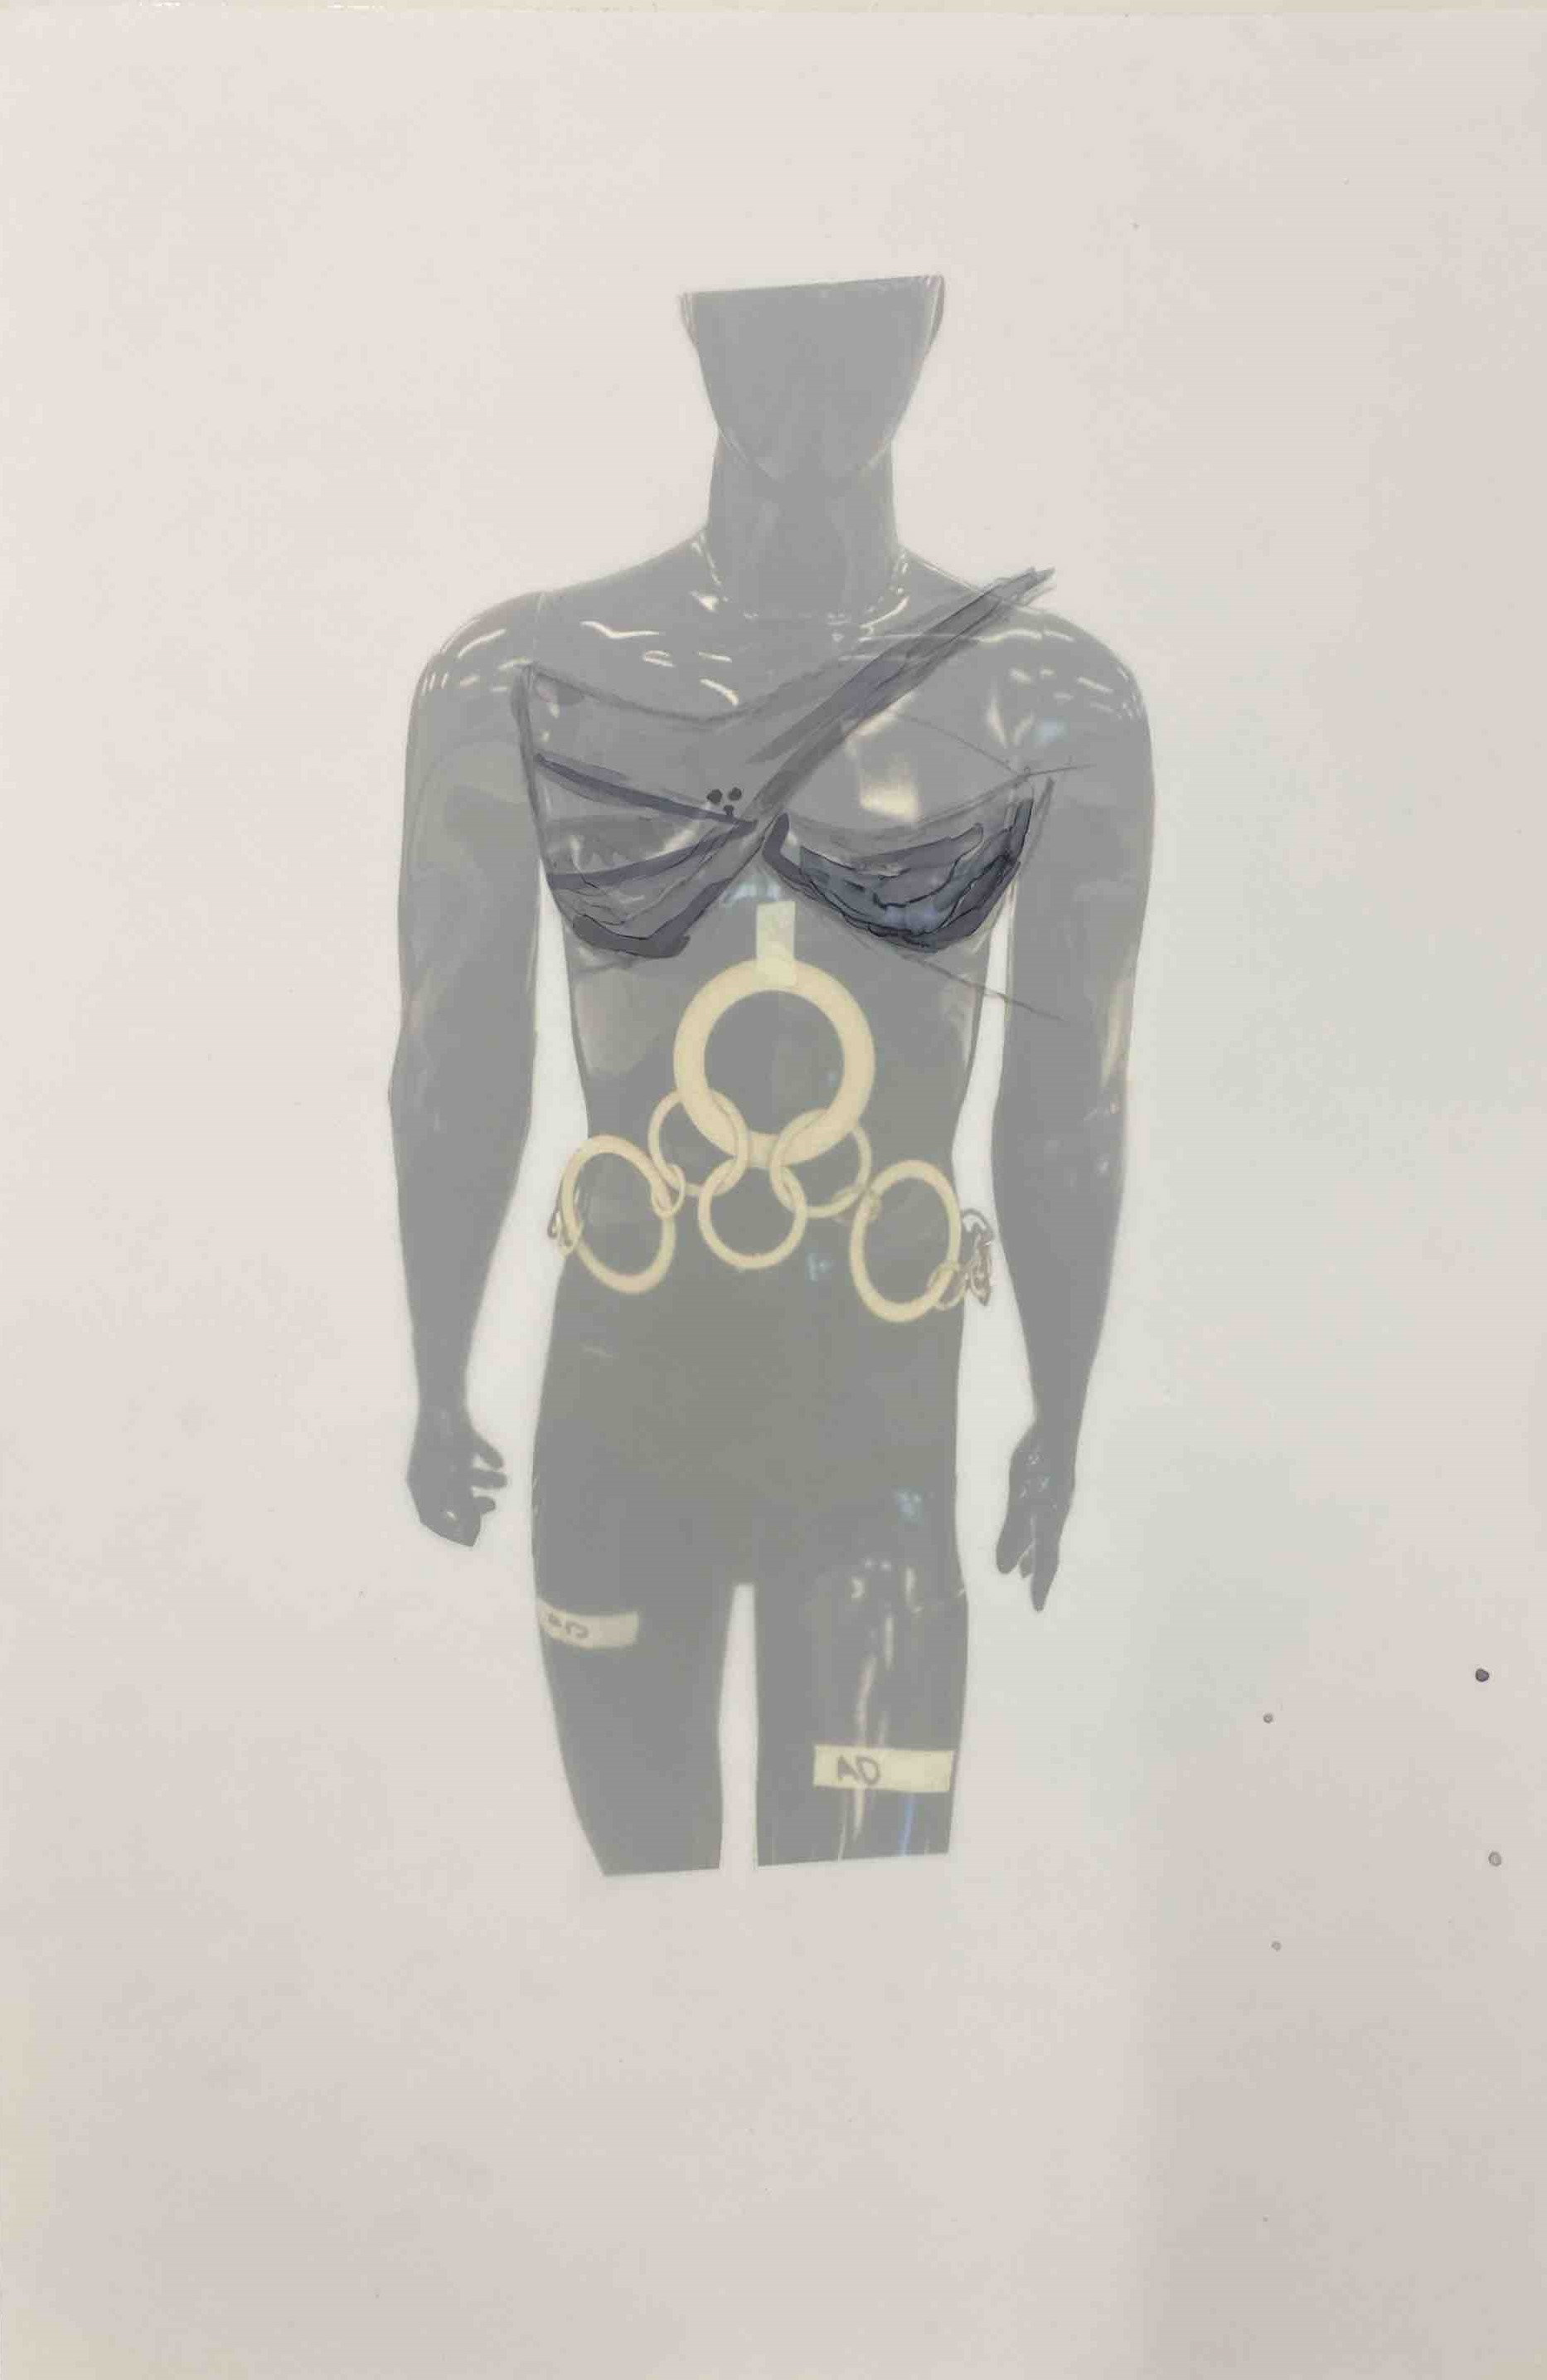
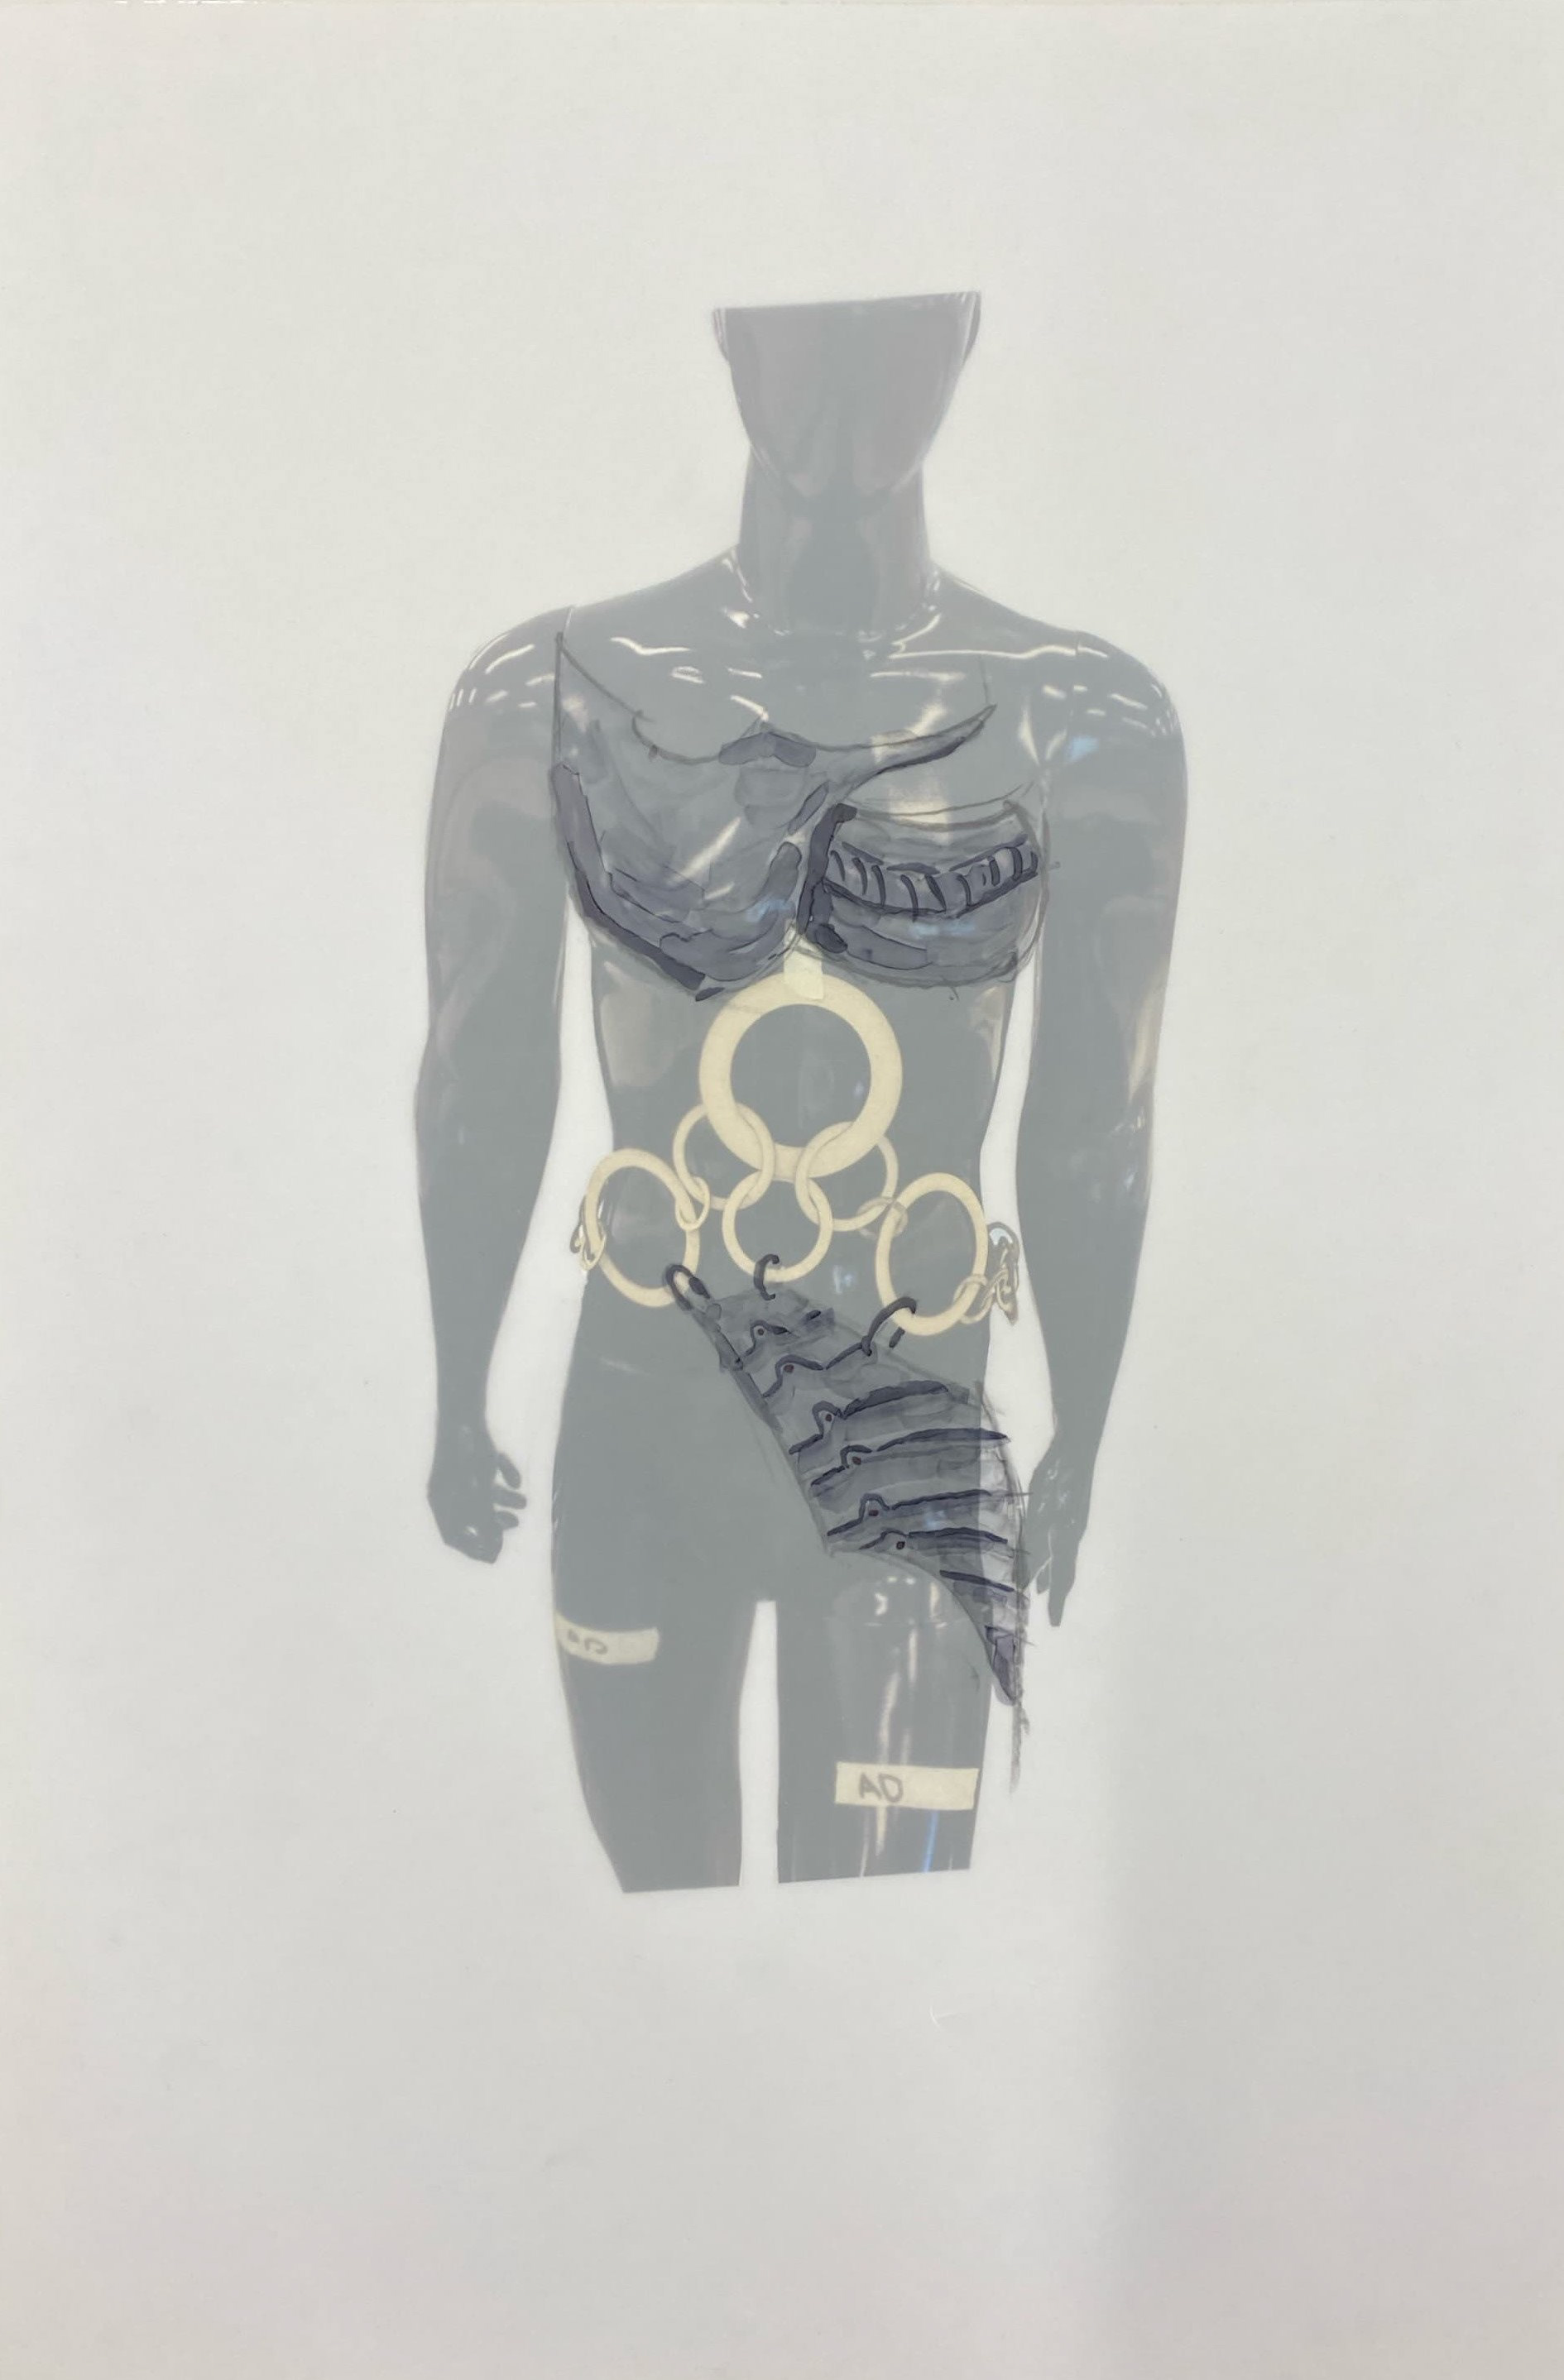
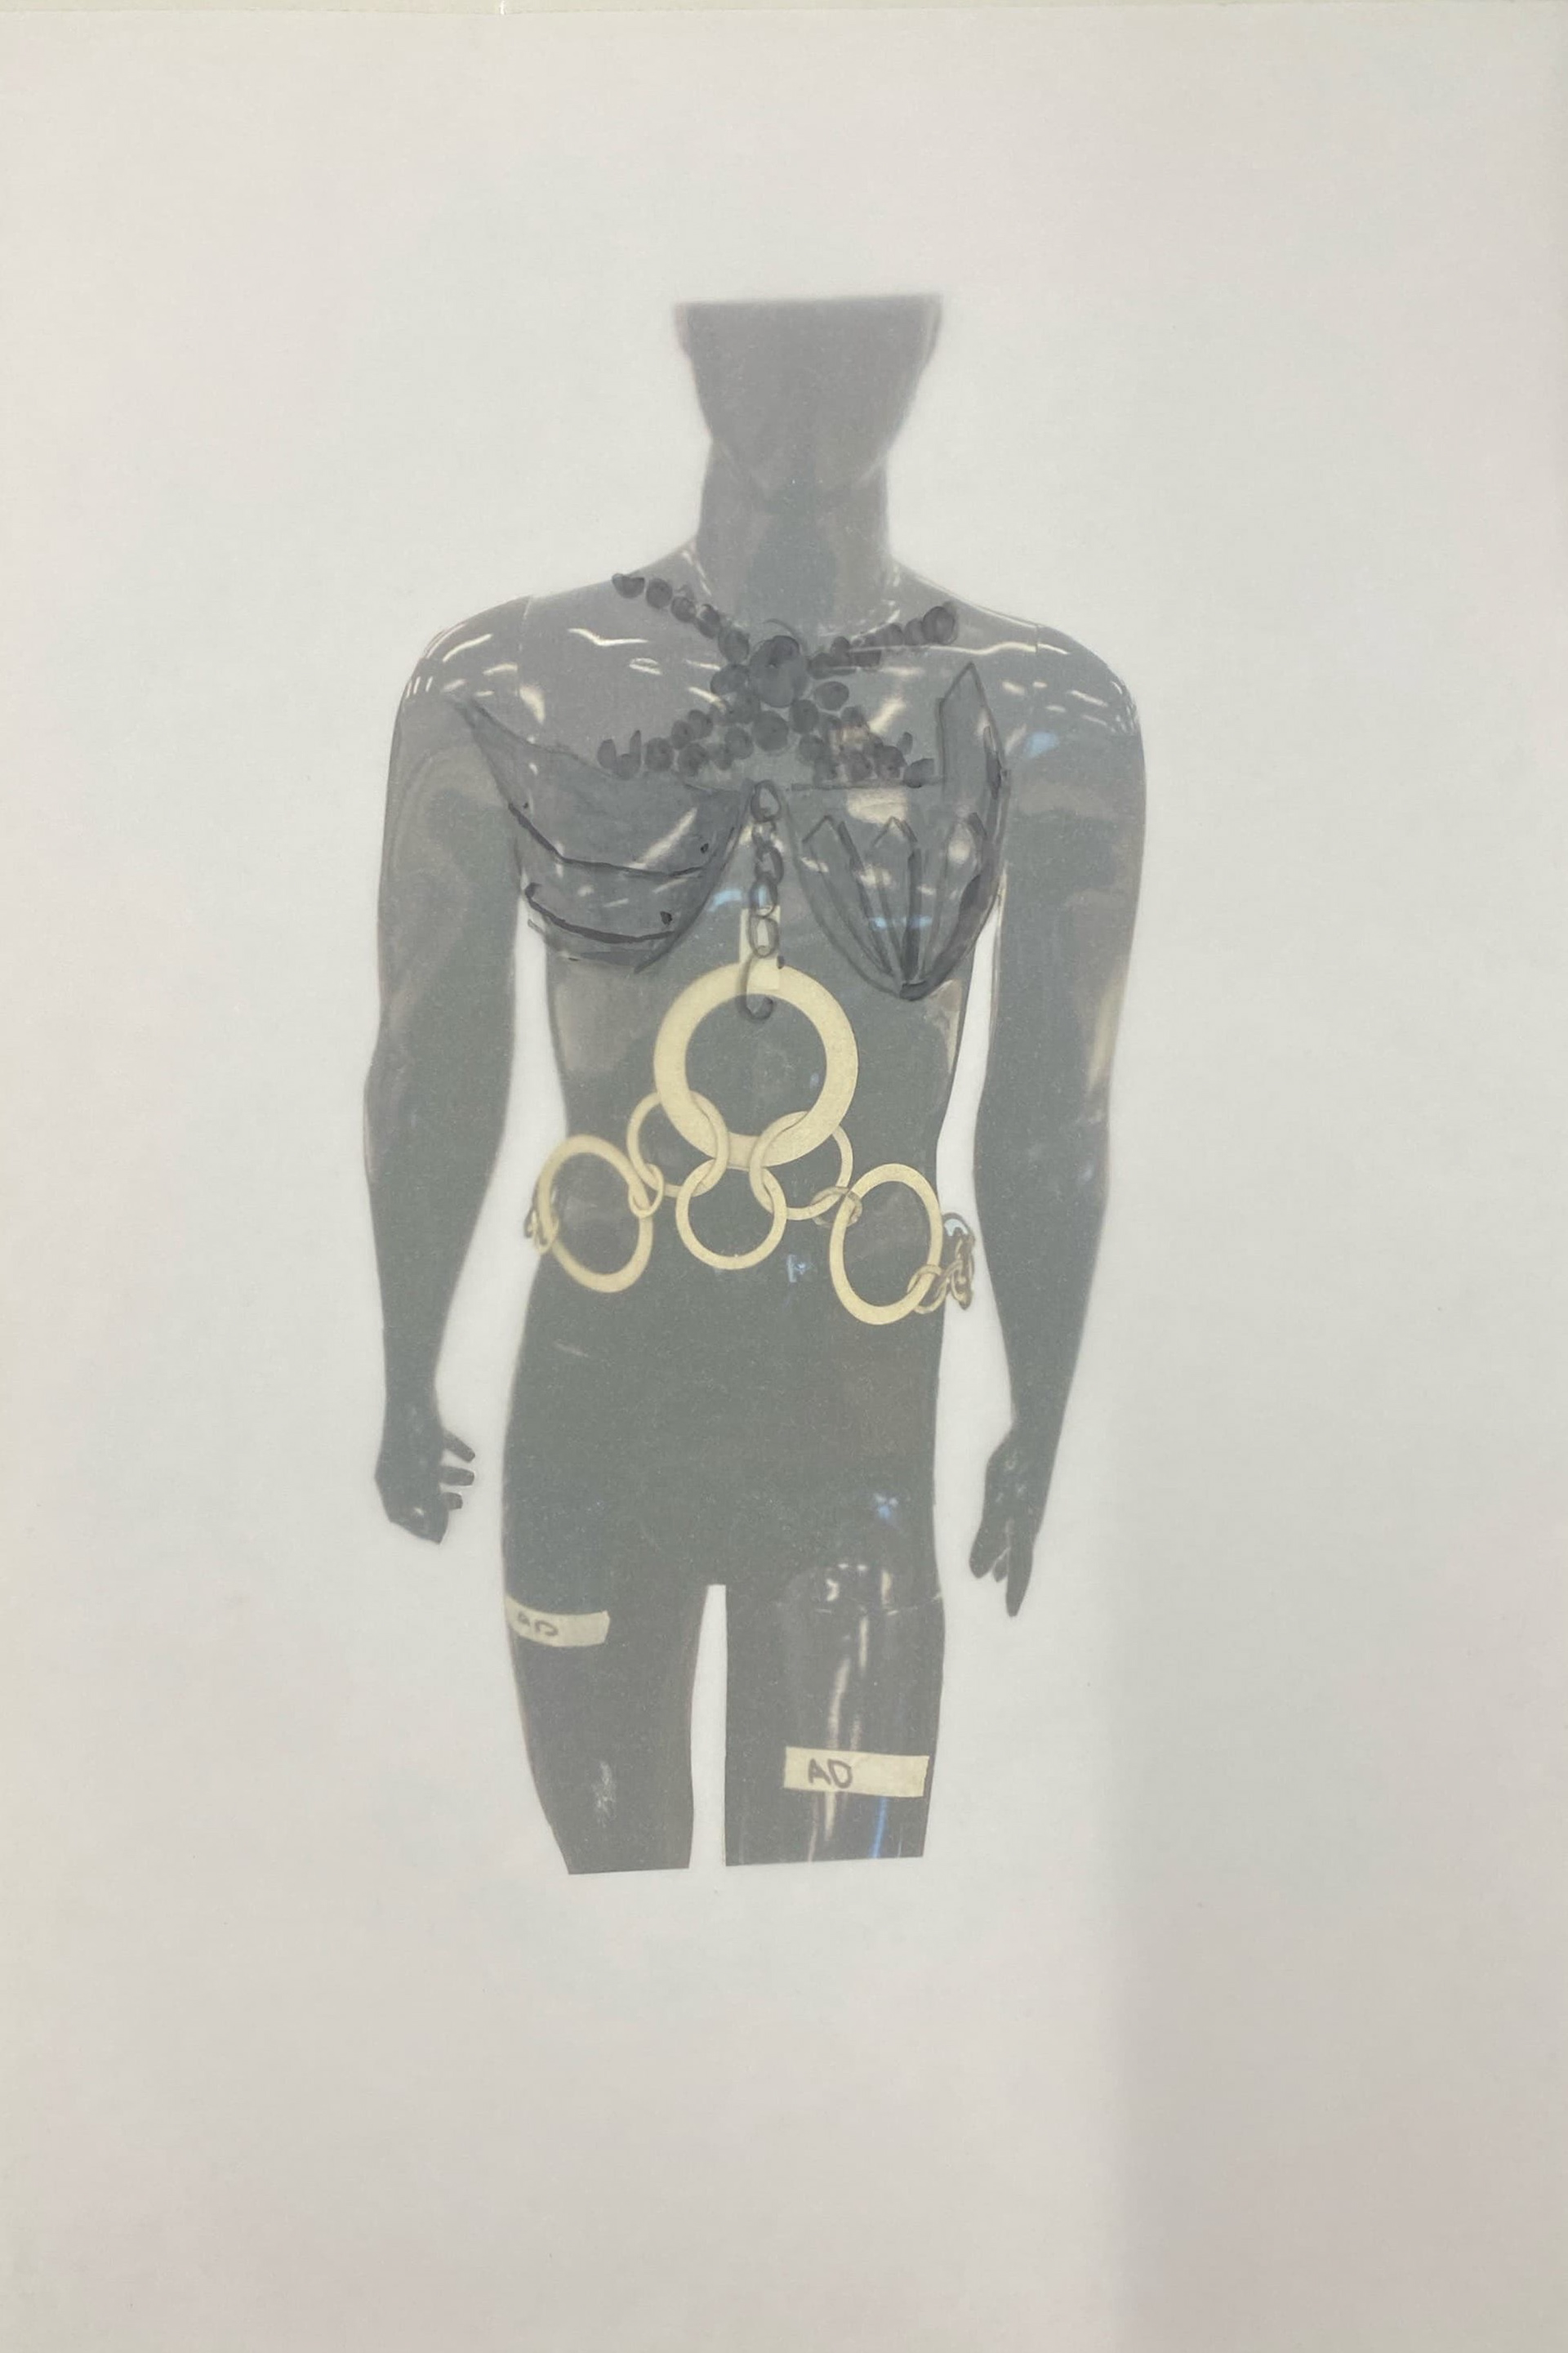
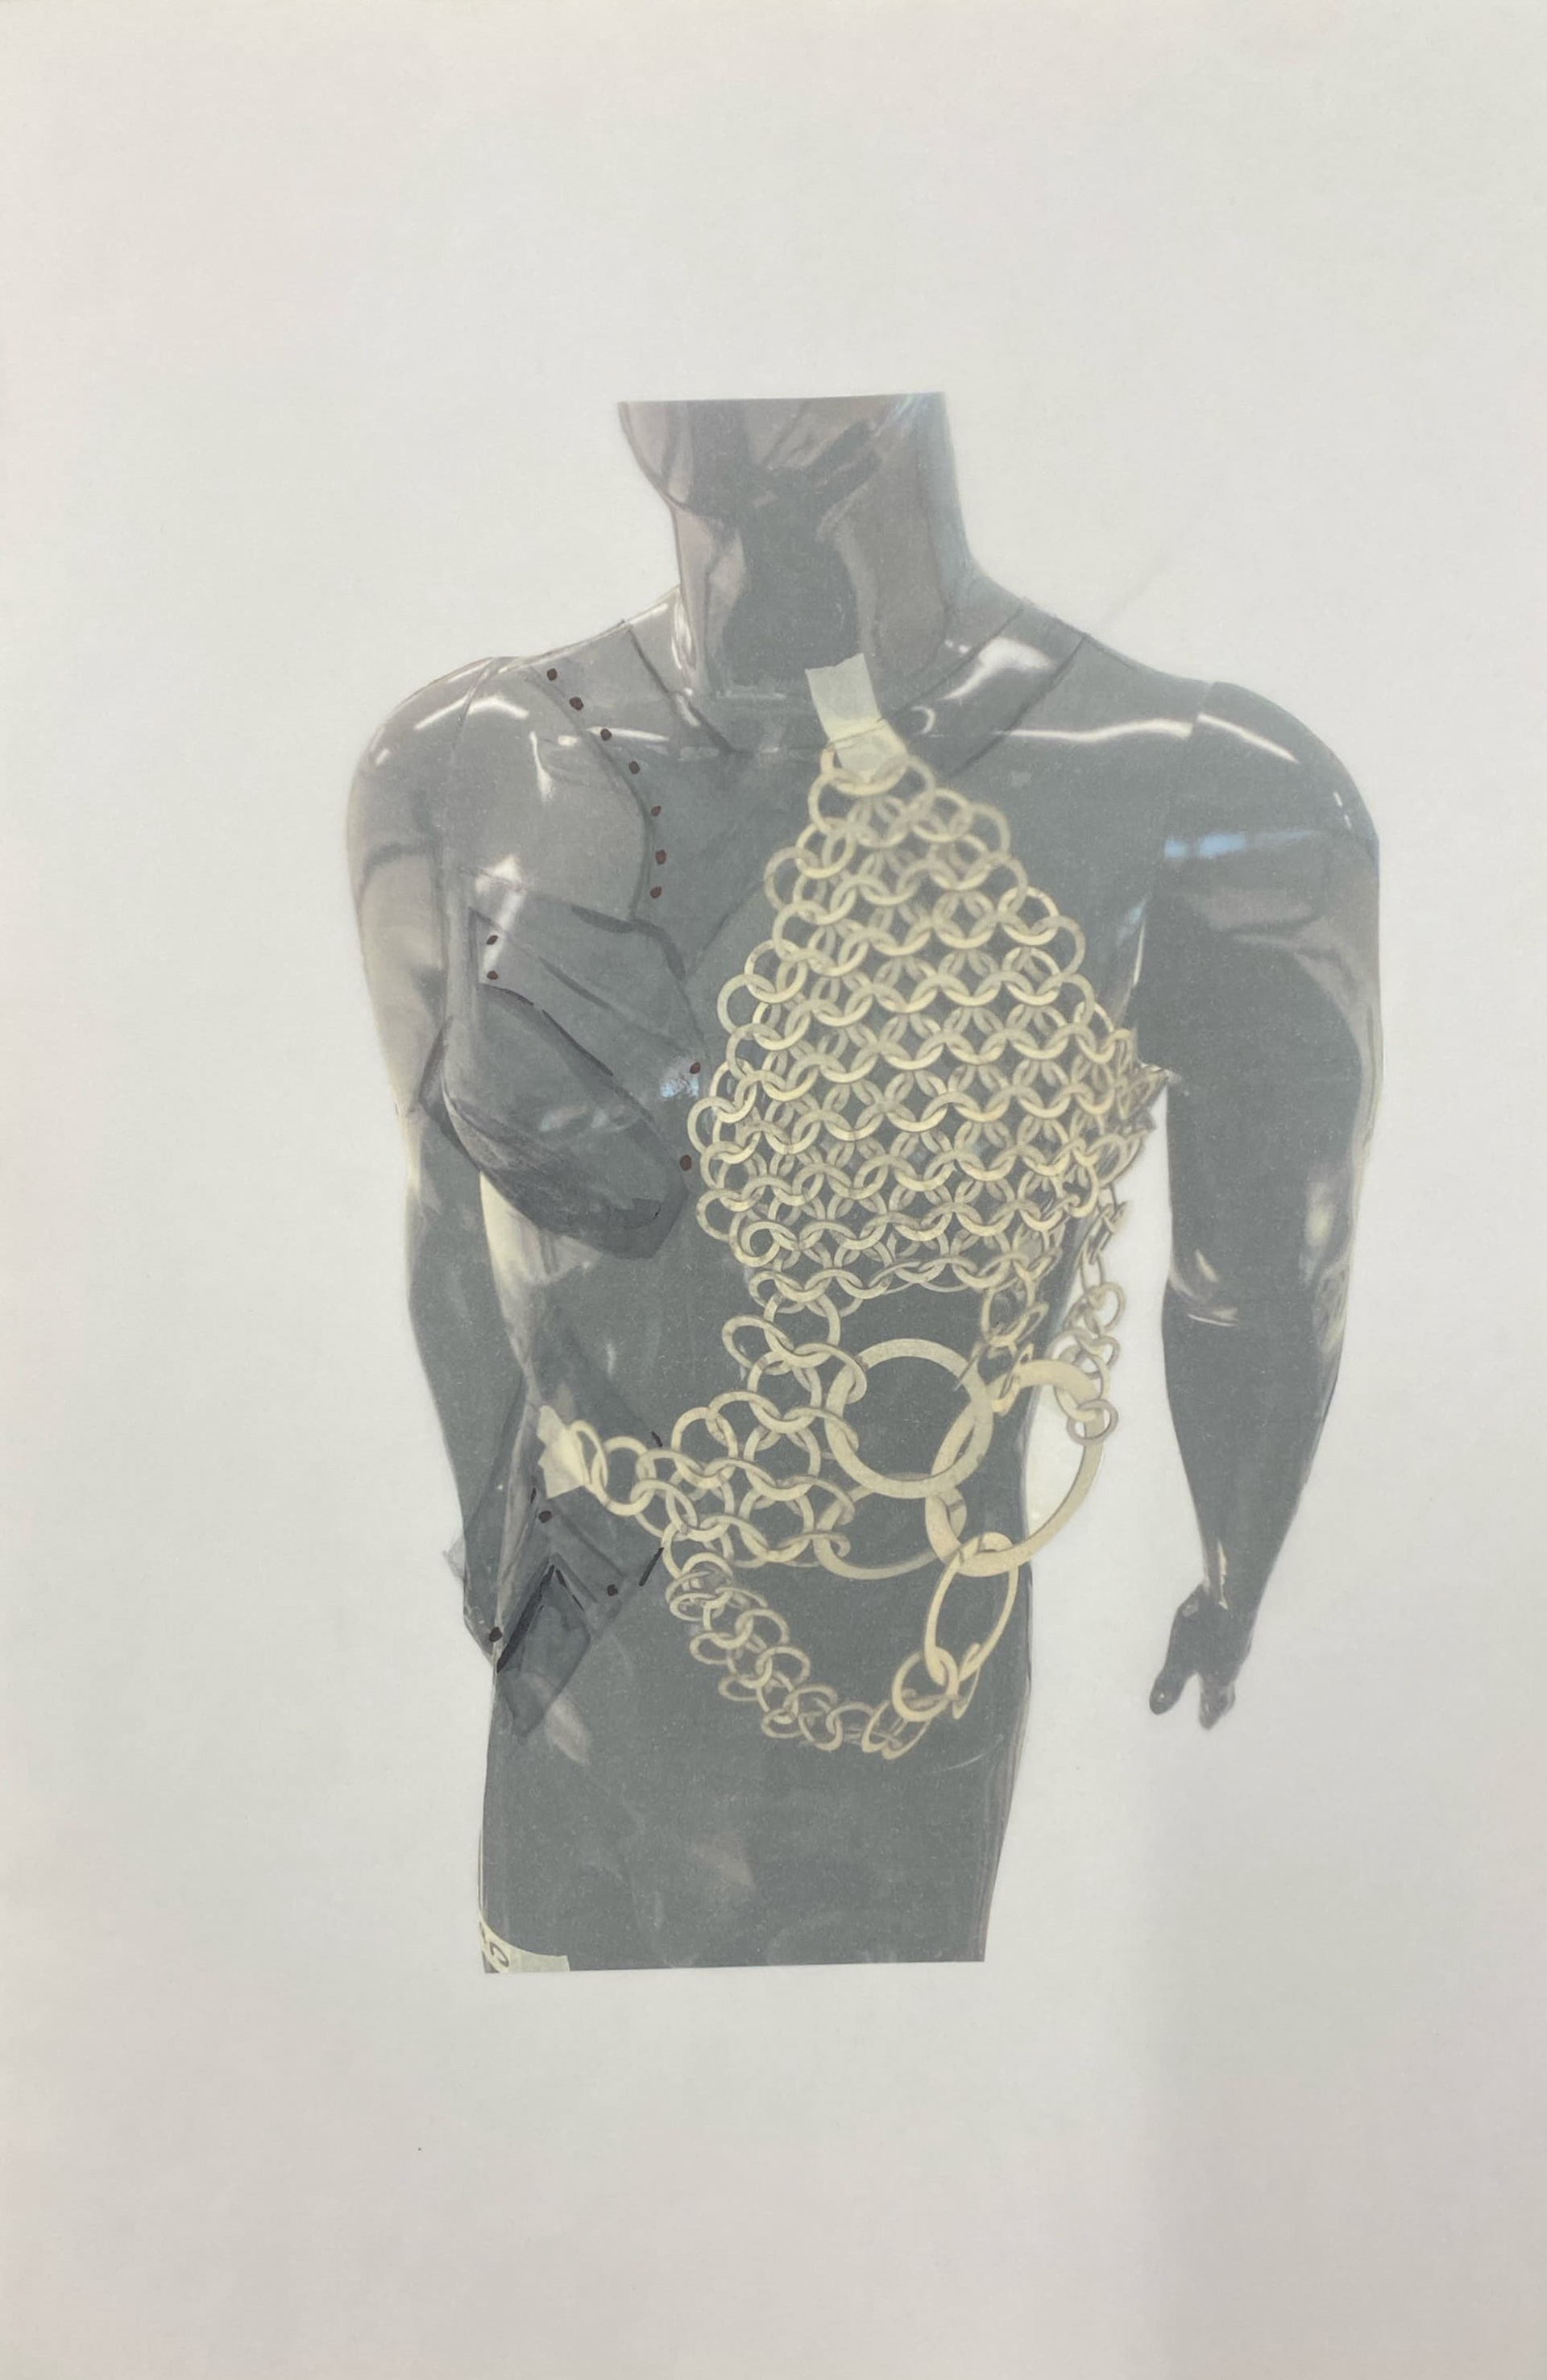

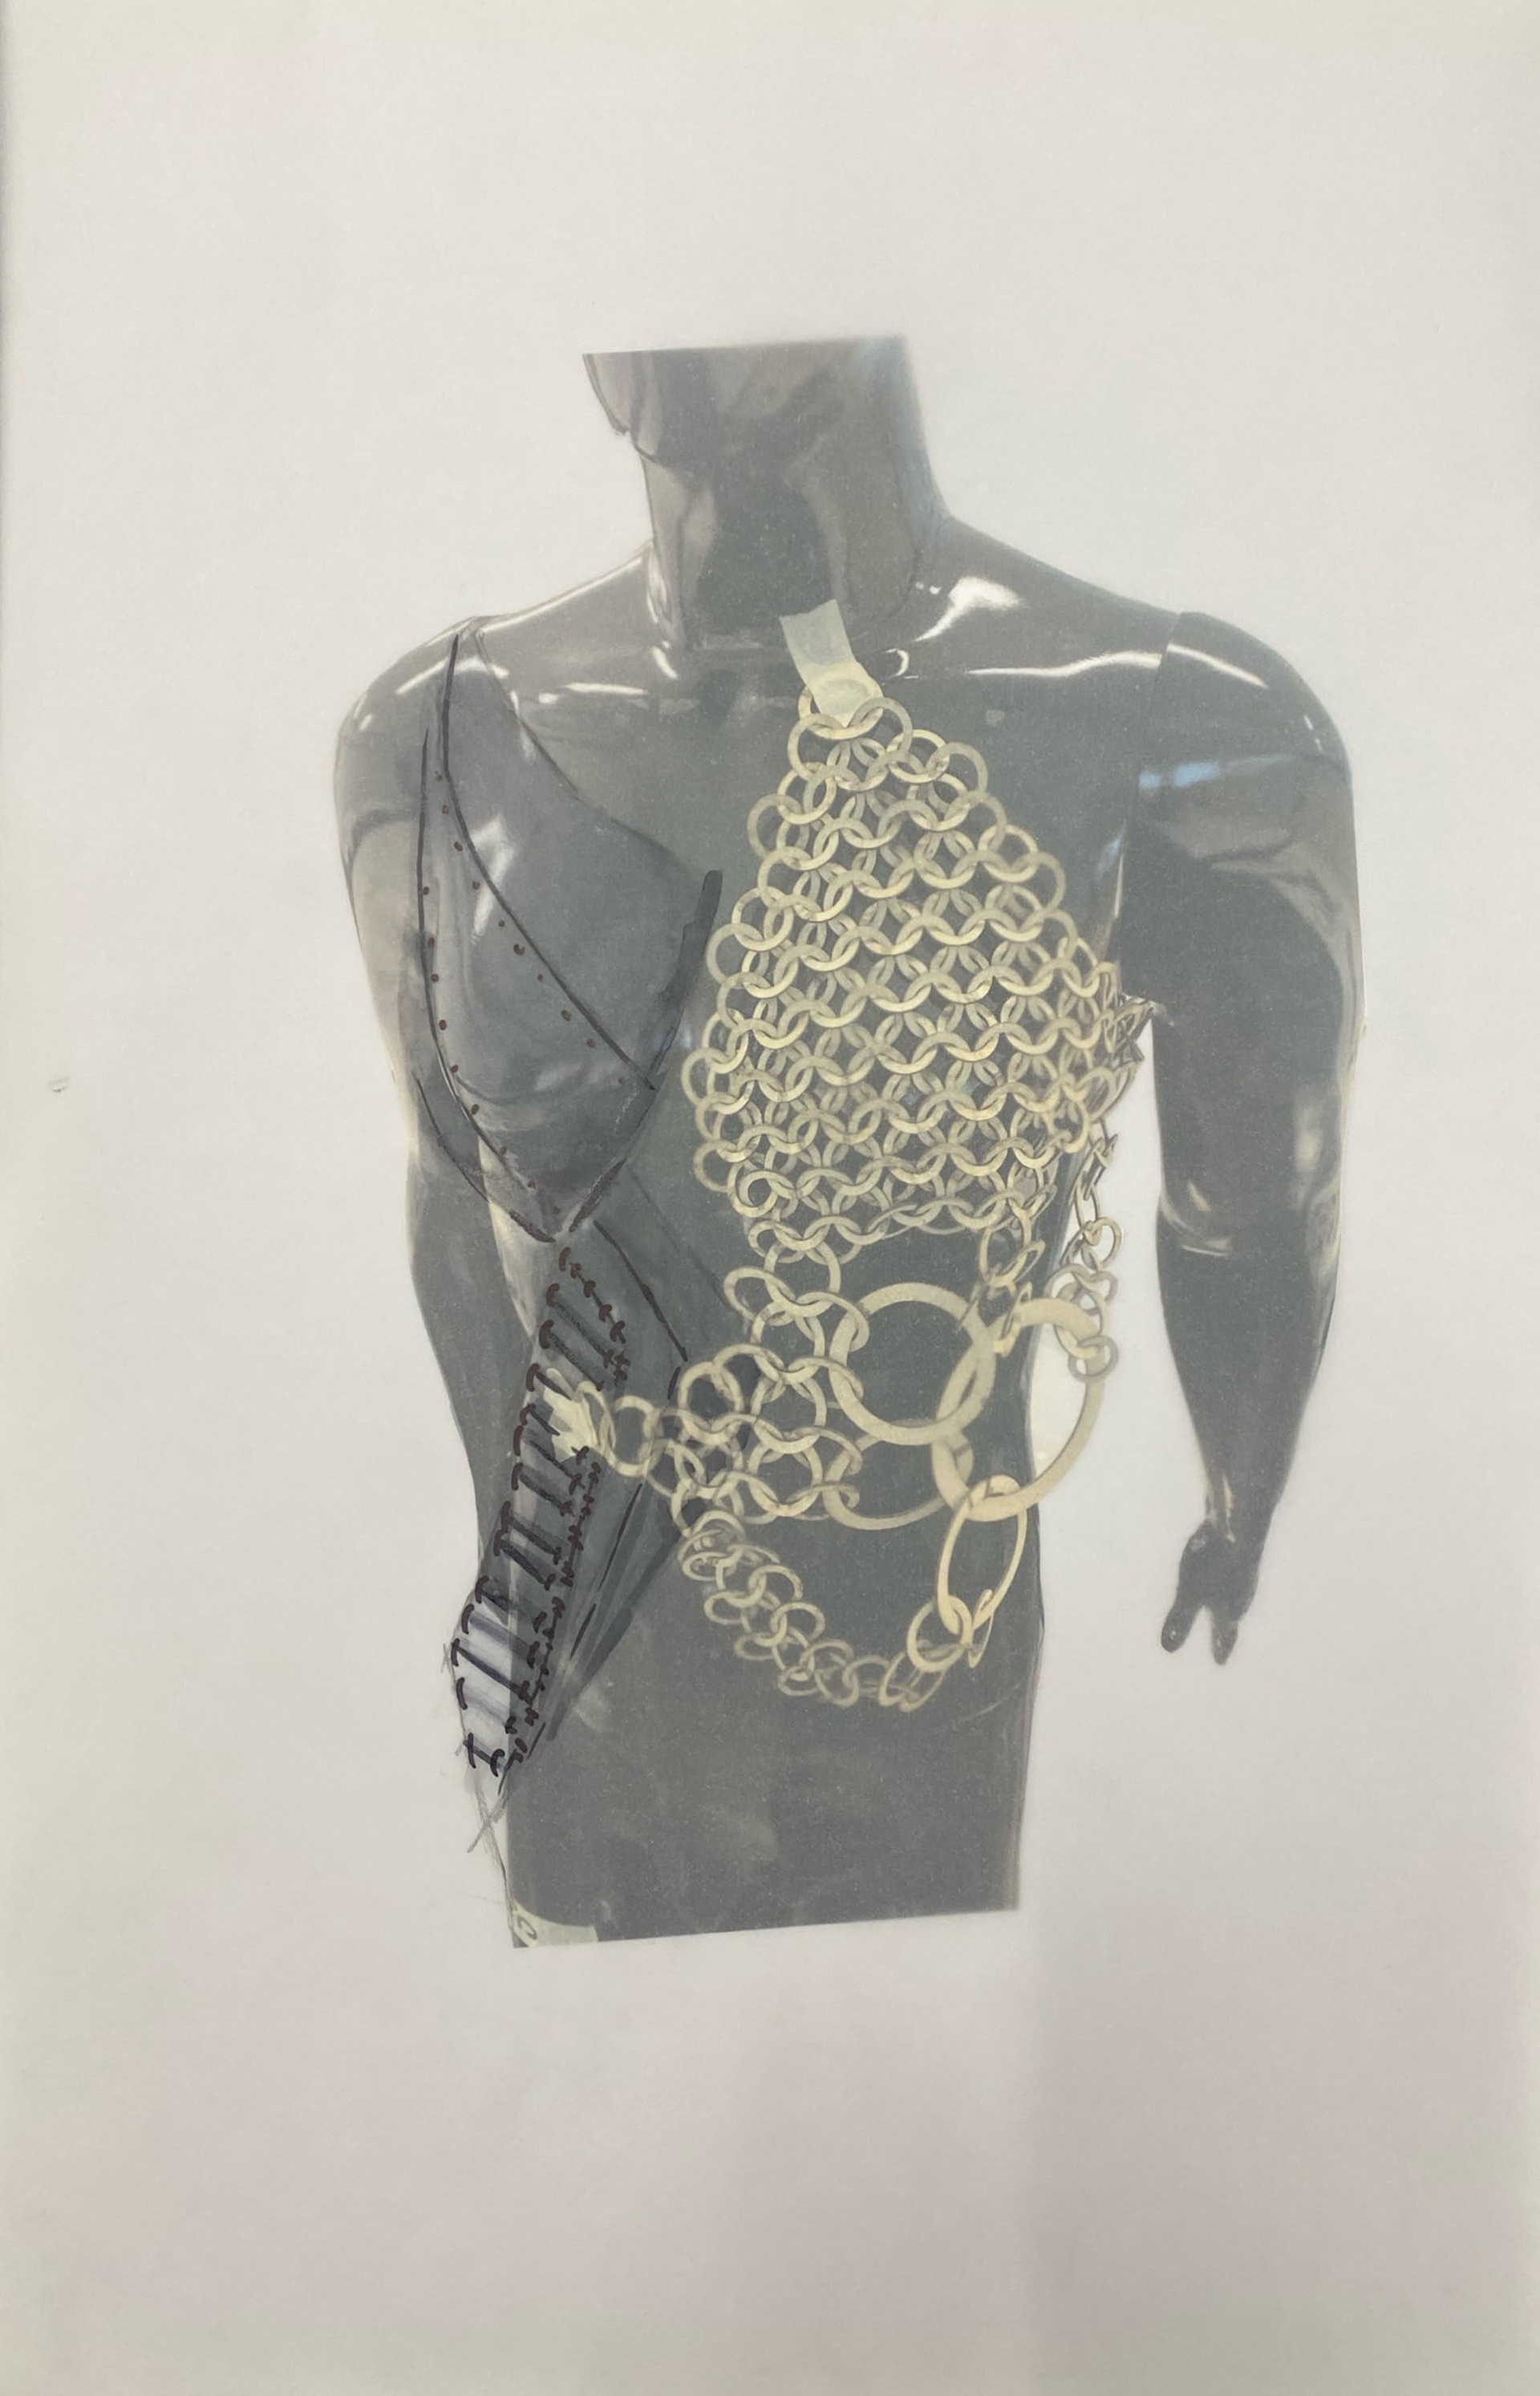

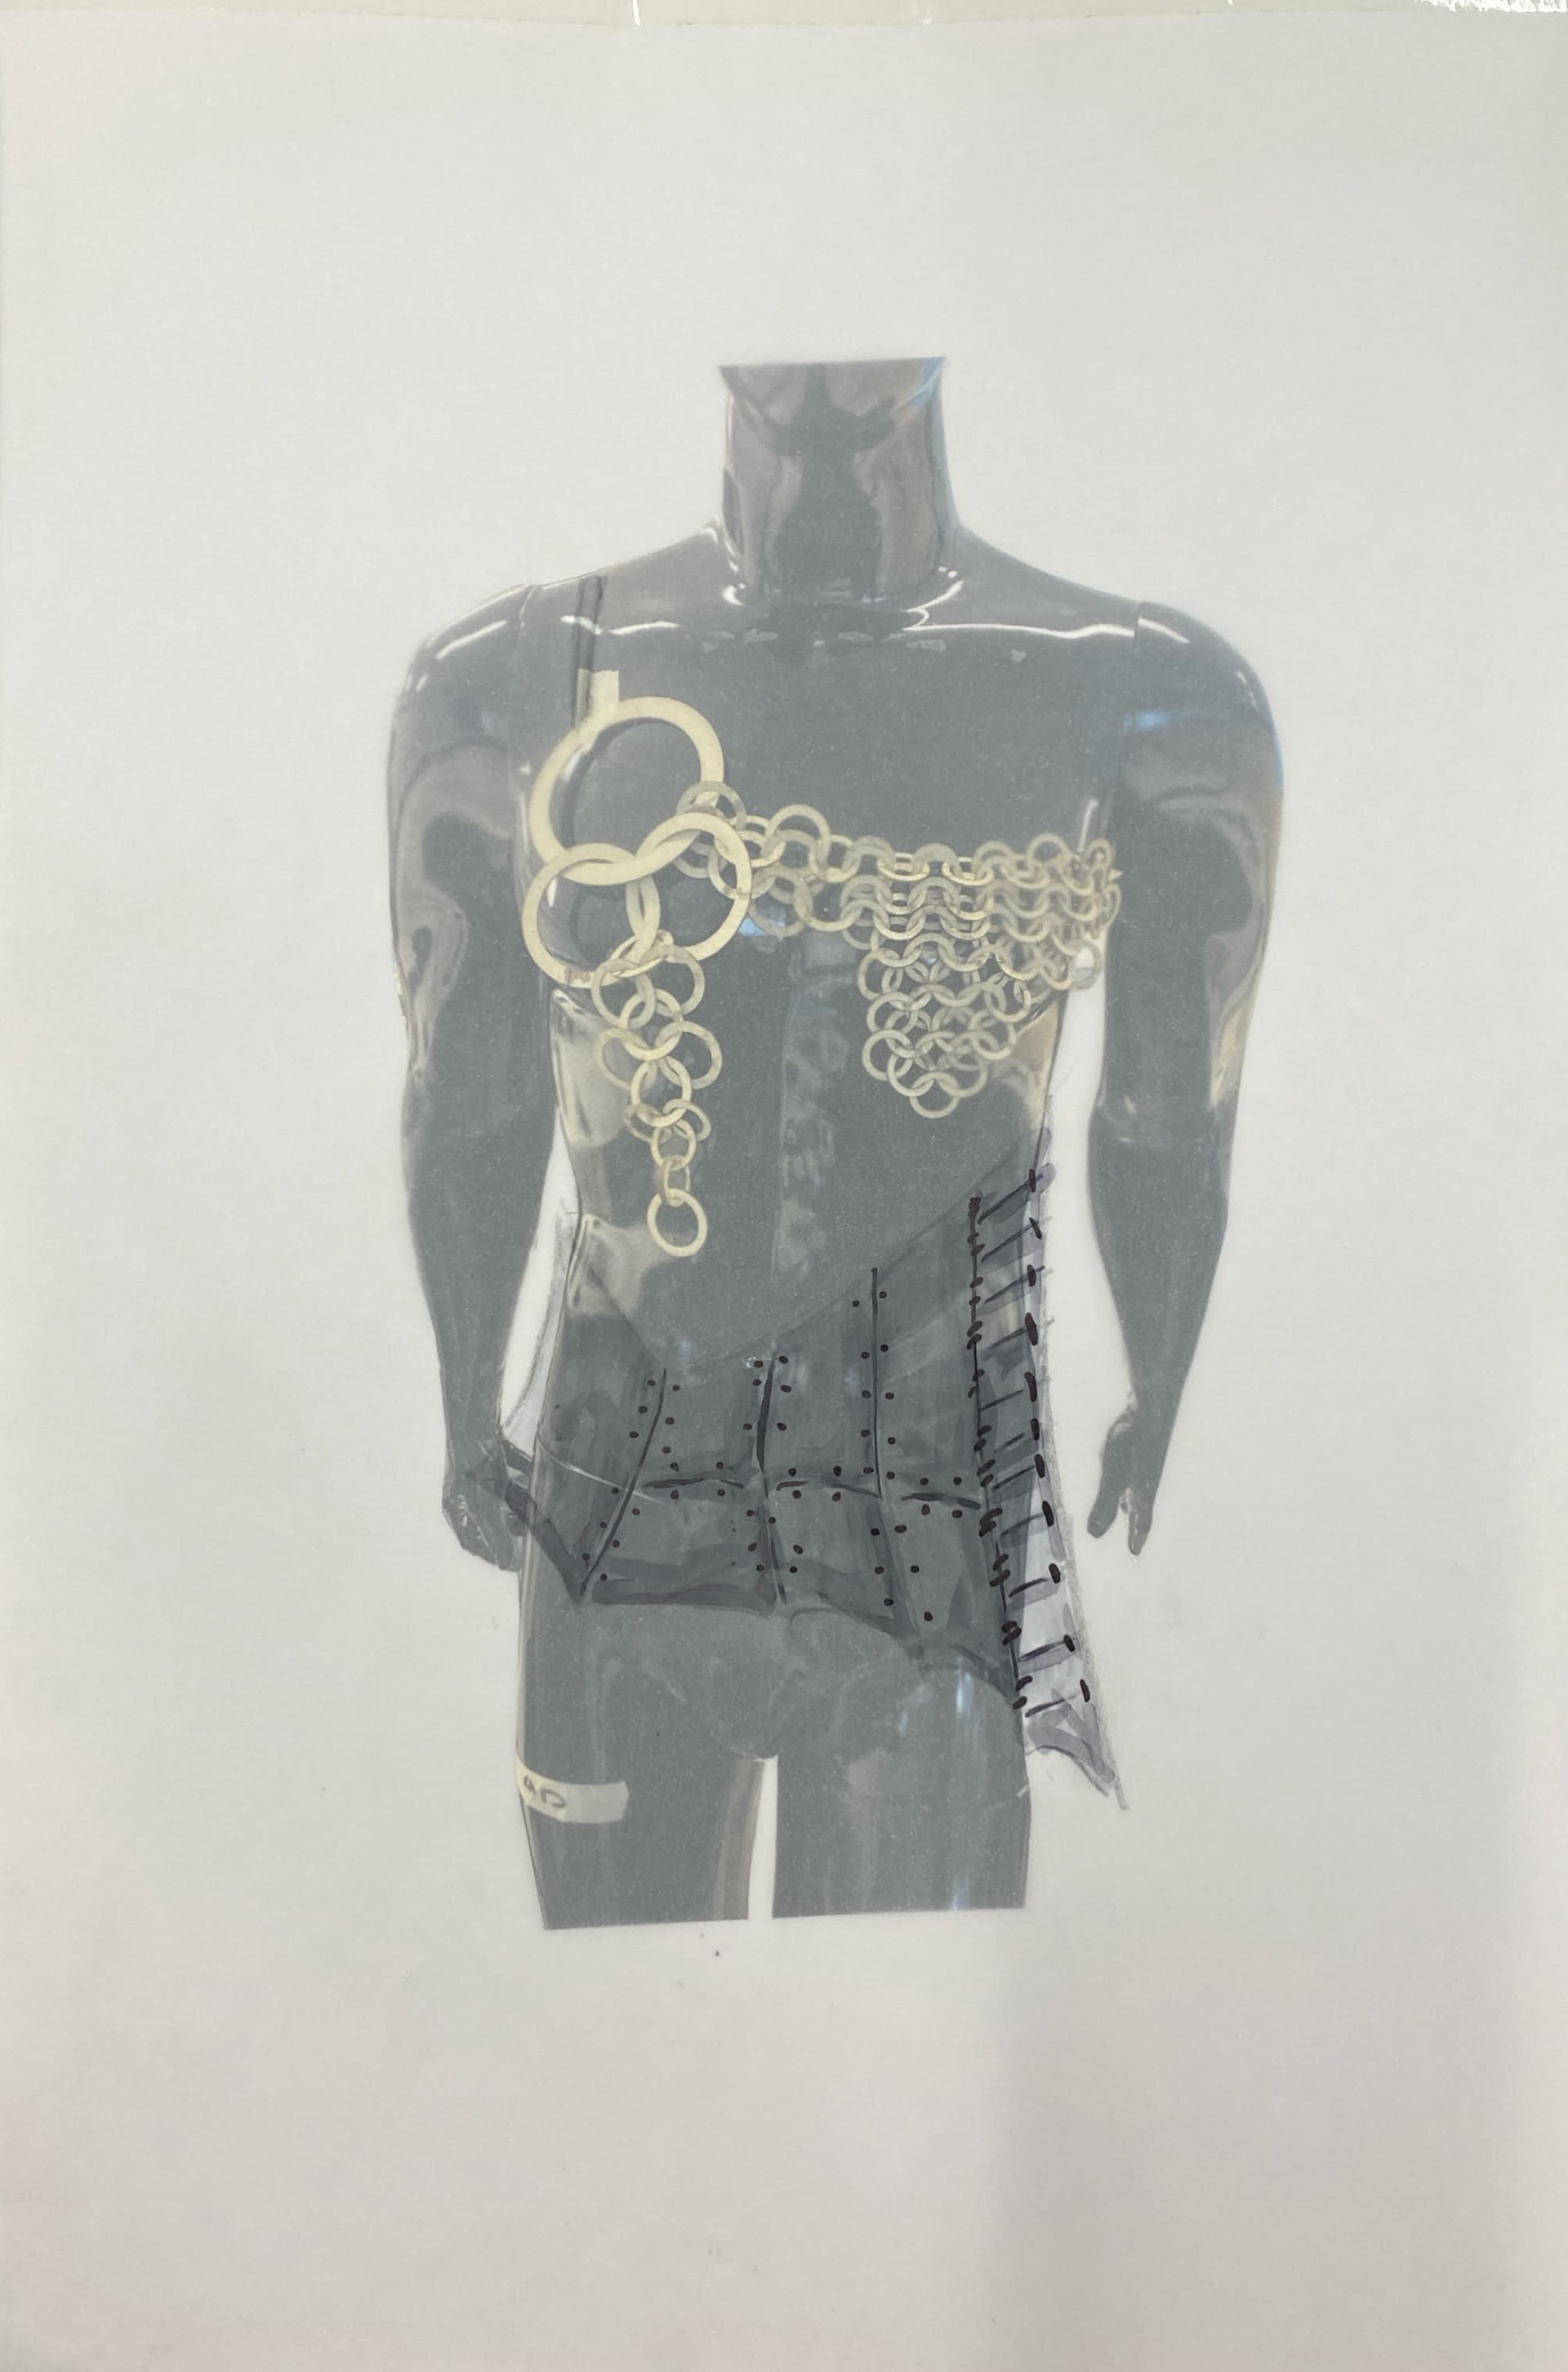

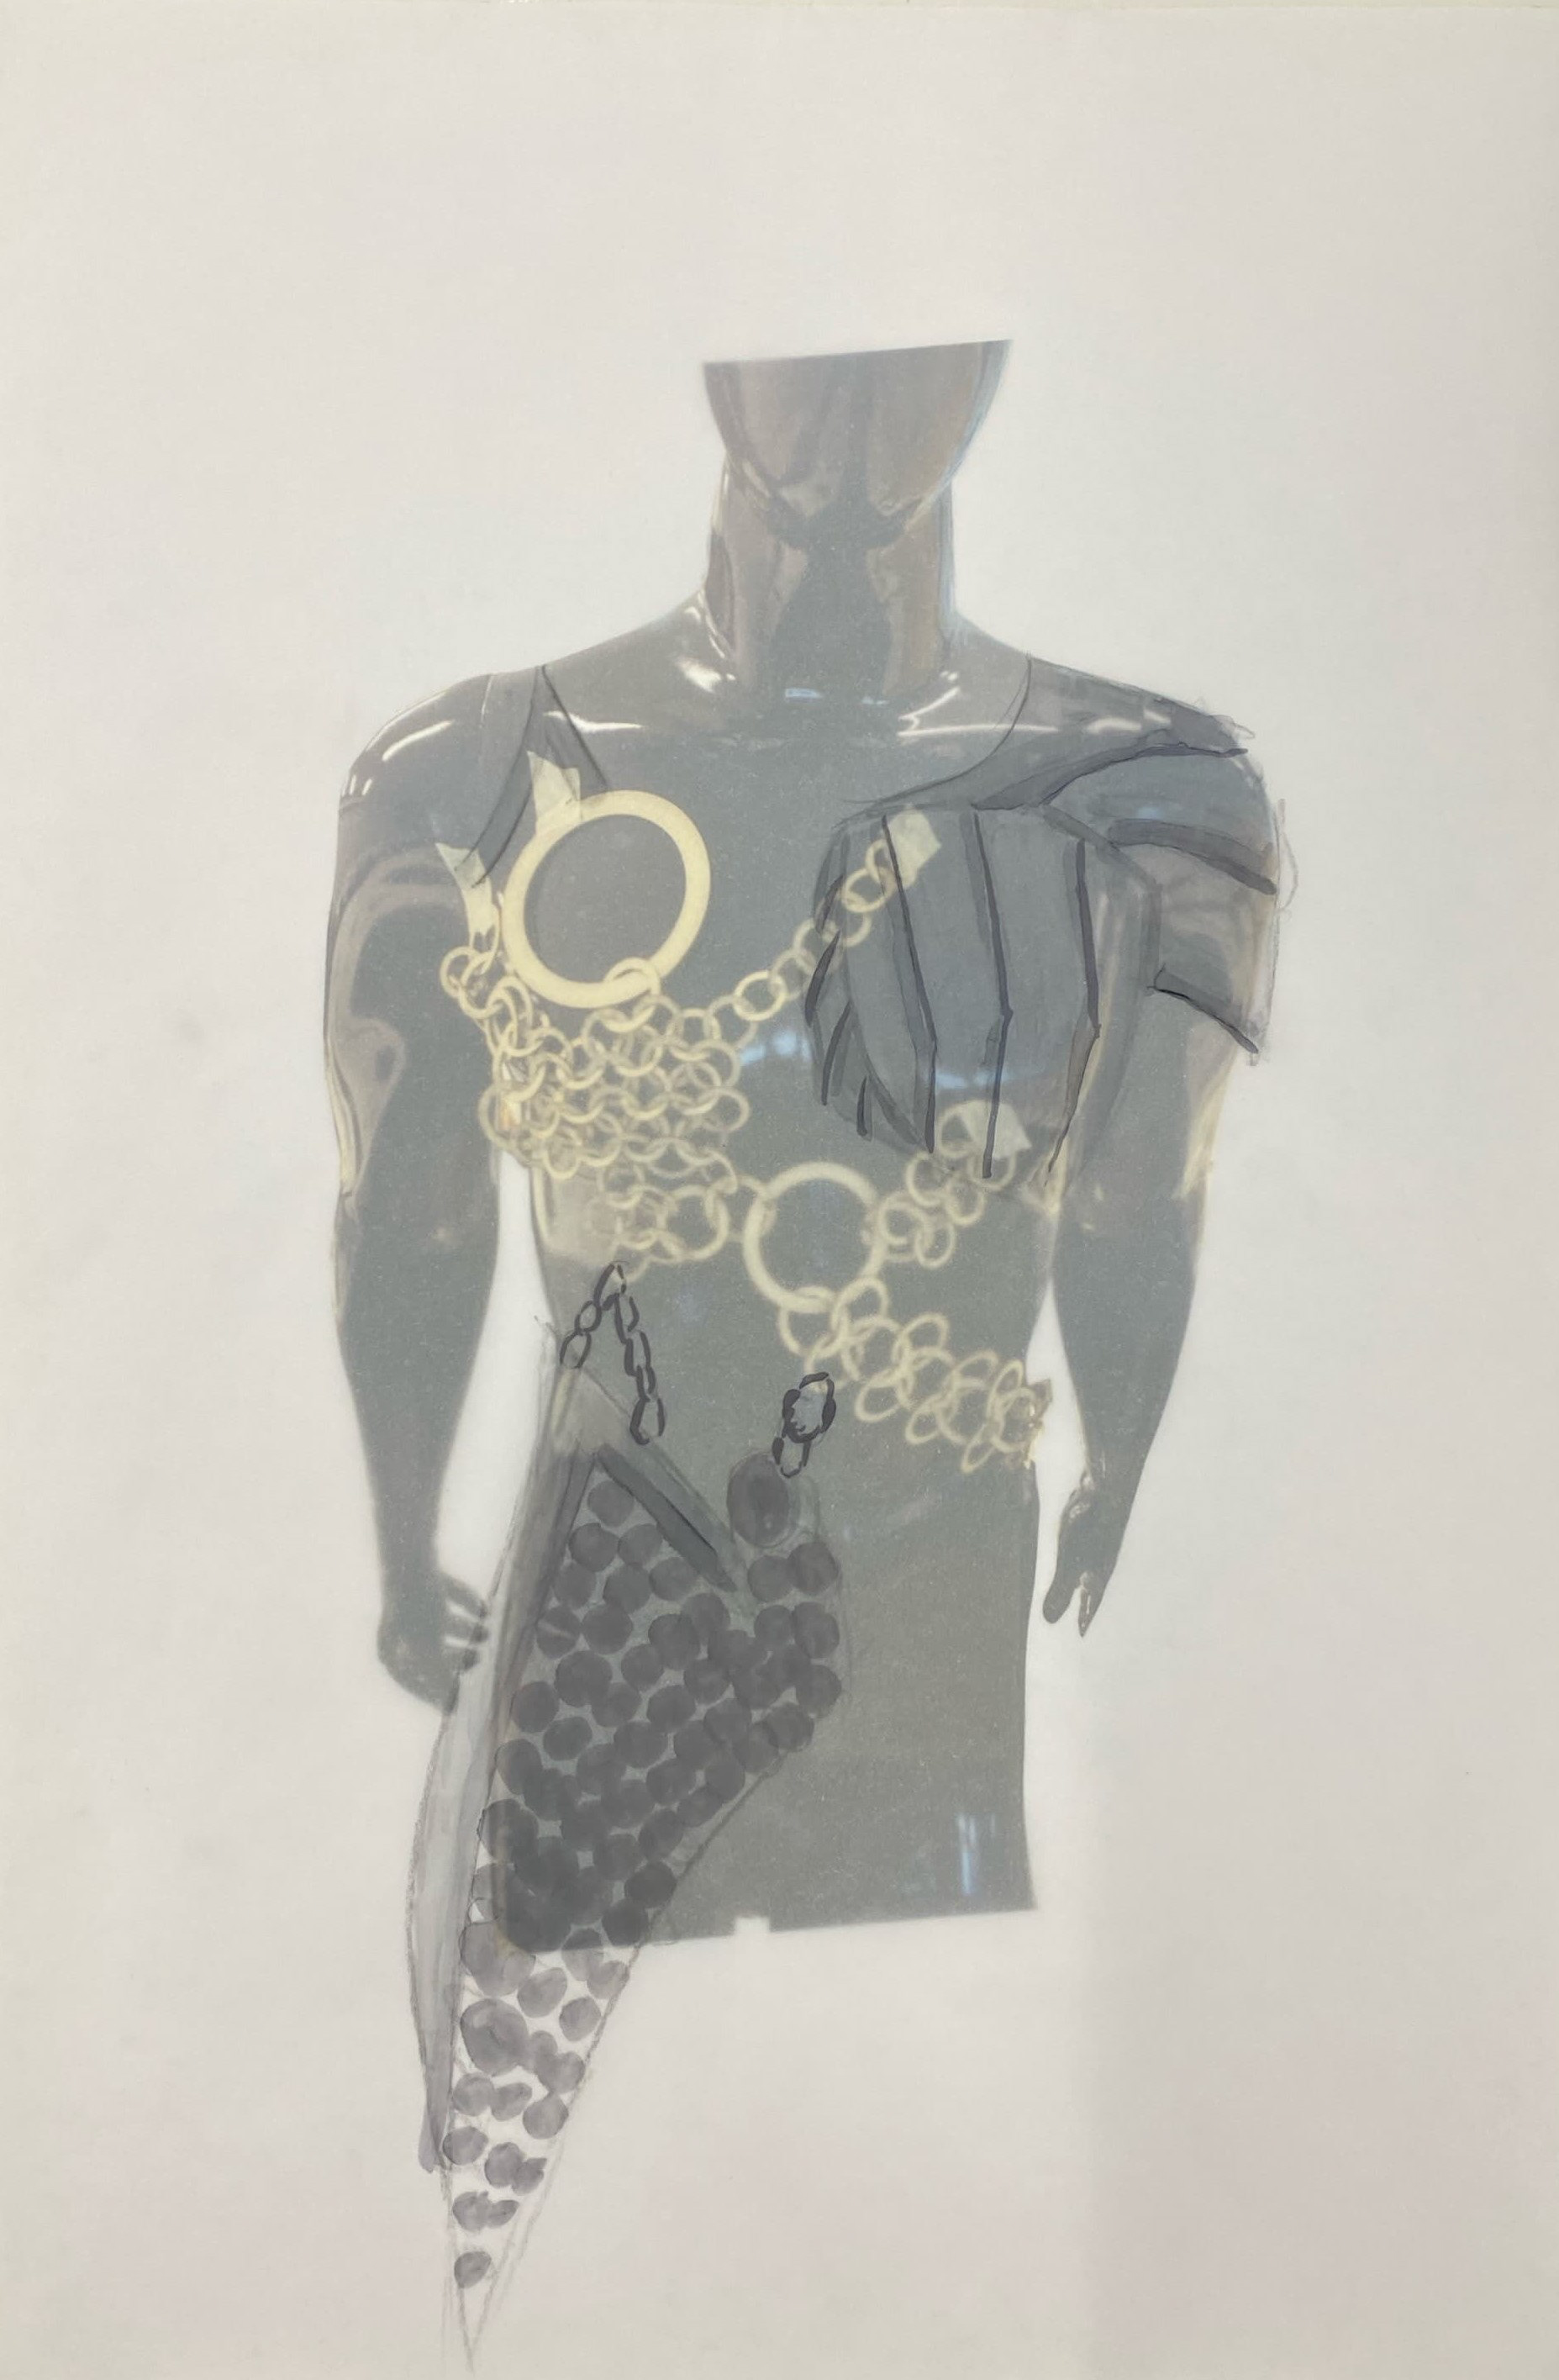
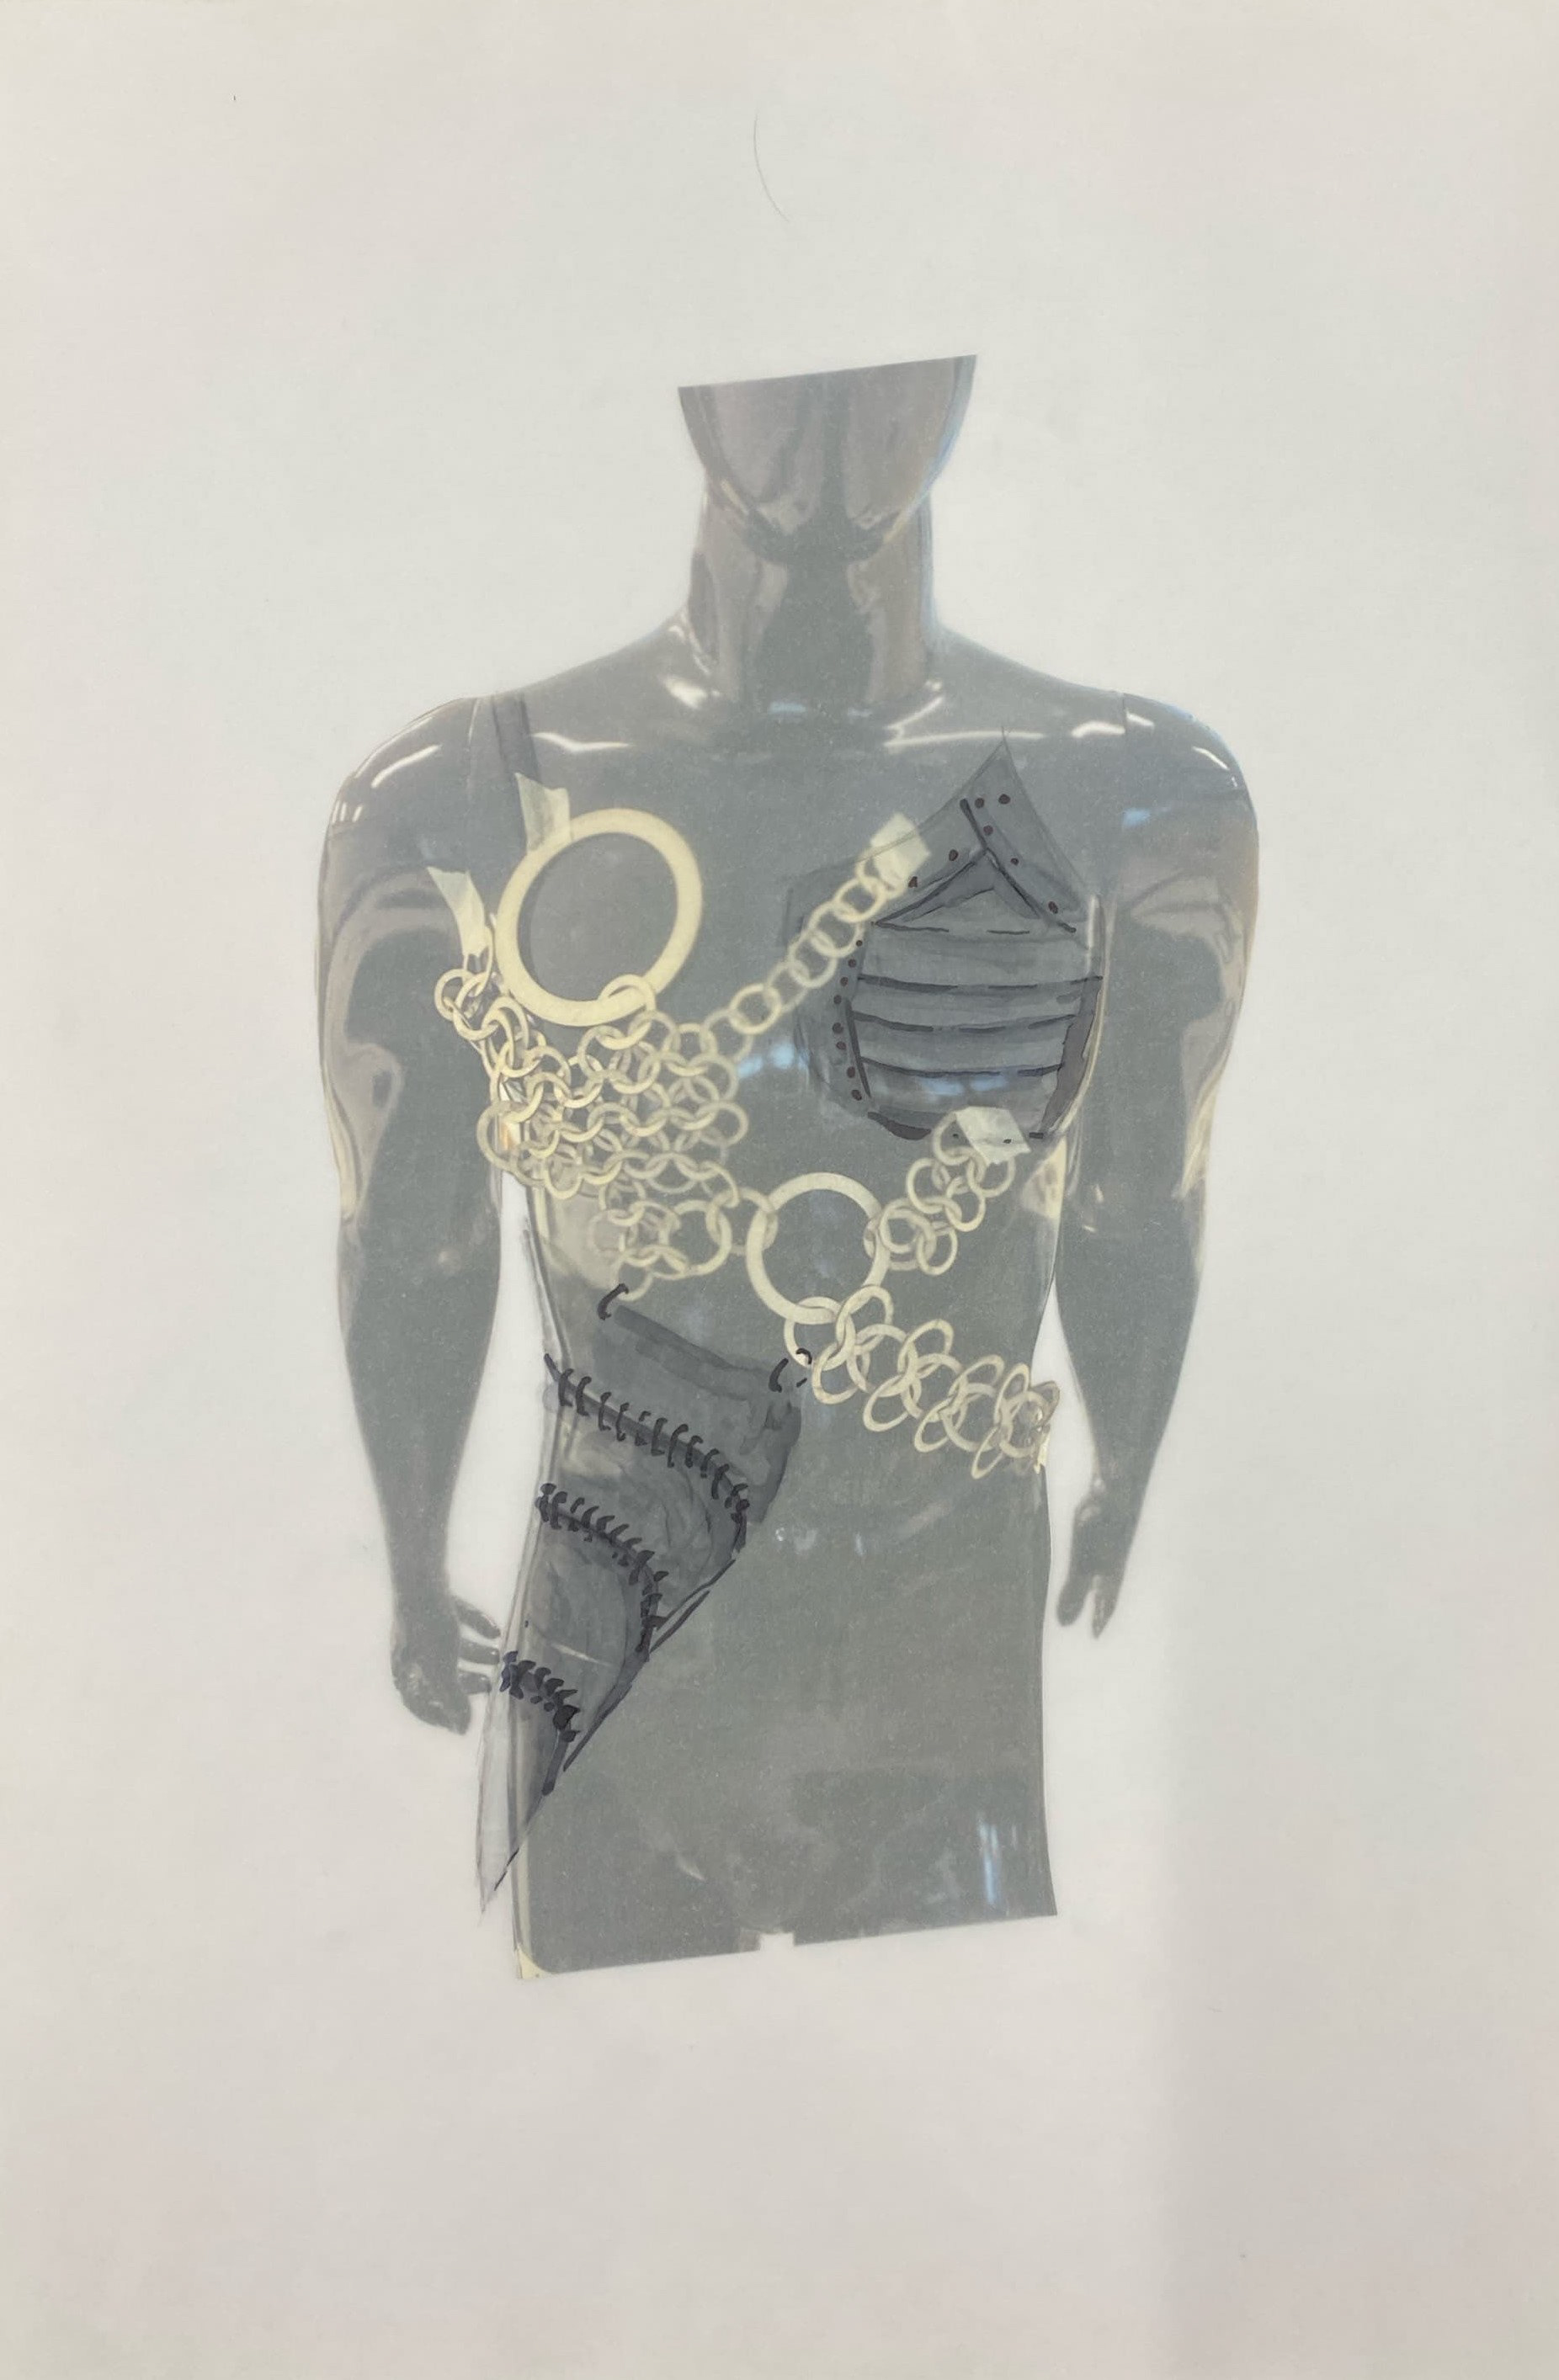
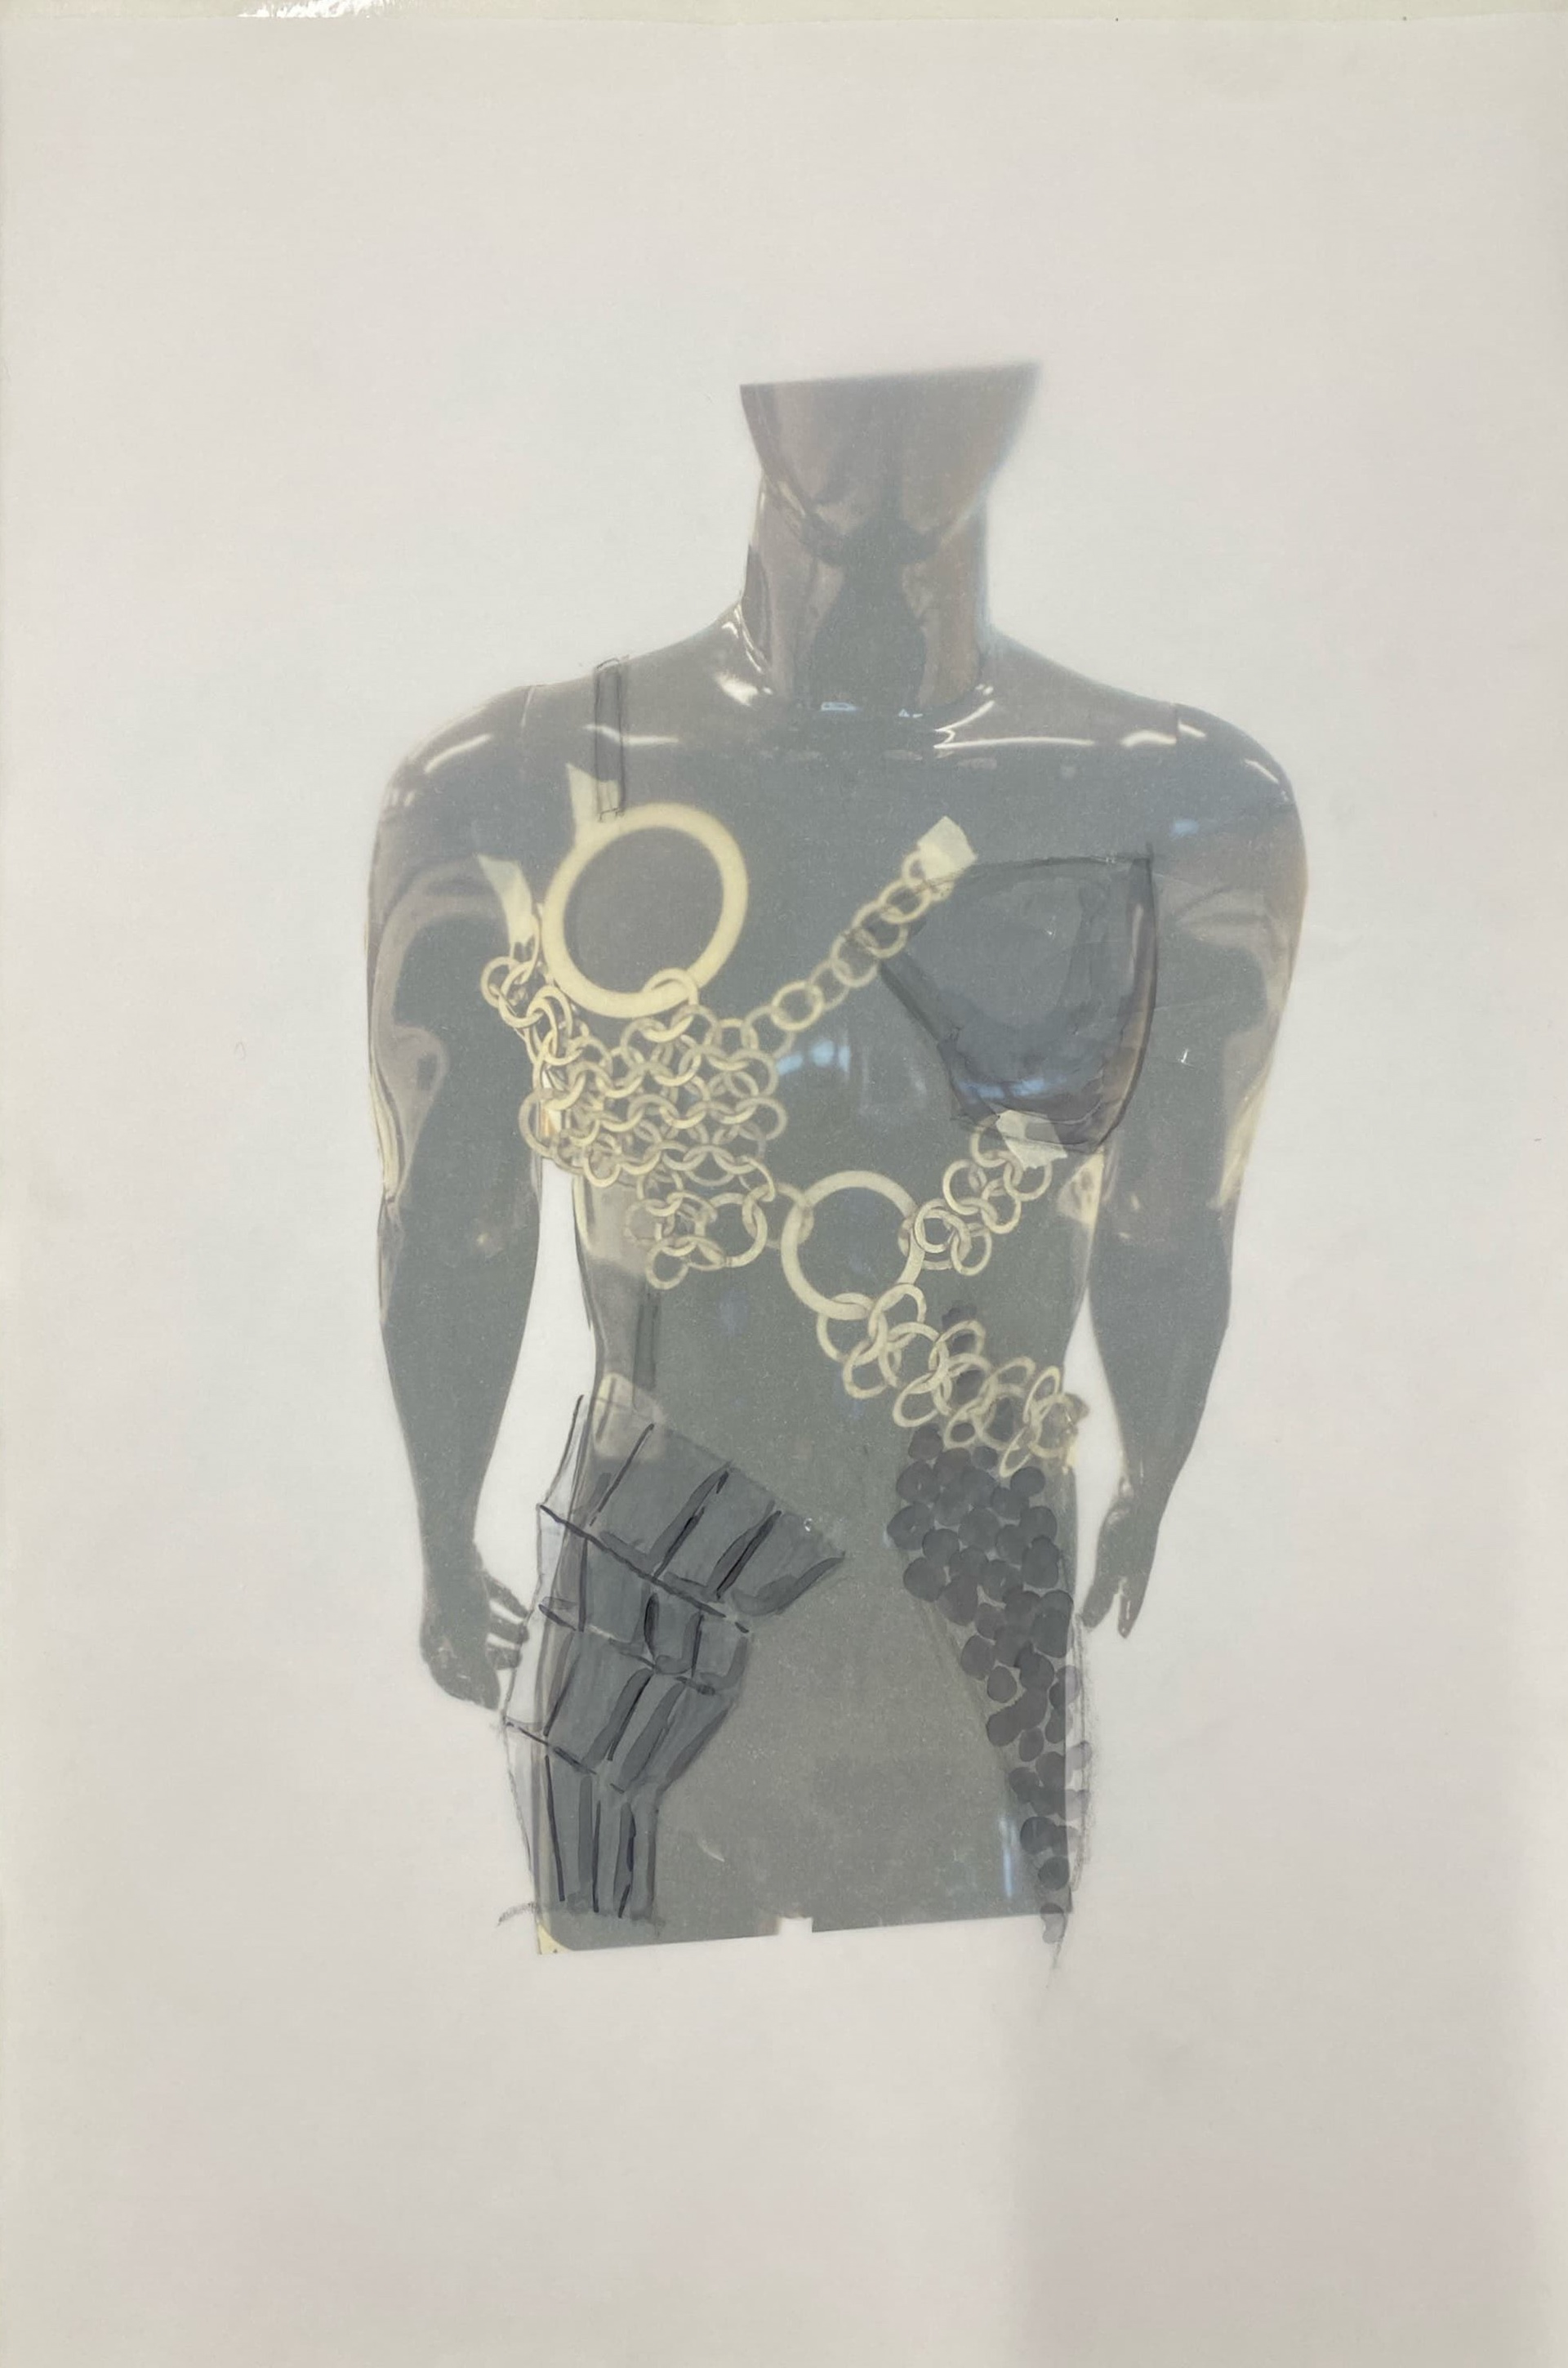

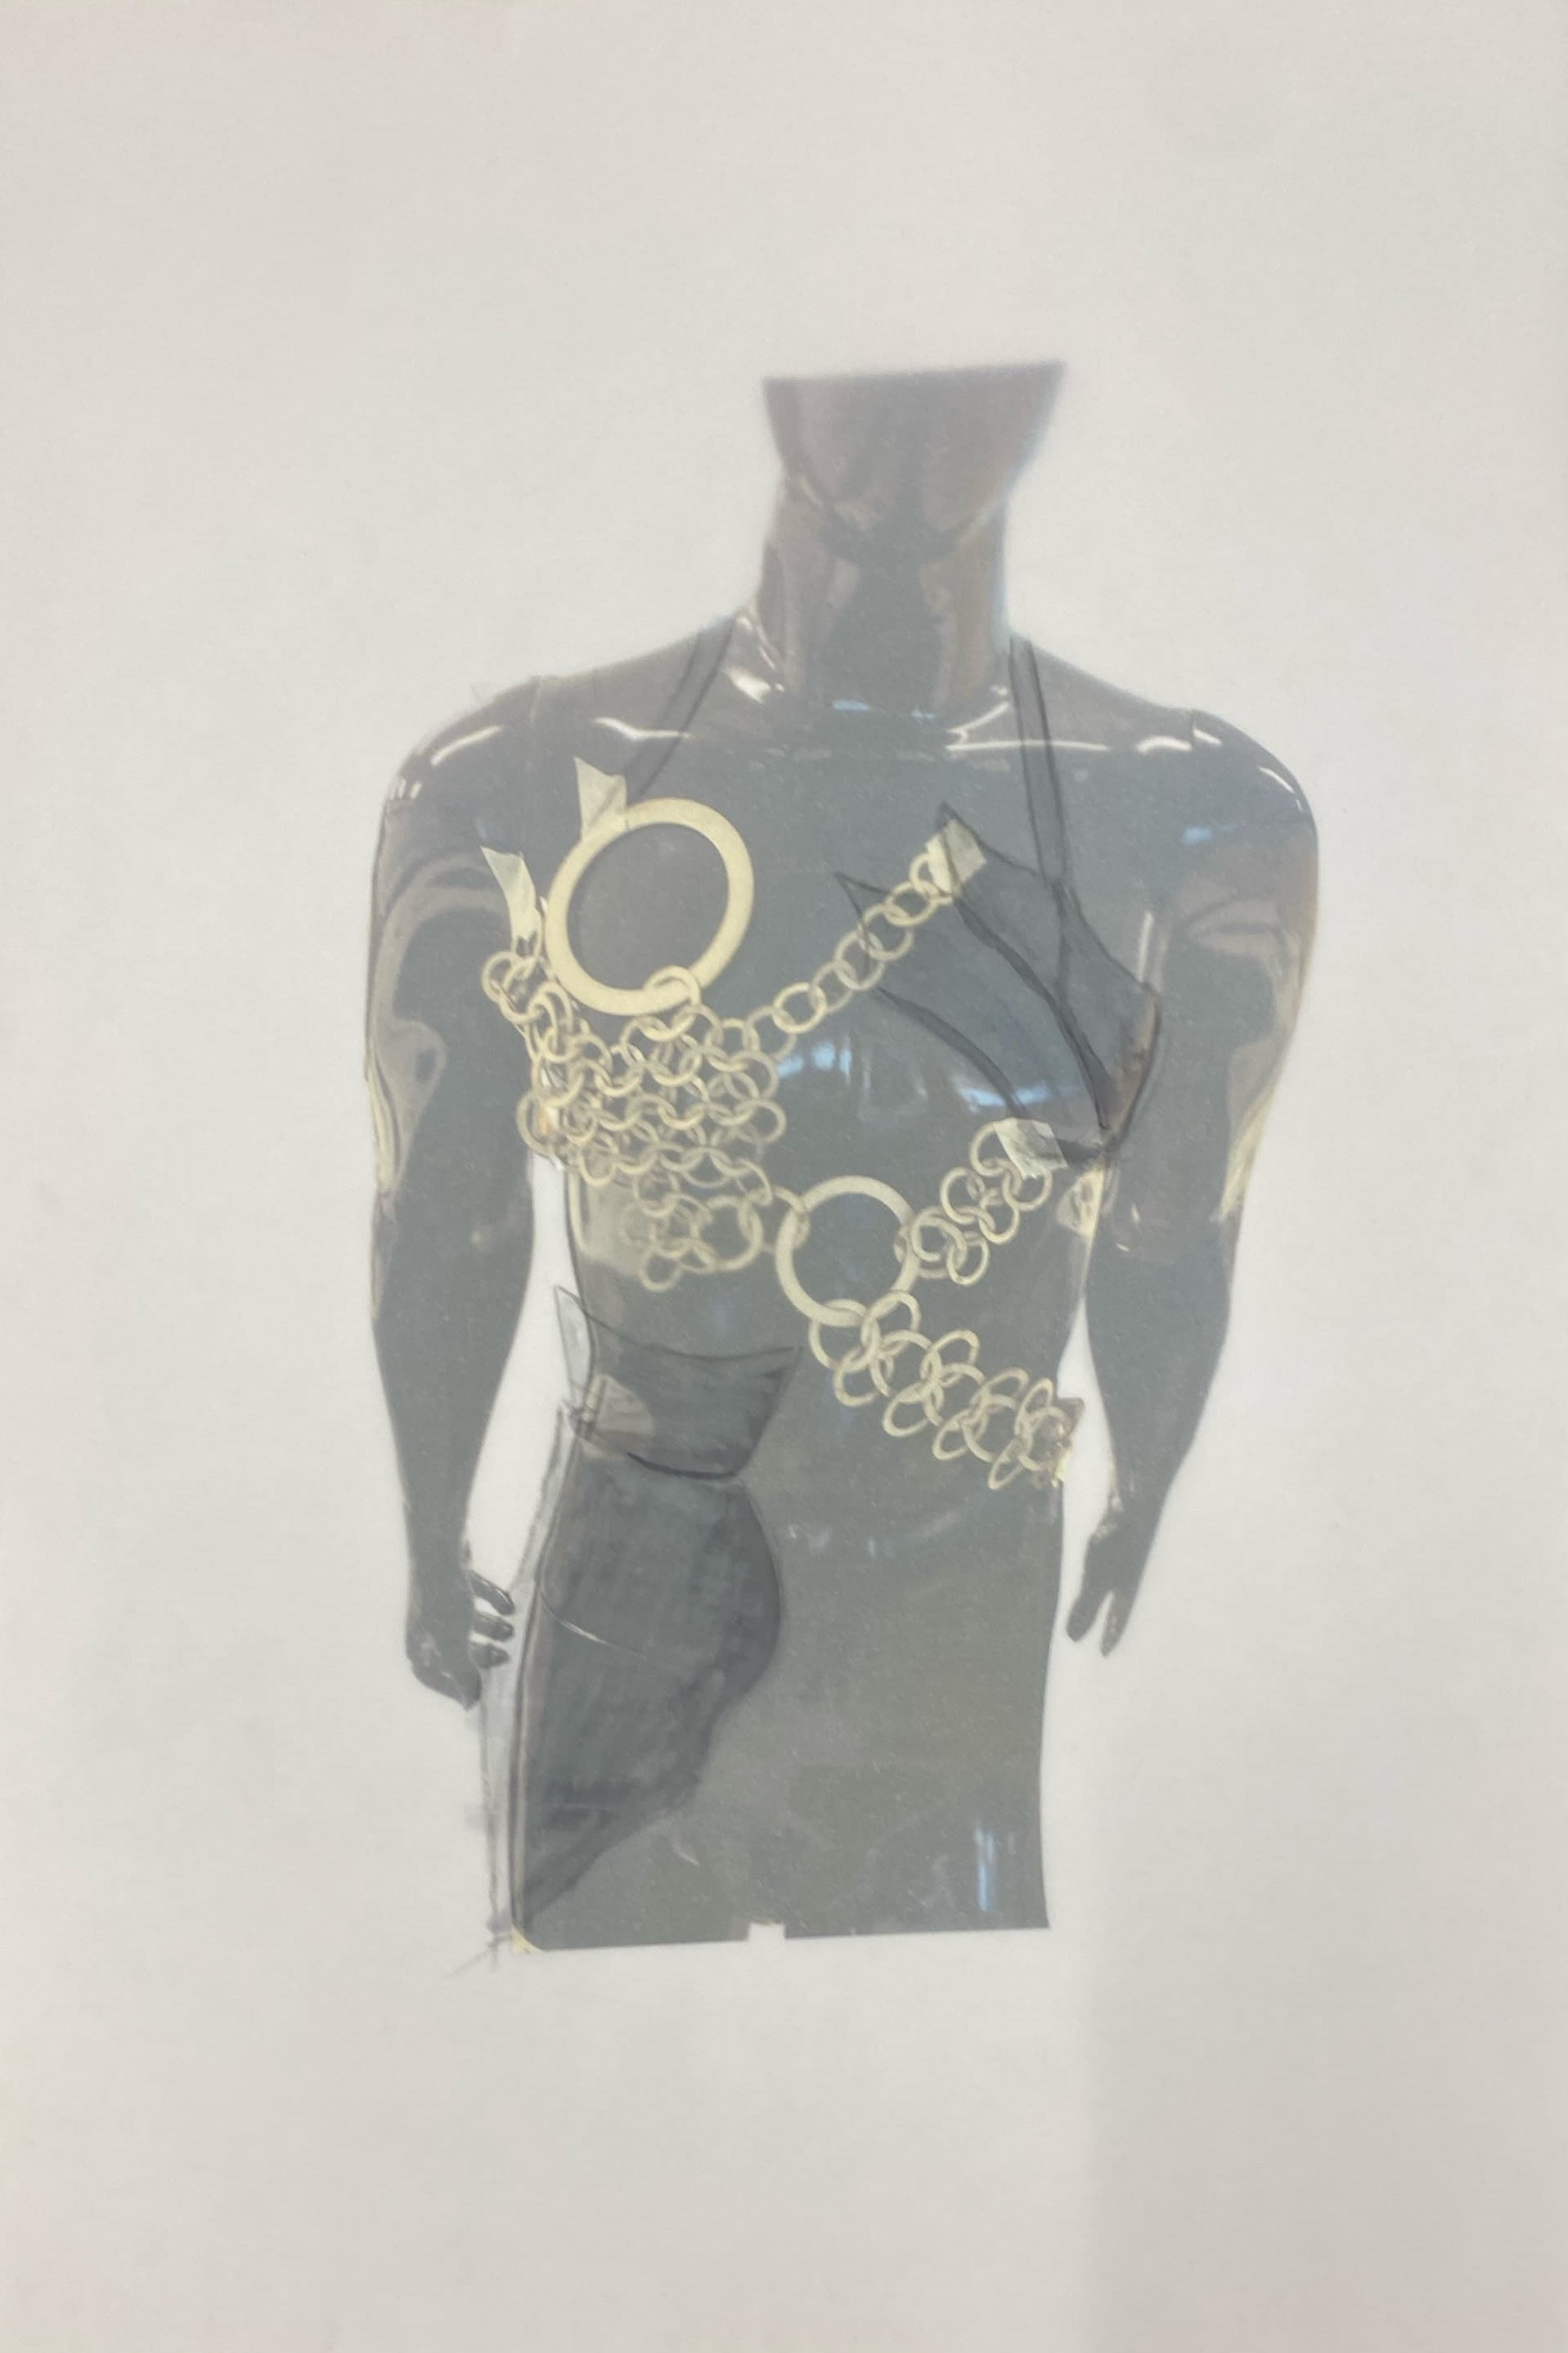
I worked over the top of my previous chain mail models to add in the different plate and sheet components. I referenced different forms from my gallery visit looking to cover and conceal the chest area. Whilst looking to enhance the feminine figure by flaring out the design at the hips. I tried to design with different the different structures that I have tested in mind so that there was clear direction for my developments.